In this lesson of “Mastering Calligraphy”, we’re going to learn how to write in cursive script.
Flowing, cursive calligraphy is still seen today on wedding invitations and menus at fancy restaurants. While it looks extremely difficult to ink, it’s actually made of a few basic strokes. Better yet, with the Cursive Script, you hardly ever have to lift your pen off the paper!

In this tutorial, you’ll learn how to write in cursive letters. But if you’d like to save time and find the best calligraphy fonts for your digital projects, scroll down after this tutorial. We’ve got a hand-picked selection of cursive calligraphy fonts from Envato Elements.
First, let’s begin with the full process of how to write in cursive for beginners.
What You Will Learn in This Calligraphy Tutorial
- How to write in cursive/learn cursive writing
- How to write the alphabet in Cursive Script
- Cursive script writing in lowercase
- Cursive script writing in uppercase
What You’ll Need

- Pencil
- Pencil sharpener
- Eraser
- Ballpoint pen or gel pen (any pen with good ink flow)
- Practice sheet
1. Warm Up With the Basic Strokes
Before we dive into cursive script writing, let’s warm up our hands.
Step 1
Print out four or five of the practice sheets on blank paper.
Step 2
Practice the basic entrance/exit stroke for one or two lines to warm up. Keep in mind that cursive script is all about joined letters; to ensure easy connecting, all lowercase letters have entrance and exit strokes.

Step 3
Practice the basic upward stroke for one or two lines to warm up. This stroke is a bit new but very easy. You start just above the bottom line. Then, you shoot up to the top line.

Step 4
Practice the basic curve stroke for one or two lines to warm up. This one hasn’t changed, but you may curl up a bit more than before. Starting a little under the dashed line, go up and around anticlockwise toward the bottom line and curve up, leaving a little gap.

Okay! Now we’re ready to start. In this lesson on how to write in cursive for beginners, we’re going to learn a very familiar alphabet called Cursive Script.
2. How to Write the Cursive Script Lowercase Alphabet

Let’s take a look at the cursive script alphabet in lowercase. As you can see, it looks almost identical to the cursive you learned in elementary school. The red arrows above show the directions of the pen strokes.
Cursive script is all about efficiency, so when writing most of the letters, the pen stays on the paper. Most letters will be made with just one stroke as cursive is all about efficiency. We’re going to start with the lowercase alphabet and break it up into two sections: upward stroke letters and curve stroke letters. So let’s start with the upward stroke letters!
Print out a copy of the cursive calligraphy alphabet above, so that you have it handy for reference.
3. How to Write the Upward Stroke Lowercase Letters
Step 1
Let’s start learning some cursive calligraphy letters. The letters b, f, h, i, j, k, l, m, n, p, r, s, t, u, v, w, x, y, and z all begin with an upward stroke. Some have strokes that fill up the entire height of the line, and others only reach to the dashed line. Some, like the “f”, even reach below the bottom line.
To start, I’m going to show you the direction of each stroke. When you’re writing out the letters yourself, you can sketch them out using your pencil first. Then you can simply follow the pencil lines with your pen. This is also helpful for learning to write a “k” in cursive.

Step 2
Let’s start with the “u” since it’s easiest. Place your pen tip on the bottom line. Make an upward stroke to the dashed line. Then make a downward stroke that dips to the bottom line and then swings back up again. Next, make another downward stroke and end just below the dashed line. Voila! You have a Cursive Script “u”. It kind of felt like drawing waves on the sea, right?

Step 3
Repeat the process of making the letter “u” three times so that you get the feel of it. Many letters, such as the i, j, m, n, r, v, w, and y, are very similar to the “u”. Once you have the “u” down, it’s easy to see how other letters are made.
Step 4
Let’s try a harder letter: h. The “h” starts the same as the “u”, but its stroke reaches all the way up to the top line. You then arc to the left and make a downward stroke to the bottom line. You’ll cross over your previous line right near the bottom. Now arc up to the dashed line and make a downward stroke back down to the bottom line, curling up and ending just below the dashed line.
Step 5
Repeat the process of making the letter “h” three times so that you get the feel of it. Many letters, such as the b, f, k, and l, are very similar to the “h”.
Step 6
Slowly make your way through the rest of the curved stroke lowercase letters, using the guide of the strokes as a reference.
4. How to Write the Curved Stroke Lowercase Letters
Step 1
Now, let’s practice some more lowercase cursive script letters. The letters a, c, d, e, g, o, and q all begin with an entrance stroke that starts at the bottom line and ends just below the dashed line. After completing our entrance stroke, we then curve anticlockwise and round.
To start, I’m going to show you the direction of each stroke. You can always sketch out the letters using your pencil first to feel more comfortable. Then you can simply follow the pencil lines with your pen.

Step 2
Let’s start with the “o”, since it’s easiest. Place your pen tip just above the bottom line. Arc up just below the dashed line and curve round anticlockwise, closing the gap just below the dashed line. Then come down slightly and flick out ending on the dashed line. Voila! You have a Cursive Script “o”. Not too hard, was it?
Step 3
Repeat the process of making the letter “o” three times so that you get the feel of it. Once you have the “o” down, it’s easy to see how the other downward curve letters are made.
Step 4
Let’s try a harder letter: g. Make the same start to the “g” as you did the “o”, but instead of creating a circular shape when coming round, go straight up, closing the gap. Then make a downward stroke and go past the bottom line. Curl to the left and make an upward, diagonal stroke that continues up toward and ends just below the dashed line. It should intersect the downward stroke of your “g” right at the bottom line.
Step 5
Repeat the process of making the letter “g” three times so that you get the feel of it.
Step 6
Slowly make your way through the rest of the curved stroke lowercase letters, using the guide of the strokes as a reference.
5. How to Write the Lowercase Cursive Alphabet
Now that you’ve written each letter multiple times, it’s time to put it all together and write out the cursive script alphabet in lowercase.
6. How to Write the Cursive Script Uppercase Alphabet

The uppercase cursive script alphabet always plays by different rules and is generally much more elaborate. The curved strokes are much bigger, and the upward strokes have more curls and slant to them. Besides that, the uppercase letters are just as simple to write as the lowercase.
You can always sketch out the letters using your pencil first to feel more comfortable. Then you can simply follow the pencil lines with your pen. When it comes to uppercase letters, I prefer to pencil mine out beforehand.
Step 1
Since most of the cursive script letters begin with a curved stroke, I didn’t divide the alphabet into groups. Instead, we’ll simply work our way through it, using the guide above to see what direction the strokes go.
So let’s start with an easy letter: the letter “L”. Place your pen tip just below the top line. Arc down just above the dashed line and around anticlockwise, coming up to the top line. Then arc over to the left and make a downward stroke to the bottom line. Your line will be slanting to the right. When you reach the bottom line, curl up and around. Finally, sweep your line out to the right, making a nice, gentle curve. Voila! You have a Cursive Script uppercase “L”. Remember, it’s all about curls and slants. The bigger, the better.
Step 2
Repeat the process of making the letter “L” three times so that you get the feel of it. As I said before, when it comes to uppercase letters, the more flourish, the better, so don’t be scared to make some big curls and sweeping lines. Once you have the “L” down, it’s easy to see how other uppercase letters like the C, E, G, O, and Q are made.
Step 3
Let’s try a harder letter: R. Start with your pen tip on the top line. Make a downward stroke to the bottom line, arcing slightly to the left and ending in a fancy curl. Then lift up your pen and place it on the dashed line. Make a curved stroke up and around clockwise toward the top line. Then curve down to the dashed line again and go up and over ever so slightly, creating a loop. Now make another curved stroke out to the right and down to the bottom line, again ending in a fancy curl. A bit tricky but not too hard, right?
Step 4
Repeat the process of making the letter “R” three times so that you get the feel of it. The letter “R” is very similar to the letters B, D, F, I, J, P, and T. So once you have this one down, you can do the rest!
Step 5
Slowly make your way through the rest of the uppercase letters, using the guide of the strokes as reference.
Now that you’ve written each letter multiple times, it’s time to put it all together and write out the uppercase cursive script alphabet.
7. An Exercise in How to Write in Cursive
Step 1
Cursive script is incredibly popular and is used for everyday writing. Now that we have learned both the lowercase and uppercase cursive script alphabet, let’s put our new skills to work and write out a simple sentence.

Step 2
To start, replicate the first stroke in the uppercase “R” we learned earlier. Then, starting a little below the top line, from the left, make a slightly waved horizontal line to the right. Then, write the letter “h” as we learned earlier, bringing its exit stroke all the way to the dashed line. Without lifting your pen off the page, continue your line straight down toward the bottom line and dip, swinging right back up to the dashed line.
Finally come back down with a slight curve going to the right and close the gap at the bottom line, reverse direction and end with an exit stroke just below the dashed line. Dot your “i” and, voila, first and second words complete! This word will allow you to write “is” with ease.

Step 3
Again, as we did earlier, write an “h”, bringing its exit stroke up to the dashed line, but in a slight arc fashion, and write the letter “o” as we did earlier. Then from its little flick, come straight down, dip, and swing back up to the dashed line. Repeat this one more time, and at the dashed line, make a little flick. Third word down—great work!
Step 4
Starting with an entrance stroke, go to write the letter “u”, but instead of swinging up from the bottom line, shoot straight down to the last line and loop up like in the letter “g” we learned earlier. Then, coming straight up and slightly arcing toward the dashed line, write the letter “o”, connecting to the letter “u” as we did in the previous word. Fourth word down—simple, right?

Step 5
With an entrance stroke, write the letter “w”, using the previous word as a reference. At the end, at the dashed line, make a short diagonal line coming down to the right, pause and come straight down, dipping and swinging back up to the dashed line to make the letter “i”. Then swing up toward the top line, not quite reaching it, and reverse, coming straight down to the bottom line. Then dip and swing back up toward the dashed line and make the letter “e”. Fifth word down!
Step 6
For this word, write the letter “i” like in our previous words, and at the dashed line, arc down. Then arc up and down again to the bottom line and end with an exit stroke, just below the dashed line. Sixth word down!
Step 7
For our uppercase “C”, start just below the top line and curve down to the right toward the dashed line. Then come back up to the top line, curving to the left and coming straight down to the bottom line. Finish by curving back up to the dashed line.
Keeping our pen on the page, write the letter “u”, coming straight up to the dashed line, and then write the lowercase “r” like in the previous word, making sure to end at the dashed line. Then write the letter “s”, ending at the dashed line, and come straight down to make the letter “i”, also ending at the dashed line.
From this point, make a slight diagonal line to the right, ending at the bottom line, and come up, making another slight diagonal line to the right, up to the dashed line, and flick out like our “w”. Instead of our flick ending at the dashed line, we want to bring it a little lower and curve to the right and round anticlockwise, to write the letter “e”.
Sixth word down—we nearly have a full sentence written!
Step 8
For our uppercase “s”, start at the bottom line and make an upward stroke as we learned earlier, looping slightly to the left at the top line. Then come straight down to the bottom line, curving to the left, and up a little—halfway down from the dashed line. Curve back down to the bottom line and immediately write the lowercase “c”, followed by the lowercase “r”, “i”, “p”, and “t”. And that’s it—you’ve done it!
You’ve Mastered the Cursive Script!
This style of calligraphy is the one most often used in everyday writing as it makes for fast and legible handwriting, while looking elegant. I hope that you’ve discovered it’s actually quite a simple font to write, despite looking very fancy. The more you practice, the easier it will be to ink the letters and the faster you’ll be at writing. In future tutorials, we’ll learn a slightly more complicated script that looks even fancier.
5 Top Cursive Calligraphy Fonts From Envato Elements
Now you know how to write in cursive for beginners. Next up, I’ll share with you some of the best cursive calligraphy fonts from Envato Elements.
If you’re working on multiple digital creative projects, you’ll love our subscription-based marketplace. For a low monthly fee, enjoy unlimited downloads of the best calligraphy fonts. You can also get unlimited premium fonts, graphic templates, actions and presets, and more.
Let’s see some top cursive script fonts:
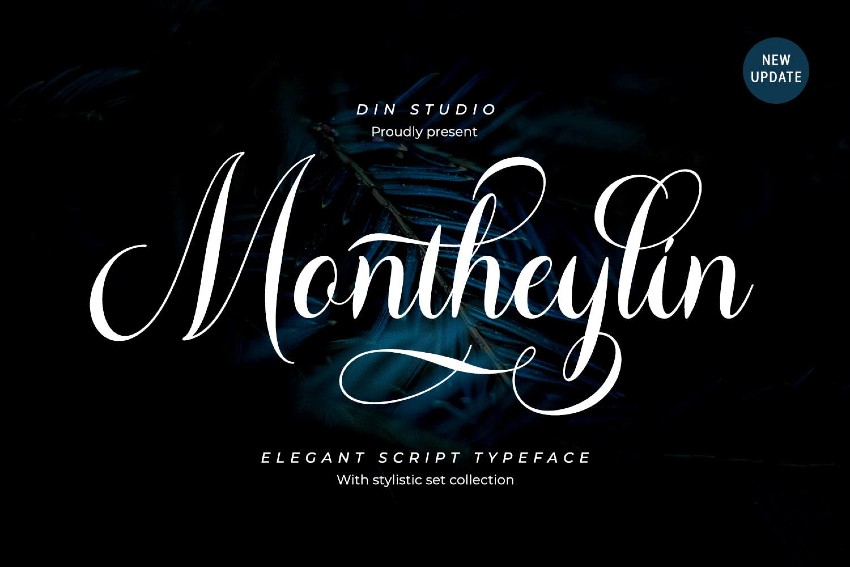
1. Montheylin – Calligraphy Font (OTF, TTF, WOFF)
Montheylin is an elegant cursive script font. These cursive calligraphy letters feature a natural handwritten look. This cursive script font features beautiful ligatures, stylistic sets, and multilingual support.
2. Quenyland – Cursive Script Font (OTF, TTF)

Are you looking for classic cursive calligraphy fonts? Quenyland is a beautiful cursive script font, perfect for branding and stationery.
This calligraphy font is compatible with software like the Adobe suite and MS Word. Quenyland includes alternates and ligatures, along with PUA-encoded characters.
3. Hargalia – Cursive Calligraphy Font (OTF, TTF)

Hargalia is a classic cursive script font. It’s inspired by Renaissance style and the famous Lucida calligraphy font.
This cursive script font looks great in headlines, branding, quotes, and other creative projects. If you’d like an alternative to the Lucida calligraphy font, be sure to try this one!
4. Butterscotch – Cursive Calligraphy Font (OTF, TTF)

Butterscotch is a beautiful cursive calligraphy alphabet. If you need a classic and clean cursive script font for stationery and logos, this is for you. This cursive calligraphy font supports ligatures and stylistic sets, as well as multilingual support.
5. Ralyne Beautiful Cursive Script Font (OTF, TTF, WOFF)

Ralyne is another classic cursive script font. These cursive calligraphy letters feature a beautiful handwritten look. The cursive calligraphy alphabet includes a full set of uppercase and lowercase letters, multilingual symbols, numerals, punctuation, and ligatures.
Discover More Calligraphy Font Inspiration
Here you’ve learned how to write the alphabet in cursive. I’ve also shared with you some of the top cursive calligraphy fonts from Envato Elements. Now, I’m sure you’d like to discover more awesome calligraphy fonts:
 Fonts35 Best Calligraphy Fonts
-
Fonts25+ Best Free Hand-Lettering Style Fonts (Designs for 2021)
-
Fonts25+ Best Free Calligraphy Fonts (Free Downloads)
-
FontsHow to Choose the Best Wedding Fonts for Invitations and More
-
Fonts29 Best Japanese Style Fonts (Calligraphy, Tattoo, and More!)
-
Fonts40+ Best Swash Fonts and Fonts With Tails (Download Now!)
-
Fonts30+ Beautiful Modern Script Fonts (Typefaces for 2021)
-
Fonts30+ Free Signature Fonts (Script Fonts to Download Now)

Start Cursive Calligraphy Writing Today
If you’re interested in getting some help with your lettering or calligraphy, Envato Studio has a great collection of Lettering and Calligraphy Services that you might like to explore.
Or if you prefer a digital solution that lets you create elegant invitations with that hand-written look, browse the selection of cursive calligraphy fonts on Envato Elements.
