
Hi everyone, in this tutorial I’ll teach you guys to reach a similar outcome as the following Killzone signature:

It’s not a difficult tutorial if you already know some basics and medium skills.
It is fully labeled, this way you can exactly see what I did when creating the signature, even steps that I didn’t explain in the tutorial.
Never again you will get stuck because you don’t understand something in the tutorial, just take a look inside the .psd file and boost your signature making skills with new technique’s and ideas!
Step 1: Picking a stock and render
First you have to open a new canvas in any resolution you like. I suggest a medium-big resolution for better results (500px x 250px). Select a render of your choice and a stock image too. It’s important that the render and the stock match each other. Here are my choices:

You can find some great game renders in this post. A collection of city stocks can be found here.
Now that you have your canvas,stock and render, put them all together. Now try to give some flow to the image by rotating your stock using free transform (CTRL+T). I put my stock and render like this:

Step 2: Adding C4D renders
So, the base of your signature is done. To spice it up we are going to add some C4D renders underneath the render. I chose some C4D’s made by K3-Studio:
And the result after this step:

After that I placed some C4D renders on top of the render. I changed the blending mode of one of these C4D renders to multiply to blend the killzone render with the stock (as you can see in the red circle):

Step 3: Motion blur
Now return to your stock image, duplicate the layer and give it some flow with Filter>Blur>Motion Blur (I used a distance of 10 and an angle of 60º). Turn down the oppacity of this new layer untill you are satisfied with it. My oppacity was 65%:

Step 4: Adding special effects
Now we are going to add some great effects using an abstract C4D render with some nice color in it. Here is the render I used:

Insert the render into your signature and rotate it so it matches your flow. Delete parts you don’t like / duplicate parts you do like.
Add a motion blur to the C4D render that matches the motion blur done in the previous step:

Duplicate these layers and set the blending mode of these layers on Linear dodge to improve the colors.

Now just keep adding and removing parts of the C4D render untill you are happy with the result, this is what I got:

Step 5: Lighting
The signature is starting to look good, lets continue by working on the lighting!
Pick the brush tool, a soft brush in any size (around 50px), set your color to black and brush the edges and the dark spots of your signature. You can put the layer in soft light if you want, I just put in normal and lowered the opacity of the layer a bit.

Now we are going to add a gradient layer using the gradient tool (G). My gradient layer looks like this:

As you can see the gradient layer matches the lighting in my signature and enhanced it. I set my gradient layer to ‘soft light‘ and lowered the opacity to around 50%. Here is the result after this step:

Step 6: Enhancing colors
To add some color I used the brush tool and a soft round brush to add some orange and white in certain spots. Put these layers in screen/overlay/softlight anyone will do, pick the one you like the most. Here is where I placed the extra color:

Now we’ll add another gradient map. For the first color use a color that matches your signature (I used orange) for the second color pick black. Put the gradient map on overlay and lower the opacity (I lowered the opacity to 25%).

To improve the colors I also added a curves layer. Here is the final result after this step:

Step 7: Depth
Now we are going to improve the depth in the signature. We do this by:
- Making the render stand out by sharpening it
- By blurring the background using a motion blur.
For the sharpening: First create a new empty layer (ctrl + N) and go to Image > apply image. Now go to Filter > Sharpen > Sharpen. The entire signature is now sharpened, but we don’t want this! This is why we are going to add a mask to this layer, the mask will allow us to make certain parts of the layer visible (the parts where we want to keep the sharpening) and other parts invisible (the parts we want to remove).
How to apply a mask to a layer
Open the masks panel in photoshop if you don’t have it enabled (Window > masks). Now add a pixel mask to the layer by clicking on the following button:
A mask will be added to the layer:
With the mask still selected, you take out the Brush Tool, a soft round brush (10/50px size) and a black color. Now brush on the mask render where you want the sharpening to be removed, keep in mind:
- White = visible
- Black = invisible
Now repeat these steps with a motion blur:
I lowered the opacity of these layers down a bit, here is the result after this step:

Step 8: Improve lighting
Create a new layer and again go to image > apply image. Now take out your burn tool and dodge tool and improve your lighting by making certain parts darker using the burn tool, and making certain parts lighter using the dodge tool.

Step 9: Final adjustments
Our signature is almost done, I decided not to add any text. In this step I used:
- Levels
- Color balance
- Brightness/contrast
- Some soft brushing of yellow / white in certain area’s
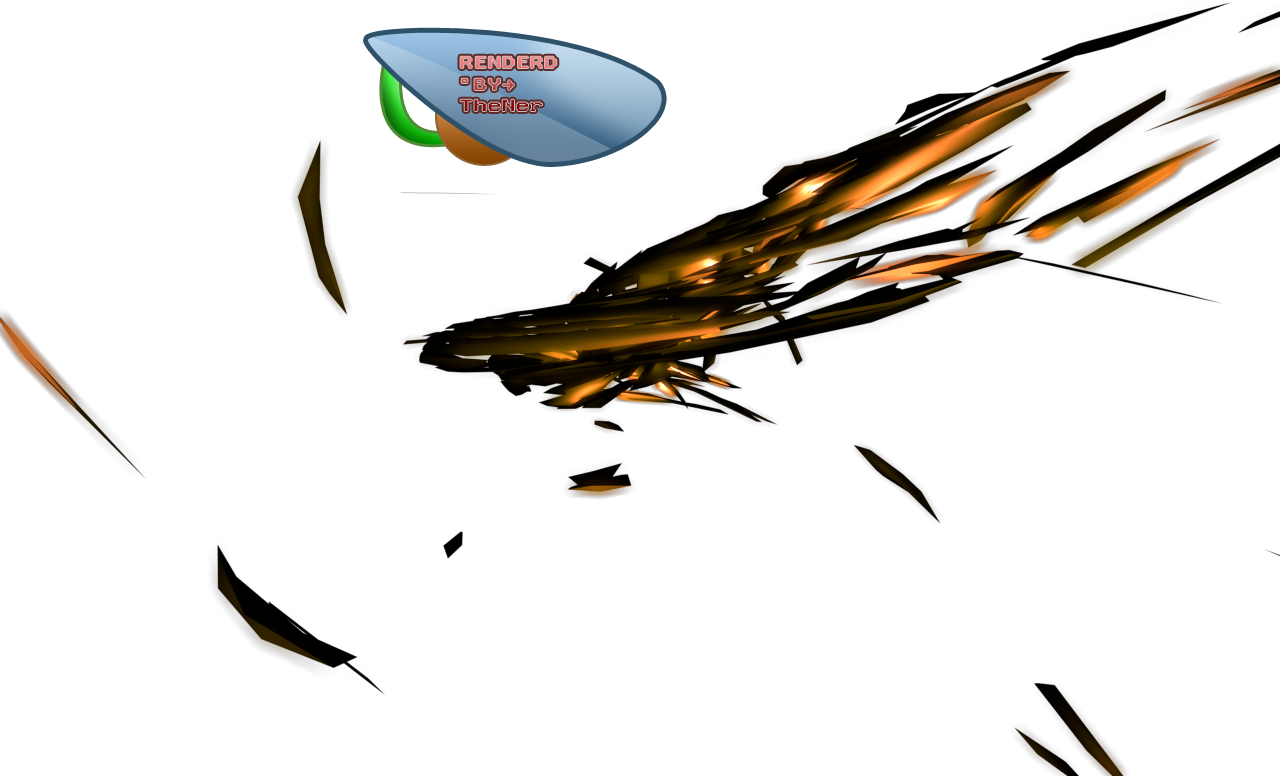
And here is the final result:
Conclusion
In this tutorial you have learned how to use abstract C4D’s, a city stock and a render to create a simple but great looking signature.
You learned how to create a great effect using abstract renders and a motion blur and how to work with masks, a great technique that can be applied in a lot of ways!
Credits: Original Tutorial and signature by Marcos-Inu