In the following tutorial, you will learn how to take shadows out of pictures using Affinity Photo. It’s easy to remove all those unwanted shadows on a subject’s face, body, or clothing, and here you have all the steps explained in detail. Let’s begin!
How to remove shadows in Affinity Photo
Step 1
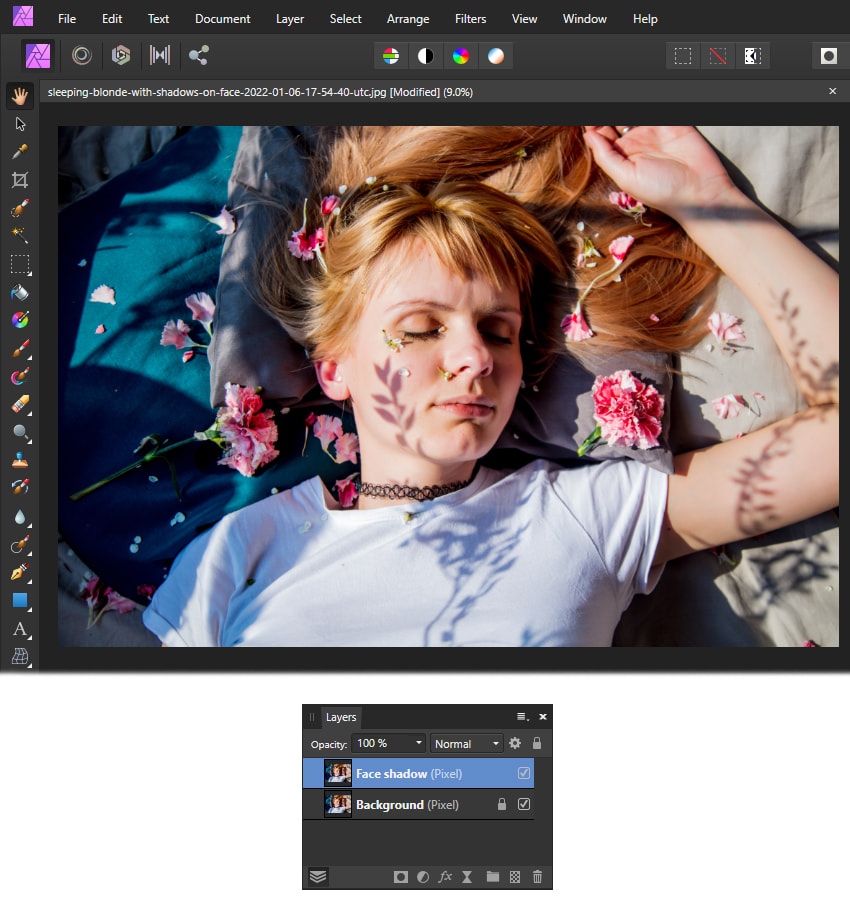
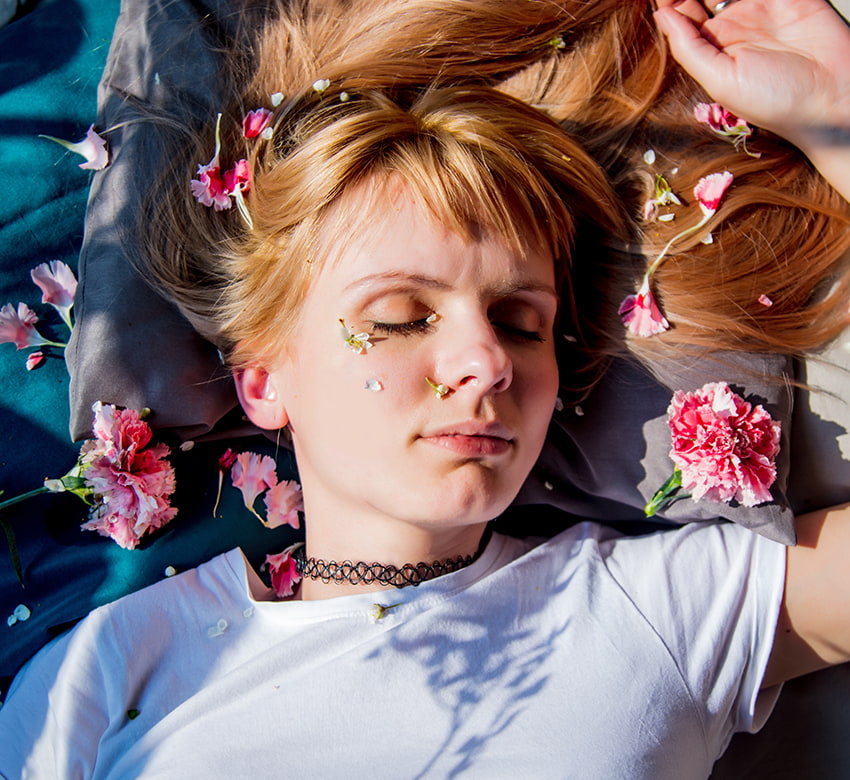
Launch Affinity Photo. Go to File > Open and locate the image on your computer to open it. For demonstration purposes, I’ll be using the Sleeping blonde with shadows on face photo from Envato.
In the Layers panel, right-click on the Background layer and choose Duplicate from the menu. Name the new layer Face shadow, and we will work on this layer from now on.

Step 2
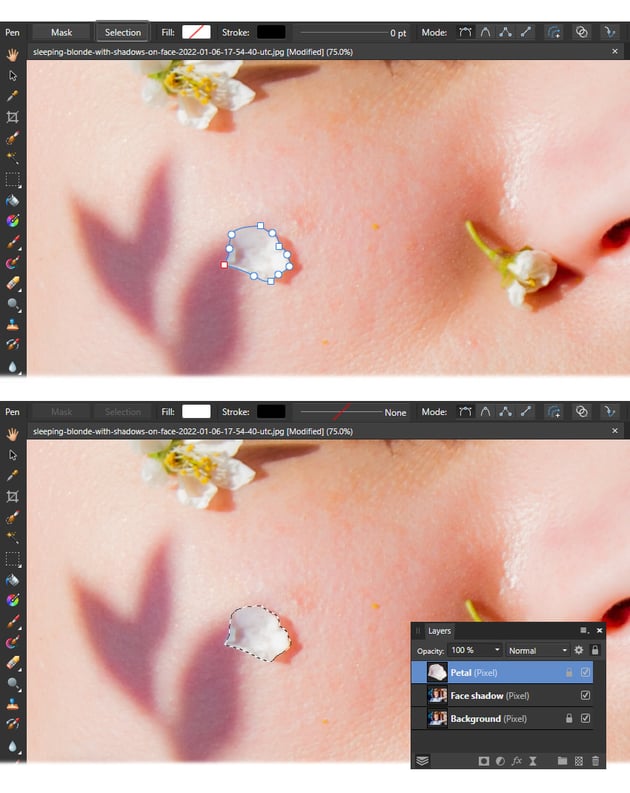
Notice a little petal on the woman’s face, next to the shadow that we want to remove. If you want to keep it there, then I suggest the following.
Grab the Pen Tool (P), zoom as much as needed, and start tracing the shape of the petal. Once done, click on Selection at the top of your document, followed by Edit > Copy (Control-C) and Edit > Paste (Control-V).
By default, Affinity Photo will paste the selection in the same place, creating a new layer. Name it Petal and keep the layer locked.


Step 3
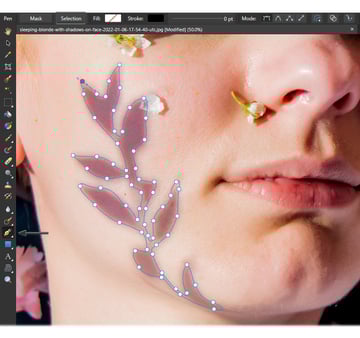
Let’s learn how to actually delete a shadow from a picture in Affinity Photo. Zoom in on the woman’s face and grab the Pen Tool (P). Start tracing the shape of the shadow as shown below.
Once done, you can switch to the Node Tool and adjust some of the nodes and handles if needed. When you’re happy with your tracing, click on Selection at the top of your document to turn it into an active selection.


Step 4
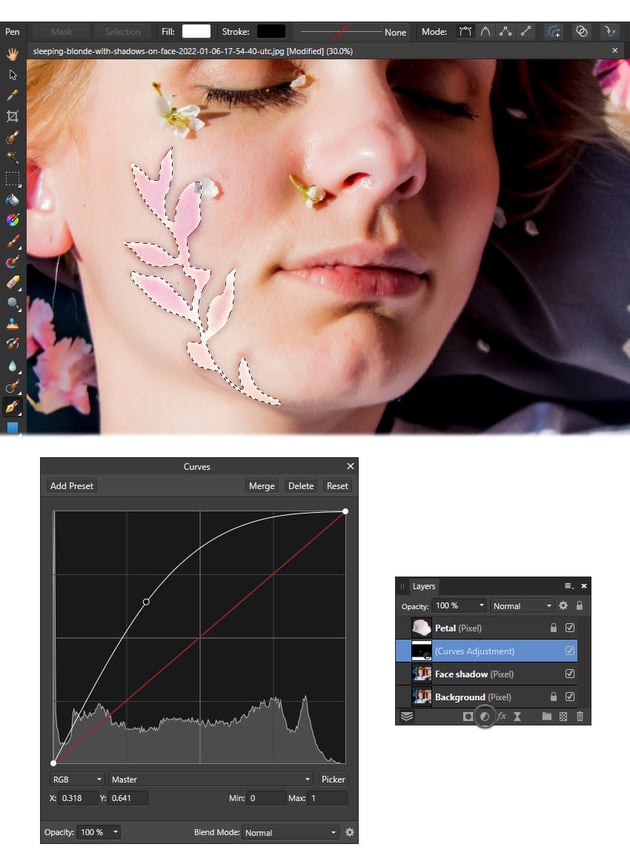
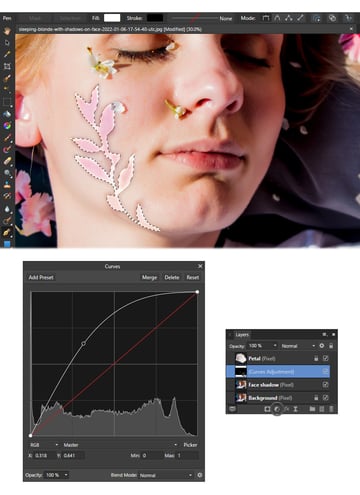
While your selection is active, go to the Layers panel and click on Adjustments at the bottom. Choose Curves, and the Curves window will open.
Hold the mid-point and drag it as shown in the image below. Basically, go for the maximum brightness that matches the skin tone of the subject.

Step 5
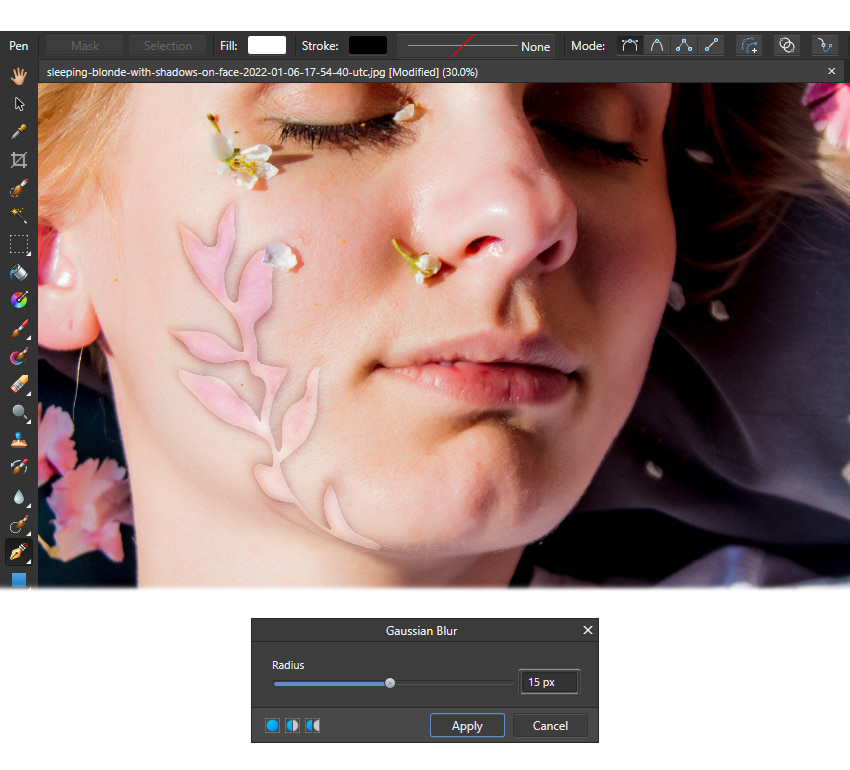
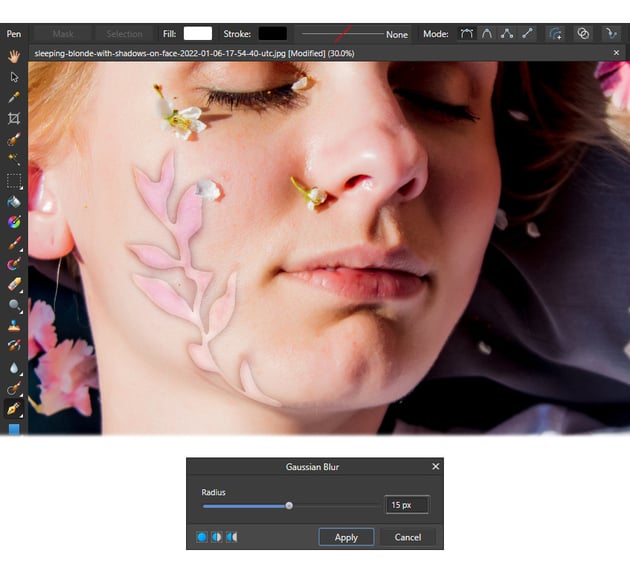
At this point, you will have hard edges, but don’t worry. Let’s keep working on it. You are on the right track.
Keep your selection active and go to Filters > Blur > Gaussian Blur. Apply a Radius of about 10–15 px; then follow up with Select > Deselect. Notice that those hard edges are now softer.

Step 6
Before you continue, put the Curves Adjustment layer and the Face shadow layer into a group. While the group is selected, right-click on it and choose Merge Visible from the menu. As a result, you will get a new Pixel layer above.
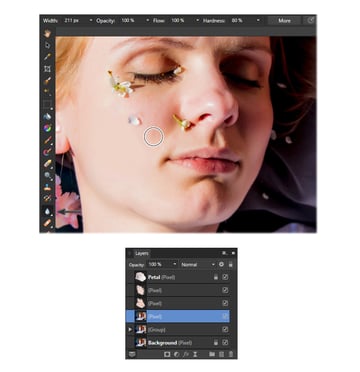
Now, zoom in on the shadow as much as needed and take the Inpainting Brush Tool. Drag the brush on the edge, a short section of it, and notice how it almost disappears.
The settings of the Inpainting Brush Tool are:
- Width: 100 px
- Opacity: 100%
- Flow: 100%
- Hardness: 0%
- Foreground color: black

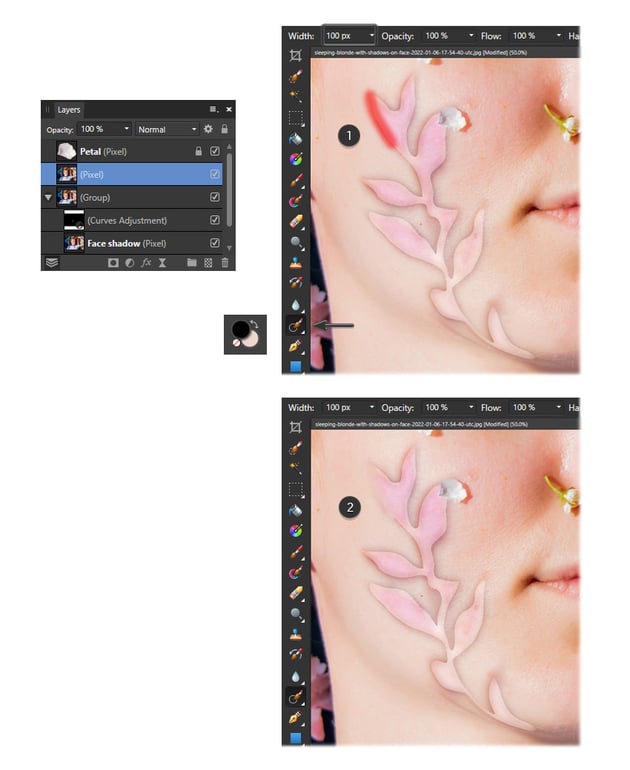

Step 7
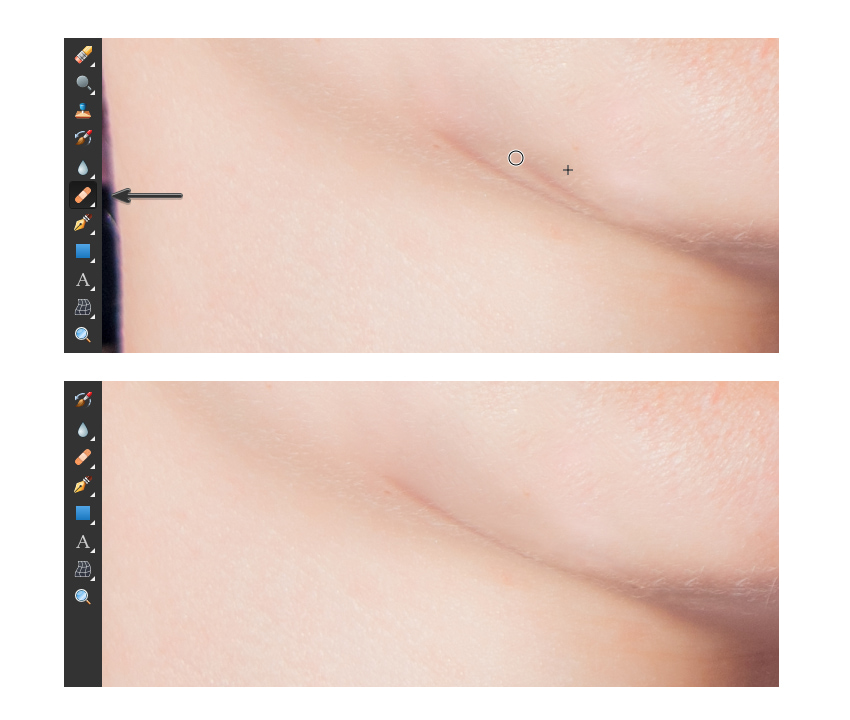
Gently use the brush over the edges in short sections, and continue to do so until you go around the entire contour.


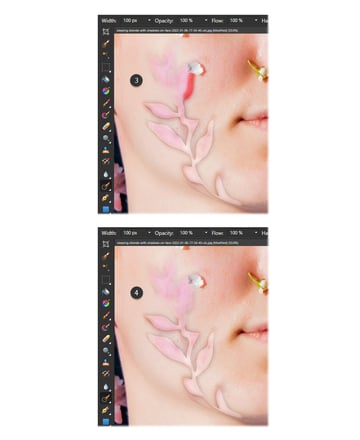
Step 8
Next, increase the Width of the Inpainting Brush Tool to 200 px and continue to brush over the pink areas that are left on the subject’s face until you get a much smoother and more uniform appearance.
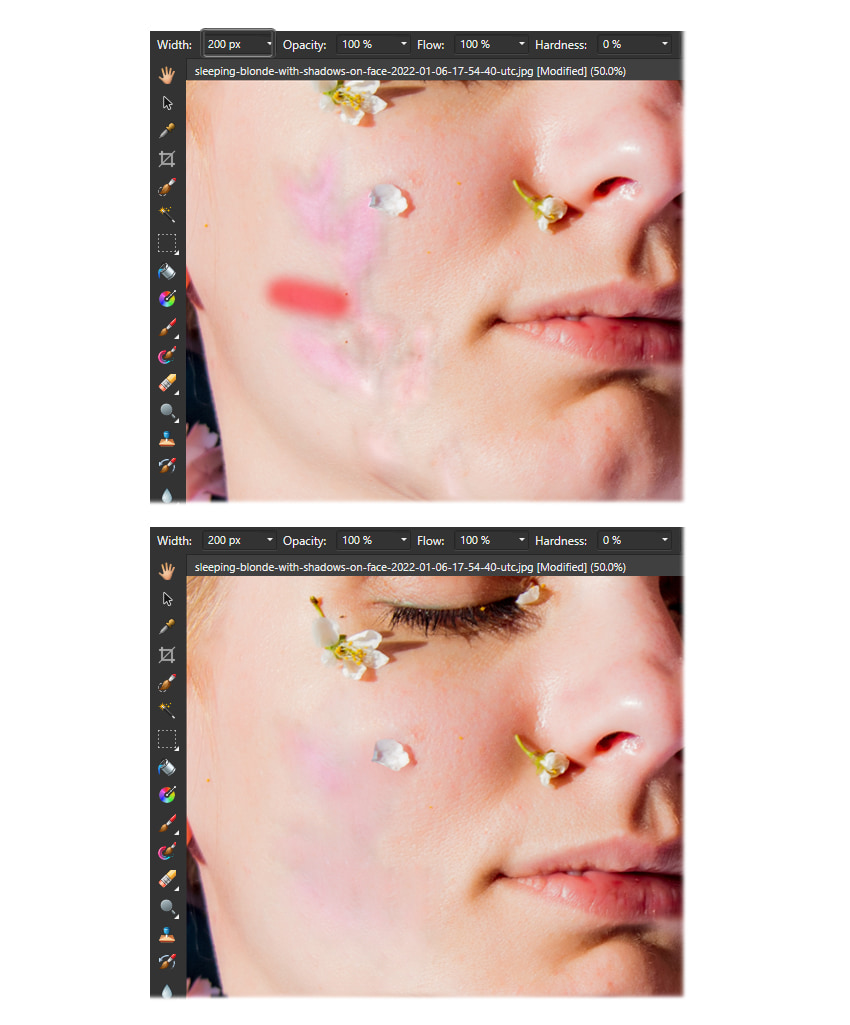

Step 9
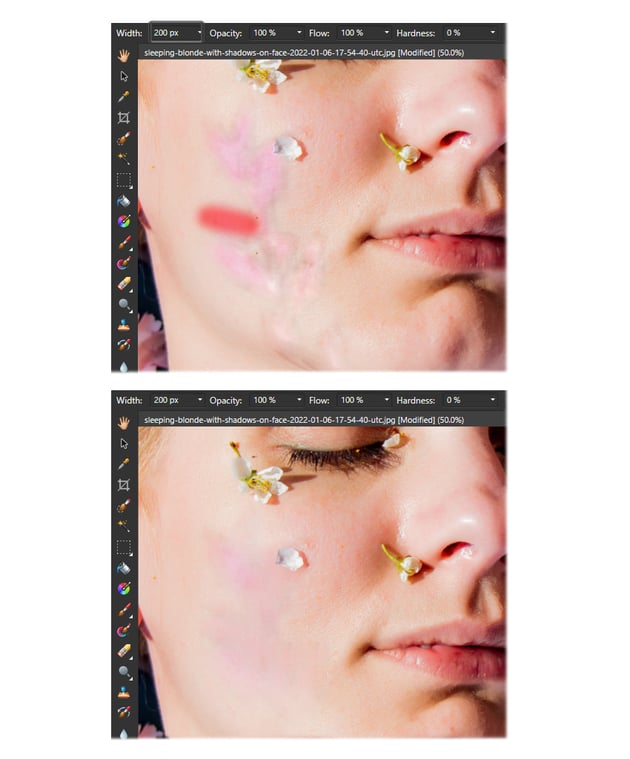
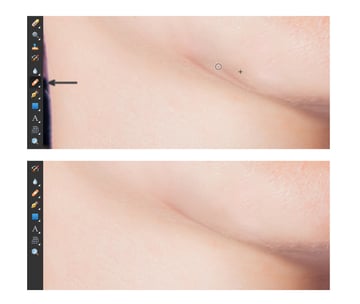
To remove the shadow on the neck area, you can simply use the Healing Brush Tool. Hold the Alt key and click on the image, in an area close to the shadow, in order to set the source indicated by the + sign.
Now, choose a brush size that is a little bigger than the shadow, and then brush on it from one end to the other. Watch it disappear!

Step 10
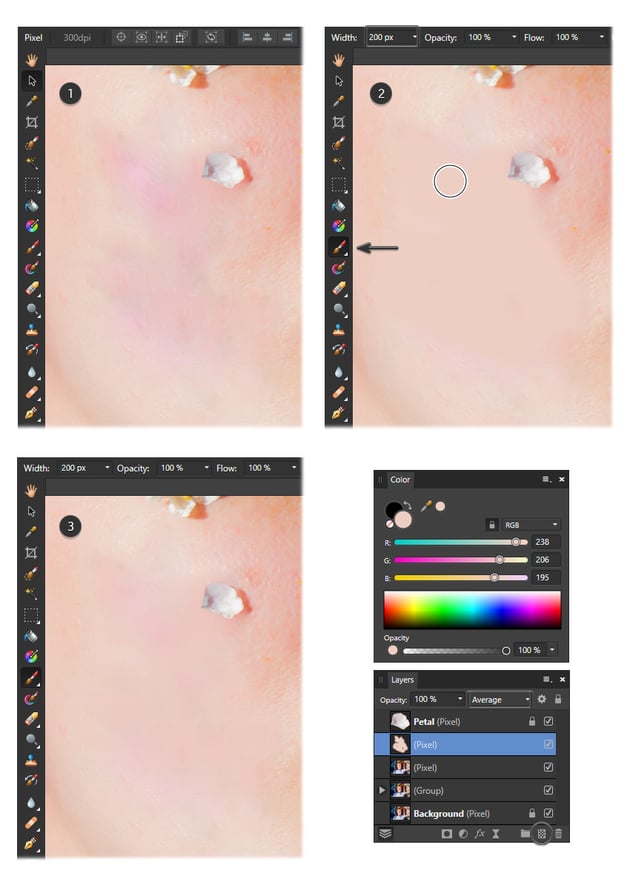
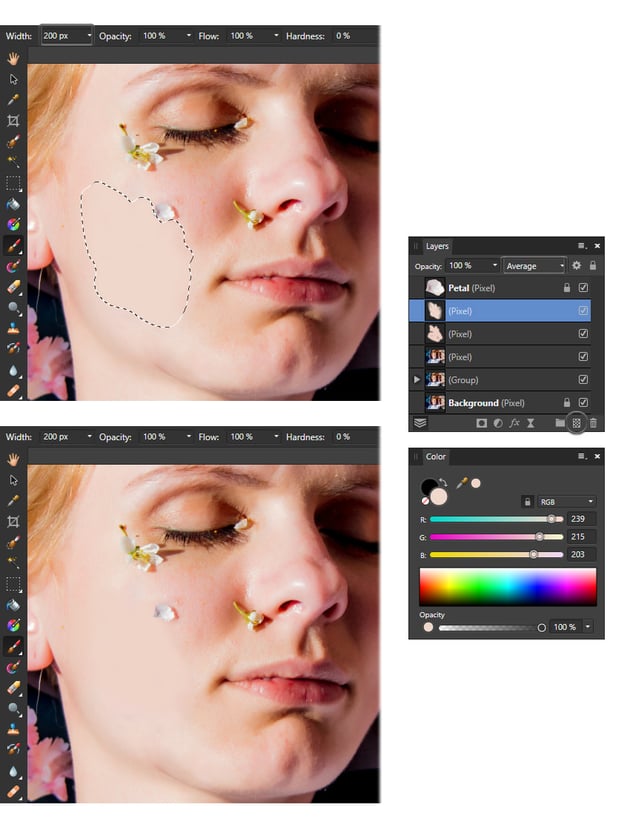
Let’s go back to the face. All that’s left to do is to color correct the pink area. First, use the Color Picker Tool (I) to take a color sample from the skin.
Press Add Pixel Layer at the bottom of the Layers panel to add a new layer above the photo. Now, use the Paint Brush Tool (B) to brush on the face until you cover the pink area. Once done, set the Blending mode of the layer to Average.
The settings of the Paint Brush Tool are:
- Width: 200 px
- Opacity: 100%
- Flow: 100%
- Hardness: 0%
- Color: R=238, G=206, B=195


Step 11
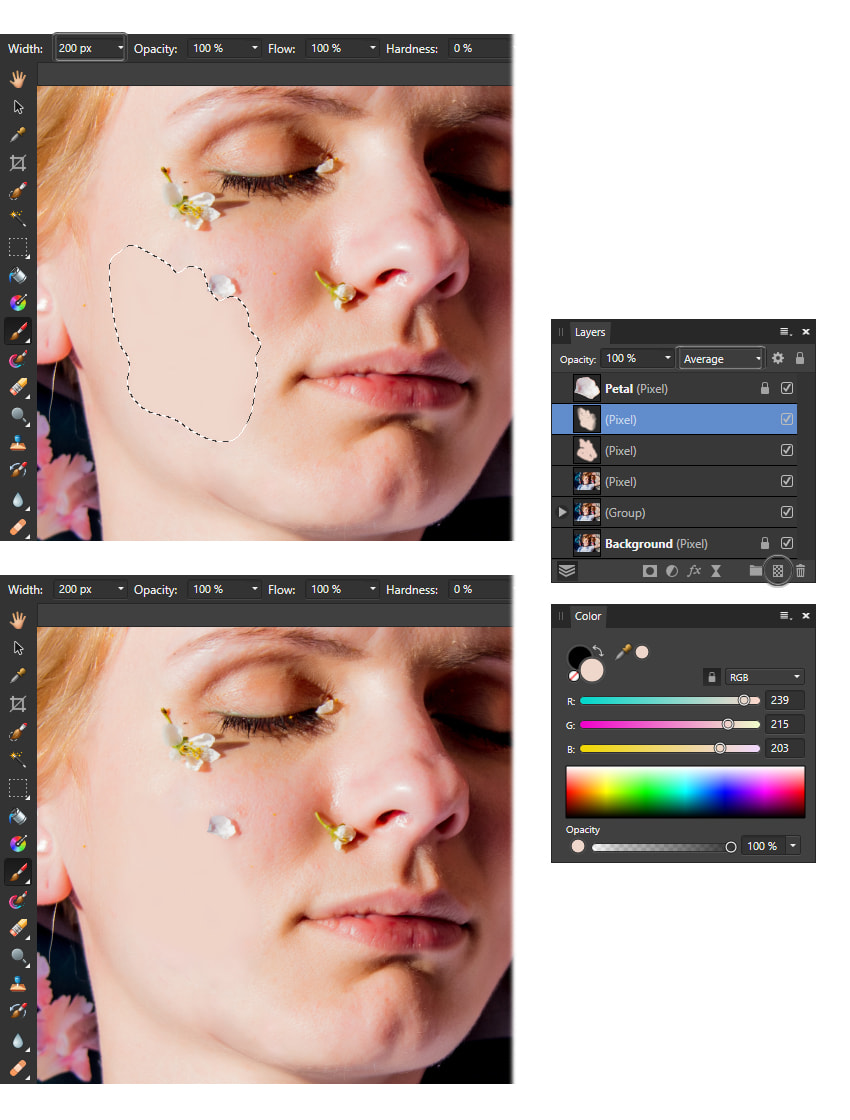
Press the Add Pixel Layer icon at the bottom of the Layers panel again. This will create another layer at the top.
Take another color sample from the skin with the Color Picker Tool (I); then switch to the Paint Brush Tool (B) and brush on the face to cover the cheek area. Set the Blending mode of the layer to Average.

Step 12
One more extra step that you can do is to grab the Blur Brush Tool and start brushing around the “corrected area” in order to smooth out the texture of the skin in the original photo. This should be done on the photo Pixel layer.


Step 13
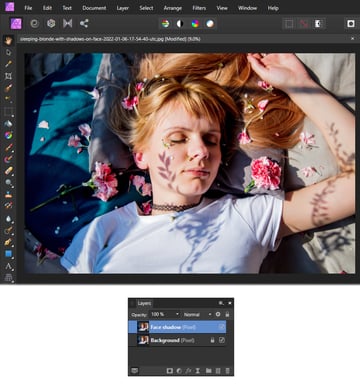
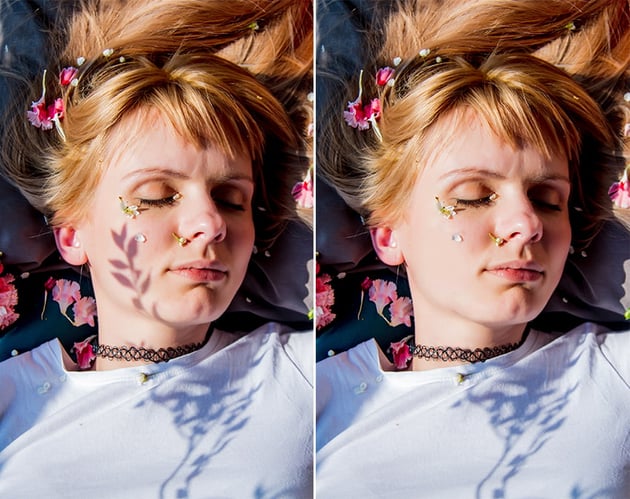
Here is the before and after comparison. You have successfully learned how to delete a shadow from a picture.
The techniques explained can be applied to remove shadows from the neck too, as well as from other body parts or from clothing. Give it a try!


Congratulations, you’re done!
Now you know how to remove a shadow from a photo without Photoshop in just a few steps. Feel free to test the technique and practice using other photos too.
You can find a lot of sources of inspiration and resources ready to be used at Envato. Get unlimited downloads of photos, actions, graphics, fonts, and much more, ready to be used in your projects!


Want to learn more Affinity Photo?
If you like design video tutorials, check this one out from the Envato Tuts+ YouTube channel. You’ll learn how to use LUTs on your pictures in Affinity Photo.
If you don’t have time to learn how to take shadows out of pictures, why not try an AI face shadow remover? Envato’s AI tools, including ImageEdit, are all part of your subscription—with unlimited use!
No need for complicated prompts, creating new accounts, or installing anything. ImageEdit can work as your go-to AI shadow remover. Try it out to easily enhance your images and stay on top of the latest AI trends.


Whether you choose to use AI to remove a shadow from a photo or the Affinity Photo tools, editing images is a useful skill, and there are many things to learn about it.
And if you’re just starting with Affinity Photo, there’s so much more you can explore. We have loads of tutorials on Envato Tuts+ that teach many other useful techniques. Here is a list of tutorials specially made for you, so take a look!