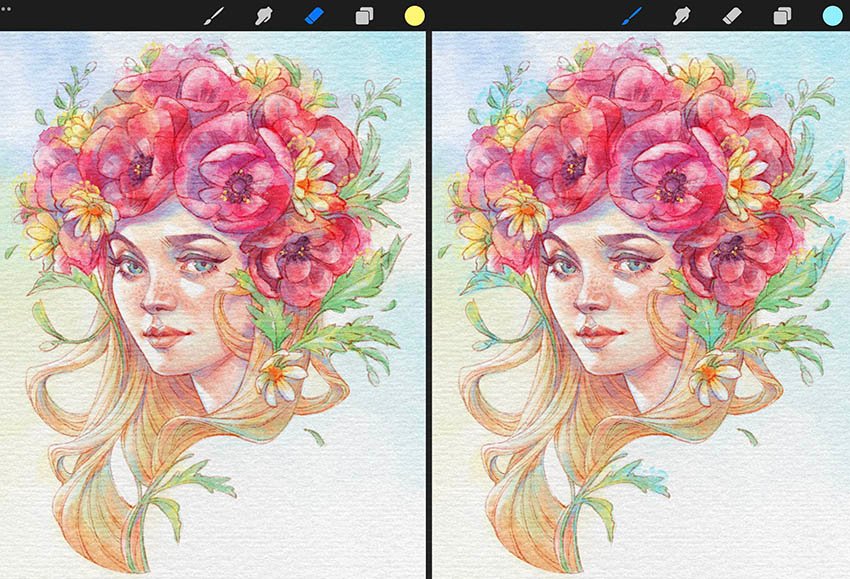
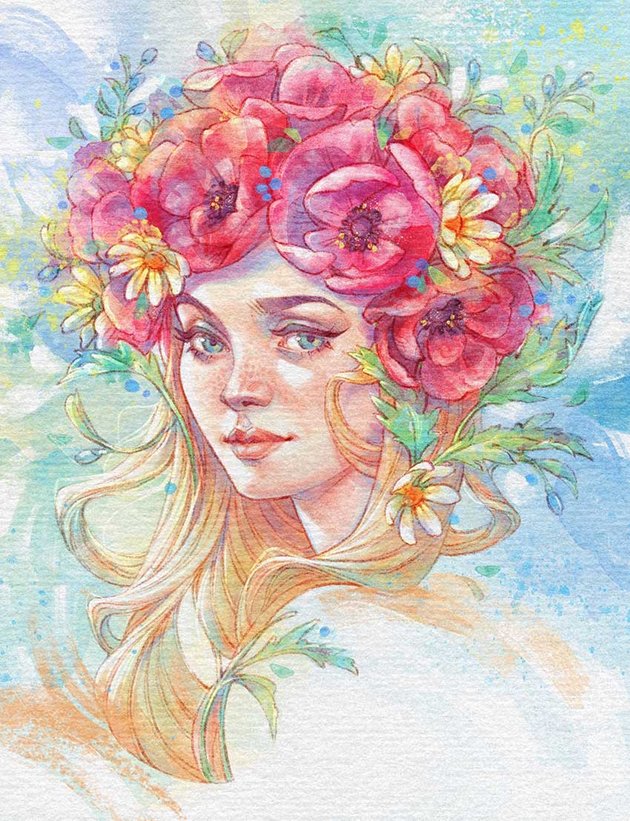
This Procreate watercolor tutorial will teach you how to create a vibrant yet soft digital watercolor portrait in Procreate from scratch.
We’ll explore different drawing techniques and textures to achieve an authentic watercolor look. Also, you’ll learn how to make your portrait expressive using colors and lines.
Creating a watercolor portrait in Procreate is a very fun process, especially using the right tools. We’ll use a few Procreate watercolor brushes from Envato Elements with great watercolor brushes, stamps, and paper textures. So make sure to download these before starting our digital water-coloring design:
Do you like video tutorials? If you prefer to learn new skills by watching new videos, then you’ll love this new video from the Envato Tuts+ YouTube channel. Watch me work and learn how to paint watercolor in Procreate by following this video tutorial:
What You’ll Learn in This Procreate Watercolor Tutorial
- How to import a Procreate watercolor brush set
- How to make a sketch
- How to create the line art
- How to block in the base colors
- How to draw the skin tone
- How to draw the hair
- How to draw the flowers
- How to draw the leaves
- How to add the final touches
1. How to Import a Procreate Watercolor Brush Set
In this digital water-coloring tutorial, I’m using an iPad Pro with the Apple Pencil and the Procreate 5.2.6 app. Make sure you have at least Procreate 5, so you can use the new imported brushes without any issues.
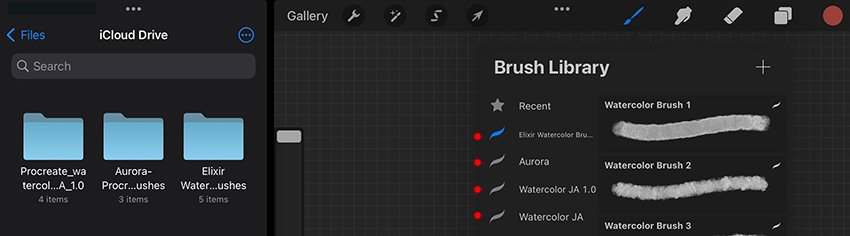
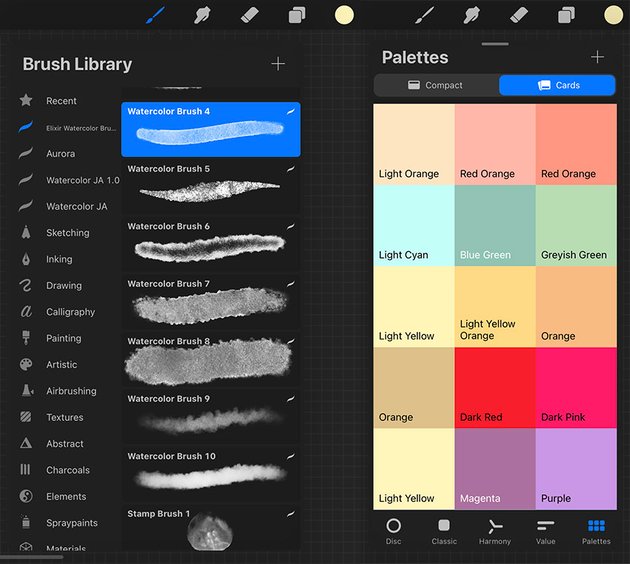
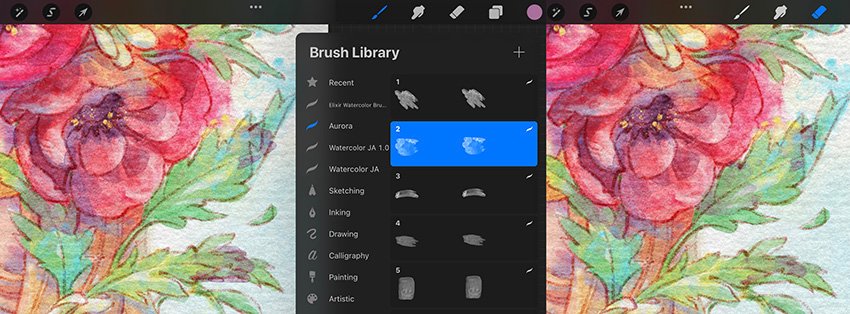
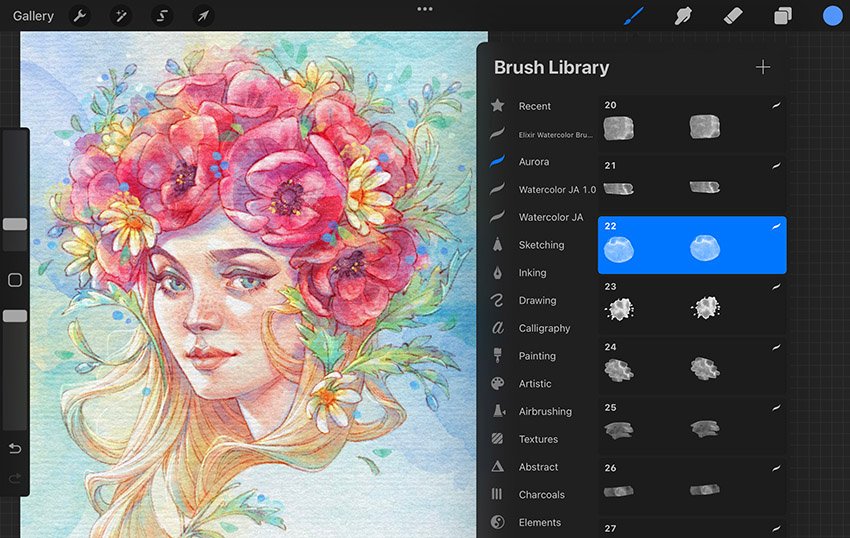
Open the downloaded Procreate watercolor brushes by choosing Share in the contextual menu and tapping Open in Procreate.


Are you all set? Let’s start then!
2. How to Make a Sketch
Step 1
To do watercolor in Procreate, start by creating a New Canvas for your work.
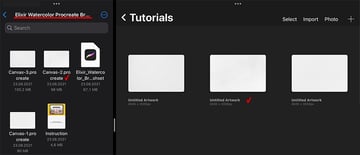
Open the “Elixir Watercolor Brushes” from your Files and download the ready-made canvases to Procreate by tapping the canvas file. You can pick any canvas with a paper texture you like. I chose Canvas-2 for this portrait.


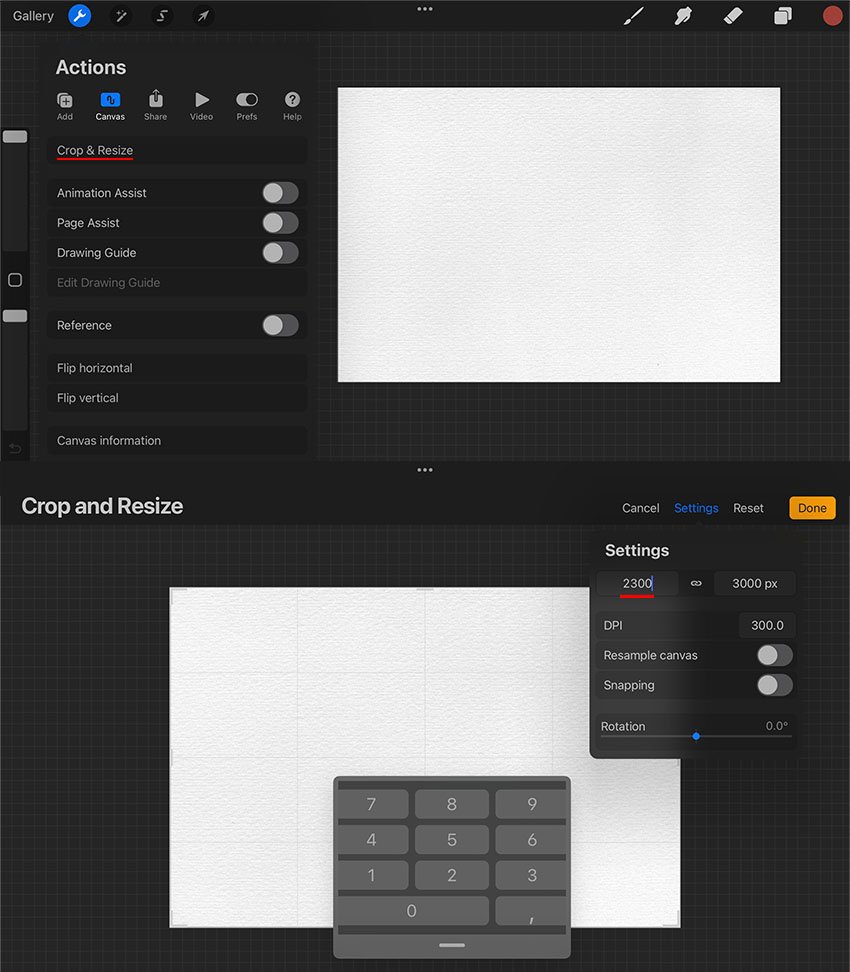
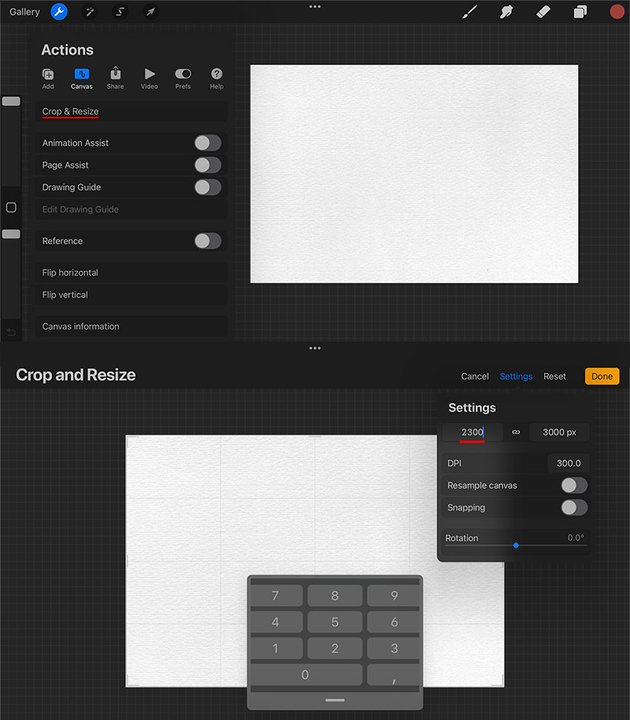
Since the ready-made canvas has a landscape format, we need to resize it to make it suitable for our portrait.
Go to the Actions menu, choose Canvas, and tap the Crop & Resize option. Change the Canvas Size to 2300 x 3000 px in the Settings.
Also, if you’d like to work on a larger canvas, you can just rotate the canvas first and crop it after.

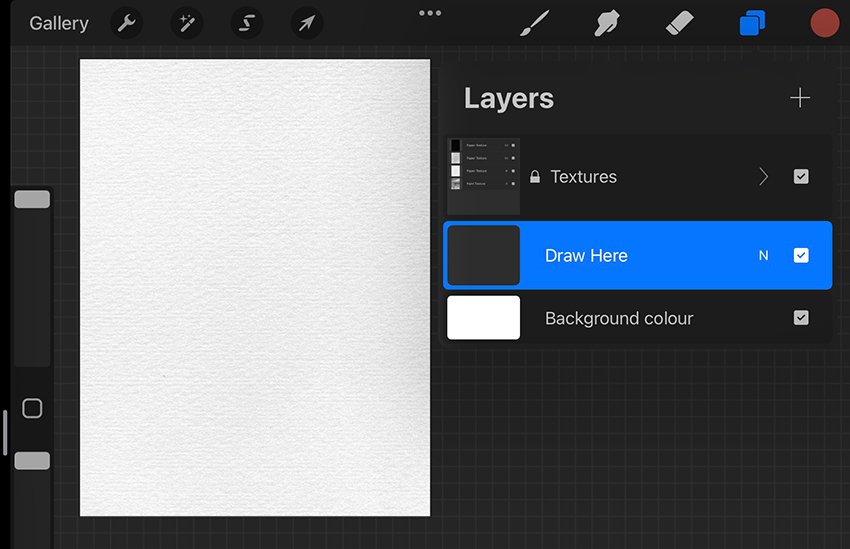
Choosing the canvas size is very important if you want to recreate the spacing and proportions of the drawing. Now we have a perfect canvas, so we can start our sketching process on the “Draw Here” layer.


Step 2
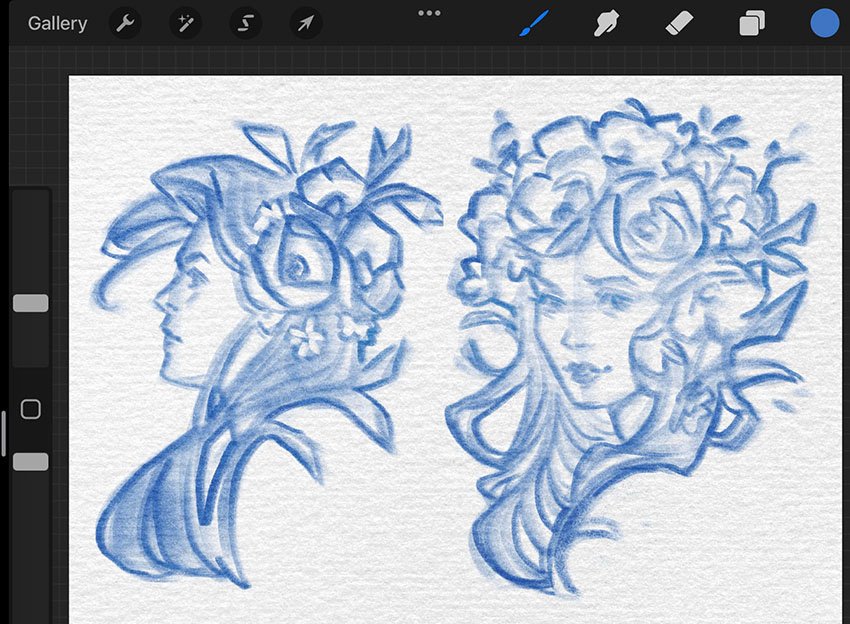
I start the process by making a couple of thumbnail sketches, exploring new ideas and compositions for my artwork.
I prefer to start my sketch directly in Procreate using a large, textured brush for loose sketching. Sketching the silhouette helps to establish the size and placement of the portrait.
Choose any color you like from the Color menu in the top-right corner. Start by sketching the general shape of the silhouette, keeping the image rough and simple. Feel free to work very loose here, focusing on the largest shapes.

Step 3
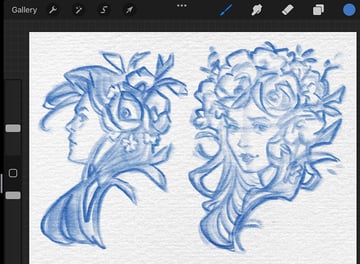
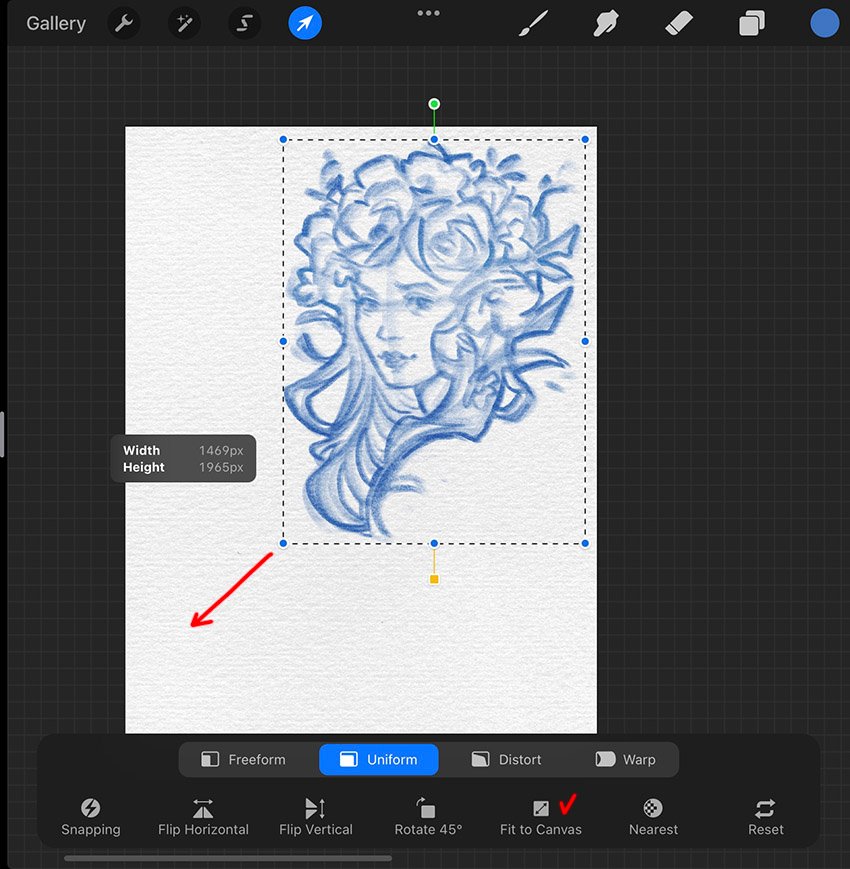
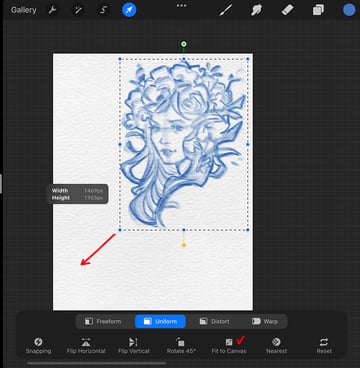
When you’re done with the thumbnail sketches, choose the idea you like the most. I ended up with the second one.
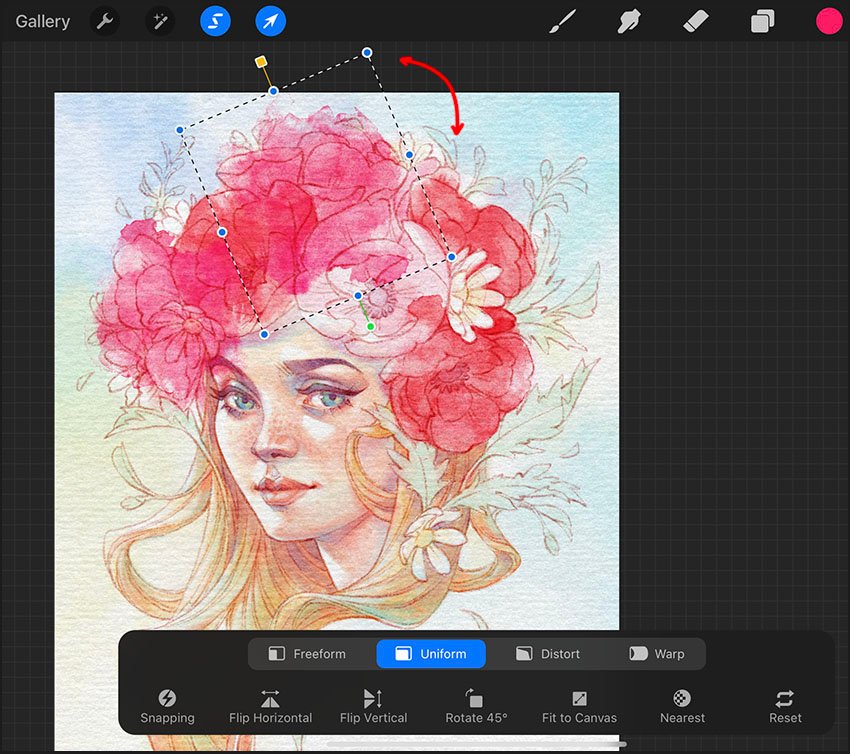
Tap Transform in the top panel to select the image. Make sure the Uniform option is selected. Then drag the selection corners to fit your sketch to the canvas. Or you can just tap Fit to Canvas from the menu.

Step 4
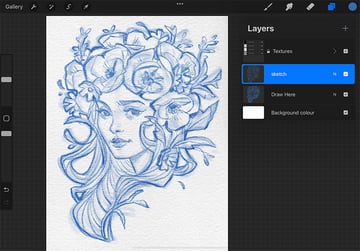
Create a New Layer for a detailed sketch on top of the “Draw Here” layer.
Let’s refine the sketch and clean up the line work a bit using a smaller brush. You can make your brush size smaller by pulling down the top slider on the left side of the screen, or just choose another brush you prefer to use for detailing.
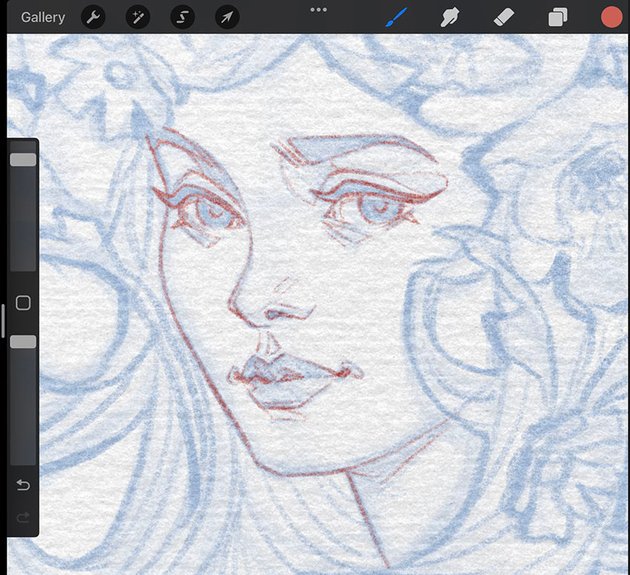
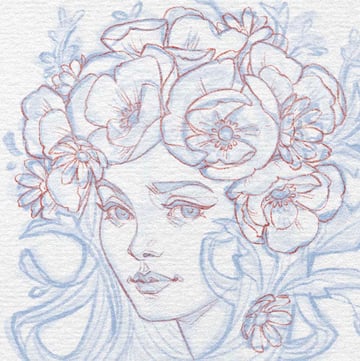
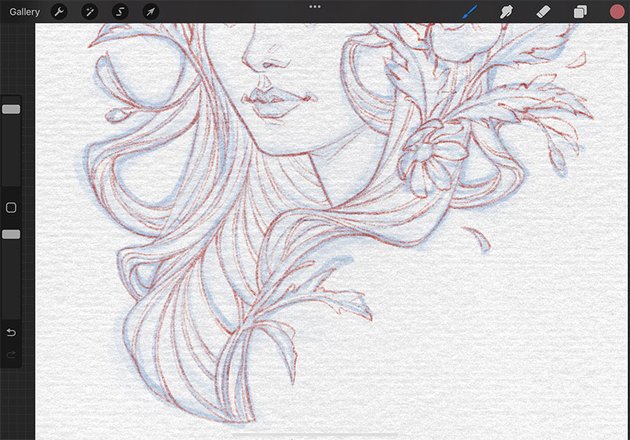
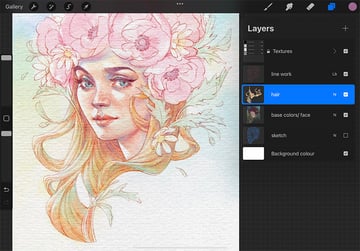
Refine your sketch, adding more details to the face first. Then establish the form of flowers by adding the main shapes with some detail. In the end, draw the contour shape of the hair, dividing the main shape into sections to create strands and a sense of movement.


3. How to Create the Line Art
Step 1
Once we’re done with the sketch, let’s focus on polishing the drawing with clean lines.
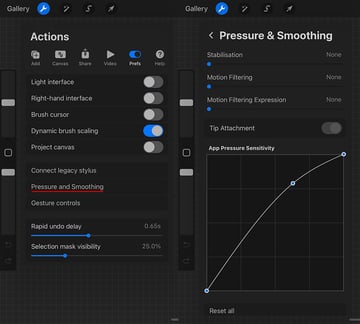
But first, let’s change the pressure of the pen, so we can use a very light touch for the line work. Pressure is the key to creating good line art, especially for high-quality and detailed work. It helps to create a variety of line weights and makes your drawing more natural and fluent.
Go to Actions in the top panel and tap the Prefs icon. Choose Pressure & Smoothing from the drop-down list. Change the curve as shown below.


Step 2
Now we’re ready to start creating the line art for our digital water-coloring design.
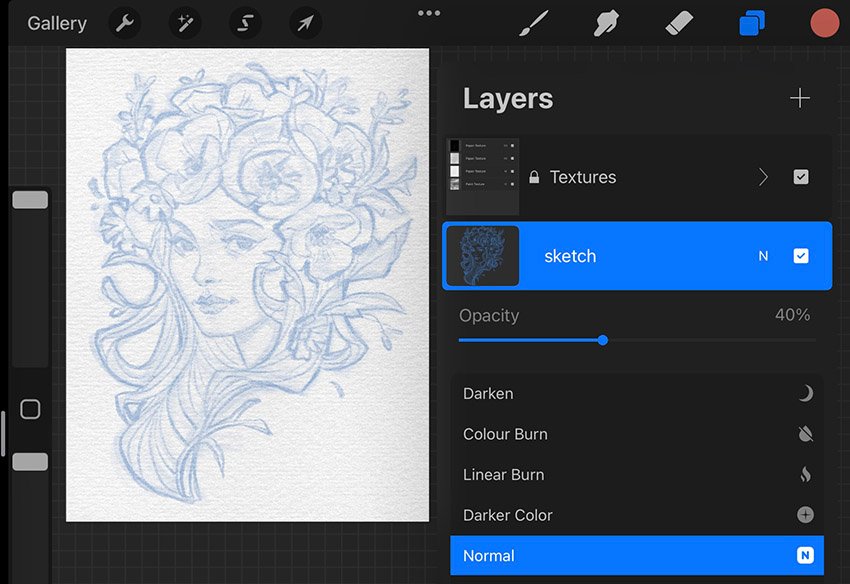
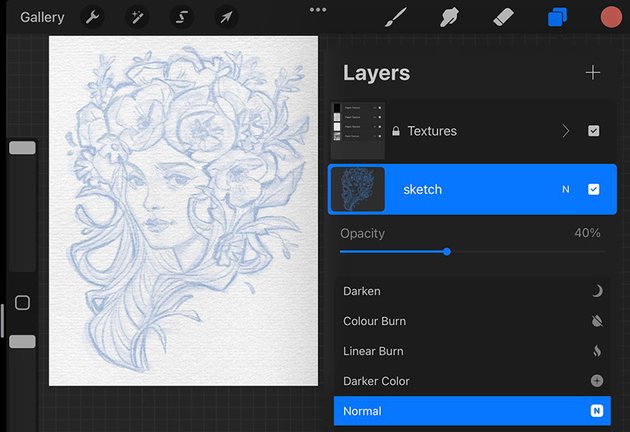
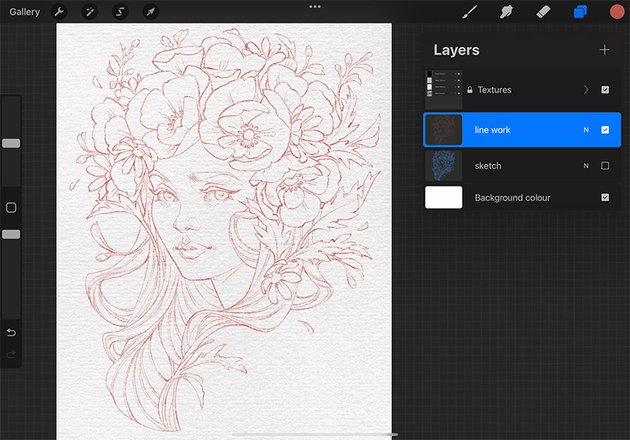
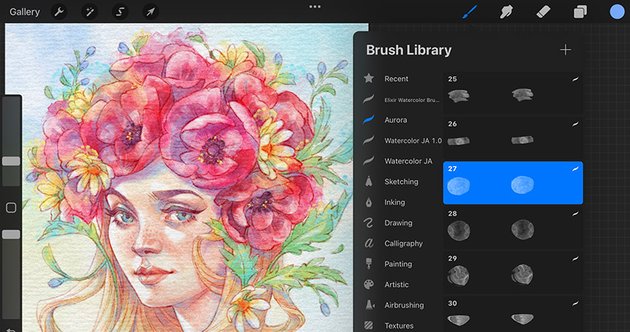
First, lower the Opacity of the sketch layer to about 40% and create a new layer for the line art on top. Pick a brick color from the Colors menu, avoiding dark tones for a softer look.

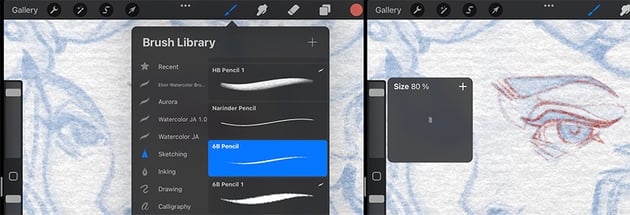
Let’s choose the perfect brush for the line art. I like using pencil brushes for the lines, and I found a great one from the default Procreate brushes, the 6B Pencil from the Sketching set. This textured brush is ideal for drawing clean line art and tiny details.
Start your line art from the eye—it allows you to find and establish the size of the brush for the entire work. Set the brush Size to about 80% with 100% Opacity. The thickness and opacity of the lines depend on the pressing force of the stylus.

Step 3
Start by drawing the face with smooth lines on top of your sketch. You can experiment with different shapes for the eyes, lips, and nose to create an interesting look and emotions. Create clean, confident lines by varying the line weight. It gives more life to your drawing.


Step 4
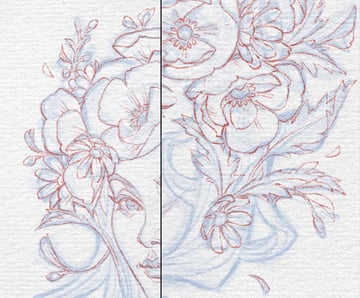
Draw flowers and decorate the hairstyle with leaves using the same principle. Don’t hesitate to use any photo references here; this will help move your work forward and enable you to draw flowers more confidently.


Step 5
Now let’s draw the hairstyle. First, draw the main lines following the movement of the hair, and then make it more detailed by adding tiny strands.
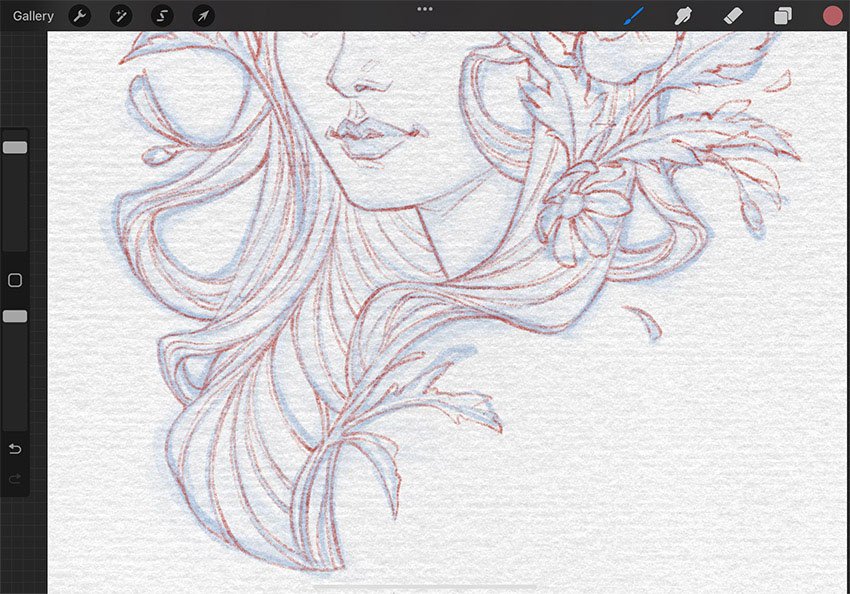
Finish your line art by adding more details to the drawing if necessary. Every line should serve the composition, so make sure they’re cohesive in their design.
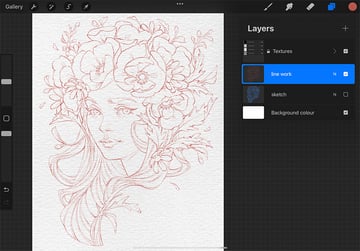
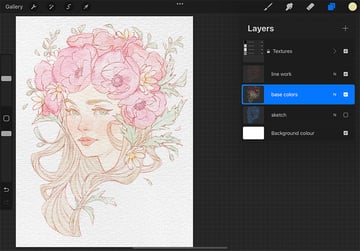
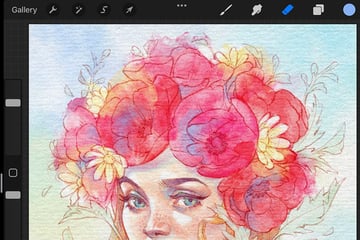
Turn off the “sketch” layer, and admire the result of your line work.

4. How to Block in the Base Colors
Step 1
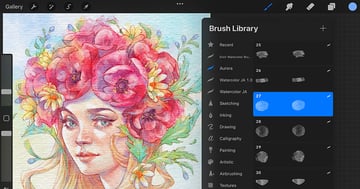
The next step in doing watercolor with Procreate is choosing the colors. Let’s gather the Color Palette with some vibrant yet soft colors to give our painting a summer vibe.
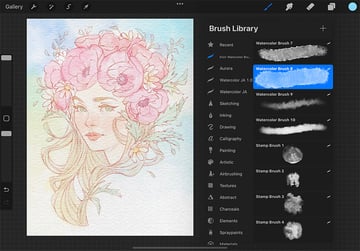
Pick Watercolor Brush 4 from the Elixir Watercolor Brushes set.

Step 2
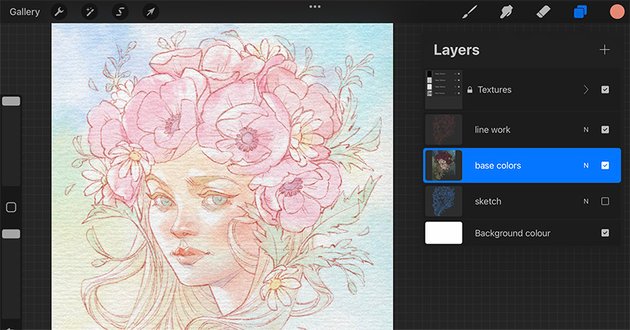
Now create a New Layer under the “line work” layer.
Lay in the base colors to establish your base shapes, considering contrast and color fundamentals to harmonize your painting. Use your line work as a guide in the process.
Start by filling the face with color. We’ll use a very light orange as a basic color, with some light red-orange for the cheeks, nose, and lips. Fill the eyes and leaves with blue-green and the flowers with dark red and pink. Pick a dark orange color for the hair, brows, and eyelashes.


Pick Watercolor Brush 8 from the Elixir Watercolor Brushes set and fill the background with color combinations of blue, turquoise, and yellow.


5. How to Draw the Skin Tone
Step 1
Let’s start adding some volume to the face.
Create a New Layer for the skin shading on top of “base colors”. Now pick Watercolor Brush 4 again. Paint some soft gradients using yellow, light orange, pink, and blue, adding some nuance to the existing colors.
It’s important to add some variations in the skin tone: the forehead is usually yellow-toned, the cheeks and nose are reddish, and the under-eye area and jawline are cooler.

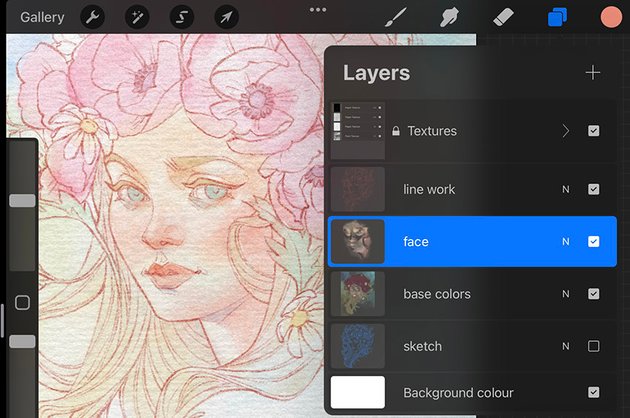

Step 2
At this point, let’s introduce some proper lighting, establishing the light source.
Merge the “face” and “base colors” into one layer first. Then pick the Eraser Tool and form strong highlights on the lightened area of the face, keeping in mind where the light source is. In our case, it’s coming from the left.
This way, add some highlights to the hair and flowers as well.

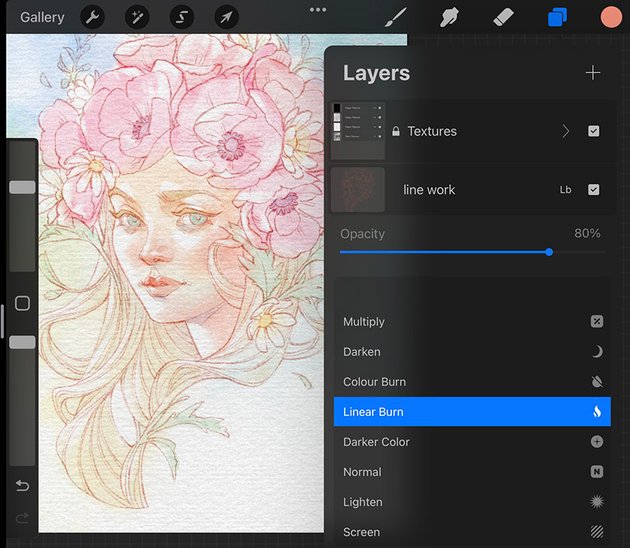
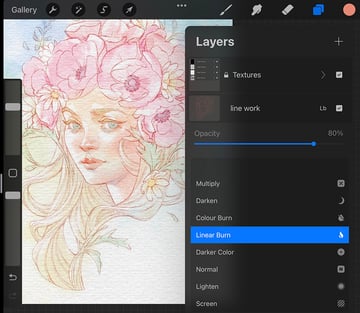
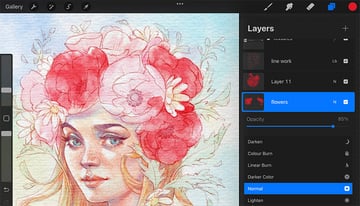
Step 3
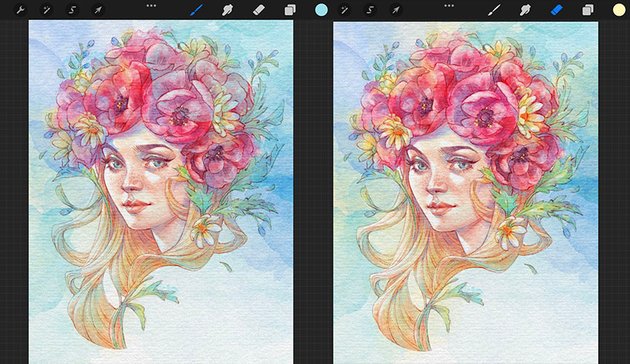
Before we move on to the face rendering, let’s add more color variations to the line art by changing the Blending Mode to Linear Burn. If the lines are too bright, make them softer by reducing the layer Opacity to about 80%.

Step 4
On a New Layer, start building subtle shadows on the face and neck using purple. Then add some nuances with blue and cyan.
The separate layer allows you to refine the shadows with the Eraser Tool. Clean the area outside the lines if needed.
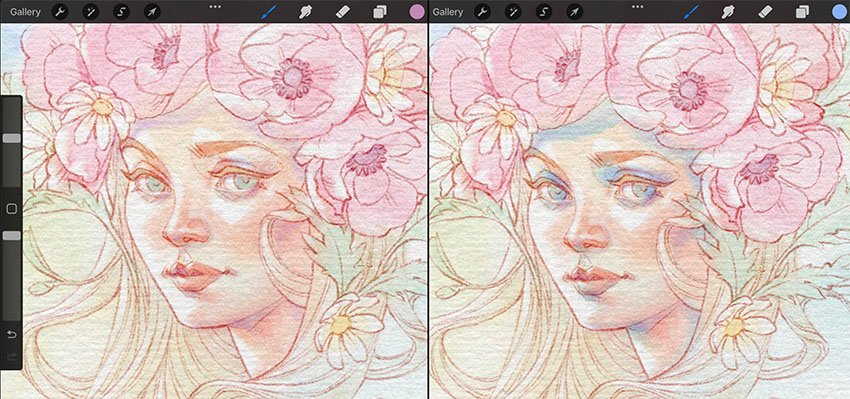

Step 5
Let’s bring the face into focus by adding some contrast to some of the facial features, while leaving others soft.
Create a New Layer again. Pick a purple color, and using the same brush but smaller, draw the eyebrows, eyelashes, pupils, and nostrils.
Then make the look more expressive by adding some color variations to the eyes and lips. Use some blue, turquoise, and yellow for the irises, and some red-orange for the lips.


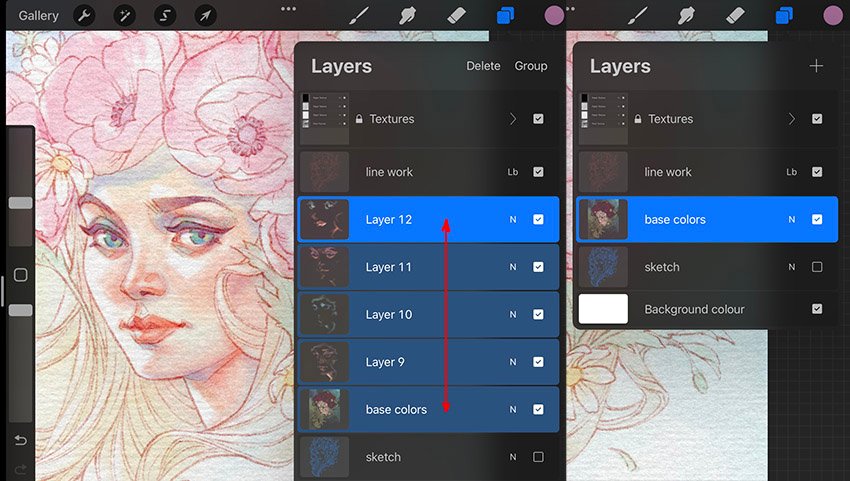
Step 6
Once we’re happy with the result, we can merge all the face layers with the “base colors” into one. Just take the two layers (one finger on the top one, and one finger on the bottom one) and squeeze them together.


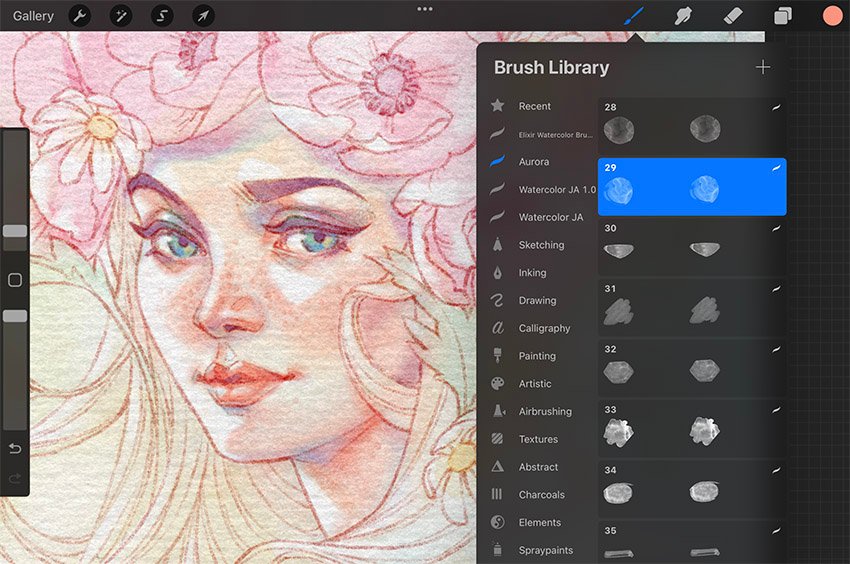
Step 7
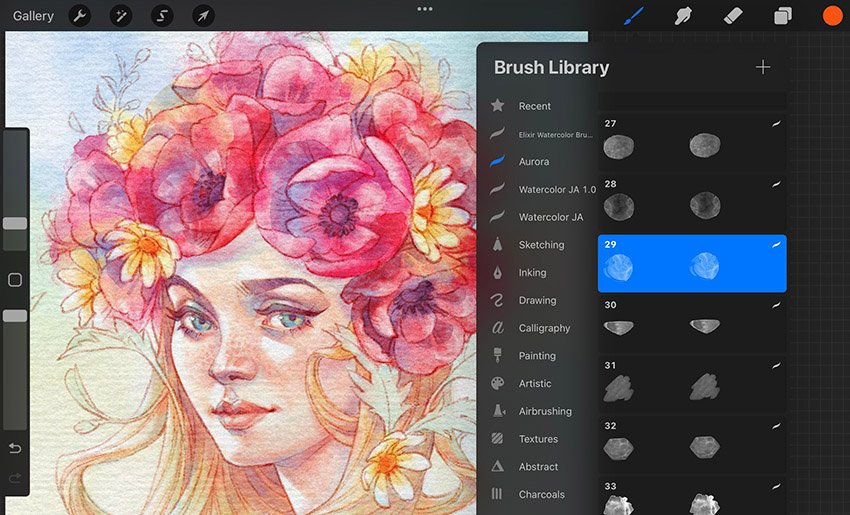
Let’s add some freckles to the face to make the skin more natural. Using the stamp brush 29 from the Aurora set and a light red-orange color, add freckles randomly, varying the size and opacity.


Step 8
Finish the face rendering by adding some more contrast: use the Eraser Tool to form crisp highlights, and add some shadows to the areas under the eyes and nose. Also add some final details to the eyes, such as eyelashes and bright highlights.

6. How to Draw the Hair
Step 1
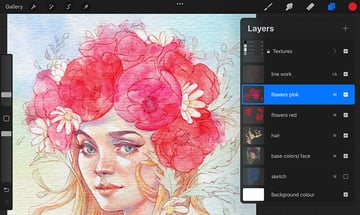
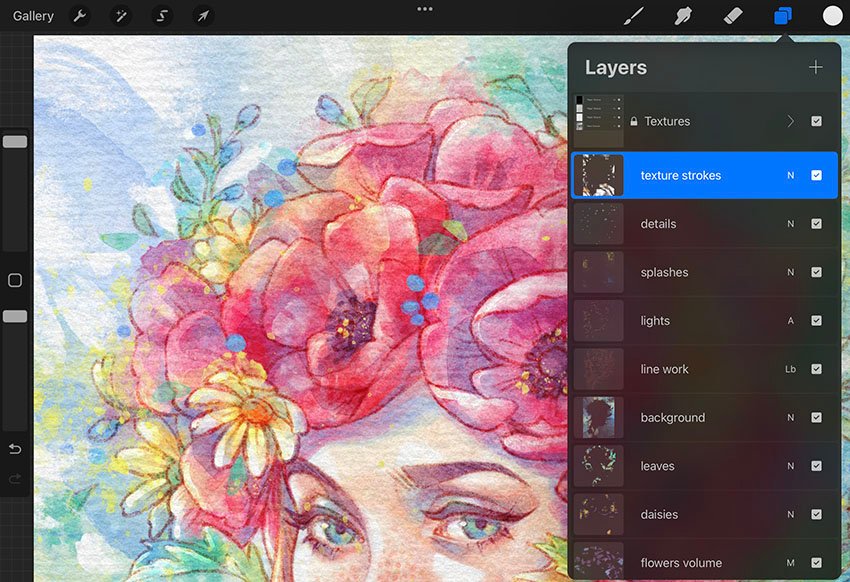
It’s time to refine the hairstyle as we continue making our watercolor with Procreate. Create a new “hair” layer on top of the “base colors” layer.
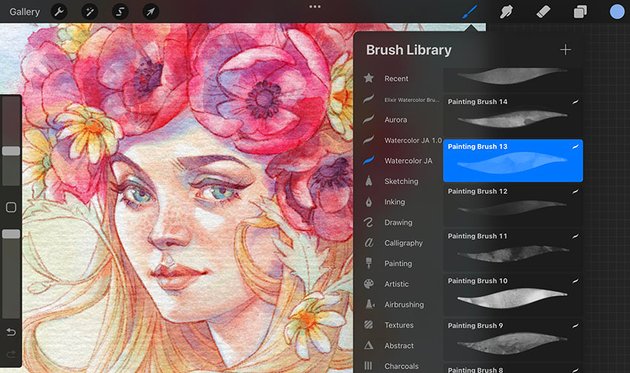
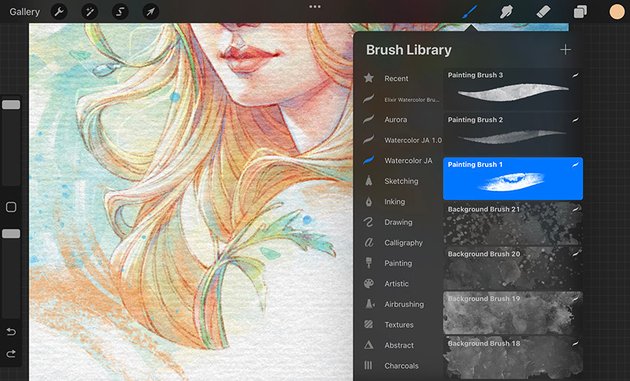
Use the Selection Tool with the Freehand option to draw the contour shape of the hair. Pick Painting Brush 1 from the Watercolor JA set and use a light orange color.

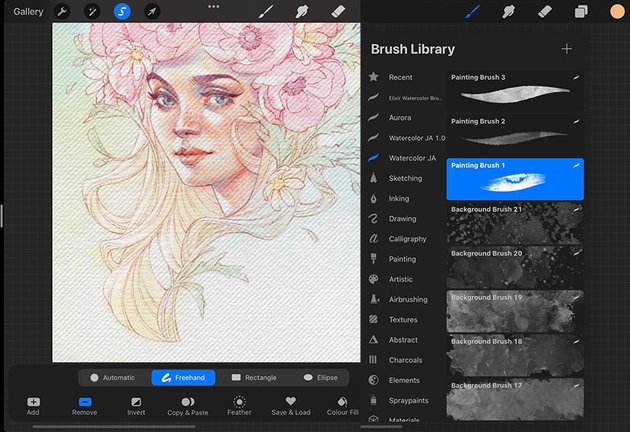
Use a large brush size to fill the hair shape with texture. Use the same method for the rest of the hair shapes. Refine the hairline with the Eraser Tool if needed.

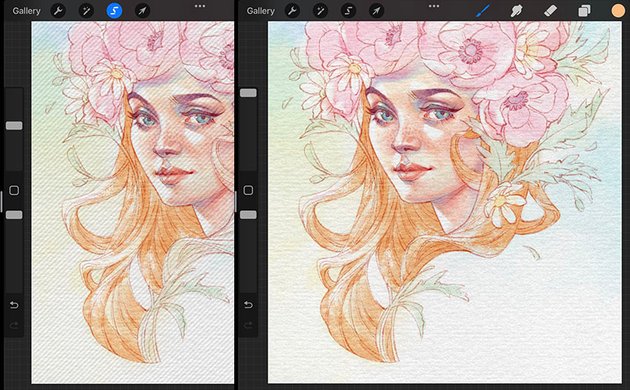

Step 2
Let’s blend the hair texture a bit. Pick Painting Brush 13 from the Watercolor JA set and draw with yellow on top of the textured shapes. Then pick the red-orange and add some value to the roots and on the shadowy area of the locks. Also, divide the main shape into sections to create strands by varying the size of the brush. We don’t draw every single hair individually at this stage; instead, we cluster and form groups.


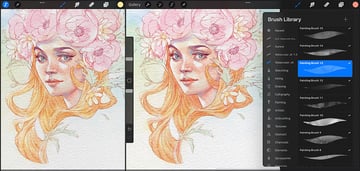
Step 3
Add nuance and detail to the base colors, bringing your portrait to life. Use some cyan for the outer edges and purple for the shading to create the appearance of volume.
In the end, switch to the Eraser Tool and form some strong strokes for the highlights.


7. How to Draw the Flowers
Step 1
The next step in this tutorial on watercolor in Procreate is to create a New Layer for the flowers on top of the “hair”.
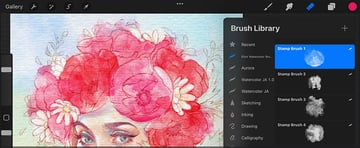
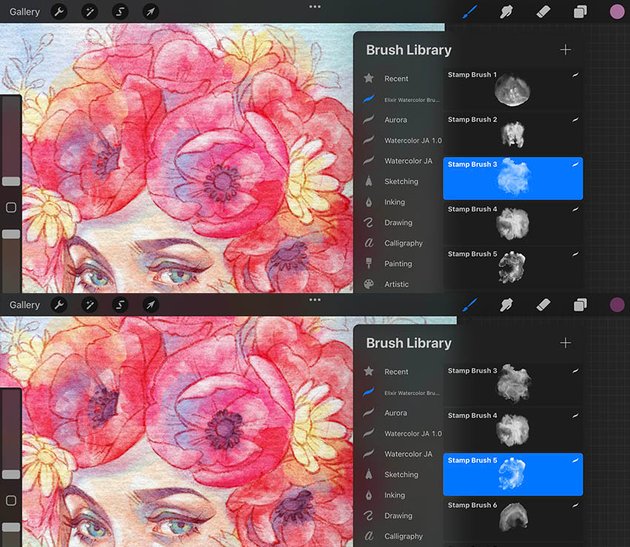
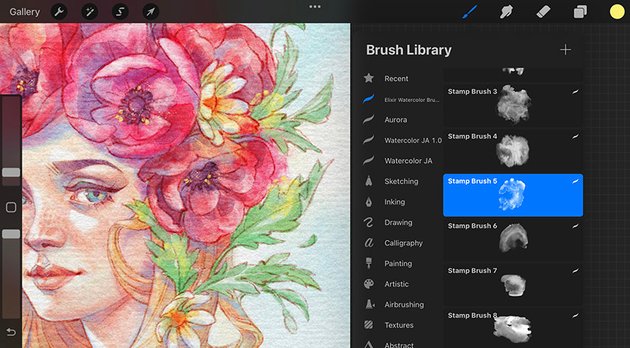
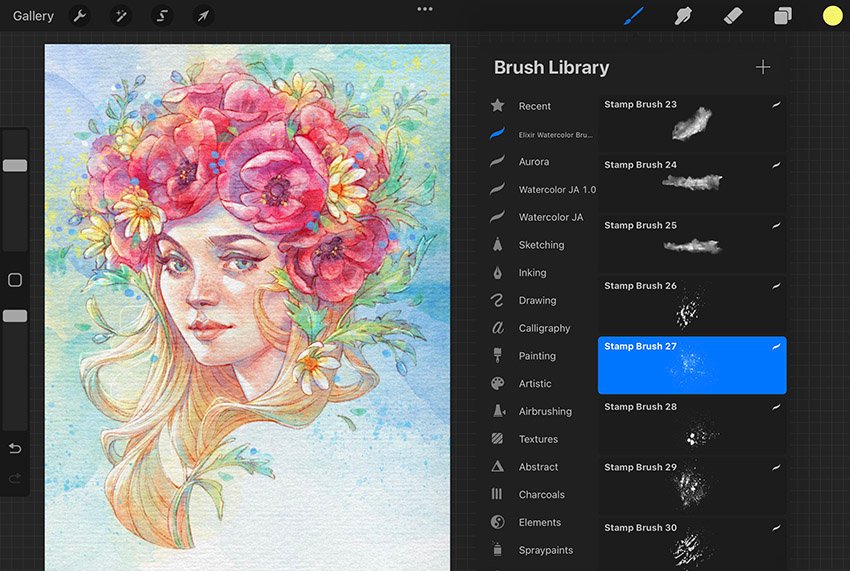
We’ll use stamp brushes for the base of the flower shapes. Pick Stamp Brush 4 from the Elixir Watercolor Brushes set and dark red from our Color Palette to create a couple of flower shapes.


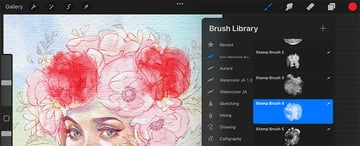
Clean the area outside the lines. On a New Layer, add a new flower shape with Stamp Brush 3. You can leave some beautiful texture outside the form.


Since the stamps have a different color intensity, let’s reduce the Opacity of the first two flowers to about 85%.

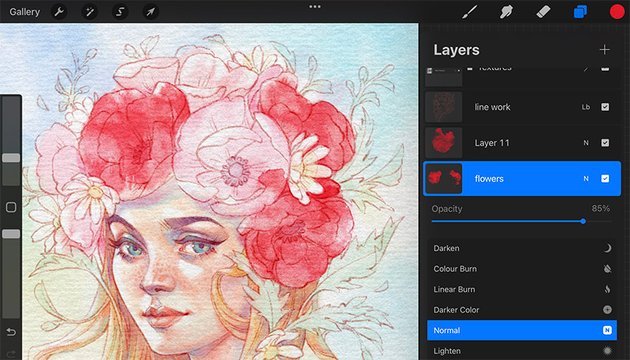
Merge the flower layers. Tap on the top layer and choose Merge Down from the drop-down list.


Step 2
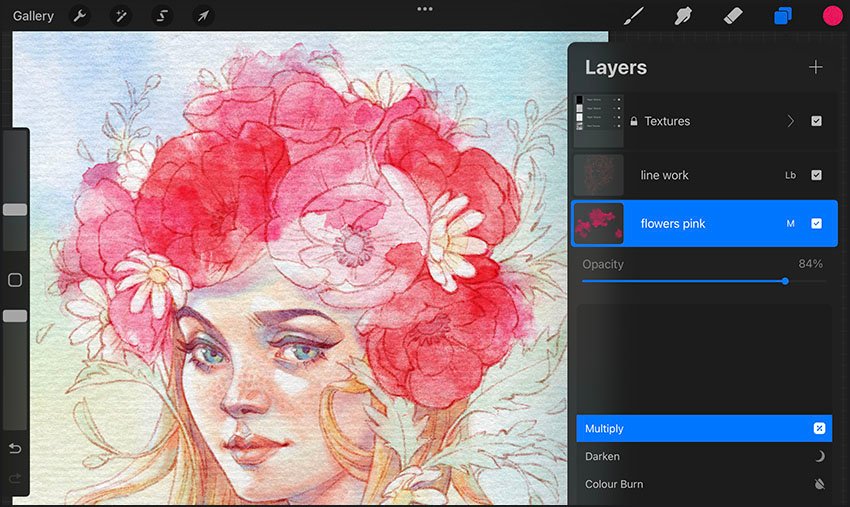
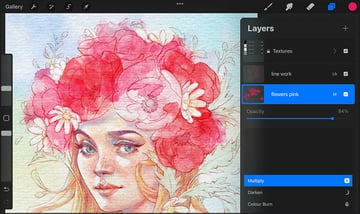
Create a New Layer again. Pick a dark pink color and create two more flowers using the same Stamp Brush 3. You can rotate the stamp to find a better position for the flower. Just tap Transform in the top panel to select the shape, and then rotate it by moving the selection corner clockwise or vice versa until you get the desired look.


Change the Blending Mode of this layer to Multiply and reduce the Opacity to about 85%.

Step 3
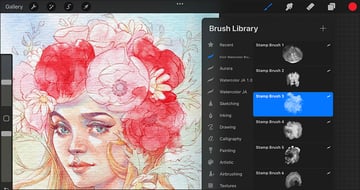
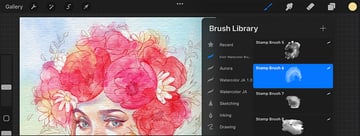
Pick Stamp Brush 1 to create the final pink flower with a beautiful watercolor texture. Refine the edges if needed.


Step 4
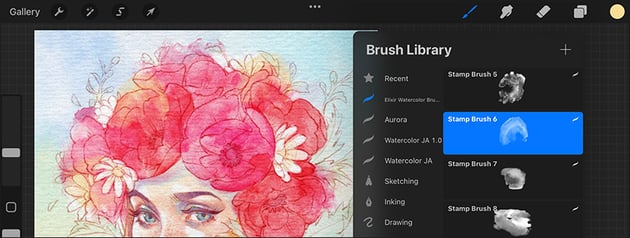
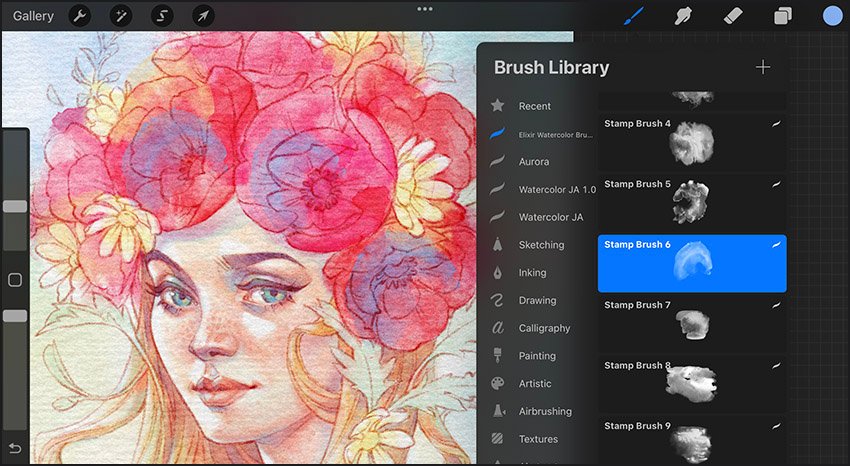
Let’s create a New Layer and add a yellow texture to the large flowers using Stamp Brush 6. Also add some to the middle of the daisies.

To make the flowers more colorful, let’s add some light blue to the shadows using the same brush. Use a New Layer again.


Refine the shadows using the Eraser Tool.


Step 5
Let’s make our flowers more lively and expressive by adding some intense highlights.
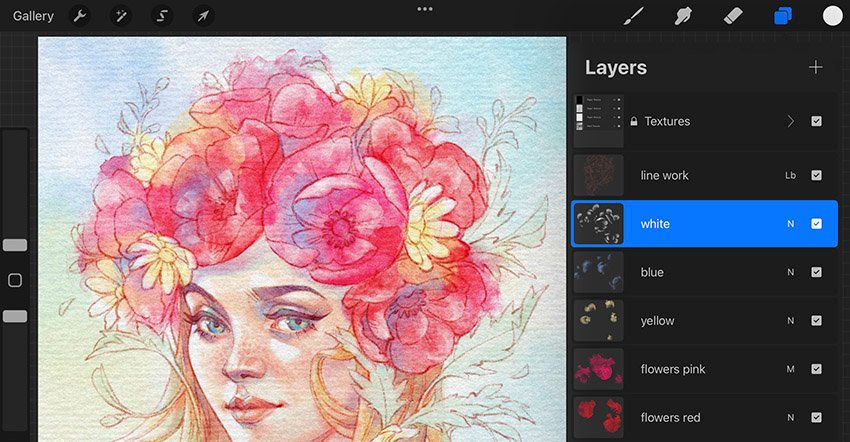
Create a New Layer on top of the “blue” layer. Using the same brush in white, add a bright light to the illuminated parts of the flowers. Finally, use the Eraser Tool again to refine and form interesting shapes for the highlights.

Step 6
Once we’re happy with the highlights, let’s add some more details to the flowers.
On a New Layer, use Stamp Brush 3 in purple to form the cores of the flowers. Also, use Stamp Brush 5 and dark purple to add some depth and texture.


Step 7
Let’s experiment a bit and make final adjustments to the large flowers.
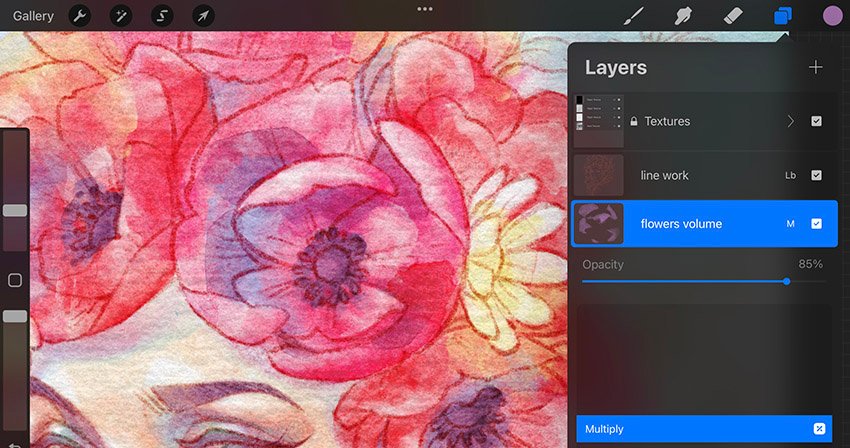
Create a New Layer for the flowers’ volume. Pick the 19 stamp brush from the Aurora set and add some purple shadows to the petals. Change the brush size in the process.
Rotate the canvas while using the stamp to make the shape fit the growth direction of the petals.


Change the Blending Mode of this layer to Multiply and reduce the Opacity to about 85%. Refine the stamps, correcting the shadow shapes with the Eraser Tool.

Step 8
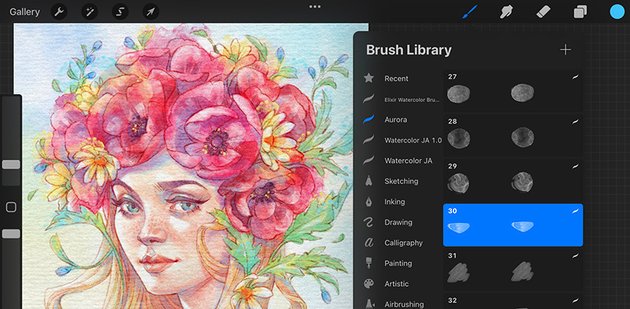
It’s time to add some color to the daisies in our beautiful flower crown.
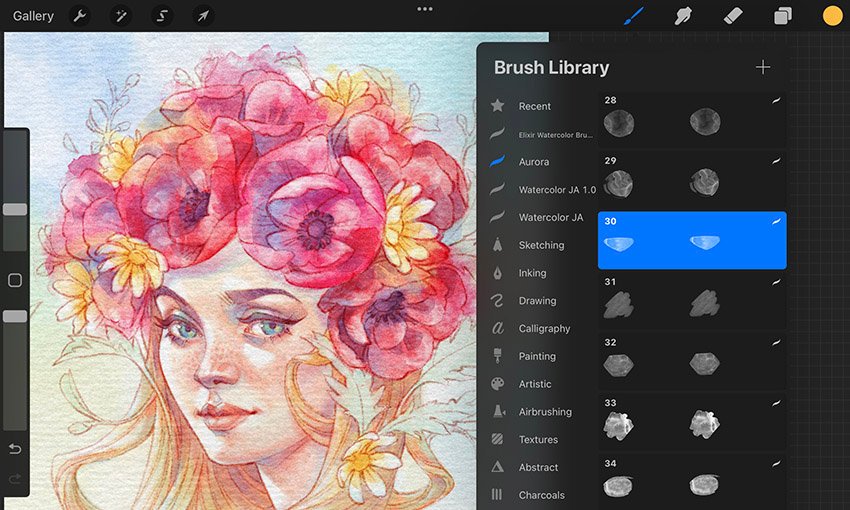
Create a New Layer first. Then pick the 30 stamp brush from the Aurora set and choose yellow. The shape of the stamp is very similar to petals, so it’s very easy to use it to create some petals. Rotate the canvas in the process or use the Transform Tool to make the stamp fit the shape of the petals.


Finalize the daisies by adding some more details. Use the 29 stamp brush from the Aurora set to create the orange core of the flowers.


Also pick a greyish green color from our Color Palette to add some color variation to the base colors.


Step 9
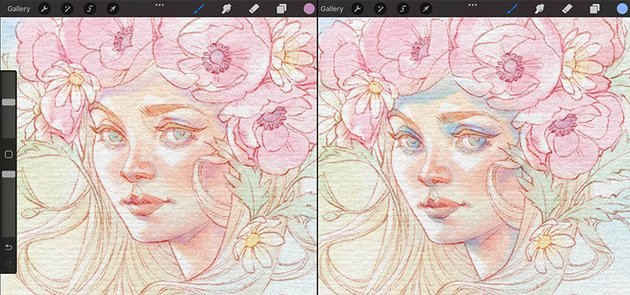
At this point, I noticed that the falling shadows from the flowers are a bit faded on the skin considering the richness of the flowers themselves. So let’s add some more shadows.
Create a New Layer on top of the “hair” layer. Pick Painting Brush 13 from the Watercolor JA set and add a combination of pink and blue, forming some falling shadows. Add them to the forehead and hair under the flowers and leaves. Also add some to the cheeks under the strands of hair. Refine the edges using the Eraser Tool if needed.


Step 10
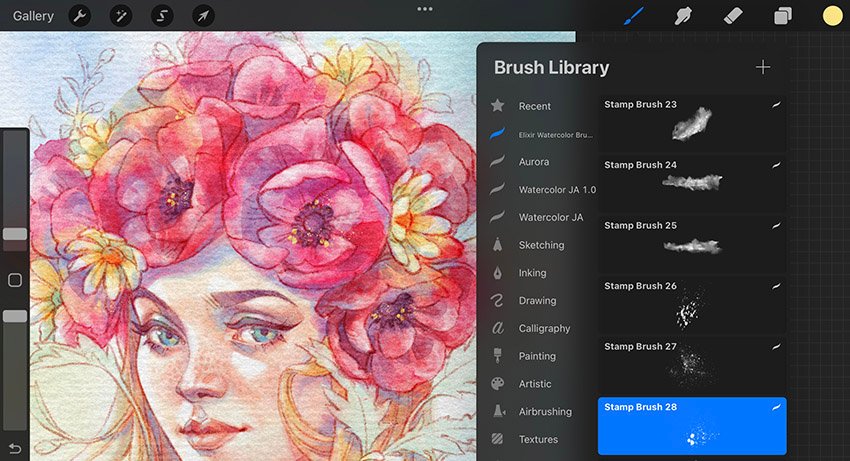
Complete the flowers by adding some fine details, such as bright little dots in the centre of the large flowers and around the daisies. Use Stamp Brush 28 from the Elixir Watercolor Brushes set for these tiny details.


8. How to Draw the Leaves
Step 1
We’re almost done learning how to do watercolor with Procreate. Create a New Layer for the leaves on top of the “daisies” layer.
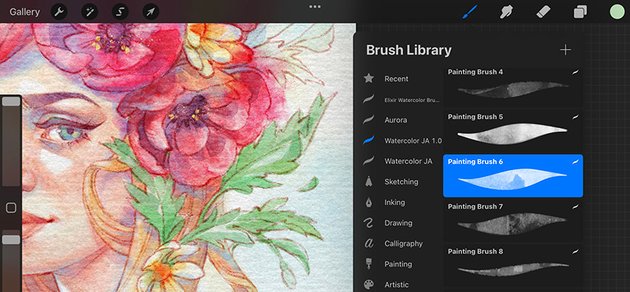
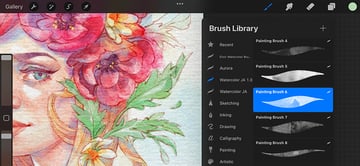
We’ll use Painting Brush 6 from the Watercolor JA 1.0 set and greyish green from our Color Palette to paint the leaves. Use the Max Size of the brush to fill the leaves with color, but leaving some empty spaces on the lightened areas.

Step 2
Now pick Stamp Brush 5 from the Elixir Watercolor Brushes set and add some yellow texture to the empty spaces.


Refine the shapes of the leaves outside the lines with the Eraser Tool. Then, add some cyan textures using the same stamp brush.


Step 3
Let’s add some color to these tiny buds on the stems. Go to the Aurora brush set and pick the 27 stamp. The shape of the stamp is very similar to these buds and has a nice watercolor texture.
Choose a cold blue color to create some delicate flower buds. Again, rotate the canvas in the process to make the stamp fit the shape of the buds.

Now pick the 30 stamp brush and add blue accents to the buds to create some color variation.


Step 4
Let’s finalize the leaves by adding some purple shadows. We’ll use stamp 2 to achieve this beautiful watercolor effect. Refine the edges with the Eraser Tool.


9. How to Add the Final Touches
Step 1
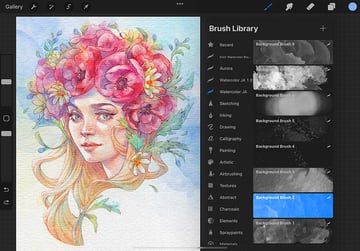
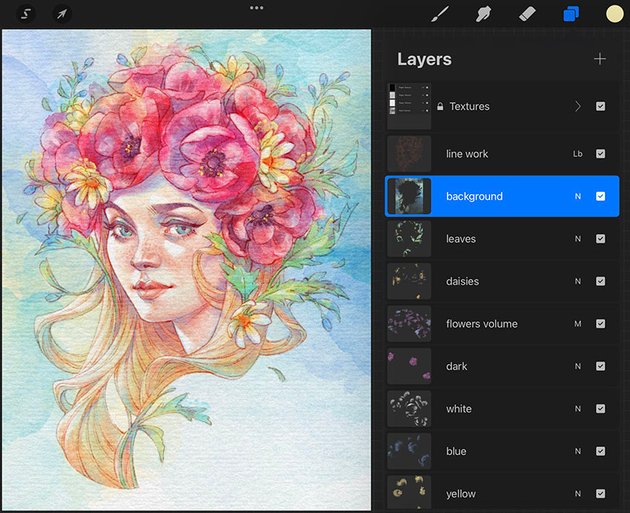
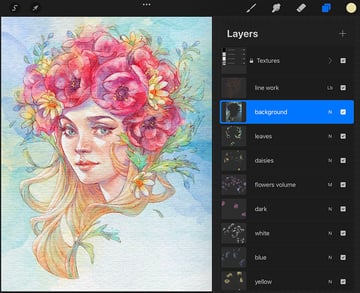
Our water brush Procreate portrait has come along nicely, so let’s continue by placing our character on an appropriate background.
Create a New Layer for the background under the “line work” layer. Choose Background Brush 2 from the Watercolor JA set and a cold blue color. This brush is perfect for achieving a traditional watercolor look. So feel free to cover the background with texture randomly. Play around with it until you get the desired result.


Add some more color variations using cyan and yellow.

Now use the Eraser Tool to clean the face, flowers, and hair areas from the texture, making soft transitions from the character to the background. Give a natural look to the color elements, softly erasing the edges of the shapes to fit them into the background better.

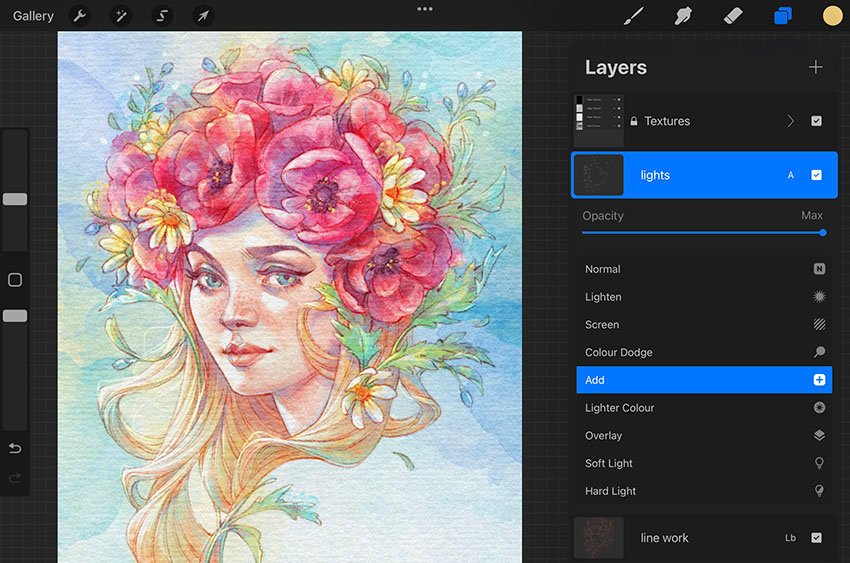
Step 2
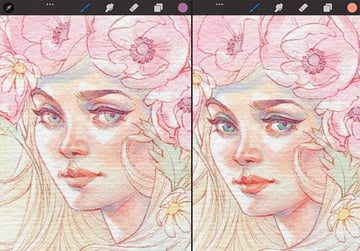
Let’s add some more lights to our portrait. Create a New Layer for the lights on top of the “line work” layer. Change the Blending Mode of this layer to Add.
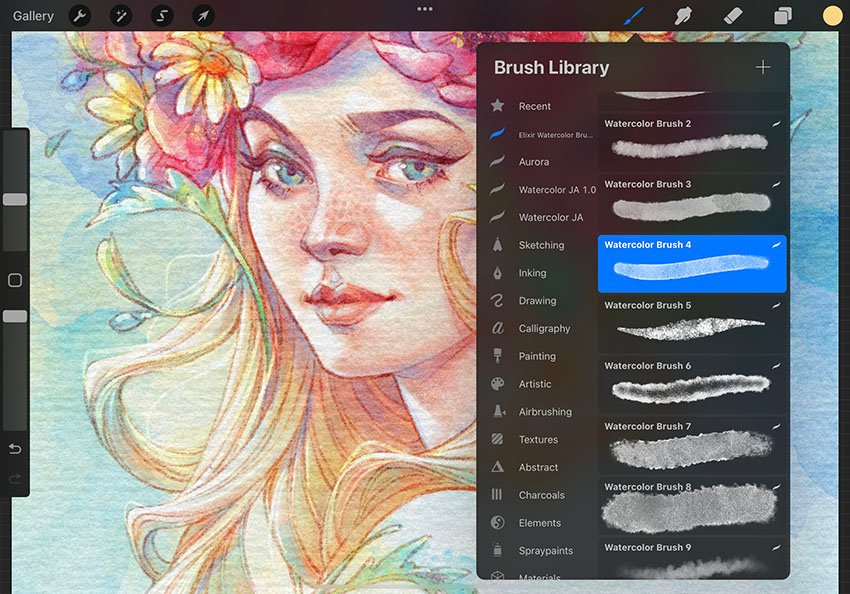
Pick Watercolor Brush 4 from the Elixir Watercolor Brushes set and change the color to yellow.
Add fine details, such as individual strands of hair, to make the hairstyle look more natural and organic. Add more thin lines to create a sense of movement. Also add some gloss and contrast to the flowers and leaves to make them pop.
Finally, add some shiny dots to the background.


Step 3
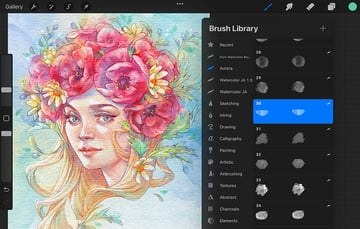
Let’s add a couple more details to the background to complete our water brush Procreate piece.
Create a New Layer on top of the “lights” layer first. Go to the Aurora brush set and pick the 30 stamp to add some tiny green leaves to the background. Also insert some leaf stamps into the flowers to make the flower crown richer. Use different shades of green to add more colors to the portrait. And don’t forget to rotate the canvas in the process.


Now pick the 22 stamp and a vivid blue color to add some stylized buds to the flowers and around the crown. You can play around with them until you’re happy with how it looks.


Step 4
As a final touch, add some blue and bright yellow splashes using Stamp Brush 27 from the Elixir Watercolor Brushes set.

Step 5
Complete your drawing by adding some texture strokes to bring some life and picturesqueness to the portrait.
Create a New Layer on top of the “details” layer. Go to the Watercolor JA brush set and pick Painting Brush 1. Choose a light orange color to paint some textured strokes, incorporating them into the hairstyle.


Then paint around the character with white to create a sense of movement in the background.


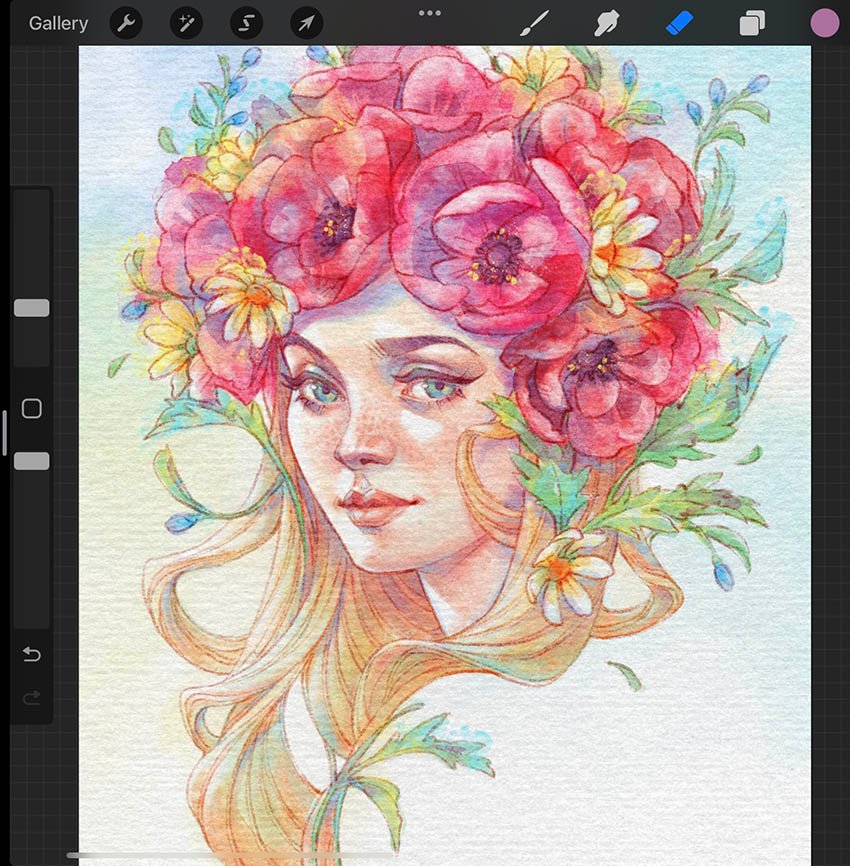
And We’re Finished!
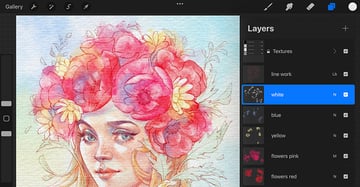
Congratulations on completing this water brush Procreate tutorial! I hope you enjoyed the process and you’re happy with the result! Thank you for creating and experimenting with me!


5 Top Procreate Watercolor Brushes From Envato Elements
Now you know how to paint watercolor in Procreate to make an incredible portrait. We used professional Procreate watercolor brushes from Envato Elements to help us along the way. And if you use Procreate and other design software on a daily basis, Envato Elements is a fantastic option for you.
The subscription-based marketplace offers you unlimited Procreate brushes, add-ons for Photoshop and Illustrator, premium fonts, and more! Everything is included for a flat monthly fee. And you don’t need to worry—it’s a no-tie contract, and you can cancel anytime.
If you’d like to explore some top premium Procreate watercolor brush kits, here we’ll review more amazing options:
1. Aquarelle Watercolor Procreate Brushes (BRUSHSET, PROCREATE)


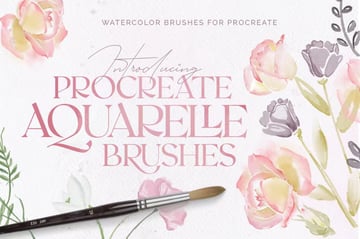
If you want to do watercolor in Procreate and achieve professional results, this kit is a must-try. The set includes 16 realistic texture brushes and 5 paper textures as a bonus. Make all the digital water-coloring projects you wish!
2. Procreate Watercolor Brushes (BRUSHSET)

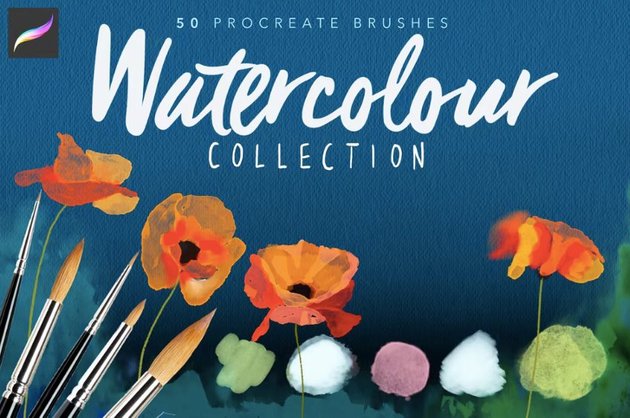

If you’re looking for a complete kit of Procreate watercolor brushes, this is a great option. You’ll get 50 artisanal watercolor Procreate brushes: paint brushes, textures, splatters, blenders, and pencils.
3. 10 Watercolor Brushes for Procreate (BRUSHSET)


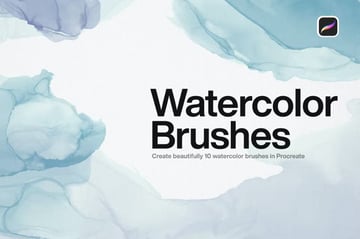
This basic kit is perfect for creating watercolor backgrounds and soft textures. It’s a great option with ten brushes for watercolor with Procreate.
4. Watercolor Texture Aquarelle Brushes (BRUSHSET)
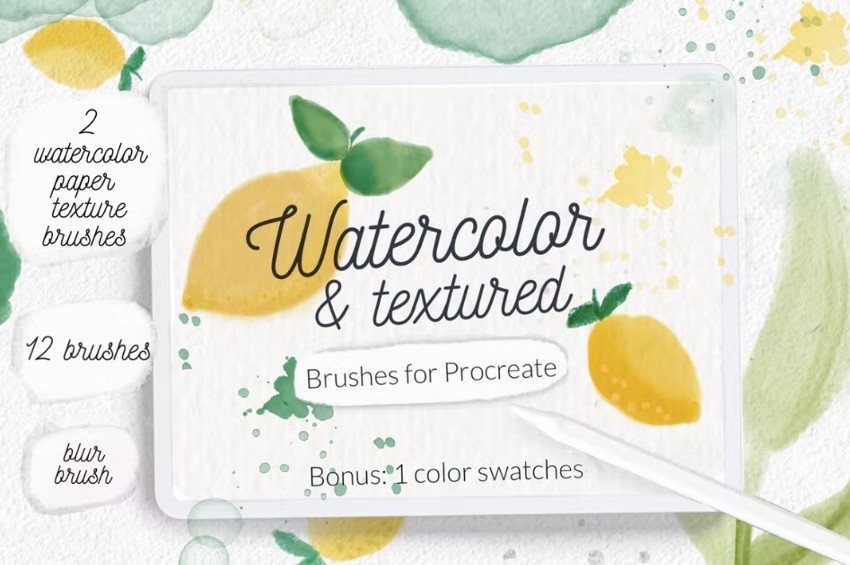
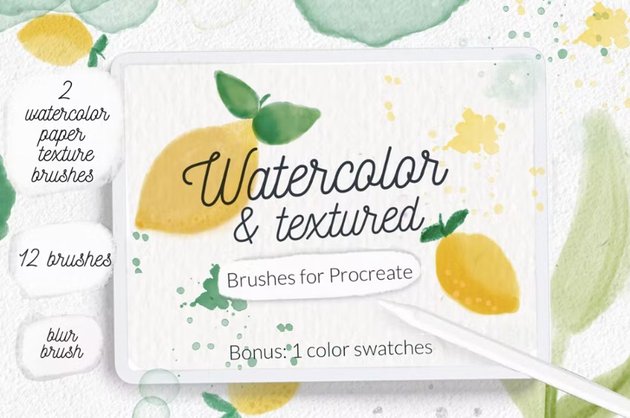

Here’s another great option you need to try to make cool water brush Procreate drawings. The set comes with 11 brushes, one blur brush, two watercolor paper background brushes, and one color swatch with a realistic watercolor palette.
5. Soft Watercolor Procreate Brushes (PROCREATE)

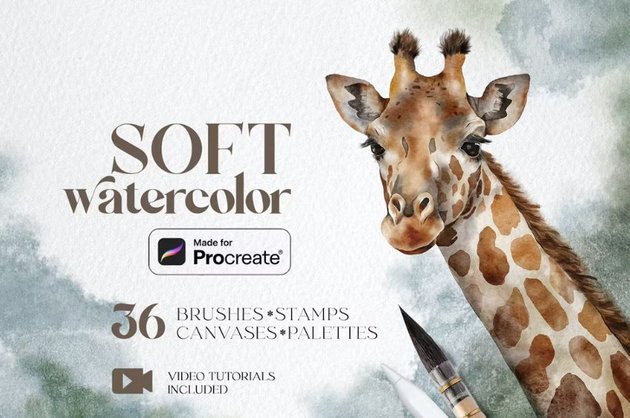

This kit will help you achieve a soft watercolor effect, just like the design we made in this Procreate watercolor tutorial. It’s a complete water brush Procreate set:
- 17 watercolor brushes
- 19 watercolor stamp brushes
- 5 canvases with real watercolor papers
- 16 premade Procreate color palettes
- 4 video tutorials
Discover More Procreate Tutorials and Resources
If you’re an avid Procreate user and you’re looking for more tutorials and resources, we’ve got plenty from Envato Tuts+: