Need to create a banner design but don’t have the required tools or skills? Well, what if I told you that you can use an online banner maker that comes with a large selection of banner templates that you can choose and customize?
If that sounds interesting, follow me in this tutorial as you will learn how to make a banner using a banner maker.
We’re going to rely on Placeit’s Digital Banner Maker, so no matter whether you’re a designer or not, at the end you should be able to put together a great-looking design.
You can view this video and many more on our Envato Tuts+ YouTube Channel.
How to Make a Banner Using Placeit’s Banner Maker
First, make sure
you navigate to the Placeit website and create an account since you’re going to
need it later on in order to download the final design.
Step 1
Once you’re ready, you can access the tool using the site’s top menu, by
heading over to Designs and then clicking on Banner Maker.

Step 2
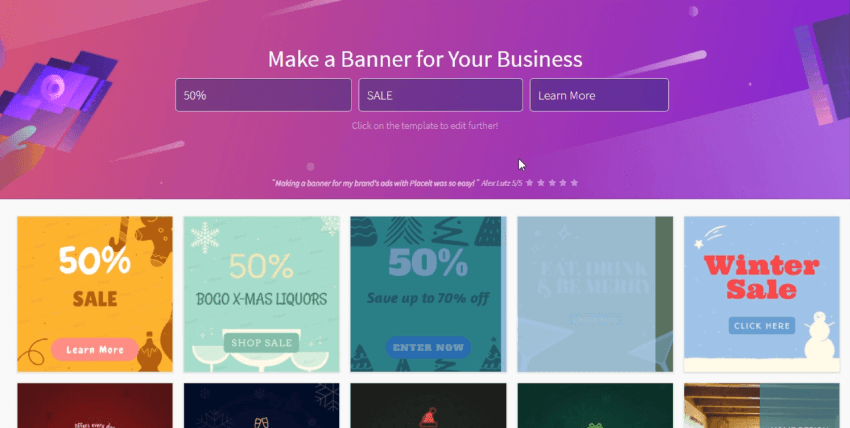
Here, you’ll find
a truly impressive library of banner templates to choose from.
If you need help figuring out which template will be a better fit, you
can use the three text input boxes found at the top of the page, which will
give you a quick preview of how they would actually look once you add your
own text.
Step 3
Once you’ve made
up your mind, you can further customize the design by clicking on it, which
will open it up in a new window tab.
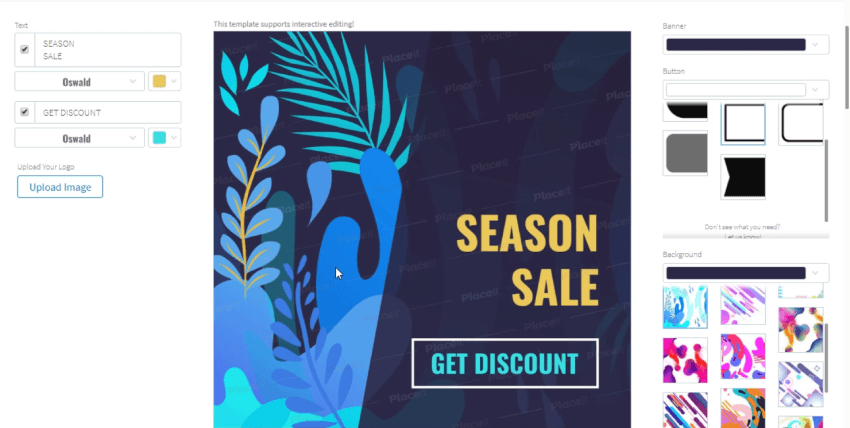
Here, you’ll be
greeted by the actual banner front and center, which will be surrounded by a
couple of options which may vary depending on the template itself.
Usually on the left side you’ll have all your text-related options,
while on the right one you’ll find your shape and background-related ones.
Step 4
To change the
default text, all you have to do is click on its corresponding input box, and then
overwrite the preview text with your own.
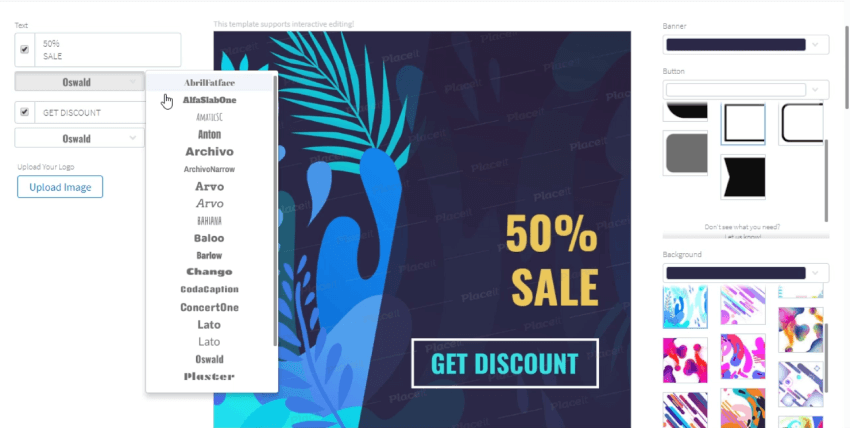
You can further adjust the text by changing its font and even its color
using the underlying dropdown lists.
Step 5
When it comes to colors, you can either choose
from one of the predefined values, or you can click on More and use a custom
one of your own.
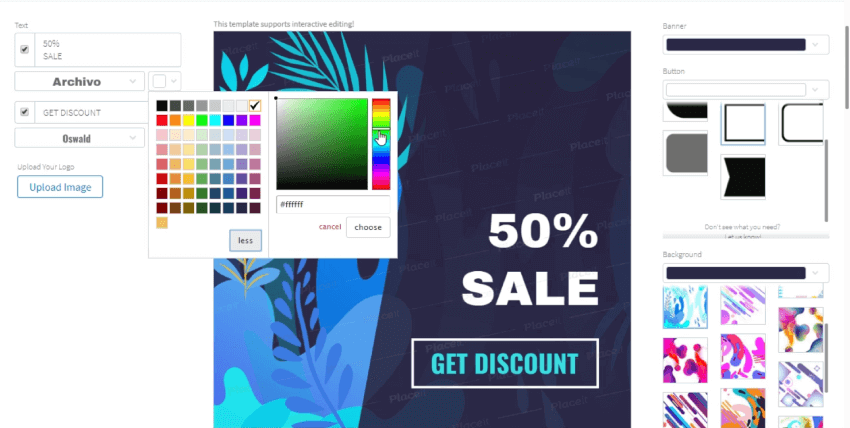
Step 6
If needed, you can actually hide a text line by
unchecking the little checkbox found in front of it.

Step 7
Moving on down,
you’ll see that we have the option of uploading our own logo, but for this
example I’m going to leave that out.
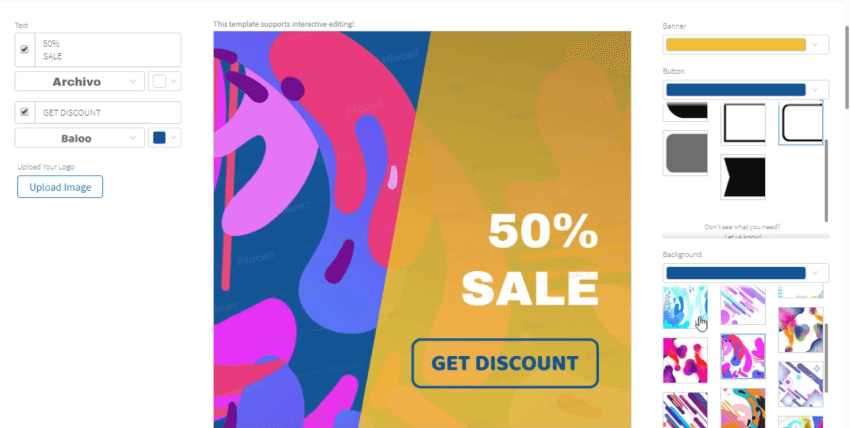
If we move on to the right side of the page, we’ll see an option called
Banner, which will allow us to change the color of the shape found underneath
our text.

Step 8
We then have Button, which lets us change the
color and style of the call to action button.

Step 9
Lastly we have
another option called Background, which as the name suggests allows us to
change the color and style of the background.
To be honest, I really like the default floral pattern, so for this
example I’m going to leave it as it is.
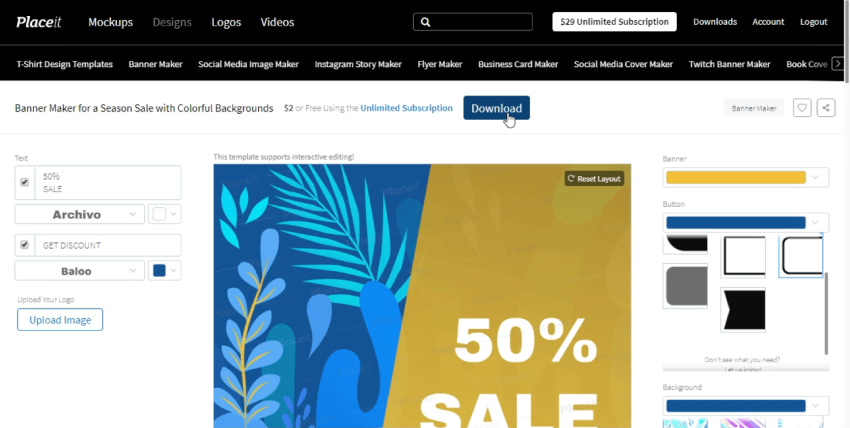
Step 10
Since the template supports interactive editing,
we can easily adjust the position of some of our banner’s composing elements by
first clicking on them in order to bring up their bounding box, and then simply
clicking and dragging in order to reposition them as needed.

Step 11
You can also resize them by hovering over the
bounding box’s corners, and then clicking and dragging either outwards or
inwards depending on what you’re trying to achieve.

Step 12
If for some reason you’re not happy with the
result, you can easily undo all the changes by using the Reset Layout button.

Step 13
Once you’ve finished customizing the template
using the Digital Banner Maker, you can download the resulting design by simply
clicking on the Download button, which will charge you a small fee every time
you use it.
Conclusion
No matter whether you’re a designer or not, you can quickly create a banner using Placeit‘s Banner Maker, which as we just saw is actually really fun and easy to use.
As always, I hope you had fun watching this video and most importantly managed to learn something new and useful during the process!
Build Your Designer Skills!
Just finished going through this quick tutorial, and feel like learning more? Well, if that’s the case, you’re in luck, since I took the time to put together this little list that should keep you going for the following days!
-
![]()
From file type to file format, we’re going to explore the meaning of these notions and learn what are the most common images that are used right now.
-
![]()
Always wondered what a “mockup” is but never managed to fully figure it out? Well, in today’s video, we’re going to break it down and see how easy it is to…
-
![]()
Learn how to create line icons both in Adobe Illustrator and Affinity Designer, and see how you can craft a usable finished product using a few basic shapes.
-
![]()
In today’s tutorial, we’re going to take a quick look at the process of creating a set of vector line patterns in Adobe Illustrator, using nothing more than…
-
![]()
Learn how to create an icon in Affinity Designer, and see how you can take some basic geometric shapes and turn them into a usable, functional product.


