
Welcome! Today I will be taking you though some of the processes behind simulating studio lighting on images taken outside of a controlled environment. We’ll be focusing on lighting for the most part and how to get some natural highlights and shadows.
What you’ll be creating
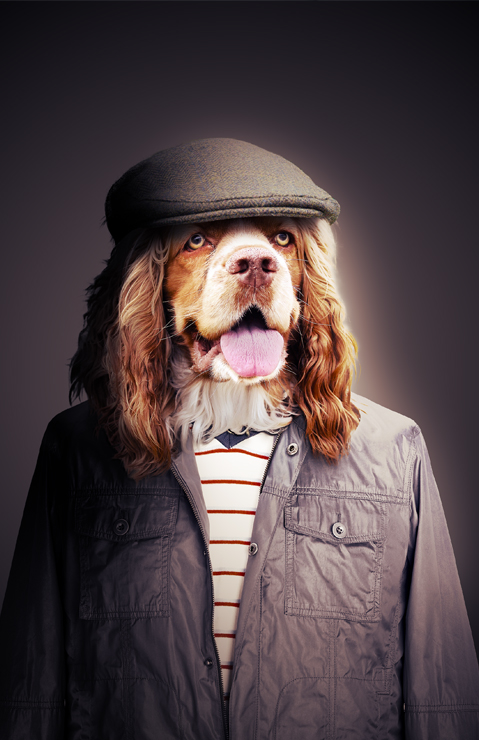
Created as something fun for a friend of mine, we’ll be making a studio “portrait” of a dog. For this I used some very simple techniques that should allow any pet owners here to use their own dogs as models! This will also serve as great practice for simulating studio lighting when doing photo manipulations in general. The rule to remember here is to take advantage of layers to produce dynamic and realistic shadows. So lets get started!
Tutorial Resources
Step 1
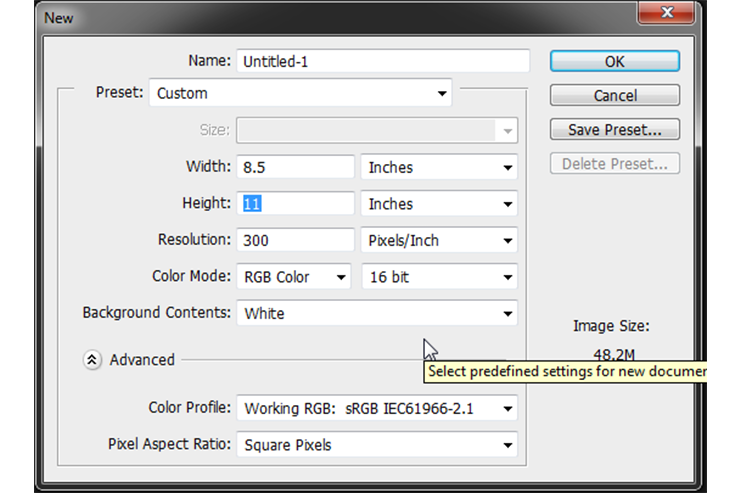
Lets go ahead and make a new document in Photoshop (File > New) and go with a taller tabloid size. However its also helpful to work in sizes that preform better on your own computer, and with this project size isn’t set in concrete.
Step 2
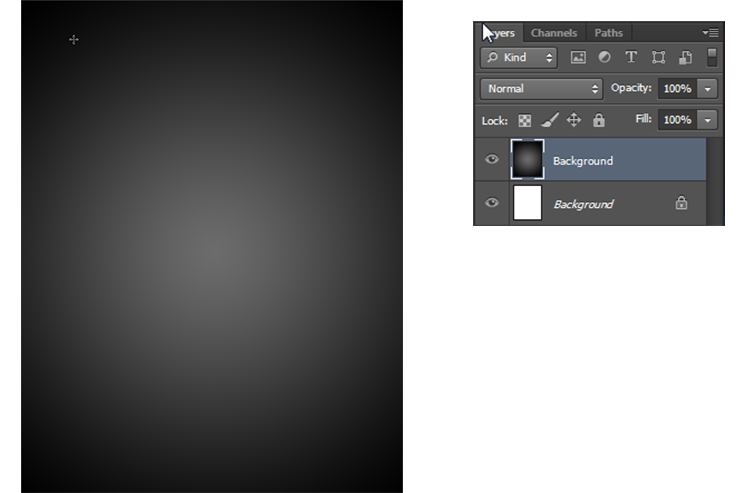
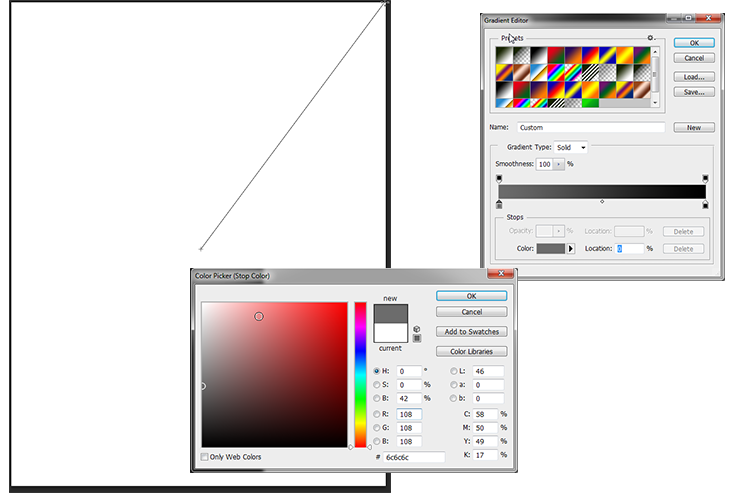
Now that we’ve got a document all set up, bring in a new layer ( Shft+Ctrl+N on PC and Cmd+Shft+N on Mac). Go ahead and name this layer “Background” or something similar for your own convinance. We’re going to make this a nice dark gradient so bring up the Gradient tool (G) and set the left color to #6c6c6c and the right to complete black #000000. Make sure the tool is set to radial (on the top bar its located right under where it says Type, Second from the left). Click in the middle and drag out just past one of the corners. This will give us a nice soft base to work off of.
Step 3
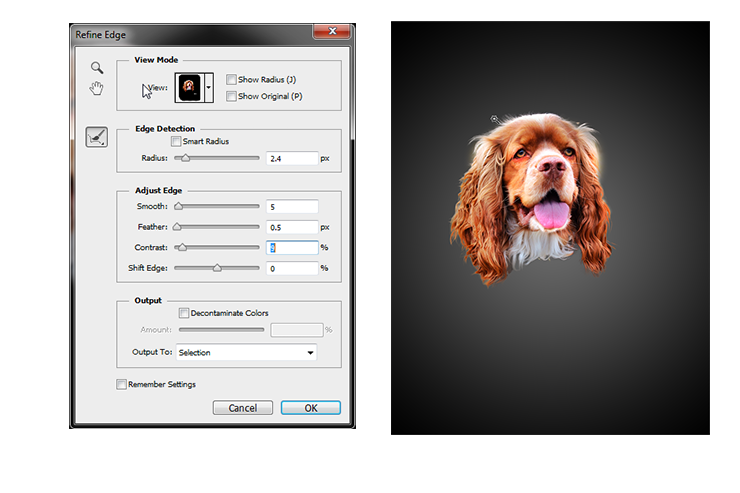
Bring in your pet photo, remember the higher the quality you use here then the better it will look later. Even still theres a lot you can do with less than perfect pictures with time and effort. Go ahead and use the pen tool (P) to get a close cut around the edge of your pet. It doesn’t have to be exact (especially with fur) just a nice close shape. Once your happy with the line you have Right Click and click on Make Selection. Now we can use a wonderful tool called Refine Edge.

Step 4
With the selection still active and the Magic Wand tool as your active tool (W) right click and select Refine Edge. Basically this allows you to tweak your edge to better reflect the substance being cut out (fur has different opacities in places that a hard edge wont create properly). My settings are below, but an important part of refine edge is the brush associated with it. With the Refine Edge box still up you can brush around your selection in the work area. This will automatically try and figure out whats a part of your object and intended selection and what isn’t and add it to your selection. Its much easier to understand when you use it so I encourage you to play with it a bit before moving forward. This is a very important tool for extracting things like hair. Once you’re happy with the result click on OK and the selection will be applied. You’ll still have marching ants and the rest of your image will still be visible but once you mask out the layer (Layer > Layer Mask > Reveal All) your selection will show. Remember to mask out with the mask selected (The white box to the right of the layer thumbnail). From here we can use a similar technique on the pieces of clothing to bring them in nicely.
Step 5
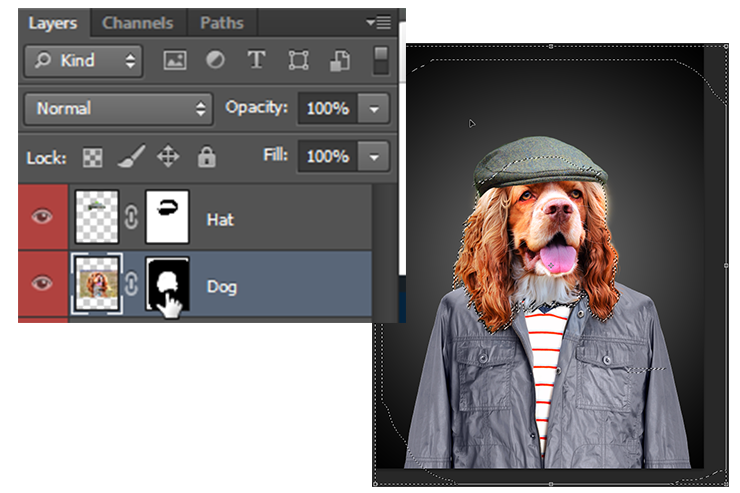
Here we can bring in the clothing. Remember to use Masks so you can make any adjustments later. Mask and place them on your model. Keep in mind things like fur around the collar and ears hanging down over or behind the clothing. Adding little pieces of depth can help add to the realism of the final product.
Step 6
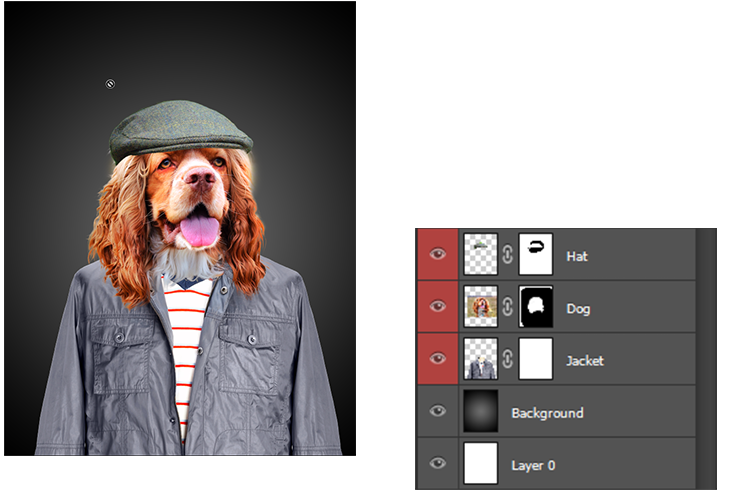
From here we can start adding shadows, these are really what will make this image pop and give it a believable feel. First lets make a hard shadow under the ears and collar as if the main light was coming from the top right. If you place your cursor over the mask for the dog and hold Ctrl or Cmd when you click on it it will select the mask. Bring in a new layer under the animal but above the clothing called “Hard Shadow”. With the Layer “Hard Shadow” active and the Subjects mask as the selection go to Selection > Transform Selection and move it down and to the left by just a little bit. Hit enter and use a nice fluffy brush at about 10% opacity to draw in a little shadow. No need to get too harsh here just enough to define the edge. Then deselect that (Select > Deselect) and bring in a new layer above “Hard Shadow” and call it “Soft Shadow”. Here we’ll use abut the same brush to draw in a fluffier shadow following the same line as the last one but without the hard edge. Let the Hard Shadow define the edge and the soft shadow give some depth.
Step 7
This Step depends entirely on if you chose to add a hat or any other clothing to the face, if you haven’t then feel free to move on. Go ahead and create a new layer on top of your subjects layer and call it Hat Shadow (or whatever article of clothing you’re using) and just brush in a nice soft shadow under the brim of the hat. Don’t be afraid to make it pretty dark right under it but work in 10% increments (using a black brush with 10% opacity).

Step 8
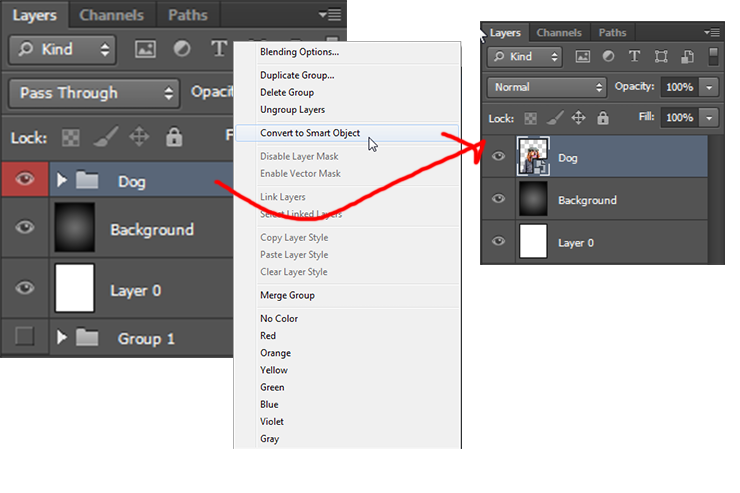
Again this step is optional but I thought it could be useful as it helps keep things clean and organized and also helps with computer performance. Group all the layers together that are involved with your main subject by selecting them all while holding shift and pressing Ctrl+G on PC or Cmd+G on Mac. This will group them together. By right clicking on this group you can convert it to a smart object. Making it work as one layer, however you can double click on the thumbnail and edit it in its own window. A nice little feature that can be very helpful in certain situations.
Step 9
Moving on to the overall lighting, we’ll start with the back light. Above the Background layer create a new layer (Ctrl+Shft+N on PC and CMD+Shft+N on Mac) and name it Back light. Brush in white with a nice big soft brush a soft light behind the right side of your model, similar to below. This will help extenuate the highlights later.

Step 10
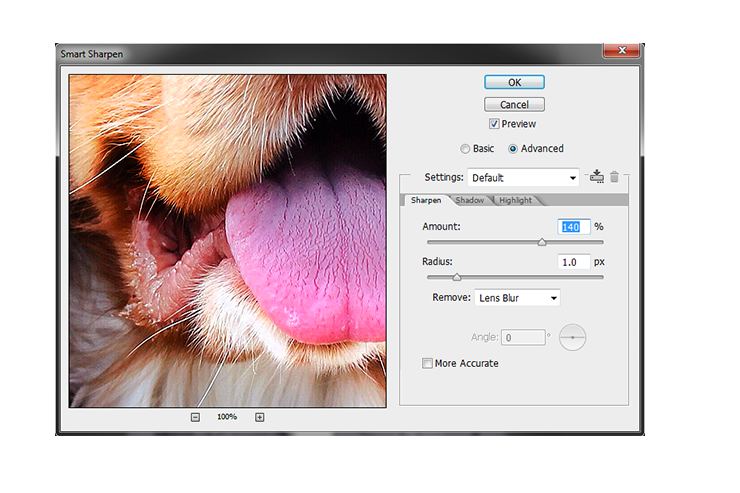
Before going forward lets sharpen up our image to give it a real studio feel. This can really be done whenever but i chose to do it here. With the smart object layer selected go to Filters>Sharpen>Smart Sharpen, my personal settings can be seen below but your own image may require a different touch.
Step 11
Next bring in a new layer on top of the subject layer and name it “Hightlight”. Right click on this layer and make it a clipping mask to the subject layer. This will make sure it only applies to the subject layer and not the Background. Brush in, with a big fluffy brush at about 20% opacity a little highlight on the right side. Set the layer’s blending mode to overlay. Be careful not to over do it, this will cause pixels to distort and end up looking bad later. A soft touch is encouraged here.

Step 12
We’ll do the opposite for the left side. A new layer named “LowersideShadow” with a clipping mask down to the subjects layer. Do roughly the same as above but with a black brush.

Step 13
Repeat the last step but this time with a normal blending mode and focusing more on the upper left than the lower. It may seem tedious but layering here will help create nice, realistic shadows.

Step 14
Here you can do the other clothing items and accessories. I chose to focus on the hat and add a slight shadow to the left just to give it a little bit more shape.
