In today’s video tutorial I’m going to show you how to create a “split-screen” slider element (or UI, whatever you prefer to call it) using JavaScript. Inspiration for this came from a page on the Corsair website; let’s see how we can build one for our own projects.
What We’re Going to Build
Let’s first take a look at a demo of what we’re building. View the project on CodePen, or grab the source files from GitHub.
Watch the Screencast
1. Build Your Panels
So how is this done? Begin by building two separate panels in your HTML markup. I’ve used two div elements with a class of panel. The first has an additional class of bottom, the other an additional class of top. Each one contains another div to wrap the contents.
<div class="splitview">
    <div class="panel bottom">
        <div class="content">

        </div>
    </div>
    <div class="panel top">
        <div class="content">

        </div>
    </div>
</div>
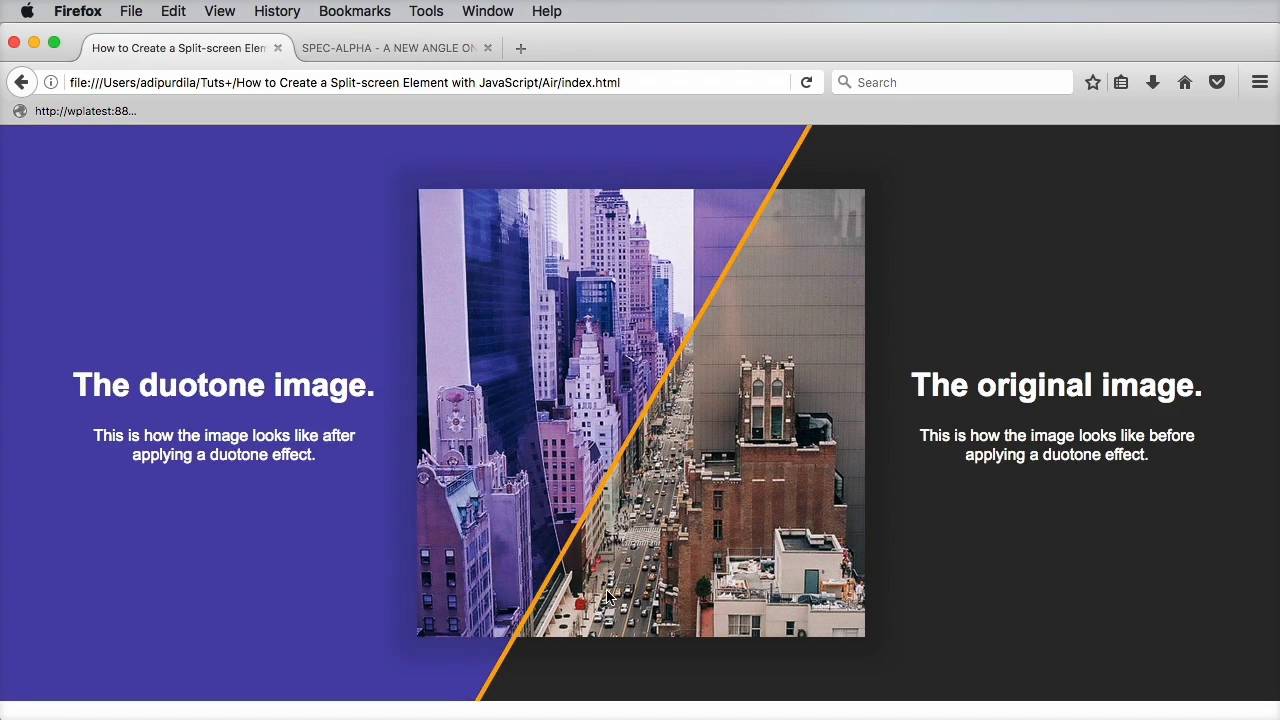
Put whatever contents you like (images, headings etc.) within the content divs.
With those done, add a new div, before the closing splitview tag to act as a handle.
<div class="handle"></div>
2. Add Some Styles to Stack the Panels
The first important styles will stack our two panels on top of one another, making sure that they are fluid too.
/* Panels. */
.splitview {
    position: relative;
    width: 100%;
    min-height: 45vw;
    overflow: hidden;
}

.panel {
    position: absolute;
    width: 100vw;
    min-height: 45vw;
    overflow: hidden;
}
Style each individual panel–top and bottom–differently, such as giving them differingbackground-color, and style the contents within them however you please. One thing to note is the z-index of each, to make sure they stack in the correct order.
.bottom {
    background-color: rgb(44, 44, 44);
    z-index: 1;
}

.top {
    background-color: rgb(77, 69, 173);
    z-index: 2;
}
3. Apply a Simple Mask
We now have our top panel completely covering the one underneath, so let’s experiment by reducing its width:
.top {
    background-color: rgb(77, 69, 173);
    z-index: 2;
    width: 50vw;
}
You should find you now have something like this, with the top panel only reaching the middle (50vw) of the page:


4. Kicking Off the JavaScript
Now that we have things worked out with CSS, let’s turn to JavaScript and see if we can animate this sliding mask effect. We’ll begin by asking the browser to execute a function, but only once the DOM has loaded:
document.addEventListener('DOMContentLoaded', function() {

});
The rest of our code will go within this function, between the curly braces.
Next we’ll assign some variables by fetching the parent element, the top panel (namely the only one we’ll be changing), and the handle element.
    var parent = document.querySelector('.splitview'),
        topPanel = parent.querySelector('.top'),
        handle = parent.querySelector('.handle'),
5. Building the Handle
Before we go any further, let’s style the handle.
/* Handle. */
.handle {
    height: 100%;
    position: absolute;
    display: block;
    background-color: rgb(253, 171, 0);
    width: 5px;
    top: 0;
    left: 50%;
    z-index: 3;
}
It’s a 5px wide yellow bar, running the height of the container and placed in the center of the viewport. It has a z-index of 3 to make sure it sits on top.
Make it Move
We want to grab the x coordinates of the mouse cursor whenever we move it within the viewport. We then want to move the handle and set the width of the top panel according to those coordinates.
We begin with an event listener on the parent element, and then set the left style property of the handle as being equal to the event.clientX value.
parent.addEventListener('mousemove', function(event) {
        // Move the handle.
        handle.style.left = event.clientX + 'px';
});
That takes care of our moving handle, let’s now resize the panel, again making it equal to event.clientX.
parent.addEventListener('mousemove', function(event) {
        // Move the handle.
        handle.style.left = event.clientX + 'px';

        // Adjust the top panel width.
        topPanel.style.width = event.clientX + 'px';
});
We’re Done!
Well done for reaching the end; with that relatively straightforward CSS and JavaScript we’ve created a brilliant split-screen sliding mask effect. To take it further, as I do in the video, we can skew the handle too–check out the demo on CodePen to see how it’s achieved!