A Privacy Policy page is a page on a website where users and visitors can find a detailed statement about how the website or company collects, manages, and processes their personal information, such as name, address, email, sex, nationality, and so on. It states whether that information is kept confidential or is shared with third parties (and perhaps the circumstances for that).
In this tutorial, I’ll show you how to add a privacy policy page to your WordPress website. To follow along, you’ll need to have a WordPress installation on your local machine or a hosting provider.
Check if You Already Have a Privacy Policy Page
If you’re using version 5.9 or a later version of WordPress, you should have the privacy policy page included by default. This might be true for other 5.x versions.
To check for it, log in to your WordPress admin dashboard and navigate to Pages > All Pages. If the privacy page is included, you’ll find it there.

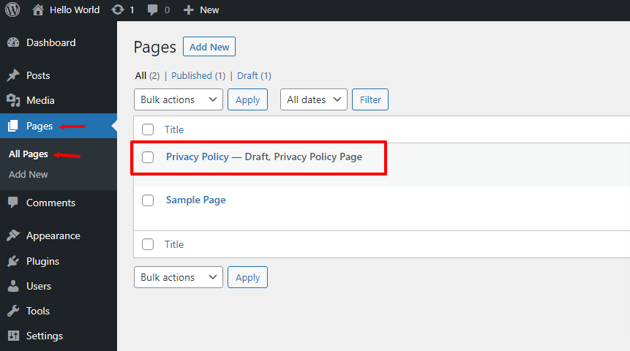

But if you’re using an older version of WordPress, chances are it won’t be automatically included. If that’s the case for you, read on to learn how to create one from scratch.
Create a New Privacy Policy Page in WordPress
In the sidebar, navigate to Settings > Privacy.
You’ll have two different options for creating the Privacy Policy page:
- You can create a new page from scratch (option 1 in the image below).
- You can simply select an existing page to be your privacy policy page (option 2 in the image below).

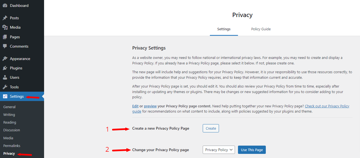
For this tutorial, we’ll be creating one from scratch. To do this, click on Create to open the block editor.
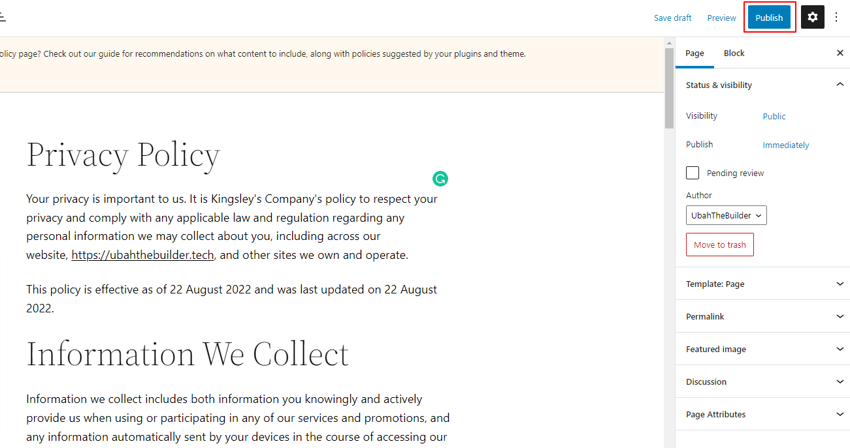
In the block editor, you’ll be provided with a template or rough outline of a privacy policy to edit. It’s important that you rewrite it to suit your brand or business.
Once you’re done writing and editing your privacy policy in the editor, click on the Publish button in the top-right corner to publish the page. You can also schedule it to be published at a later time or change the Visibility to Private if you don’t want it to be visible to users.

Change the Permalink
Often, when you create and publish a new privacy policy page (or any other page, for that matter), its URL will have a random number attached to it. Here’s an example: https://my-domain.com/privacy-policy-2/.
However, you might want the URL to be like this instead: https://my-domain.com/privacy-policy/.
To edit the permalink, navigate to Settings > Permalinks in your WordPress dashboard. Choose the Post name option under Common Settings.
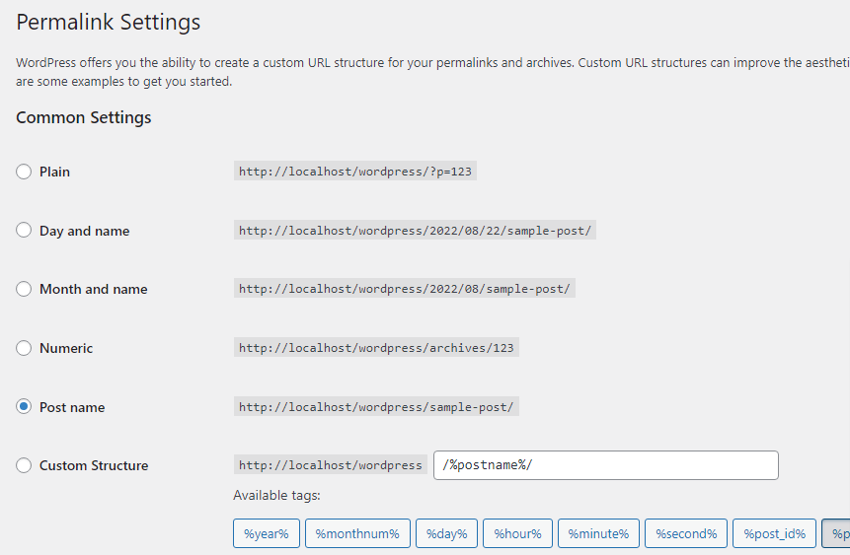

Scroll down and click on Save Changes.
Now navigate to Pages > All Pages and click Quick Edit on the Privacy Policy page whose URL you want to update. Under QUICK EDIT, simply remove the numbers from the Slug as I have done in the following image.
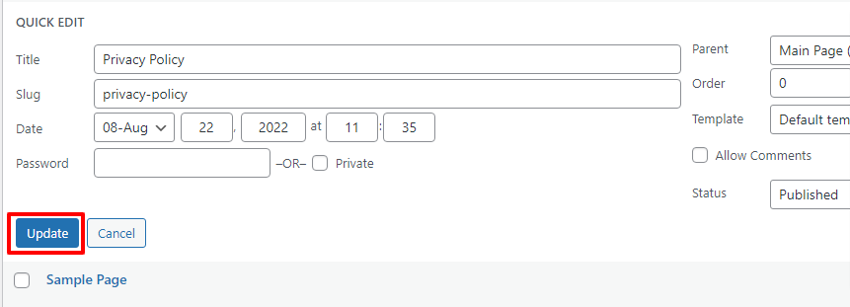


Click Update to save the changes. This will remove all numbers from the page’s URL.
Conclusion
I hope you found this tutorial helpful. We have many other articles about WordPress—check them out!