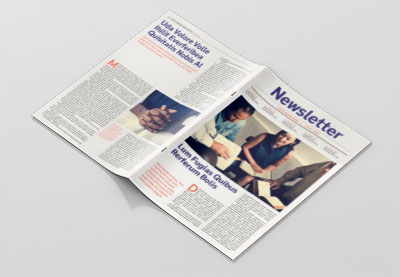
In this tutorial, you’ll learn how to create a newsletter template in Affinity Publisher. This simple newsletter template is easy to put together and quick to customise, and it also features an on-trend color palette and contemporary typography, making for one of the best newsletter templates you can find for corporate businesses.
This tutorial comes complete with free newsletter templates to download for both Adobe InDesign and Affinity Publisher, allowing you to quickly create your own business newsletter template and use it as a blank canvas for your own designs.
Follow the steps below to learn how to create a printable newsletter template in Affinity Publisher, and put your newsletter design ideas into practice.
Looking for more business newsletter templates? Discover some great options over on Envato Elements.
Follow along with us over on our Envato Tuts+ YouTube channel:
What You’ll Need to Create Your Affinity Publisher Newsletter Template
In this tutorial, we’ll be using Affinity Publisher to create our simple template newsletter. If you’re an InDesign user, you can download the InDesign newsletter template attached to this tutorial. In the enclosed ZIP file, you’ll also find Publisher newsletter templates.
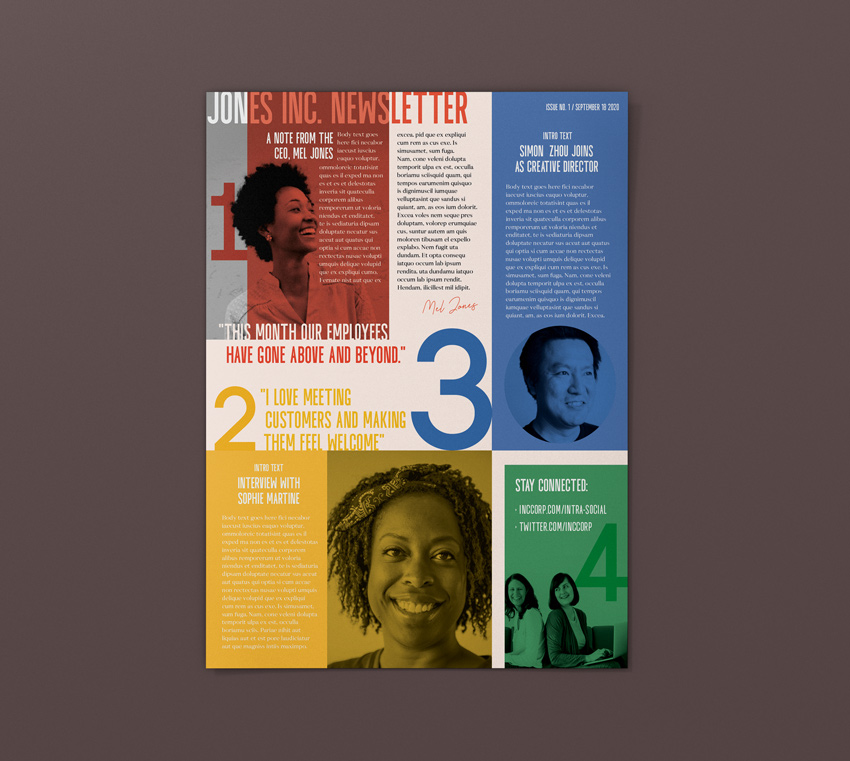
As well as access to Affinity Publisher, you’ll also need to download the following fonts and images from Envato Elements to recreate the newsletter format and Affinity Publisher newsletter template pictured here:
Images for newsletter design (pictured in tutorial):
1. How to Set Up Your Blank Newsletter Template in Affinity Publisher
Step 1
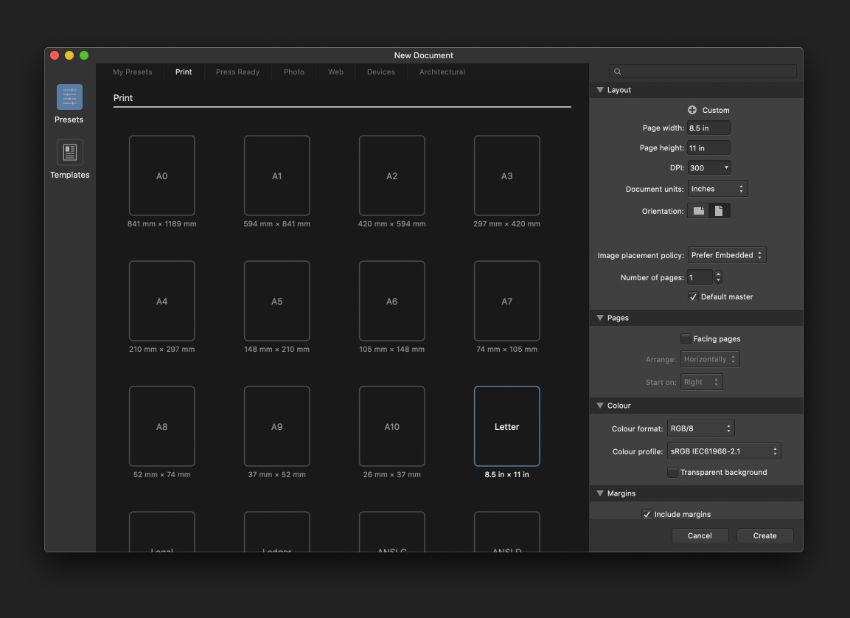
Open Publisher, and go to File > New.
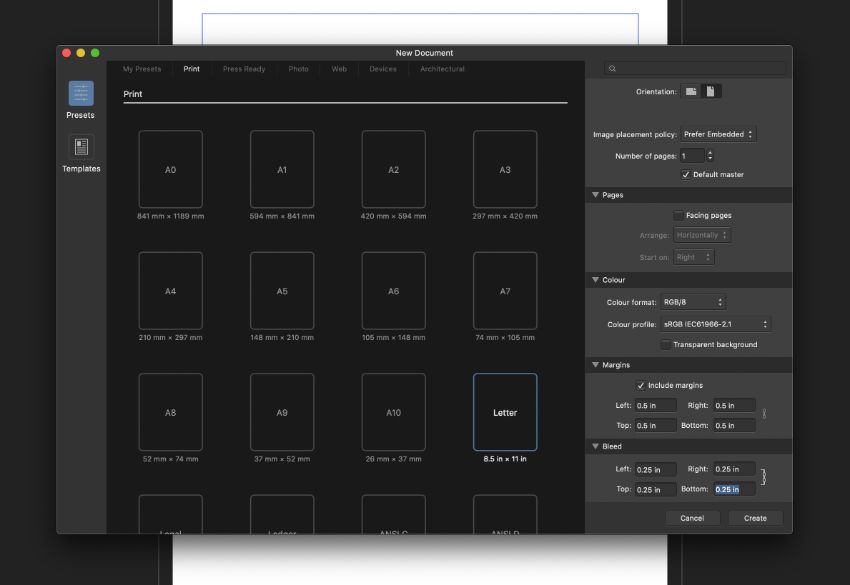
Select Print from the options along the top of the window. Set the Page width to 11 in and Page height to 8.5 in. Deselect Facing Pages.
Step 2
From the Margins options, set a margin width of 0.5 in for all sides of the page. Add a Bleed width of 0.25 in.
Then click Create.
Step 3
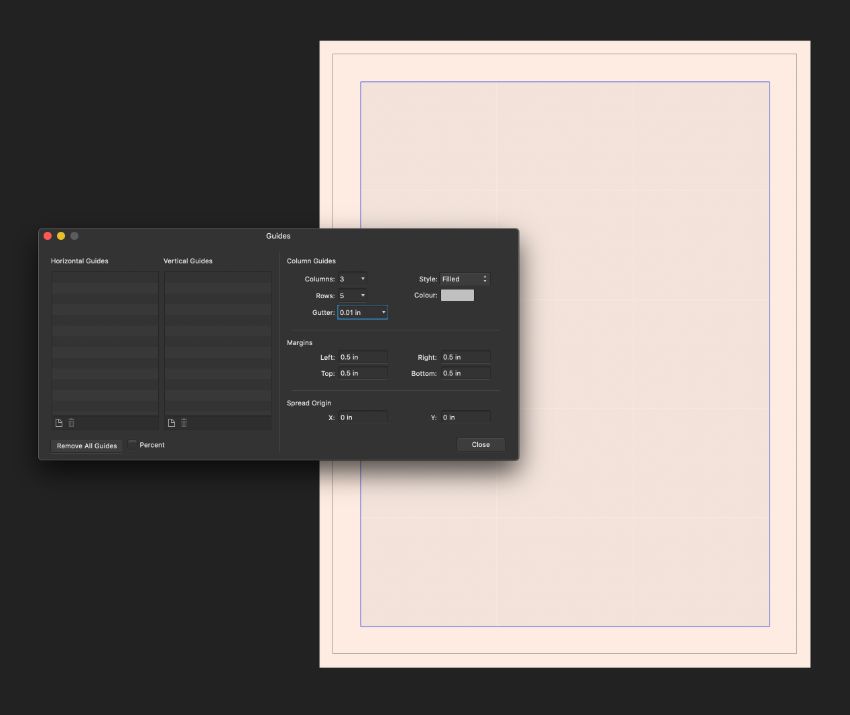
Go to View > Guides Manager.
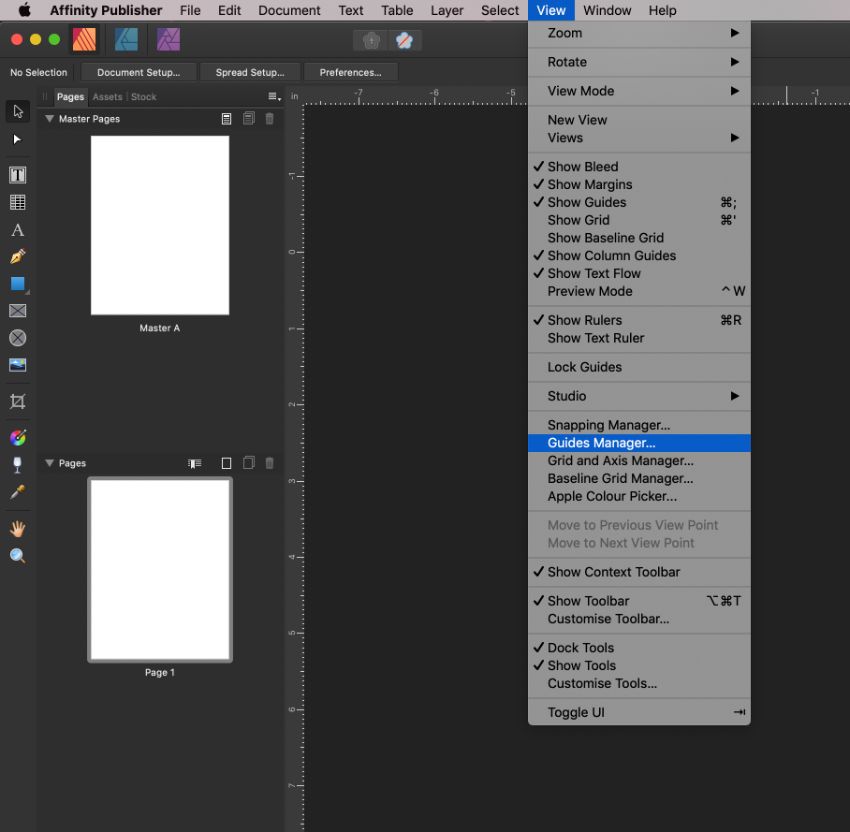
Increase the number of Columns to 3. Then click Close.
Step 4
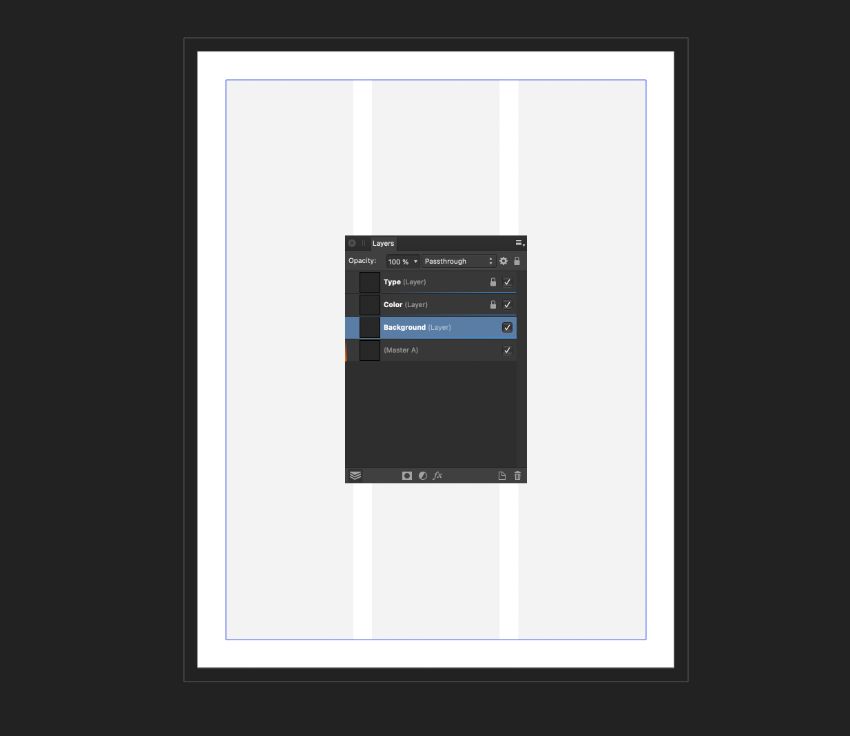
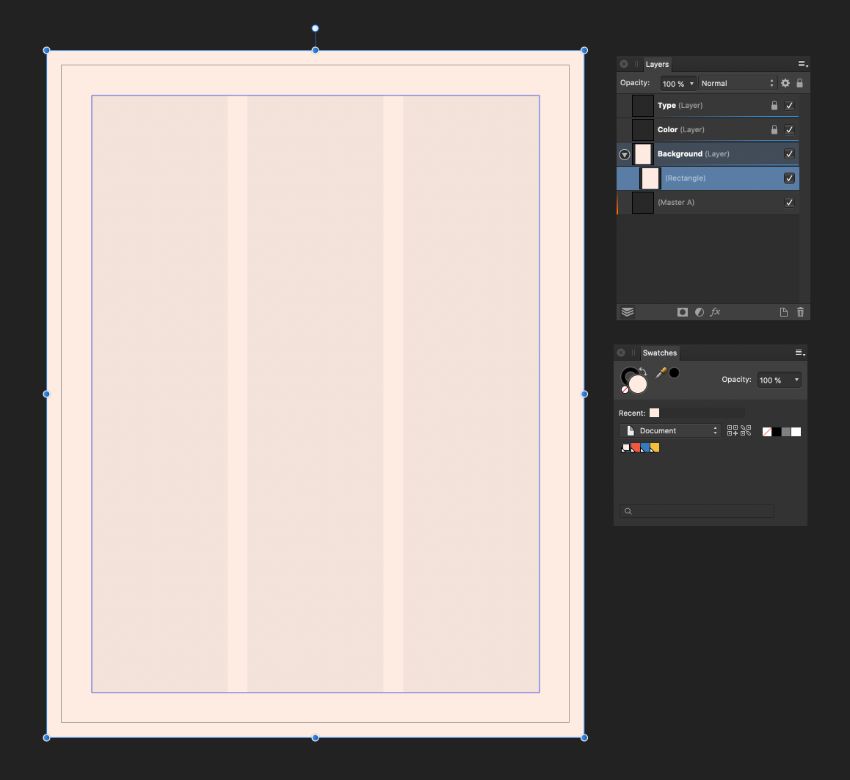
Double-click on Page 1 in the Pages panel to make sure you’re on the main page of your document, not the master page.
Then go to the Layers panel (View > Studio > Layers) and click on the Add Layer button at the bottom-right of the panel. Name this layer Background.
Repeat to create two more layers, naming them Color and Type.
Select both the Color and Type layers and lock them by clicking the padlock icon at top-right.
Step 5
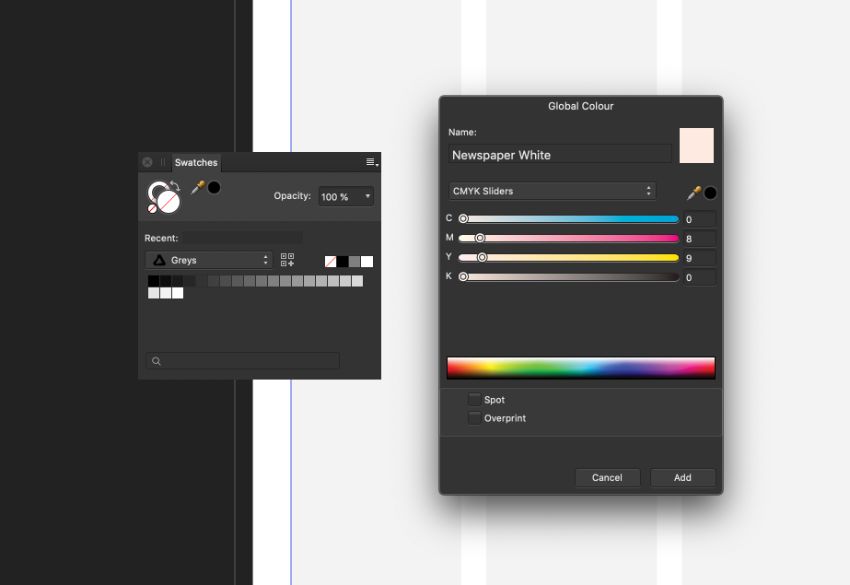
Go to the Swatches panel (View > Studio > Swatches) and choose Add Global Colour from the drop-down menu at top-right.
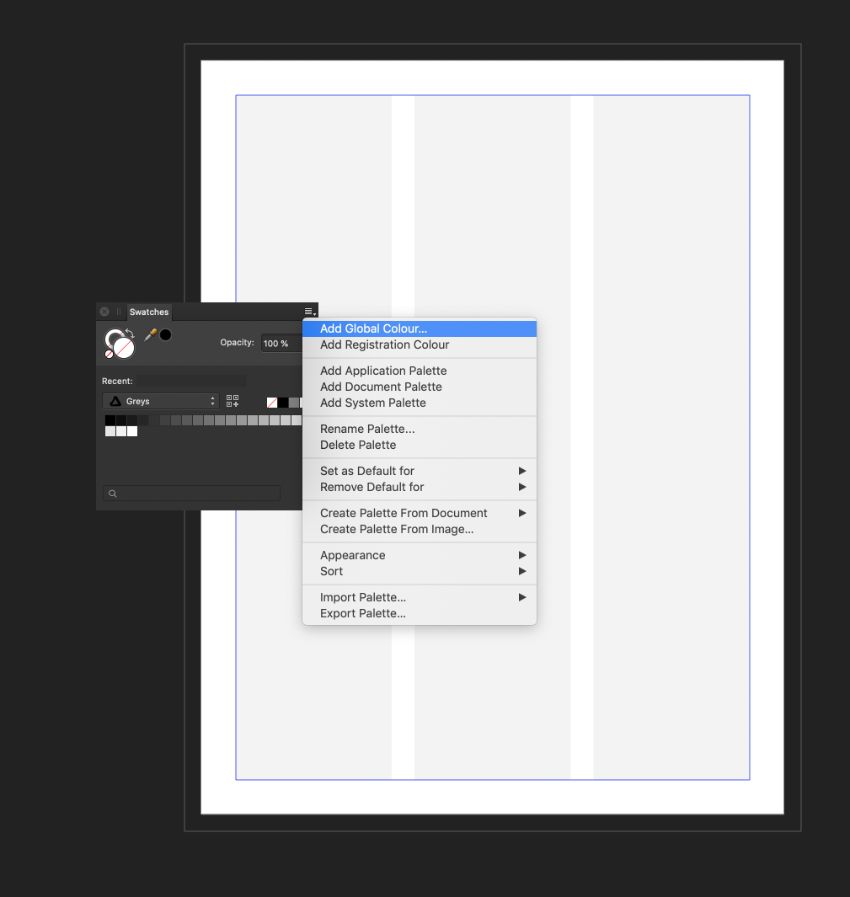
Name the swatch Newspaper White and set the levels below to C=0 M=8 Y=9 K=0. Then click Add.
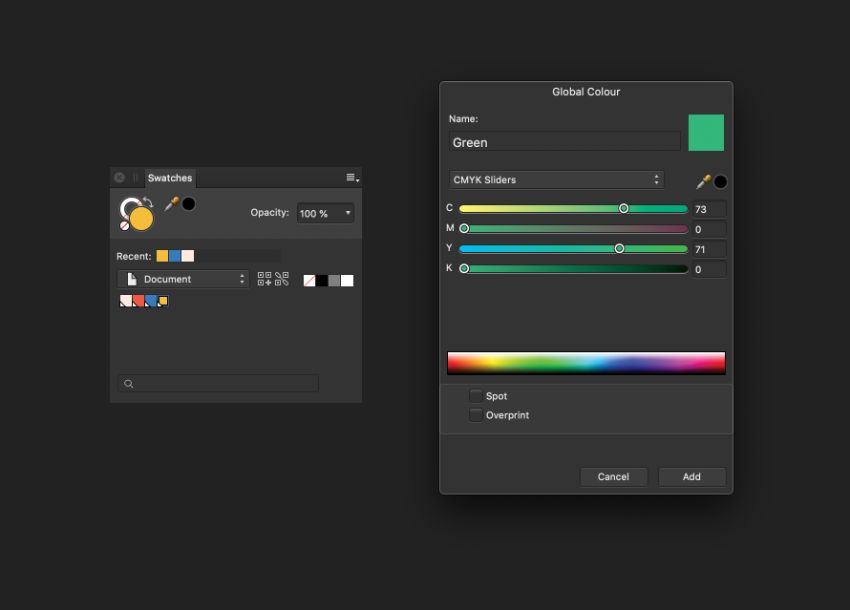
Repeat to create four more swatches:
- Coral: C=0 M=81 Y=78 K=0
- Blue: C=79 M=47 Y=0 K=0
- Yellow: C=4 M=26 Y=88 K=0
- Green: C=73 M=0 Y=71 K=0
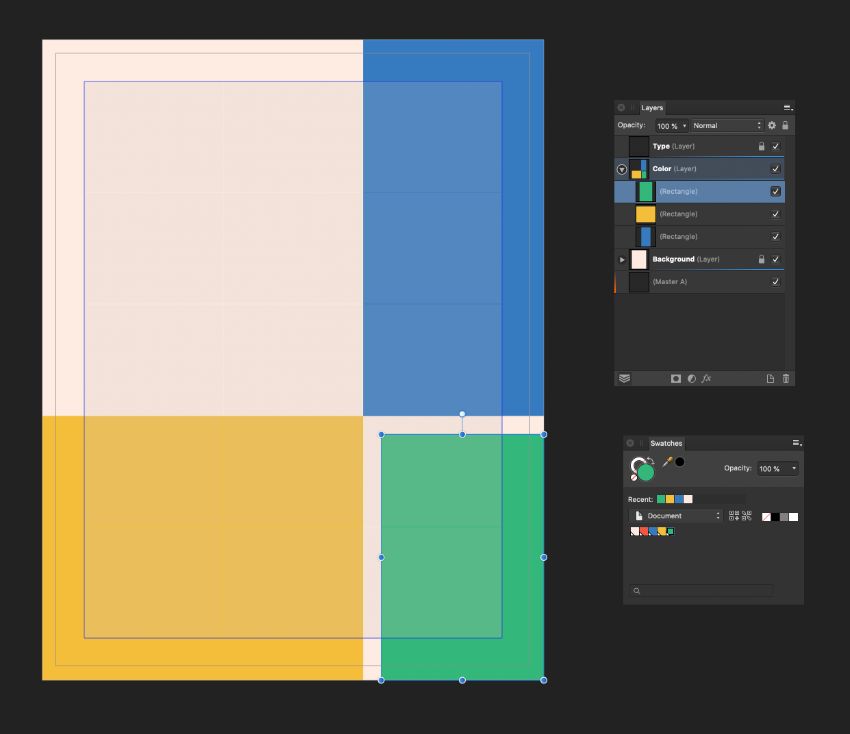
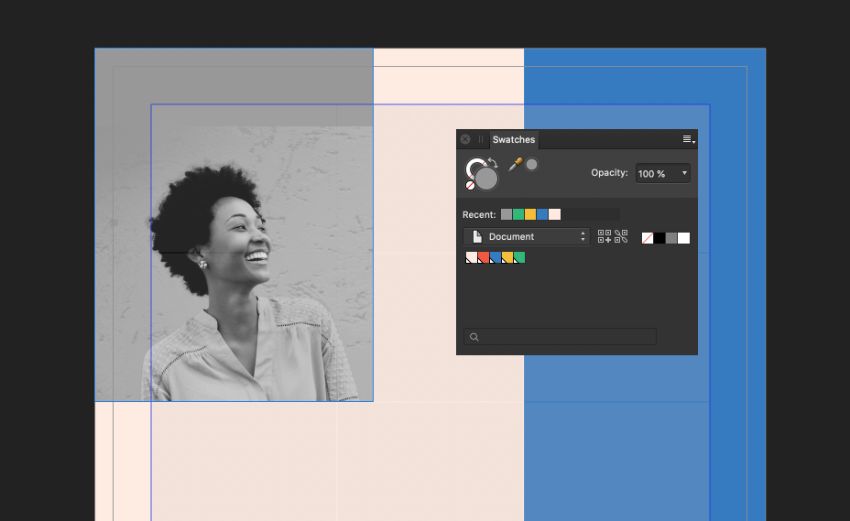
2. How to Add Color and Images to Your Affinity Publisher Newsletter Template
Step 1
Working on the Background layer, select the Rectangle Tool (M) from the Tools panel and drag across the whole of Page 1, extending the edges up to the bleed.
From the Swatches panel, set the Fill Color to Newspaper White.
Step 2
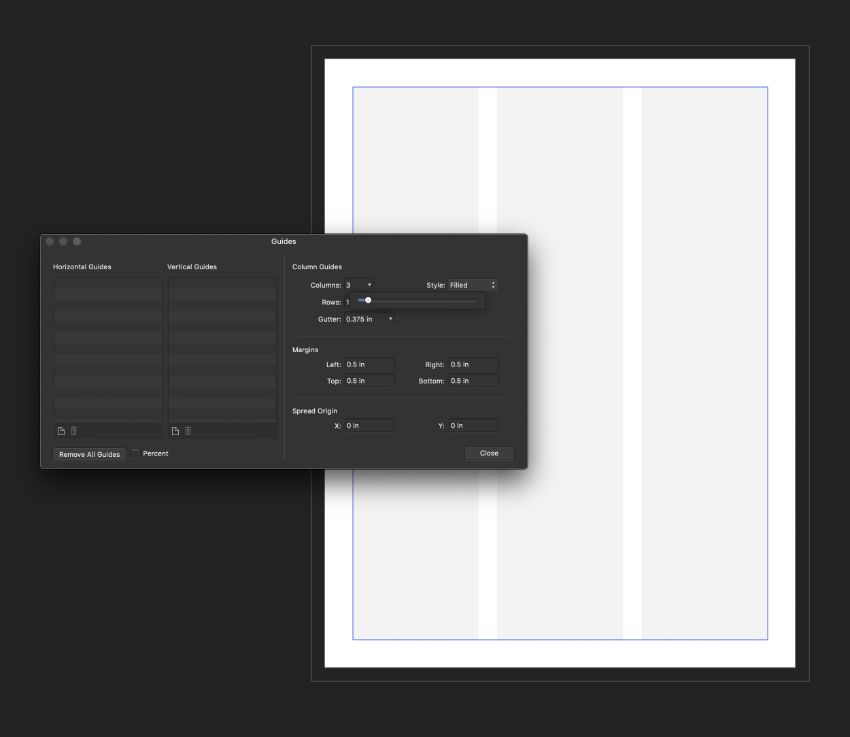
To divide up the newsletter layout further, we can add rows across the page. To do this, head back to View > Guides Manager.
Increase the number of Rows to 5. Set the width of the Gutter to 0.01 in. Then click Close.
Step 3
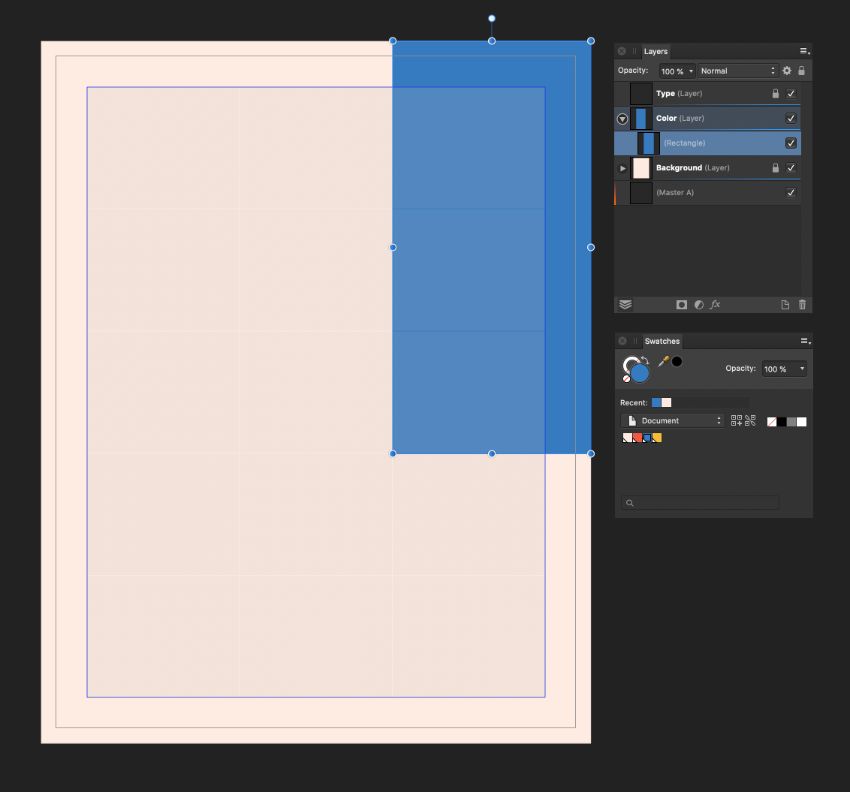
Working on the Color layer, use the Rectangle Tool to create a shape on the page, filling the top three rows of the right-hand column.
Set the Fill to Blue.
Step 4
Create a second shape across the bottom-left corner of the page, meeting the bottom-right corner of the blue rectangle. Set the Fill of this shape to Yellow.
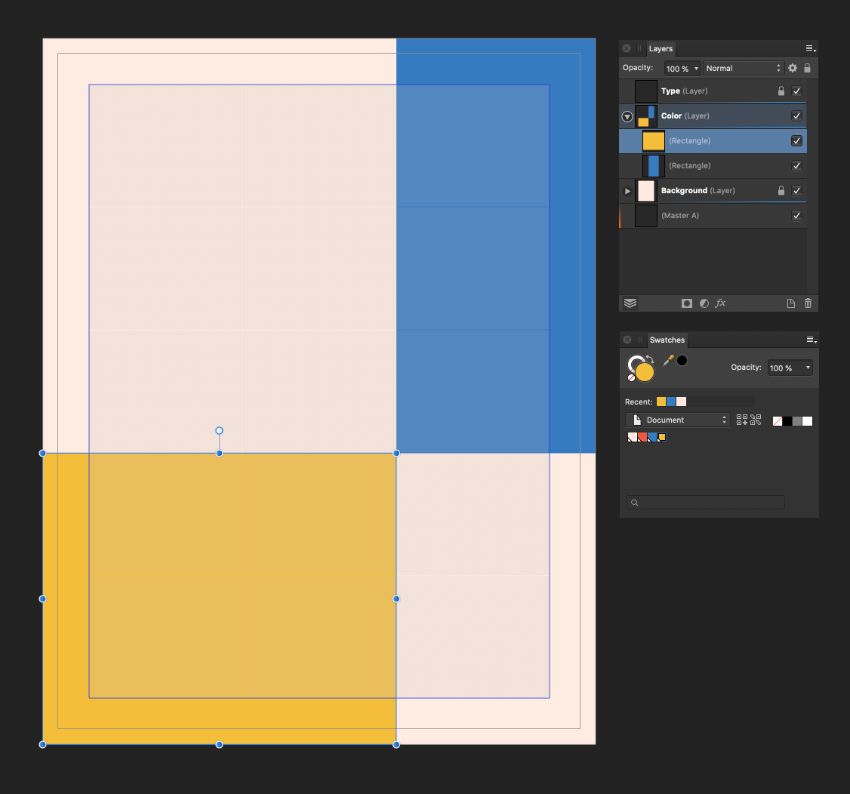
Add a third shape in the bottom-right corner of the page, setting the Fill to Green.
Step 5
The newsletter design will look better with all the images set in black and white. You can use Affinity Photo to quickly adjust color images to black and white, and resave them for using on your newsletter.
Open your color image in Affinity Photo and duplicate the Background layer, working on the copied layer.
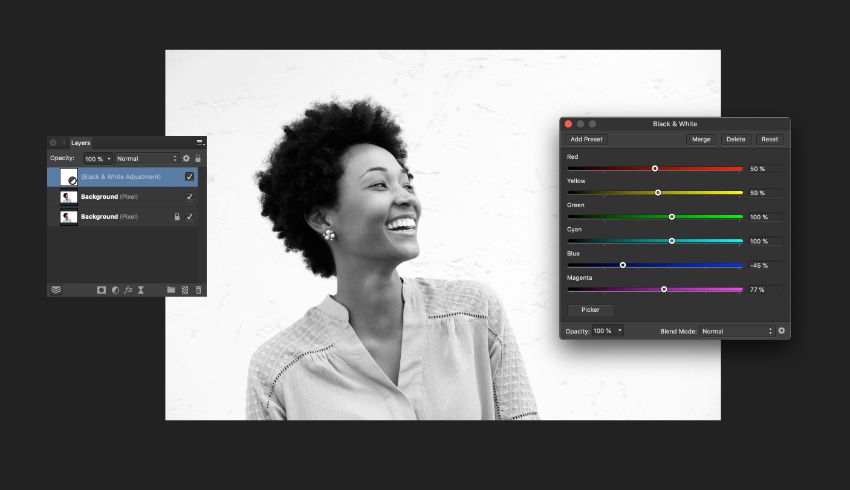
From the Adjustments drop-down menu at the bottom of the Layers panel, choose Black and White.
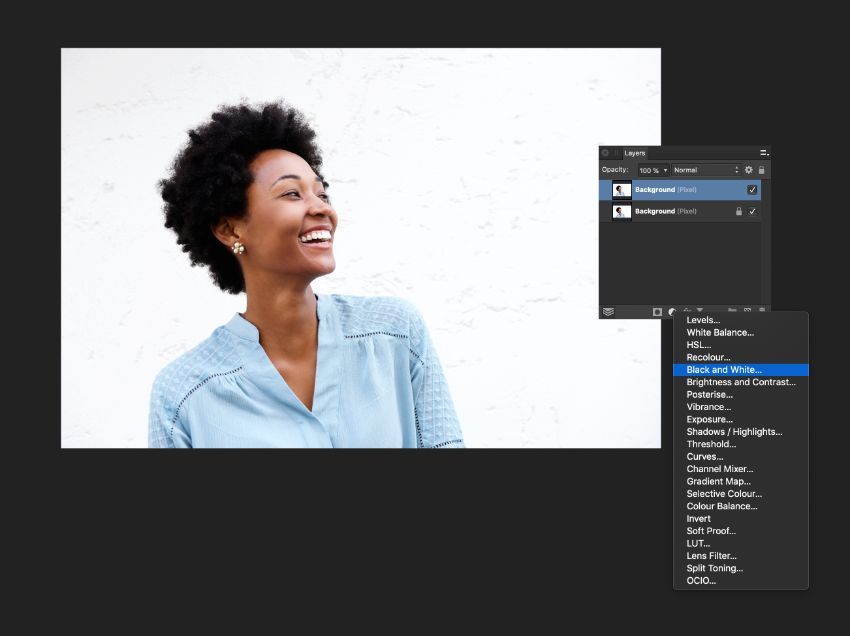
In the Black & White window that opens, adjust the color sliders until you’re happy with the result.
Exit the window, and File > Export the image as a JPG file.
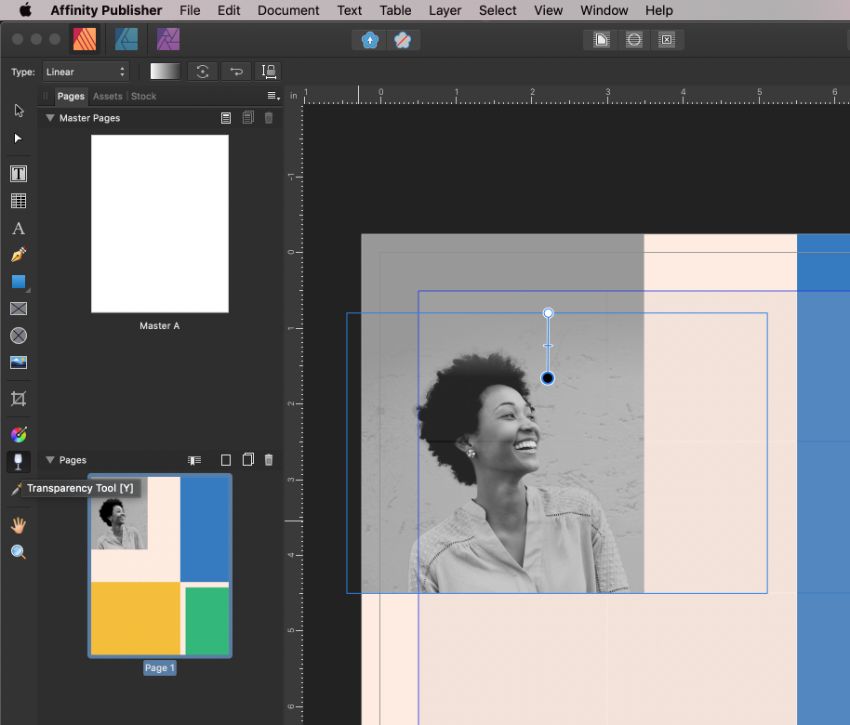
Step 6
Back in Affinity Publisher, switch to the Picture Frame Rectangle Tool (F) and create a frame across the top-left corner of the page.
Go to File > Place, choose your edited image, and click Open.
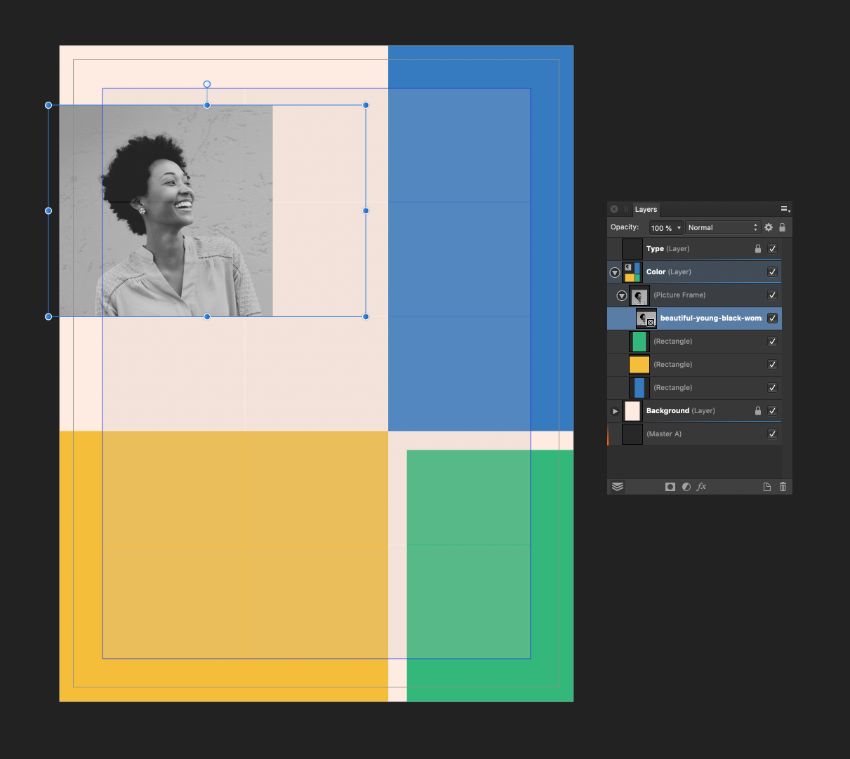
Double-click inside the picture frame to select the image directly, and scale it until you’re happy with the position.
Here I’ve extended the height of the image by using the Colour Picker Tool (I) to pick up a grey color from the top of the image and applied this to the Fill of the image frame.
I then use the Transparency Tool (Y) to fade the top of the photo by directly selecting the image inside the frame and clicking the tool from bottom to top.
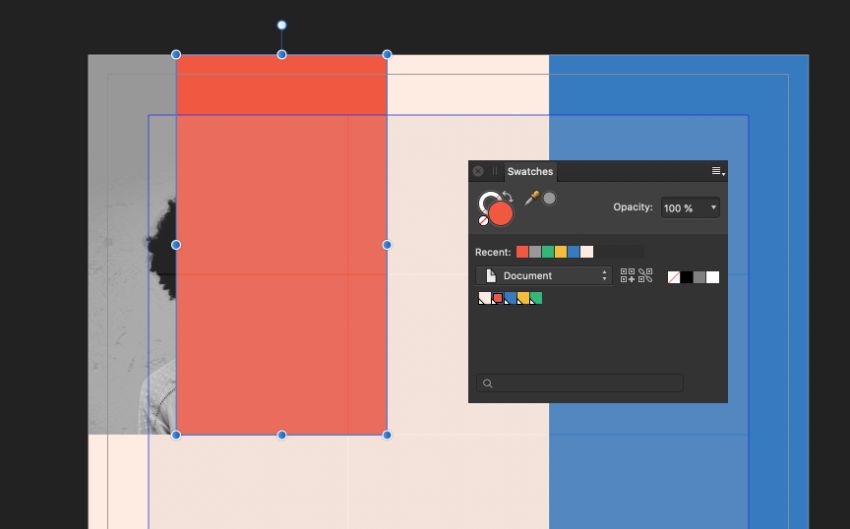
Step 7
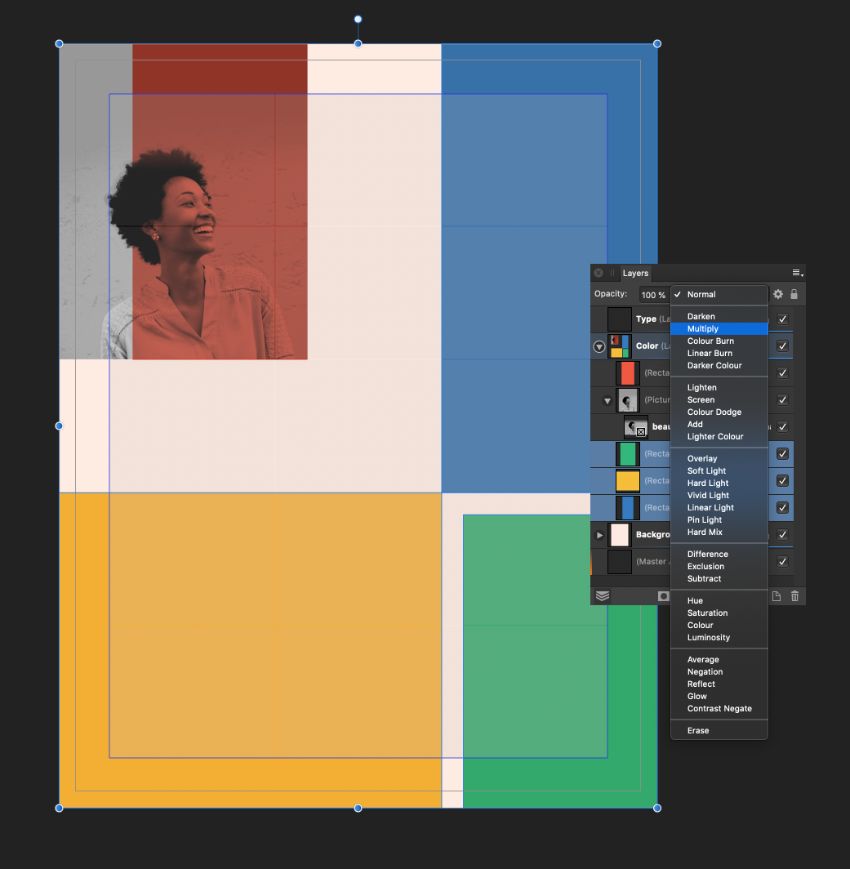
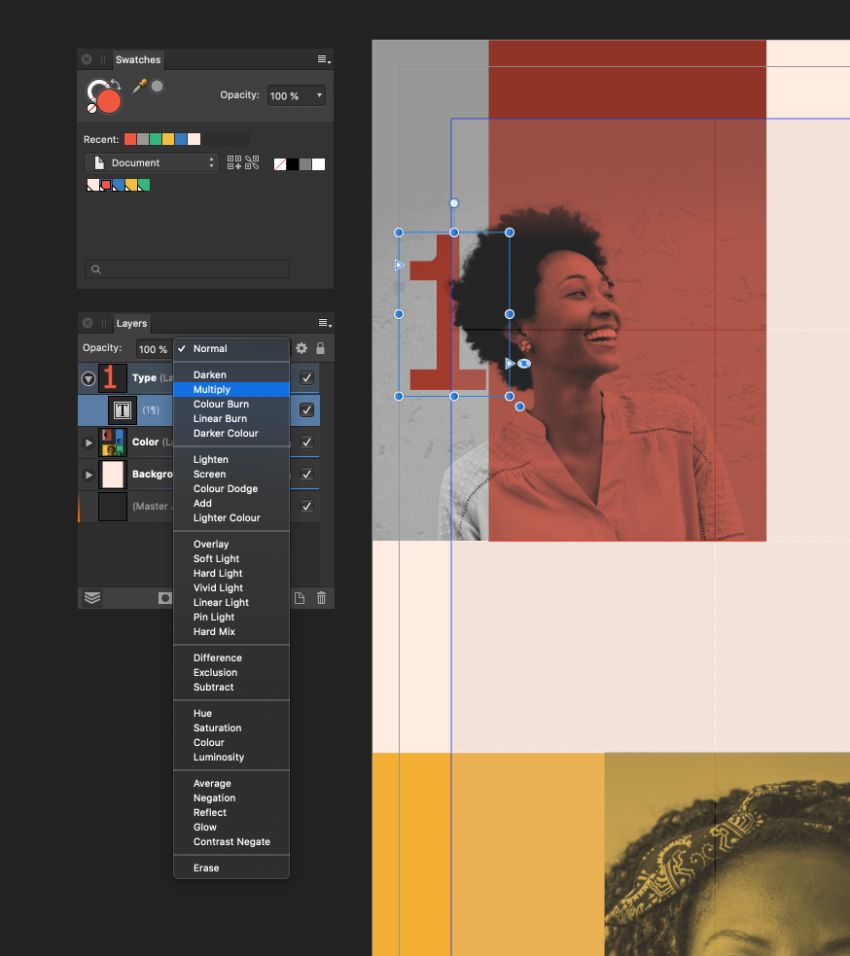
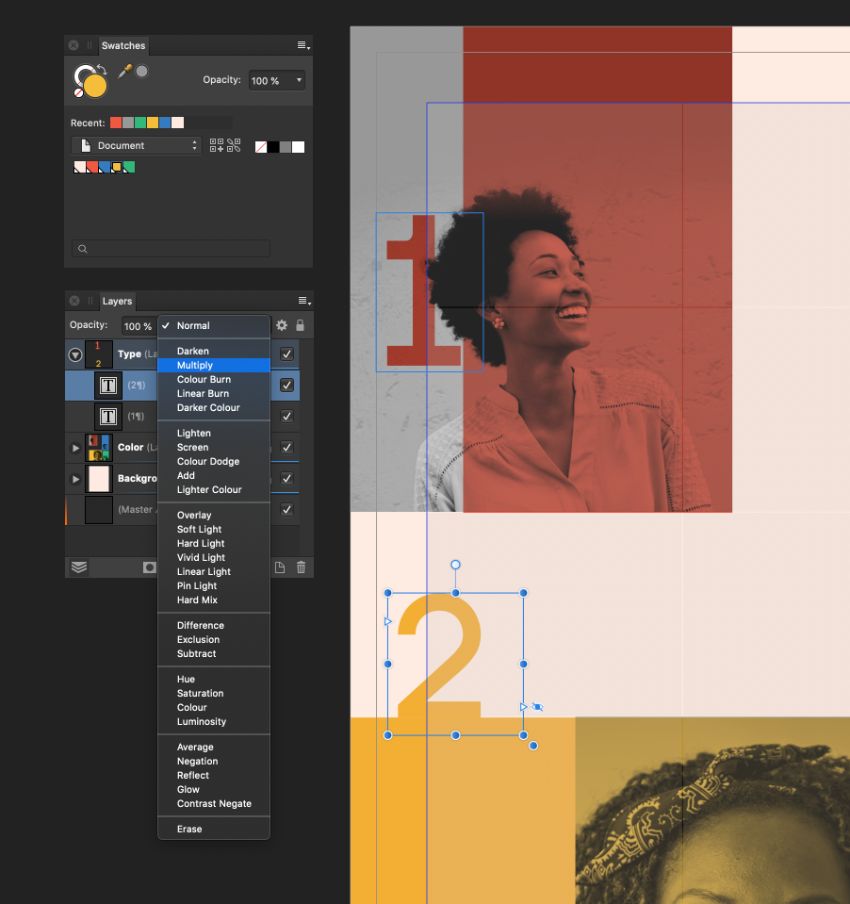
Use the Rectangle Tool to create a tall shape over the top of two-thirds of the photo, setting the Fill to Red.
With the shape still selected, choose Multiply from the blending menu at the top of the Layers panel.
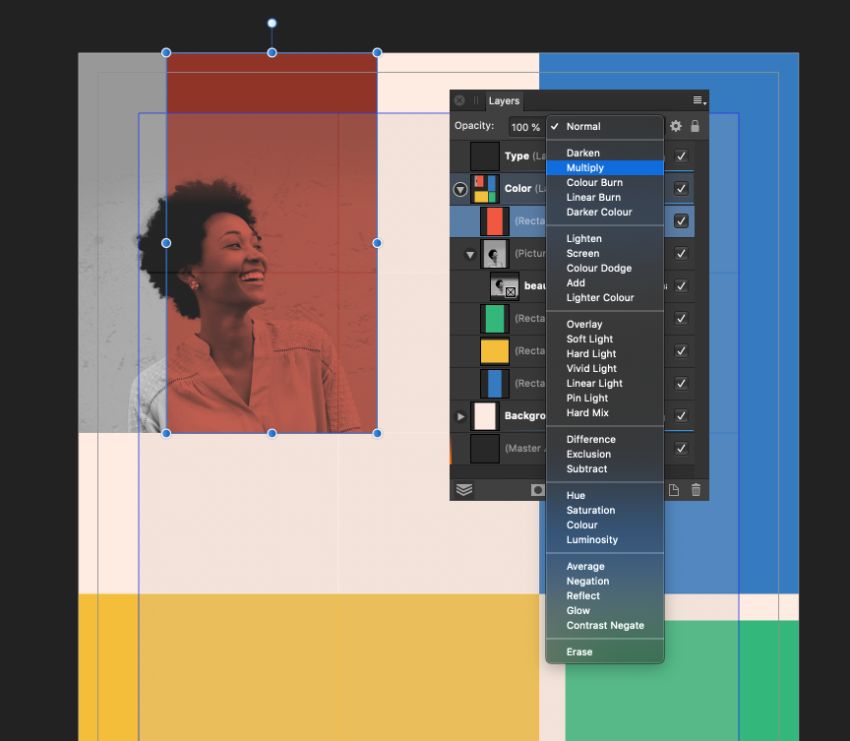
Select all the other colored shapes and apply a Multiply effect to these too.
Step 8
Use the Picture Frame Rectangle Tool (F) to create an image frame across the right half of the yellow rectangle.
File > Place, dropping another black and white image into the frame.
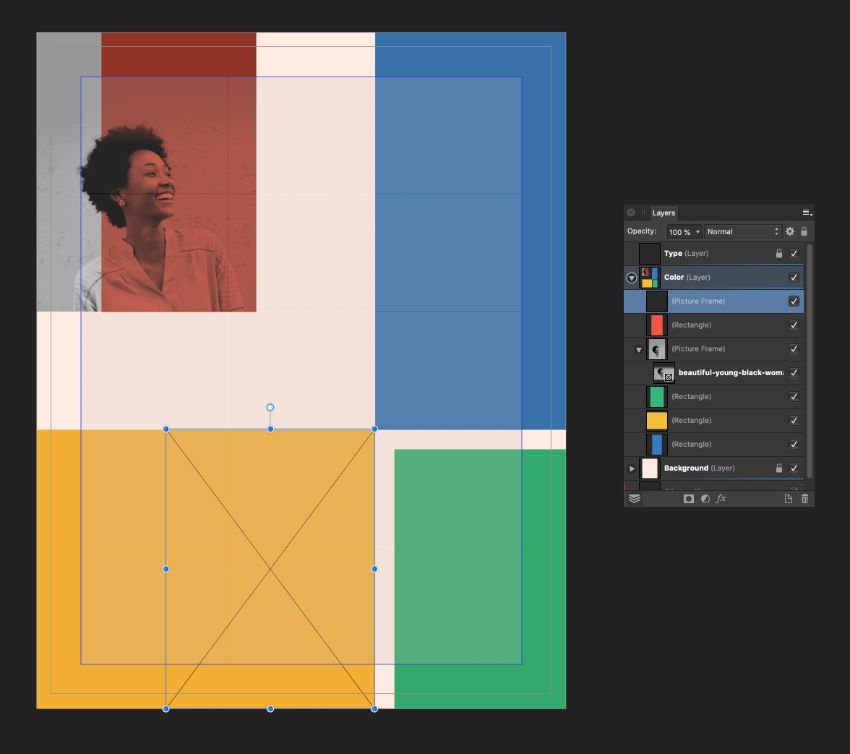
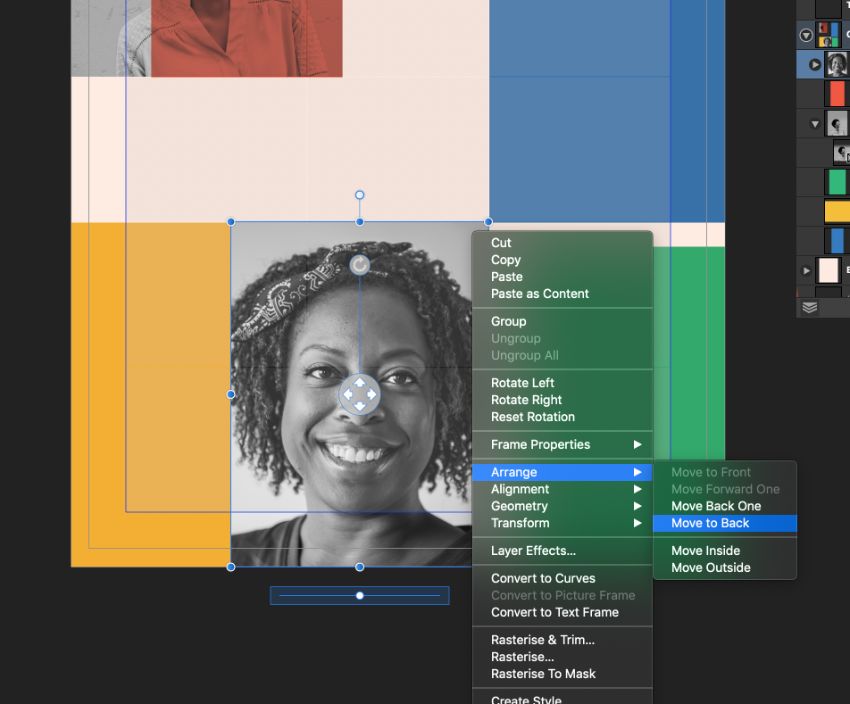
On the image frame, Right-Click > Arrange > Move to Back.
Step 9
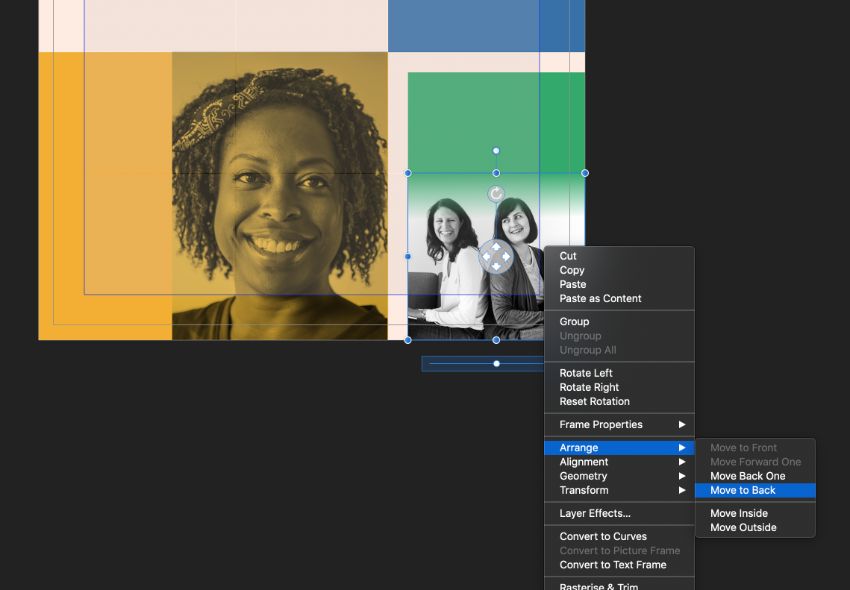
Create another image frame, this time over the green rectangle.

If you need to hide the top or side of an image, use the Transparency Tool (Y) to create a subtle fade on any visible edges.

Then, as before, Right-Click > Arrange > Move to Back.
Step 10
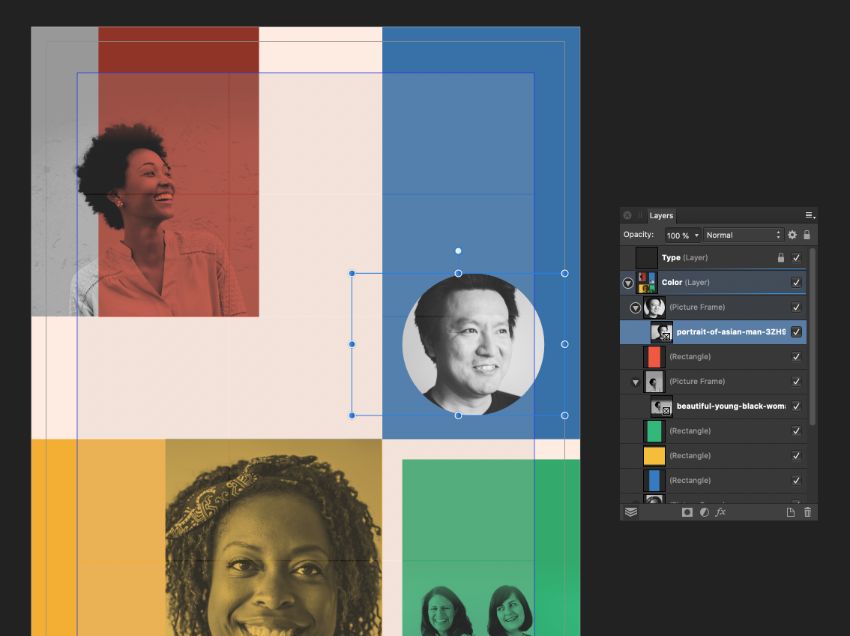
Use the Picture Frame Ellipse Tool (F) to create a circular image frame over the bottom of the blue rectangle.
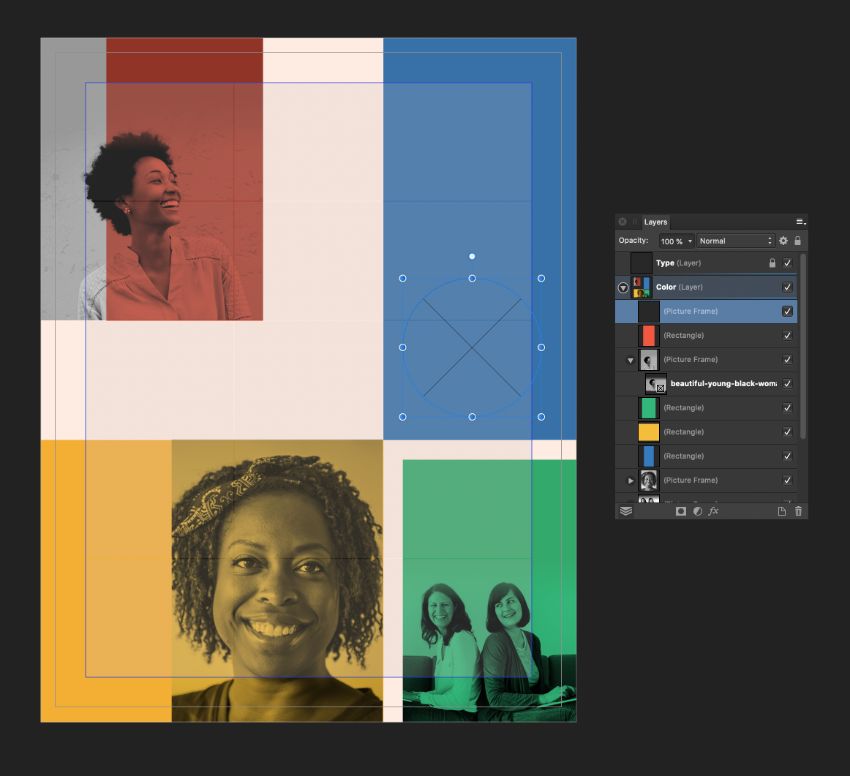
File > Place an image, before Right-Click > Arrange > Move to Back.

3. How to Format Type on Your Affinity Publisher Newsletter Template
Step 1
Lock the Color layer and unlock the top layer, Type.
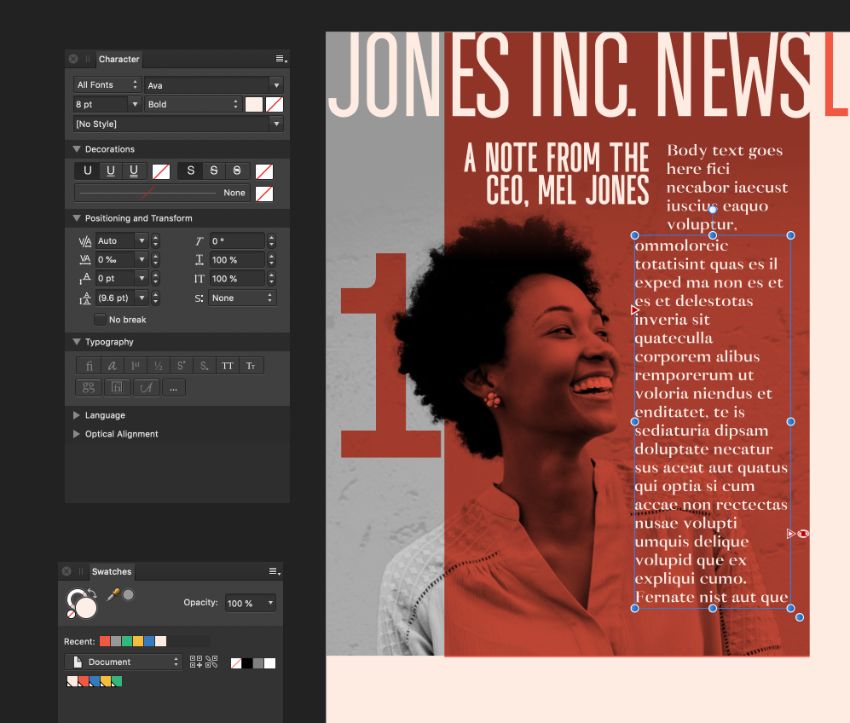
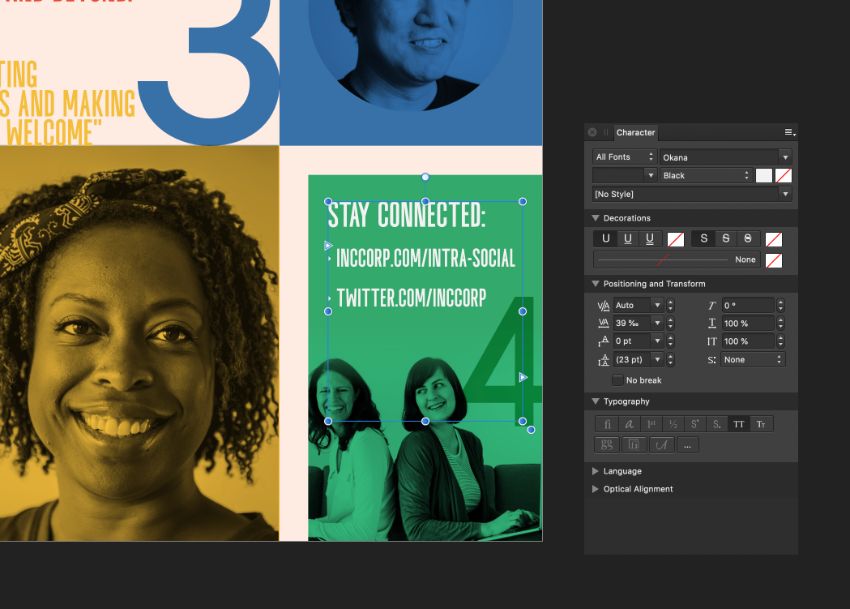
Use the Frame Text Tool (T) to create a text frame to the left side of the red shape, typing in ‘1’.
From the Character and Paragraph panels (View > Studio > Character) set the Font to Liber Grotesque Bold, and from the Swatches panel set the Font Colour to Red.
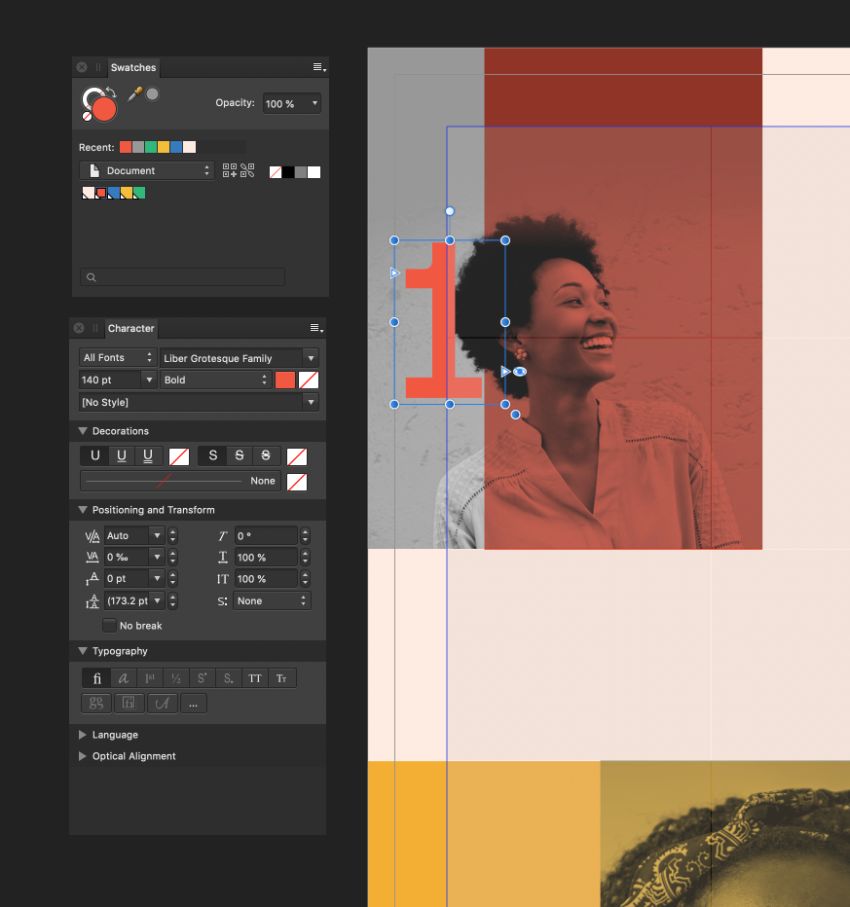
From the Layers panel, adjust the blending mode of the text frame to Multiply.
Repeat to create a second number text frame above the yellow shape.
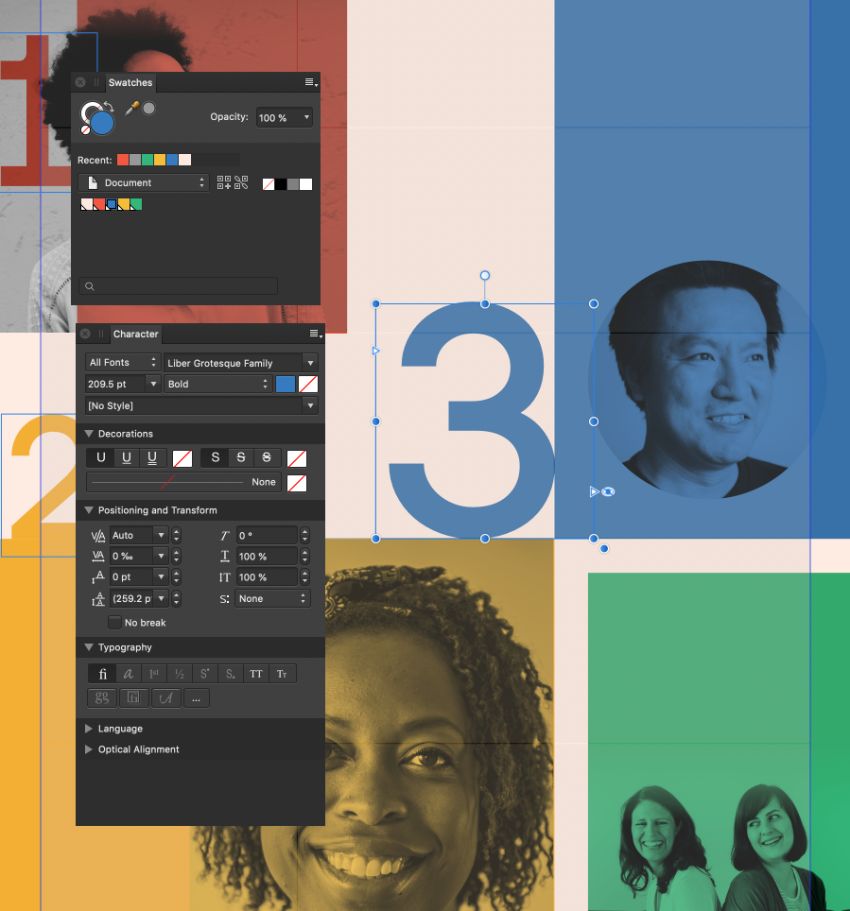
Create a larger ‘3’ text frame to the left of the blue shape.
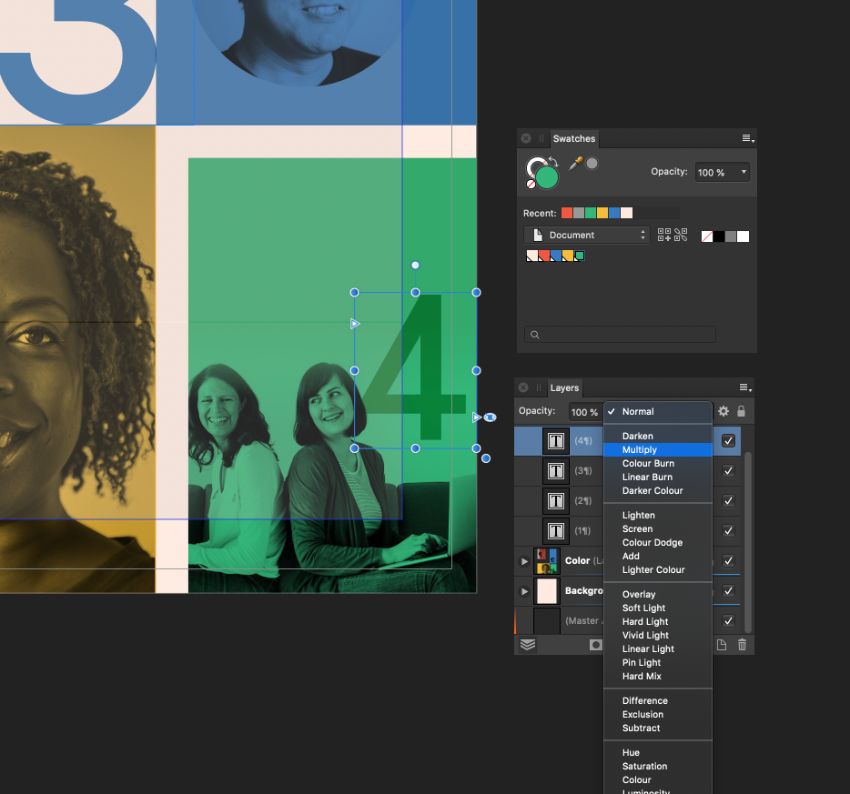
Finally, add a ‘4’ to the right side of the green rectangle.
Step 2
Create another text frame across the top-left corner of the page, typing in the title of the newsletter template. Set the Font to Okana Bold, All Caps, and reduce the Tracking (letter-spacing) to -40%.
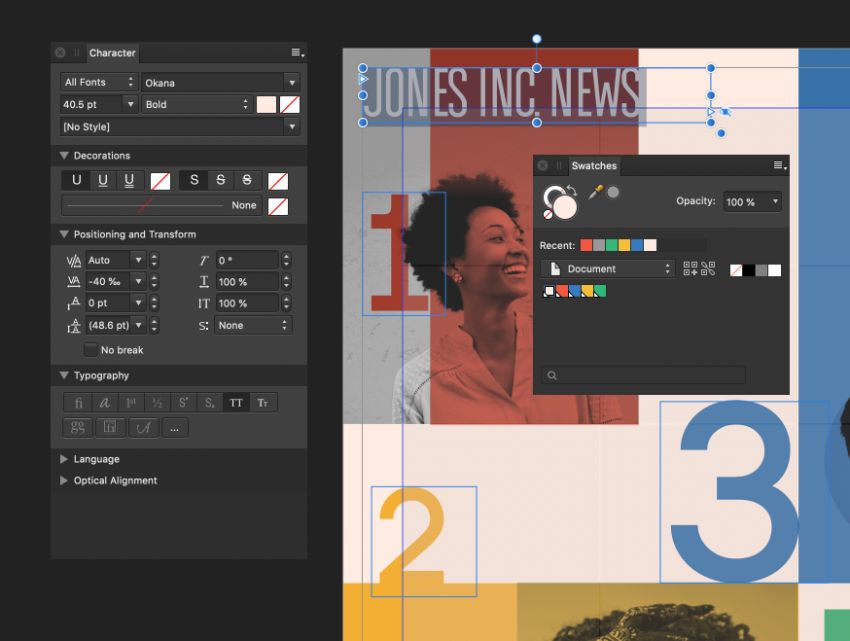
For color contrast, set the Font Color of the text over the colored shape to Newspaper White, and any outlying text to Red.
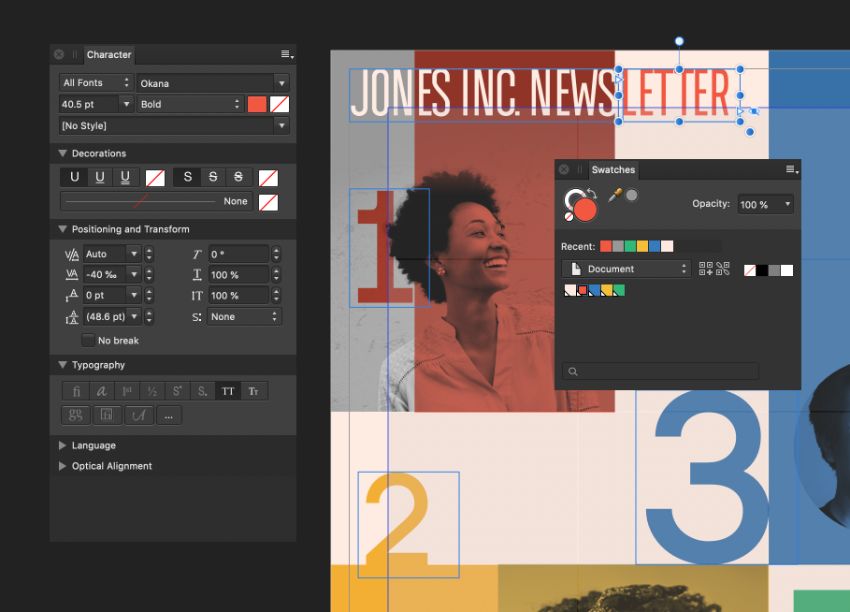
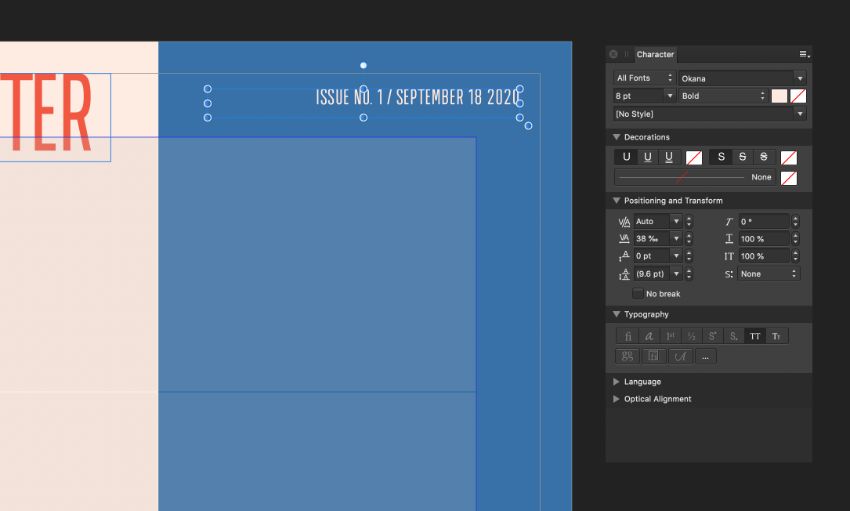
Add the issue number and date to the top-right corner, setting the Font to Okana Bold, as before.
Step 3
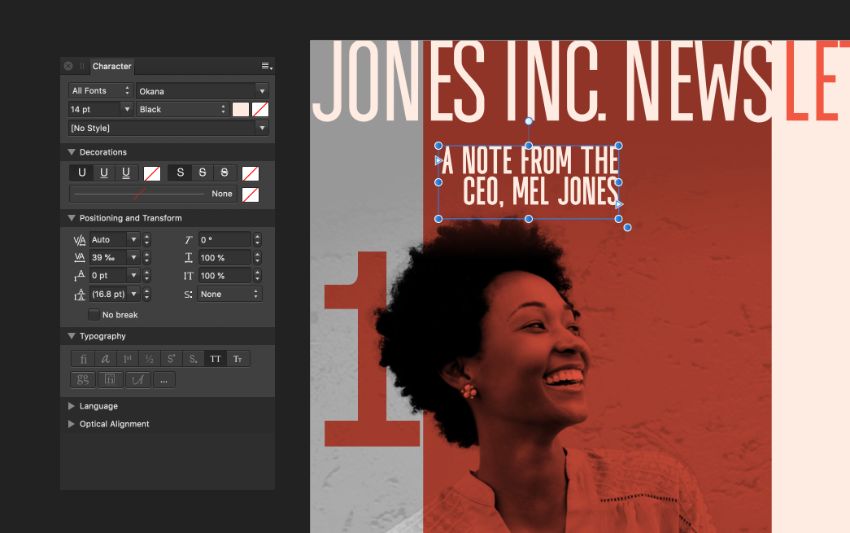
Use the Frame Text Tool (T) to create a smaller text frame to the left side of the red rectangle.
Type in the first article heading, setting the Font to Okana Black and the Font Size to around 14 pt.
Create a new frame for the start of the body text on your newsletter format, setting this to Ava Bold, Size 8 pt. Create more linked text frames for body text by clicking on the red arrow icon at the bottom-right corner of the text frame.
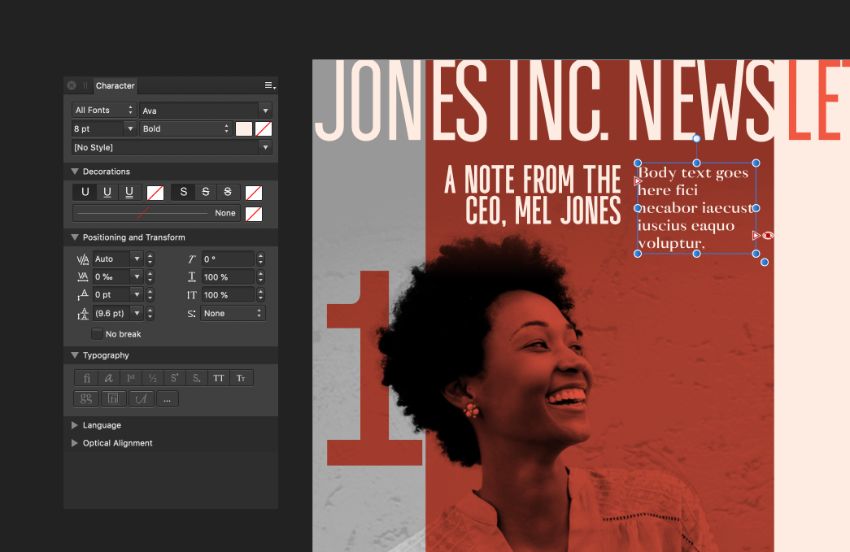
Click again to create a linked text frame. Arrange these into two columns, adjusting the Font Color of text in each to improve contrast.
Step 4
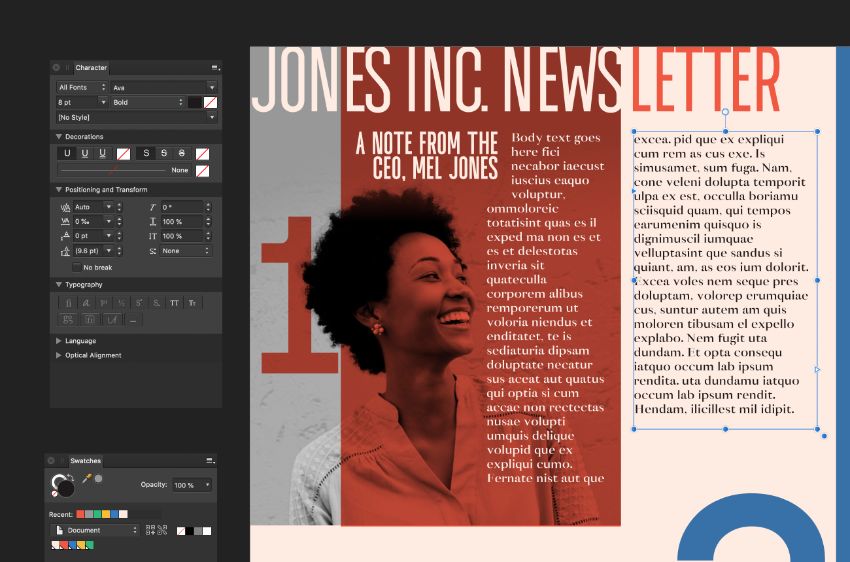
Copy and Paste the title and body text frames to populate other areas of your Publisher newsletter layout.

Step 5
Create a pull-quote set in Okana Black across the bottom of the red corner, setting the Font Size to around 21 pt, All Caps, and the Tracking to 40%.
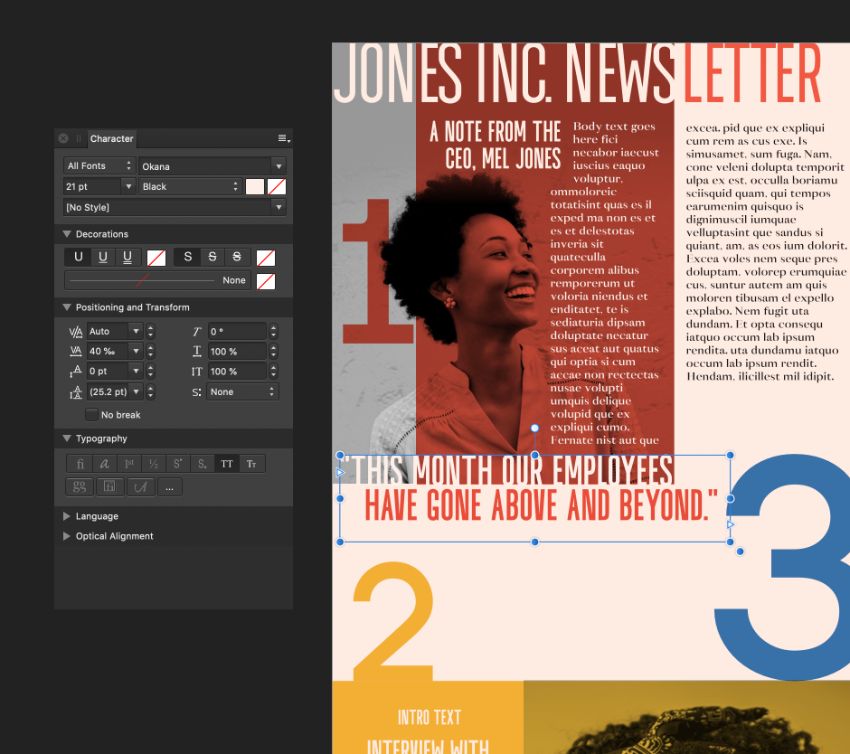
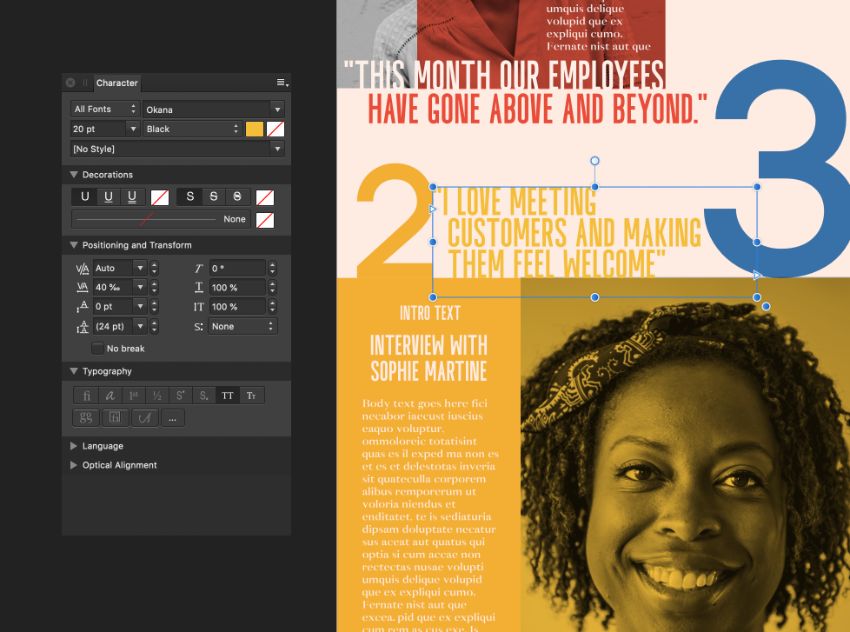
Copy and Paste the quote text frame to create a second pull-quote above the yellow corner, adjusting the Font Color to match.
Step 6
The final green square is a good place to list contact details, a web address, or social media handles.
Set the Font to Okana Black and a Newspaper White Font Color.
4. How to Export Your Simple Newsletter Template for Print
Step 1
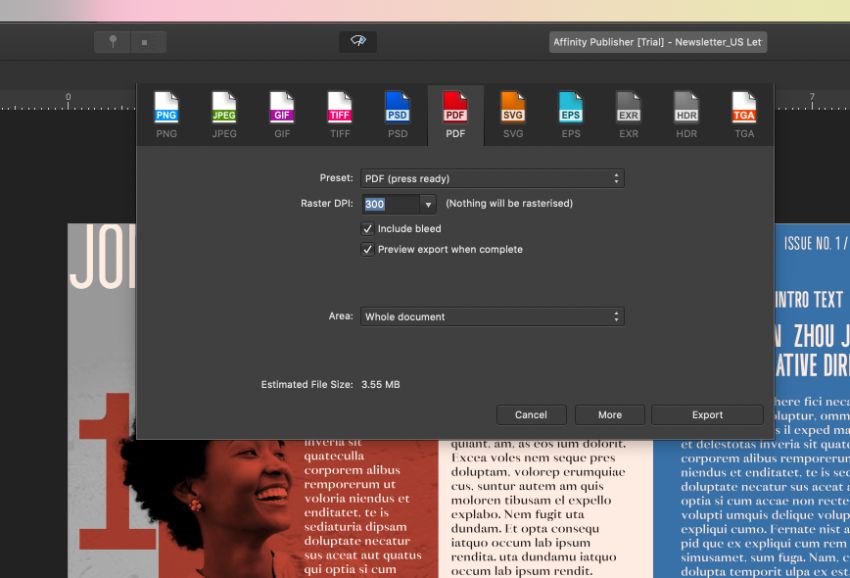
When you’ve finished working on your Affinity Publisher newsletter template, it’s time to export your newsletter design as a PDF, ready for sending to print.
File > Save your work, before going to File > Export.
In the window that opens, choose PDF from the icon options at the top, and select PDF (press ready) from the Preset menu.
Make sure the Raster DPI is set to 300, and that the Include Bleed box is checked.
Then click Export.
Step 2
Name your file, select a folder to save it into, and then hit Save.
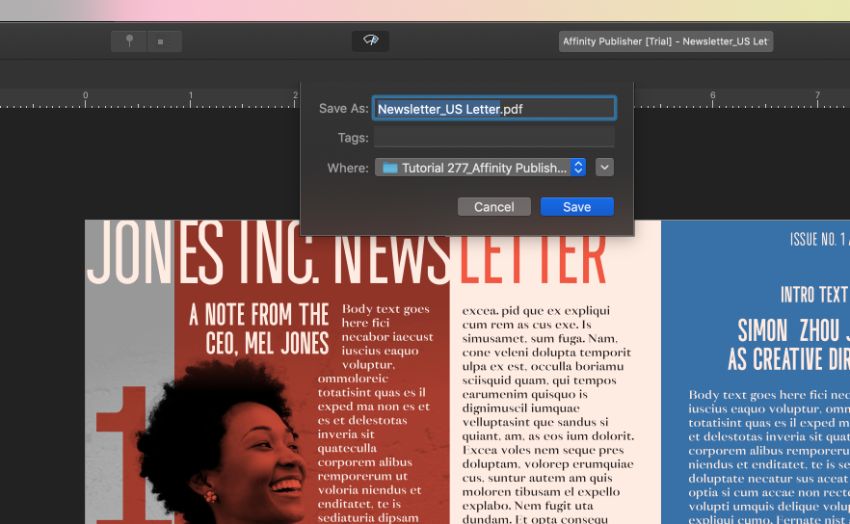
You can send the exported PDF straight off to the printers—awesome work!
Conclusion: Your Finished Affinity Publisher Newsletter Template
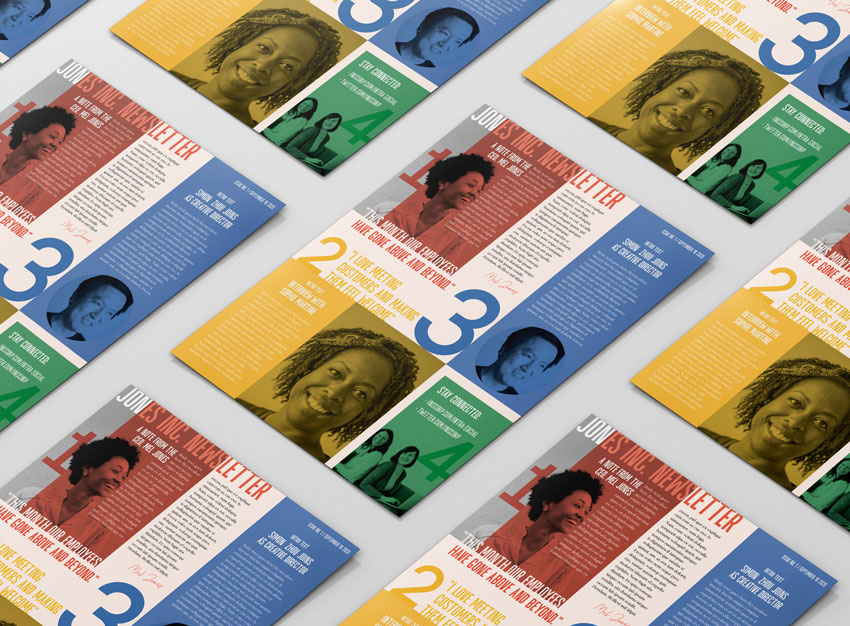
Your Affinity Publisher newsletter template is finished—great job! Here you’ve learned how to create a newsletter template with a colorful, corporate style.

In this tutorial, you’ve picked up a wide range of skills and techniques for how to create Affinity Publisher newsletter templates, from setting up a blank layout to creating color swatches, placing images, and formatting typography to create a stylish and contemporary business newsletter template.
If you want to compare your newsletter design ideas with my own, make sure to download the completed Affinity Publisher newsletter template. It’s also available as an InDesign newsletter template.
It’s quick and easy to customise your end result by swapping in different color swatches, fonts, and images.
Looking for more business newsletter templates and newsletter examples? Discover some of the best newsletter templates over on Envato Elements.
Eager to develop your print design skills further? Don’t miss these Affinity Publisher tutorials for creating your own templates and discovering some awesome newsletter examples:
-

33 Best Company Newsletter Templates (New for 2020)
-
How to Create a Church Newsletter Template in InDesign
-
How to Create a One-Page Newsletter Template in InDesign
-
How to Create a Real Estate Newsletter Template in InDesign