Learn how to expand simple strokes, multiple strokes, or text outlines into shapes that you can further modify and distort as you need.
Once you’ve learned how to convert a stroke to a shape in Affinity Designer, you can head over to Envato Elements, where you can get unlimited downloads of stock videos, music, graphics, photos, fonts, and more.
What You’ll Learn in This Tutorial
- How to expand simple strokes in Affinity Designer
- How to expand multiple strokes in Affinity Designer
- How to expand a text outline
- The difference between Expand Stroke and Convert to Curves
1. Locate the Expand Stroke Function in Affinity Designer
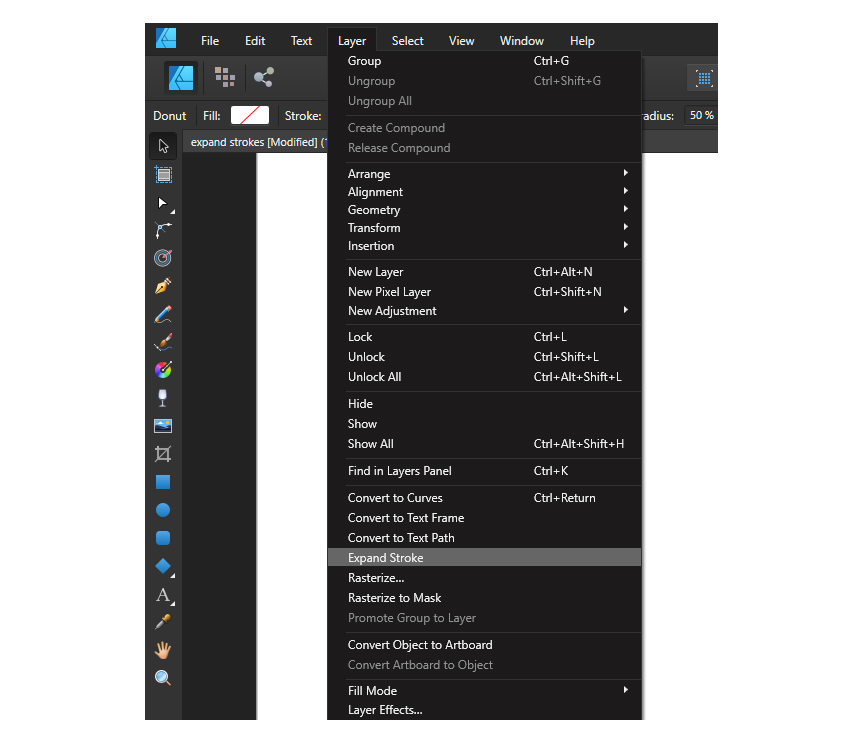
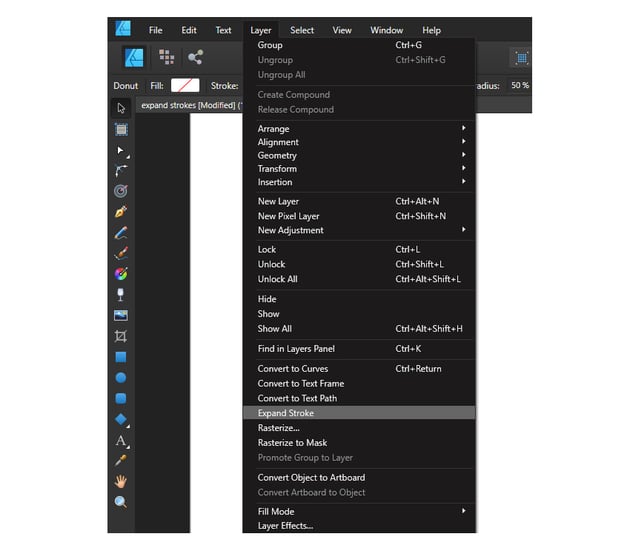
To convert a stroke to a shape, Affinity Designer has the Expand Stroke function located in the Layer menu. To expand a line, a shape, or a text stroke, you will use this function.
There is also the Convert to Curves function in the Layer menu that seems to do the same thing but not quite, and it generates confusion between the application’s users. Wondering about the difference between Expand Stroke and Convert to Curves? Let’s find out everything in the following steps.

2. How to Expand Simple Strokes in Affinity Designer
Step 1
Let’s start with a simple line, which you can draw on your artboard using the Pen Tool (P). In the Appearance panel, apply a stroke of any width and any color. To convert the line to a fill, go to the Layer menu and choose Expand Stroke. It’s that easy!


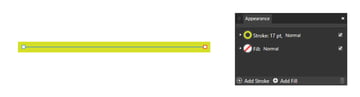
In Affinity Designer, converting a stroke to a shape means that you can distort it as you want with the Node Tool (A), adding extra nodes or deleting existing nodes.


Step 2
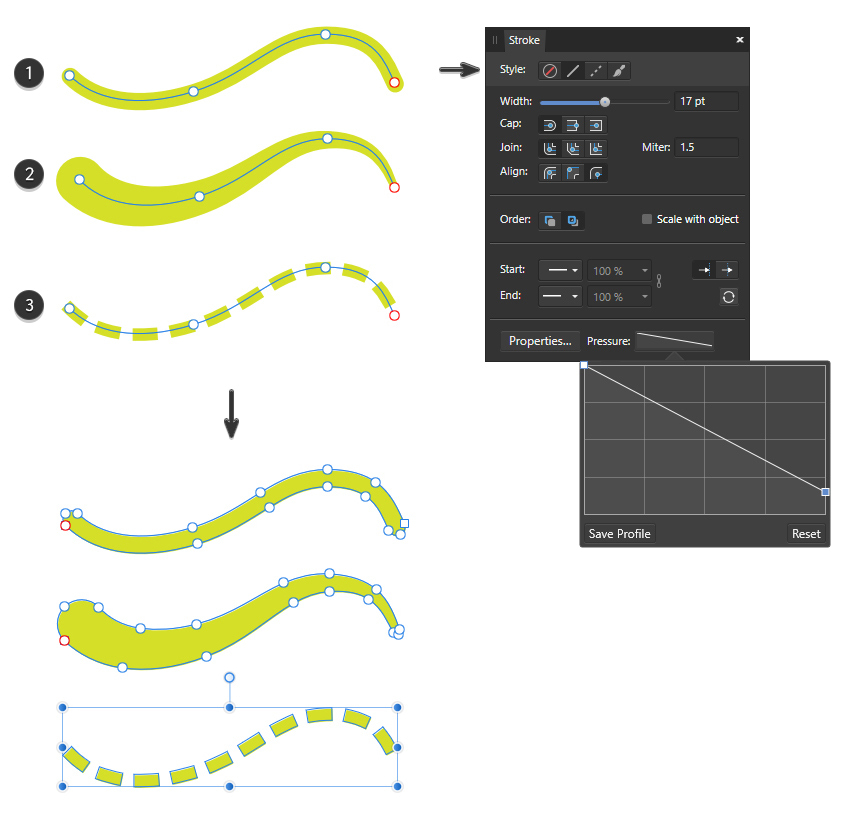
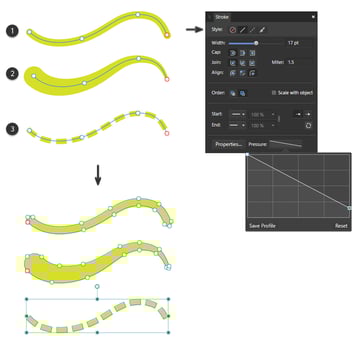
Any of the stroke styles available in the Stroke panel can be converted into shapes in the same way. Let’s take a look.
If you use a solid line stroke (1), or if you use Pressure to create a custom stroke and imitate a tapered brush (2) or use a Dash line (3), turn any of them into shapes by going to Layer > Expand Stroke.

Step 3
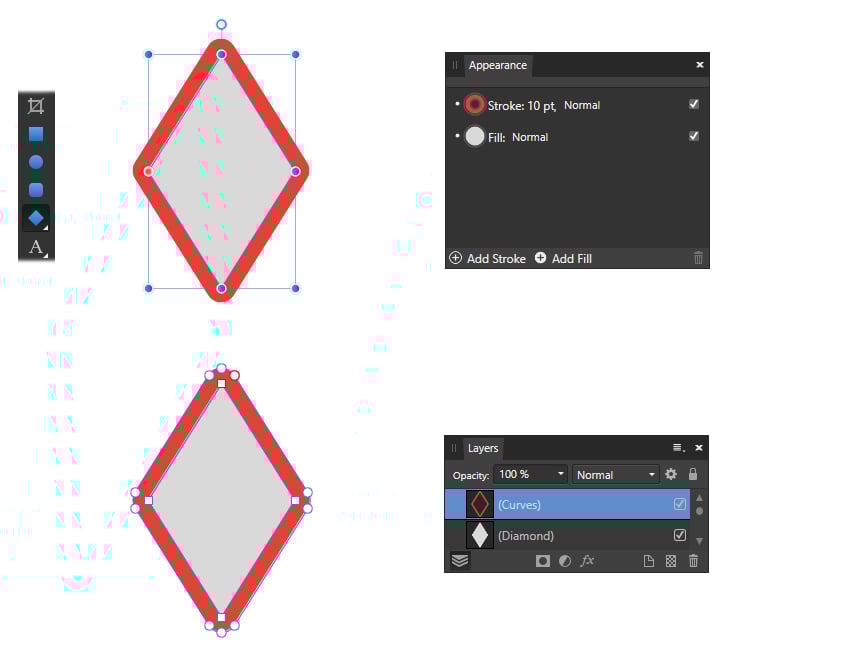
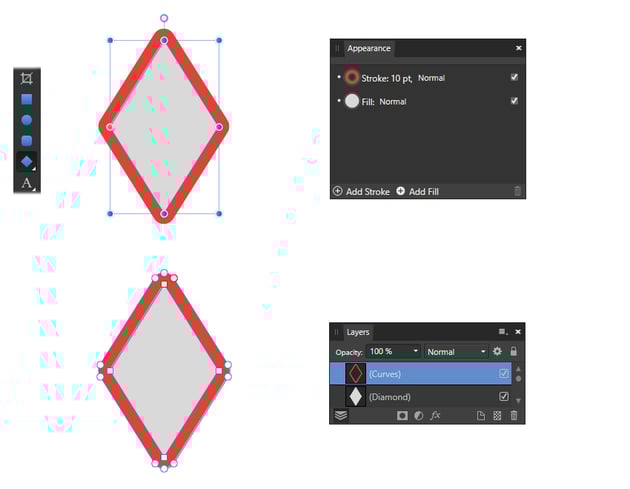
The same thing goes if you stroke any of the geometrical shapes available in Affinity Designer or any other shape that you want to draw.


3. How to Expand Multiple Strokes in Affinity Designer
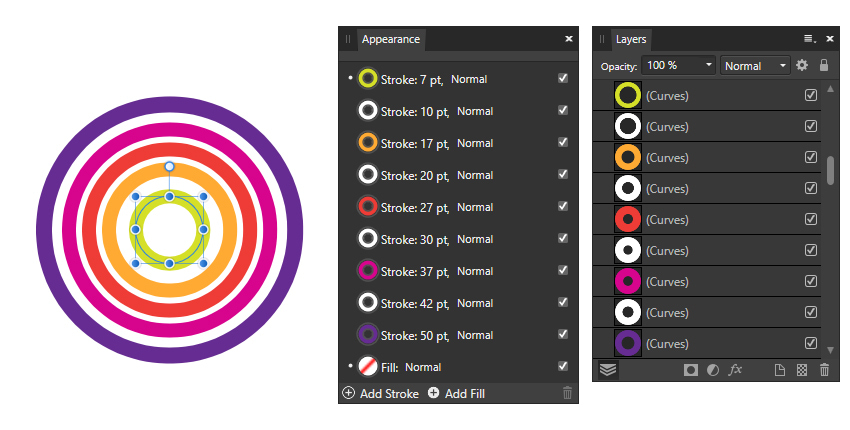
Apply multiple strokes to a shape by clicking on Add Stroke at the bottom of the Appearance panel. Feel free to choose different colors and different width values. This does not influence the expanding process. Once you’re done, go to Layer > Expand Stroke, and all of your strokes will turn into different shapes. They will generate separate layers in the Layers panel too.
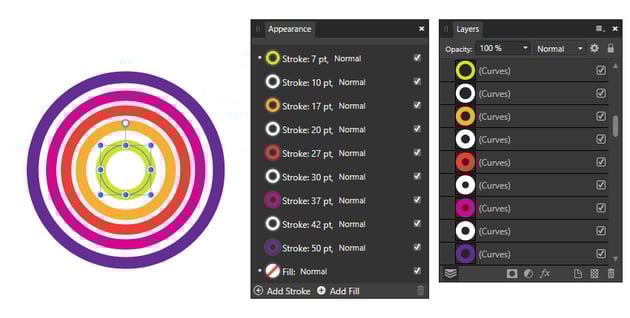

After you’ve converted multiple strokes to shapes, use the Node Tool (A) to distort any of the resulting shapes to achieve the desired outcome.


4. How to Expand a Text Outline
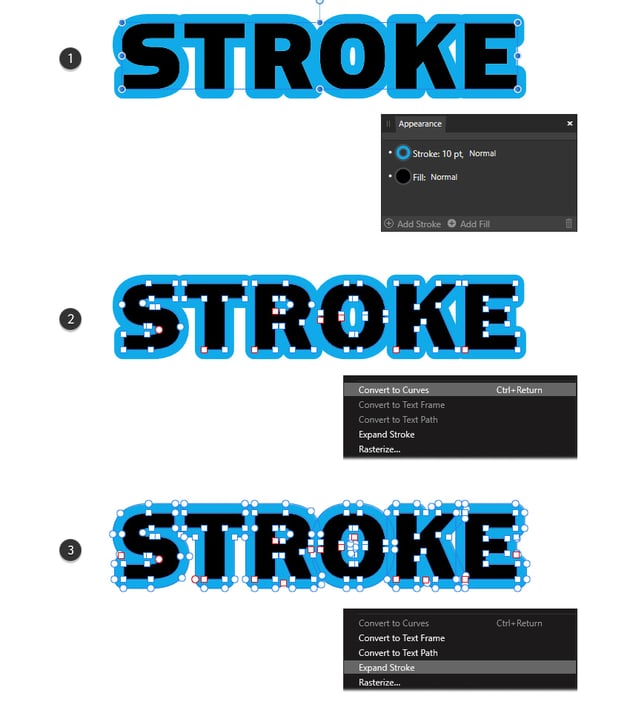
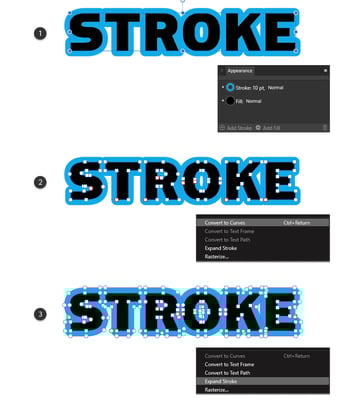
When it comes to text outlines, things are a little extra. Use the Artistic Text Tool to write anything on your artboard, and give it a stroke of any width using the Appearance panel (1). The next step is to go to Layer > Convert to Curves in order to expand the live font first (2). Follow up with Layer > Ungroup (Control-Shift-G).
Go to Layer > Expand Stroke, and now your stroke will turn into editable shapes that you can further work with (3).

5. What Is the Difference Between Expand Stroke and Convert to Curves?
Expand Stroke does exactly what it says: it expands the stroke of a shape or line, turning it into a shape itself. It doesn’t matter what style, cap, width, pressure, or color you choose. Expanding the stroke converts the line’s boundaries into paths, forming a closed shape so you can edit it manually as you do with regular shapes.
Convert to Curves is used to convert live text and objects like geometrical shapes into “regular” shapes. Live text and shapes have specific settings you can change from the context toolbar to customize them, but sometimes this is not enough and you want to distort them even further. Only by converting them to curves will you be able to customize and distort them. This does not expand strokes; it only turns a live text/shape into a non-live (editable) text/shape.
Congratulations! You’re Done
Expanding a stroke in Illustrator actually converts any stroke (art, brushes, etc.) into a traced vector shape, while in Affinity Designer, converting a stroke to a shape seems to only work on a very rudimentary level. Basic strokes only! I hope this function will improve in future application updates.
Here are some situations where this function fails to work:
- You cannot expand brush strokes (paint, pens, markers, grunge, textured, watercolor, etc.) using brushes available in the Brushes panel. They can only be rasterized.
- You cannot expand a text outline obtained using Layer Effects > Outline, only via the Appearance panel.
- In the case of groups, you have to Ungroup or select all objects contained inside the group first, and then apply the Expand Stroke function.
Now that you know how to convert a stroke to a shape in Affinity Designer, make sure to check out Envato Elements, where you’ll find plenty of resources that are ready for you to download and use, from stock videos to music, graphics, photos, fonts, and much more.
Want to Learn More About Affinity Designer?
Did you like this tutorial on how to convert a stroke to a shape in Affinity Designer? We have loads of tutorials on Envato Tuts+ that teach many other useful techniques. Here’s a list of tutorials specially made for you. Take a look!