In the following tutorial, you will learn three methods that can be used to outline text in Affinity Designer.
Once you’ve learned how to outline text in Affinity Designer, you can head over to Envato Elements where you can get unlimited downloads of stock videos, music, graphics, photos, fonts, and more.
What You’ll Learn in This Tutorial
- How to outline text in Affinity Designer using Layer Effects
- How to outline text in Affinity Designer using the Appearance Studio
- How to outline text in Affinity Designer using the Contour Tool
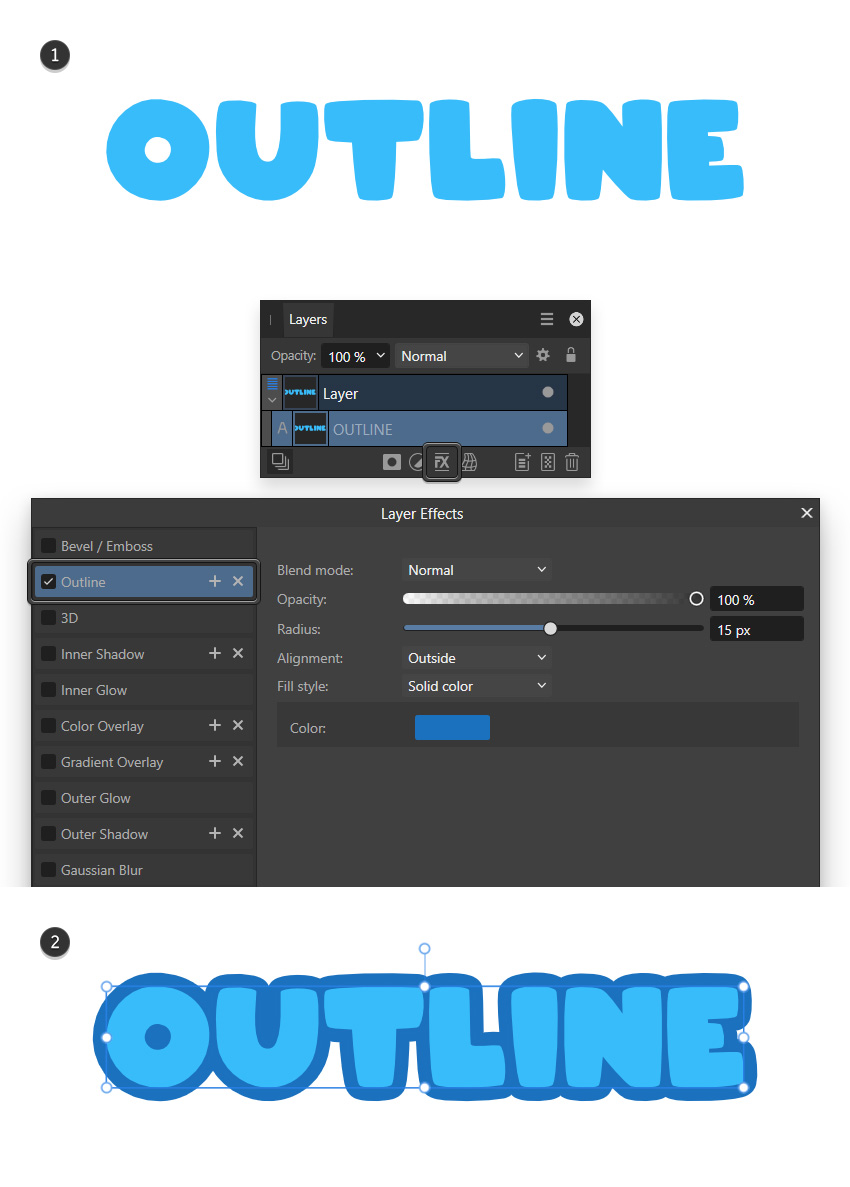
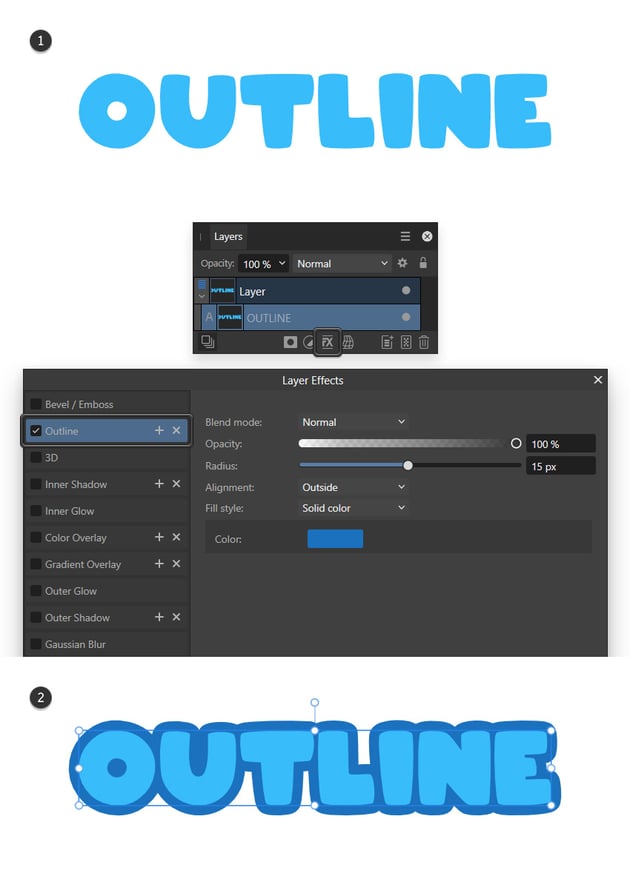
1. How to Outline Text in Affinity Designer Using Layer Effects
Select your text and click the Layer Effects button from the bottom of the Layers studio. Alternatively, you can go to Layer > Layer Effects in the menu bar.
Enable the Outline and feel free to play with all those settings to customize your outline.
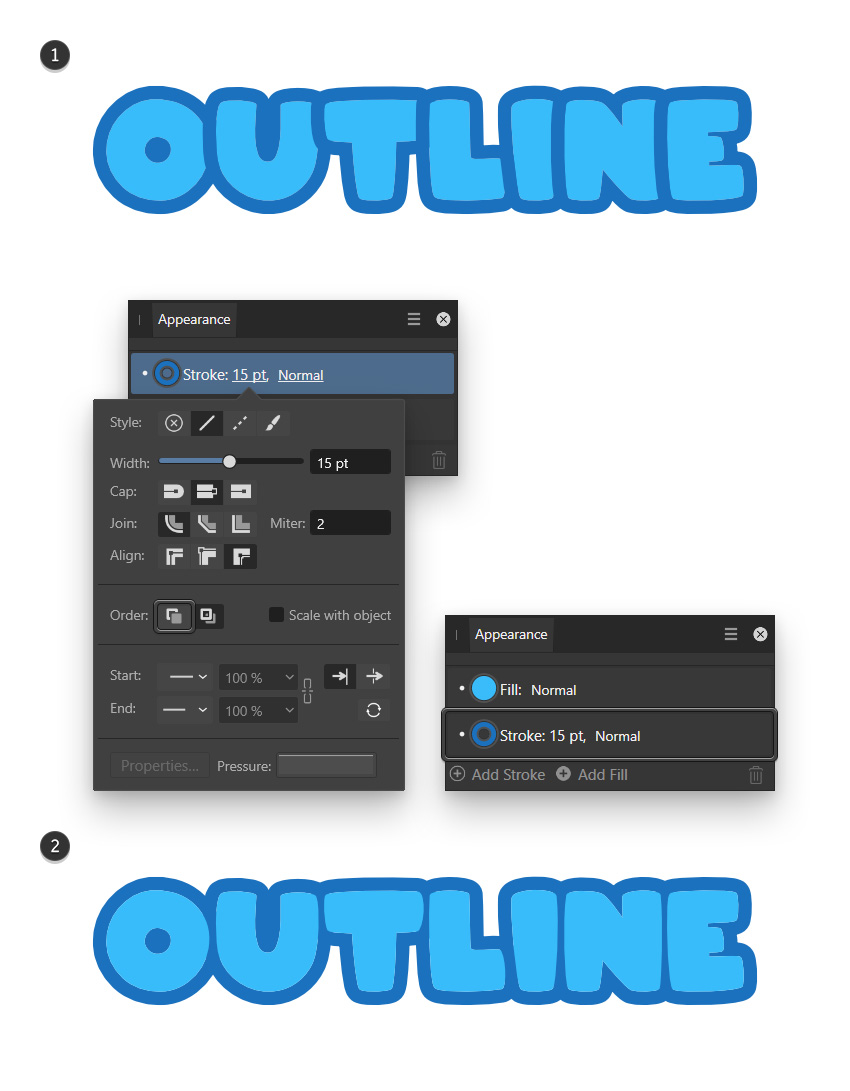
2. How to Outline Text in Affinity Designer Using the Appearance Studio
Select your text and focus on the Appearance studio. First, set the Stroke color, and then click the size to open the fly-out menu where you can adjust the rest of the stroke settings.
Remember to check that Draw stroke behind button if you wish to move the outlines behind the fill.


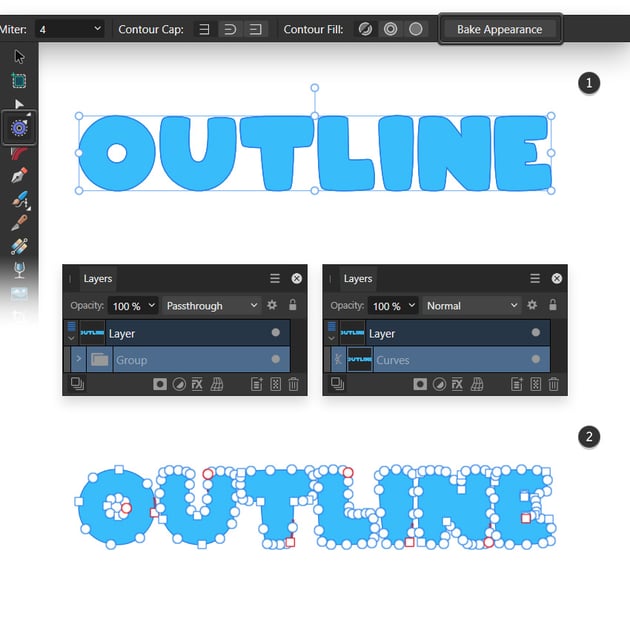
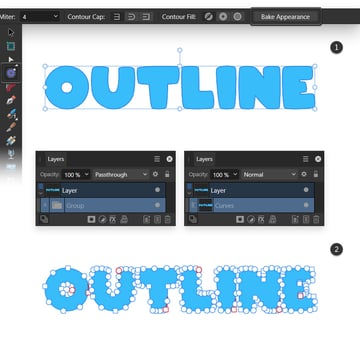
3. How to Outline Text in Affinity Designer Using the Contour Tool
Select your text and pick the Contour Tool (O), and then click that Bake Appearance button which will turn your text into vector shapes. Press Shift-Control-G to Ungroup your vector text, and then go to Layer > Geometry > Merge Curves to turn your vector letters into a single object.

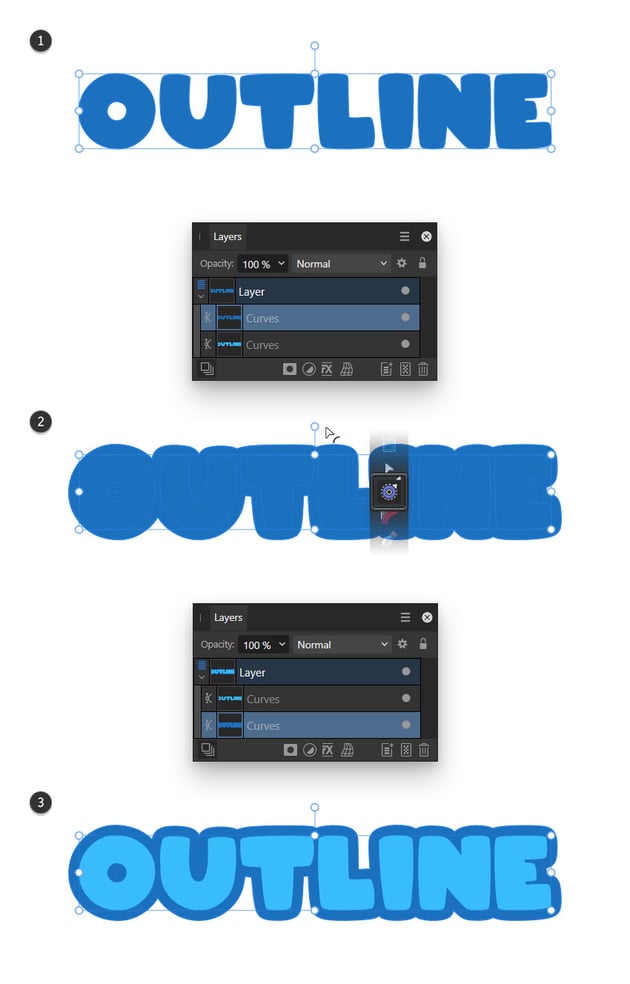
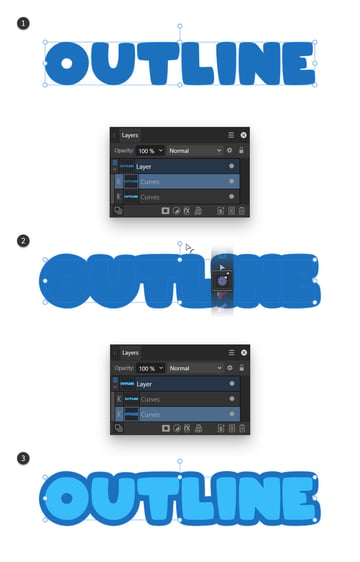
Now, press Control-C and Control-V to duplicate your vector text. Keep this copy selected and replace the existing fill color with the color that you wish to use for the outline.
Make sure that the Contour Tool (O) is still active and simply click and drag from the inside to the outside of your text, which will offset the original outline. Finally, press Control-[ to move this larger text behind the original one, and you’ve got your outlined text. The only downside of this technique is that you can’t edit the text once you turn it into vector shapes.

Congratulations! You’re Done!
Now that you’ve learned how to outline text in Affinity Designer, feel free to use these techniques in your future projects.
You can find some great sources of inspiration at Envato Elements, with interesting solutions to improve your design portfolio.
Want to Learn More?
We have loads of tutorials on Envato Tuts+, from beginner to intermediate level. Take a look!
Note: This tutorial was written with the aid of an artificial intelligence tool. It has been thoroughly edited and checked for accuracy by the Envato Tuts+ editorial team.