Amazon is one of the biggest e-commerce platforms on the planet, selling a huge variety of products.
In addition to keeping the world supplied with everything from top-of-the-range MacBooks, to dishwasher tablets and mattresses, Amazon offers an Amazon Associates program that makes it possible for anyone to earn commission, simply by referring people to the Amazon website.
Once you’re signed up to this program, you’ll receive a payment every single time someone purchases an Amazon product via your unique referral links. If you already have a blog or website, then the Amazon Associates program can be a way to start earning money from your site—or to boost the revenue you’re already generating.
In this article, I’ll show you how to quickly and easily build an Amazon Affiliates store, using WordPress, WooCommerce, and the WooCommerce Amazon Affiliates plugin.
Even if you’ve never heard of the Amazon Associates program before, by the end of this article you’ll have enrolled as an official Amazon Affiliate, and will have built a fully-functioning Amazon Affiliates store that you can place anywhere on your website.
What Is the Amazon Associates Program?
The Amazon Associates program enables you to earn commission, by promoting any product from Amazon’s huge catalogue of items. Using simple tools such as WordPress and the free WooCommerce plugin, you can quickly and easily build an Amazon Affiliates Store that links through to products currently listed for sale on Amazon, and then feature this store on your own website or blog.
Every time someone clicks a product in your online store, they’ll be redirected to Amazon where they can complete their purchase as normal. For every sale that originates from your referral links, you’ll receive a commission—and without any of the headaches usually associated with running your own online store, including sourcing products, tracking inventory, shipping orders, and responding to customer complaints.
The amount of commission you earn on every qualifying sale can vary across product categories, for example according to the Associates Program Standard Fees Schedule for the United States, you can expect to earn a 5% commission on any sale that falls into the Digital Music category, but a 10% commission on all products that are classified as Luxury Beauty.
You’ll find a complete list of percentages over at Associates Central, although percentages can vary across locales so make sure you’re reviewing the information for the correct locate, for example the information for the United Kingdom or the United States.
You’ll also receive a fixed fee every time a customer uses your affiliate links to sign up for certain Amazon services, for example in the US you’ll earn $3.00 every time someone enrolls for an Amazon Prime Free Trial, and $10.00 for every person who registers for an Audible Gold Digital Membership. Again, you’ll find a complete breakdown of these fees, known as “bountys” over at the Amazon Associates page for your specific locale.
At this point, you may be wondering about the differences between the Amazon Associates program and Amazon Affiliates, particularly since these terms are often used interchangeably. Essentially, you become an Amazon Affiliate by signing up to the Amazon Associates program, so by the end of this article you’ll be an Affiliate who’s enrolled in the Associates program.
Downloading the WooCommerce Amazon Affiliates Plugin
In this article, we’ll be building our Amazon Affiliates store using the WooCommerce Amazon Affiliates plugin.
When building a store, you’ll need to import each Amazon product that you want to promote, including all the data associated with each product, such as its description, reviews, and any recommended related products. The WooCommerce Amazon Affiliates plugin provides several ways to import Amazon products into your WordPress account, including importing potentially hundreds of products en masse, which can save you a significant amount of time and effort.
You can purchase this plugin via CodeCanyon:
- If you’re not already registered, then create a free Envato Market account.
- Head over to the CodeCanyon website, click the little Sign In button in the upper-right, and then enter your Envato account details when prompted.
- Once you’re logged into your account, head over to the WooCommerce Amazon Affiliates listing, click Buy Now and then follow the onscreen instructions to complete the purchase.
- When prompted, download your plugin.
- Unzip your plugin; the subsequent folder should contain several items, including a woozone.zip file, which you’ll need to upload to your WordPress account.
Adding a Third Party Plugin to WordPress
Once you have your plugin, the next step is adding it to your WordPress account:
- Log into your WordPress account, if you haven’t already.
- Select Plugins from WordPress’ left-hand menu, followed by Add New.
- Select the Upload Plugin button.
- On the subsequent screen, select Choose file and then upload the woozone.zip file.
- Select Install Now. This plugin should now be uploaded to your WordPress account.
- Once your plugin has been successfully uploaded, select Installed Plugins from WordPress’ left-hand menu.
- On the subsequent screen, find WooCommerce Amazon Affiliates and select Activate.
A new WZone item should now appear in WordPress’ left-hand menu; this is the sub-menu where you’ll access all of WooCommerce Amazon Affiliates’ settings.

Before you can start using WooCommerce Amazon Affiliates, you’ll need to install some default settings:
- Select WZone from WordPress’ left-hand menu, followed by Config.
- On the subsequent screen, select Setup / Backup.

- Find the Paste settings here section and give its accompanying Install settings button a click.
The default settings will now be installed, and the WooCommerce Amazon Affiliates plugin will be ready for you to use!
Don’t Already Have WooCommerce?
In this tutorial we’ll be focusing on WooCommerce Amazon Affiliates, but this plugin does require the free WooCommerce e-commerce plugin.
If you don’t already have WooCommerce installed, then you can install it by selecting Plugins from WordPress’ left-hand menu, then clicking Add New. Search for WooCommerce, and when you spot the WooCommerce plugin, click Install.
Activate the plugin and when prompted, launch the setup wizard and follow the onscreen instructions to add your payment information.
Partner Up With Amazon: Becoming an Amazon Affiliate
Before you can start promoting Amazon products on your website or blog, you’ll need to enroll in the Amazon Associates program.
To start, head over to the Amazon Associates website for your locale. For example, I’m using the UK version. Your Amazon Associate ID is location-specific, so if you want to operate across multiple locales, then you’ll need to complete the registration process multiple times, for different locates.
Select Join Now and log in with your Amazon account details. Specify where you want to receive your Amazon commission. By default, Amazon will make payments to your primary Amazon account. Once you’re happy with your payment information, click Next.
Enter all the top level website domains and mobile app store links where you plan to advertise Amazon products. There may be a chance that your site isn’t yet public, for example maybe you’re in the testing phases—however, even in this scenario you’ll still need to provide all the URLs that you plan to use.
Once you’re happy with the information you’ve entered, click Next. You’ll now be prompted to confirm that your website or mobile app isn’t primarily aimed at children under 13, as these are not eligible to display advertisements via the Amazon Associates program. Read through the information carefully, and if you’re confident that your website or blog qualifies, then select No, followed by Confirm.
Next, enter your preferred Associates Store ID. Find the What are your websites or mobile apps about? field, and enter as much information as possible. This data will be used to provide you with customized content, so make sure you supply accurate information about who your website is targeting, and the kind of products you intend to promote.
Then, move onto the following dropdown menus: Which of the following topics best describes your websites or mobile apps? Open each dropdown menu in turn and select your website’s Primary and Secondary topics, such as books, business, travel or movies.
Use the various checkboxes to specify the type of Amazon items that you intend to promote, for example digital downloads, electronics, or health and beauty. Use the dropdown menus to specify the category your website or mobile application falls into, for example whether it’s a blog or a comparison shopping engine.
In the Traffic & Monetization section, specify the method(s) you use to direct traffic to your website, such as forums, SEO, blogs, or lead generation.

Next, provide some information about how you utilize your website or app to generate income. If this is your first attempt to monetize your WordPress site, then you can select Amazon Affiliates is the only way I monetize my site.
Open the How do you usually build links? dropdown and choose from: Blog Editor, Content Management System, HTML Editor, Manually via text editor, or Other.Open the next dropdown menu and provide an estimate for the total number of unique visitors your application or website attracts per month. Then open the What is your primary reason for joining the Amazon Associates Program? dropdown. You can choose from the following options: To get rich content for my site; To monetize my site; or Other.
Next, let Amazon know how you heard about the Amazon Affiliates program. And finally, prove that you’re not a robot by navigating the CAPTCHA (always everyone’s favourite step!)
Confirm Your Identity
You’ll also need to verify your identity by providing a PIN number to Amazon over the phone:
Enter a telephone number that you can answer right now. Note that at the time of writing, this was an automated service and I received my phone call within seconds. Select Call Me Now, which generates a PIN. Make sure you keep this information to hand! After a few moments, you should receive a call on the telephone number you provided. When prompted, enter your PIN using your phone’s keypad.
Assuming that you’ve entered your PIN correctly, you should be presented with a Finish button; give it a click and you’ll receive your unique Amazon Associates ID!
At this point, you can either opt to enter your payment and tax information now, or to wait until later. You’ll need to provide this information before you can receive any payments, so you may want to complete this step now—to help keep this article’s word count under control, I’ll be skipping this step!
Now that you’re enrolled, you can view all the information from your Amazon Associates account, at any time, by logging into the Amazon Associates dashboard.
How Do I Import Amazon Products?
Before you can retrieve information about Amazon’s products and listings, you’ll need to generate an Access Key ID and a Secret Key, and then share this information with your WooCommerce Amazon Affiliates plugin.
You can generate these keys, using Amazon’s Product Advertising API, but there’s a catch: you can only access the Product Advertising API once your application or website has been manually reviewed by Amazon, and you’ve received final acceptance into the Amazon Associates program. In addition, Amazon will only review your application after you’ve generated a minimum of three qualified sales via your referral links, which must occur within 180 days of you joining the Amazon Associates program.
If you haven’t generated these three required sales just yet, then there’s a few potential workarounds, but in this tutorial we’ll be bypassing the Access Key ID and Secret Key requirements, by using the WZone Direct Import browser extension.
This Chrome extension makes it possible to import products into your WordPress account without having to enter an Access Key ID or a Secret Key. The downside, is that the WZone Direct Import extension can only import a single product at a time, which can become tedious if you have a large number of products to import. However, if you’re a new associate who’s eager to get started today, then you can use WZone Direct Import to build a basic store, at which point you can start working towards generating those three initial sales. Once you’ve generated these sales, you’ll gain access to WooCommerce Amazon Affiliates’ mass import feature, which will make populating your store much easier.
In this section, I’ll show you how to import a handful of products using the WZone Direct Import browser extension, before looking at how you can get your hands on the necessary Access Key ID and Secret Keys, using the Product Advertising API.
Importing Products With the WZone Direct Import Extension
To setup the WZone Direct Import browser extension:
- In your WordPress account, select WZone from the left-hand menu.
- Select Direct Import Extension.
- Click the Get the WZone Direct Import Extension here link. This takes you to an external website, where you can install WZone Direct Import.
- Select Add to Chrome.
- Switch back to your WordPress account, and then select WZone > Direct Import Extension from the left-hand menu.
- Double-check that the API URL matches your website’s URL, and then click Generate New Key.
- Select Save the Settings.
A banner should now appear, asking whether you want to authorize this extension; select Authorize. After a few moments, you should see a Website successfully added message.
To import your first product, using WZone Direct, first head over to Amazon and find a product that you want to add to your Affiliates store.
A WZone Direct Import banner should now open along the top of your screen; if you don’t see this banner then click the little arrow icon, and the banner should appear (where the cursor is positioned in the following screenshot).

Hover over the Where to Import text and select your website from the subsequent dropdown menu. Finally, click the little cloud icon (where the cursor is positioned in the following screenshot).

After a few moments, you’ll see a notification that this product has been imported successfully. If you switch back to your WordPress Dashboard, and select Products > All Products then you should notice a new item.

If you select View then you’ll see that all of this product’s information has been imported into your website, along with an Add to cart link that’ll allow users to add this item to their shopping cart. Whenever a user is ready to checkout, they’ll automatically be redirected to the relevant Amazon page, where they can complete their purchase as normal—and you’ll receive your commission!

Generating Amazon Keys: Accessing the Product Advertising API
Once you’ve generated three qualified sales, the Amazon team will review your website to make sure you’re in compliance with their Associate program’s Operating Agreement. Assuming that you pass this check, your application will be approved and you’ll gain access to Amazon’s Product Advertising API. At this point, you can generate an Access Key ID and a Secret Key, and start using the WooCommerce Amazon Affiliates plugin to import products en masse, saving you a significant amount of time and effort.
Let’s look at how you’d generate these keys, using the Product Advertising API:
- Head over to the Amazon Associates Console and sign into your account.
- Select the Tools tab, followed by Product Advertising API.
- Choose Join.
- When prompted, provide the requested information.
- On the Success page, select Manage Your Account.
From here, select AWS Security Credentials Console. Note that if you don’t already have an AWS (Amazon Web Services) account, then Amazon will create one for you automatically. In the subsequent popup, select Get Started with IAM Users. You will now be guided through the process of creating an IAM user and granting them permission to access the Product Advertising API.
- Select Add user.
- Give this user a memorable name, such as ProductAdverting-user.
- Find the Access Type section, and then select Programmatic access.
- Select Next: Permissions.
- Choose Attach existing policies directly.
- Select Create policy.
- On the subsequent page, find the Create Your Own Policy section, and choose Select.
- On the Review Policy page, enter a memorable Policy Name such as AmazonProductAdvertisingAccess.
- In the Description section, provide some information about this policy, for example: This policy provides full access to the Product Advertising API.
In the Policy Document field, copy/paste the following:
{
    "Version": "2012-10-17",
    "Statement": [

        {
            "Effect": "Allow",
            "Action": "ProductAdvertisingAPI:*",
            "Resource": "*"
        }
    ]
}
- Select Validate Policy, followed by Create Policy.
- Return to the Add user page. In the Policy Type section, search for and then select the policy you just created.
- Select Next: Review and check the information you’ve just entered. If you’re happy to proceed, then click Create user.
You can now either select Download.csv which downloads a CSV file containing your Access Key ID and Secret Key, or you can view your keys as plain text, by selecting Show. Just be aware that for security reasons, you will not be able to retrieve these keys again, so it’s recommended that you download the CSV file and store it somewhere safe.
Adding Amazon AWS Keys to WordPress
Now you have your Access Key ID and Secret Key, it’s time to share this information with the WooCommerce Amazon Affiliates plugin:
- In WordPress’ left-hand menu, select WZone > Config.
- Make sure the General & Amazon tab is selected.
- Find the Add Multiple Keys section and copy/paste the Access ID Key and Secret Access Key into the two text fields.
- While we’re here, open the Amazon Location dropdown and choose the locale where you registered as an Amazon Affiliate.
Now scroll to the Your Affiliate IDs section, and copy/paste your Affiliate ID into the correct geographical location. If you can’t remember your Affiliate ID, then log into the Amazon Associates dashboard and check the upper-right corner, which contains your unique Affiliate ID.
Import Hundreds of Amazon Products: WZone’s Insane Mode
Now we have our keys, we can finally use WooCommerce Amazon Affiliates to import potentially hundreds of Amazon products, with a few clicks of the mouse!
You can import Amazon products en masse, using the plugin’s Insane mode. This mode provides several import methods, ranging from manually searching for products using a keyword, to cherry-picking Amazon’s best sellers, or searching for products using their ASIN (Amazon Standard Identification Number) codes.
To access Insane mode:
- In WordPress, select WZone from the left-hand menu.
- Select Insane Import Mode.
Insane Import Mode is divided into three tabs:
Search for Products
In this tab, you can search for products using a keyword or phrase. Since Amazon sells millions of different products, you may also want to consider restricting your searches to specific Amazon departments, or setting a maximum number of pages that the plugin should search.

Once you’re happy with the information you’ve entered, click Launch Search. After a few moments, WooCommerce Amazon Affiliates will return a list of all the products that match your search criteria. At this point, you can select the product(s) that you want to import and make some optional changes, for example restricting the maximum number of images imported per product.
When you’re happy with your selection, click Import products.
Grab Products
This is where you can identify and import products that feature on any of the following Amazon pages:
To import products that fall into any of these categories:
- Navigate to one of the above pages.
- Copy the URL.
- Switch back to WordPress, and find the Amazon URL field.
- Open the Page Type dropdown and select the corresponding category from the list, such as Best sellers or Most gifted.
- Click Get ASIN Codes which will return a list of all products that fall within this category.
- The WooCommerce Amazon Affiliates plugin will now return a list of products. Select all the products that you wish to import.
When you’re happy with your selection, click Import Product.
Already Have a List?
If you have a list of ASIN codes for all the products you want to import, then you can enter this information in the Already have a list? tab.
- Find the ASIN Codes section. Either type each code manually, or copy/paste a list of codes into the text box. Whatever approach you take, make sure you place each code on a separate line.
- Select Add ASIN Codes to queue. All of your products will now be imported.
- Review the list of products, and when you’re happy with your selection click Import Products.
Open for Business: Building Your Amazon Affiliates Store
So far, we’ve enrolled in the Amazon Associates program and imported at least one Amazon product into our WordPress account. At this point, we’re finally ready to build our Amazon Affiliates store, and start earning that all-important commission!
You may not have noticed, but when you installed the free WooCommerce e-commerce plugin, it automatically created a Shop page. We can use this page to quickly and easily build a fully-functioning Amazon store.
To view your Shop:
- In WordPress, select Pages from the left-hand menu.
- Select All Pages.
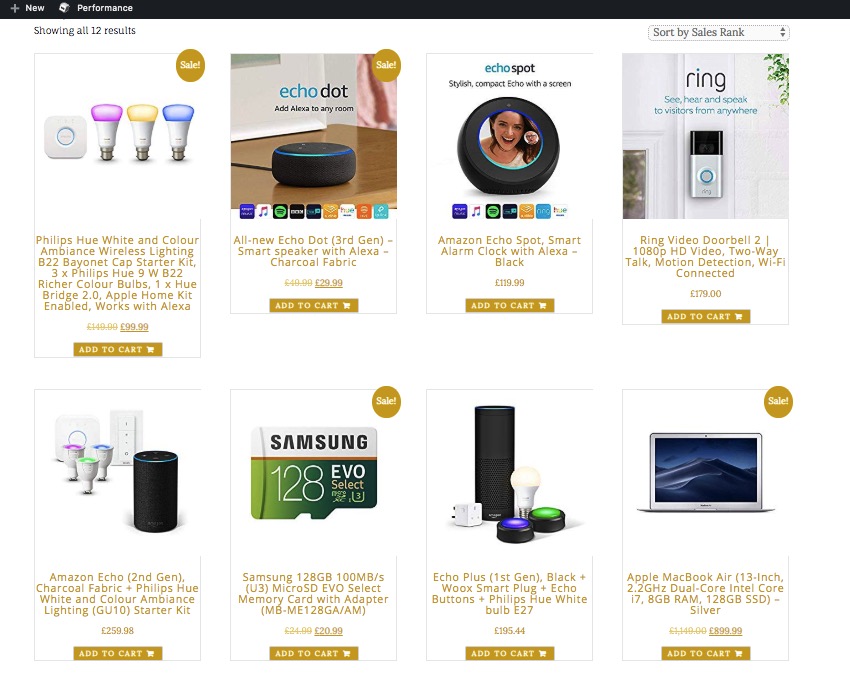
- Find the Shop page, hover over it and then click its accompanying View link. This will display your Shop, which should already feature all the products you’ve imported from Amazon.

Select any product, to view more information about that product, including its description, any customer reviews, and even some recommendations for related products.
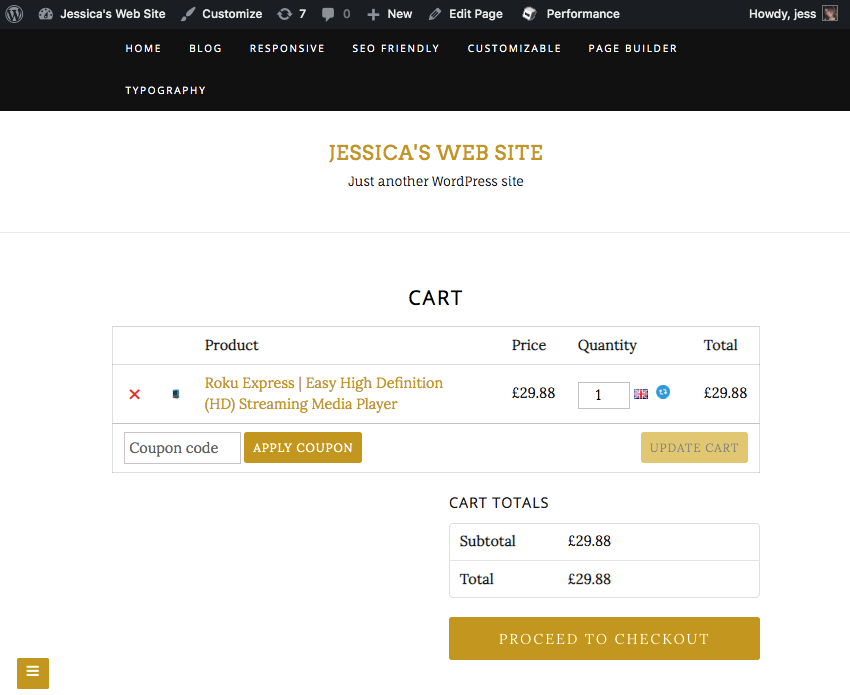
To test the purchase workflow, select Add To Cart, followed by View cart.

- Select Proceed to checkout. You will now be redirected to the appropriate section of Amazon, ready for you to complete your purchase.
There’s lots of different ways that you can customize your Amazon Affiliates store, so spend some time exploring WordPress’ various menus. When you’re happy with how your store looks and functions, the only thing left to do is publish it!
You publish an Amazon Affiliates store just like another other WordPress page – so simply hit that Publish button and your store will be online and open for business!

Conclusion
In this article, I showed you how to setup and publish your own Amazon Affiliates store. If you’ve been following along with this article, then you’ll have enrolled in the Amazon Associates program, imported some initial products, and published your Amazon-powered store, ready to start earning commission.
If you imported some initial products using the WZone Direct Import browser extension, then your next task is to generate three qualified sales. Once you have three confirmed sales, you’ll be able to create your Access Key ID and Secret Key, and will have access to WooCommerce Amazon Affiliates’ time-saving Insane mode.
While you’re here, check out some of our other posts on WooCommerce and WordPress e-commerce!