Ionic is a popular mobile app framework that helps you build hybrid mobile apps quickly, using HTML, CSS, and JavaScript. In this series, you learn how to set up and build your own mobile apps with Ionic by creating a fully functional mobile app together. We start with an introduction to Ionic and learn how to get started with the tooling.
In this tutorial, we cover:
- what Ionic is and its various components
- why you would choose to use Ionic
- how to set up your machine for building Ionic
hybrid apps - the development workflow, from starting to deploying
apps
1. Ionic Stack: Cordova, Angular, Ionic
Ionic is several technologies that are
neatly bundled and managed together. I like to think of Ionic as a stack of
several frameworks. The interplay between these technologies is what ultimately
creates the resulting app and provides a good developer and user experience.
Cordova: Hybrid App Framework
As a foundation, Ionic uses Cordova
as the hybrid app framework. Essentially, it allows a web application to be
bundled up into a native app that can be installed on a device. It embeds a web view, which is an isolated browser instance that runs your web applications.
It also provides an API that you can use to communicate with the device
itself, for example, to ask for GPS coordinates or access the camera. Many of these
additional hardware features are enabled through the Cordova plugin system, so you only have to install and use the features you need. I introduce you to more Cordova in a later tutorial.
Angular: Web Application Framework
Angular is a well-known JavaScript framework for building web applications, and Ionic is built on top of it. Angular provides the web application
logic used to build the actual application.
If you are already familiar with it, then you’ll be able to quickly pick up the Ionic features. If you are
new to Angular, you can continue reading and you’ll start to pick up some basic
Angular.
I won’t be covering Angular in much detail, so I recommend taking some time to learn the basics by reading the
Angular documentation.
Ionic: User Interface Framework
Ionic’s primary selling feature is a clean set of user interface
components that are designed for mobile. When you build a native app, there are
native SDKs that provide you with interface components, such as tabs and dialogs.
Ionic provides a similar set of interface components for use in hybrid
apps. Ionic is fond of claiming it is the missing SDK for hybrid apps, and it
fills that role quite well. In addition, Ionic has a number of other significant features that make it a very compelling choice.
2. Why Ionic
Ionic is more than just a set of user interface components, it is also a set of developer tools and an ecosystem for rapidly building hybrid mobile apps. I’d like to cover why hybrid apps are a great fit for web developers, details about the Ionic platform and tooling, and when Ionic might not be the right fit.
Why Hybrid Versus Native or Mobile Web
There are old debates about the quality of different
approaches to building apps. A few months ago, I wrote a detailed article about the three types of mobile experiences. I recommend that you review it if you are uncertain
about the strengths and weaknesses of these different approaches on modern devices.
Hybrid apps are the sweet spot in providing web developers with the ability to use the skills they already know to build mobile apps that can
look and feel like native apps.
Great Tooling & Ionic Platform
Very few of the mobile frameworks available have tooling
that comes close to the quality of Ionic’s tooling. We take a closer look at the primary tooling available in the rest of the tutorial, but I’d like to cover some of the features that you’ll likely find useful over time.
Ionic CLI
Ionic’s CLI tooling is first rate and provides a lot of features that help you start a project, preview it, and ultimately build it.
Ionic Platform
Ionic provides a number of features, some free and others paid, that are useful for professional development, such as app analytics, push notifications, and deployment tools.
Ionic Market
There are a number of free and paid add-ons for Ionic that can be easily integrated into your app. There are themes, unique components, and other plugins.
Ionic Limitations
Ionic isn’t a perfect fit for every mobile app. Consider the
following cases to decide if Ionic is the right fit for your project.
- Ionic doesn’t support every platform. iOS and
Android are fully supported, but Ionic may work with others
to some degree. It also works best on more modern versions. Supporting old(er) devices or old(er) operating systems may result in degraded performance, usually due
to poor browser implementations. - Ionic doesn’t provide a true native app. If
your app requires heavy integration with the native platform, such as intensive
graphics, Ionic may not be able to provide the full power needed. This is due to the
need to interface the hardware from the web application trough Cordova, which
can add some lag.
In other words, if you aren’t building an app for old
devices and don’t have the need to program a lot at the hardware level, Ionic is
more than capable of providing a quality app experience for your users.
3. Installing Ionic and Cordova
Ionic comes with a fantastic CLI (Command Line Interface) to help start, build, and
deploy your apps. You’ll use the CLI heavily during development. Ionic also
relies on Cordova, so you’ll be using it indirectly.
You
must have Node.js installed to begin. If you
don’t, take a moment to install it on your system. I use Node.js 5.6 for this tutorial and I recommend to be on the latest stable version.
Installing Ionic and Cordova is as simple as installing two
global node modules. If you’ve done this before, then this should look quite
familiar. Open your terminal and run the following command:
npm install -g [email protected] [email protected]
This may take a few moments, but you should get a success
message that says they are both installed. You can verify this by running the
following to see the version numbers output.
ionic -v && cordova -v
It should output the version of both Ionic and Cordova. For
the purposes of this tutorial, I’m using version 1.7.14 of Ionic and version 6.0.0 of Cordova.
There are quite a few features in the Ionic CLI and you can
always get a quick reference by running ionic
. You can also look at the documentation online
help
for more support if needed.
Other Installations
Ionic doesn’t bundle all of the tooling required to build an
app, it relies on some additional SDKs and software provided by Apple and/or
Google. It is good to read and follow the platform guides provided by Cordova to set up for each platform you wish to work with.
You can do this at a later time, but you’ll need to set up
the platform tooling before you can preview or emulate an application on a simulator
or device.
4. Ionic Development Flow
There is a general set of steps that you’ll go through when
developing an Ionic app. These steps have corresponding CLI commands to help you. Let’s
take a look at the primary commands that represent a typical development flow
for building Ionic apps.
Step 1: Starting a Project
Assuming you’ve already got a basic idea what you’re
planning to build, the first step is to create a new project. Ionic projects
are based on Cordova and require some scaffolding for Cordova to later
understand your project. Ionic has several prebuilt templates that you can use
to generate a starter project, but you can also provide your own.
To start a project, run the ionic start sample command. It generates a new folder in the
current directory based on the name you provide (i.e. sample). While the
command runs, it downloads the files from GitHub that are needed for the
project, and initializes the project for you. It uses the default project, which has a basic app with a basic tabs interface.
Run cd sample to
navigate into the new directory. When you inspect the directory, you’ll notice a few files and directories. Don’t concern yourself too much with every
single file at the moment. Here are a few things you’ll need to work with initially.
- cordova.xml: This file contains the configuration for Cordova.
- ionic.project: This file contains the configuration for Ionic.
-
/plugins: This directory holds any installed
Cordova plugins. Initially, this is loaded with a couple default plugins that
Ionic preinstalls for you. -
/platforms: This directory holds assets for any
platforms that you’ve configured for your app to target, such as Android and
iOS. Ionic may install a platform for you by default. - /scss: This directory contains the source files for the SASS styles for the application. You can customize it as you’ll find out later.
-
/www: This directory holds the web application
files that are loaded by Cordova. All of your JavaScript, HTML,
and CSS files should live in this directory.
For the rest of this tutorial, we’ll work with the project you just
generated and see how to develop and preview the app.
Step 2: Develop and Preview the App
You’ve started a project, now you want to start developing.
During the initial development, you’ll likely preview your work in a browser.
After all, an Ionic app is really just a web application. Ionic comes with a local
development server that builds and serves your app.
To start the development server, run ionic serve. As soon as this runs, it opens a preview of the
app in your default browser. At this point, you can use the browser’s developer
tools to inspect the application, watch for errors, and any other task you
would normally do when building a web application.
The server continues running
in the background and watches the project for file changes. When it detects
that you’ve edited and saved a file, it automatically reloads the browser for you.
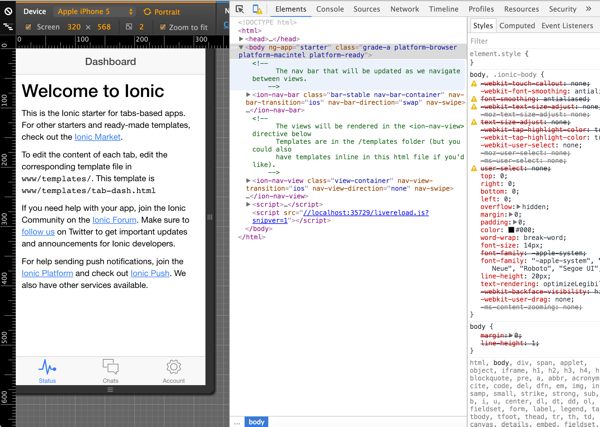
I recommend using Chrome as the browser because of its great developer tooling. One particularly useful feature is the ability to
emulate device dimensions, which makes it easy to see what the app looks like
on a particular device. It isn’t a real emulator that executes the app like a
real device, it just mimics the app dimensions.
Step 3: Add a Platform
Cordova supports a lot of different types of mobile devices,
which are called platforms. You have to register the platforms you wish to
target with your app and install the appropriate project files. Luckily, this
is mostly managed through the Ionic CLI. Ionic fully supports the iOS and Android
platforms.
To add a platform, run ionic
. Replace
platform add androidandroid with ios to add iOS instead. Once added, you’ll see a new folder in
the platforms directory of your project. This folder contains platform specific files. In general, you need to avoid making too many changes to the files in this directory.
If you have any issues, you can remove the platform and add it again. To remove a platform, run ionic platform remove android.
Step 4: Emulate the App
At some point, you’ll want to start previewing your app in a
real emulator. Emulators are essentially software versions of a real device. This
is really useful to quickly test how the app should behave on a real device.
Be aware that emulators don’t have every feature of a physical device since they are only software emulating devices.
Some of your code may not work as expected, for example, if
you are expecting to use the device’s contact list. Typically, only the features
that integrate with hardware may not work as expected, but for most things it
should work fine.
Setting up emulators can be a bit of a task, depending on
what type of computer you use and what you need to test. Emulating an iPhone
can only be done on a computer running OS X, but Android can be emulated on any operating system.
To set up emulators, refer to the platform guides I linked to earlier.
Once you have that done, you can emulate using ionic emulate android -c -l. Like before, replace android with ios if you are targeting iOS. This builds, installs, and launches the app in the simulator. This can take a few
moments, so you may want to use some of the helpful live reload features like you did earlier in the browser.
You can use the optional -l flag to have the app live
reload in the simulator (without the need to rebuild and reinstall). This is
great as long as you aren’t changing anything related to how the app is built
(such as Cordova settings). You can also use the optional -c flag to have any console
messages forwarded to the terminal log. I use them almost every time.
Step 5: Deploy the App to a Device
The best way to preview your app is to actually install
and run it on a device. This requires that you’ve set up a platform and have a device
connected to your machine. Doing this requires some configuration that varies based on the type of device you have. You can refer to the platform guides above to connect your device.
Once you have a connected device, it is quite simple to run
the app on it from the command line. Use ionic
and Ionic builds, deploys, and launches your app. Again, you can substitute
run android -c -lios for android. Just like
the emulate command, you can use the optional -l and -c flags to enable live reloading and
console logging to the terminal.
Once the app is on your device, you can disconnect it and the app will remain installed on the device. This is helpful if you want to use the app over a period of time to test how it behaves or just show it off to others.
5. What About Ionic 2
I frequently get asked about Ionic 2 and whether people
should use it. At the time of writing, early 2016, there isn’t a simple answer yet.
I’ve worked with it and built some prototypes, and I know a few people that have built
production apps with it, but it isn’t ready yet.
The good news is that learning Ionic 1 today means that
learning Ionic 2 will be fairly straightforward. Most of the Ionic-specific things you’ll learn in this series remain fairly consistent between versions. The biggest changes will occur
because of Ionic 2 being built on Angular 2.
So while you could build Ionic 2 apps today, it isn’t officially released yet. You aren’t wasting any
time by learning Ionic 1 now. Upgrading should be relatively
straightforward once Ionic 2 is officially released.
Summary
In this tutorial, we covered a lot about Ionic.
- You learned about the strengths and a few weaknesses of Ionic.
- You set up your computer for building Ionic apps.
- You created your first project and previewed it in the browser.
- You set up an emulator and/or connected device to preview your app.
In the next part of this series, you’ll start to
build a real, functional app using the techniques outlined in this tutorial.