GitHub Copilot is an AI pair programming tool. This is a fancy way of calling it a “second programmer” that works within your source code editor. Copilot gives you autocomplete-style suggestions as you code, helping you code faster and more efficiently.
This article will walk you through the steps for installing and setting up GitHub Copilot in VS Code. You’ll then learn how to use Copilot to speed up the coding process.
Requirements
To use GitHub Copilot, you need to have a GitHub account. If you don’t already have one, you can register for an account on the official website.
Make sure you’re signed into your GitHub account before signing up for GitHub Copilot. The service comes with a 30-day free trial, after which you’re required to subscribe for one of the paid plans.
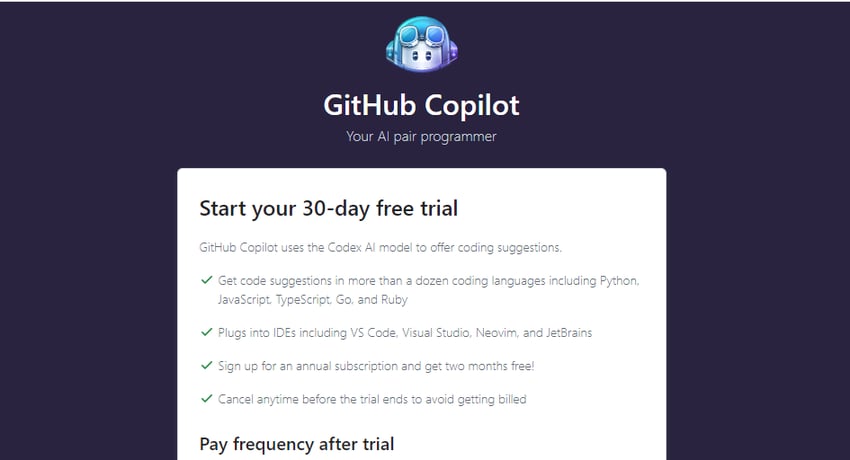


If you have no intention of subscribing for a paid plan, then make sure you cancel GitHub Copilot before the trial ends to avoid getting billed.
Finally, you’ll need to have Visual Studio Code installed on your local machine. To install Visual Studio Code, visit the official VS Code downloads page.
Installing the GitHub Copilot Extension
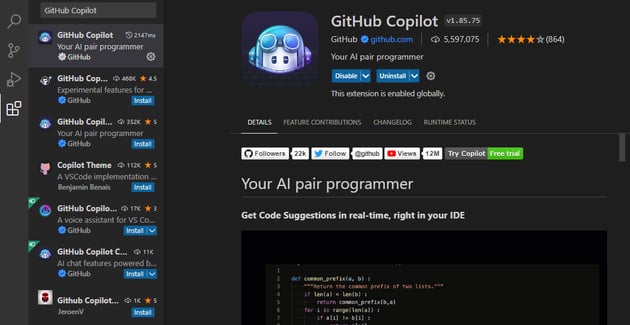
Start by launching your Visual Studio Code editor. Next, click on the Extensions tab. Use the search box to search for GitHub Copilot. Install and activate the extension (it has over 5 million downloads at the time of writing this):


Once fully active, a prompt will appear telling you to sign into GitHub. Click the button to sign in. The authentication process will be quick because you’re already signed into GitHub and GitHub Copilot. If the process was successful, you’ll find the Copilot icon at the lower right hand corner of VS Code.
Note that GitHub Copilot is a paid service ($10/month at the time of writing) but there is a 30-day free trial.
Ask Copilot Technical Questions
While Copilot is known to be a coding assistant, you can ask it technical questions directly. This is perfect if you’re studying for a technical interview and want to quickly get answers to common interview questions.
To ask GitHub Copilot a question, put your question in a comment preceded by :q:
1 |
// q: What is a class in object-oriented programming?
|
Once you see a suggestion by Copilot (in grey color), click the tab key on your keyboard to accept it as your answer. The answer is preceded by :a. The tab key works on both Window and Mac computer.
You can also ask specifically about one of those answers, (i.e. get more information about the answer). Copilot will figure out what you’re about to ask and autocomplete the question for you.
Using Copilot with HTML and CSS
Now let’s turn our attention to coding, starting with an HTML example. Copilot will help speed up the process of writing HTML. Let’s see how.
Create two HTML files in your project. The files should be named example1.html and example2.html. Next, open example1.html file in VS Code.
Start by typing the doctype declaration. When you click enter on your keyboard, Copilot already knows that the <html> tag is going to be the next obvious tag to add. So it suggests the tag (click tab to accept it)
Within that, Copilot suggests that you add the <head>, then <title>. It closes the <head>, and sure enough, <body> is suggested along with an <h1> tag and paragraph.
If you want to generate an element, you simply describe the element you want to generate in a comment and press Tab. Here’s an example:
1 |
<!-- An h1 with inline blue heading -->
|
This will generate an <h1> element with blue text:
1 |
<h1 style="color:blue">This is a blue heading</h1> |
You can also ask for a bulleted list with the following prompt:
1 |
<!-- Create a bulleted list -->
|
Here’s the result:
1 |
<ul>
|
2 |
<li>First item</li> |
3 |
<li>Second item</li> |
4 |
<li>Third item</li> |
5 |
</ul>
|
As per best practices, styles should always be in a separate stylesheet. Create a styles.css file in the same folder as the HTML files.
The following prompt will generate the link element that references the stylesheet. Write the prompt within the <head> tags in HTML:
1 |
<!-- Reference the stylesheet named style.css -->
|
This would be the output:
1 |
<link rel="stylesheet" type="text/css" href="style.css"> |
If the stylesheet file is inside another folder, just describe the directory structure in your prompt and Copilot will use the correct URL in the href.
Copilot Facilitating Bootstrap
With a simple “Add Bootstrap” prompt, Copilot will generate a link that references Bootstrap on the CDN. This is better than having to search the web looking for the up-to-date link to Bootstrap.
Copilot will also apply the Bootstrap classes on your elements. When you start a <div> element and hit the space bar, Copilot knows that you most likely want to add the alert and alert-success classes, so it suggests it.
1 |
<div class="alert alert-success"> |
2 |
<strong>Success!</strong> This alert box represents a successful or positive action |
3 |
</div>
|
Just press Tab to accept the suggestion.
Regex Simplified With Copilot
If you’ve ever dealt with regex, you should know how confusing it can be to interpret the patterns. But with Copilot by your side, writing regular expressions can be a lot easier because you can ask Copilot to write a particular pattern for you.
For example, if you wanted to a regular expression that matches a phone number, you’d the following prompt in a JavaScript file:
1 |
// Regex to match the phone number in the format (xxx) xxx-xxxx
|
If you hit Enter on your keyboard, Copilot will give you the regex you requested:
1 |
var phoneRegex = /^(d{3}) d{3}-d{4}$/; |
Regex is commonly used for testing. Which is what the next section is all about.
Unit Testing Made Easy with Copilot
Copilot makes the unit testing super easy. Let’s see an example.
The following function takes a string, checks if it matches the regex, parses the first and last values, before joining the number based on the operator:
1 |
function calculator(str) { |
2 |
var regex = /^(d{3}) d{3}-d{4}$/; |
3 |
var match = str.match(regex) |
4 |
|
5 |
var num1 = parseInt(match[1]) |
6 |
var num2 = parseInt(match[3]) |
7 |
|
8 |
switch (match[2]) { |
9 |
case "+": |
10 |
return num1 + num2; |
11 |
case "-": |
12 |
return num1 - num2; |
13 |
case "*": |
14 |
return num1 * num2; |
15 |
case "/": |
16 |
return num1 / num2; |
17 |
default: |
18 |
return "Invalid operator"; |
19 |
}
|
20 |
}
|
Now you can tell copilot to test that function with console.log() using a prompt like this:
1 |
// test calculator function
|
Copilot will log each of the operations and give the output:
1 |
console.log("1+1") // 2 |
2 |
console.log("1-1") // 0 |
3 |
console.log("1*1") // 1 |
4 |
console.log("1/1") // 1 |
With the following prompt, Copilot will generate the coding for unit testing the function:
1 |
// create unit test for calculator function
|
2 |
|
3 |
var assert = require("asser") |
4 |
assert.equal(calculator("1+1"), 2, "calculator can add") |
It’ll not just generate the code, but also suggest other operations to test besides addition.
Choosing From Multiple Solutions by Copilot
So far we’ve seen Copilot give us suggestions. But always keep in mind that you don’t always have to choose the first suggestion. If you don’t like the first solution, you can always choose another one.
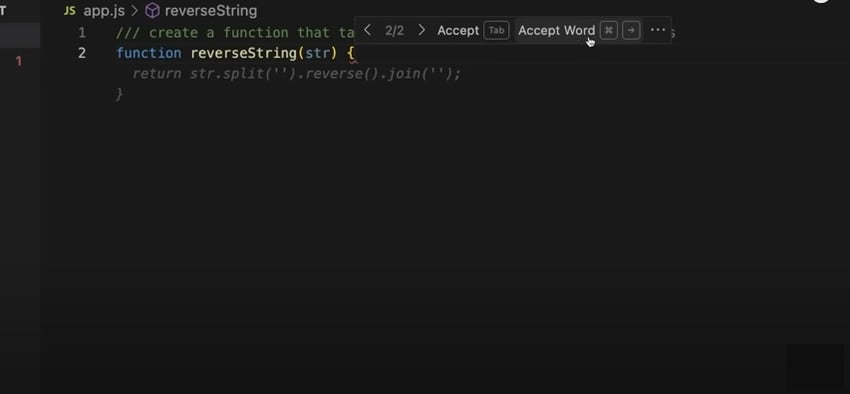
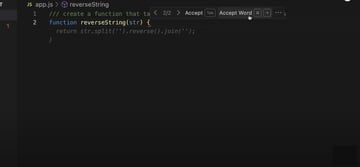
Consider the following prompt:
1 |
// Create a function that takes a string and returns it backwards
|
Start tabbing to see the suggestions. If you aren’t satisfied with the first one, hover on the text and navigate to the next solution (using the > icon). Once you arrive at an acceptable solution, you can then click the Accept button.

Prompting Copilot With Multiple Conditions
When writing your Copilot prompt, you can specify multiple conditions in your prompt. This is quite useful if you want to write a complex program with different rules.
Let’s say you wanted to parse a list of expenses with some conditions. Inside the function, you’ll ask Copilot to do three things in your prompt (represented by the comment):
1 |
function parseExpenses(expenses) { |
2 |
/* Parse the list of expenses and return the array of
|
3 |
triples (date, value, currency). Ignore the lines starting with //.
|
4 |
Parse the date using Date()
|
5 |
*/
|
6 |
}
|
Here we specified three conditions: parse the list, ignore comments, and parse the date. Hit Control + Enter your keyboard and pick the best solution from the suggestions.
One of the suggestions when I tested this was the following:
1 |
return expenses.split("n") |
2 |
.filter(line => !line.startsWith("//")) |
3 |
.map(line => line.split(",")) |
4 |
.map(([date, value, currency]) => [new Date(date), Number(value), currency]); |
That’s pretty good. But watch out, some of the suggestions that were suggested for me used line[0]=="/" to test which lines to ignore. This isn’t quite what we asked for!
It’s important to read the code generated by Copilot or any other AI tool carefully to make sure it matches what you expect.
Conclusion
In this tutorial, we looked at the basics of using GitHub Copilot. Just write your prompt in a comment and press Ctrl + Enter to see the suggestions.