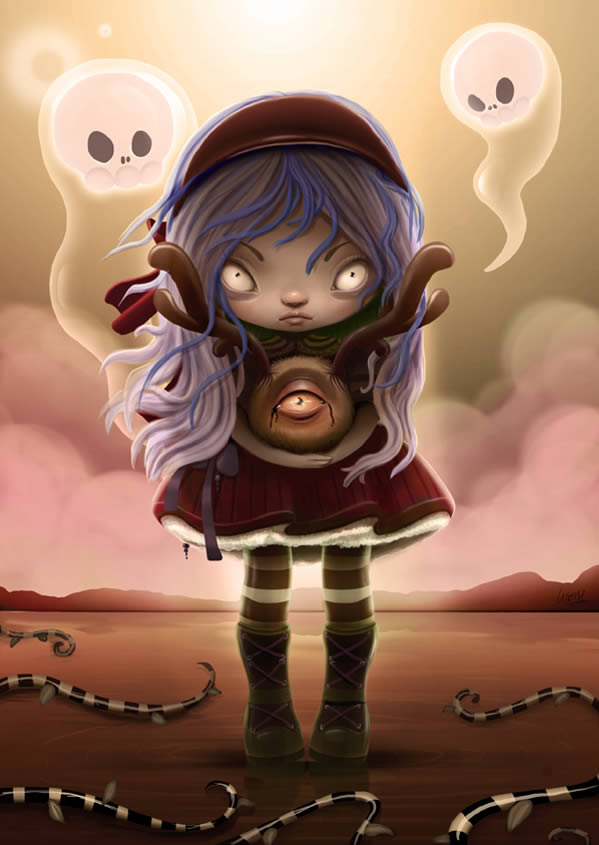
As the fall approaches in many parts of the world, designers and illustrators might already be thinking about the upcoming Halloween holiday, especially those that are based in the U.S. In this tutorial, we will show you how to illustrate a cute and scary children’s illustration using techniques that you could easily incorporate into your own Halloween artwork. Let’s get started!
Speed Painting Video
1. Before You Begin
Before we begin, I would like to discuss some things about the process that I will use. For this illustration I will only use a basic Round Brush, using the settings below.
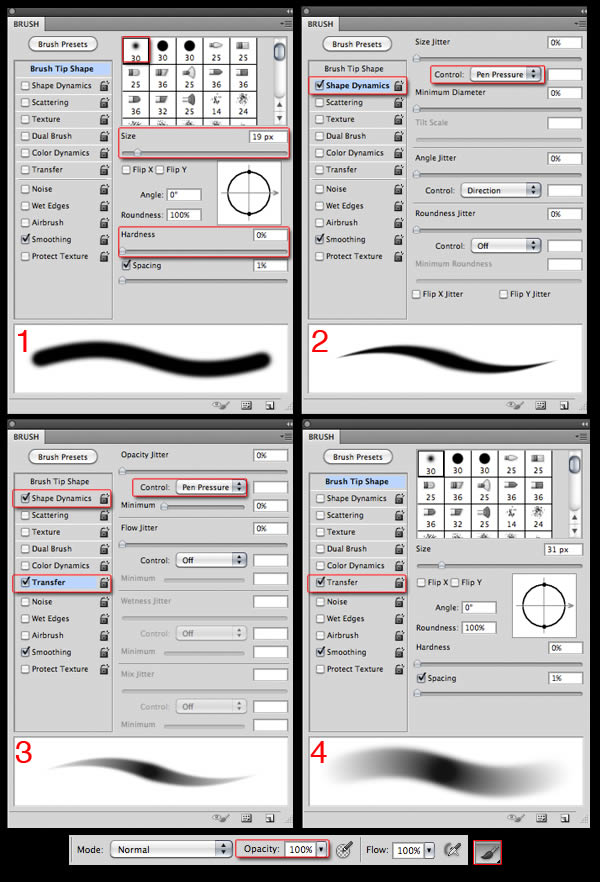
1-In Brush Tip Shape you can choose between the brushes you have loaded, change the size, hardness or spacing (this last one will leave it to 0). 2-In Shape Dynamics, select Control: Pen Pressure to activate the pen pressure. 3-In transfer, select Control: Pen Pressure to control the flow of paint from the pen pressure. 4-You can combine all of these features along with brush Opacity to get the stroke you want. Whether to make precise lines or soft and smooth color transitions.
2. Create the Document
Step 1
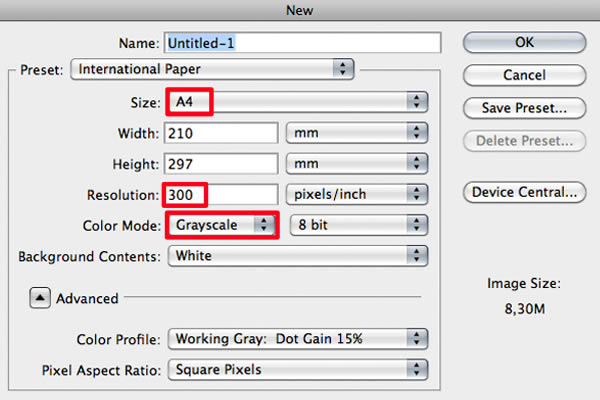
Create a New File by going to File > New (CMD/CTRL + N). In Preset select International paper and set the size as in the image below.
3. Create the Sketch
Step 1
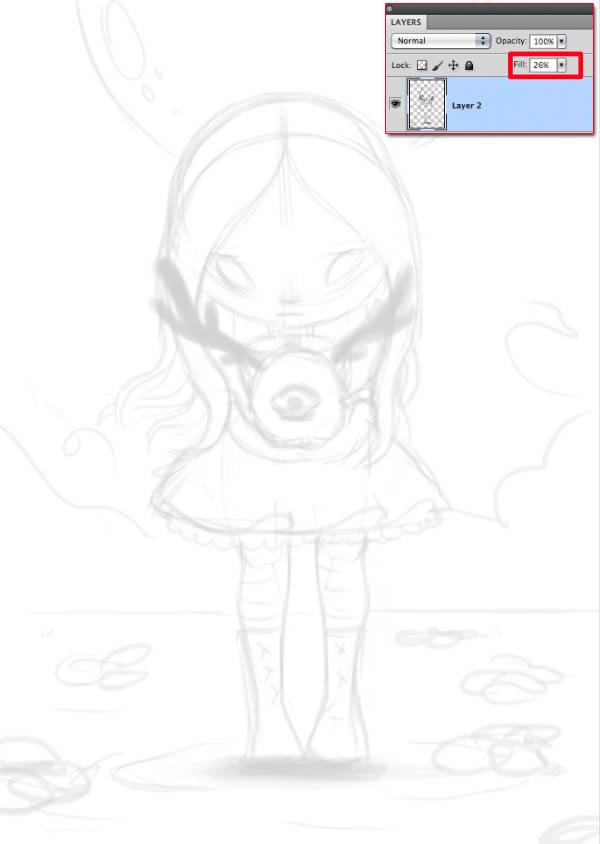
For sketching the character, add a new layer (Shift + CMD/CTRL + N) and start drawing the basic shapes to define the composition.
Use as many layers as you feel necessary. When finished you can combine them using Merge (Select the layers and press CMD/CTRL + E).
Finally, lower the opacity of the layer.
Step 2
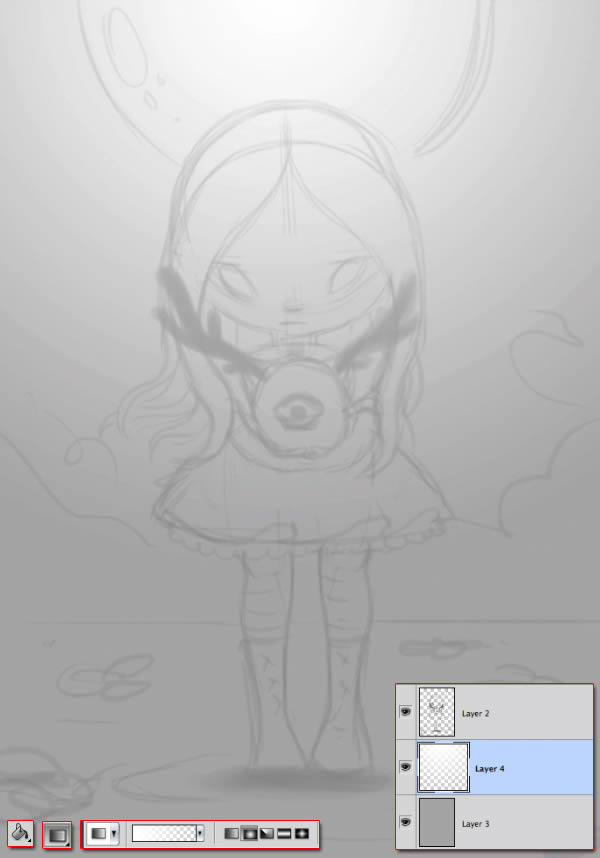
Add two layers below the sketch: in the first, paint in gray with the Paint Bucket (G).
In the second one, make a white circular gradient as seen in the image, using the Radial Gradient Tool (G).
4. Blocking
Step 1
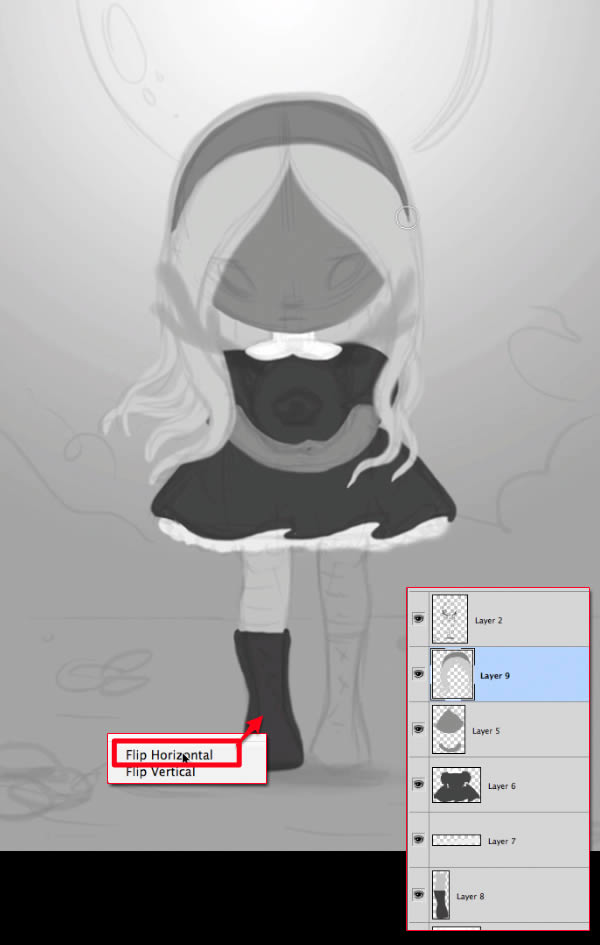
In different layers, paint each element separately.
The legs and horns you can paint once and then duplicate and flip (CMD/CTRL + T or Right click and Flip horizontal).
Step 2
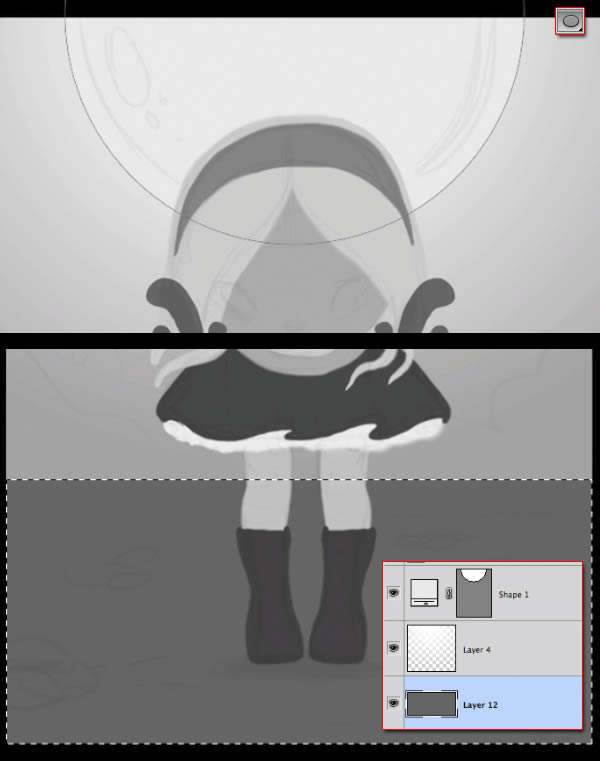
Add the water below and then create the moon with the Ellipse Tool (U).
Step 3
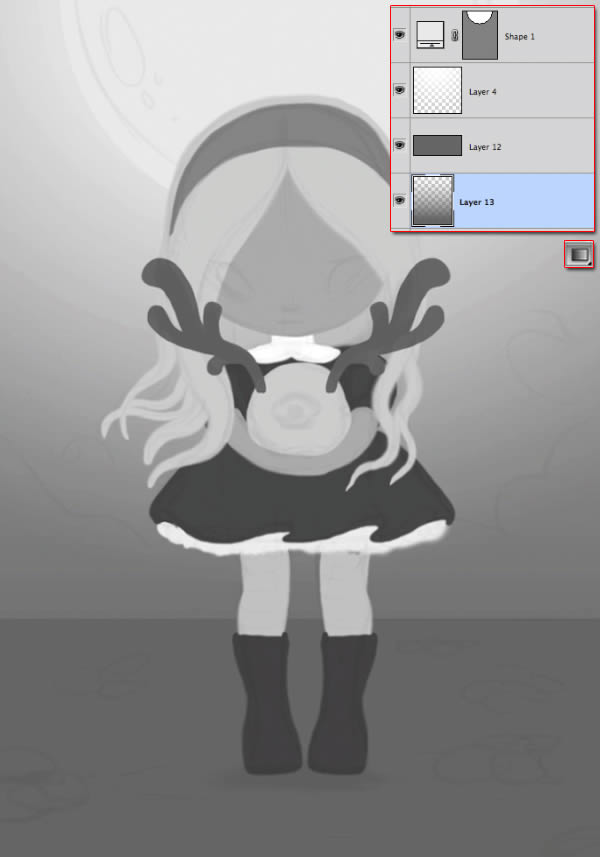
Add a darker gradient under the water.
Step 4
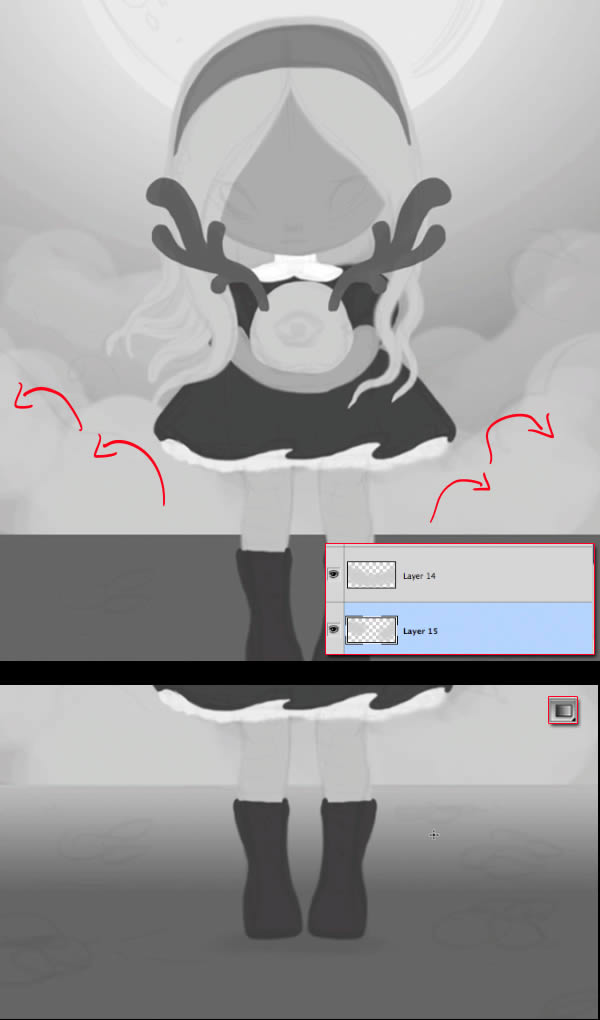
Use a hard round brush to roughly paint the clouds and add a little light gray gradient in the water layer.
Step 5
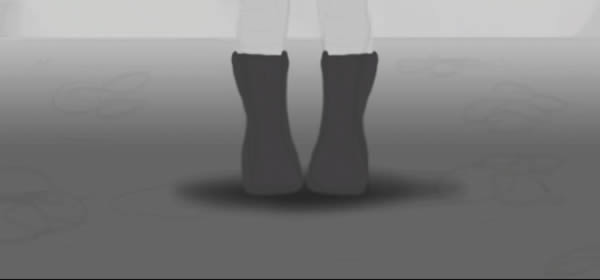
Paint the shadow under the girl. Use the Eraser Tool (E) to soften.
5. Painting the Girl
Step 1
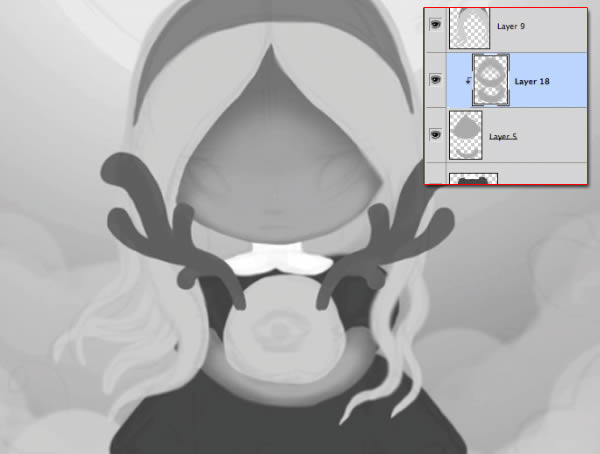
To make a base shadow, use the same gray as the skin in a Multiply mode layer.
In order to use the shape layer as a Clipping mask, just press Alt while click in between both layers.
Step 2
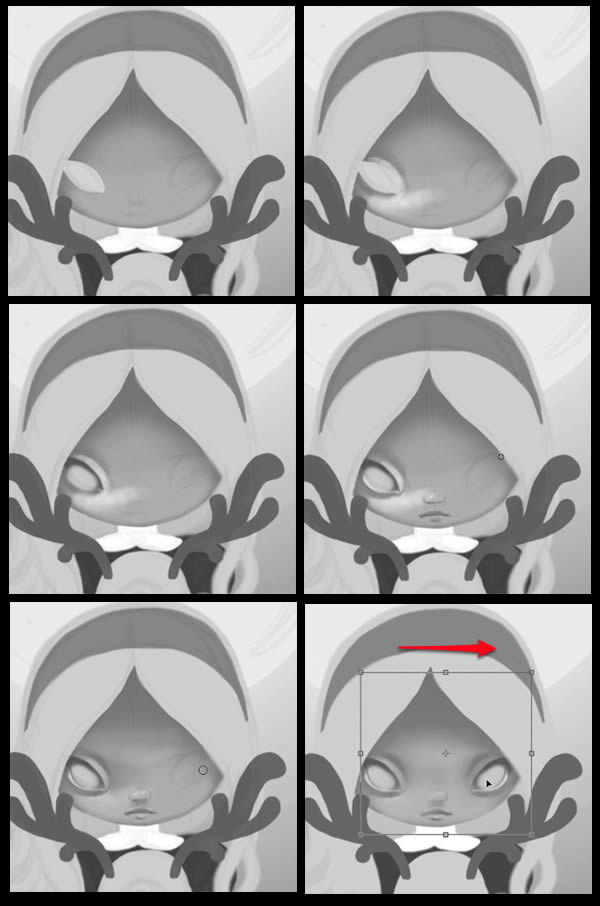
Paint the face. To save time, in this step, you can paint half of the face and then duplicate and merge the layers and flip.
At this stage you do not need much detail. The important thing is to define the volumes.
Step 3
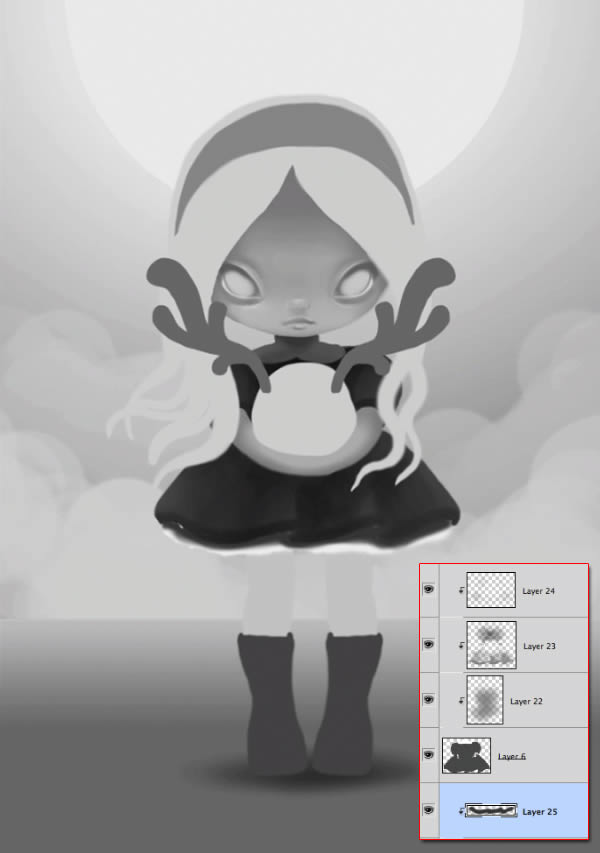
Continue with the cloth. Define the ripples of the dress. When you paint on a clipping mask, you will see that in the base layer may have small holes unpainted. Take advantage of the occasion to correct it.
Step 4
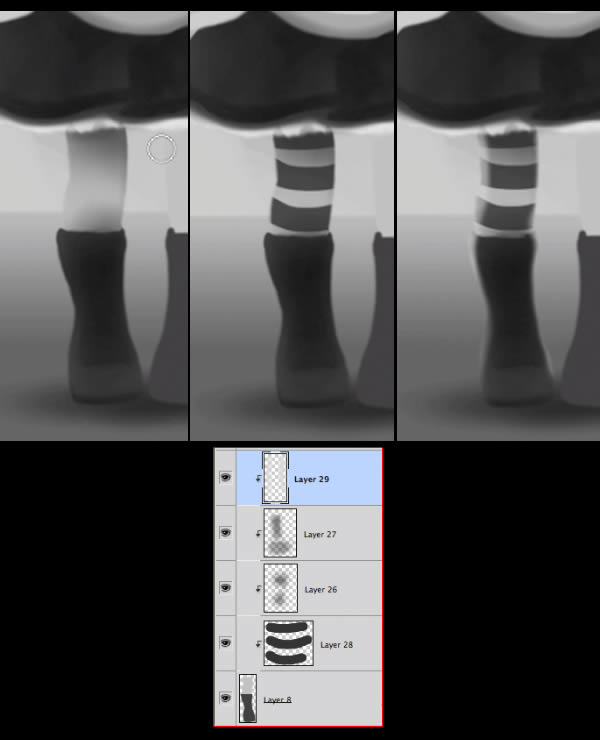
Let’s move on with the legs. Don’t forget to use the Eraser Tool to help you soften the shadows.
Step 5
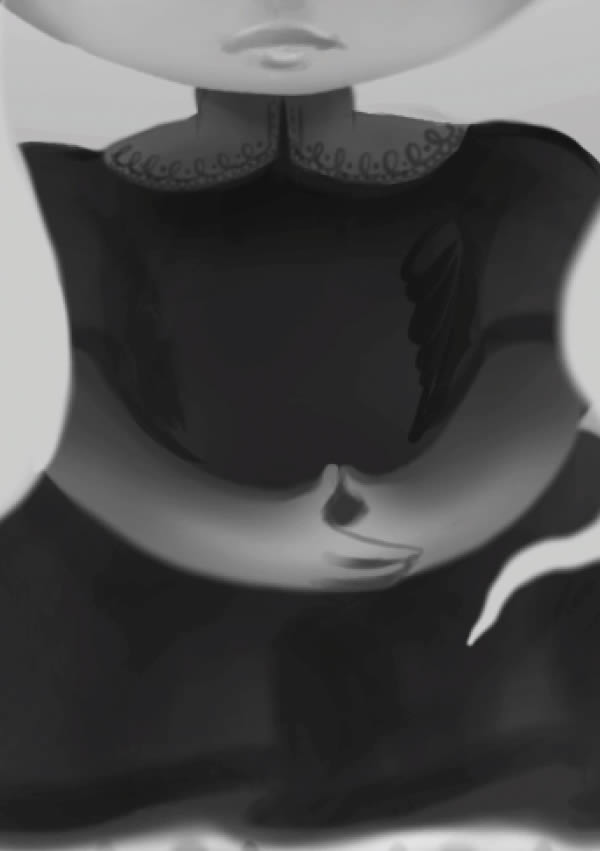
Start making the arms and some ornaments on the collar. .
Step 6
If you didn’t before, add a layer below and paint the back of the hair.
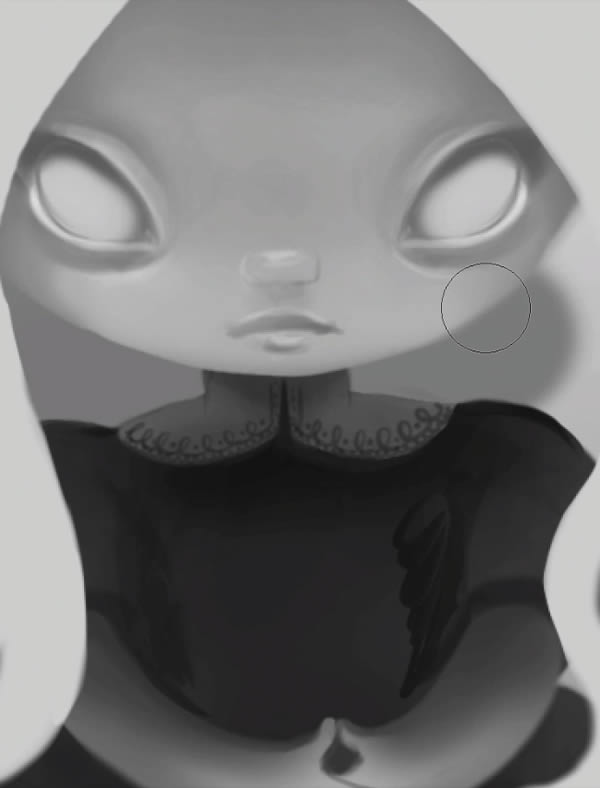
Step 7
For the hair, use a light and a dark gray to make strands. You can use a hard brush and then a soft one to blend a little.
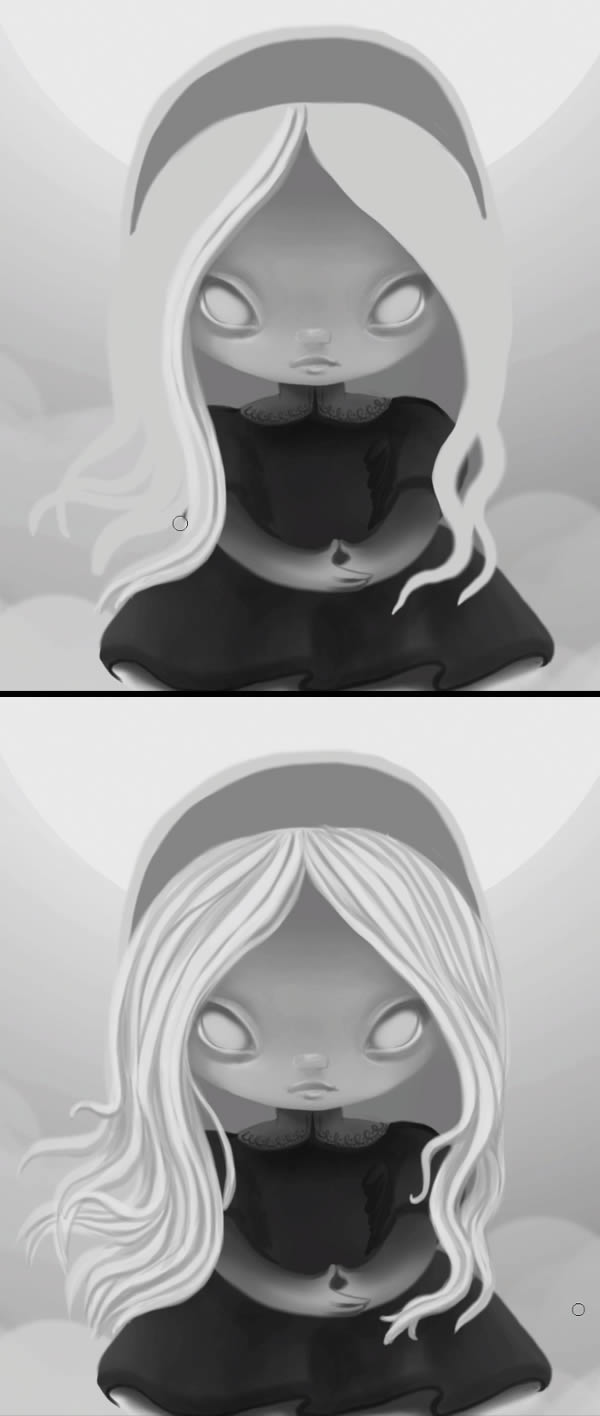
Step 8
Let’s paint the little creature. Remember to just set up the volume, details will come later.
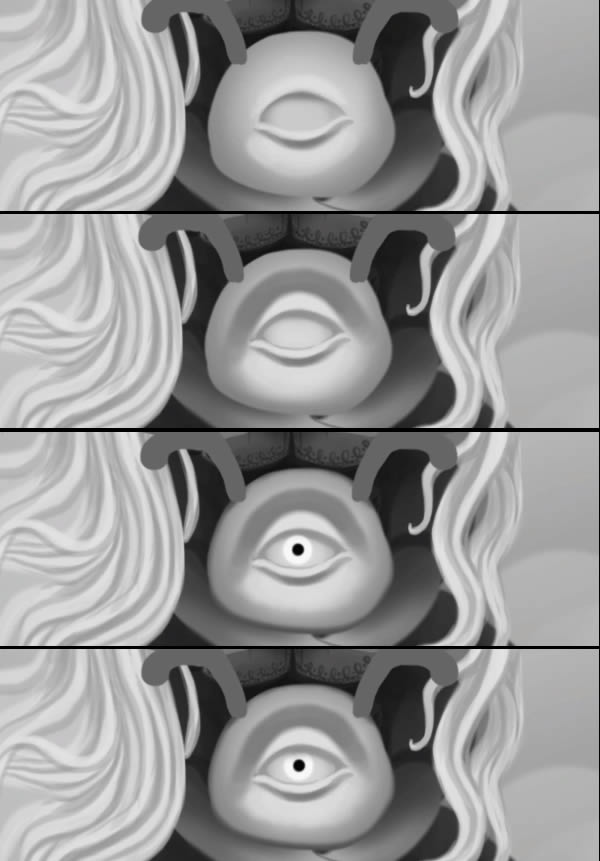
Step 9
Add shadows to the horn. Then use the Smudge Tool with a hard, small brush to make these “roots” at the base as seen in the image.
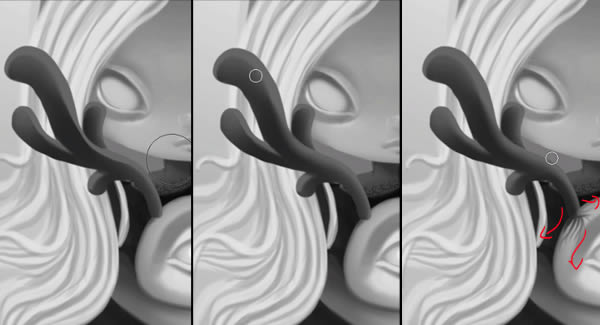
Step 10
To make the hair of the creature, first select all the layers, duplicate them and merge (CMD/CTRL + E).
Use the Smudge Tool to create each strand, follow the direction of the shape. Finally, add some shadows below. .
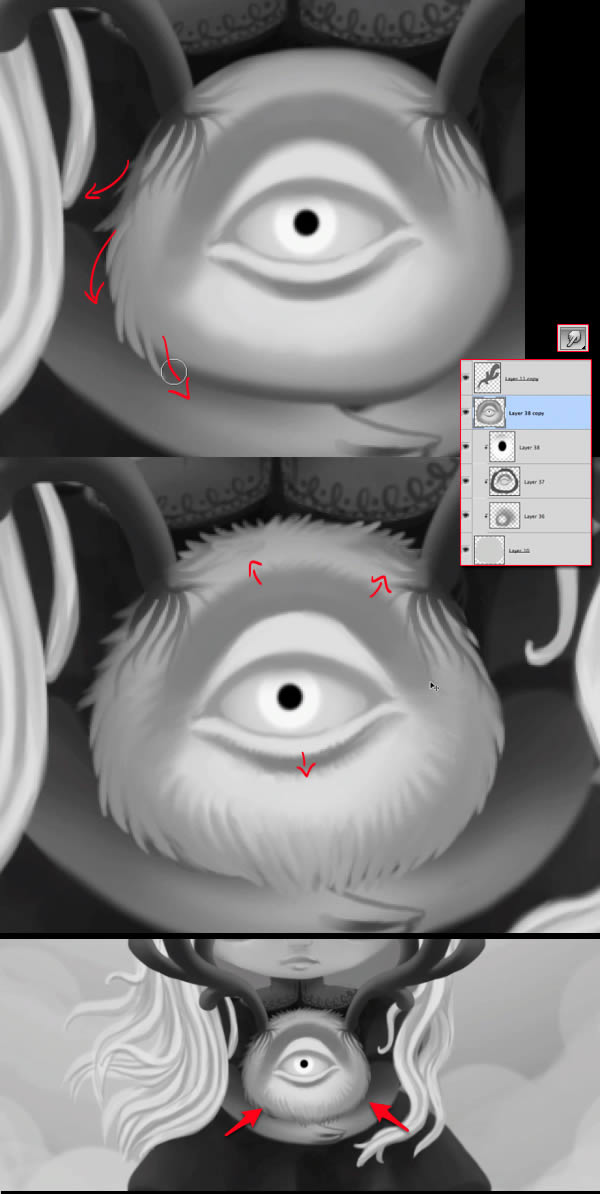
Step 11
Add a layer above all and make some strands across the forehead. Also do locks of the back.
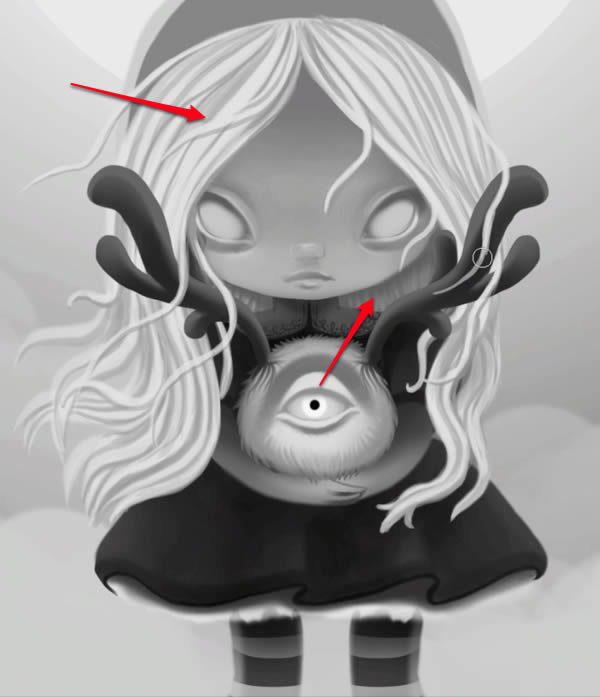
Step 12
Start detailing the hosiery with small circular movements.
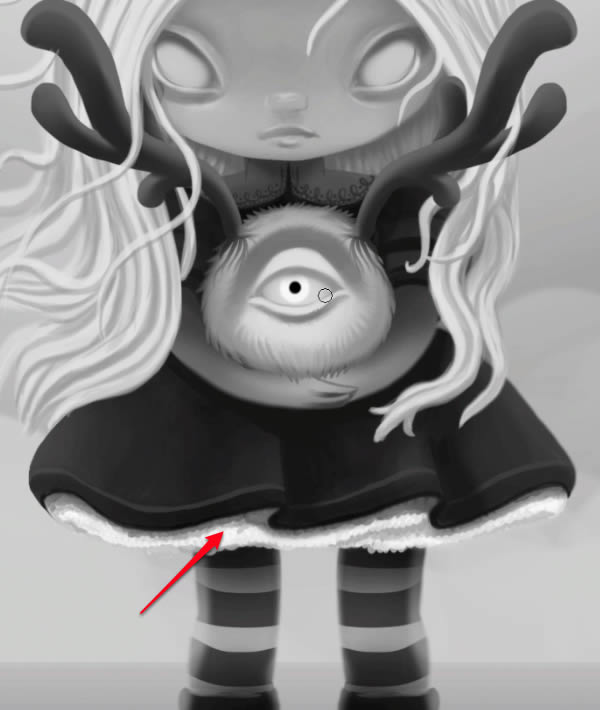
Step 13
Make the pattern of the dress, use a Multiply or Overlay mode layer (depending on the shade of gray) so that the texture is integrated into the volume.
You can make lines, dots, flowers or whatever you like, just keep in mind that the texture should follow the shape of the fabric. .
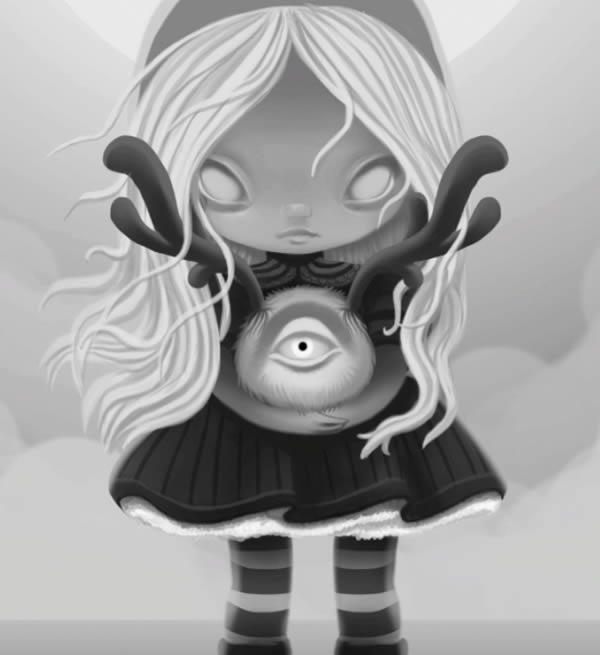
Step 14
Start detailing the boots.
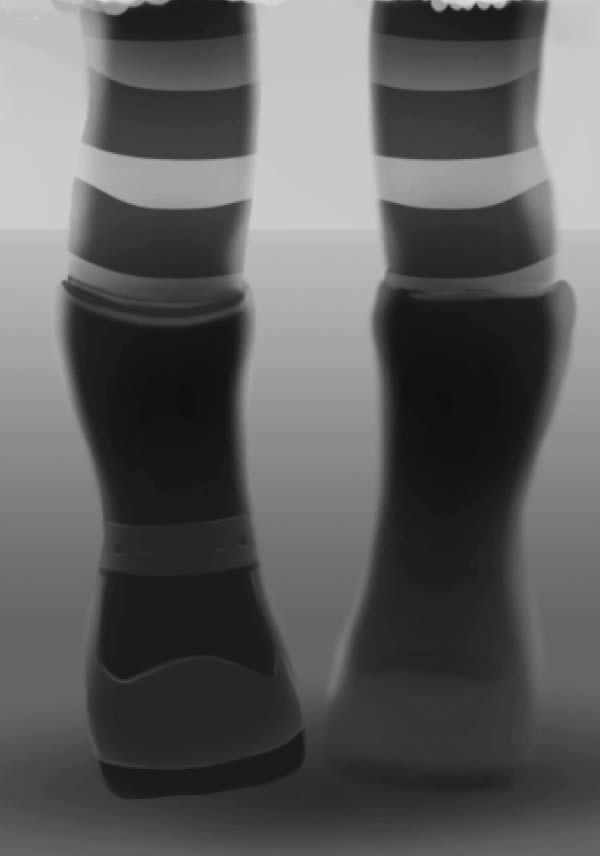
Step 15
Paint the back of the dress.
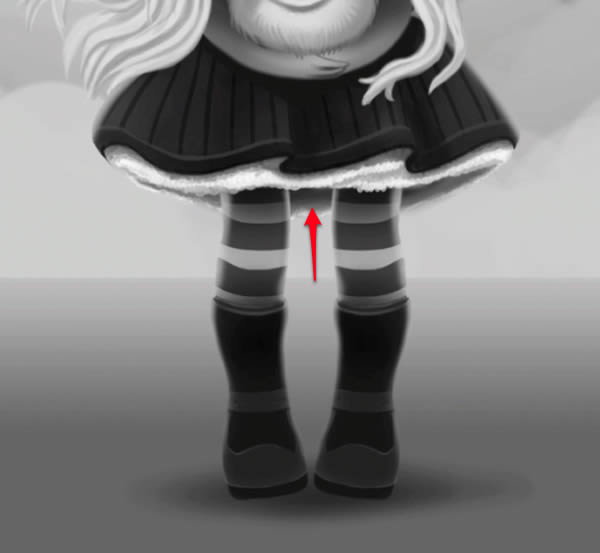
Step 16
Let’s go back to the creature, define the eye adding details and some lights. Also put a hard shadow where it meets the arm.
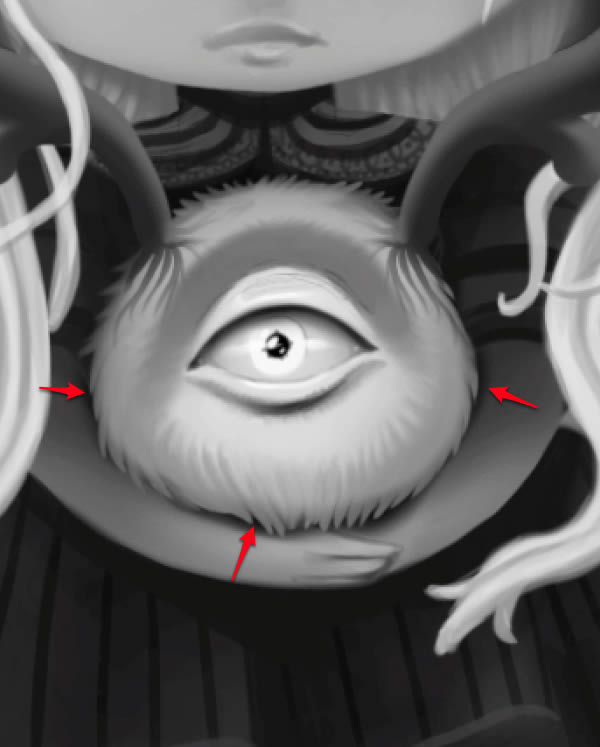
Step 17
Add more definition to facial features. Use glossiness to enhance the feeling of volume.
Smooth transitions that look rough.

6. Background and finishing touches
Step 1
Draw concentric waves around the girl. Then add a layer in Multiply mode and paint slightly random stripes in various shades of gray.
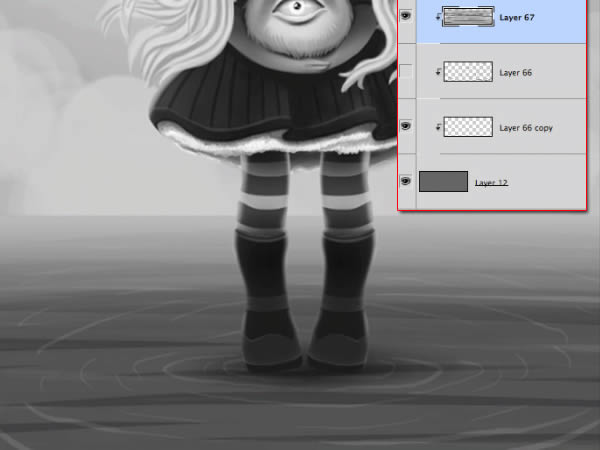
Step 2
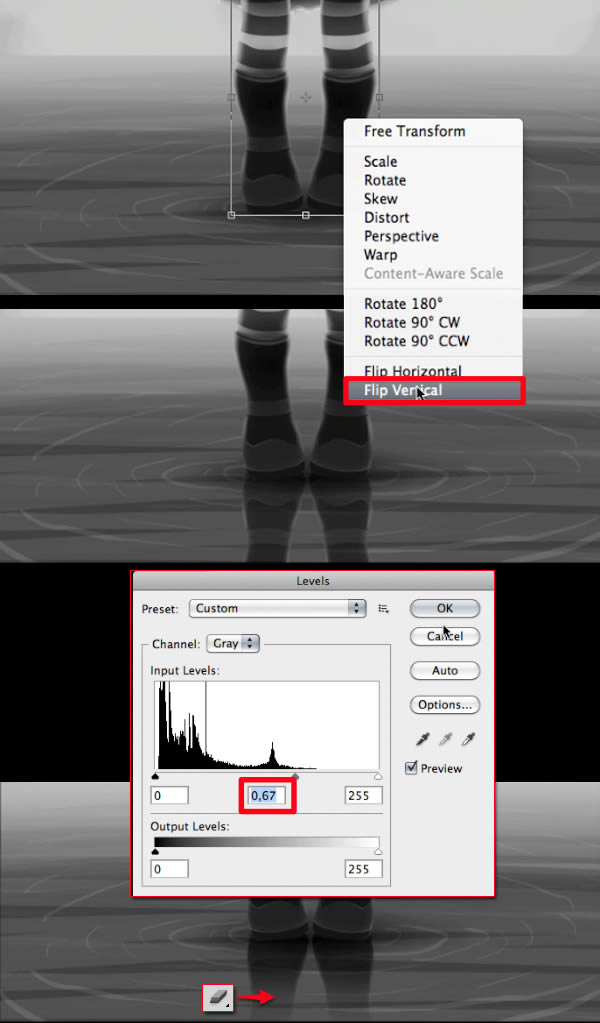
Select all the layers of the leg, duplicate them and merge. Flip vertically and use Levels (CMD/CTRL + L) to make them darker, the use the Eraser Tool to soften below.
Step 3
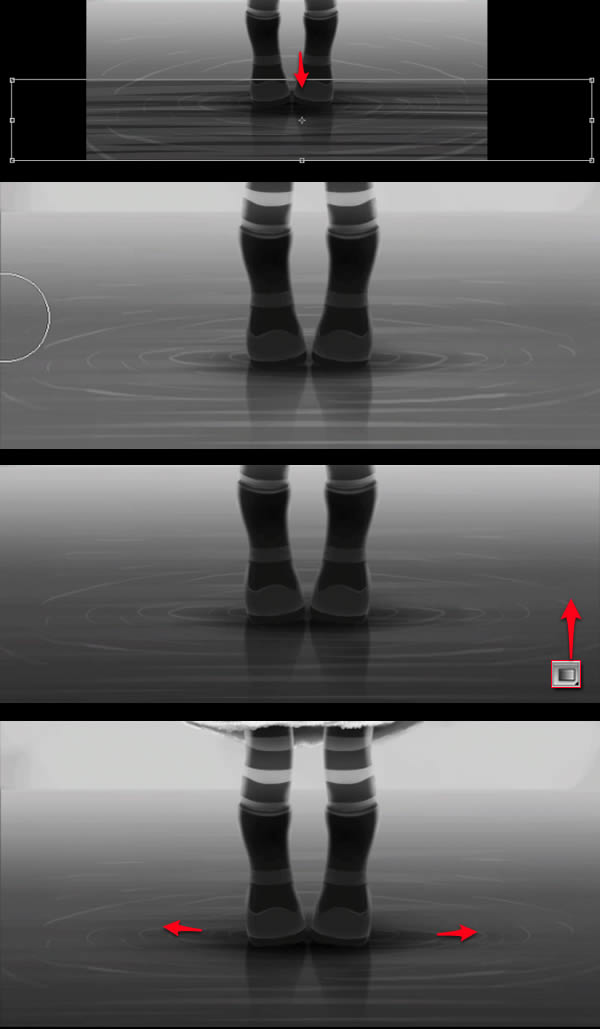
Select the layer with darker strips and flatten on top, duplicate the layer and place it above. Merge both layers and make a gradient from top to bottom with the Eraser Tool.
Flatten the circles layer slightly too. Make a dark gradient from bottom to top. That will complete the shadow of the girl.
.
Step 4
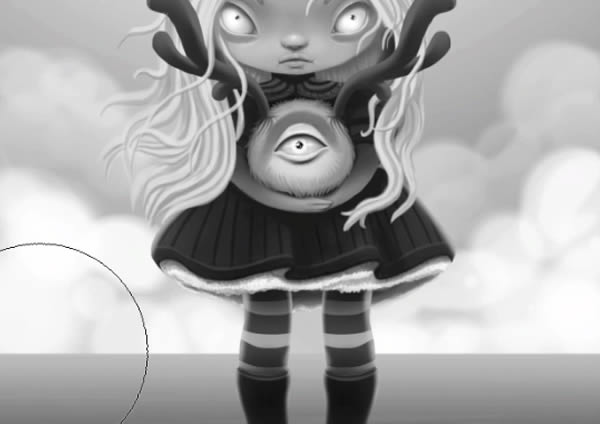
Use a big brush to define the clouds.
Step 5
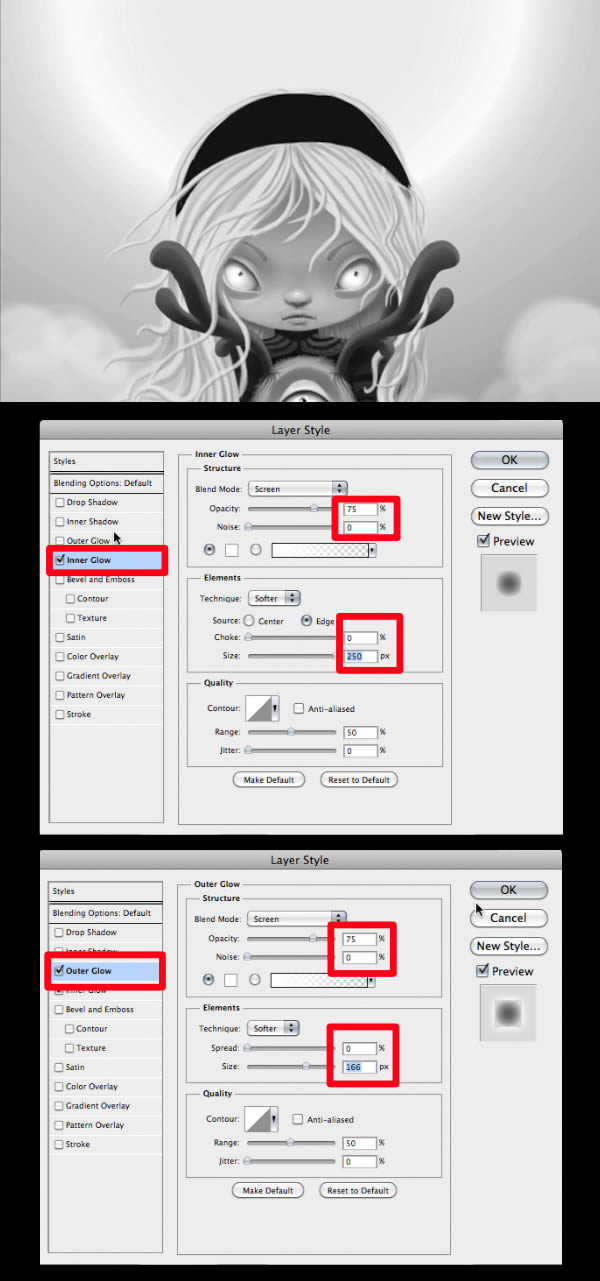
This is how I made the moon but keep in mind that I will remove the moon at a later step. Double click on the layer to get the Layer Styles panel and set as seen in the image.
Step 6
To paint the highlights in the water make a triangle and then distort it with the Smudge Tool. Then, soften the sides with the Eraser Tool.
Add a slight white gradient on top of the water.
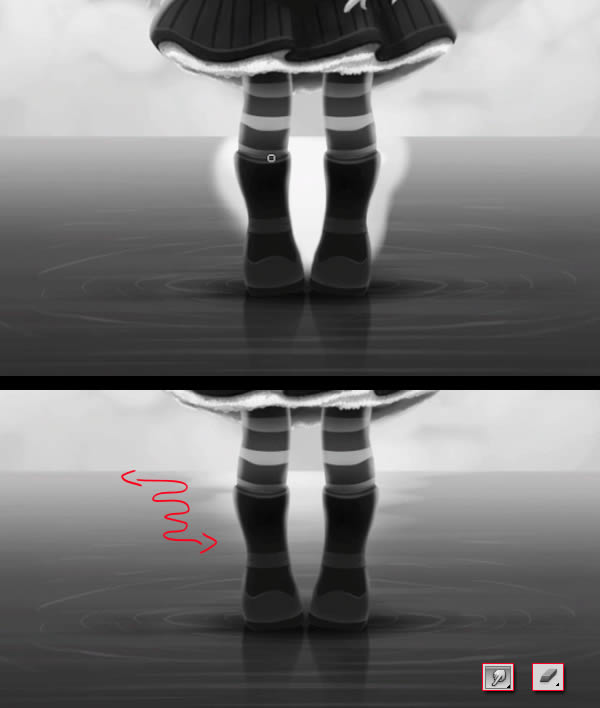
Step 7
Reinforce the shadows and highlights on the girl, uses layers in Multiply and Overlay mode with a soft brush.
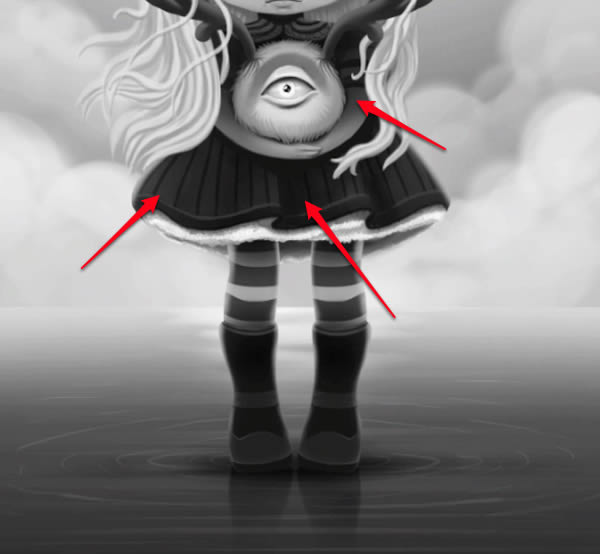
Step 8
Finish detailing the eye of the creature and add some highlights on the horns.
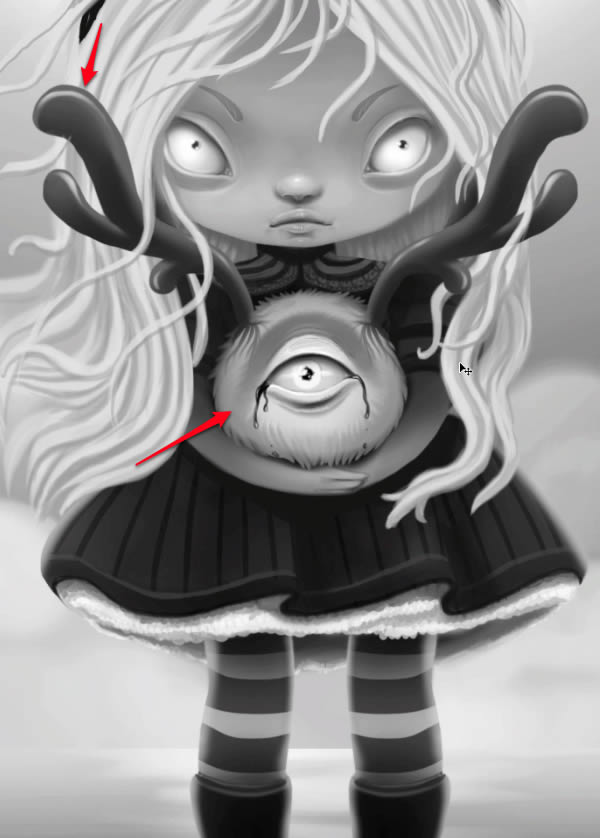
Step 9
Paint the hair ribbon and add the fabric of the knot from behind.
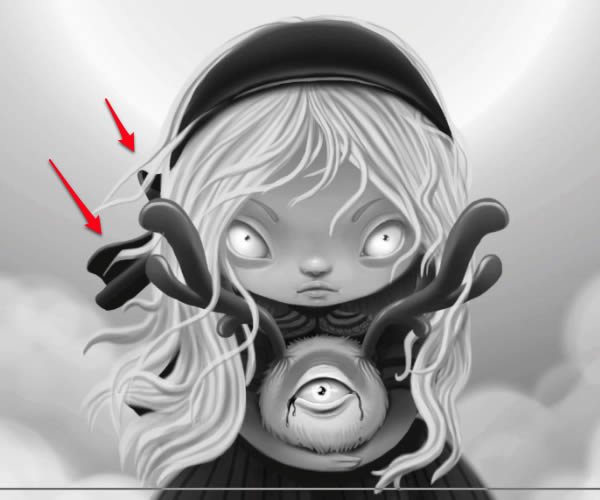
Step 10
Blur the horizon line of the sea using the Blur Tool.
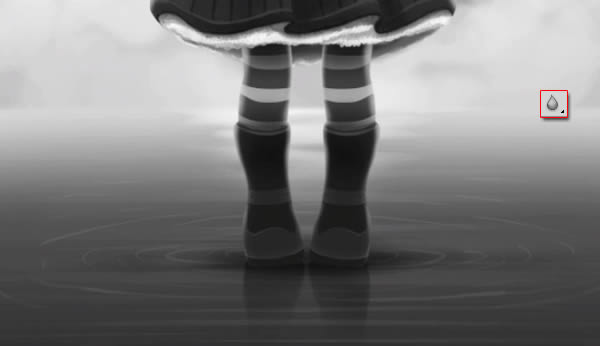
7. Color
Step 1
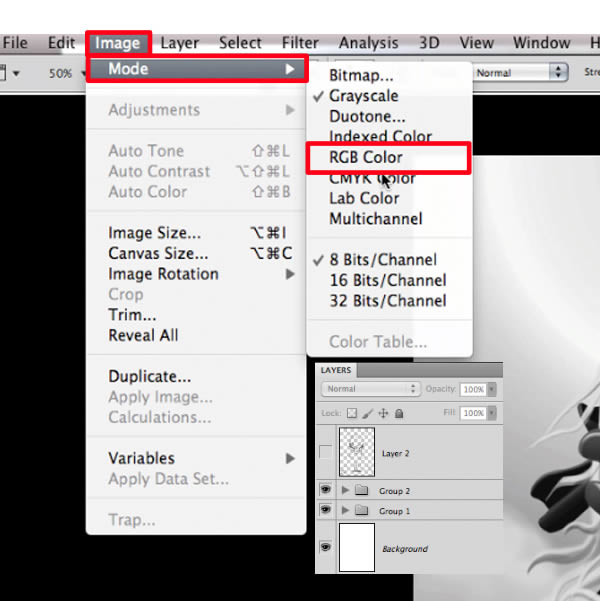
Go to Image > Mode > RGB Color.
Place all layers in a group and add a new group on top for the color.
Step 2
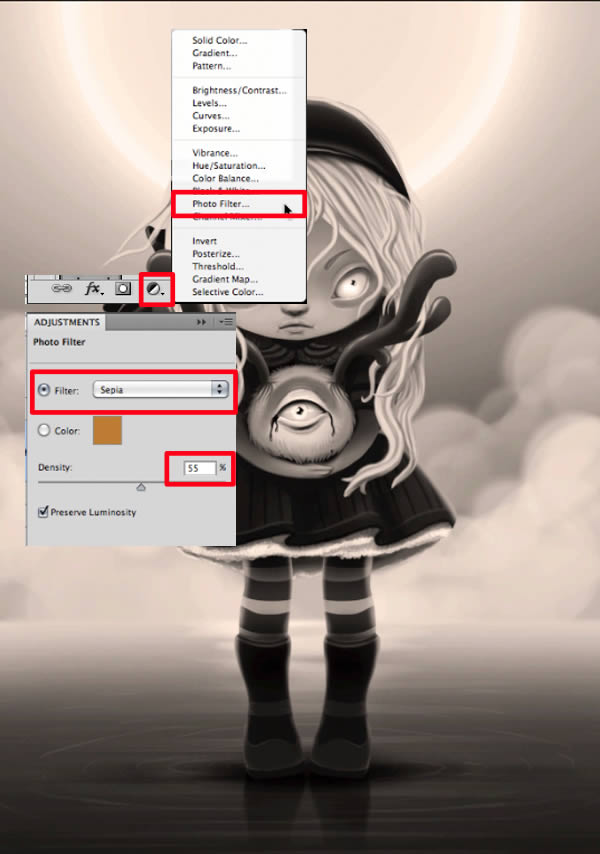
Create an Adjustment Layer > Photo Filter, choose Sepia and set as in the image.
Step 3
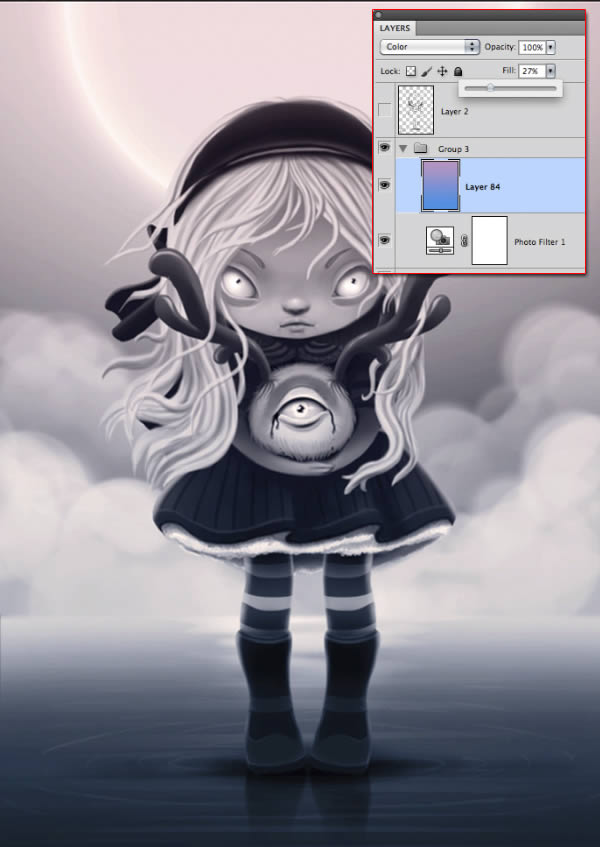
Add a Color mode layer and make a blue and violet linear gradient. Lower the opacity as seen in the image.
Step 4
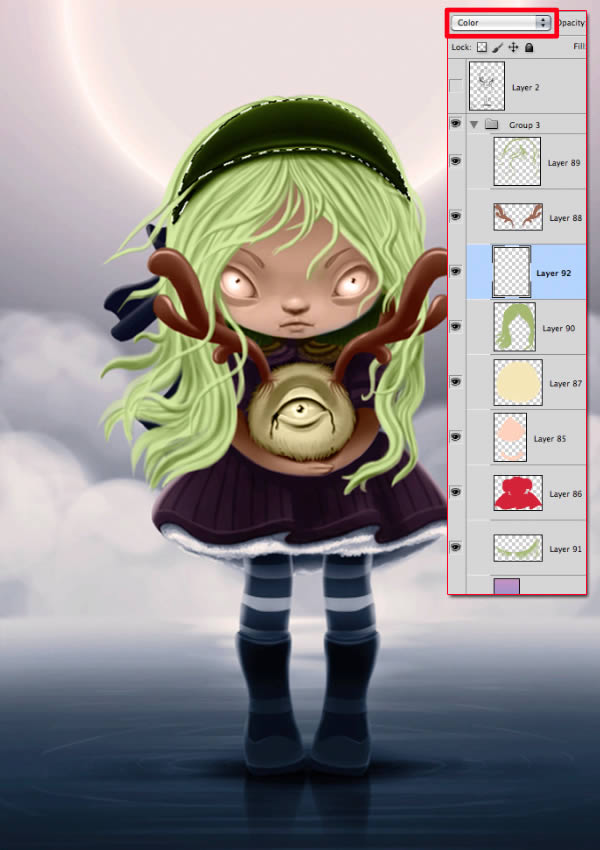
Paint each part on a separate Color mode layer. You simply select the forms and fill with color.
I do it this way because it is easier to change a color, if necessary.
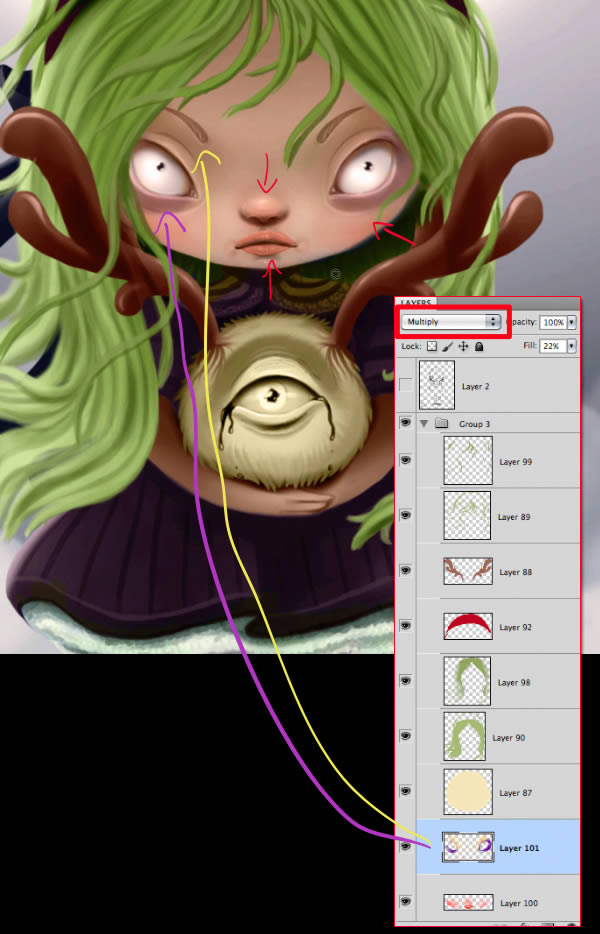
Step 5
To add color shades, use layers in multiply mode with very low opacity. For example, in this case I used purple and yellow eyes, pink for the cheeks, nose and arm joints.
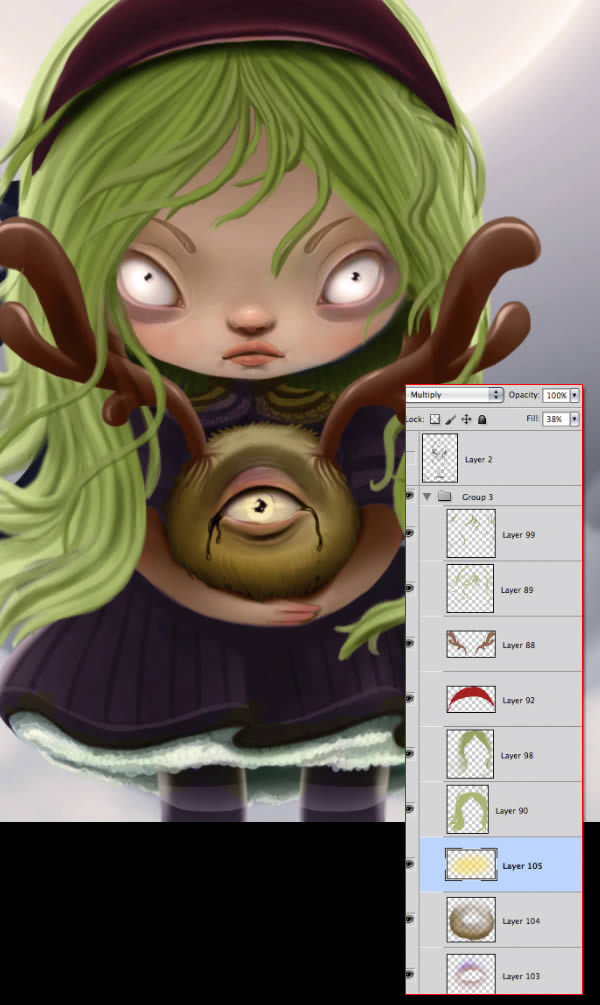
Step 6
For the shadows, use the same or a bit darker color of the base in multiply mode with low opacity. For lighting, use light colors, you can try effects using Overlay, Soft Light mode etc…
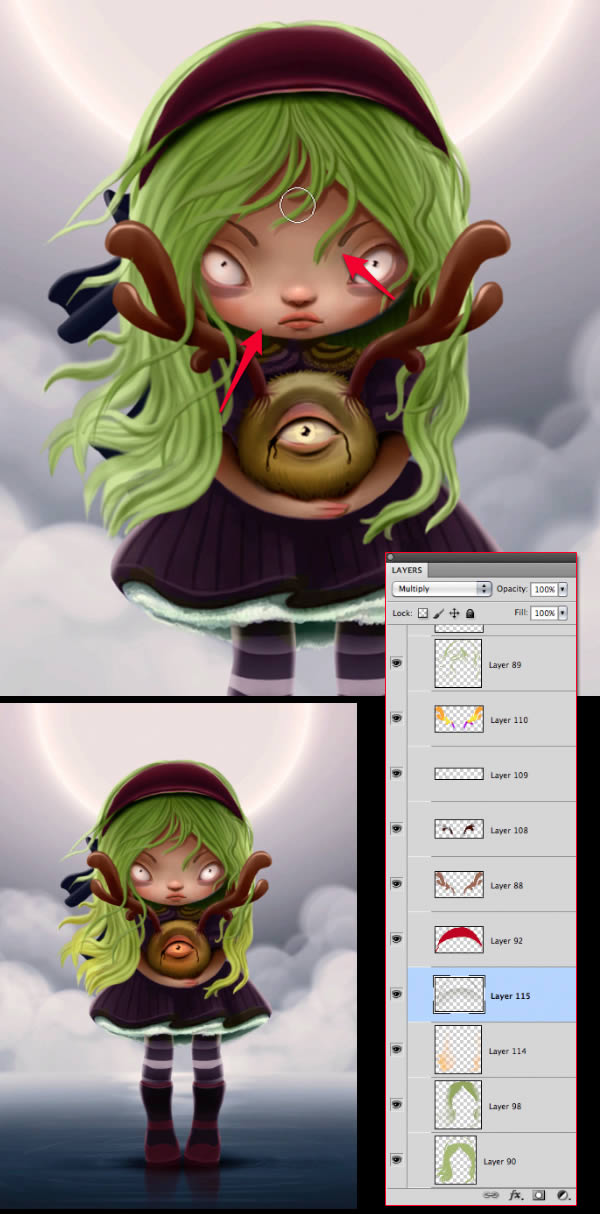
Step 7
As seen in the image, enhance the volume of the face with a soft shadow all around. Also, add the shadows cast by the hair.
Use some colors to make the hair look less flat, like yellow and violet very faint on the horns or yellow in the hair tips.
Step 8
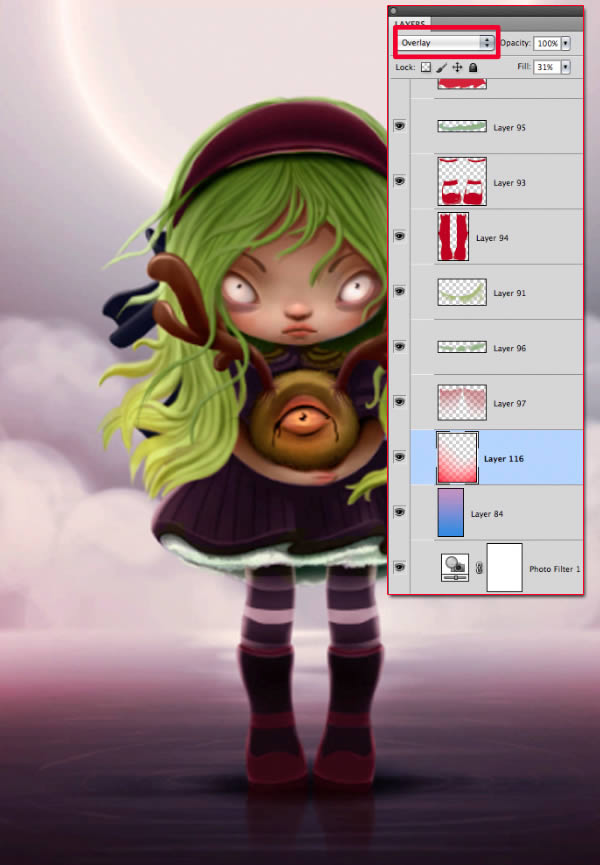
Go back to the background and add a red gradient from below in Overlay mode with low opacity.
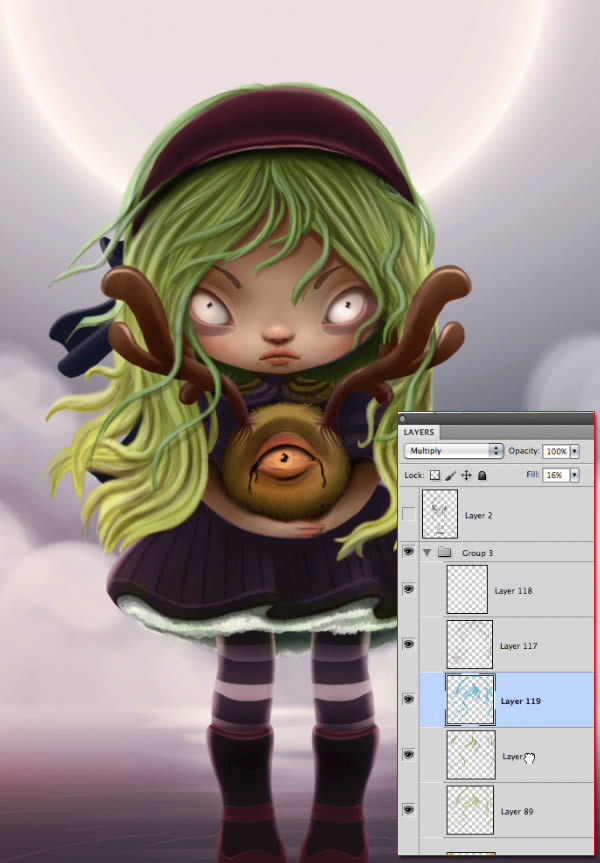
Step 9
Change the color of the girl’s bangs (hair). Just duplicate the layer and use Hue/Saturation (CMD/CTRL + U) then set as in the image..
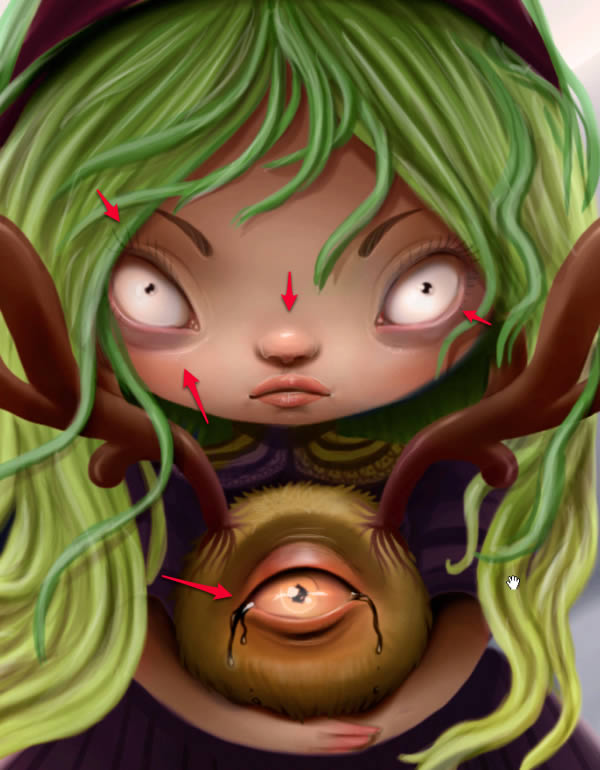
Step 10
For the eyelashes, add some highlights as you see in the image to give it more life. Also in the hair.
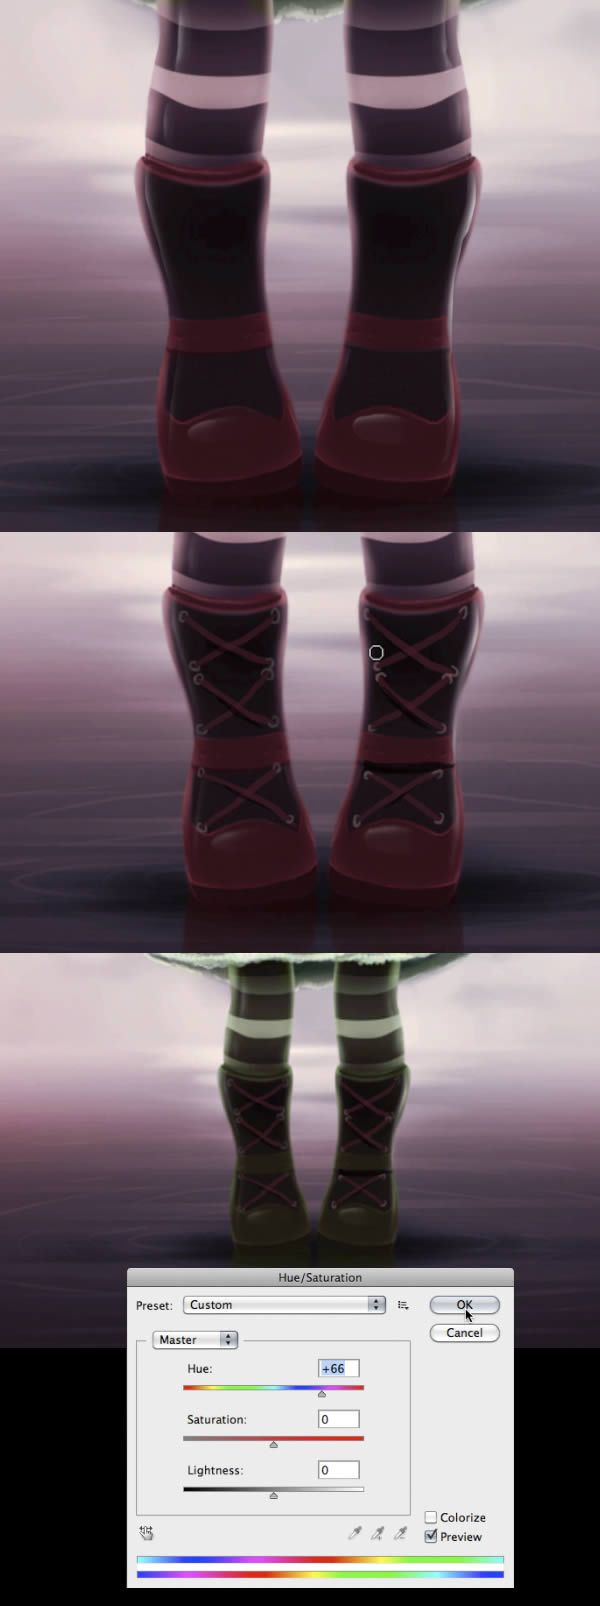
Step 11
Now paint some highlights on the shoes and add the details. Finally, duplicate and merge all the leg layers and use Hue/Saturation to change the color.
Step 12
Paint a bow at the waist.
Step 13
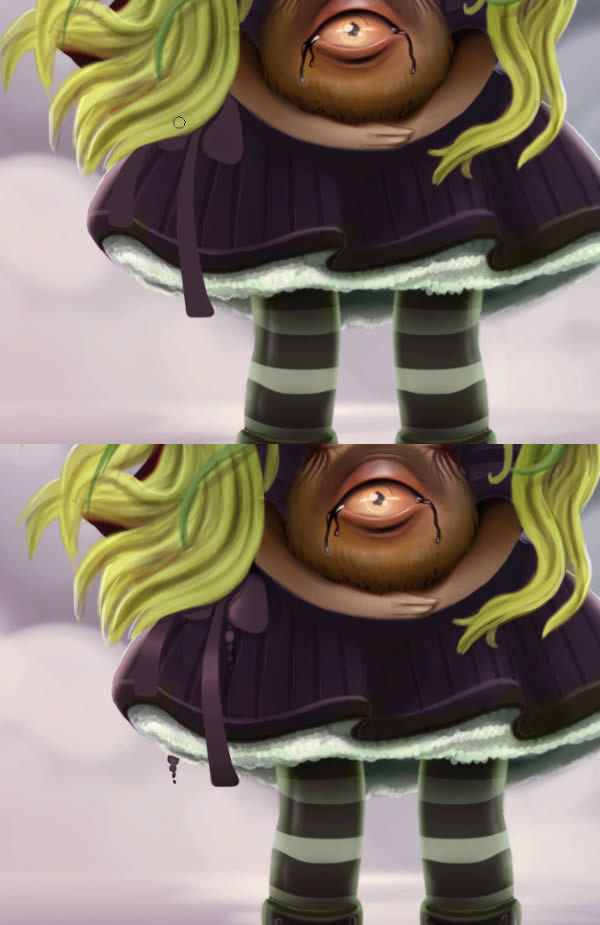
Use black in a layer as you see in the picture to shade the girl in front. And then use white for the contours, this will add a little backlight.

Step 14
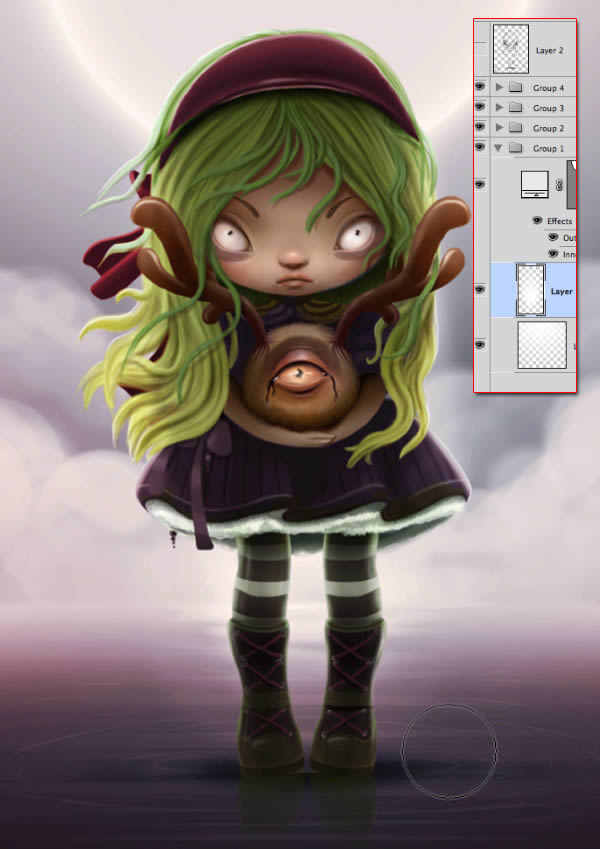
Now paint a white soft halo around the girl.
8. Ghosts
Step 1
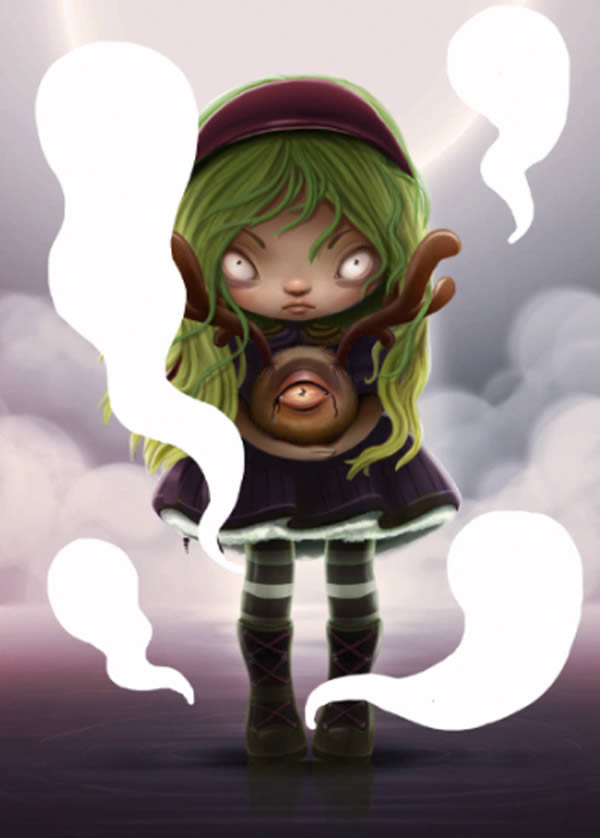
First, paint the silhouettes of the ghosts.
Step 2
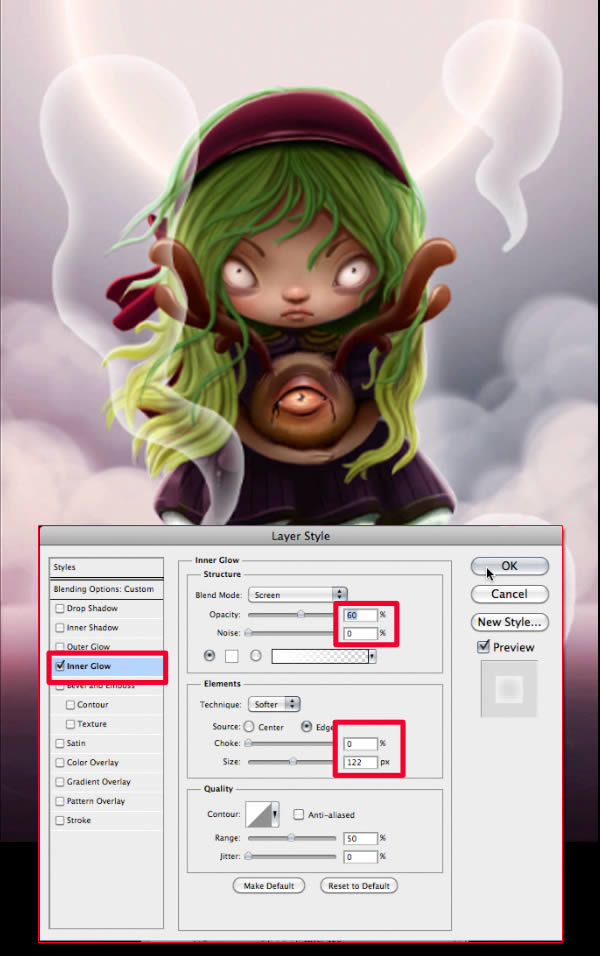
Lower the opacity to 0%, double click to get the Layer Style panel and set as in the image.
Step 3
Paint some highlights and soften with the Eraser Tool.
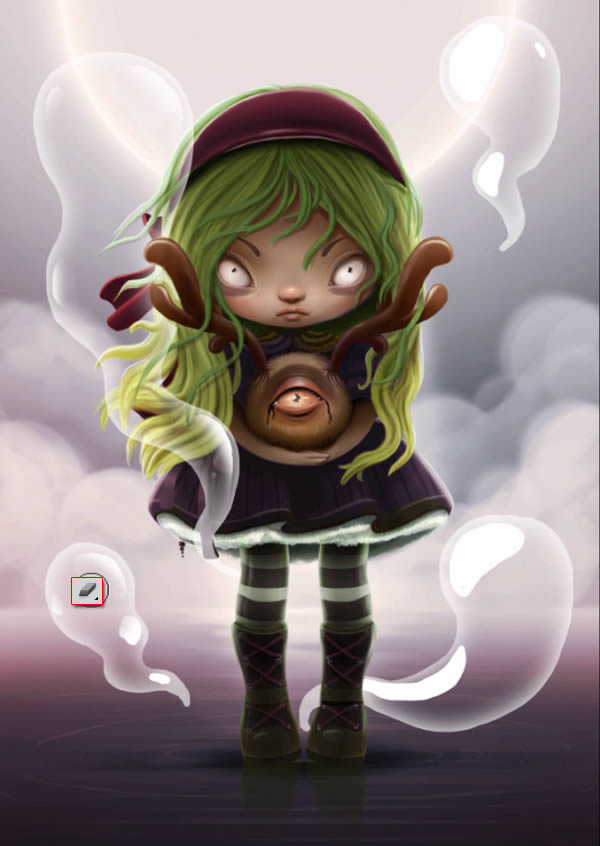
Step 4
Use the image below as reference to make the skulls. Finally, lower the opacity of them and place the layer under the silhouettes.

9. Last Steps
Step 1
Add an Adjustment Layer > Photo Filter and set as in the image.
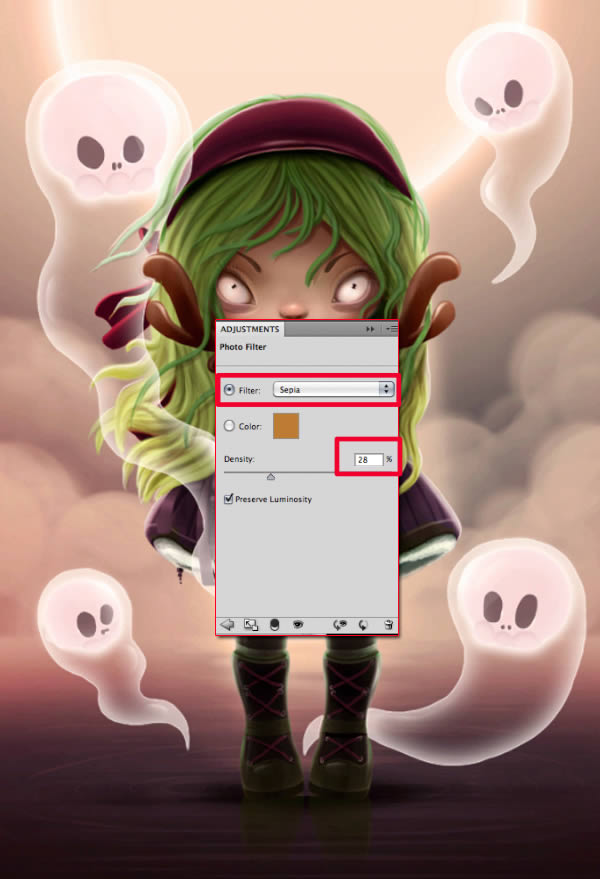
Step 2
Go back to the clouds and add some color to them. I have used pink and yellow. Make some reflections of the colors in the water as well.
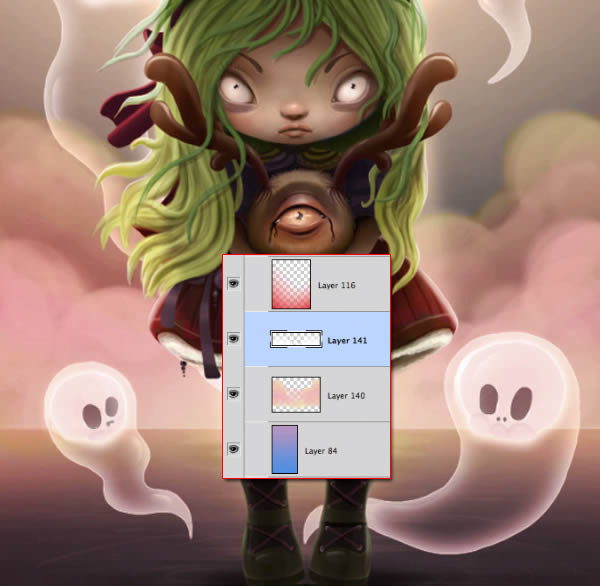
Step 3
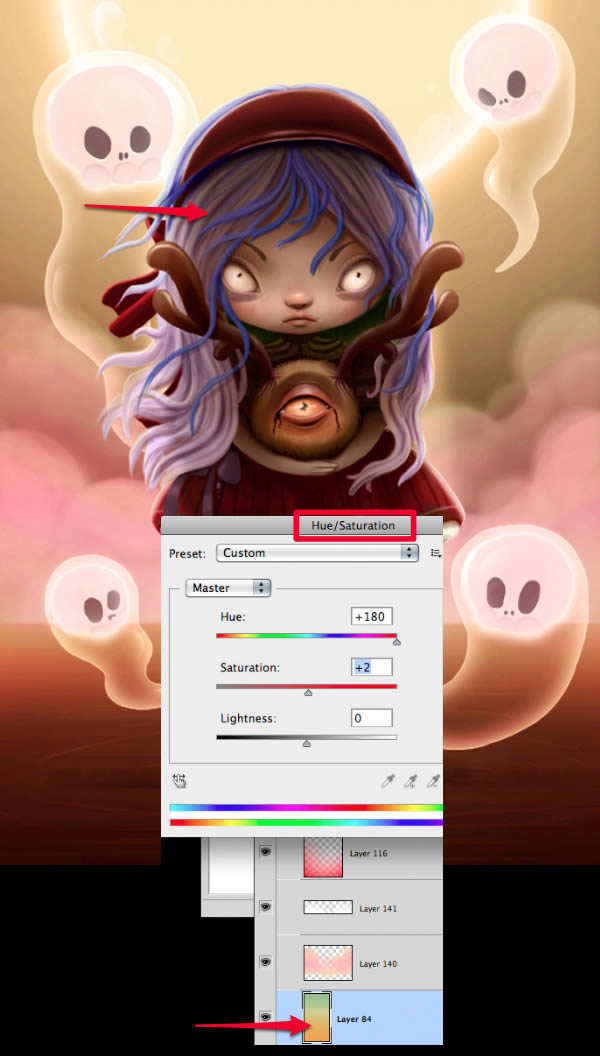
If you feel like it, change the color of the hair. This is also a good time to change any color you do not like.
Also, I have changed the background gradient as seen in the image.
Step 4
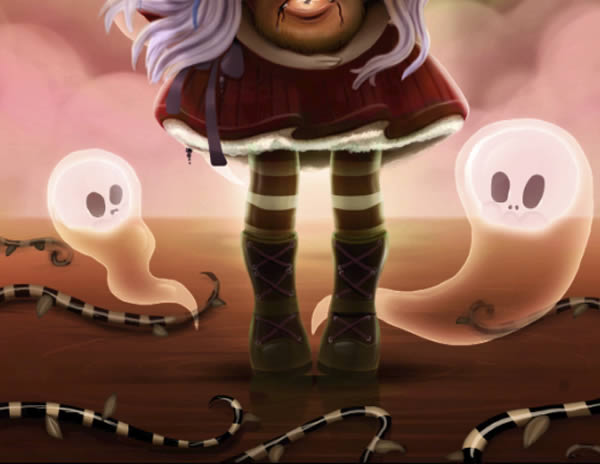
Paint some striped branches floating on water. The procedure is the same as the one we’ve used all along. Do not forget to add the shadow and reflection in the water.
Step 5
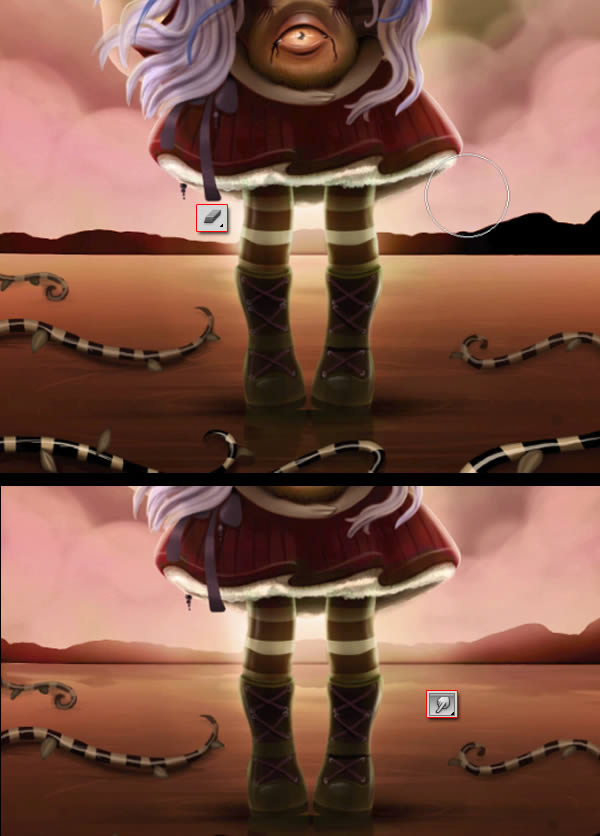
I decided to delete the two ghosts below. Instead I painted some dark red mountains. Use the Eraser Tool to soften. Make the reflection on the water.
Step 6
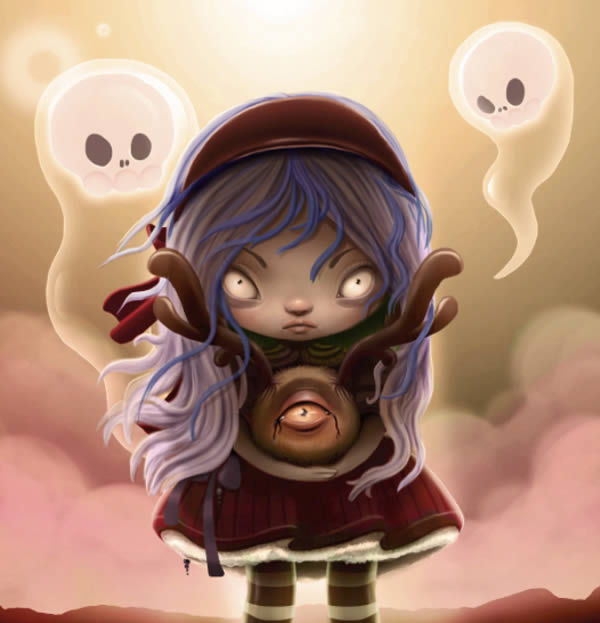
Finally, delete the moon layer. There is a big bright spot in that place that will work fine. So add a few lens flares as in the image, and we are done.
Final Image
In this tutorial, we showed you several techniques that you can use to help create your own character illustrations. We hope that you have learned something from this tutorial and can apply these techniques to your own artwork.
