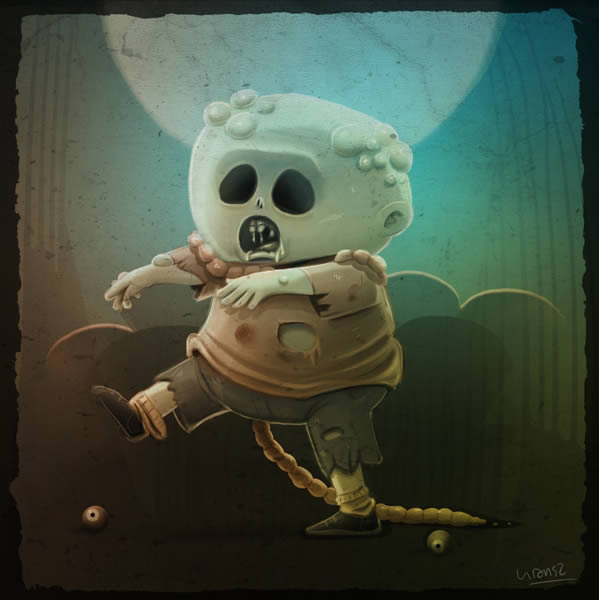
Zombies have been a staple of science fiction and horror films for decades. Recently, the T.V. show “The Walking Dead” renewed the public’s interest in these gruesome creatures. While “The Walking Dead’s” interpretation of zombies is quite scary and horrific, in this tutorial, Liran Szeiman will show you how to create a cute zombie illustration that might be more appropriate for less mature audiences. This tutorial also includes a speed painting video that demonstrates the entire process. Let’s get started!
Tutorial Assets
The following assets were used during the production of this tutorial.
1. Preparation
Step 1
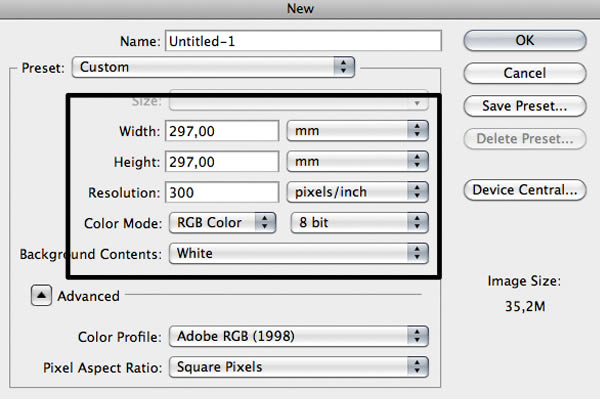
Create a New File by going to File > New (Command/Ctrl + N). In Preset select Custom and set the size as in the image below.
Step 2
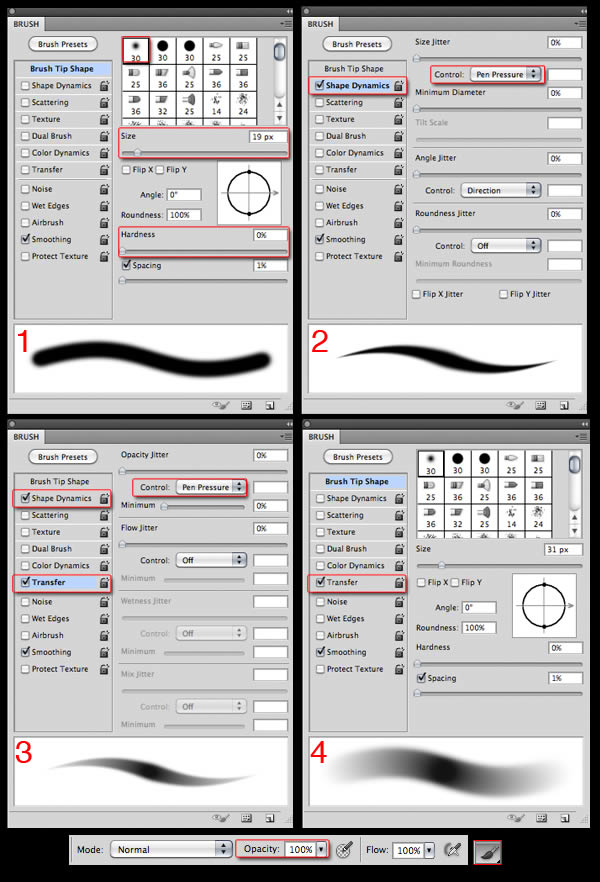
For this tutorial we use almost exclusively the basic round brush in Photoshop, taking advantage of the options that allows the use of a graphic tablet.
To open the Brush Panel, go to Window> Brush or press F5.
1-In Brush Tip Shape you can choose between the brushes you have loaded, change the size, hardness or spacing (this last one will leave it to 0). 2-In Shape Dynamics, select Control: Pen Pressure to activate the pen pressure. 3-In transfer, select Control: Pen Pressure to control the flow of paint from the pen pressure. 4-You can combine all of these features along with the Opacity to get the stroke you want to make precise lines or soft and smooth color transitions.
2. Sketch Your Illustration
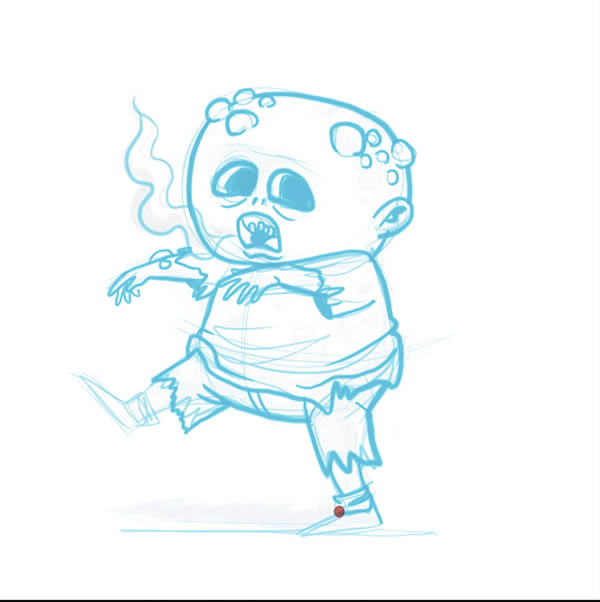
Step 1
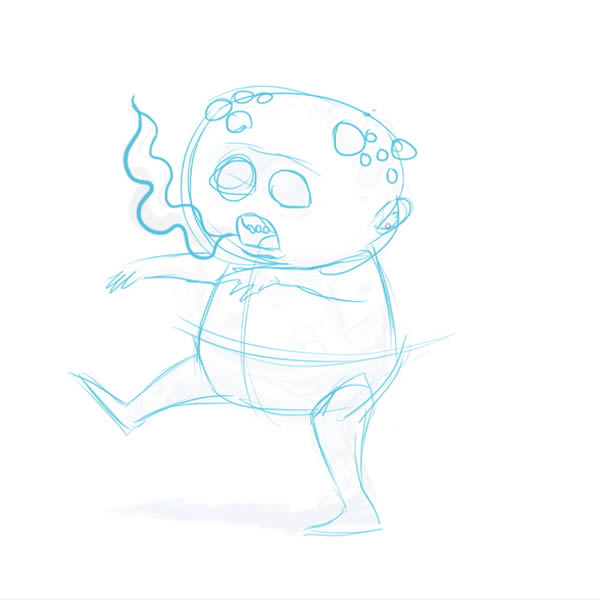
For sketching the character, add a new layer (Shift + Command/Ctrl + N) and start drawing the basic shapes to define the pose.
Step 2
Lower the opacity of the layer and on a new layer start to clean the lines and add detail.
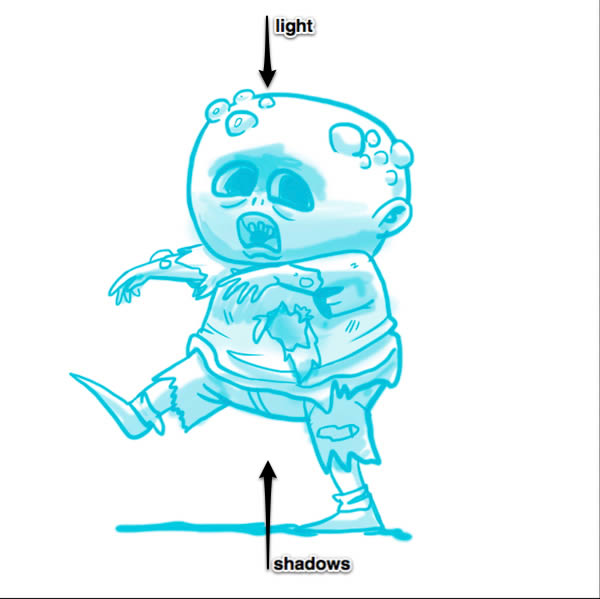
Step 3
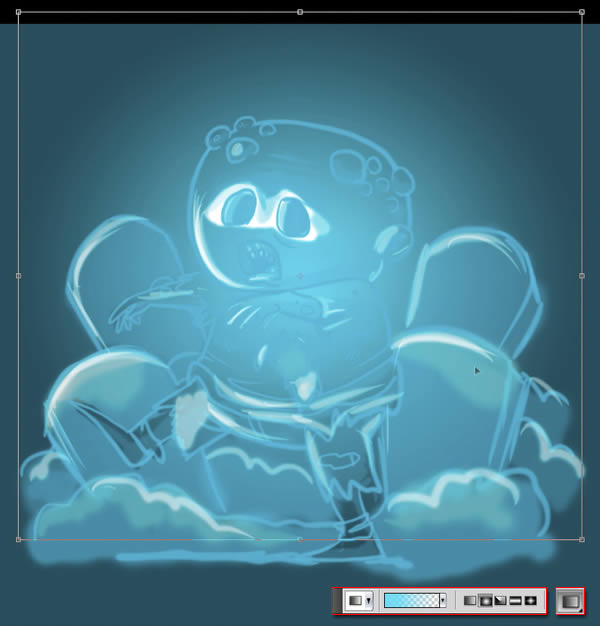
With a brush at low opacity and Transfer Mode on, set the light, which in this case comes from above and behind.
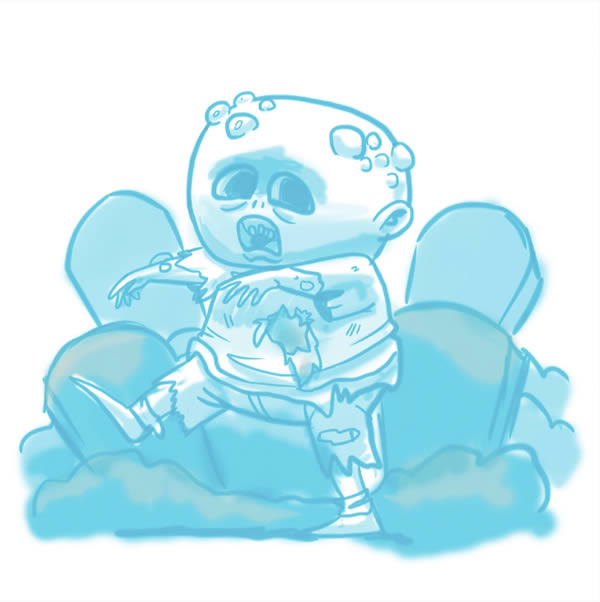
Step 4
Add a layer below and roughly sketch the background with some gravestones.
Step 5
Go back to the layer “Background” and use the Paint Bucket Tool (G) to paint it dark blue.
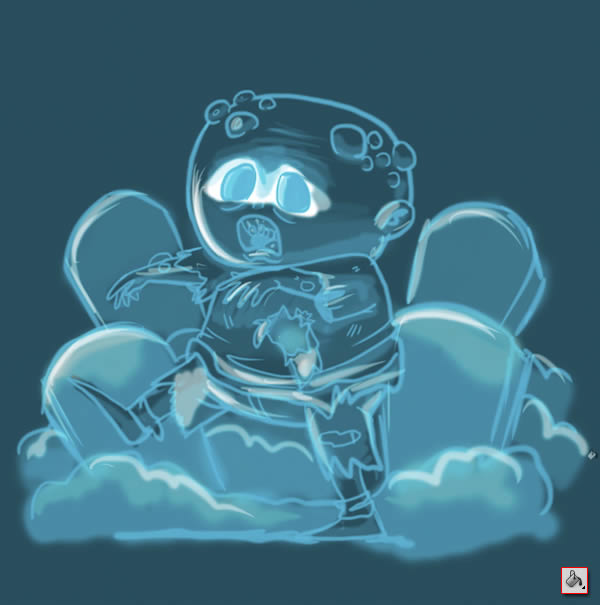
Step 6
Create a new layer and use the Radial Gradient Tool (G) to create a gradient of light blue in the center. Press Command/Ctrl + T and from a corner node transform it to the desired size.
3. Begin to Paint Your Figure
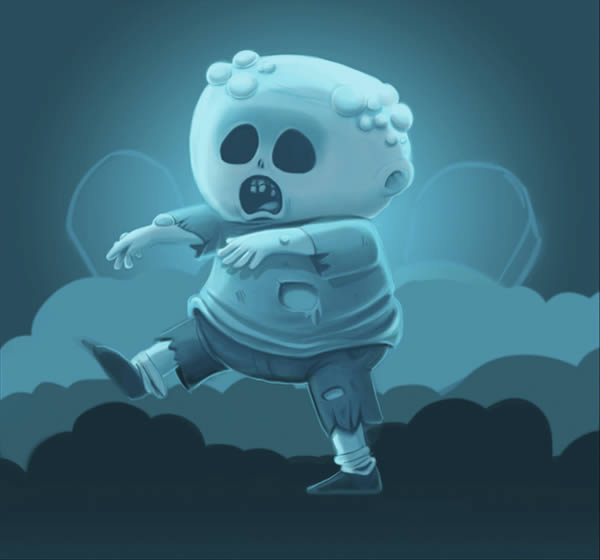
Step 1
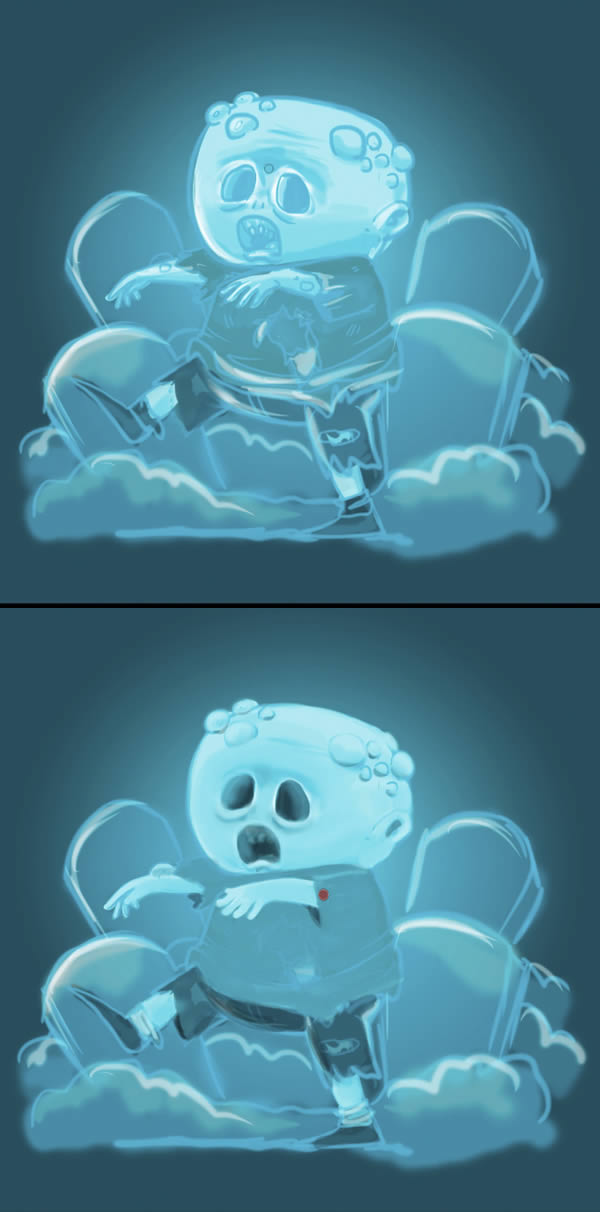
Roughly start blocking the shapes. When you are ready, add a new layer on top and begin to clean it up a little bit.
Step 2
Gradually begin to create shadows and smooth color transitions. For this, use a low opacity soft brush, with pressure to distinguish each area, and without pressure to soften.
Step 3
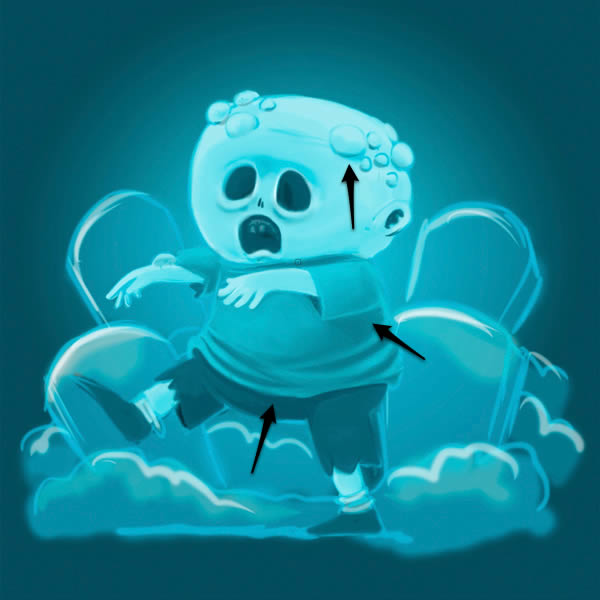
Now is the time to start adding lights and some detail. As in the previous case better not to use pure white, use blue instead.

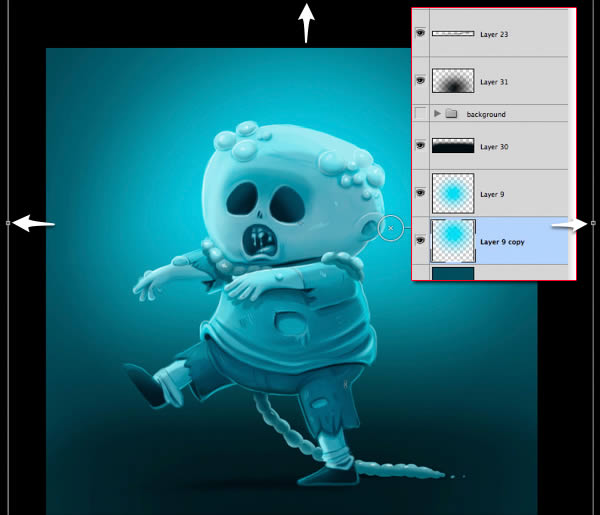
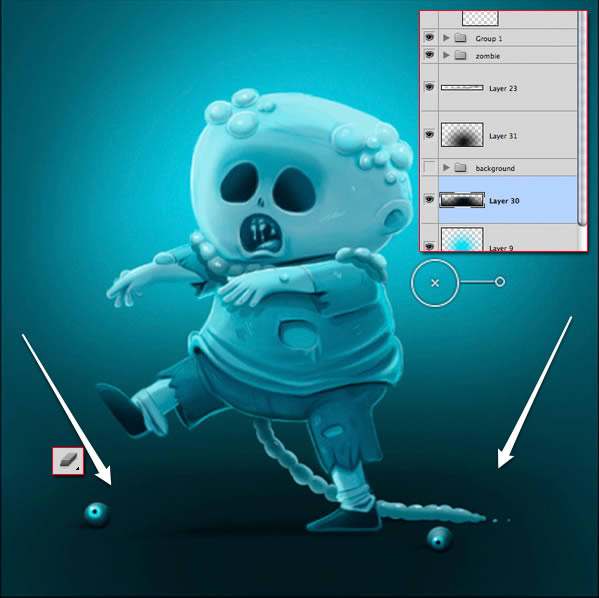
Step 4
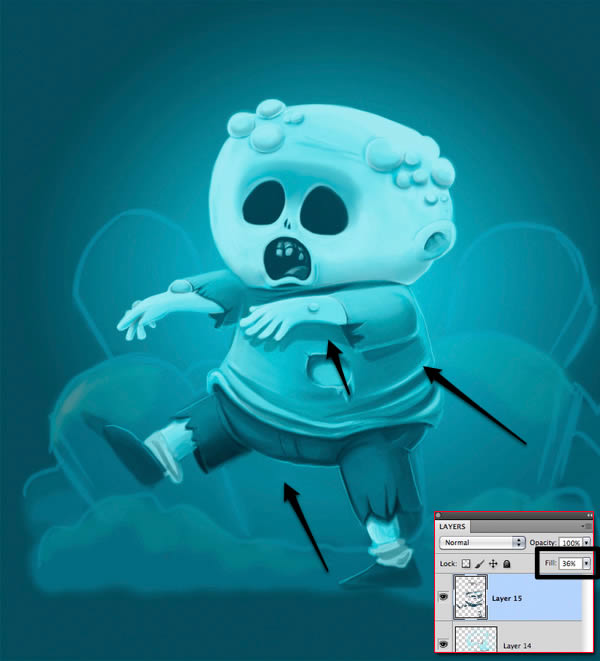
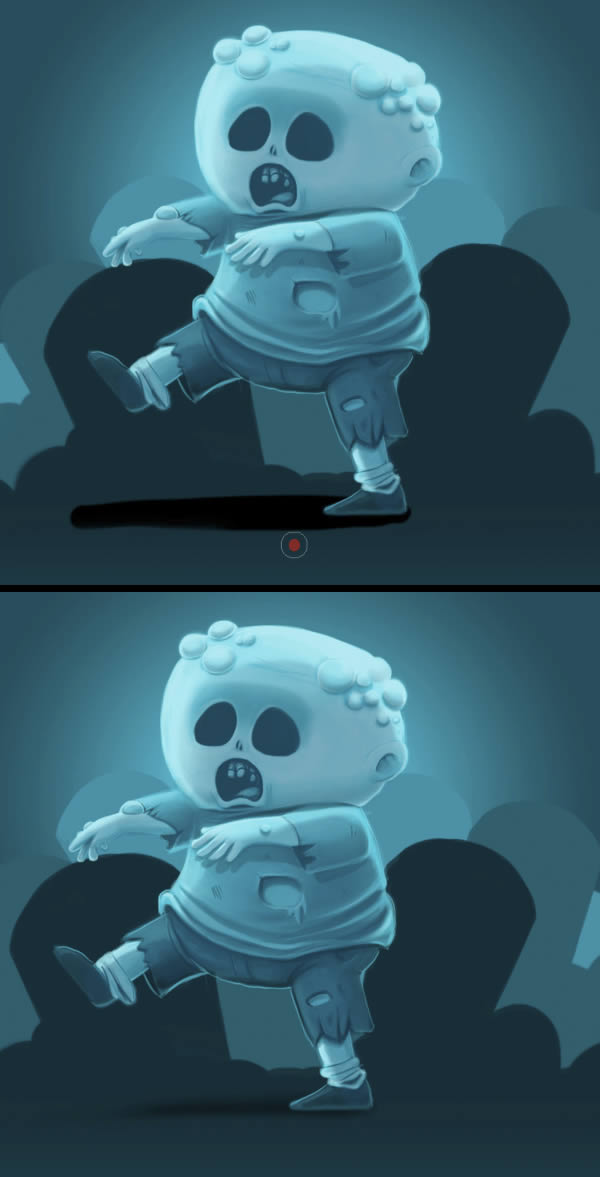
To create projected shadows use dark blue to paint them in a layer at low opacity, as seen in the picture.
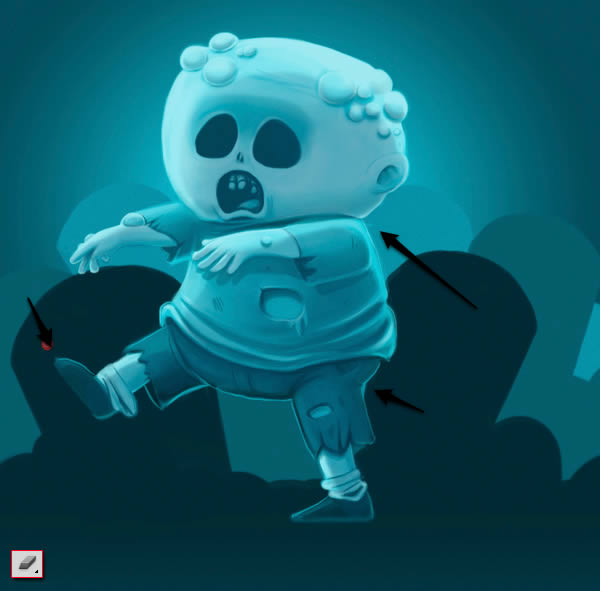
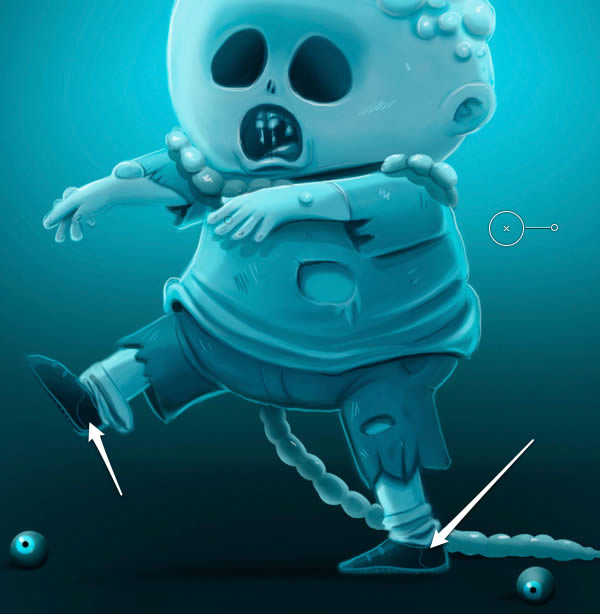
Step 5
Start adding more and more details on the clothing and the body, such as blemishes, wrinkles or tears.
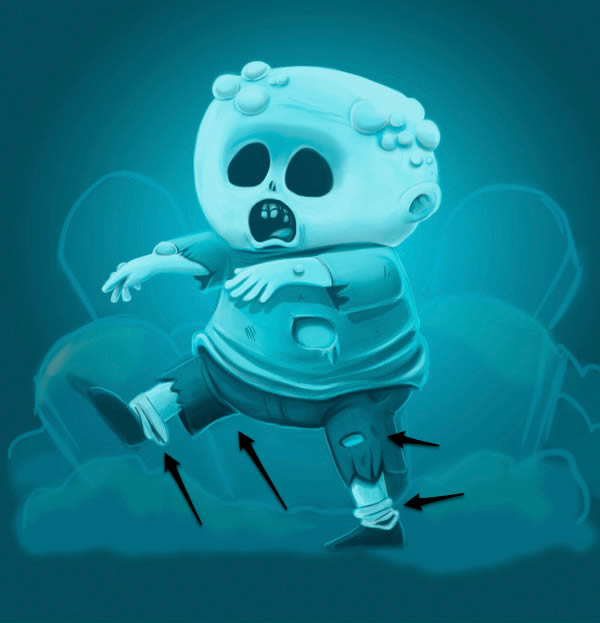
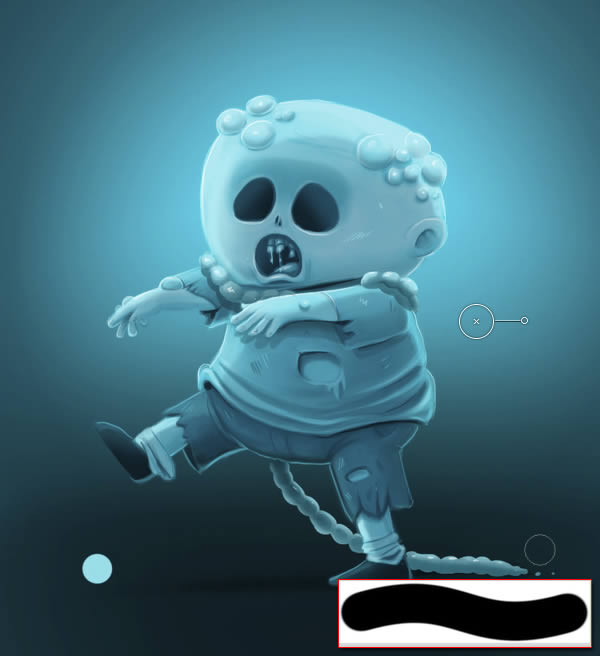
Step 6
To make this shadow, repeat what we did in step 4. Paint with dark blue, lower the opacity of the layer as seen in the picture.

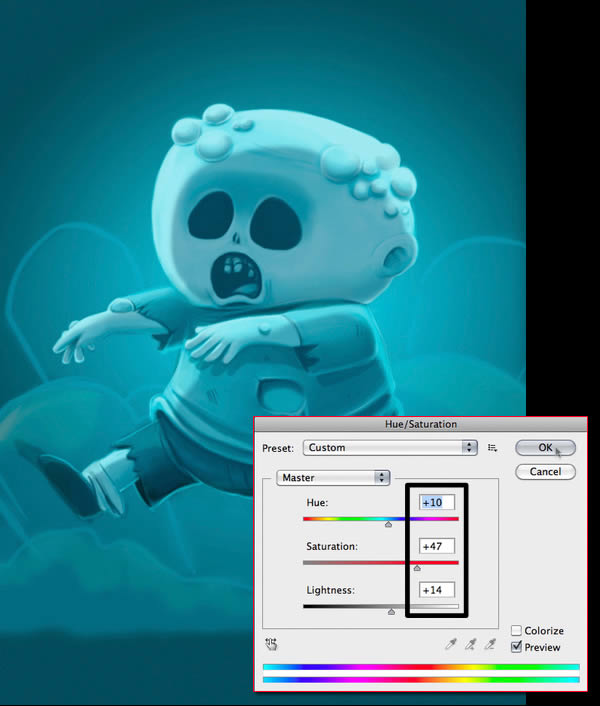
Step 7
To correct the pitch of the shadow open Hue/Saturation (Command/Ctrl + U) and set the parameters as shown in the picture.
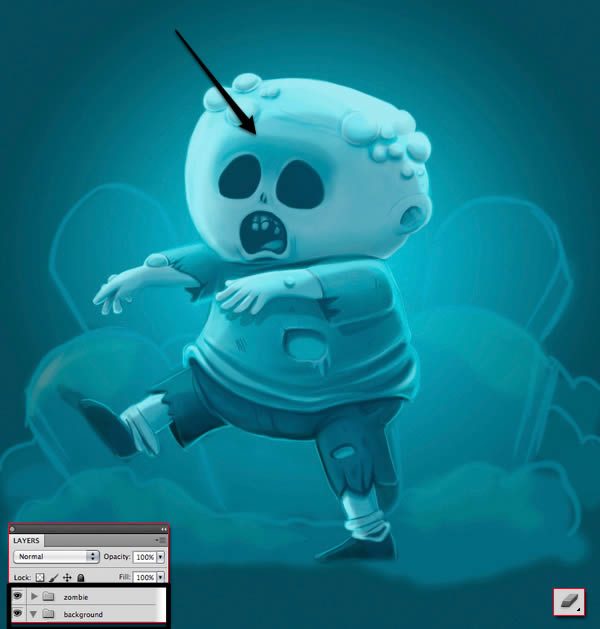
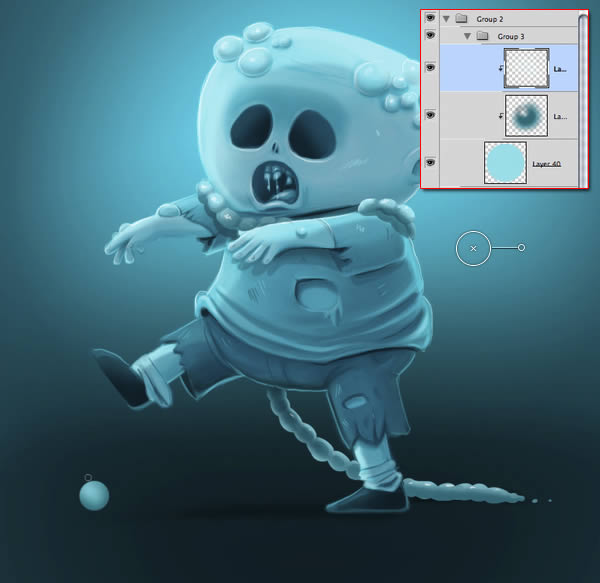
Step 8
Use the Eraser Tool (E) to soften the shadow edges. To keep things organized, I will create a new group and place all the layers of the zombie and then another group for the background.
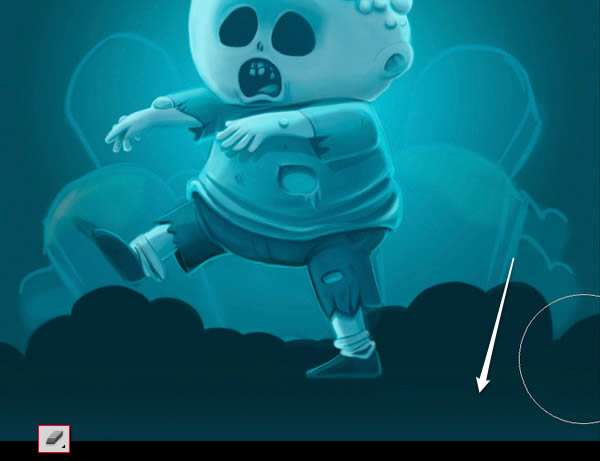
4. Begin to Paint the Background
Step 1
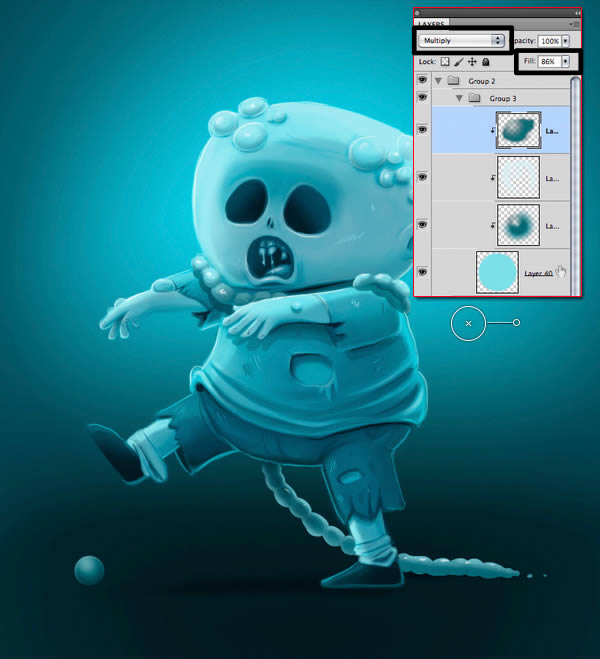
We will paint the background in three sections, from darker to lighter. In a new layer paint the strip of land in the foreground with a dark blue. With the Eraser Tool (E) and a large soft brush, erase the bottom slightly.
Step 2
Repeat with the other two layers.
Step 3
In a new layer, paint a simple coffin. Place this layer below the first. Press Command/Ctrl + T to put in place and turn a little.
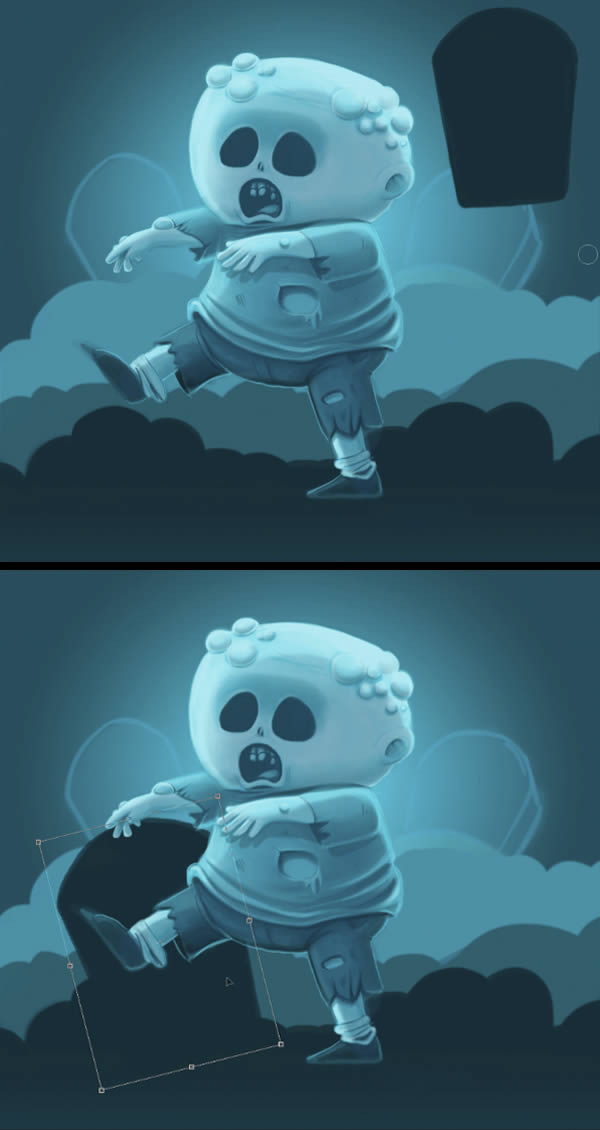
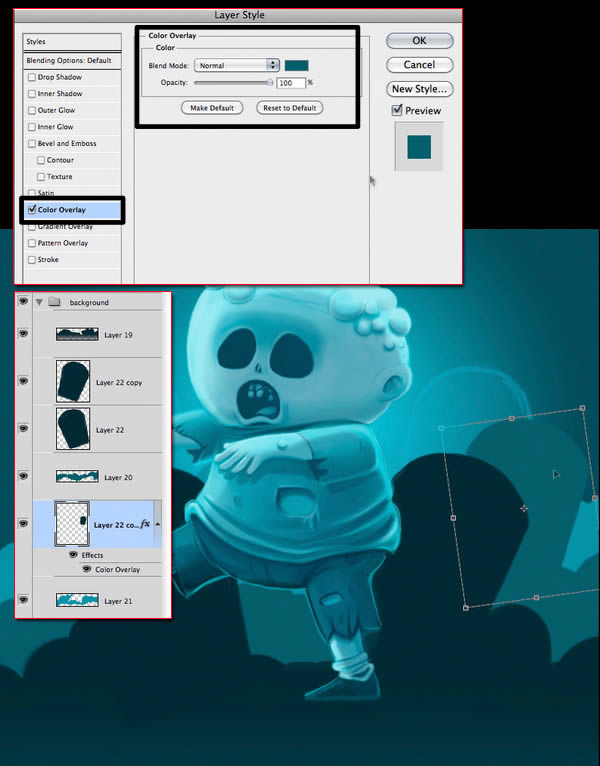
Step 4
Duplicate the layer of the gravestone (Alt + drag layer) and make double click on it to use the Layer Style. Select Color Overlay and put the color of the second layer of ground. Press Command/Ctrl + T to put in place. Repeat steps to place all gravestones.
Step 5
Delete the lines with the Eraser Tool (E)
Step 6
To make the shadow on the ground, paint it with dark blue and then smooth it with the Eraser Tool (E).
Step 7
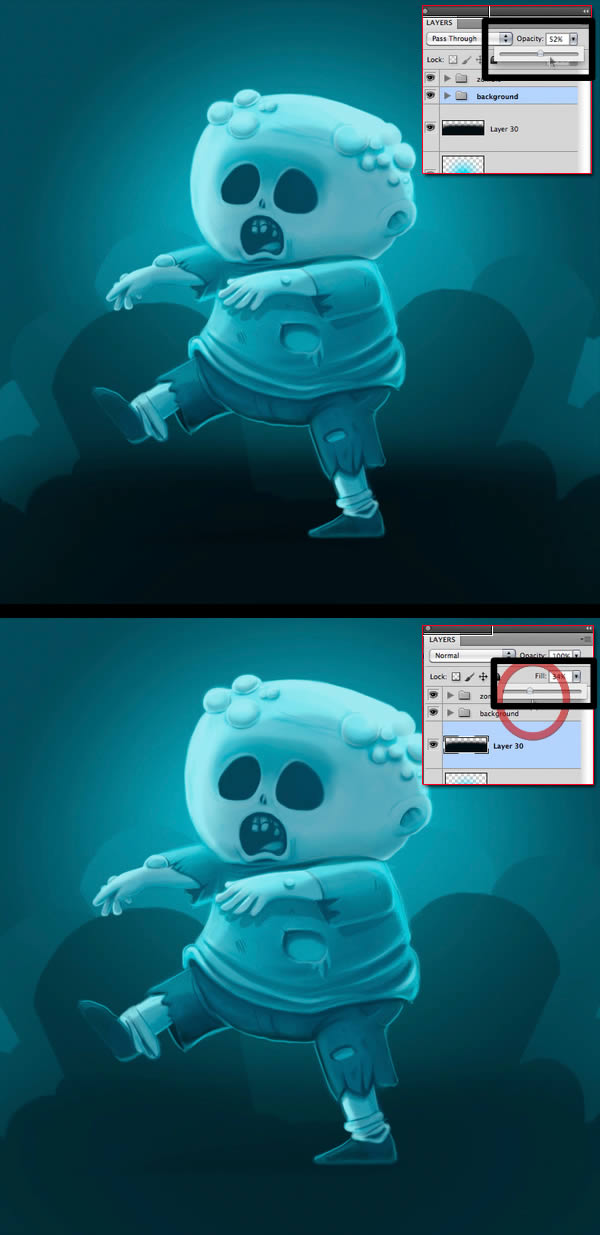
Make a black Linear Gradient at the bottom (I used a radial gradient and then stretched). Place this layer under the group “background”.
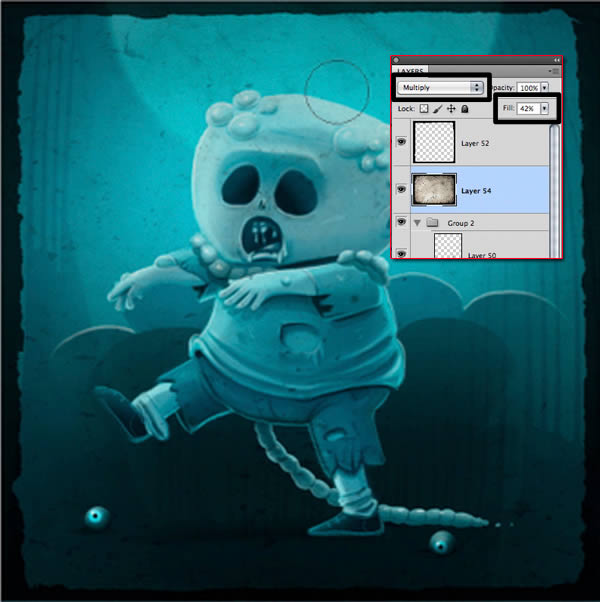
Step 8
Lower the opacity of the group “background” and the gradient layer as seen in the picture.
5. Finishing Touches to Figure
Step 1
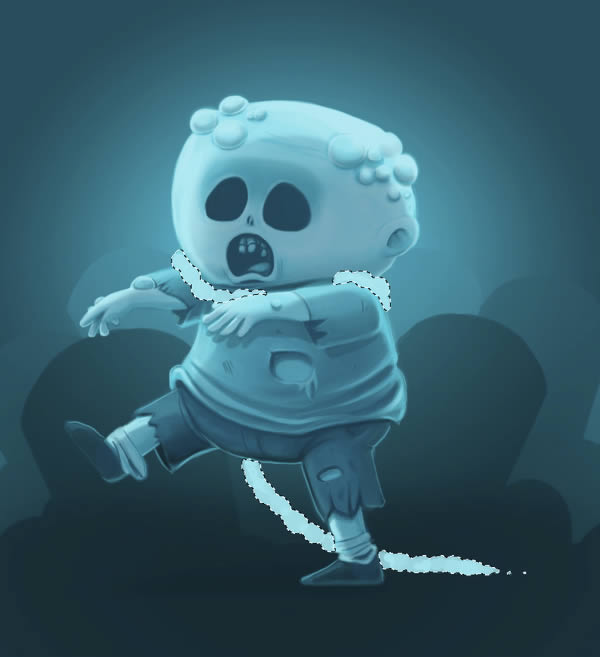
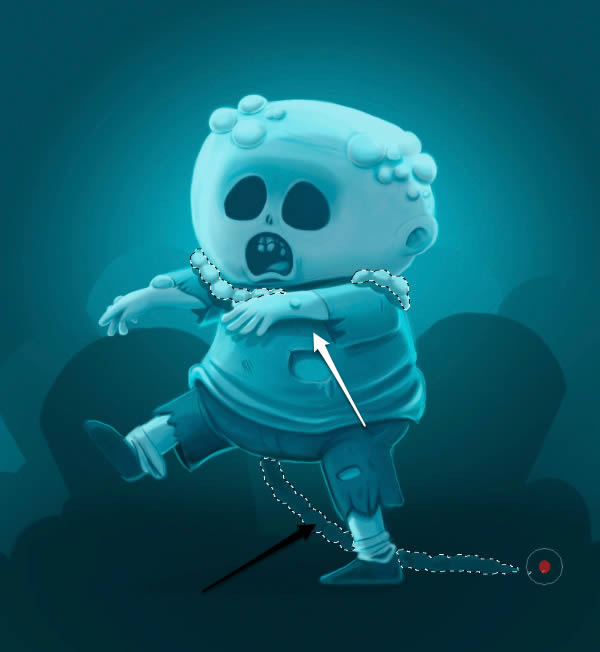
Add a layer above all to draw the “scarf”.
Step 2
Click on the layer by pressing Command/Ctrl to select the object. Once selected press Command/Ctrl + H, this makes both the guidelines and the selection disappear, but still active.
This is one of many methods to paint without going out of a given area.
Step 3
Then, with the selection made but hidden, start putting the first shadows in a new layer.
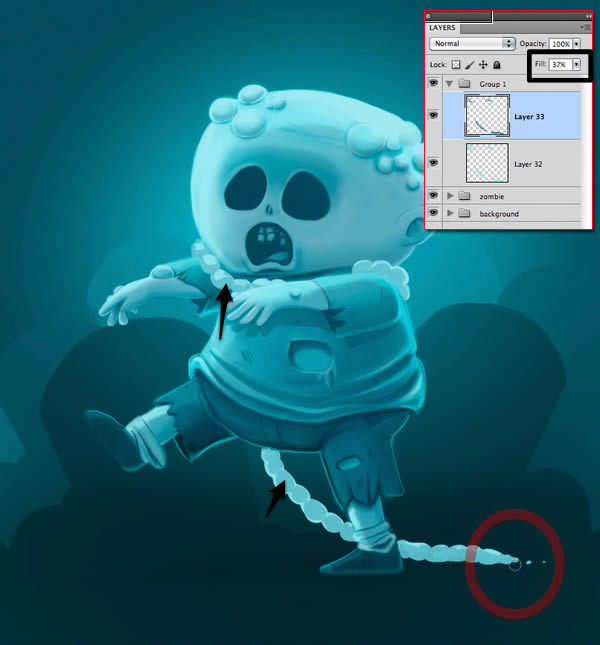
Step 4
Use the Eraser Tool (E) to clean up and soften a bit. Add another layer and with a darker blue keep modeling the volumes.
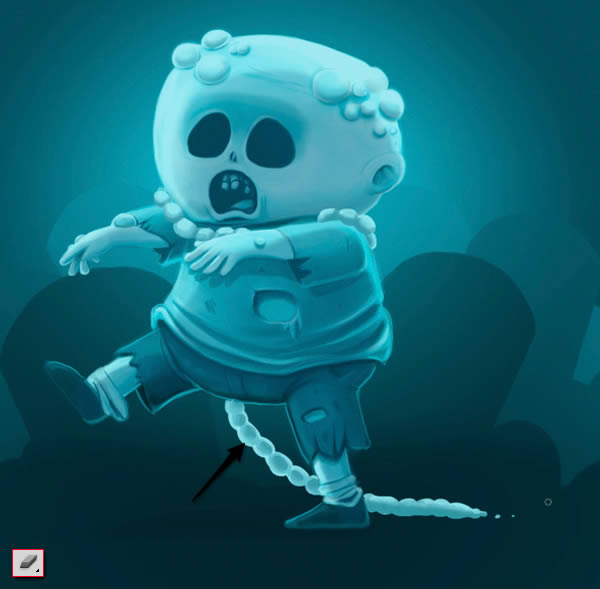
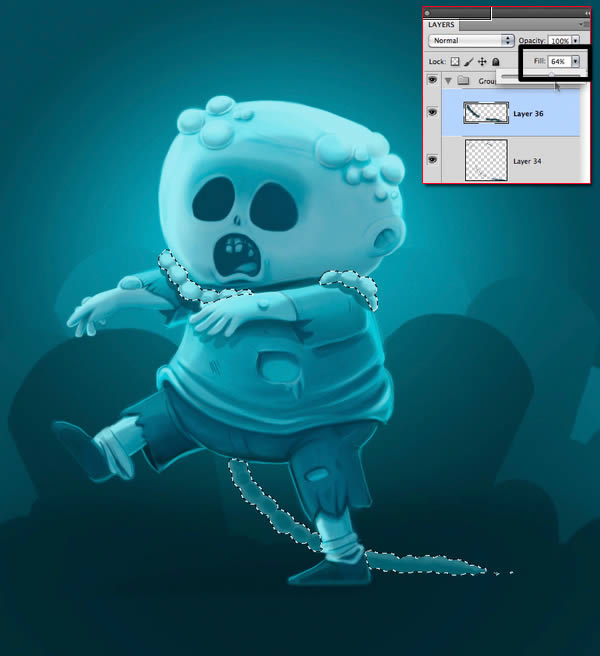
Step 5
Press Shift + Command + I to invert the selection. Add a layer with low opacity below the “scarf” and paint the protected shadows.
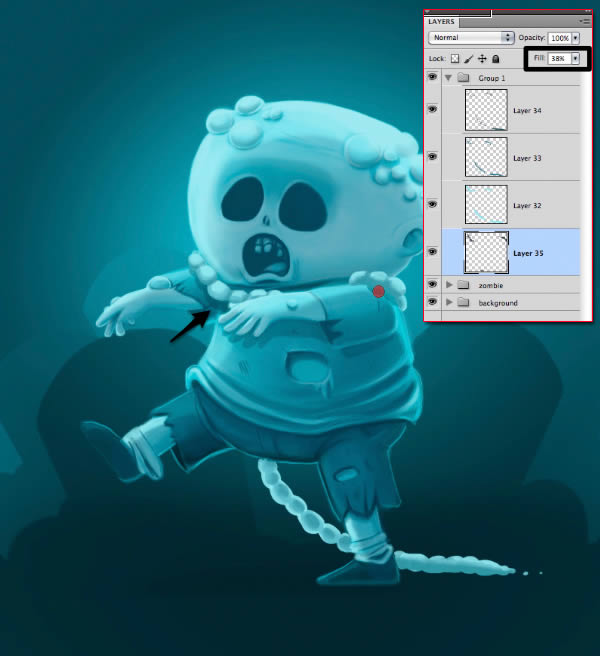
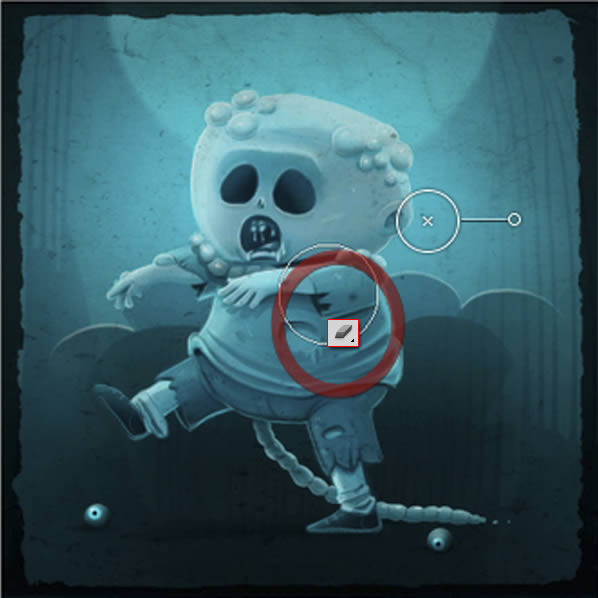
Step 6
In this case also I reinforced some shadows on body.

Step 7
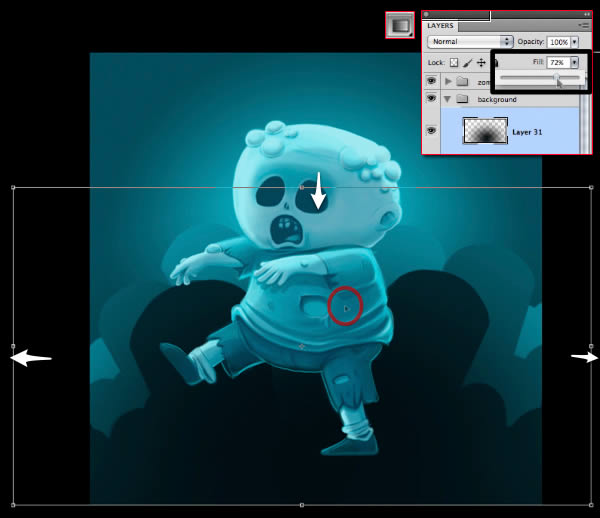
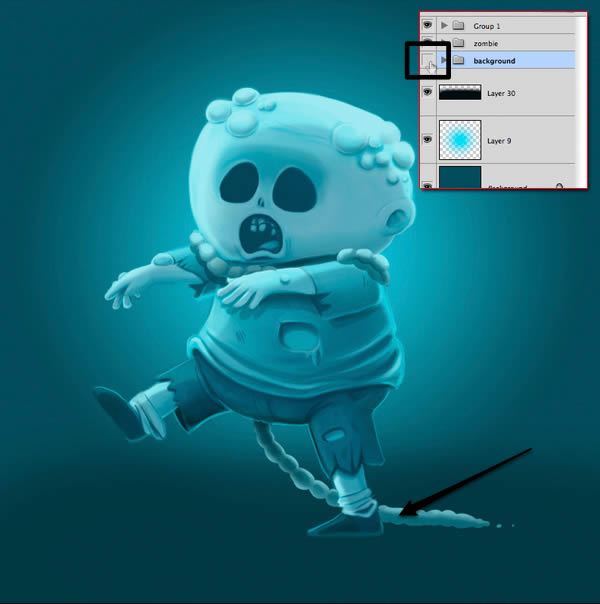
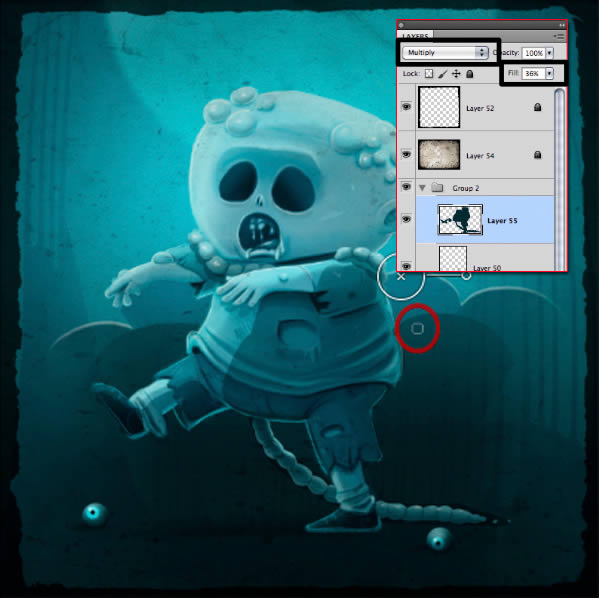
Press Shift + Command/Ctrl + I to invert the selection back again. In a new layer, darken the lower part.
Step 8
Bring down the opacity of the layer as seen in the image.
Step 9
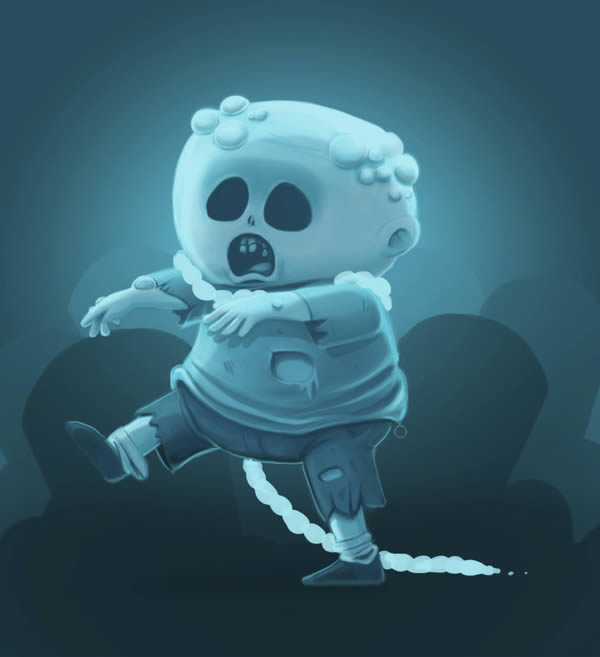
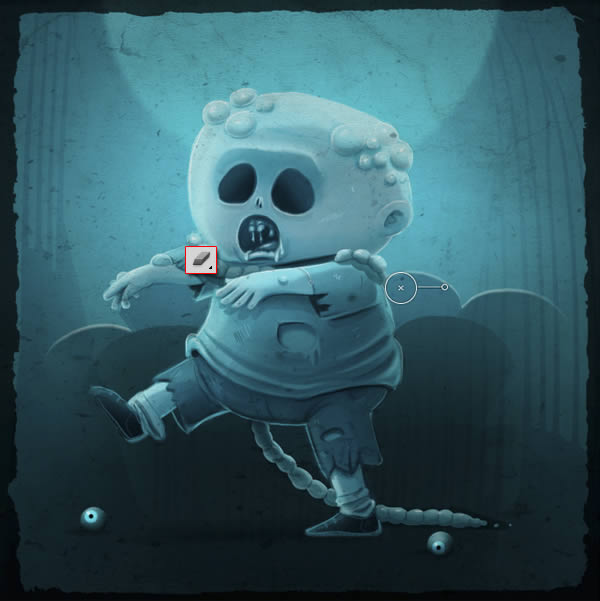
Now erase a little bit the lower part and the borders. Turn off the “background” group.
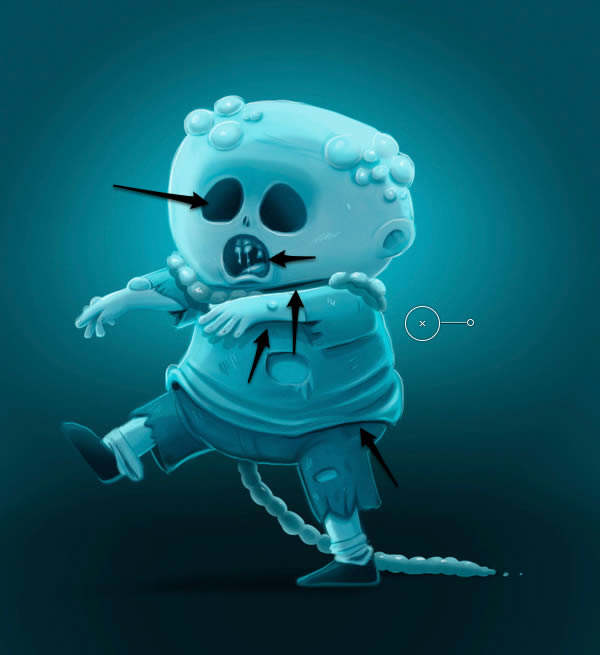
Step 10
Remove from the group “background” the layers with lighting and shading and place them outside to keep the values. Add a new layer on top. Useswhite to make highlights. Add more details, like some spittle.

Step 11
Now use some black to strengthen the separation of the elements or depth.
Step 12
Duplicate the light blue circular gradient layer, press Command/Ctrl + T and make it bigger.
Step 13
Now for the eyes on the ground, Create a ball with a hard brush without pressure.
Step 14
Add a Clipping Mask, to do this add a new layer above, press Alt + click in between the layers. Then paint the shadows and the highlights in another Clipping Mask layer.
Step 15
Strengthen the shadows with Dark blue in a Multiply layer like in the image.
Step 16
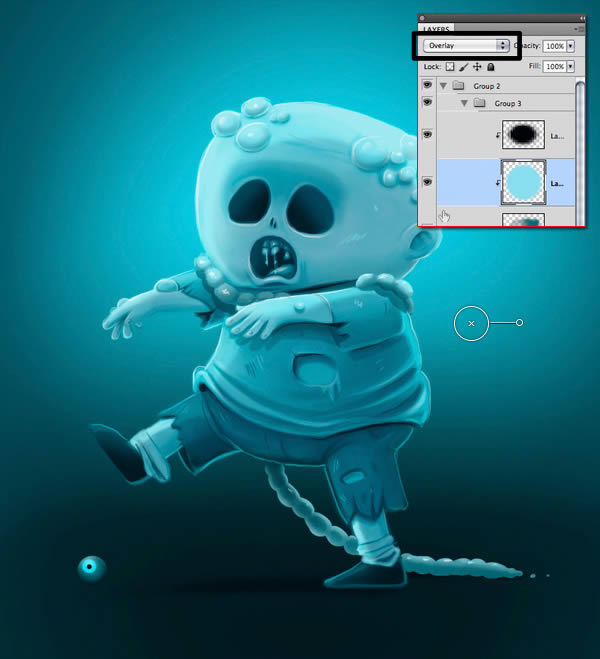
Add to separate circles for the pupil and iris.

Step 17
Put the pupil layer in Overlay Mode.
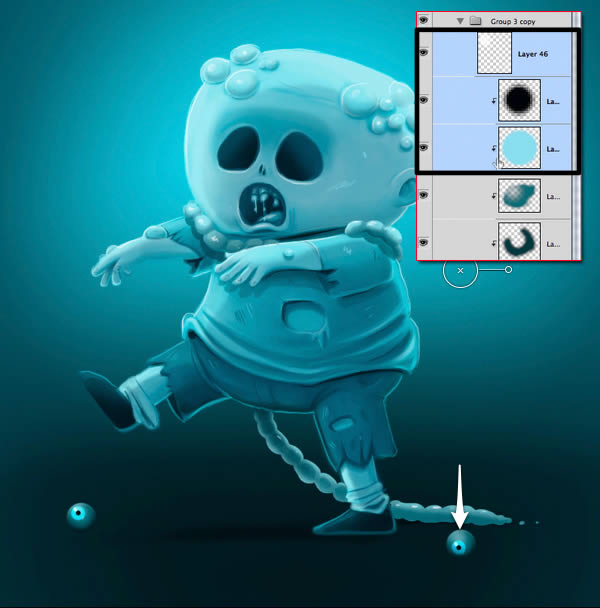
Step 18
Add a highlight to the pupil then duplicate the eye group, press Command/Ctrl + T and move it on the other side of the canvas.

Step 19
Select the layers with the pupil, iris and highlight and move them down a bit.
Step 20
In a layer below the eyeballs, paint the shadows and soften a bit.
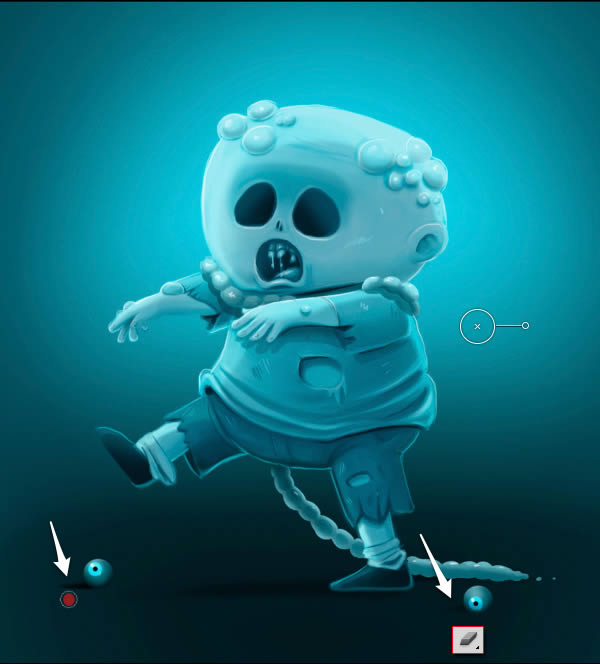
Step 21
Merge the eyes group. To do so, just click on the group and press Command/Ctrl + E. To make a selection of both eyes, click on the layers while press Shift + Command/Ctrl. Then add a new layer with low opacity and paint a shadow and then soften it as seen in the image.
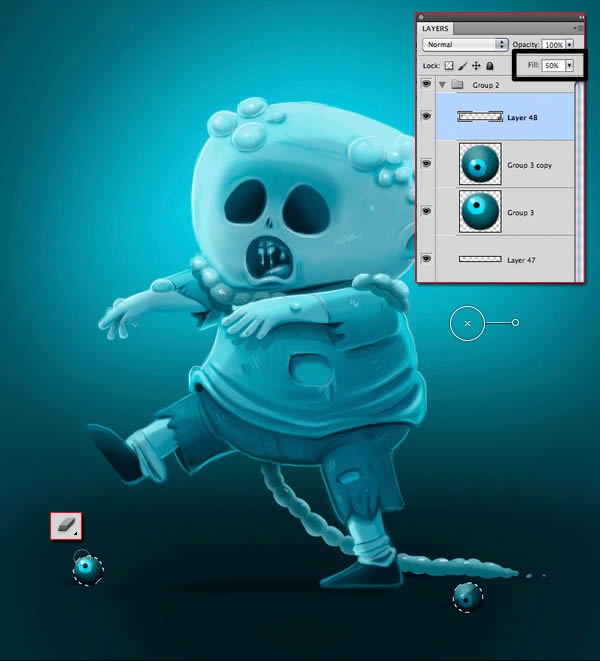
Step 22
Go back to the dark layer above, and use a big soft brush with the Eraser Tool to slightly erase the sides. Do not use pressure sensitivity.
Step 23
Now add a new layer into the zombie group and adds more details, like, in this case, to the shoes.
6. Finishing the Background
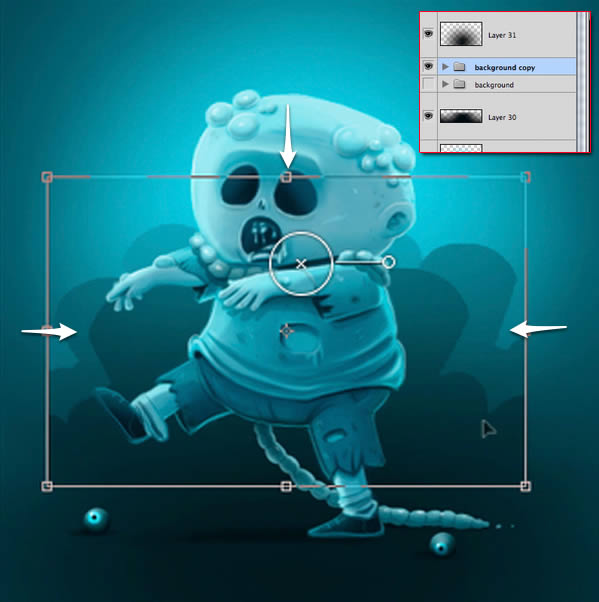
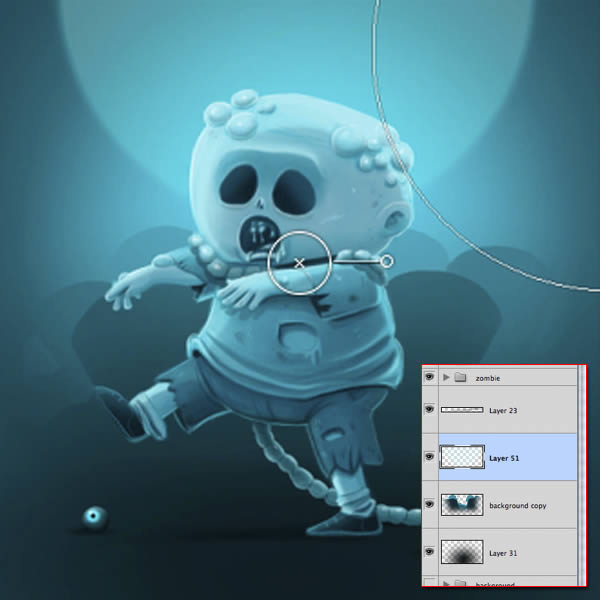
Step 1
Duplicate the “background” group and turn it on (this is just in case you need to go back to the first background later) and make it smaller.
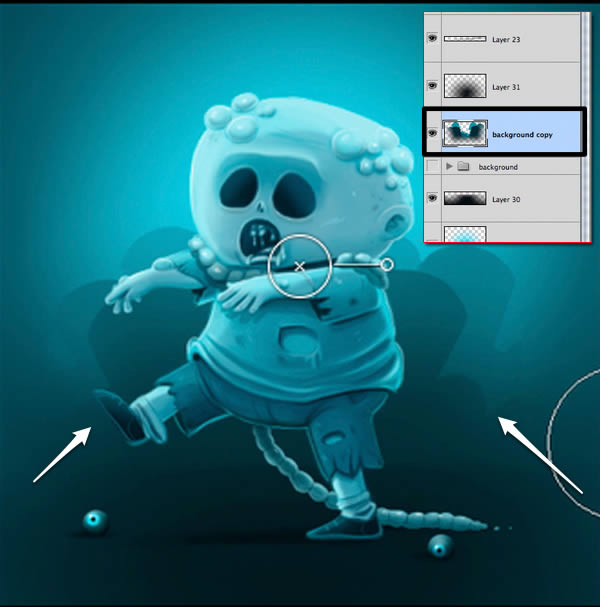
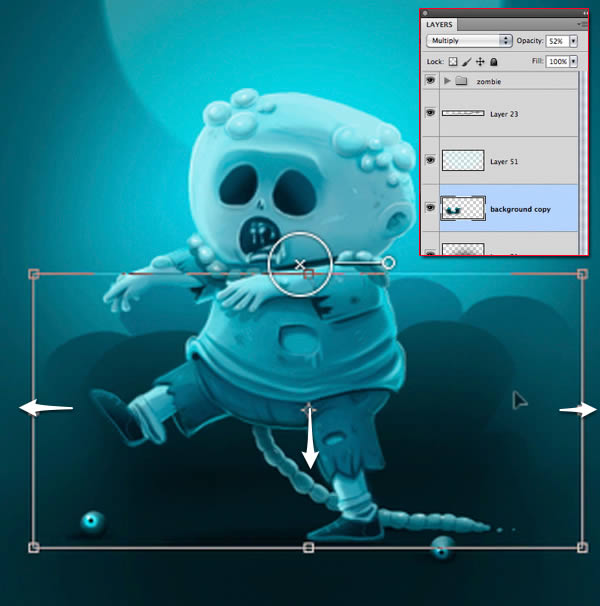
Step 2
Merge the group, lower down the opacity just a little bit and erase slightly the sides.
Step 3
Add a new layer. Uses a big round brush to make the moon as seen in the image.
Step 4
Move the gravestones down and stretch them on both sides a little.
Step 5
Duplicate the gravestones layer and put it below the first one. Invert the color by pressing Command/Ctrl + I and move it a few pixels up.

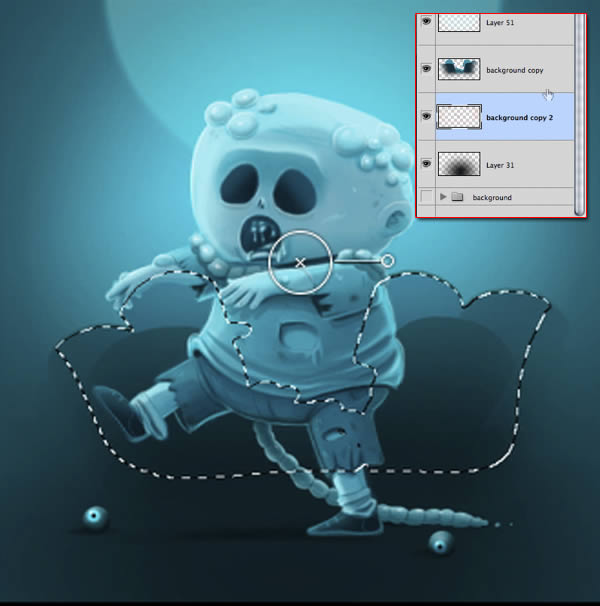
Step 6
Make a selection of the first coffins layer. Click on the second one and erase.
Step 7
Put this second layer in Screen Mode.
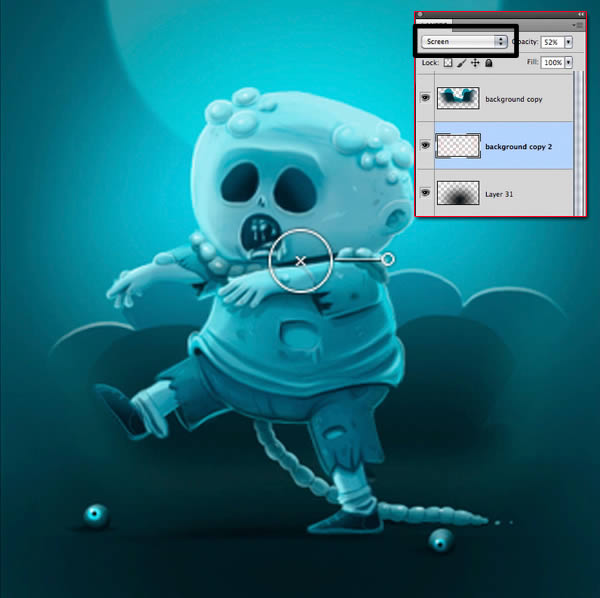
Step 8
Erase from the sides and below.
7. Add Texture to Illustration
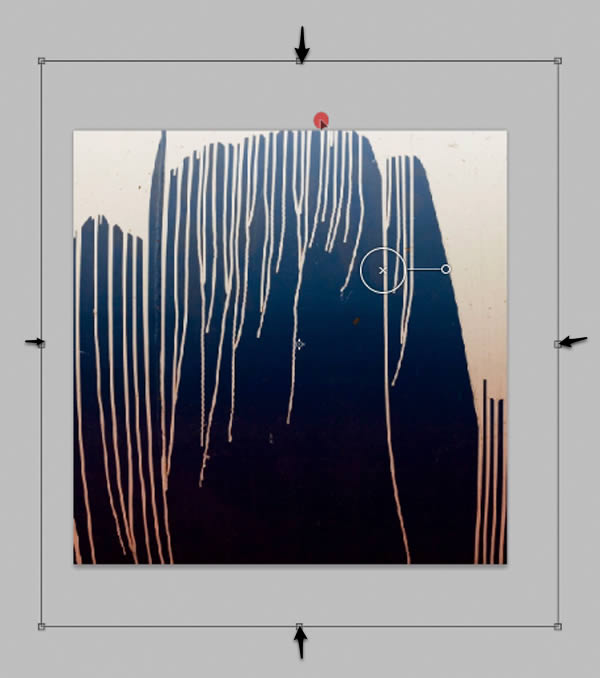
Step 1
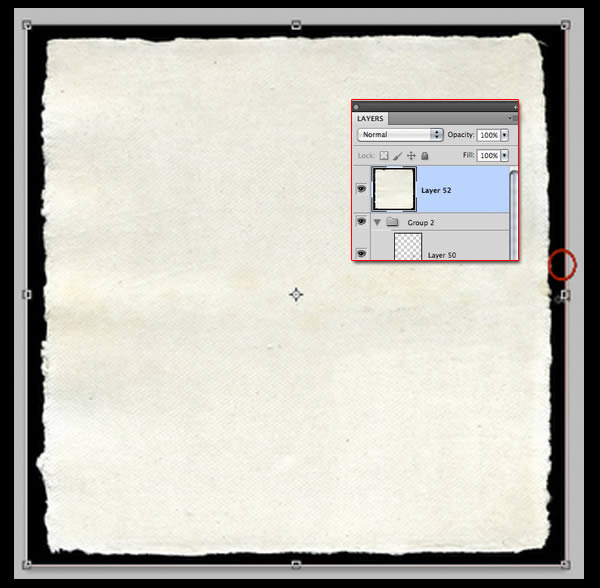
Place the first layer on the canvas. Transform it to fit in the canvas.
Step 2
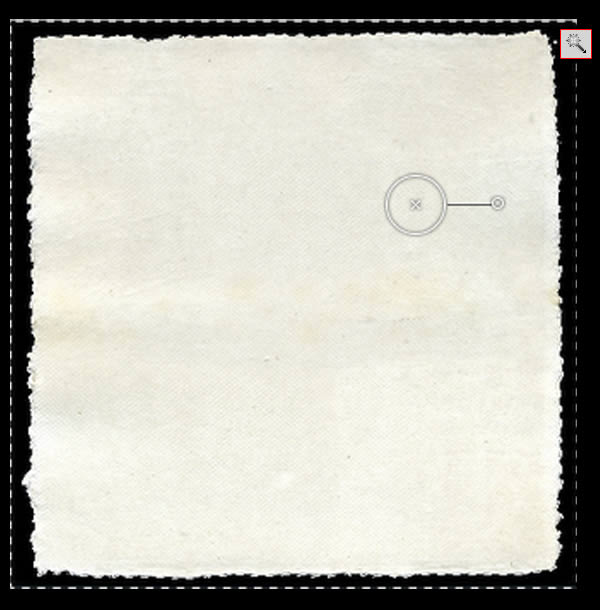
Use the Magic Wand Tool (W) to make a selection of the black sides. Then press Command/Ctrl + I to invert the selection area.
Step 3
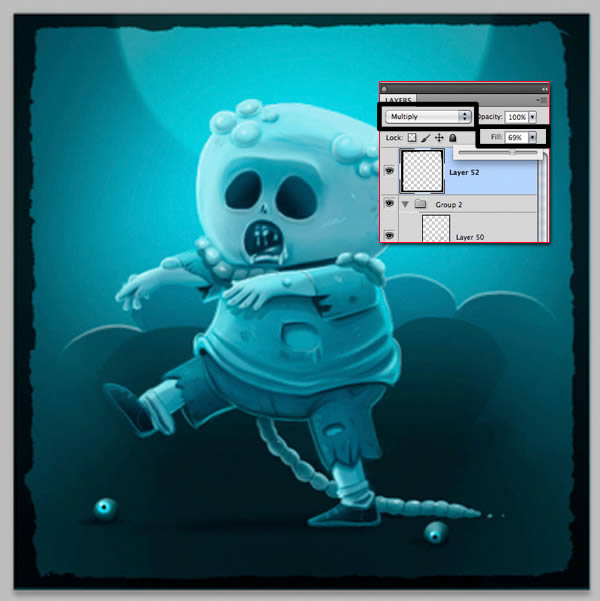
Erase the white part, put the layer in Multiply Mode and lower down the opacity as seen in the image.
Step 4
Place the second layer and transform it like in the image.
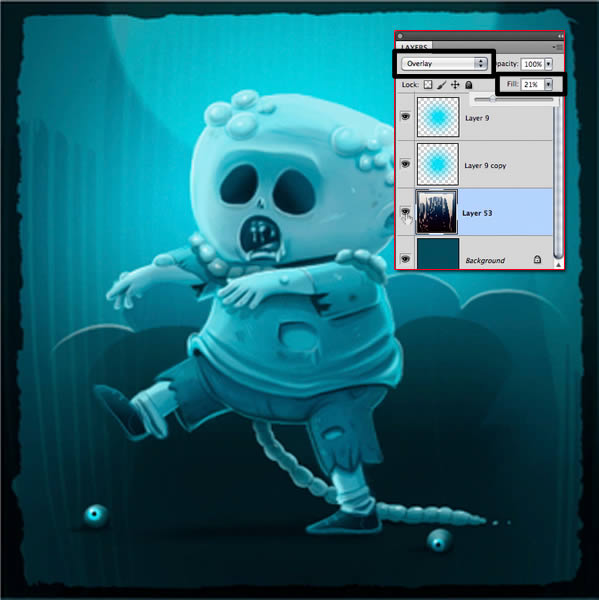
Step 5
Place this layer above all. Put it in Overlay Mode and lower down the opacity.
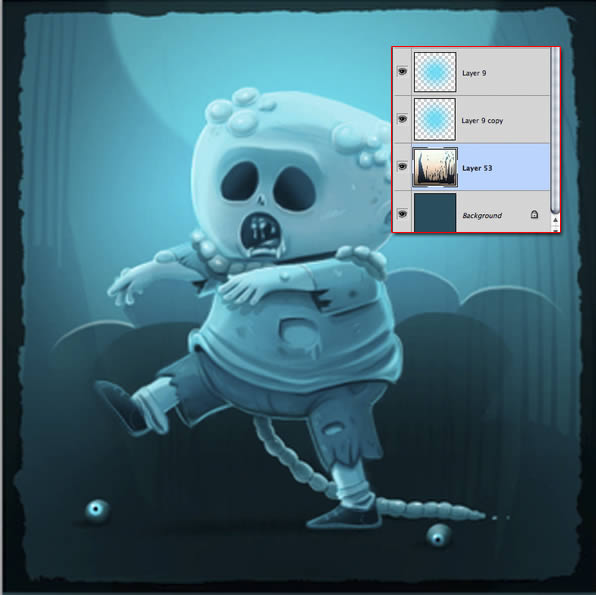
Step 6
Press Command/Ctrl + I to invert the colors and then flip vertical (Command/Ctrl + T then Right click)
Step 7
Place the third texture. This one will add some “dirt” to the image. Adjust it the size as seen in the picture.
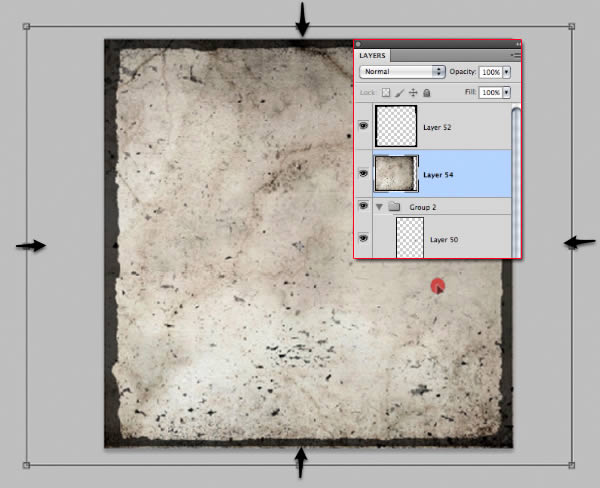
Step 8
Put the layer in Multiply Mode and the lower down the opacity.
Step 9
Use a big, soft Eraser with low opacity to delete a bit in the face and the body.
Step 10
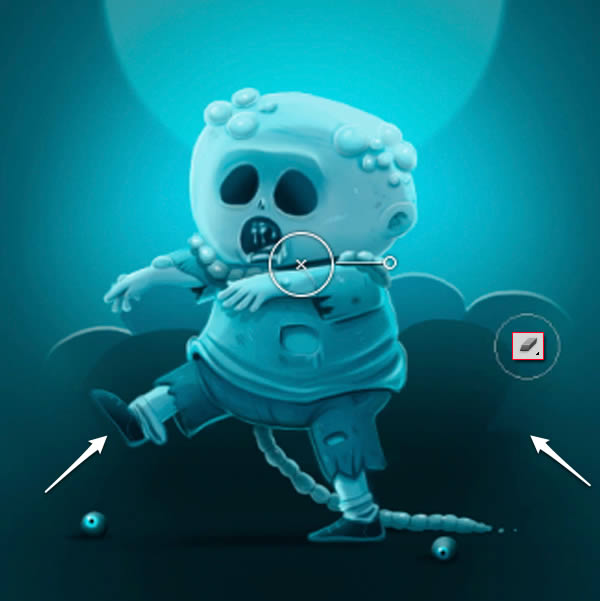
The zombie needs more shadow. Paint it just as we did in the past, like in the picture.
Step 11
Soften the side of the shadow with the Eraser Tool.
8. Add Color
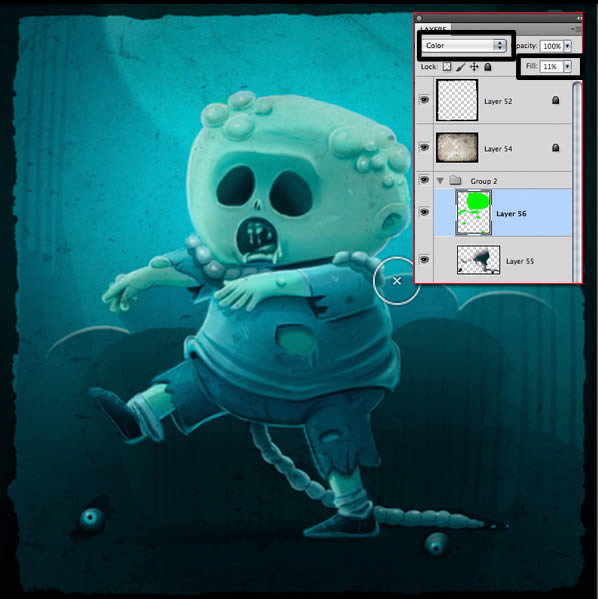
Step 1
Now, let’s put some color. Add a new layer in Color Mode and low opacity. Use a bright green to paint the face, arms and legs.
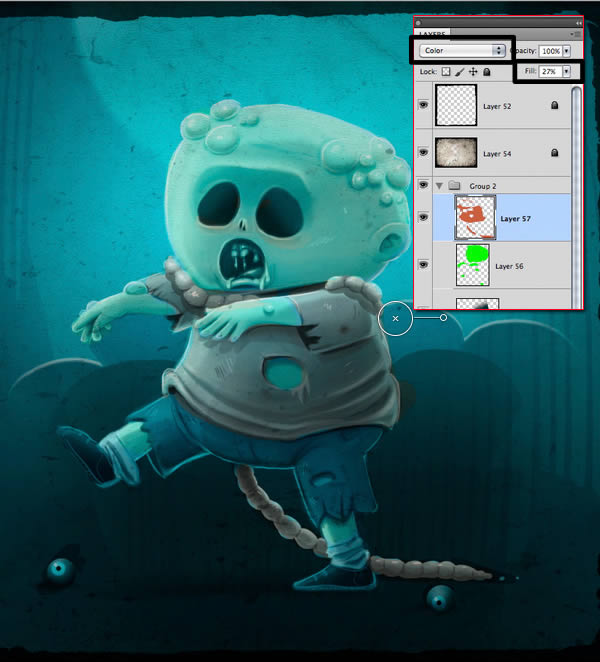
Step 2
In another Color layer, paint the shirt and “scarf” with a dull red.
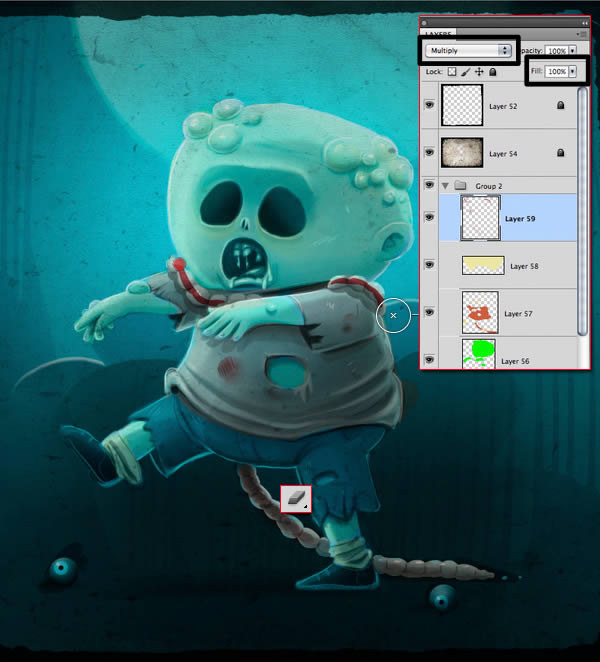
Step 3
To paint the moon uses a Soft Light layer with low opacity and paint with light yellow.

Step 4
In a Multiply layer paint the “scarf” as seen in the image with darkish red, then soften the borders. Also, add a few stains in the cloth.
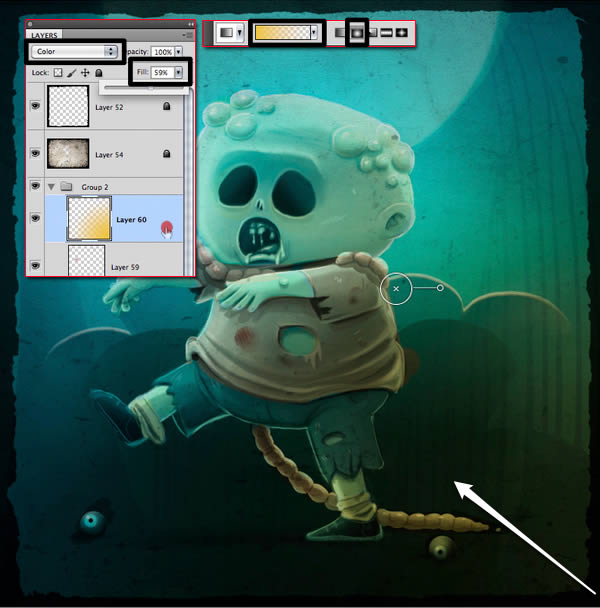
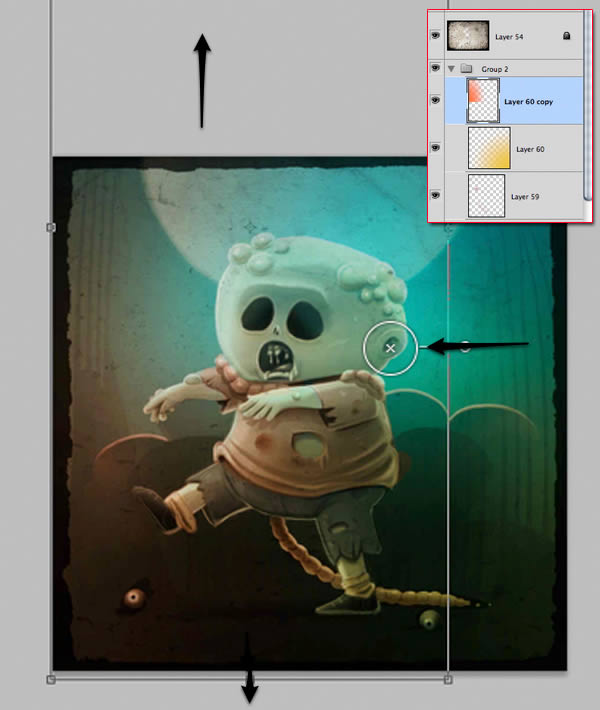
Step 5
In a Color Mode layer at half opacity, make a yellow circular gradient from the bottom corner.
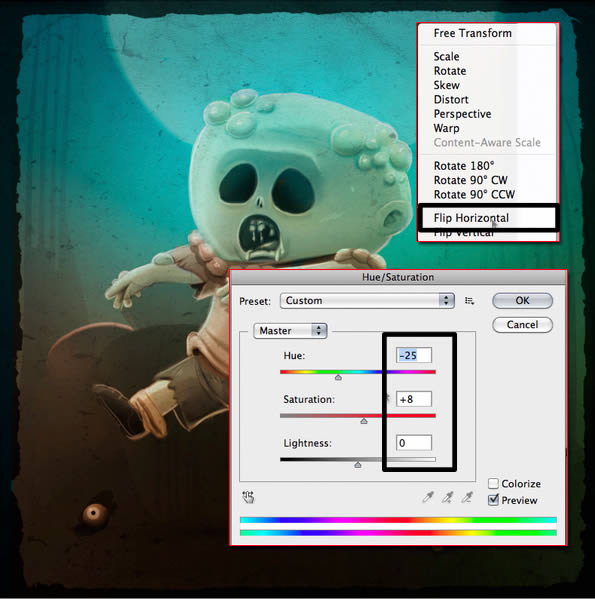
Step 6
Duplicate the layer, flip it horizontal. Then use Hue/Saturation (Command + U) and set as in the image.
Step 7
Stretch it up.
Step 8
In a low opacity layer adds some black in the basis of the shoes, eyes and “scarf”.
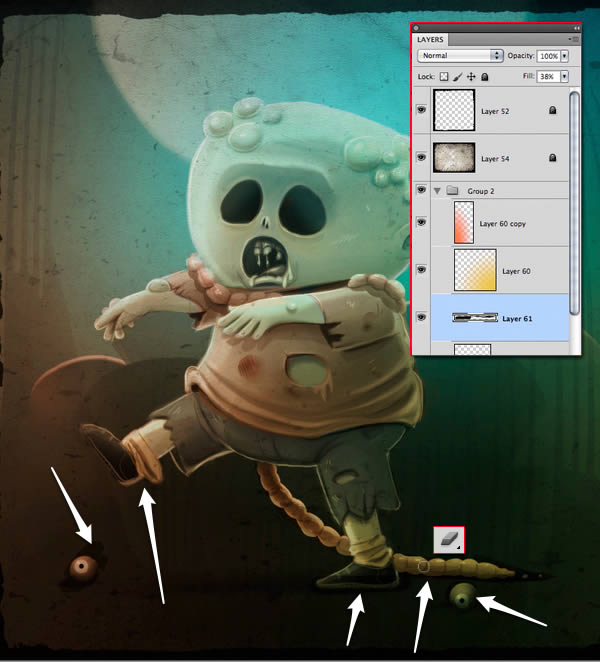
Step 9
If you feel it necessary, adjust the opacity of the color layers (in this case, up the opacity of the gradient) and corrects errors stains or misplaced.

Conclusion
In this tutorial, we showed you how to create a cute zombie illustration using digital painting techniques in Photoshop. We showed you how to block in your colors, add shadows and highlights, and finally how to clean up and add the finishing touches to your illustration. We also included a short speed painting video that demonstrated the entire process from beginning to end. We hope that you enjoyed this tutorial. See you next time!
