There are many options to choose from when you are looking to add a map to your WordPress website. There are even free options for plugins that use Google Maps.
However, the problem with many of the existing WordPress map plugins and free options is the lack of customization available to you.
In order to fit a map into your website and perform specific functions, you will need a plugin that allows you to customize all aspects of the map. The Interactive World Maps WordPress plugin gives you the power to create as many maps as you would like and adjust each of these maps to function how you see fit.
In this tutorial, I’m going to show you how to create a map with the Interactive World Maps plugin. I’ll go over how to create a map, how to customize the map, and how to add it to your website with this handy plugin.
To follow along, download and install the plugin!
Creating a Map
To create a map, click on Interactive Maps > Add New Map on the left-hand side of your WordPress dashboard. This will open up the map editor.
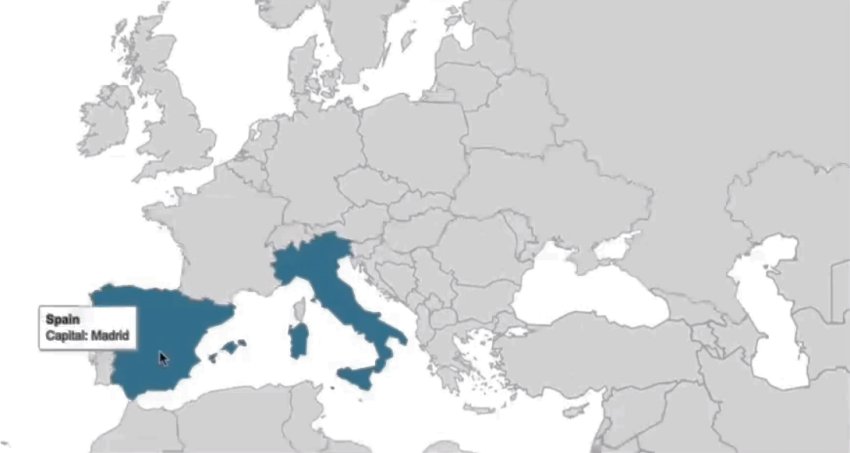
In our example, we are going to create a map that displays Europe. We are also going to add in a few interactive regions in Europe so the user can gain a better understanding of the specific country in Europe.
First, we’ll start by adding a name and description to the map. The name is going to be Europe and the description is going to be Interactive Europe Map.
Next, head over to the Map Settings section. The first option that we are going to change is the Region to Display. Since we would only like Europe to show up on our map, click Europe in the scroll down menu.
If we now scroll down to the bottom of the map editor, we can see a section called Preview. A map of Europe is now in this preview.
Going back up to the map settings, we’ll change the Active Region Action to Open URL (new window) as we would like a new webpage to appear when the user clicks on a specific country.
In our Europe map, we are going to highlight two countries, Italy and Spain. First, we’ll add in these regions under the Simple tab in the Interactive Regions section.
The first item that we need to include is the Region Code. To find the region code for our two countries, click on the Continents and Countries link right below the Map Settings—that will take you to a Google developer document listing region codes for countries and continents.
Navigate down to Europe and you will find the abbreviations for Italy and Spain which are IT and ES.
So, to create a interactive region for Italy, type in IT in the Region Code field.
Next, we are going to add a title. The title will be displayed when the user hovers their mouse over the country on the map. In this case, we’ll use Italy.
Next, we are going to add Capital: Rome in the Tooltip section. The tooltip text will appear under the title.
Finally, we are going to add in the Action Value. We will add a URL to this field, linking to a website which will be opened when the region is clicked.
We want the Italy Wikipedia page to open up in a new window when the country is clicked, so we’ll add that link in the Action Value field.
When you click the Add button on the far right of the editor, you will see in the preview that Italy is now highlighted. You can follow similar steps to make an interactive region for any other country.
To see the map creation process in action, check out the video below.
Adding the Map to Your Website
A WordPress shortcode can embed files or create objects that would normally require lots of complicated code in just one line.
The Interactive World Maps plugin makes use of these shortcodes to make it easy to add a map to your website. To get a shortcode for a specific map, click on the Create Map button on the left-hand side of the map editor under Visual Settings.
A shortcode will appear at the top of the editor—copy this shortcode to your editor to your clipboard.
Next, head on over to a new page or post. In the page or post editor, paste the shortcode in and click the Preview button on the right-hand side of the editor. The map that you have just created will now be visible on your page or post.
Watch the video below to see how to add the map to a WordPress post or page.
Conclusion
The Interactive Map WordPress plugin gives you the ability to create and customize an interactive map and place it on your WordPress site for an affordable price. In this plugin, you learned one way to create a map using the plugin.
To give this plugin a try, head over to CodeCanyon and check out the live preview of the Interactive Map plugin.
And while you’re here, check out some of the other great WordPress plugins available from CodeCanyon.
