Apply Noise and Texturizer with same settings like in step 2:

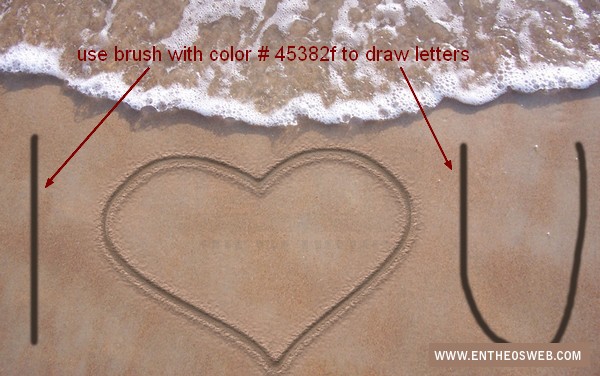
Call this layer as “letters”.
Step 11
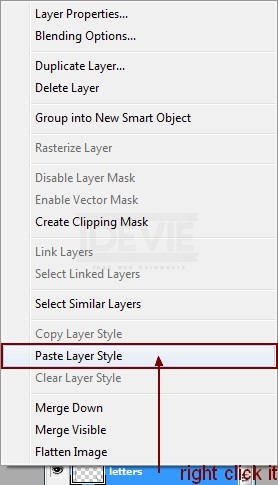
Choose heart shape layer then right click it, choose Copy Layer Style:

Choose “letters” layer, right click it, choose Paste Layer Style:
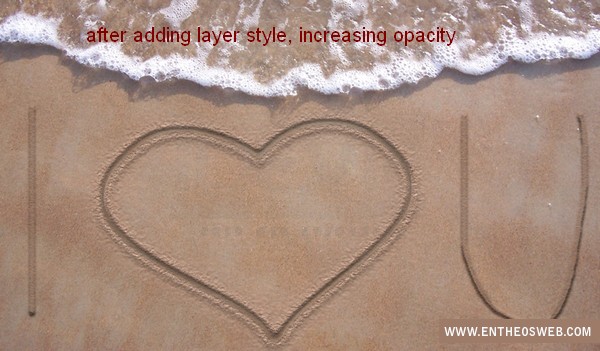
Increase opacity to Multipy 60%:
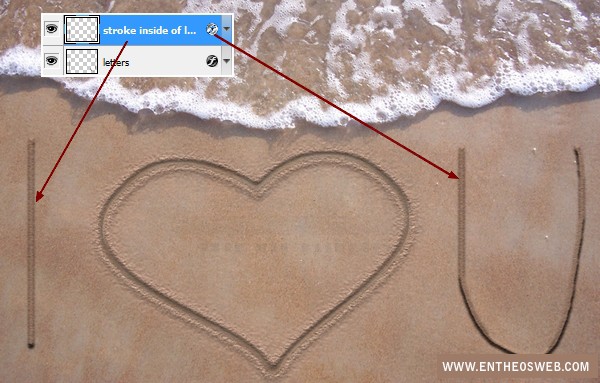
Step 12
On letters layer, load its selection with contract = 2. Right click it, choose Layer via Copy, we have:
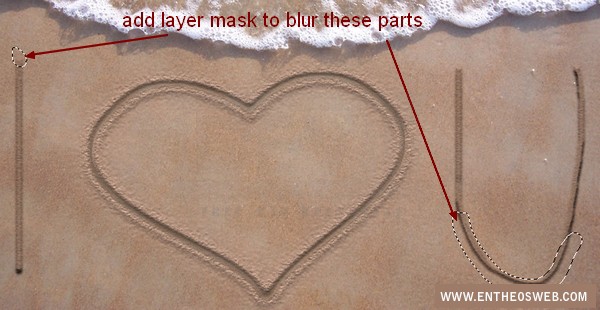
Add layer mask to blur some too visible stroke parts:
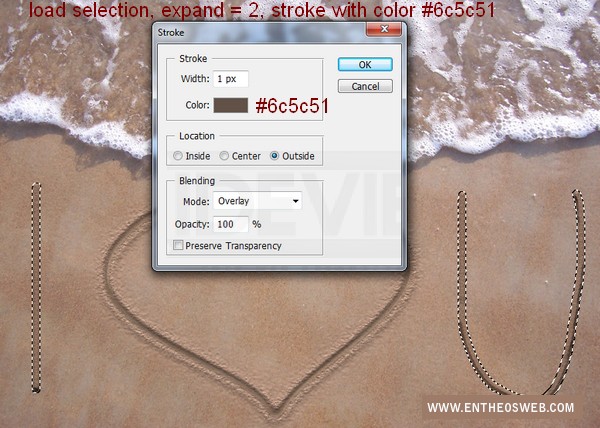
Step 13
Make a new layer and place it on the top. Load selection of letters again, apply Expand with value = 2 then stroke it with color #6c5c51:
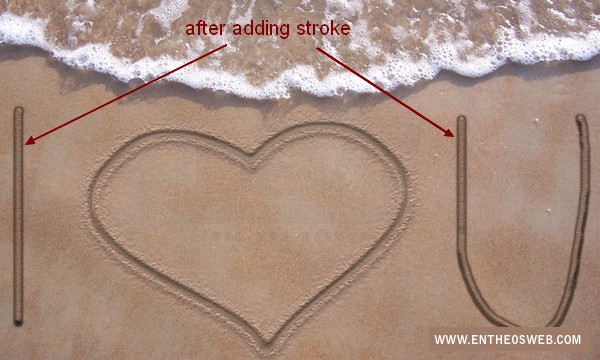
We have result:
Step 14
In this step we make more stroke outside letters by creating two layers and doing the same techniques done in step 5, 6, 7 for heart shape, except don’t duplicate stroke-in step 6). Here is my result:
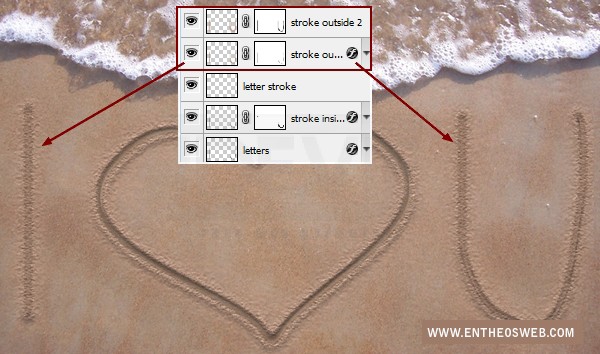
Step 15
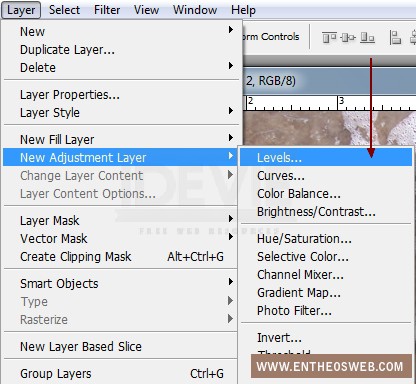
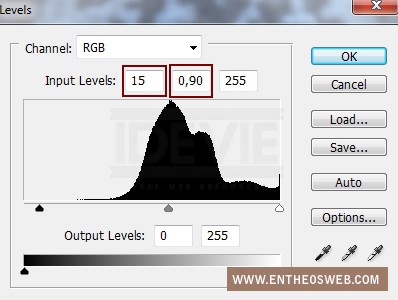
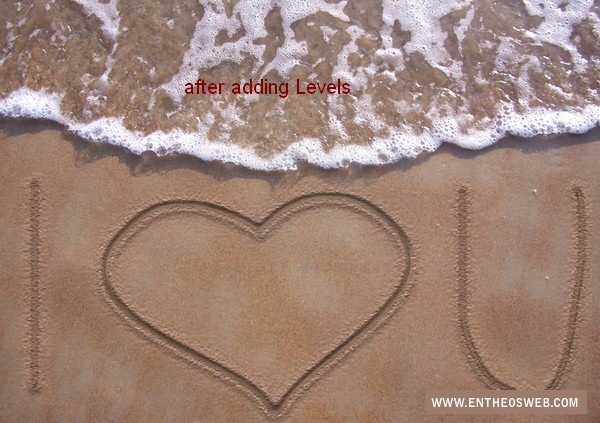
The picture looks too bright so I use a Levels layer to fix it. Choose Layer-New adjustment layer-Levels:
Change the Shadow and Midtone value:
Step 16
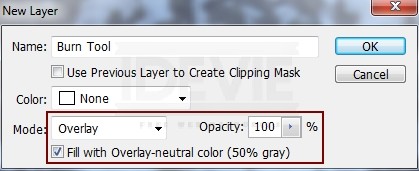
We’re almost done! Create a new layer, set to Overlay 100% and fill with 50% gray:
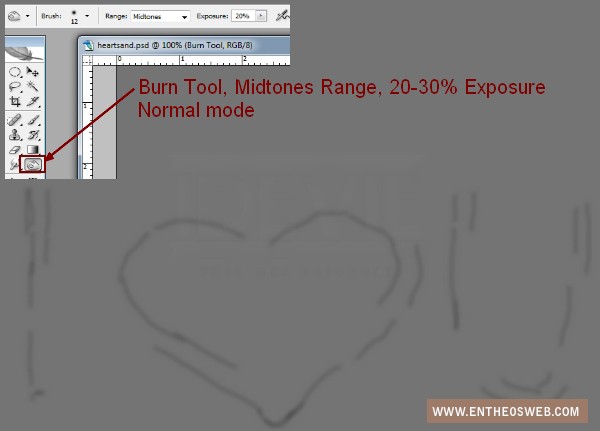
Hit O to active Burn Tool, I set value for this tool as Midtones Range and 20-30% Exposure. Use it to darken some parts of our message. You can see how I used it with Normal mode ( dark parts on screenshot):
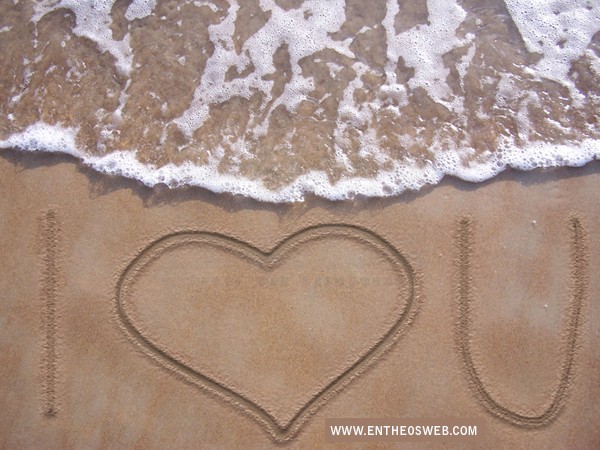
Final Result