
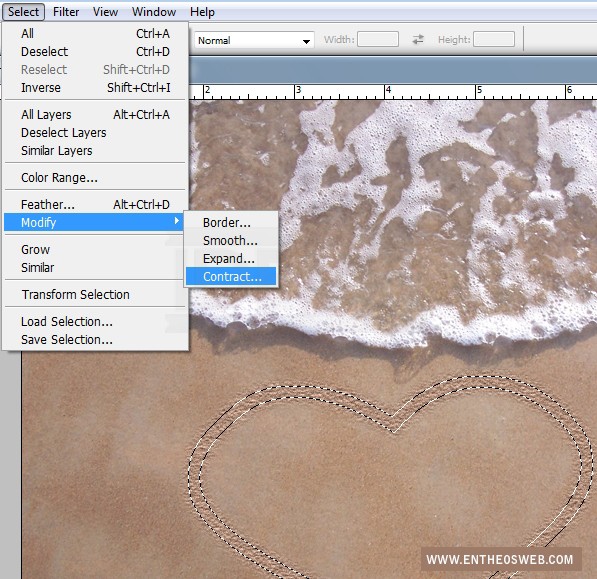
Step 5
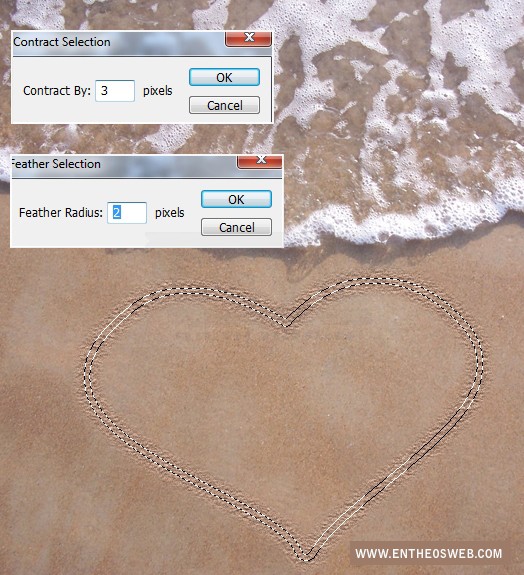
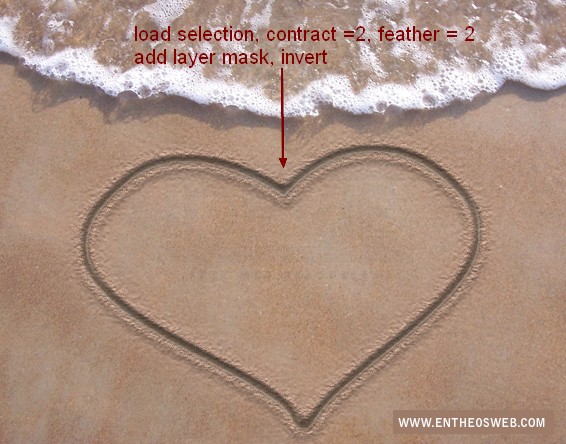
Right click heart shape layer and load its selection again. Choose Select-Modify-Contract and set value as 3. Then set feather for it as 2.
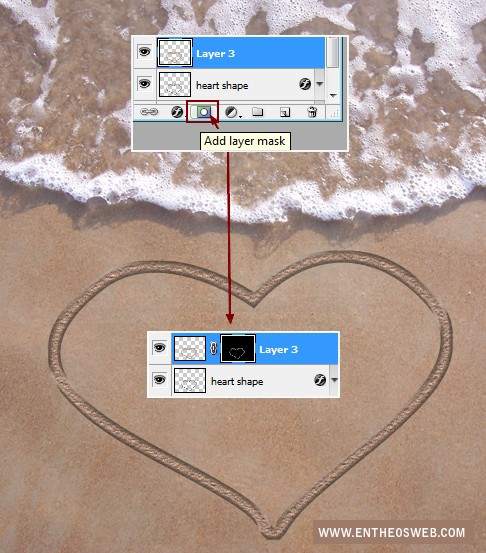
Click the button at the bottom of Layer Pallete to add layer mask. We have result:
Still choose layer mask thumbnail, press Cmd/Ctrl+I to invert layer mask:
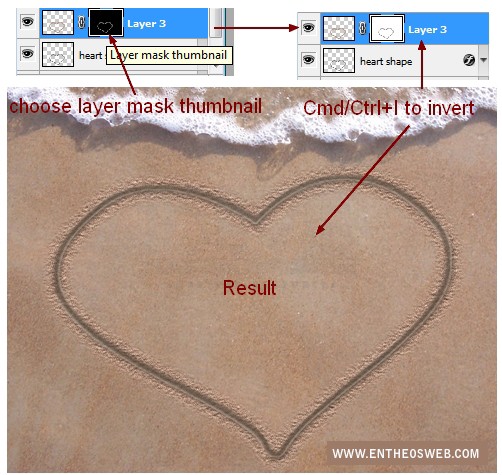
Name this layer as “stroke 1″.
Step 6
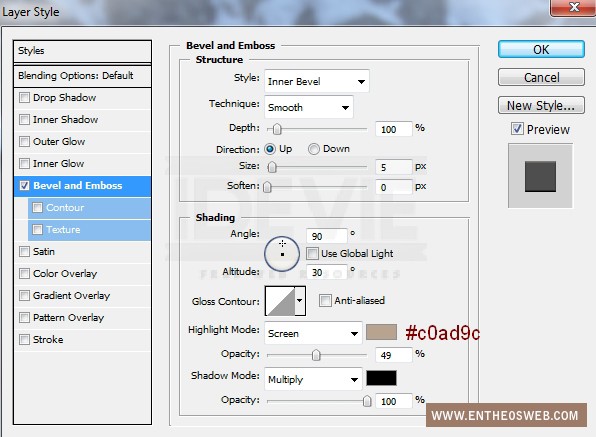
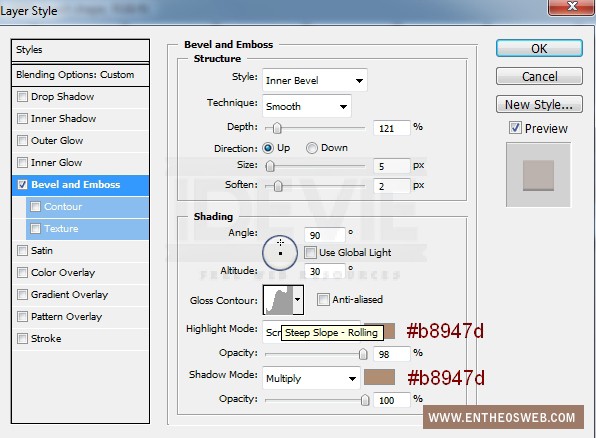
Right click “stroke 1″ layer, choose Blending options:
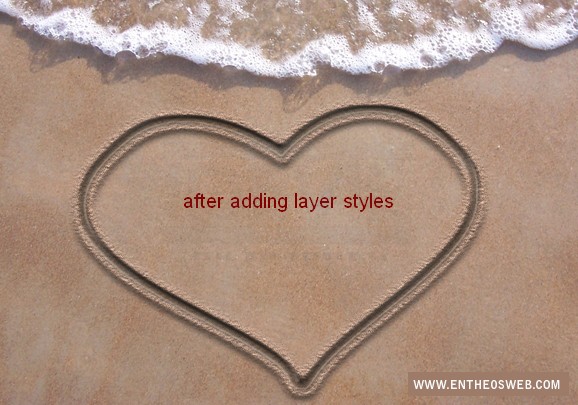
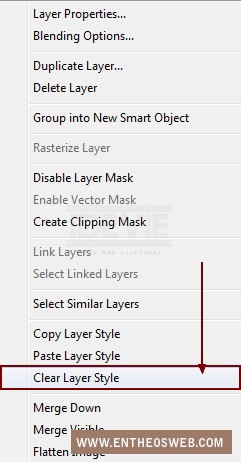
Duplicate this layer and lower opacity to 50%. Right click it, choose Clear Layer Style:

Step 7
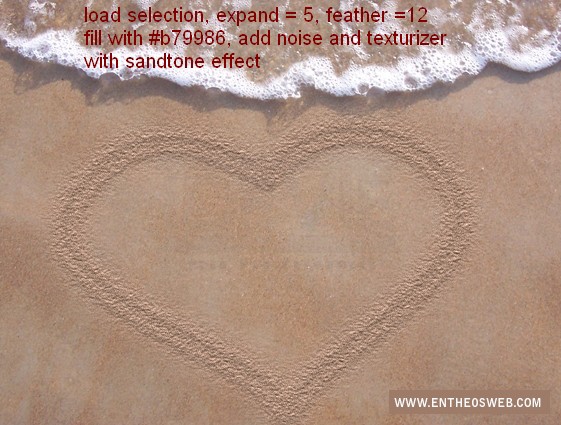
Make a new layer and place it on the top. Load selection of “stroke 1″ layer. Do the same techniques in step 4, but with feather for selection = 12. We have result after applying Noise and Texture filter:
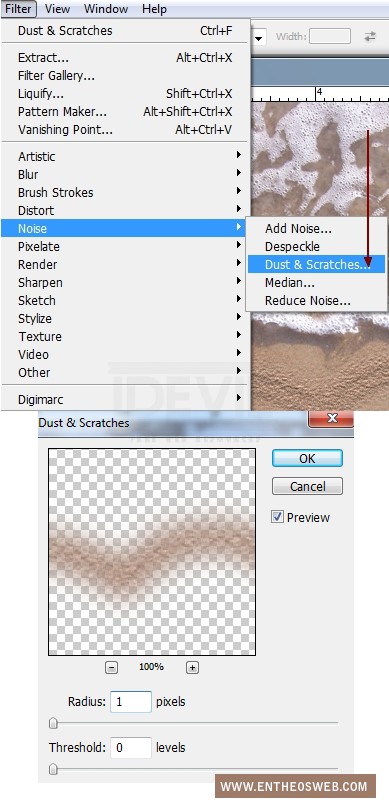
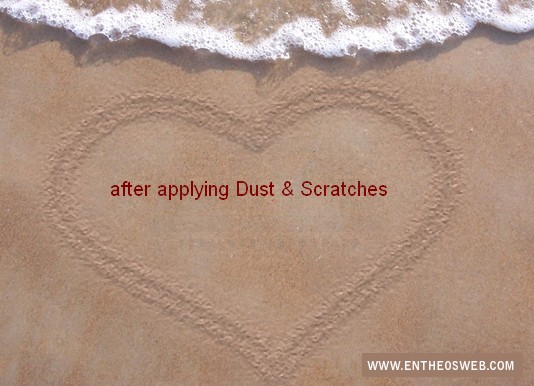
Then choose Filter-Noise-Dust & Scratches:
Load selection of “stroke 1″ layer again then do the same technique in step 5 but with value of Contract as 2. This is result we get:
Step 8
Come back to heart shape layer. We’re going to change layer style effect again to make it look more realistic. Right lick it, choose Blending options:
Lower opacity to Multipy 40%:
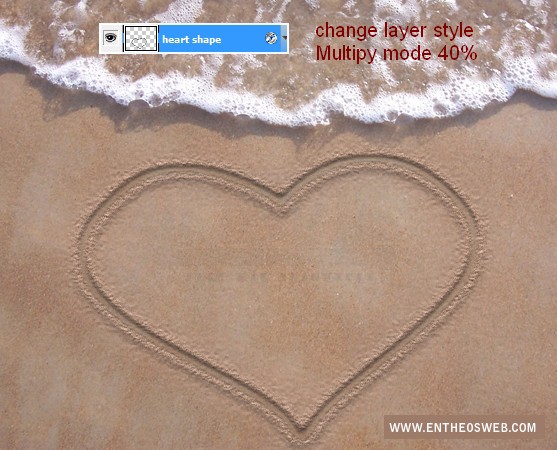
Step 9
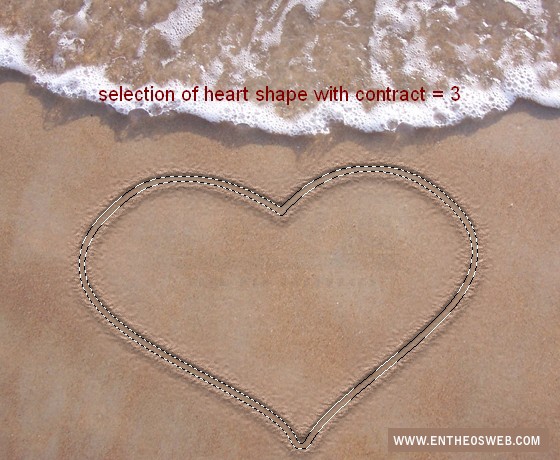
Still on heart shape layer, hold Cmd/Ctrl+click its thumbnail to load its selection. Choose Contract value as 3:
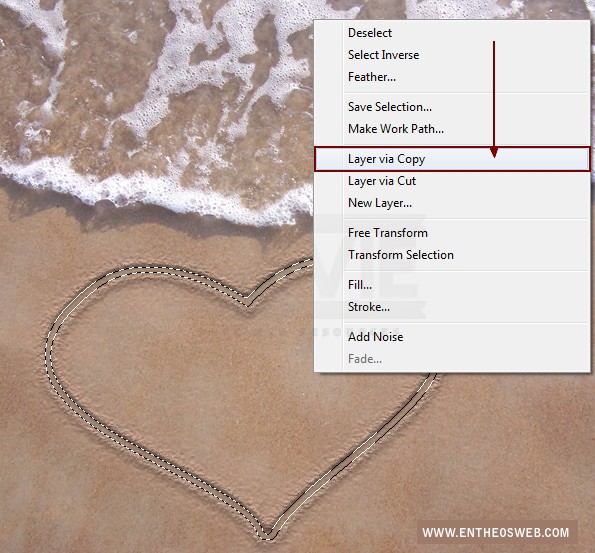
Right click this selection, choose Layer via Copy:
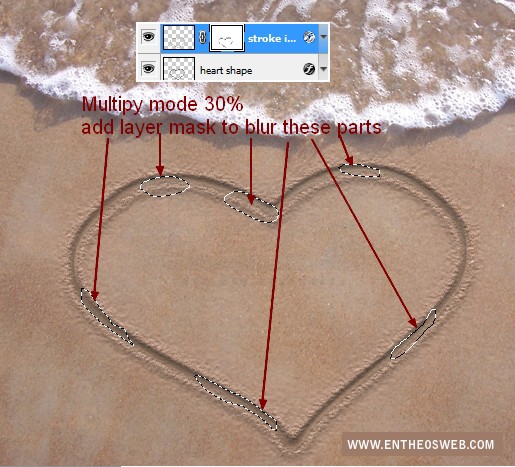
We have a new layer above heart shape layer. Name it “stroke inside”. Change opacity a bit to Multipy 30% and add layer mask with soft black brush of medium opacity ( 30-40%) to blur some sharp parts as shown below:
Step 10
We’re going to add some love texts for our picture. Make a new layer on the top. You can use handwriting font to do it but I recomend you to use your fingers with brush stroke.
I use soft brush with color # 45382f ( like in step 2 when making heart shape) to draw letters “I” and “U” and position them as the screenshot below shows: