What is Affinity Designer? It’s an award-winning graphics application with tons of possibilities. Learn how to use Affinity Designer in this quick start course.
Watch the Full Affinity Designer Quick Start Course
What You’ll Learn
- What is Affinity Designer?
- How to use Affinity Designer
- Features like Affinity Designer brushes, tools, shapes, and more
About Your Instructor
Kezz Bracey
I’m a designer & coder who works in the areas of web design/development, game development, and digital art. In short, if it’s creative and you can make it digitally, I love it.
Jump to content in this section
1. Intro to How to Use Affinity Designer
1.1 Affinity Designer Quick Start
Welcome to the course! So, what is Affinity Designer? Affinity Designer is an award-winning, vector design program from Serif, developers of the Affinity family of software. It’s such standout software that many creative professionals are leaving behind their own software environment in favor of this option.
In this course, I’ll walk you through how to use Affinity Designer, so you can confidently get started.
“Everything in this course can be done in the Free Trial version of Affinity Designer, so there’s nothing to stop you from jumping in.”
2. What Is Vector Persona in Affinity Designer?
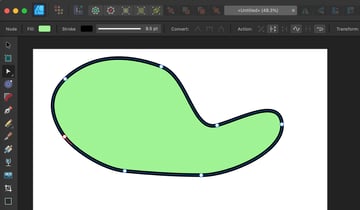
2.1 How to Create Curves in Affinity Designer
Let’s start things off by talking about how we can create and manipulate curves in Affinity Designer. A Curve is anything that has Nodes that you can edit.
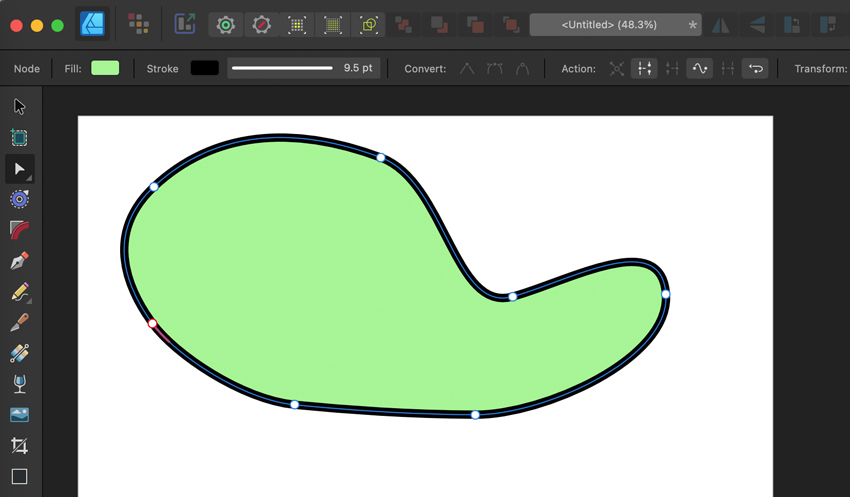

There are primarily two ways that you can create Curves:
- You can begin with a stock shape, using one of the Shape Tools.
- You can draw the Curve yourself, using either the Pen, Pencil, or Brush Tools.
Ready to give these techniques a try? Let’s begin.
2.2 How to Add, Delete, and Connect Nodes
Affinity Designer makes it quite simple to manipulate nodes. In this lesson, we’ll dig deeper into concepts like adding, deleting, and connecting our nodes. This includes content like:
- How to add extra nodes onto your curves
- Joining completely separate curves together
- Continuing your line work with new nodes
2.3 What Are Node Types and Pen Drawing Modes?
In this lesson, we’ll take a look at the different node types in Affinity Designer, as well as the Pen Drawing modes we can use with them. Let’s explore using these three types of nodes together:
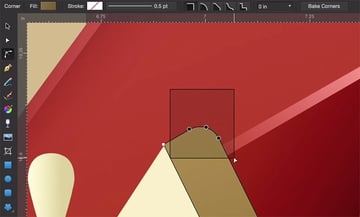
2.4 How to Use the Corner Tool in Affinity Designer
The Corner Tool makes it simple to round off corners in your work. In this lesson, we’ll take a look at taking a sharp corner and covering it to a smooth, rounded corner. We can easily click and drag to create our new corner. Ready to walk through this process together?


2.5 How to “Power Duplicate” in Affinity Designer
Power Duplicate sounds pretty amazing, doesn’t it? Well, it’s a really awesome tool in Affinity Designer. There are two main ways to duplicate in Affinity Designer:
- Use the shortcut Command-J or Control-J to easily duplicate your selection.
- Or hold down Alt or Option and drag the object you’d like to duplicate.
Power Duplicate, on the other hand, takes this shortcut even further. In addition to duplication, it can “hold onto” actions like rotations, so we can make our workflow even faster. Tune into this lesson to see how easy it is to do.


2.6 How to Use Real-Time Embedded Object Editing in Affinity Designer
You can embed most image files into Affinity Designer, like JPGs or PNGs. However, if you embed an Affinity Designer file, you have the option of editing that embedded file in real time. It’s super convenient and easy to do! Let’s walk through this process together.
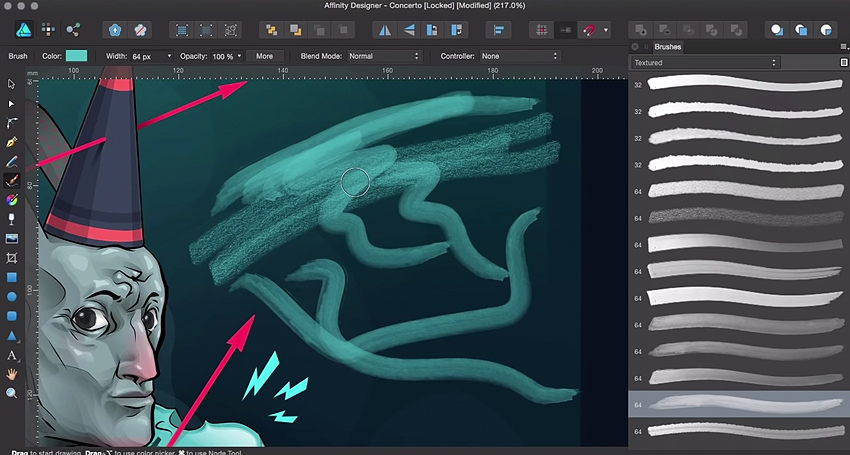
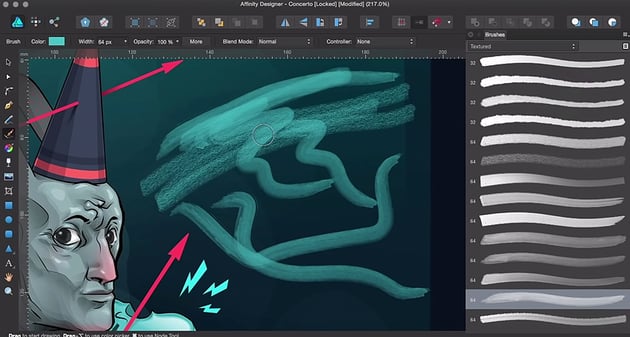
2.7 How to Paint With Vectors in Affinity Designer
In this lesson, we’ll take a look at painting with the Vector Brush Tool. Some of the process here might remind you of painting in popular raster painting software. However, unlike with raster painting, we have powerful vector tools like nodes at our disposal. You can even paint with pressure control!
Ready to get painting? Let’s dig in.

Want to learn more about Affinity Designer brushes? Check out this free content from Envato Tuts+, including brushes you can download now.
3. Affinity Designer’s Interface
3.1 How to Transform Objects in Affinity Designer
You might find a lot of the transform options in Affinity Designer to be familiar if you’re already acquainted with popular graphics software. However, this lesson walks you through the ins and outs, so you can easily jump in and adjust your work just the way you need to.
You can open the Transform panel by going to Window > Transform. However, you can also transform your work by mousing over your object and using the options that appear when you do so.
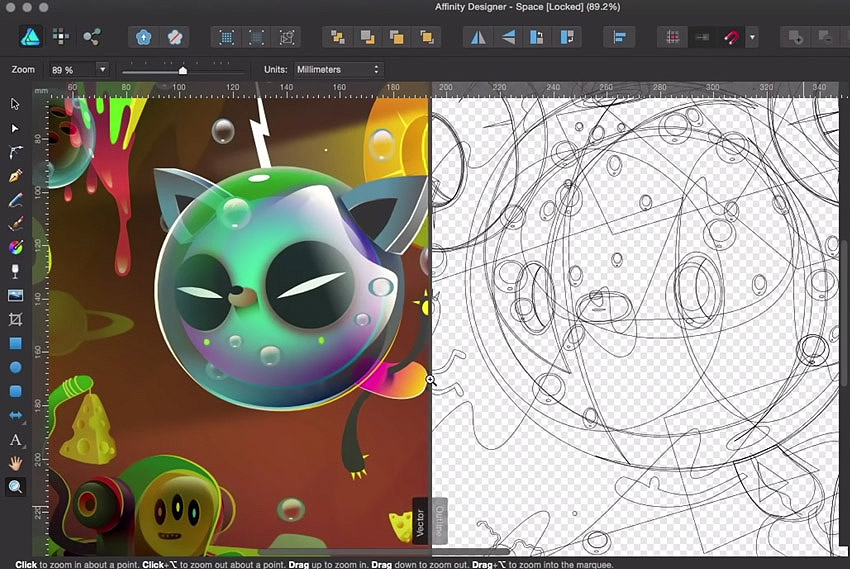
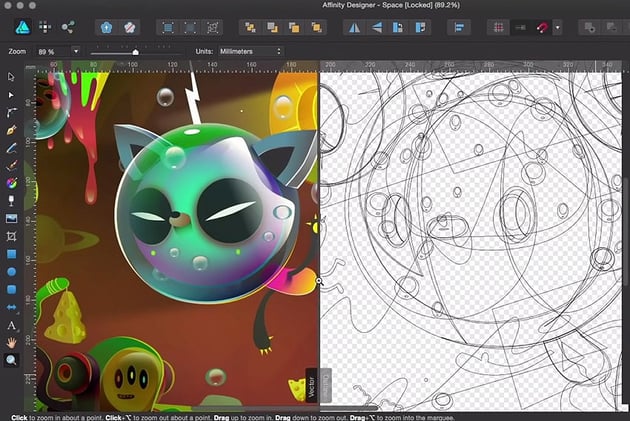
3.2 How to Use Split-Screen View With Slider
Split-Screen View is another helpful feature in Affinity Designer. You can customize your view space to zero in on particular aspects of your work, view outlines, and more. Here’s an example of viewing your work in both a regular view and an outline view at the same time.

3.3 How to Use the Layers Panel in Affinity Designer
Layers are an essential part of many designers’ and artists’ workflow. The Layers panel in Affinity Designer works a little differently than it does in some popular graphics programs, like Adobe Photoshop. In this lesson, we’ll walk through the ins and outs of working with the Layers panel.
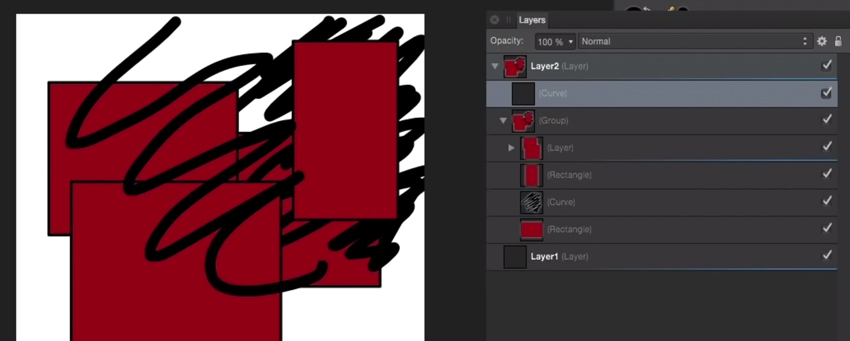

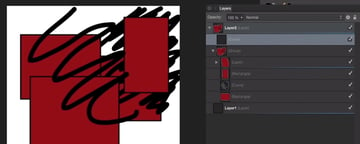
You can open the Layers panel by going to Window > Layers.
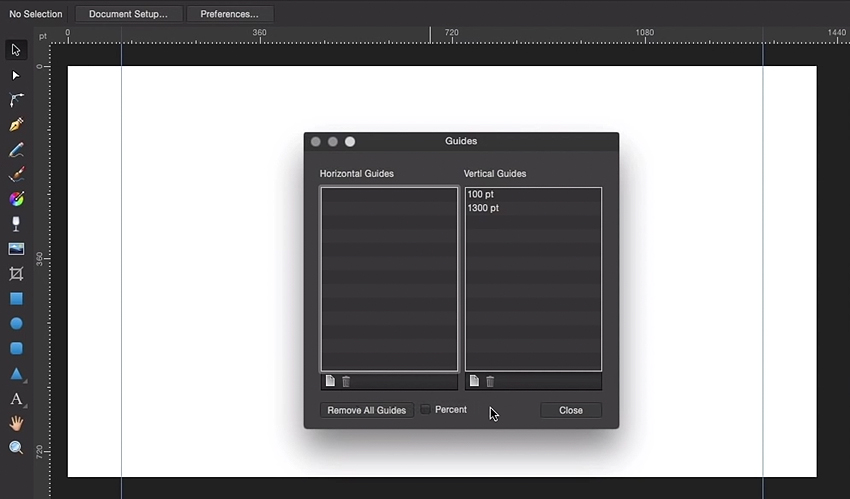
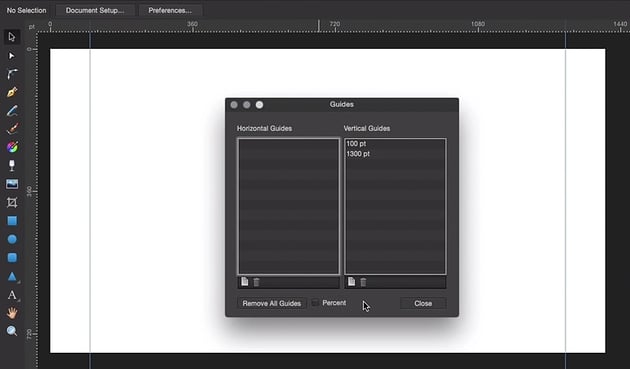
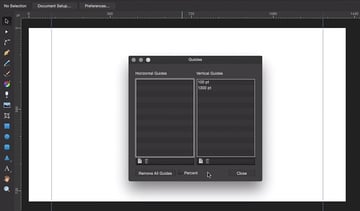
3.4 How to Use the Guides Manager in Affinity Designer
Affinity Designer makes it easy to add Guides to our work. If you’re unfamiliar, Guides make it easy to align your content to specific Guidelines that you can create and set yourself.
Try creating a Guide by dragging from the Rulers in your workspace!
The Guides Manager can be found by going to View > Guides Manager. It allows us to easily tweak and manage our guides. This is handy for precise Guides and for documents that require a lot of different Guidelines too.
3.5 Tip: Rearranging Studio Panels
You’ll notice that you have a lot of different panels you can work with in Affinity Designer. Thankfully, we can easily rearrange them, nest them, and more! In this video lesson, we’ll walk through some ways you can rearrange and customize your Studio Panels in your workspace.
Missing a panel? Go to the Studio submenu! You can find it under View > Studio. This is where you can find the majority of panels for your workspace.
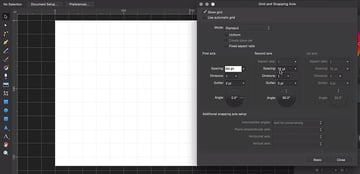
3.6 How to Set Up Grids in Affinity Designer
Affinity Designer has some really useful grid functionality, perfect for everything from icon design to game development. You can get started by going to View > Show Grid. This brings up the default grid.
However, in this lesson, we’ll take this further. We can adjust our Grid via the Grid and Axis Manager. You can find these options via View > Grid and Axis Manager.
Uncheck Use Automatic Grid to begin customizing!


Looking for even more insight on working with grids? Check out this free Affinity Designer tutorial for some extra help:
3.7 How to Set Up Snapping in Affinity Designer
Snapping can be really useful when you’re looking to align your work. Affinity Designer has a number of handy tools you can use when creating precisely aligned work. We can view our Snapping options, including turning Snapping On, in the top options within the software. The Snapping icon looks like a little magnet.


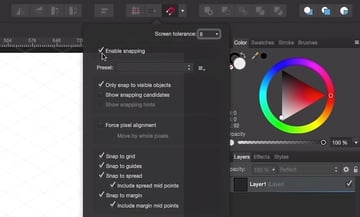
For example, we can toggle on Force Pixel Alignment, which will force your work to snap to precise pixels, rather than half alignments. We’ll also toggle on Move By Whole Pixels, which ensures your movements are snapping to whole units of measurement!
As a bonus, when you’re aligning and snapping your work, you may want to crop. Curious about how to crop in Affinity Designer? Check out this free tutorial. It’ll walk you through how to crop in Affinity Designer, step by step:
4. How to Use Color, Fill, and Stroke in Affinity Designer
4.1 Working With Fills in Affinity Designer
Like other vector graphics software, Affinity Designer uses both a Stroke and a Fill. Let’s start off with working with Fills in this lesson.
You can add a Fill via the Fill icon, up in the sub-context menu, at the top of the software, or you can use the Fill Tool. We have so many options for Fills too: everything from Swatches to Gradients and more!


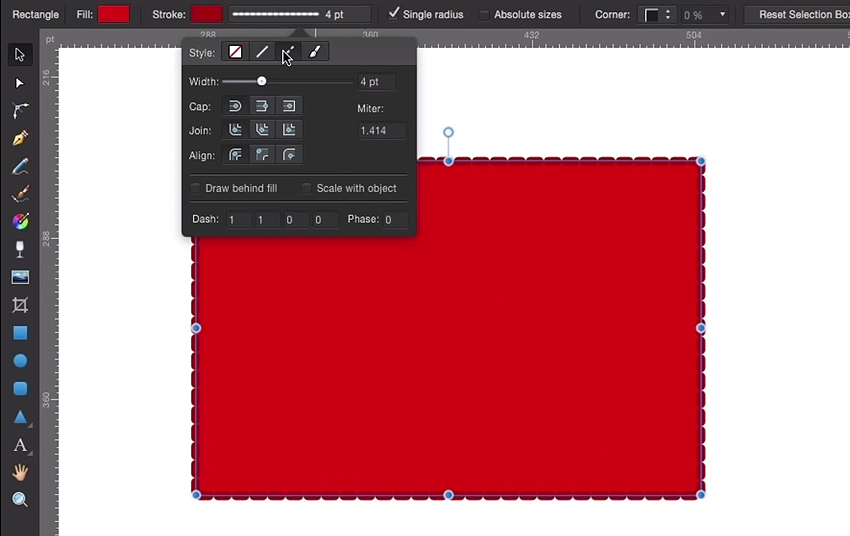
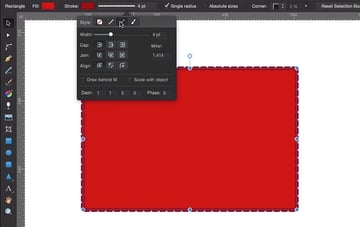
4.2 Working With Strokes in Affinity Designer
Next, let’s have a look at Strokes. The process here is rather similar: we have similar access to the Stroke color in the sub-context menu. We can also use the Fill Tool to alter our Stroke color. We just need to change the context in the sub-context menu.

We can also change the Stroke itself with a whole host of options. We’ll walk through changing the color, the appearance, and more, in this video lesson.

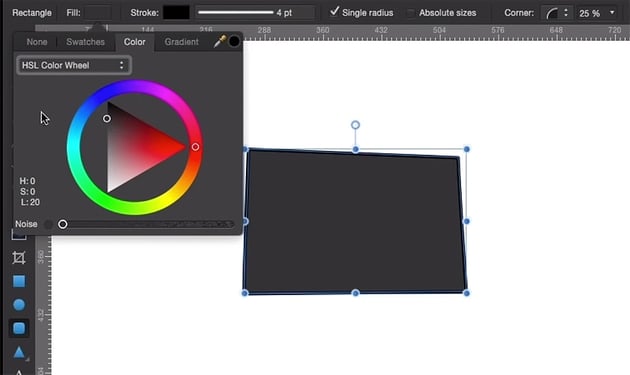
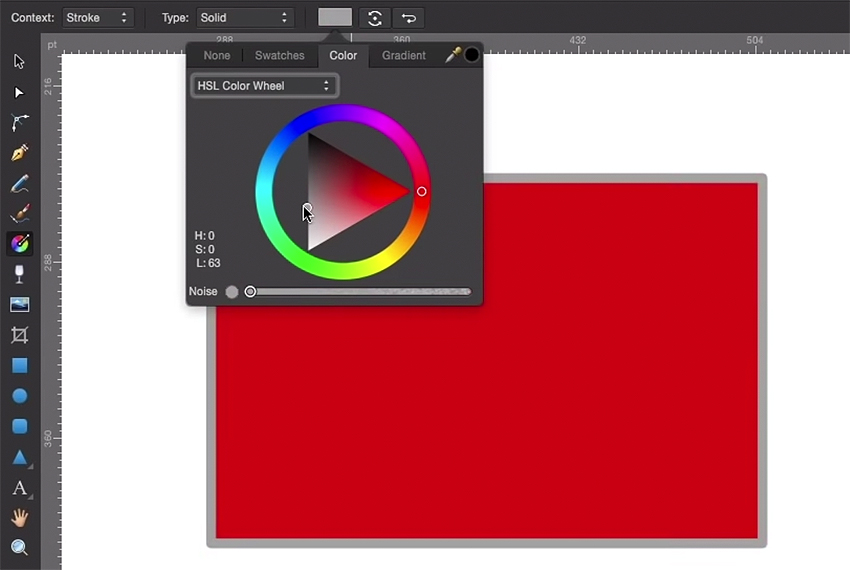
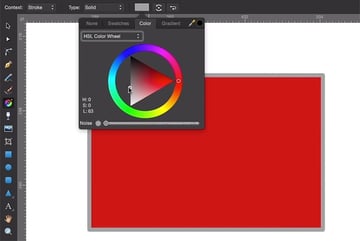
4.3 Color Selection and Copy-Paste Hexcodes in Affinity Designer
Next, let’s take a look at the ways we can easily select colors in Affinity Designer. We can use a number of color pickers. For example, we’ll take a look at the Colors Studio Panel and the many different view modes we can use to select and input color values.
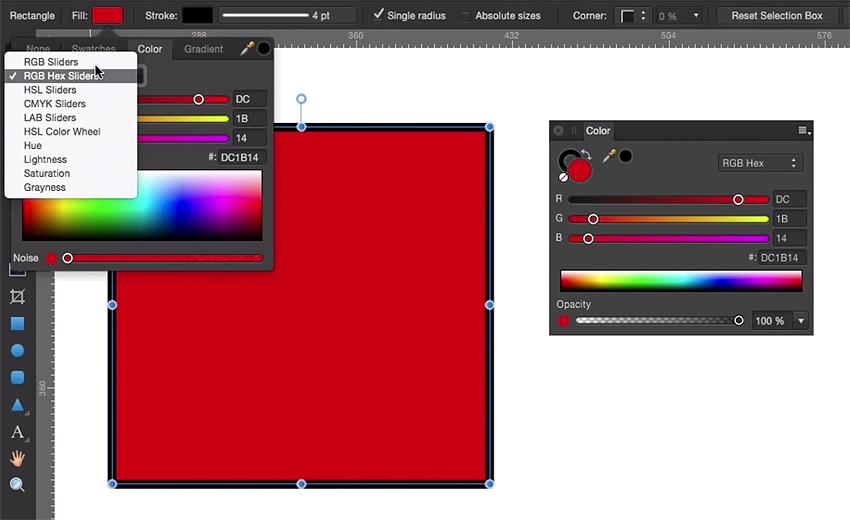

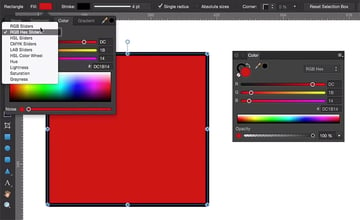
You can also select and customize your color selections in the sub-context menu, similar to where we looked at color for Strokes and Fills.
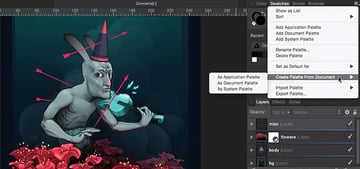
4.4 How to Extract Color Palettes in Affinity Designer
Did you know that you can extract a color palette from a design? Affinity Publisher makes this easy from the Swatches panel. From this space, we can Create Palette From Document, which is a great way to capture colors, whether you want it to be a system panel or you’re looking to continue a project.


4.5 How to Generate Color Chords in Affinity Designer
So, what’s a Color Chord? It’s a color scheme that Affinity Designer can create for you, based on a color selection. So, for example, you could choose a Complementary color chord or an Analogous one. There are ten different chords you can choose from, and they’re schemes based on traditional color theory.
You can also choose Shades when working with Color Chords, so you can get a variety of values of your chosen color.
Unfamiliar with these color theory basics? Check out these free resources from Envato Tuts+ to learn more:
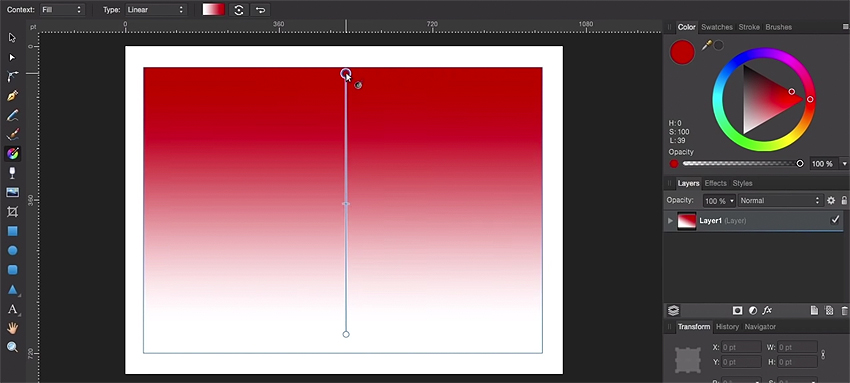
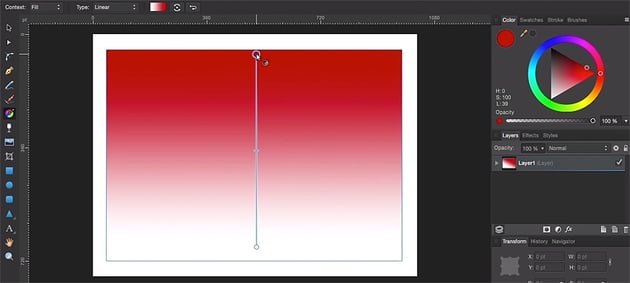
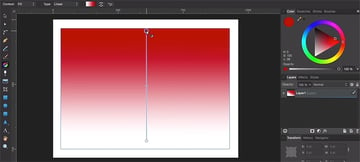
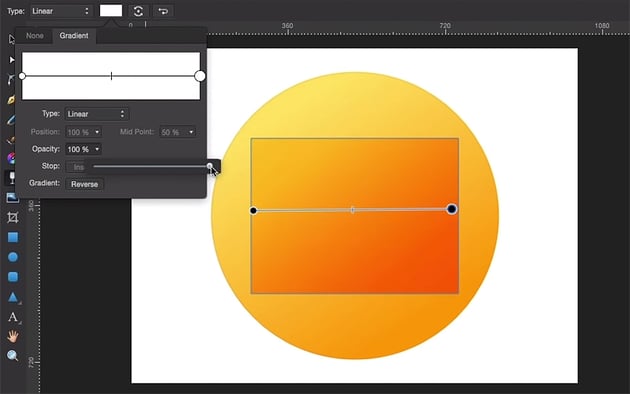
4.6 How to Define and Edit Gradients in Affinity Designer
Next, let’s learn how we can define and edit Gradients. Again, we can turn to the context menu for easy access. Or we can use our Fill Tool. Working with Gradients this way has a lot of similarities to working with Curves and Nodes. We can easily make adjustments to our Gradients in the color wheel to create a custom blend of colors.
4.7 How to Use the Transparency Tool in Affinity Designer
You’ll find that the Transparency Tool is rather similar to the Fill Tool. In this demonstration, we’ll add some transparency to an existing shape in our work area. We’ll make it transition, much like laying out a gradient.


Turn to the context menu, towards the top of the software, to find these options. When in doubt, there’s a lot of core content in this space!
6. Interactions Between Shapes in Affinity Designer
6.1 How to Use Boolean Functions in Affinity Designer
So, what’s a Boolean Function? You can use these functions to change the relationship between shapes in your composition. For example, these functions can add, subtract, and divide content. You can find all five types of Boolean Functions in the upper right-hand corner of the software.
When in doubt, mouse over the icons in the context menu. They will give you hints that say what the tool or function is. This is a great tip if you’re looking for extra help as you find your way around!
6.2 How to Use Masking and Clipping in Affinity Designer
Affinity Designer makes masking and clipping simple! What do these things do? Think of it as using one shape to hide a portion of another shape. We get two options for this in Affinity Designer: masking and clipping. They’re similar, but just a little different.
7. How to Use Effects, Styles, Pressure, and Velocity in Affinity Designer
7.1 How to Use Effects and Styles in Affinity Designer
Next, let’s take a look at Effects and Styles. Each has its own panel: the Effects panel and the Styles panel. They offer us a whole host of aesthetic sets we can apply to our work, from drop shadows to fill and stroke styles.


7.2 How to Use Velocity, Pen Pressure, and Manual Simulation in Affinity Designer
If you have a drawing tablet, you can take advantage of some really awesome pen pressure settings in Affinity Designer. With the Pencil Tool selected, take a look at the context menu. From here, we can change the Controller to Pressure.
But you’re not limited to using a drawing tablet. Affinity Publisher has a number of other tools we can use to simulate this kind of tool. For example, Velocity will alter the line based on speed: a slow stroke would be thin, while a fast stroke would be thick. This makes similar results available to users who might only have a mouse!

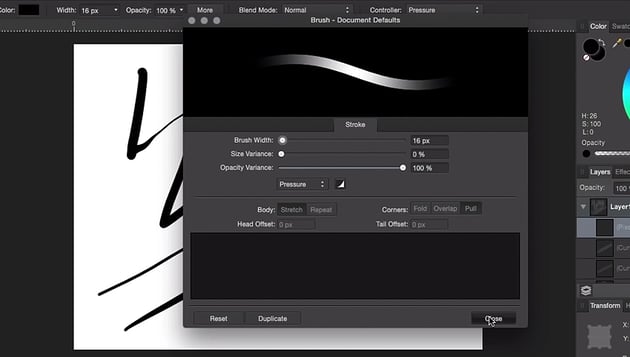
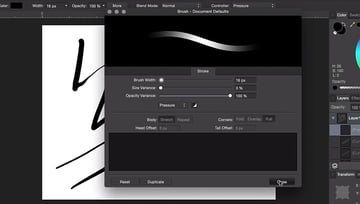
Adjust the Opacity in the context menu to add even more sensitivity to your brush strokes.
8. How to Export in Affinity Designer
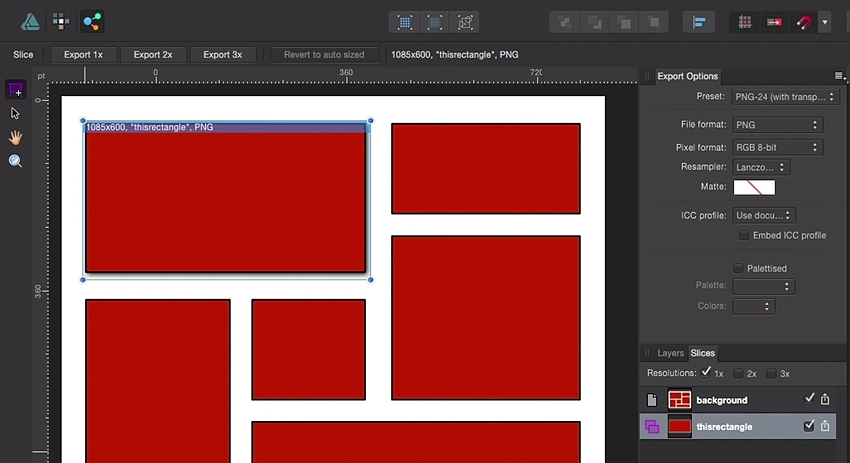
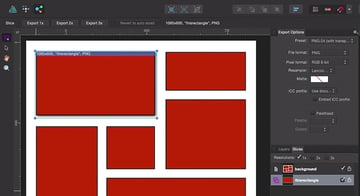
8.1 Exporting, Export Persona, and Continuous Export
In this lesson, we’ll discuss your options when it comes to exporting your finished work. You have two choices that we’ll explore: you can export your entire work area, or you can slice things up individually.
File > Export gives you a host of convenient options for exporting your work as a whole.

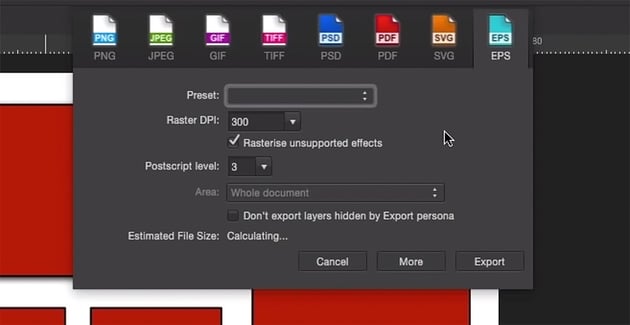

We’ll also take a look at using the Export Persona, which is perfect for exporting specific slices of your work. Using the Slice Tool, we can slice the specific area we’d like to export.

9. How to Use Affinity Designer: Wrap Up
9.1 Wrapping Up
Thanks so much for joining me on this quick start to Affinity Designer, and congratulations for making it through the course! There’s plenty more Affinity content to check out on Envato Tuts+, and we have plenty more Affinity Designer, Photo, and Publisher content on the horizon. Stay tuned!
10. Affinity Designer Tutorial: Bonus Lessons
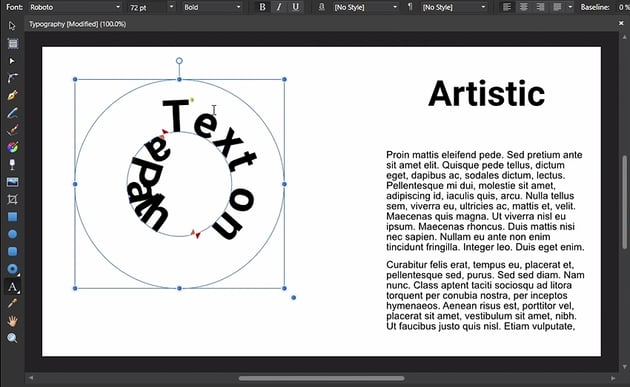
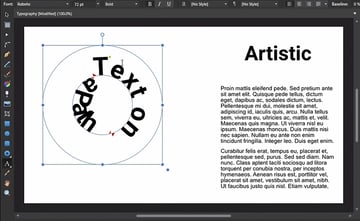
10.1 How to Use Type in Affinity Designer
Curious about typography in Affinity Designer? How about how to install fonts in Affinity Designer? Make sure to check out this bonus lesson! Affinity Designer gives us three different options when it comes to working with type:
- Artistic Text is best suited to points of interest, like headlines, and is decorative.
- Frame Text is good for body copy, like paragraphs.
- Path Text specifically goes on a designated path, like a circle or shape.
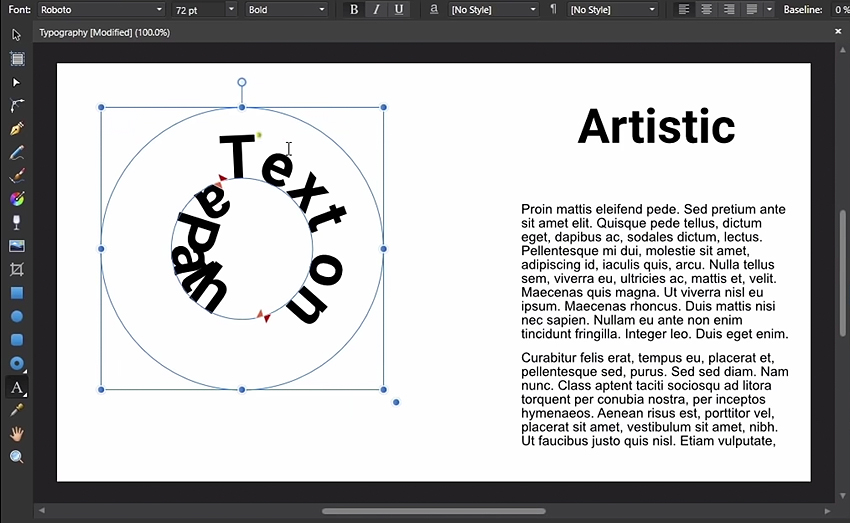
Remember to use the context menu. It’s a quick and easy way to change things like the font and the font size.
Curious about how to install fonts in Affinity Designer? Check out these helpful font installation tutorials. Like most graphic software, Affinity Designer will draw upon your system fonts: it’s that simple. The key to how to install fonts in Affinity Designer will depend on your operating system. Check out these guides for more info:
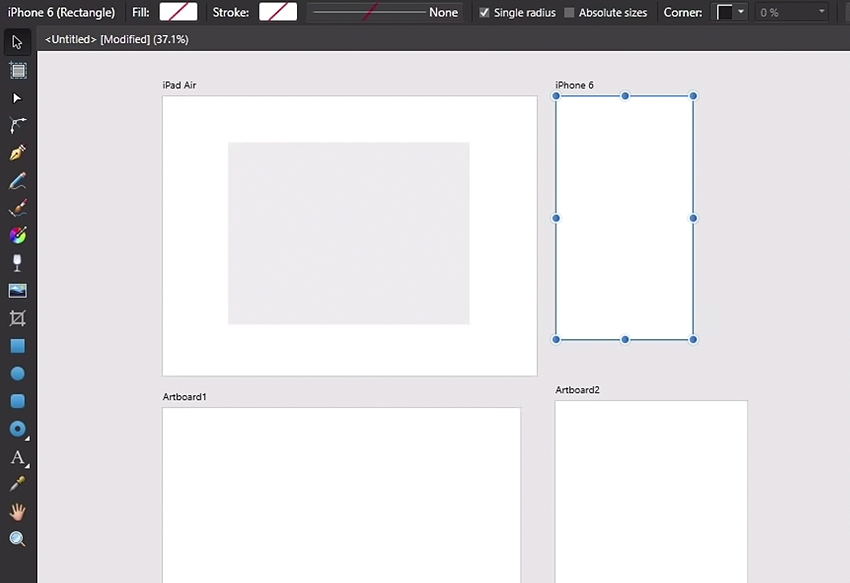
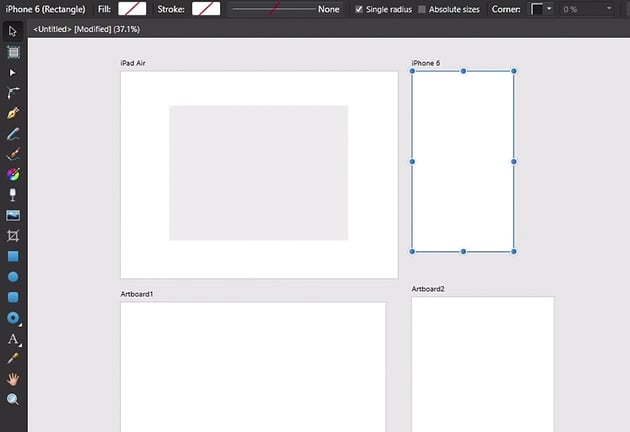
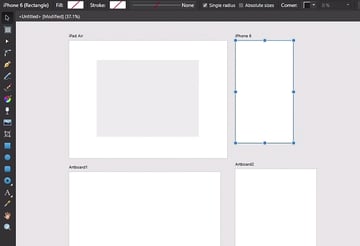
10.2 How to Use Artboards in Affinity Designer
Artboards essentially allow you to create multiple documents, within one document. Think of them like multiple canvases that you can work on at once. In this bonus lesson, we’ll walk through how you can use artboards in your design work in Affinity Designer.
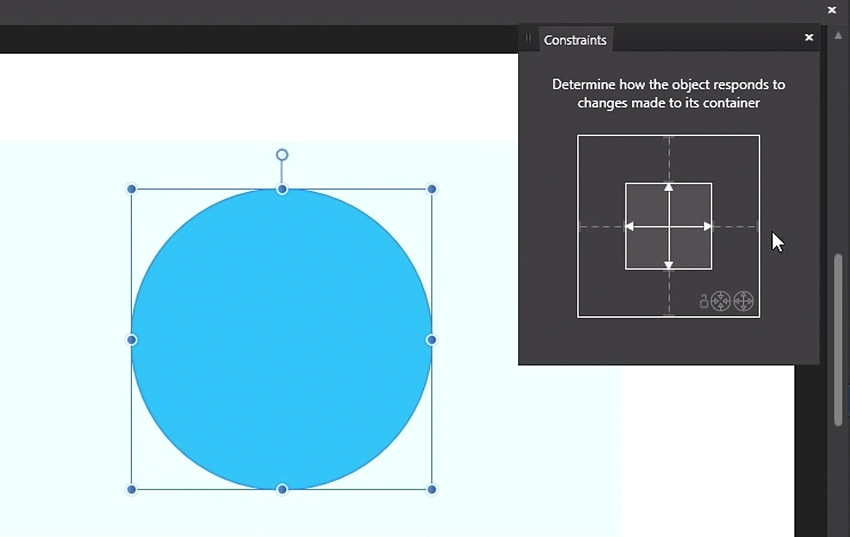
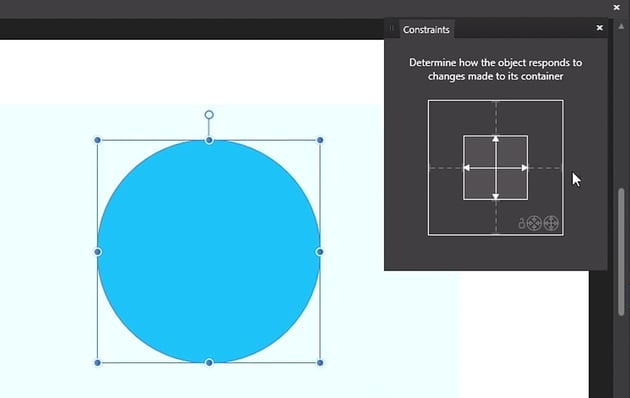
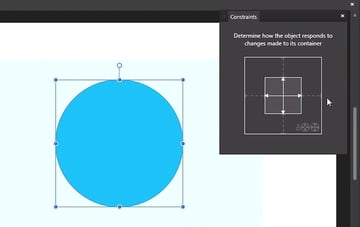
10.3 How to Use Constraints in Affinity Designer
Constraints affect how child objects behave in relation to their parent objects. You can open the Constraints panel by going to View > Studio > Constraints.
From here, we can decide how the child object behaves. So, for example, if we don’t want a child object to scale with its parent, we could define that here.
10.4 How to Use Symbols in Affinity Designer
Symbols are handy for reusing content in your Affinity Designer document. For example, in this bonus lesson, we’ll create a simple button and then make it a Symbol. Reusing it is a snap, and then, any time we edit our Symbol, every instance is edited too! Follow along and learn how you can use this in your work too.
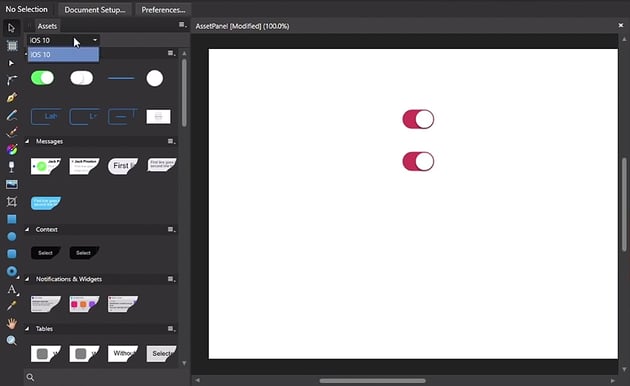
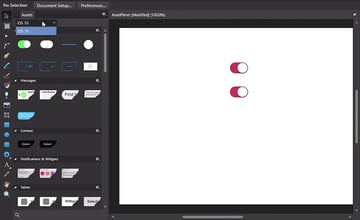
10.5 How to Use the Assets Panel in Affinity Designer
The Assets panel allows you to build a library of assets you can turn to any time you want. You can share asset libraries with others and download them too. In this demonstration, we’ll take a look at the Assets panel as well as some of the default assets that come along with the software.
Open up the Assets panel via View > Studio > Assets. Let’s begin!

Learn More About Affinity Designer
There’s plenty more to learn about Affinity Designer, and there’s lots more free content to check out on the Envato Tuts+ YouTube channel. Check out these free Affinity Designer tutorial videos to learn even more:
Or, if written tutorials are more your style, make sure to check out the wealth of content on Envato Tuts+. You can find everything from tutorials to collections of Affinity Designer templates. Here are some awesome Affinity Designer tutorial collections that you can check out right now: