In this advanced Adobe Illustrator tutorial we’re going to be creating a variety of different graphics, in various styles, using a range of tools and techniques.
You’re sure to learn something new; whether that be alternative ways of using Illustrator’s 3D features, working with custom lettering, or other pro tips like isolating rounded corners, using compound paths, and upping your gradient game with colour swatches.
Adobe Illustrator Assets on Envato Elements
Looking to up your Illustrator game? Check out Envato Elements, where you can download millions of creative assets, all with a commercial license, for as little as $16.50 per month. With your Elements subscription you’ll get unlimited access to vector graphics, illustrations, fonts, icons, design templates, and tons of other useful stuff for any creative.
Full Course: Advanced Adobe Illustrator
Watch the full course here, jump to a specifc lesson using the chapter links below, and don’t forget to subscribe to the Tuts+ Youtube channel for creative tutorials every day!
1. Setup Advanced Illustrator Workspace
To kick things off we’re going to setup our Illustrator with advanced features and tools in mind. Go to the bottom of the toolbar and hit the Edit Toolbar menu, so we can make sure we have the Advanced Toolbar enabled.
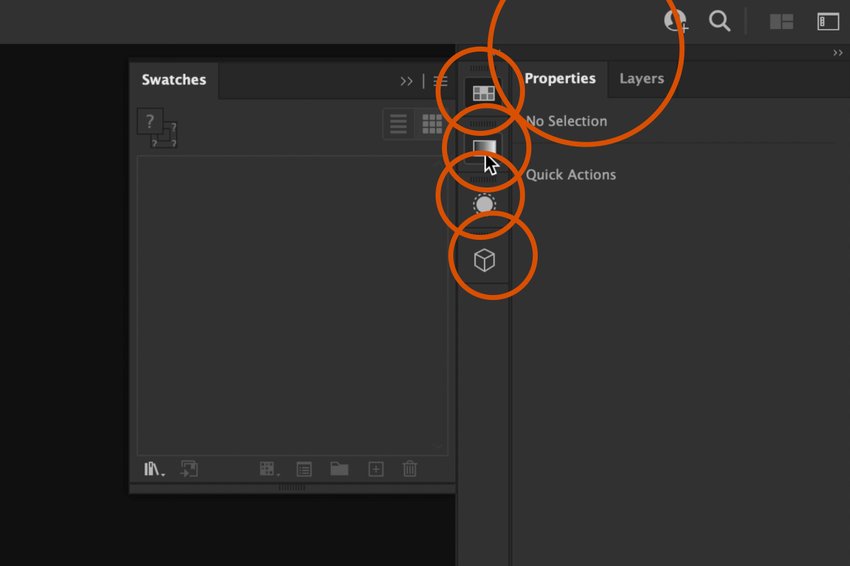
Over to the right of my workspace I have the Properties and Layer panels open, and I’ve docked Swatches, Gradients, Appearance, and 3D & Materials to one side. You can find all these panels, and many more, under the Window menu.


With all this ready we can get started!
2. Cute Video Game Character
In this first exercise we’re going to be using some advanced shape manipulation to create a character called “Ori” from a video game. It’s a great game, and Ori’s a very cute character.


Some of the skills you’ll learn include use of the shape and polygon tools, isolating rounded corners, using compound paths, and (this one is a life-changer) how to use global color swatches in gradients.
3. Isometric Mail Icon Using New 3D Features
For this exercise we’re going to begin by using shape and pathfinder tools, plus more color swatches and gradients, to create a 2D icon (see the image bottom, left). Then with that artwork, we’ll take Illustrator’s excellent new 3D panel and make ourselves a 3D isometric version (image bottom, right).
We’ll use the Extrude tool within the 3D options, and the Isometric Top preset gives us this perfect set of rotation angles.
tip
When working with 3D designs in Illustrator make sure you clean up any stray points or weird lines in your vector work first.
4. Vector Graphics With Textures and Depth of Field
Depth of field can give your illustrations real dimension, so in this tutorial we’ll use blurring and texture effects to create a genuine sense of depth.


We’ll create the noise by laying a dark block over our illustration, then applying a raster grain filter to it. Various options within the texture menu allow us to set how stippled we want things, then using blend modes and transparency we make our image underneath look as smooth or rough as we like.
Conclusion
Whether you follow all these advanced Adobe Illustrator tutorials, or just pick the ones which most appeal to you, this course should give you some brand new techniques to take your Illustrator skills to the next level. Share your creations with us on social media, don’t forget to like and subscribe, and I look forward to seeing you in the next one!
Learn More About Adobe Illustrator
If you enjoyed this advanced course, we have even more Illustrator tutorials on Tuts+ to take your skills to the next level!