I used to think video editing was a time-consuming beast! Fun in theory, but overwhelming in practice. But then Adobe started packing Premiere Pro with AI tools, and suddenly, things got way easier (and honestly, more fun).
In this article, we’ll walk through two of my favourite features: Auto-editing and Speech-to-Text. These clever tools can cut your clips, reframe them for social media, and even transcribe your audio into captions, all in just a few clicks. If you’re a creative who wants to make polished videos without getting lost in timelines, this is the good stuff.
What is Auto-editing in Premiere Pro AI?
Auto-editing in Premiere Pro AI is not just Generative Extend (although that is a fantastic tool for seamlessly stretching your clips). It’s a whole suite of time-saving features designed to handle the repetitive parts of editing so you can stay focused on the creative side.
It’s all about speeding things up and removing the repetitive grunt work from your video workflow. Instead of manually trimming clips or resizing for different formats, Premiere now offers smart tools that do a lot of that work for you, automatically.


Let the AI do the heavy lifting
Auto-editing in Premiere Pro AI helps with things like:
- Scene Edit Detection: Premiere analyzes a long video and automatically adds cuts where it detects scene changes. Great for working with pre-edited clips or breaking down long takes.
- Auto Reframe: Need your horizontal video to fit a vertical format? This tool resizes and reframes footage for different aspect ratios, and even tracks your subject to keep them centered.
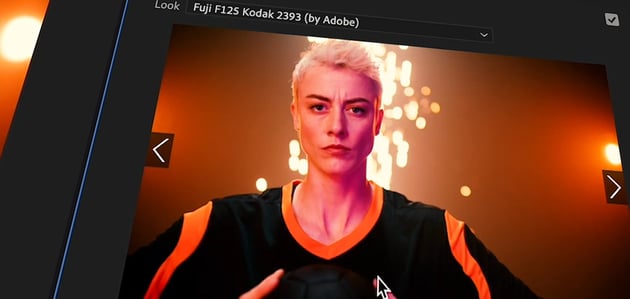
- Auto Color: Automatically adjusts your clip’s exposure, contrast, and color balance with a single click. It’s perfect for getting natural, clean color without diving into detailed grading.

Why creatives love it
If you’re used to clever time-savers in apps like Photoshop or Illustrator, auto-editing will feel right at home. It helps with things like:
- Saving time on repetitive edits
- Adapting content quickly for social media
- Helping you stay focused on creative storytelling, not technical trimming

Step-by-Step: How to Use Auto-editing with Premiere Pro AI
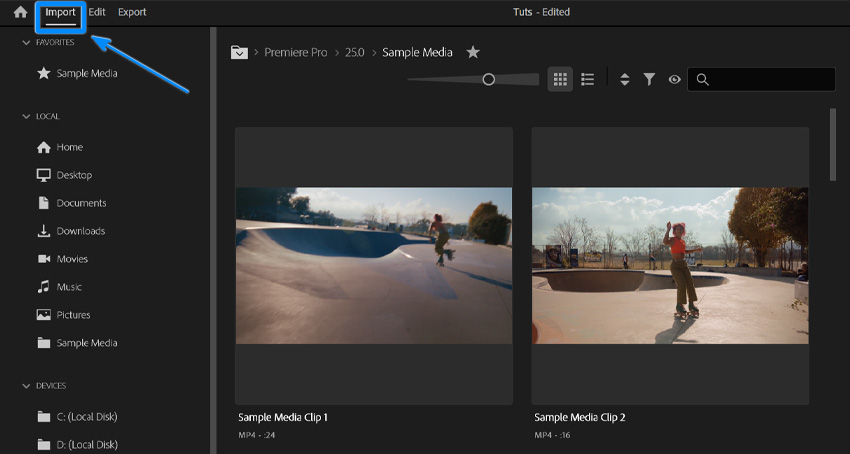
Step 1: Import your footage
Start by creating a new project and importing your video clips into the Project panel. Just drag and drop them in or go to File > Import.


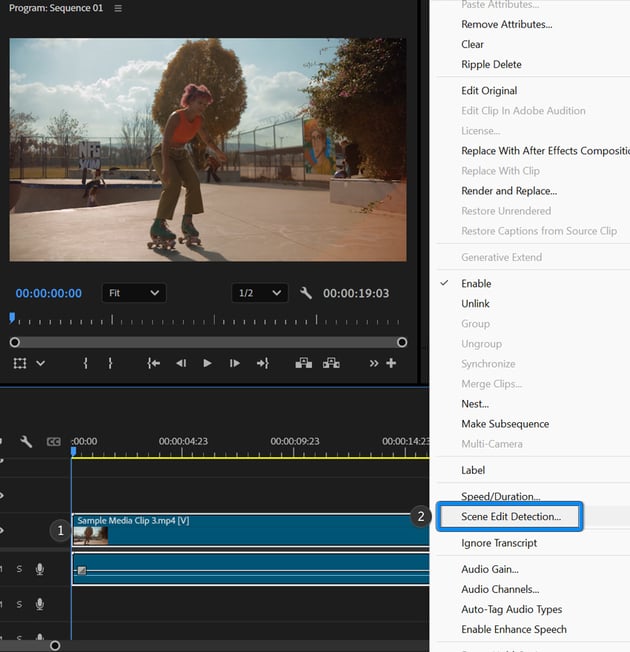
Step 2: Use Scene Edit Detection
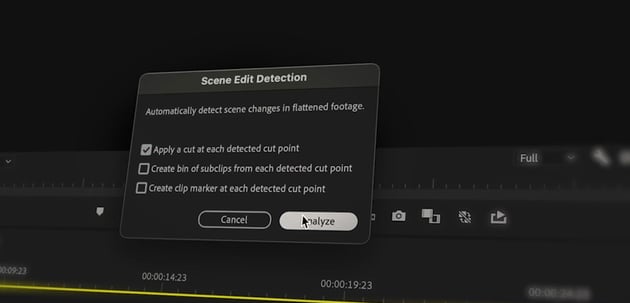
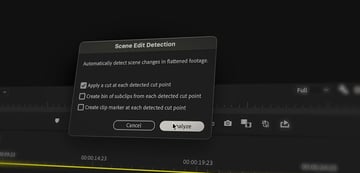
If you’re working with a single long video (like a pre-edited reel or a screen recording), Scene Edit Detection can break it up for you:
- Right-click the clip and choose Scene Edit Detection.
- In the pop-up window, check the box that says “Apply a cut at each detected cut point”.
- Click OK, and Premiere will automatically add cuts wherever it thinks a new shot begins.


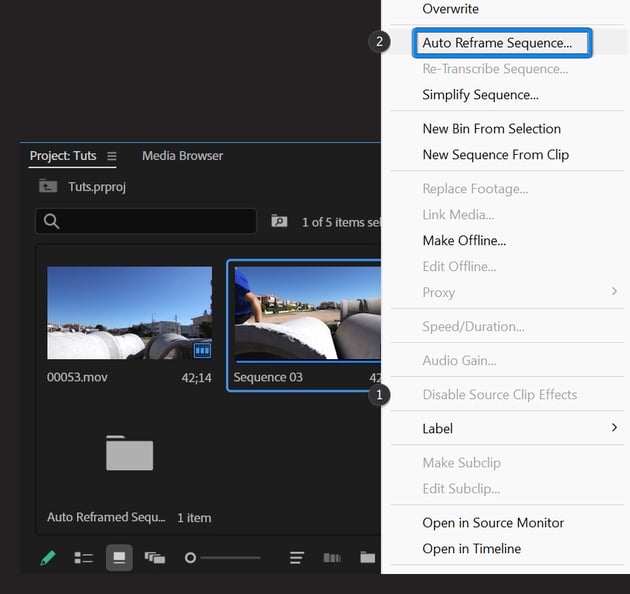
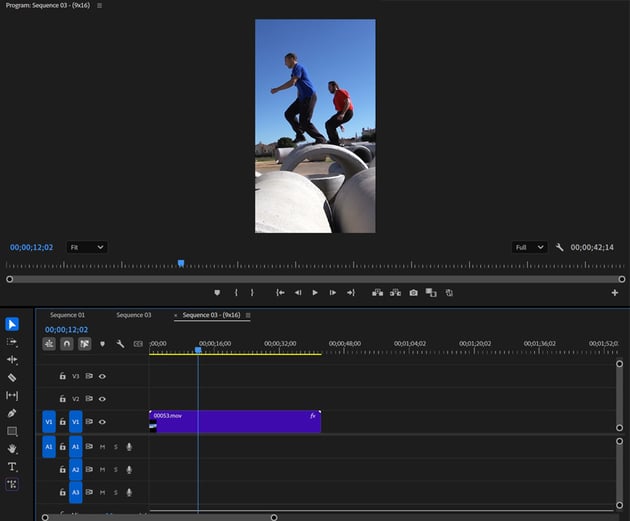
Step 3: Use Auto Reframe for different formats
Need to resize your video for Instagram, TikTok, or YouTube Shorts? Auto Reframe helps with that:
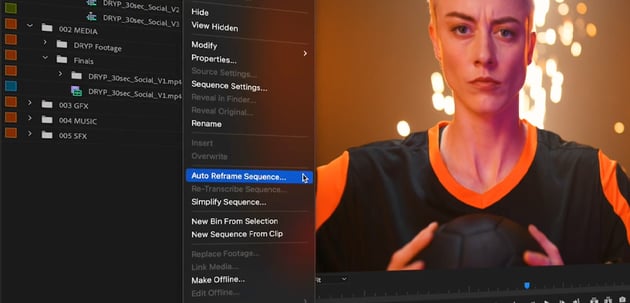
- Right-click your sequence in the Project panel and select Auto Reframe Sequence.
- Choose your target aspect ratio (e.g. Vertical 9:16 for TikTok).
- Set the motion tracking to Default, Slower Motion, or Faster Motion depending on your footage.
- Click Create, and Premiere will generate a new sequence with automatic framing adjustments.


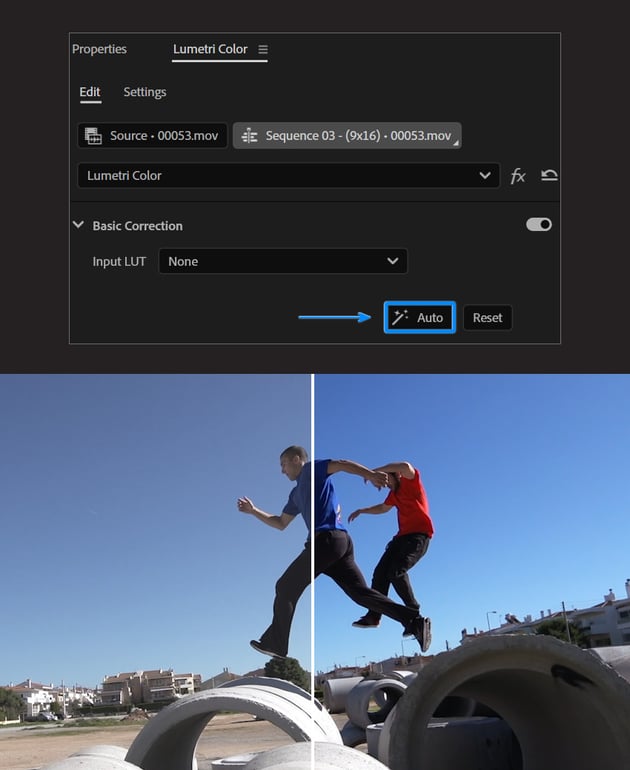
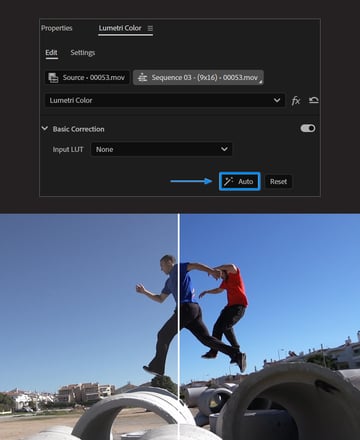
Step 4: Use Auto Color
Want to give your footage a quick boost without diving deep into color grading? Auto Color is your best friend. It uses smart adjustments to balance your shot in just one click.
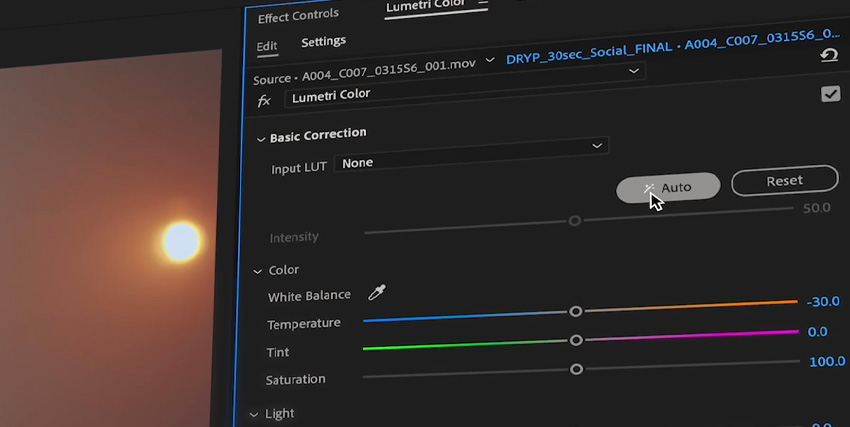
- Go to Window > Lumetri Color to open the color controls.
- In the Lumetri Color panel, under the Basic Correction section, click the Auto button. Premiere will instantly adjust exposure, contrast, highlights, shadows, and more.

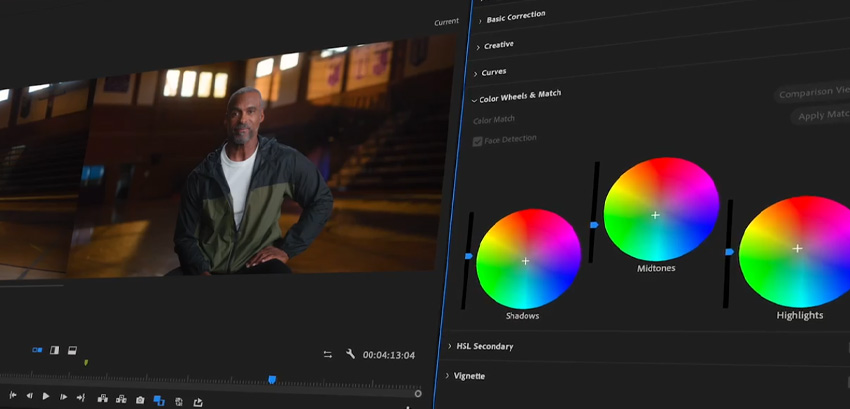
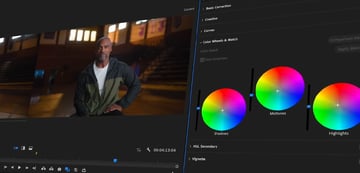
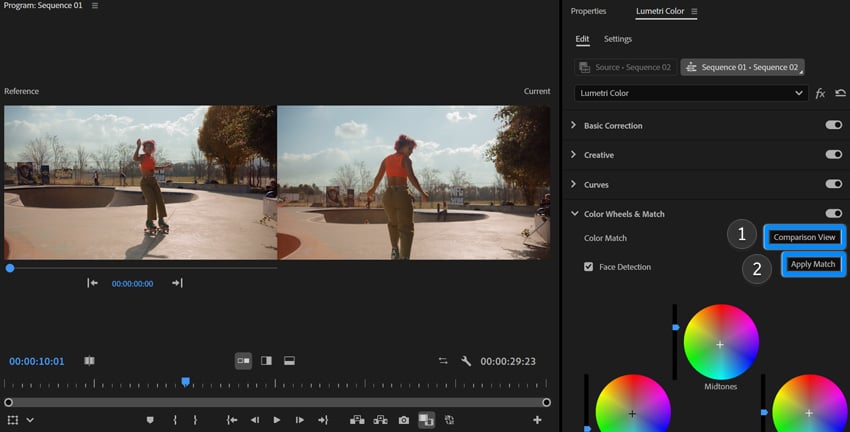
Step 5: Use Color Match to unify your shots
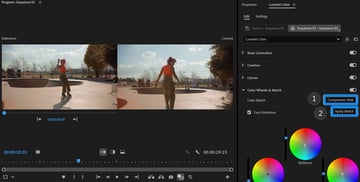
If your clips were filmed in different lighting conditions or with different cameras, Color Match helps create a more consistent look:
- Open the Lumetri Color panel and go to the Color Wheels & Match tab.
- In the timeline, position the playhead over the reference clip you want other clips to match.
- Select the clip you want to correct, and click Comparison View and then Apply Match.
- Premiere will automatically match the color and lighting based on face detection and overall scene.

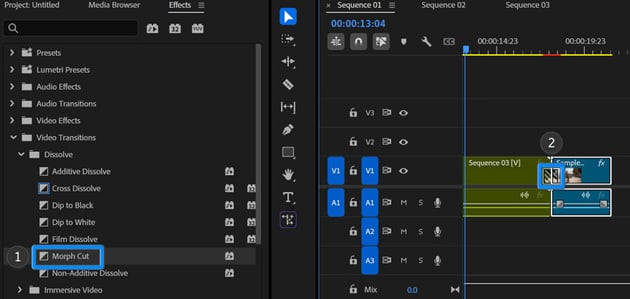
Step 6: Use Morph Cut to smooth jump cuts
Editing out pauses or filler words in a talking head video? Morph Cut helps smooth over those hard cuts:
- Trim the unwanted section between two speaking moments.
- Go to Effects > Video Transitions > Dissolve > Morph Cut, and drag it onto the cut.
- Premiere analyzes the frames and blends them for a seamless transition.


Step 7: Tweak and refine
Auto-editing gets you 80% of the way there, but a little polish helps everything feel more intentional:
- Adjust cuts that feel too early or late.
- Shift framing if the subject isn’t centered how you like.
- Add transitions, music, or text overlays to personalise your edit.


What is Speech-to-Text in Premiere Pro AI?
Adding subtitles or transcribing dialogue used to be one of those tasks I’d always put off, slow, fiddly, and honestly, not fun at all. But now that Premiere Pro AI has a built-in speech-to-text feature, it’s a completely different story.
I love how it just listens to the audio and turns it into editable text automatically. You can use it for captions, subtitles, and sometimes even as a rough script when planning out a voiceover. Whether you’re putting together a tutorial or a quick design breakdown, this tool makes everything faster and way more accessible.

Automatic captions without the hassle
With just a few clicks, Premiere can:
- Transcribe the speech in your timeline
- Break it into properly timed captions
- Let you customise the look and placement of those captions
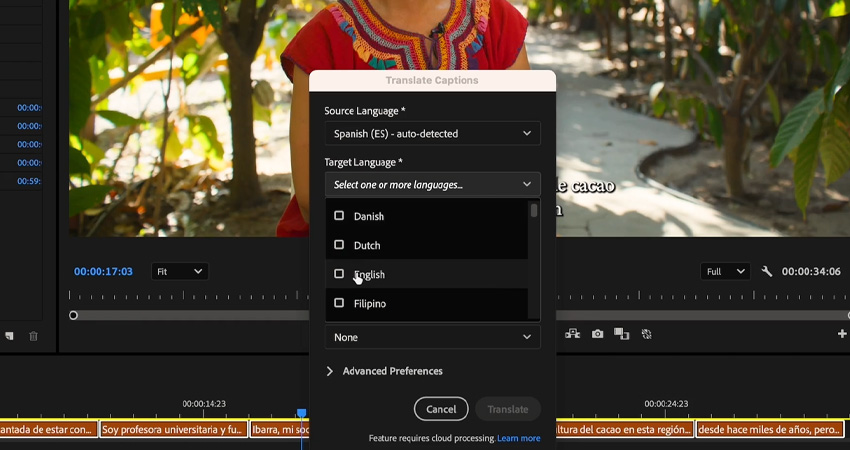
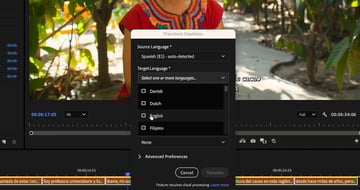
- Support for multiple languages and different speaking styles

Why it’s great for creatives
Speech-to-text isn’t just about accessibility (though that’s a huge plus). It also helps you:
- Make your videos more engaging and watchable, especially on social media where most people scroll with the sound off
- Use transcripts as a base for titles, descriptions, or even editing reference
- Save serious time compared to typing everything manually
- And if you need to tweak a word or two? The transcript is fully editable. Just click and change it, like a Google Doc.

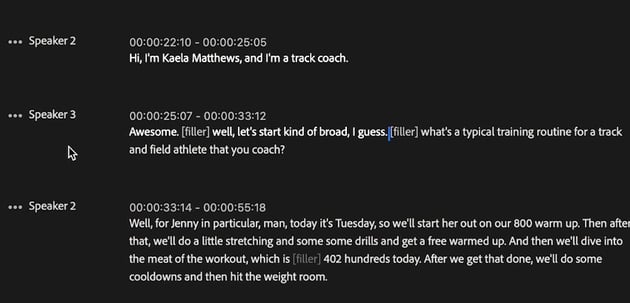
Step-by-Step: How to Use Speech-to-Text
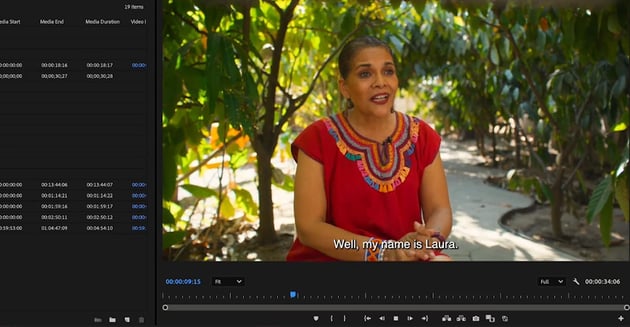
Step 1: Load your sequence
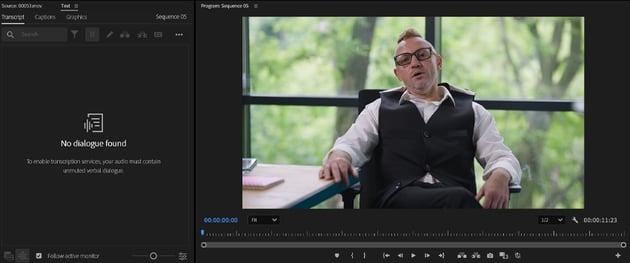
Make sure your video is in the timeline and your audio is ready to go. Speech-to-text works best when your dialogue or voiceover is clear and easy to hear. Then Go to Window > Text to open the Text panel. This is where all your transcription and caption magic happens.


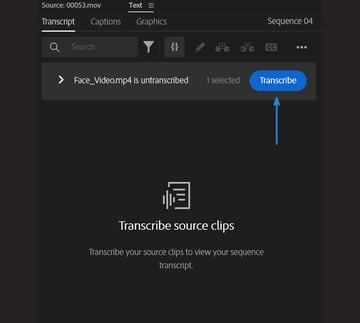
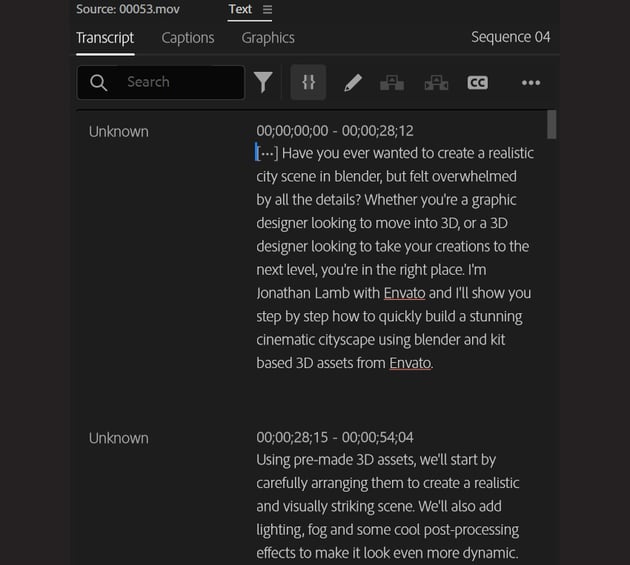
Step 2: Transcribe your sequence
Click on the Transcribe sequence button and using AI-powered voice-to-text technology, Adobe Premiere will accurately create your transcript within seconds!


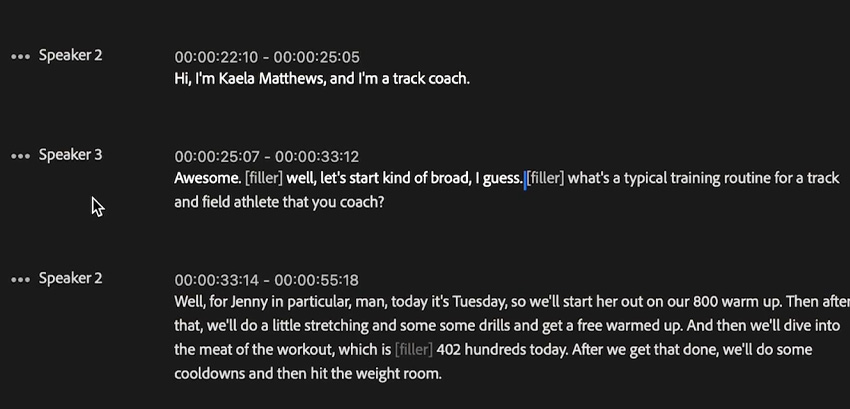
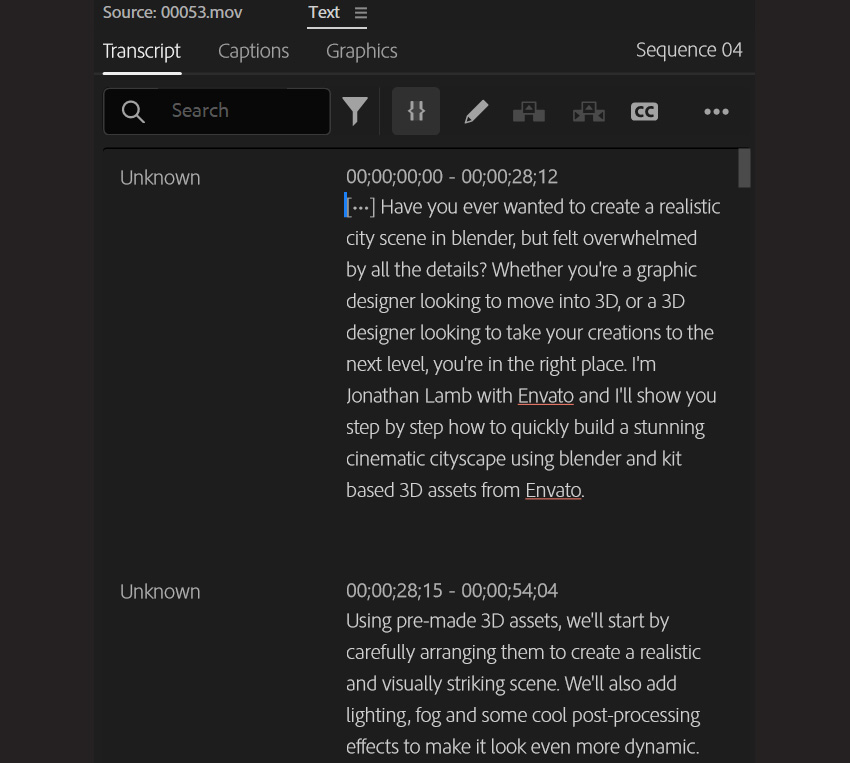
Step 3: Review and edit the transcript
Once it’s done, you’ll see a full text version of your audio. Click on any word to jump to that moment in the timeline and make quick edits if Premiere misheard something. This is also great for planning edits or pulling quotes for social captions
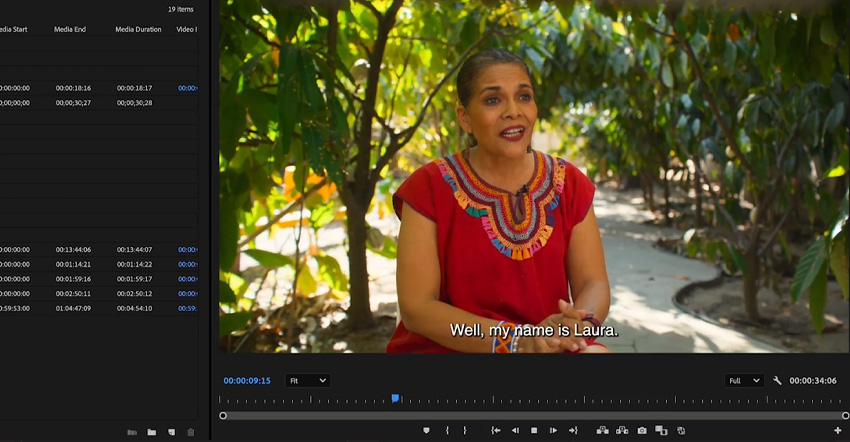
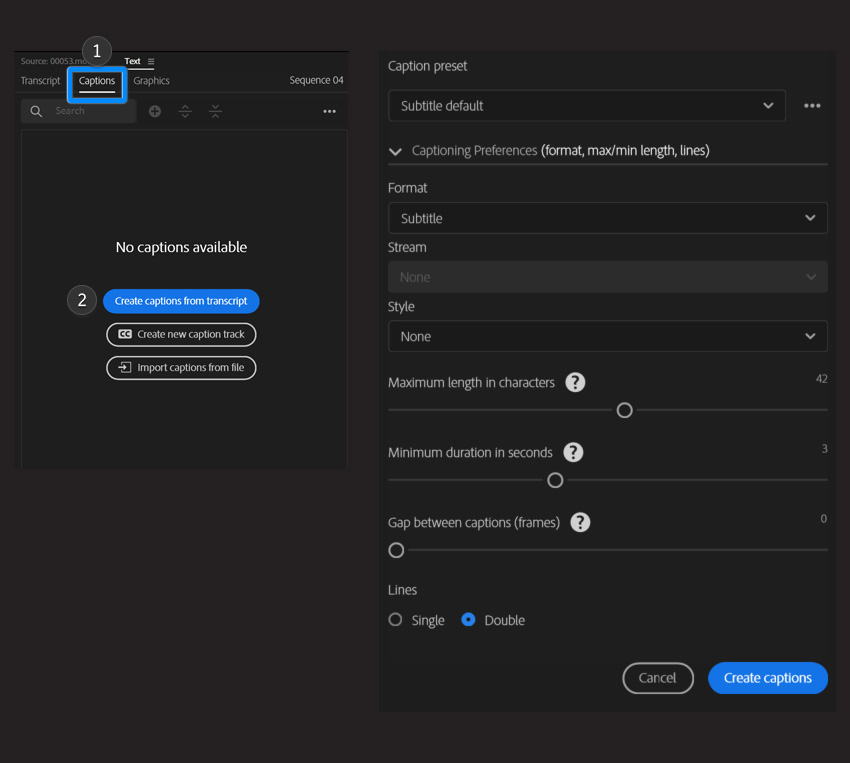
Step 4: Create captions
Click the Create captions button and open the Captioning Preferences to choose what style and format you would like to use. You can also adjust things like the Maximum length in characters and the Minimum duration in seconds. Once you’re happy hit the Create captions button.

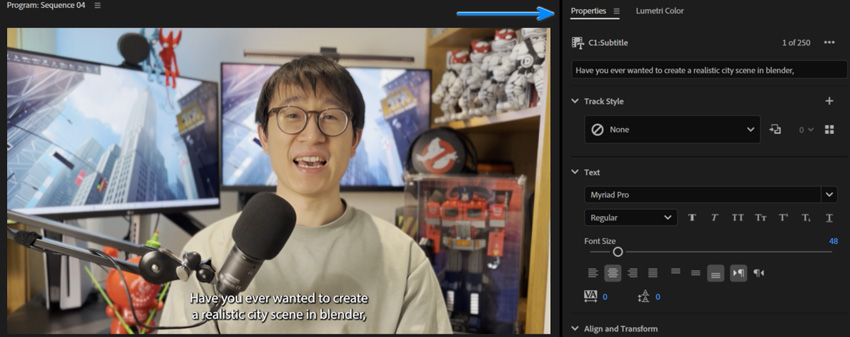
Step 5: Style and position your captions
In the Properties panel, you can change font, size, color, and position to match your video’s vibe. Keep it clean and legible, especially if you’re sharing on mobile platforms.

Limitations and what to watch for
Premiere Pro AI tools are a huge time-saver, but they’re not flawless. They handle the bulk of the busywork really well, but there are a few areas where you’ll want to keep an eye out and step in when needed.


Auto-editing isn’t always perfect
These tools are great for speeding things up, but they don’t always make the best creative choices on their own. It’s usually just a matter of dragging a frame or trimming a few clips, but that small effort makes a big difference.
- Scene Edit Detection: Automatically adds cuts where it detects scene changes, but it can misread fades, camera shakes, or fast pans. Always good to give it a quick review.
- Auto Reframe: Resizes your video for different aspect ratios and tries to track the action, but it can sometimes pick the wrong subject or drift off if there’s too much movement.
Speech-to-text has its hiccups
Transcribing audio automatically is a huge help, but it’s not perfect, especially in less-than-ideal conditions. Think of it as a great starting point, not a final draft.
- Speech-to-text: Generates captions from your audio, but can stumble with strong accents, background noise, or overlapping dialogue.
- Transcript editing: The good news is it’s fully editable, so you can fix any misheard words in seconds.
A little manual work goes a long way
At the end of the day, AI can take care of the boring stuff, but it won’t make creative decisions for you. These tools are meant to help, not replace your vision. So think of them as clever assistants, not autopilots. A quick review and a personal touch go a long way to making sure your video feels like yours.
Final Thoughts
Auto-editing and Speech-to-text in Premiere Pro have completely changed the way we can approach video projects. They take care of the time consuming stuff, so we can spend more energy on the creative side! Things like picking music, refining pacing, or just having fun with the visuals.
Whether you’re a digital artist sharing your process or a designer turning your work into scroll stopping content, these tools make it easier to get started and stay in flow. Give them a try! You might be surprised how much more you enjoy the editing process.