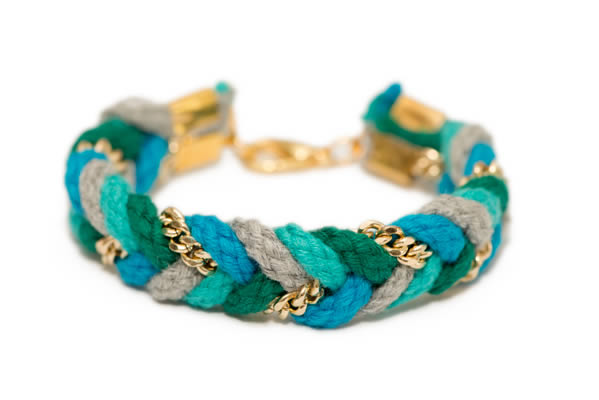
Over the years, I have spent quite a bit of time experimenting with product photography; sometimes more successfully than others. While I spend my days working as the editor of Psdtuts+, I often spend time in the evenings helping my wife by shooting photos of her jewelry. In this tutorial, I wanted to share the workflow that I have developed for quickly shooting, and retouching images using a combination of Photoshop and Lightroom. Let’s get started!
Supplies
In addition to Photoshop and Lightroom, you will need the following items to complete the tutorial.
- A DSLR (I used a Nikon D800 Digital SLR Camera)
- Lens (I used a Nikon AF-S VR Micro-Nikkor 105mm f/2.8G IF-ED Lens)
- A Shoe Mounted Flash (I used a Nikon SB-910 AF Speedlight i-TTL Shoe Mount Flash)
- A Tripod
- Sheet of Paper
Tutorial Assets
The following assets were used during the production of this tutorial. If you do not want to follow along with the photography portion of this tuorial, you are welcome to download the RAW file, and begin this tutorial in Section 3.
1. Set Up and Shoot
Step 1
Before we can begin, you’ll need to do a small amount of set up. One of the reasons that I like this set up is because it only takes a few minutes to prepare. I’ve used more complicated set ups before, and while you can certainly set them up to give you more control over the final product, lights, softboxes, and backgrounds can cost quite a bit of money. In addition, I live in a small New York City apartment, so I don’t have much room to store and set up these items.
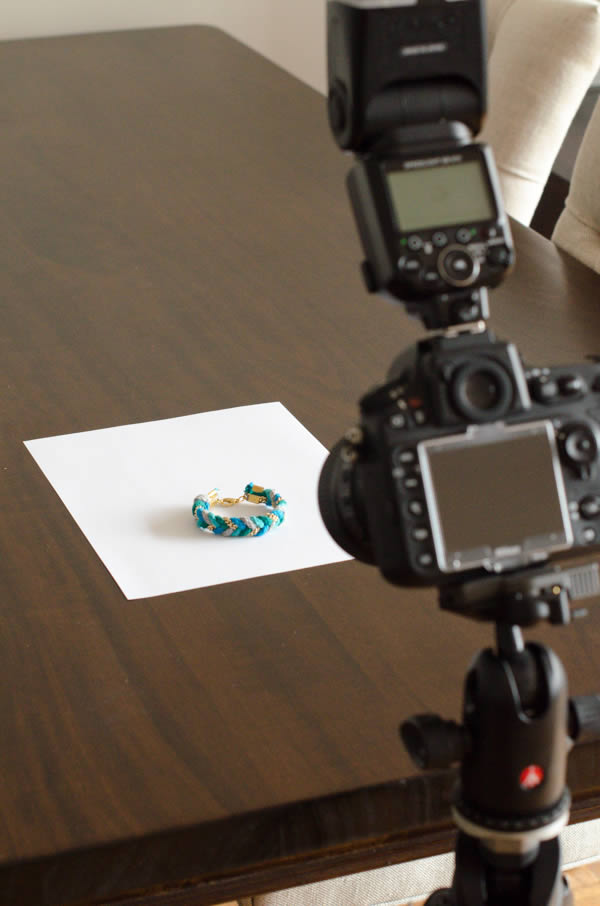
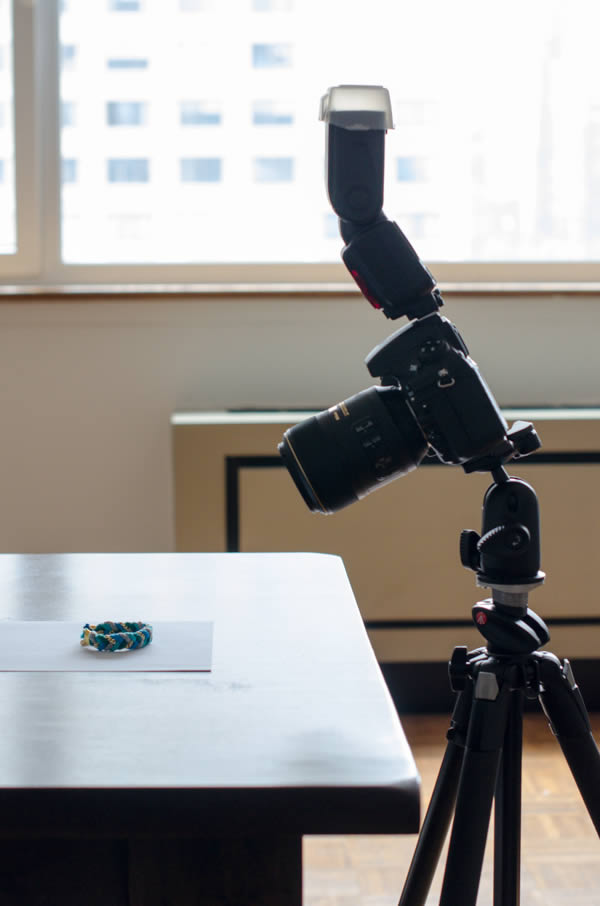
By using just a DSLR with an attached macro lens, a tripod, a flash, and a sheet of paper, I can achieve a pretty good result without having to spend too much time and money on it.
Set up your scene in a way similar to the images below. Make sure to aim your flash directly at the ceiling. That will soften the light just a bit and reduce the harsh shadows. Big thanks to Cameron Knight of Phototuts+ for that tip.
Step 2
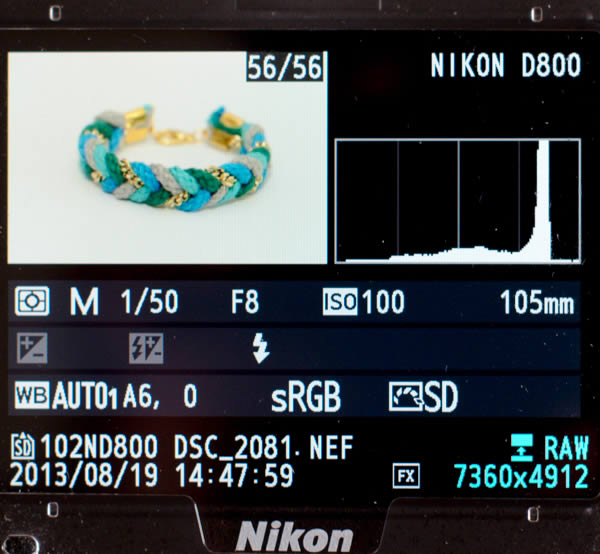
Now that you have set up your camera and have placed your subject in front of it, it’s time to set up and meter your camera. I always shoot in RAW. I find that it gives me the most flexiblity when editing my images. If you’re camera won’t allow you to shoot in RAW, that is ok. You can still shoot your images in JPG. You just might not be able to retrieve as much detail from your images later on in Lightroom and Photoshop.
While your lighting conditions might be a bit different than mine, I shot my photo using the following settings with my flash aimed at the ceiling and set to full power. I also shot my photo during the day to allow in as much natural light as possible.
- Shutter Speed: 1/50
- Aperture: F8
- ISO: 100
Once you are satisfied with how your scene looks, take your photo. It may take some trial and error to get it just right. Take as many photos as you need to in order to get the image as close to perfect as possible.
2. Import Into Lightroom and Make Adjustments
Step 1
Your first step should be to import your photos into Lightroom. You can do this in several ways. I typically prefer to tether my DSLR to my computer when I am shooting product photography but if, you don’t have the correct cable to connect to your computer or if your camera doesn’t support tethering, you can just insert a memory card into your computer’s SD slot.
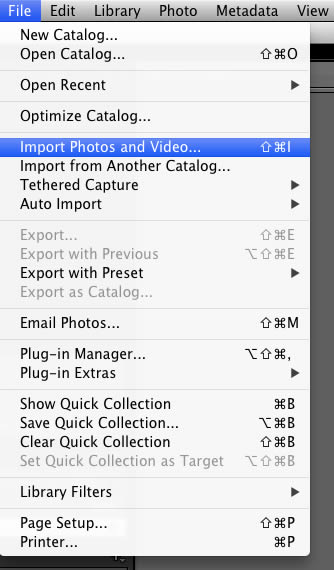
To import photos into Lightroom, open the app, then insert your memory card into your computer. Lightroom should open up a dialogue box for you automatically. If it does not, just go to File > Import Photos and Video. Select the images you want to import, and click Import.

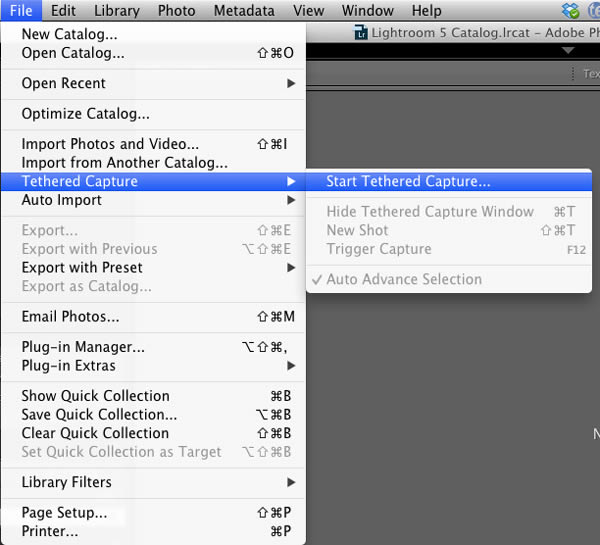
If you prefer to tether your DSLR to your computer, connect using a USB cable. Open Lightroom and select File > Tethered Capture > Start Tethered Capture. This tutorial that I wrote for Phototuts+ has a bit more information on tethering and should help.
Step 2
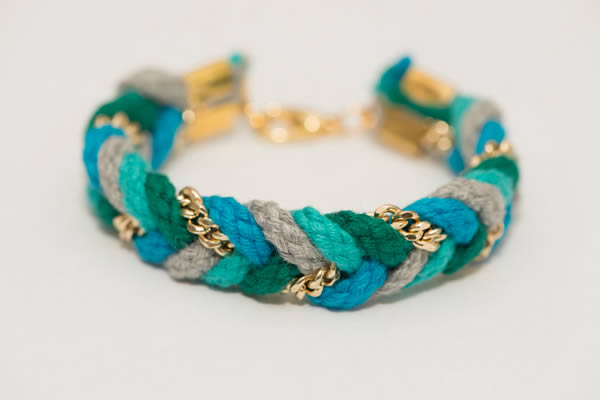
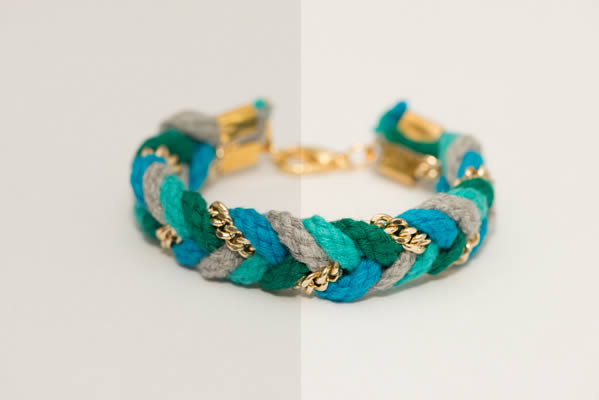
Now that you have imported your photos to your computer, select the photo that you think is best. Your image should look similar to the one below. You may notice that while the background of that photo looks ok, it looks a bit dirty and is not quite pure white. To fix this we will need to make a few adjustments using Lightroom and then move on to Photoshop.
Step 3
The first step is to enter the Develop Module in Lightroom. You can make these adjustment manually but I’ve found that the Auto feature is very fast and works really well; Select Auto.
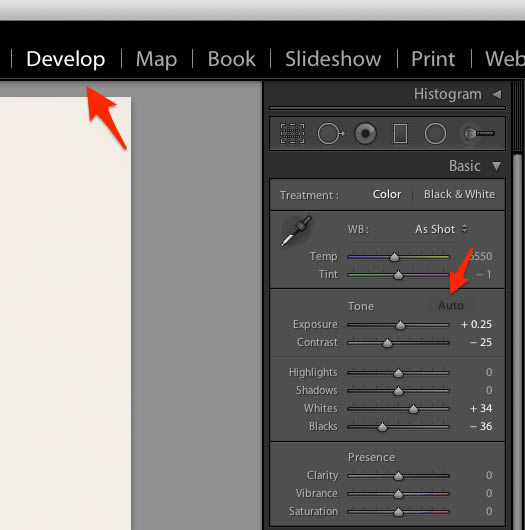
After selecting Auto, you will see that Lightroom made a few changes to your image. While the background does look whiter, it’s still not a pure white. At this point, you’ll want to open your image up in Photoshop.
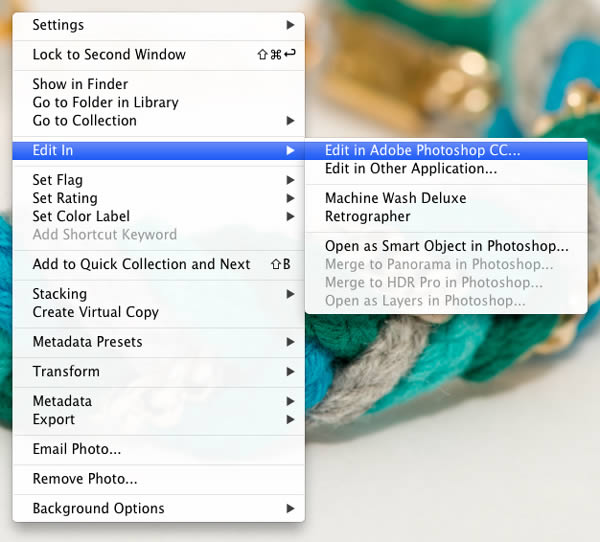
To do this, right click on your image in Lightroom and select Edit in > Photoshop CC.
3. Edit in Photoshop
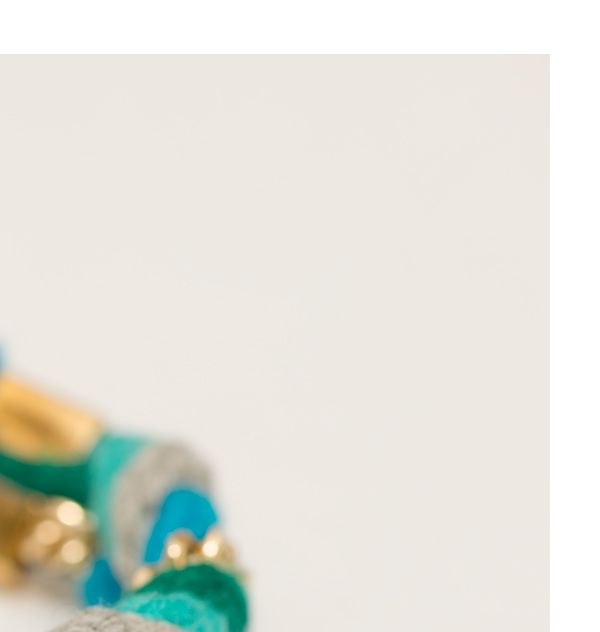
To show you exactly how dirty the background of your image actually is, I’ve expanded the canvas of the image in Photoshop. Now you can see exactly how much whiter the background needs to be.
Unfortunately, you won’t be able to make global adjustments to this image to whiten the background. While global adjustments will whiten the background, they will also wash out the subject, and that is something we do not want to do. This means that we will need to separate the object from the background using masks.
Step 1
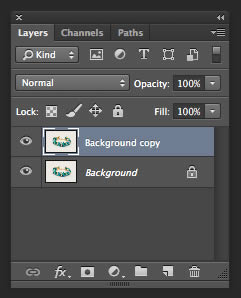
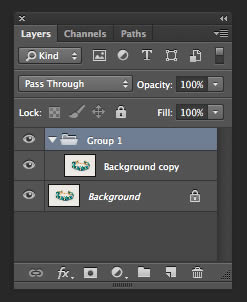
To do this, make a duplicate of the background image by dragging it onto the New Layer icon in the Layers Panel.
Step 2
Select duplicate layer and add it to a group by pressing CMD/CTRL + G.
Step 3
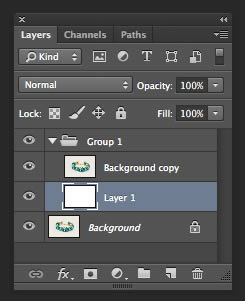
Create new layer and fill it with pure white #ffffff. Set it behind Background copy.
Step 4
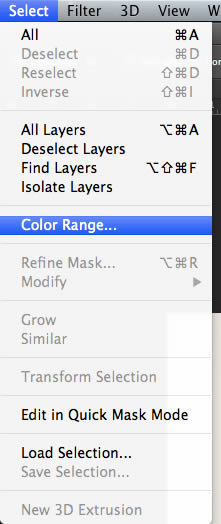
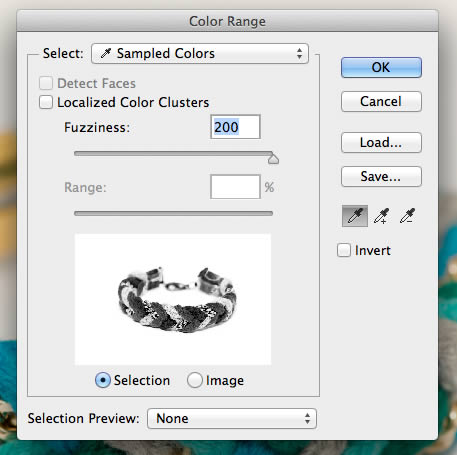
Select duplicated layer and go to Select > Color Range. Select white background with eye dropper and increase fuzziness to maximum amount.
Step 5
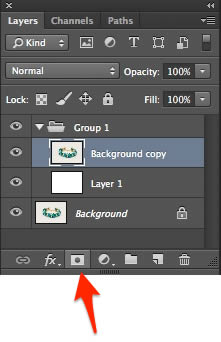
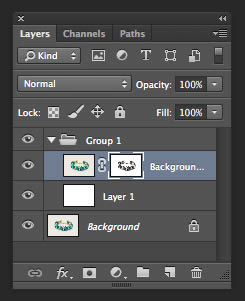
With selection active, create a mask by clicking the Add Layer Mask button in the Layer Palette.

Step 6
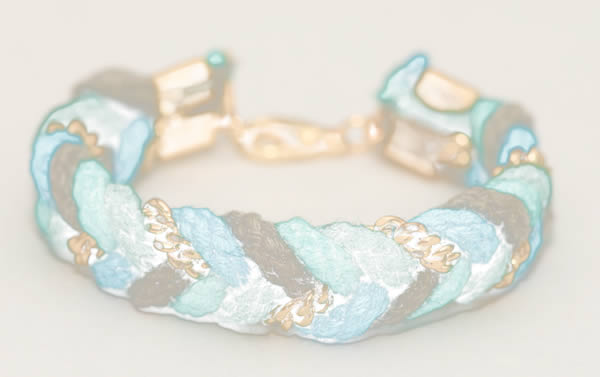
Invert mask by pressing CMD/CTRL + I. You will now see that the edges of the mask are now black. Since black hide and white reveals, the dirty white background of the original image will now be completely hidden.
Step 7
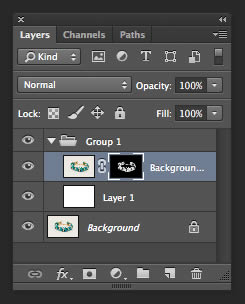
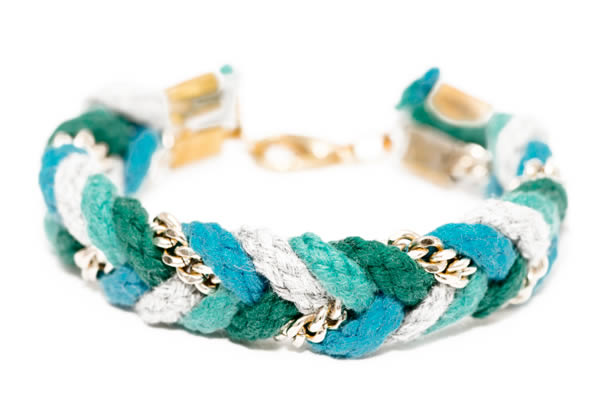
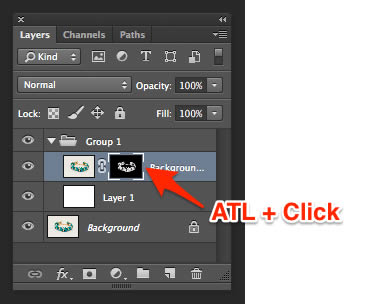
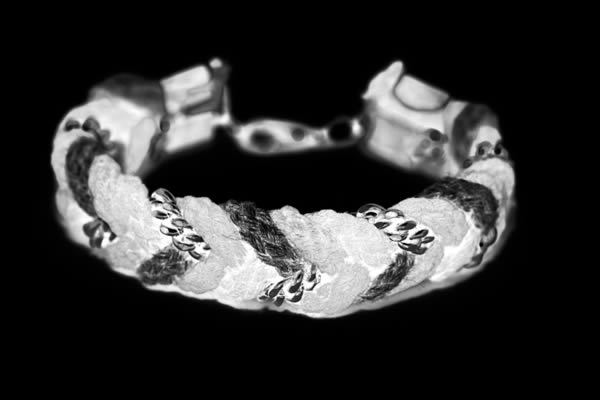
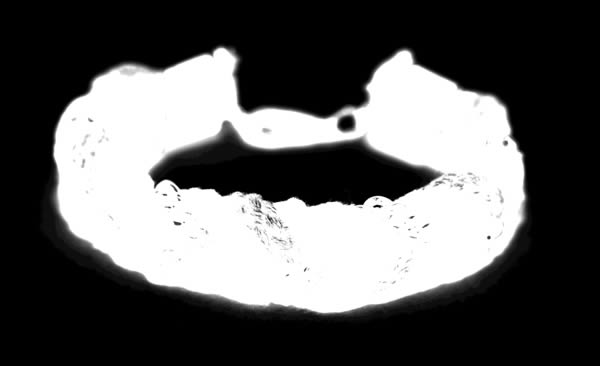
As you can see in the image above. The background is now completely white but the object is now covered in bright white highlights. This means that we will have to touch up the mask a bit. To do this, ALT + Click on the Mask in the Layer Panel to reveal it.
Step 8
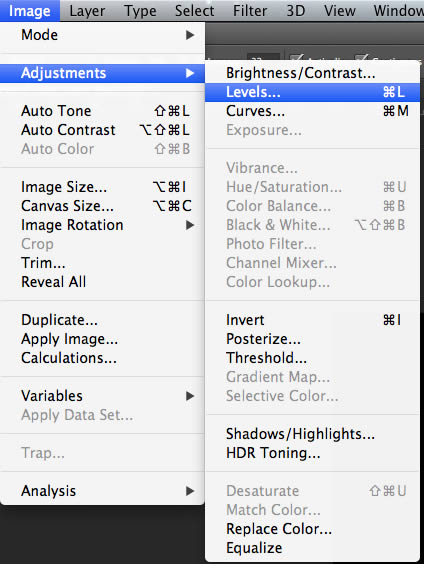
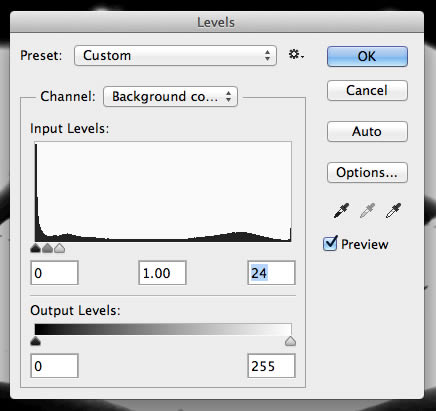
With mask layer selected go to Image > Adjustments > Levels. Move sliders to show outline of object.
Step 9
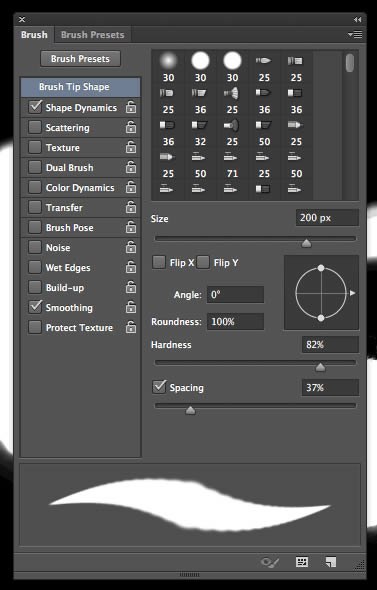
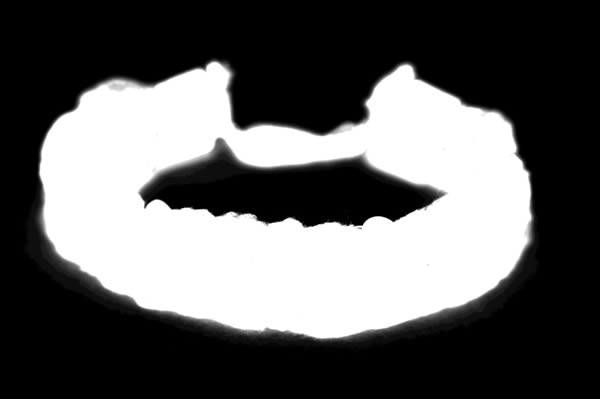
Clean up the mask using the Brush Tool. Use a slightly soft brush. White will reveal your image, black will hide. Make sure background is completely black.
Step 10
ALT + click on mask again to hide the mask and reveal the object. As you can see, the background of the image is now completely white. The edges are a bit hard, however. So we need to make a small adjustment to the mask.
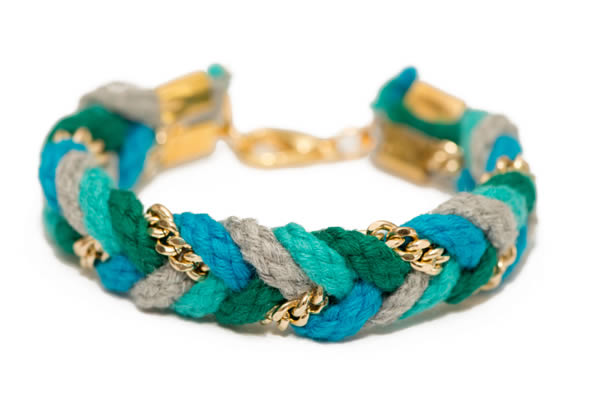
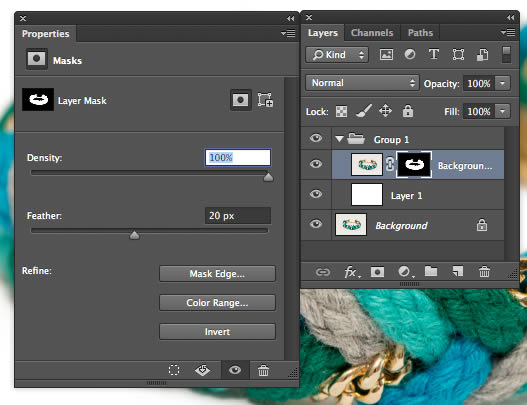
Open the Properties Panel and adjust feathering on mask if necessary. I set featering to 20 px but the amount you use will depend on your preference and resolution of image.
Step 11
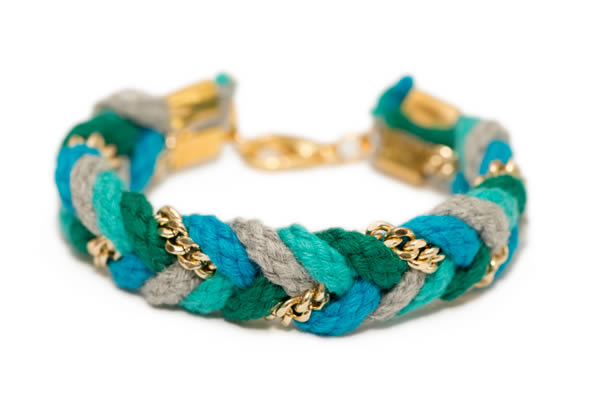
Now you can save your Photoshop document. Since you originally opened the image using Lightroom, it will automatically update in Lightroom. Make any final adjustments there. In this case, I cropped and straightened it using the Crop Tool.
Conclusion
In this tutorial, I showed you how to quickly take a photo of an object with a DSLR, a flash, and a tripod, and then how to isolate that object onto a pure white background using a combination of Lightroom and Photoshop. While there are certainly more advanced techniques to help you shoot product photography, I have found this technique to be the most economically and time-efficient method that I have used. I hope that you have found this tutorial useful and that you can use these techniques to help shoot better product photography.
Have you ever tried to shoot and retouch product photos? What techniques have you tried that proved to be useful?
