
The golden hour is the time of day, usually in the early morning or evening, when the light creates a very special effect in photography. During the golden hour (sometimes also called the magic hour), the light is soft, with a reddish hue, which brings warmth and depth to a photo. At the same time, lighting conditions change rapidly offering the possibility for very varied shots. In this article, I will explain why the golden hour is so special and give you some general tips on how to improve your photography. 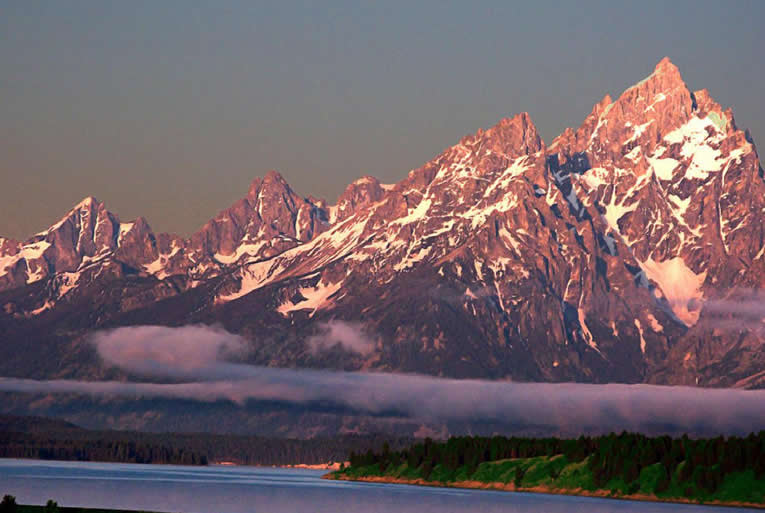 Photo by Sergiu Luculescu
What is the Golden Hour?
In photography, “golden hour” refers to a certain time of day when the sun is at its lowest and creates a unique type of lighting that is considered particularly appealing for photography. The exact time and duration of the golden hour will depend on where you are in the world and also on the season. Typically, the golden hour occurs in the very early morning and evening, and even though it is called an “hour”, the duration can vary greatly. But why is the golden hour so special?
The Basics of Hard and Soft Light
To understand why the golden hour is so special, you need to know something about lighting in photography. Photographers often talk about hard and soft light. A sunny day with no cloud cover will generate hard light; i.e. light from a single source that shines directly on the subject, casting sharp shadows and generating strong contrast. Soft light on the other hand generates soft shadows and little contrast. It is generated when light comes from multiple sources or when it is reflected or diffused. An overcast day is a great example of soft light. Here, the light rays are diffused or scattered by the clouds, creating lighting that is very even. 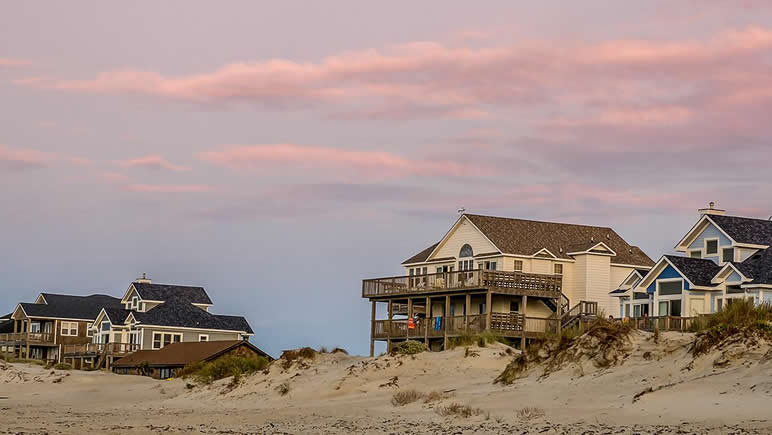 Photo by Sergiu Luculescu For the most part, the best photography is done in soft light, since it better depicts the colors and shape of the subject. Some photographers do use hard light, particularly to generate specific effects, but overall soft light is preferred for virtually all kinds of photography.
What Makes Golden Hour Photography so Special?
In the golden hour, the light travels farther to reach us, since the sun is low in the sky and the light shines at an angle. This diffuses the light, causing soft, warm lighting with long shadows and reduced contrast. The atmosphere filters the light, creating an effect that is quite unique. Anyone can create soft light, even by artificial means using a diffuser, but the color and feel of the golden hour is very special. At this time of day, lighting conditions also change rapidly, allowing the photographer to get varied types of shots within a relatively short time span. Within that “hour”, the photographer will be able to experiment with all the intermediary types of lighting and shadows as the sun sets or rises. Shooting during the golden hour is considered excellent for virtually any kind of photography, including people, landscapes, cityscapes, and wildlife. The versatility of the changing lighting conditions can create wonderfully warm pictures with vivid colors, and give the scene a three-dimensional feel due to the long shadows. It can also be used to create dramatic effects in landscape photography. 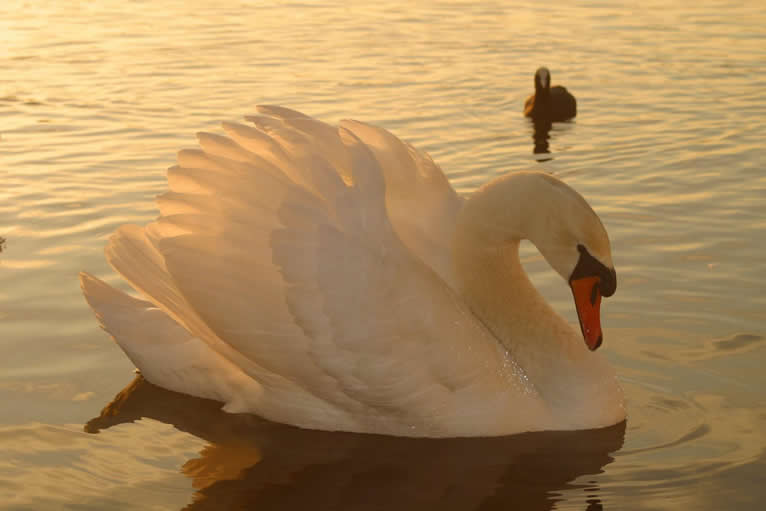 Photo by Simon Allanach Notice the warm glow and pinkish color in the picture above, taken just as the sun had begun to set.
Calculating the Golden Hour
As mentioned earlier, the exact time and duration of the golden hour varies depending on where you are in the world. The easiest way to figure out when you should be out there is to find your location here: http://www.golden-hour.com/.
Tips for Photography in the Golden Hour
So what do you need to know for great golden hour photography?
- Make sure you have the right weather: Very cloudy conditions will block out that special light.
- Come early and be prepared: Things change quickly and you need to be ready. Find the right location(s) and scout out interesting subjects (this can of course be done at an earlier time). A torch is always useful, particularly if you come before dawn.
- Experiment with your camera settings: Often, auto mode will try to negate the effect of the golden hour, thus ruining all your hard work. Try using the camera in manual mode and setting your white balance to “cloudy”.
- Use a tripod: Not only because of the practical difficulties of shooting in darker conditions, but because you may need longer exposure times.
- Experiment with angles and positions: Take advantage of this time and experiment with different subjects and angles. The effect of front vs back lighting can create very different kinds of pictures.
- Take many pictures: Conditions change rapidly making it possible to take very different shots of the same subject. Furthermore, if you are experimenting with camera settings take many pictures to make sure that you learn what works best and also so you do not end up wasting your time.