
In the following steps you will learn how to create a simple coffee bean pattern in Adobe Illustrator. You will start by learning how to create a simple art brush. Next, using some basic tools and effects along with the Round Any Corner script you will learn how to create the starting coffee bean shape, how to multiply, resize and recolor it. Finally, taking full advantage of the Snap to Grid option you will learn how to create your own pattern.
You have your Coffee Shop Logo, so now you have a color palette to work from. I’ll be showing you how to create a basic coffee bean pattern using the same colors in the logo which could be used for a variety of things including: wallpaper, print and web backgrounds, table clothes etc… The list is endless. So let’s jump into this tutorial.
Tutorial Details
[/left50]
Difficulty: Beginner-Intermediate
Estimated Completetion Time: 45 minutes [/right50] [clear]
1. Prepare a New Document
Step 1
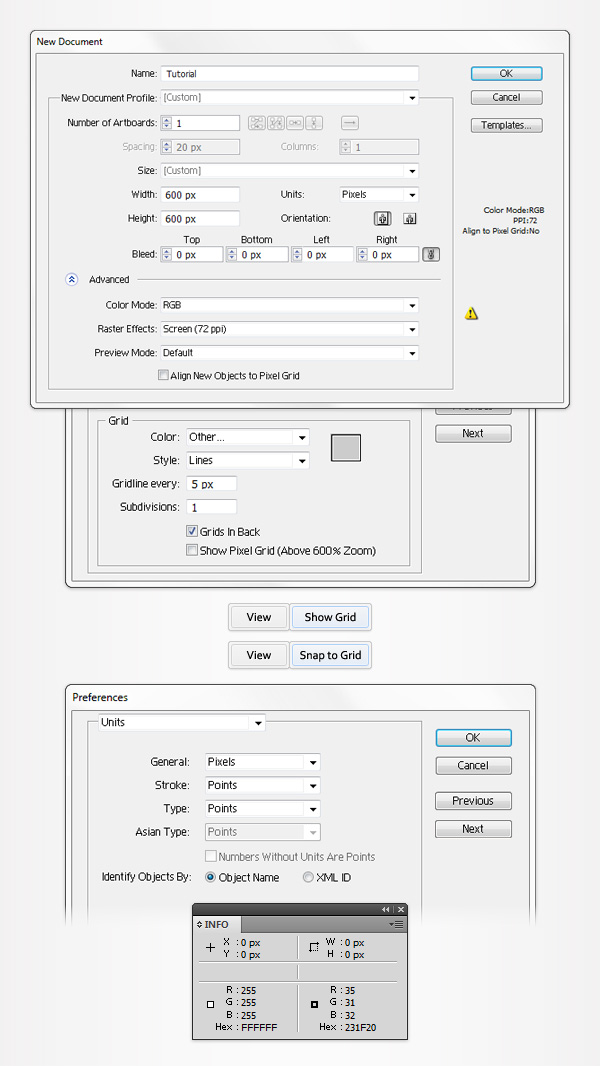
Hit Control + N to create a new document. Enter 600 in the width box and height boxes then click on the Advanced button. Select RGB, Screen (72ppi) and make sure that the Align New Objects to Pixel Grid box is unchecked before your click OK.
Enable the Grid (View > Show Grid) and the Snap to Grid (View > Snap to Grid). For starters you’ll need a grid every 5px. Simply go to Edit > Preferences > Guides > Grid, enter 5 in the Gridline every box and 1 in the Subdivisions box. You should also open the Info panel (Window > Info) for a live preview with the size and position of your shapes. Do not forget to set the unit of measurement to pixels from Edit > Preferences > Units > General. All these options will significantly increase your work speed.
2. Create the Starting Coffee Bean Shape
Step 1
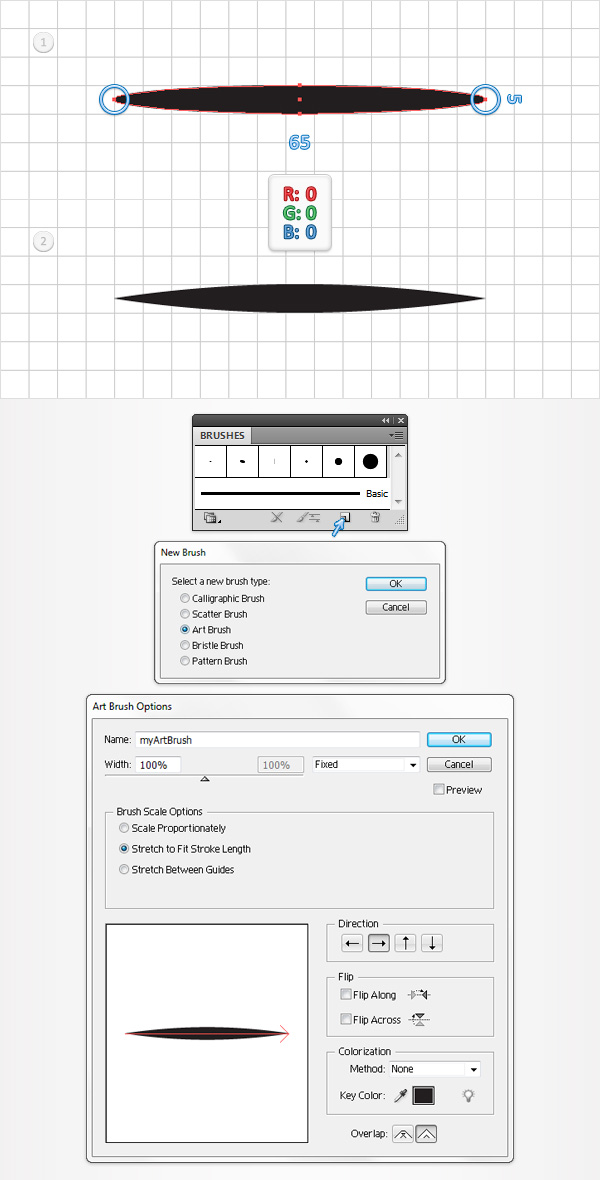
Using the Ellipse Tool (L), create a 65 by 5px shape and fill it with black. Disable the Snap to Grid (View > Snap to Grid) and keep focusing on this squeezed circle. Switch to the Convert Anchor Point Tool (Shift + C) and click on the left and right anchor points highlighted in the first image. In the end your shape should look like in the second image. Open the Brushes panel (Window > Brushes), make sure that your black shape is still selected and hit the New Brush button (pointed by the little, blue arrow in the following image). Check the Art Brush box and click OK. Pick a name for your new art brush, make sure that you enter all the properties shown in the following image and click OK.
Step 2
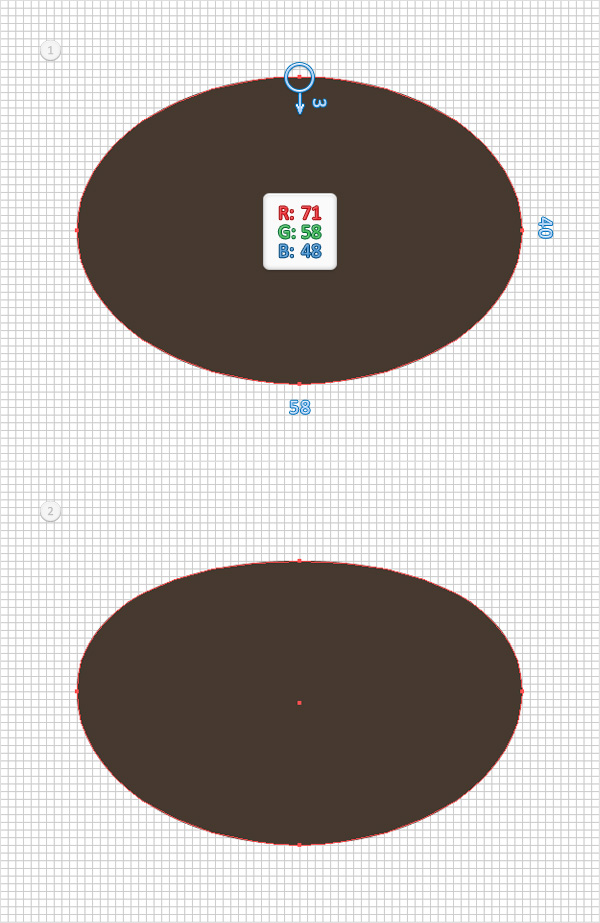
Enable the Snap to Grid (View > Snap to Grid). For the following step you will need a grid every 1px. So, go to Edit > Preferences > Guides & Grid and enter 1 in the Gridline every box. Using the Ellipse Tool (L), create a 58 by 40px shape and fill it with R=71 G=58 B=48. Focus on this new shape, switch to the Direct Selection Tool (A), select the top anchor point and drag it 3px down.
Step 3
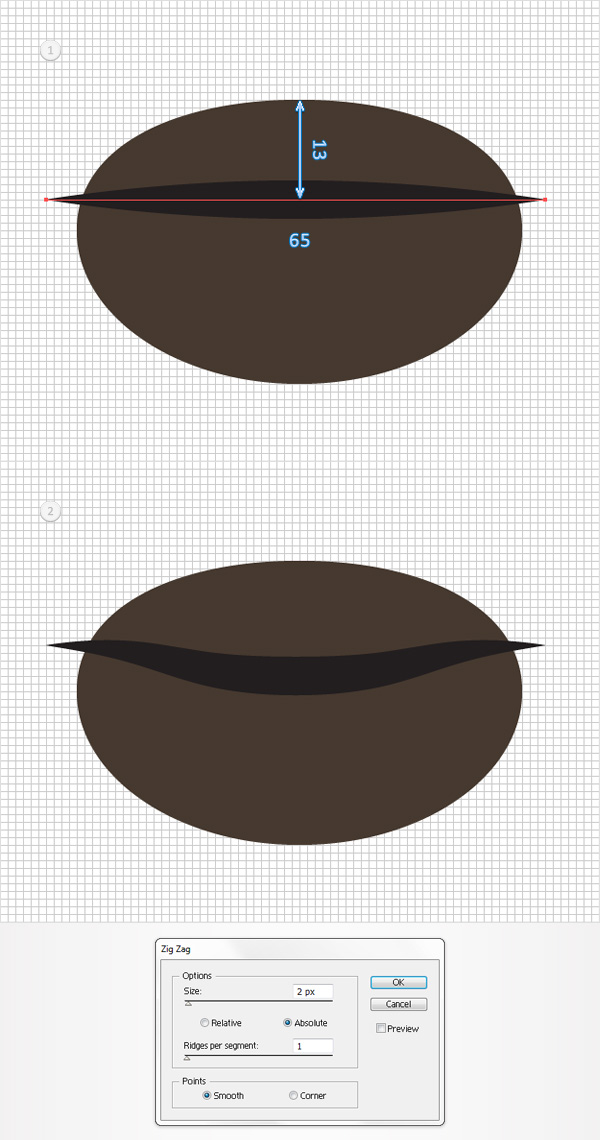
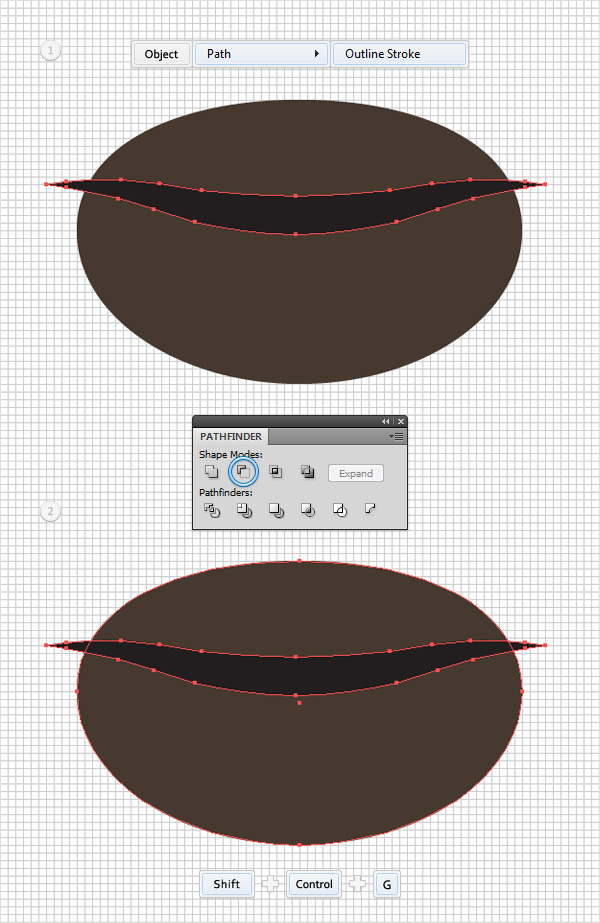
Using the Pen Tool (P), create a 65px, horizontal path and place it as shown in the first image. Select it and focus on the Appearance panel (Window > Appearance). Make sure that there’s no color set for the fill then select the stroke. Add the art brush made in the first step then go to Effect > Distort & Transform > Zig Zag. Enter the properties shown in the following image and click OK.
Step 4
Make sure that the path with the art brush is still selected and go to Object > Path > Outline Stroke. Select the resulting path along with the brown shape, open the Pathfinder panel (Window > Pathfinder) and click on the Minus Front button. Move to the Layers panel (Window > Layers), select the resulting group of shapes and Ungroup it (Shift + Control + G). Select the three darker shapes and simply delete them.
Step 5
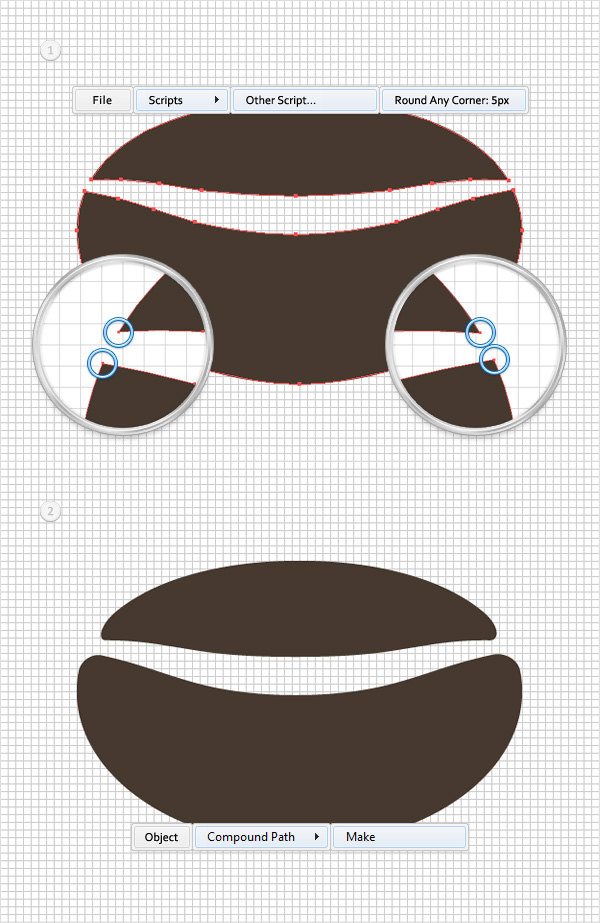
For this step you’ll need the Round Any Corner script. You can find it in the Vectortuts+ article 20 Free and Useful Adobe Illustrator Scripts. Save it to your hard drive, return to Illustrator and grab the Direct Selection Tool (A). Select the four anchor points highlighted in the first image and go to File > Scripts > Other Script. Open the Round Any Corner Script, enter a 5px Radius and click OK. In the end your shapes should look like in the second image. Select both shapes and turn them into a simple Compound Path (Object > Compound Path > Make or Control + 8)
3. Multiply the Coffee Bean Shape
Step 1
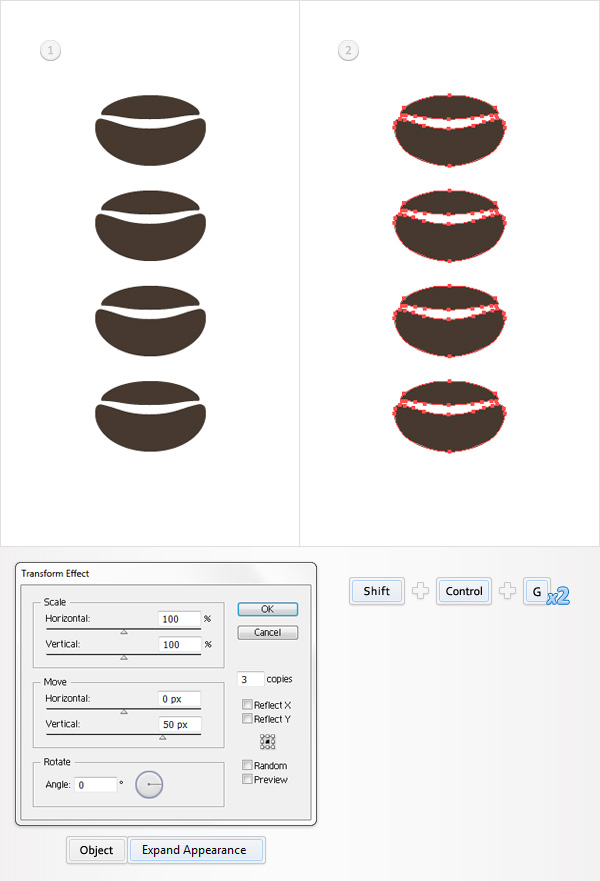
Select your compound path and go to Effect > Distort & Transform > Transform. Enter the properties shown in the following image, click OK and go to Object > Expand Appearance. Move to the Layers panel, select the resulting group and hit Shift + Control + G twice. In the end you should have four similar compound paths as shown in the second image.
Step 2
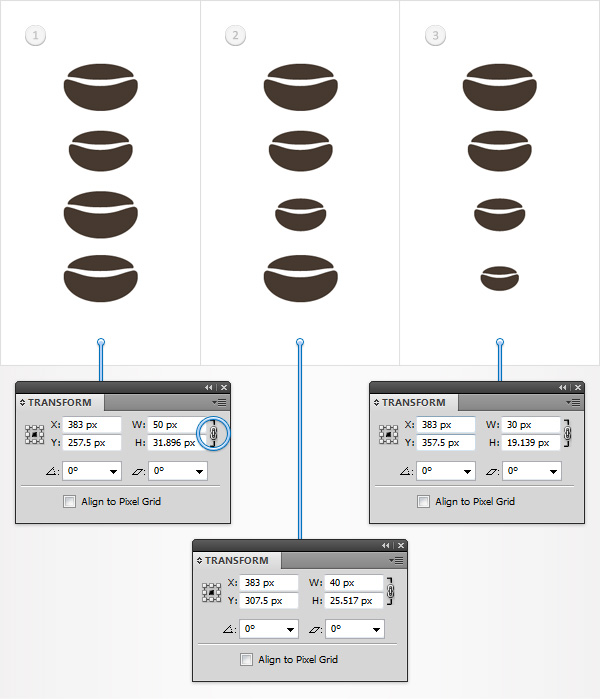
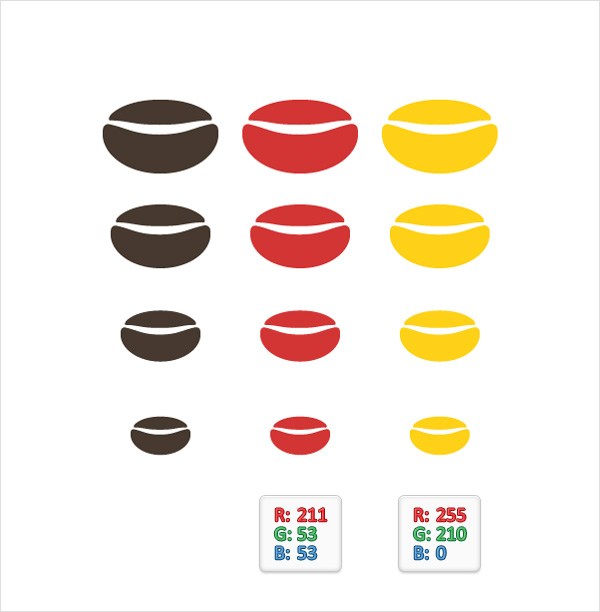
Focus on your compound paths, open the Transform panel (Window > Transform) and make sure that the Constrain Width and Height Proportions button is checked. Select the second coffee bean shape (start the count from the top) and simply enter 50 in the width (W:) box from the Transform panel. Move down to the next compound path, select it and enter 40 in the width (W:) box. Finally, select the bottom coffee bean shape and enter 30 in the width box. In the end your four coffee beans should look like in the third image.
Step 3
Select your four coffee bean shapes, Group them (Control + G) and go to Effect > Distort & Transform > Transform. Enter the properties shown in the following image, click OK and go to Object > Expand Appearance. Move to the Layers panel, select the resulting group and hit Shift + Control + G twice.

Step 4
Select the middle coffee beans column and replace the brown used for the fill with R=211 G=53 B=53. Move to the right column of coffee beans and set their fill color at R=255 G=210 B=0.
3. Make the Coffee Bean Pattern
Step 1
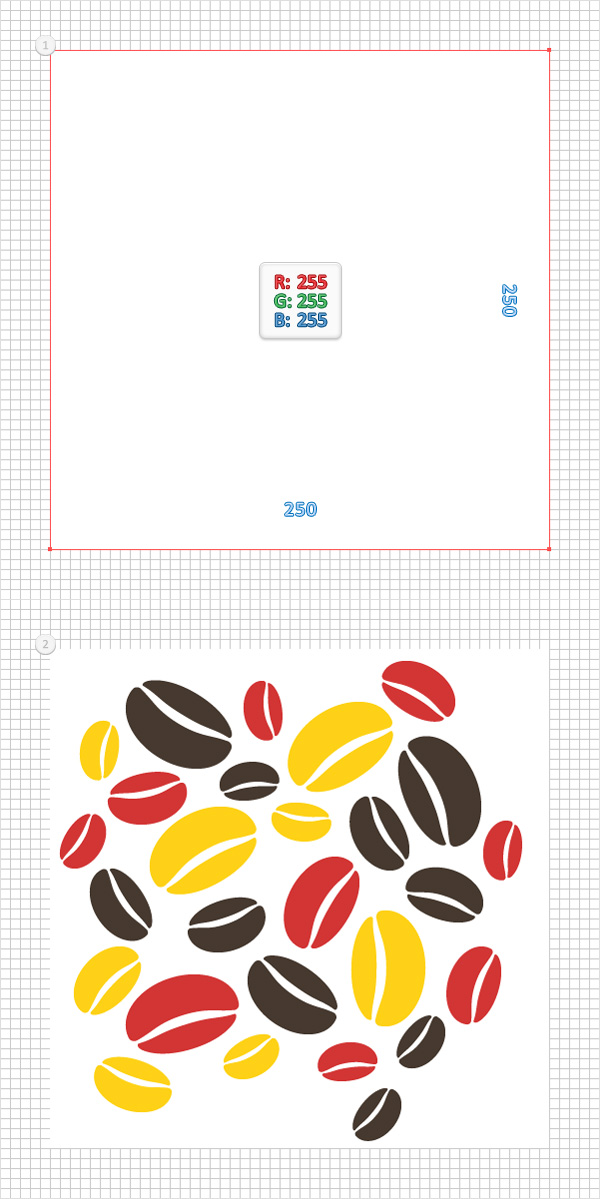
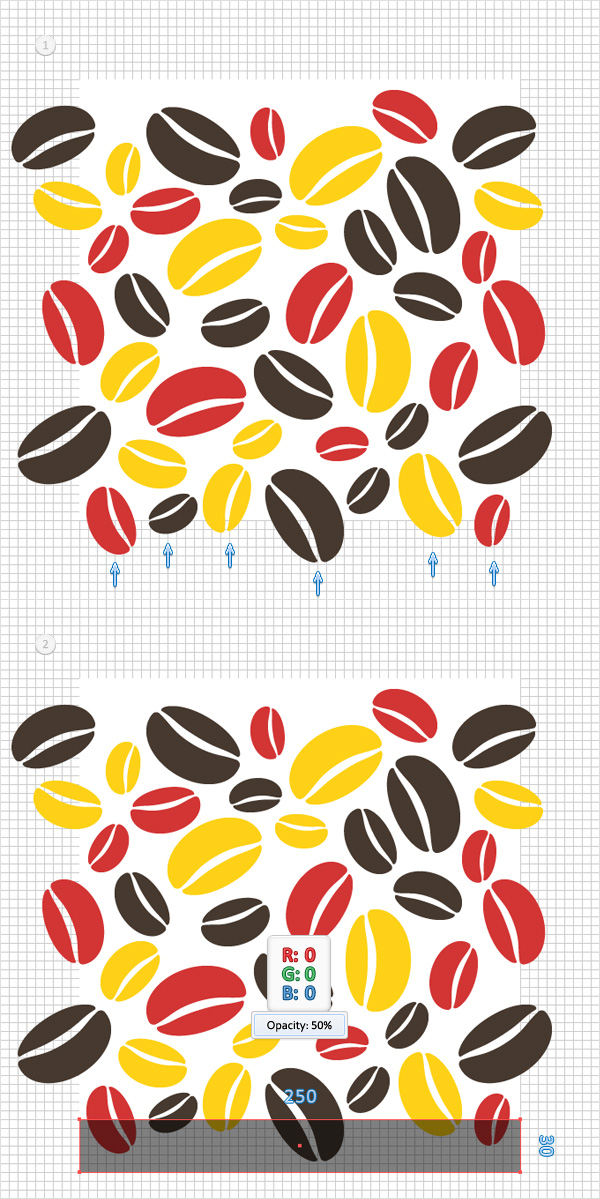
For the following step you will need a grid every 5px. So, go again to Edit > Preferences > Guides & Grid and enter 5 in the Gridline every box. Using the Rectangle Tool (M), create a 250px square and fill it with white. Move to the Layers panel and lock this shape to make sure that you won’t accidentally select/move it. Disable the Snap to Grid (View > Snap to Grid) and focus on your white rectangle. Resize/rotate your coffee bean shapes and spread them roughly as shown in the following image. Use the Control + C > Control + F shortcut to multiply your shapes if needed. Make sure that no coffee bean shape goes outside your white square.
Step 2
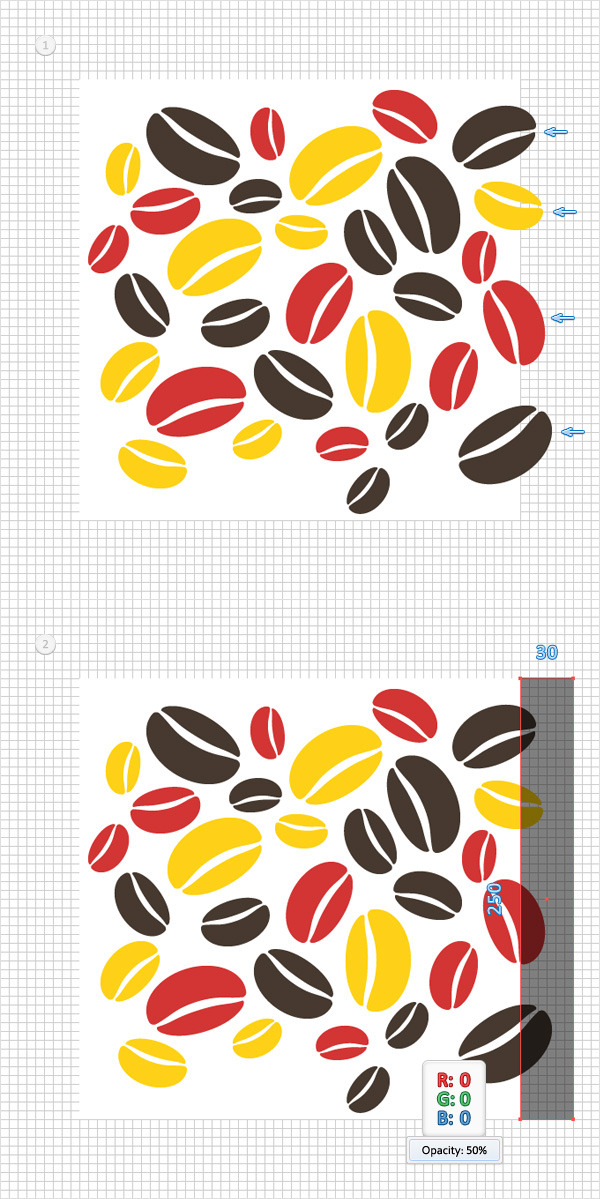
Make some new coffee beans and place them roughly as shown in the first image. Enable the Snap to Grid (View > Snap to Grid) and pick the Rectangle Tool (M). Create a 30 by 250px shape, place it as shown in the second image, fill it with black and lower its Opacity to 50%.
Step 3
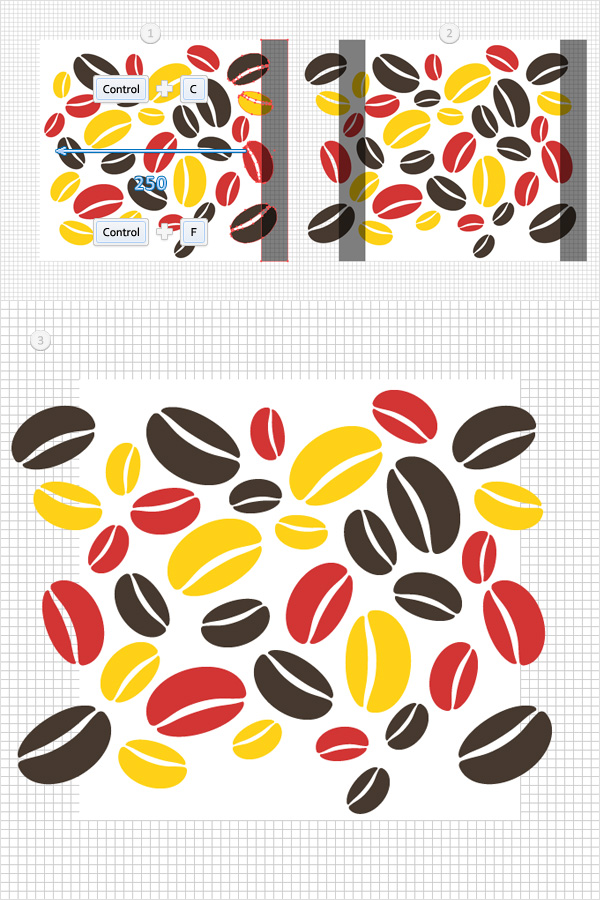
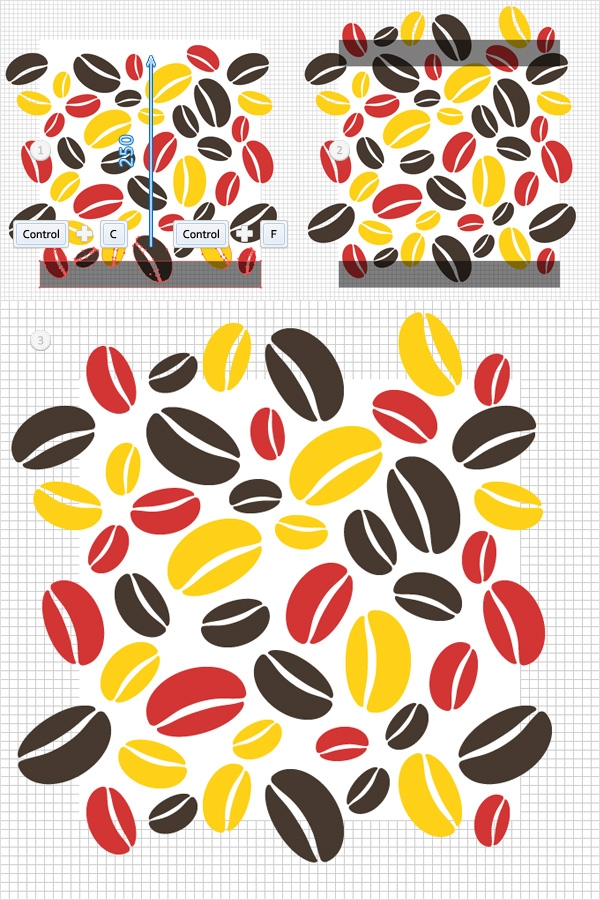
Select the black rectangle and the coffee bean shapes that go outside the white square and duplicate them (Control + C > Control + F). Select these copies and simply drag them 250px to the left as shown in the second image. Move to the Layers panel and delete both black rectangles.
Step 4
Disable the Snap to Grid (View > Snap to Grid), make some more coffee beans and place them roughly as shown in the first image. Enable the Snap to Grid (View > Snap to Grid) and pick the Rectangle Tool (M). Create a 250 by 30px shape, place it as shown in the second image, fill it with black and lower its Opacity to 50%.
Step 5
Select the black rectangle and the coffee bean shapes that go outside the white square (in the top side) and duplicate them (Control + C > Control + F). Select these copies and simply drag them 250px up as shown in the second image. Move to the Layers panel and get rid of those black rectangles.
Step 6
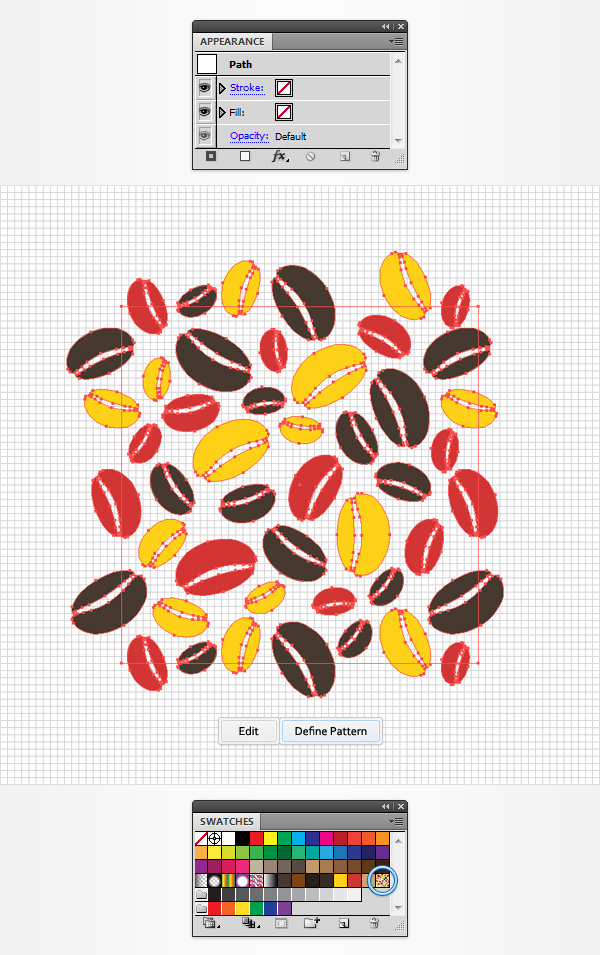
Focus on the Layers panel and Unlock the white square. Select it, move to the Appearance panel and simple remove the color from the fill. Select this invisible square along with all those coffee bean shapes and go to Edit > Define Pattern. Move to the CTRL panel (Window > Swatches) and you will find your new pattern.
4. Using the Pattern
Step 1
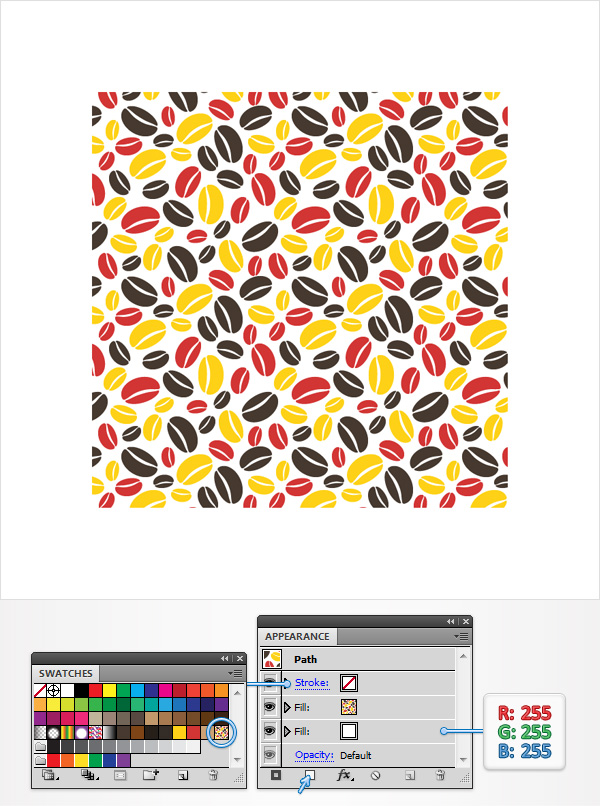
Pick the Rectangle Tool (M), create a shape the size of your Artboard and fill it with white. Make sure that this new shape stays selected, focus on the Appearance panel and add a second fill using the Add New Fill button (pointed by the little, blue arrow). Select this new fill and simply add your coffee bean pattern from the Swatches panel.
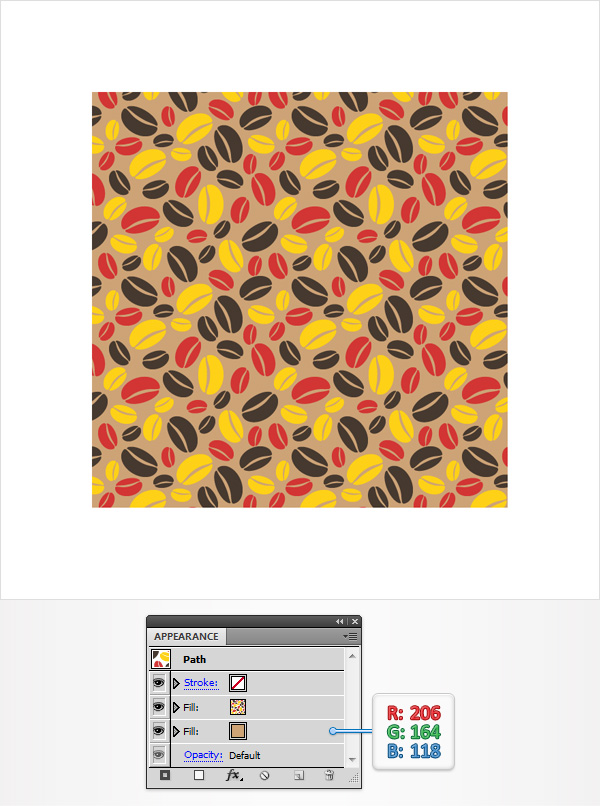
Step 2
Reselect your patterned shape, focus on the Appearance panel and simply replace the white with R=206 G=164 B=118 or any other color.
Congratulations! You’re Done.
Now your work is done. Here is how it should look. You can easily recolor your entire pattern, so feel free to use your favorite set of colors. I hope you’ve enjoyed this tutorial and can apply these techniques in your future projects.