Angular 2.3 is released! One of the exciting new feature is component inheritance. Component inheritance is very powerful and it can increase your code reusability.
What does component inheritance provide us?
Component Inheritance
Component Inheritance in Angular 2.3 covers all of the following:
-
Metadata (decorators): metadata (e.g.
@Input(),@Output), etc. defined in a derived class will override any previous metadata in the inheritance chain otherwise the base class metadata will be used. -
Constructor: the base class constructor will be used if the derived class doesn’t have one, this mean that all the services you injected in parent constructor will be inherited to child component as well.
- Lifecycle hooks: parent lifecycle hooks (e.g.
ngOnInit,ngOnChanges) will be called even when are not defined in the derived class.
Component inheritance DO NOT cover templates and styles. Any shared DOM or behaviours must be handled separately.
Building with Component Inheritance
Let’s start with a simple use case.
Someone wrote a pagination component. You like the component and its logic. The functionality is exactly what you are looking for. You want to use it, but you want to apply your own styles.
Here’s a quick look at what we’ll be building.
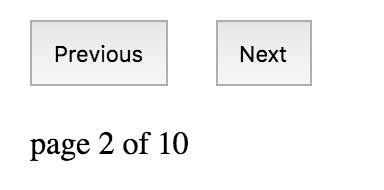
Original view:
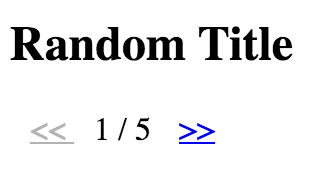
Customize view:

A few things you would like to change:
- Instead of button, you want it to be hyperlink.
- The placement of the page count on the center instead of new line
Let’s take a look of the original pagination component.
Original Pagination
Here’s the implementation:
// simple-pagination.component.ts

import { Component, Input, Output, EventEmitter } from '@angular/core';

@Component({
  selector: 'simple-pagination',
  template: `
    <button (click)="previousPage()" [disabled]="!hasPrevious()">Previous</button>
    <button (click)="nextPage()" [disabled]="!hasNext()">Next</button>

    <p>page {{ page }} of {{ pageCount }}</p>
  `
})
export class SimplePaginationComponent {
  @Input()
  pageCount: number;

  @Input()
  page: number;

  @Output()
  pageChanged = new EventEmitter<number>();

  nextPage() {
    this.page ++;
    this.pageChanged.emit(this.page);
  }

  previousPage() {
    this.page --;
    this.pageChanged.emit(this.page);
  }

  hasPrevious(): boolean { return +this.page > 1; }

  hasNext(): boolean { return +this.page < +this.pageCount; }

}
The code is pretty expressive itself.
Notes:
- We accept two inputs:
pagefor current page count andpageCountfor total pages. - Whenever the page changes, we will emit
pageChangedevent. - Disable the
previousornextbutton whenever reaching the min and max page.
Let’s Extend the Pagination Component
Now that we need to customize the pagination component, we can extend it instead of duplicating the same logic again.
// my-pagination.component.ts

import { Component } from '@angular/core';
import { SimplePaginationComponent } from './simple-pagination.component';

@Component({
  selector: 'my-pagination',
  template: `
    <a (click)="previousPage()" [class.disabled]="!hasPrevious()"
      href="javascript:void(0)">
      ««
    </a>
    <span>{{ page }} / {{ pageCount }}</span>
    <a (click)="nextPage()" [class.disabled]="!hasNext()"
      href="javascript:void(0)" >
      »»
    </a>
  `
})
export class MyPaginationComponent extends SimplePaginationComponent {
}
Notes:
- First, we import the
SimplePaginationComponent. - Then, we simply
extendstheSimplePaginationComponentclass. - We change the view template to use hyperlink.
- You can see that we can reuse all inputs, outputs, properties and function in
SimplePaginationComponentin our view template.
Overriding Parent’s Properties
Let’s modify our original component to accept customization of Previous and Next text.
// simple-pagination.component.ts

@Component({
  selector: 'simple-pagination',
  template: `
    <button (click)="previousPage()" [disabled]="!hasPrevious()">{{ previousText }}</button>
    <button (click)="nextPage()" [disabled]="!hasNext()">{{ nextText }}</button>

    <p>page {{ page }} of {{ pageCount }}</p>
  `
})
export class SimplePaginationComponent {
  ...

  @Input()
  previousText = 'Previous';

  @Input()
  nextText = 'Next';

  ...

}
Notes:
- When user doesn’t pass in
previousText, default the text toPrevious. - When user doesn’t provide
nextText, set it toNext.
We would like to let user customize the Previous and Next text in our extended component as well. However, instead of default the text to Previous and Next, we want the default value to be << and >>.
We can do so by overriding the previousText and previousText property in our child component.
// my-pagination.component.ts

import { Component, Input } from '@angular/core';
import { SimplePaginationComponent } from './simple-pagination.component';

@Component({
  selector: 'my-pagination',
  template: `
    <a (click)="previousPage()" [class.disabled]="!hasPrevious()"
      href="javascript:void(0)">
      {{ previousText }}
    </a>
    <span>{{ page }} / {{ pageCount }}</span>
    <a (click)="nextPage()" [class.disabled]="!hasNext()"
      href="javascript:void(0)" >
      {{ nextText }}
    </a>
  `
})
export class MyPaginationComponent extends SimplePaginationComponent {
  @Input()
  previousText = '<<'; // override default text

  @Input()
  nextText = '>>'; // override default text

  ...
}
New Property in Child Component
Let’s say we allow user to provide title for our child component. However, parent component don’t need that. We can add title as input to our child component only.
// my-pagination.component.ts
@Component({
  selector: 'my-pagination',
  template: `
    <h2>{{ title }}</h2>
    <a (click)="previousPage()" [class.disabled]="!hasPrevious()"
      href="javascript:void(0)">
      {{ previousText }}
    </a>
    <span>{{ page }} / {{ pageCount }}</span>
    <a (click)="nextPage()" [class.disabled]="!hasNext()"
      href="javascript:void(0)" >
      {{ nextText }}
    </a>
  `
})
export class MyPaginationComponent extends SimplePaginationComponent {
  @Input()
  title: string; // title input for child component only

  ...
}
Summary
Here is the live example of our demo.
With the introduction of component inheritance, it greatly improve the reusability and customization of our components.
That’s it. Happy coding.
Reference: