Learn how to take a drawing of a dragon and turn it into an amazing painting. This tutorial will show you how to use Photoshop to create shapes from a hand-drawn sketch, apply shading, then finish it by applying color and texture. After creating the dragon, you will learn learn how to create the starry background scene and create a fiery dragon breath.
Preview of Final Results

Resources
Step 1
On the document of 1500 pxl wide and 1500 pxl high, firstly I created the scratch of the dragon.
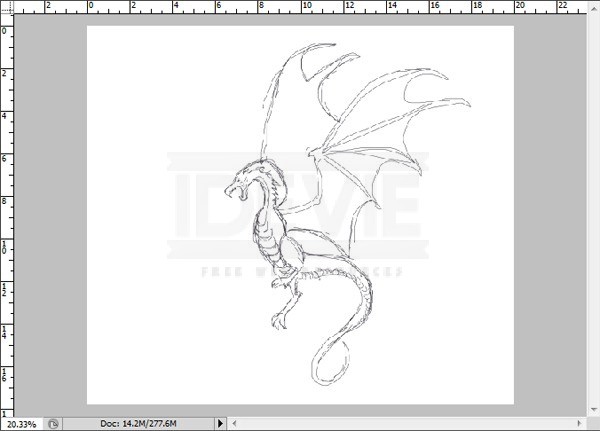
Step 2
Next, we have to make the scratch into a clear shape by changing it into an outline. I decided to work on different layers for each part of the dragon’s body. Create five new layers in the layer panel. The top most layer is the one for the left leg, the layer underneath the left leg layer is the one for the main body and head, then, the layer below the main body is the one for the left wing, next below the left wing is the right wing layer, finally, the lowest layer is the one for the right leg. Let’s outline the left leg first. With the left leg layer selected, go to the Pen tool (P) in the tool panel. Start to click the leg area to create the starting point anchor and keep on clicking to trace the leg until the path is closed which is indicated by a thin line around the traced area. Right click on the closed path. There will be an option command box, choose Fill Path and fill it with color of light grey (#acaaaa)
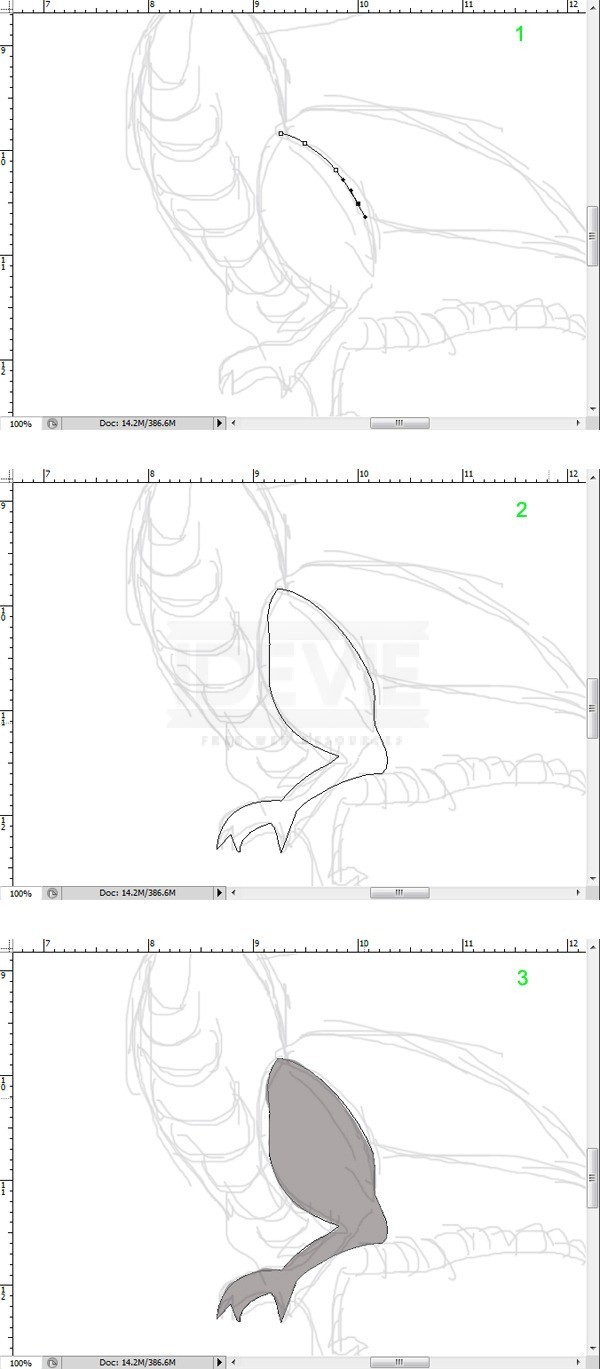
Step 3
Now select the main body layer, and take Pen Tool again. Trace the whole body (including the head and the tail) and right after the path is closed, fill it with the same color as the one used for the left leg. Please refer back to the previous step 2.
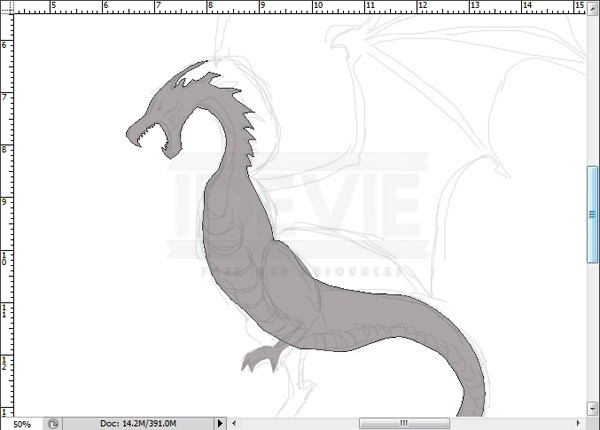
Step 4
Do the same as in previous step 2-3 for the other parts of the dragon body until we get the complete outline of the dragon.
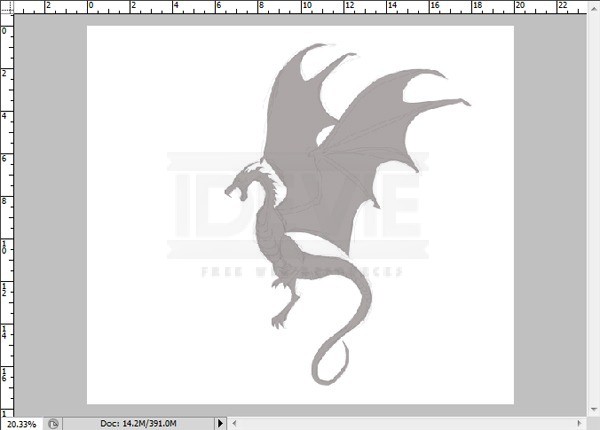
Step 5
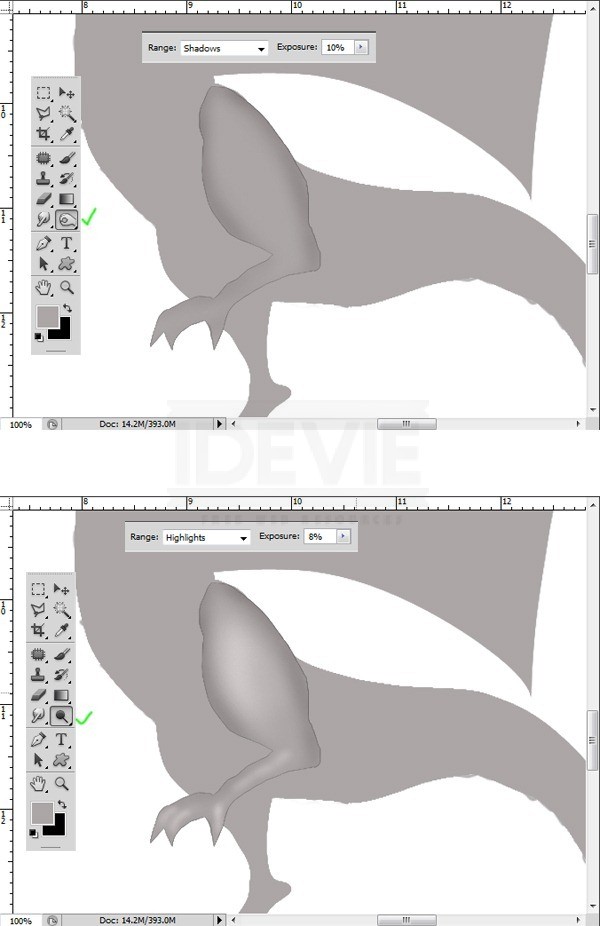
From this step on, we will give the dimension on the outline to define the detail shape of the dragon. This means that we will give some highlight and shadow on it and we can achieve this by applying Dodge and Burn tool. I decided to work on the left leg first. Select the left leg layer. Then, take Burn tool in the tool panel. Set the Range to shadow at very low exposure: 10%. With very soft brush, stroke the edge of the leg. Then, switch to Dodge tool. Start giving highlight to the leg area. Make sure to always use a very soft brush when stroking.
Step 6
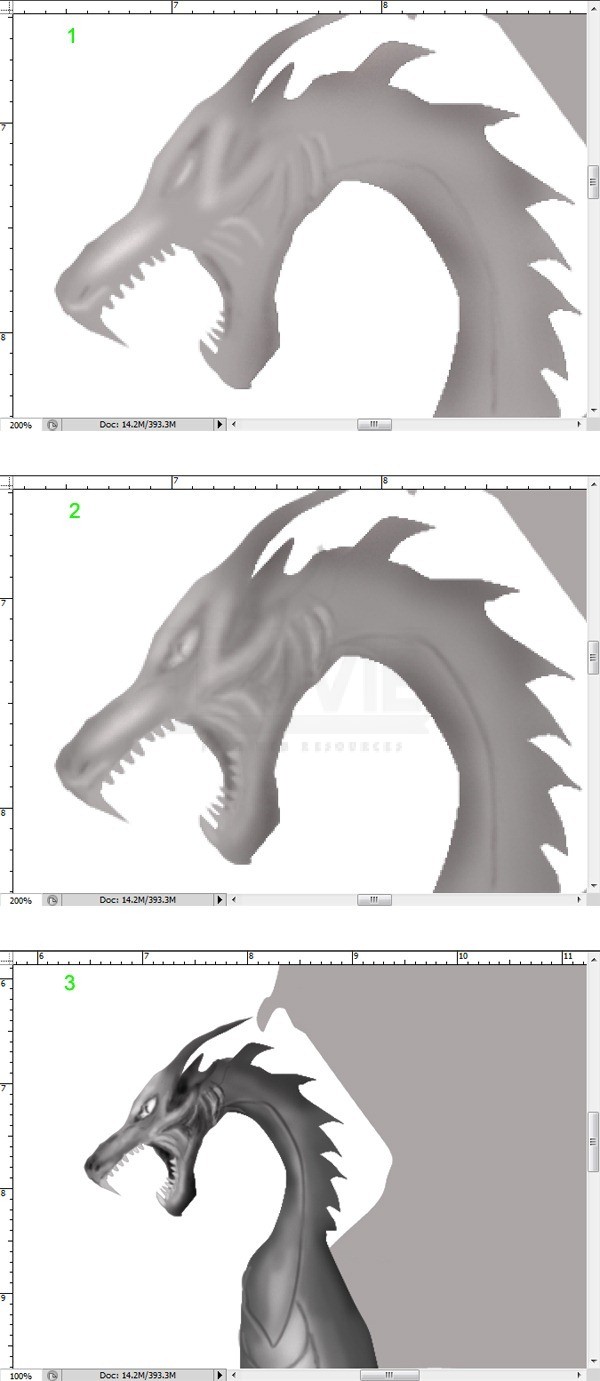
By combination usage of the Dodge and Burn tool, try to define the detail of the dragon’s face and proceed to work on the whole body.
Step 7
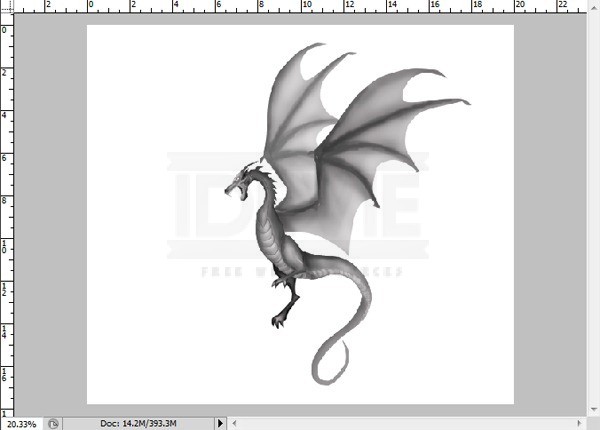
This is the complete result of the dragon I created after being given Dodge and Burn.
Step 8
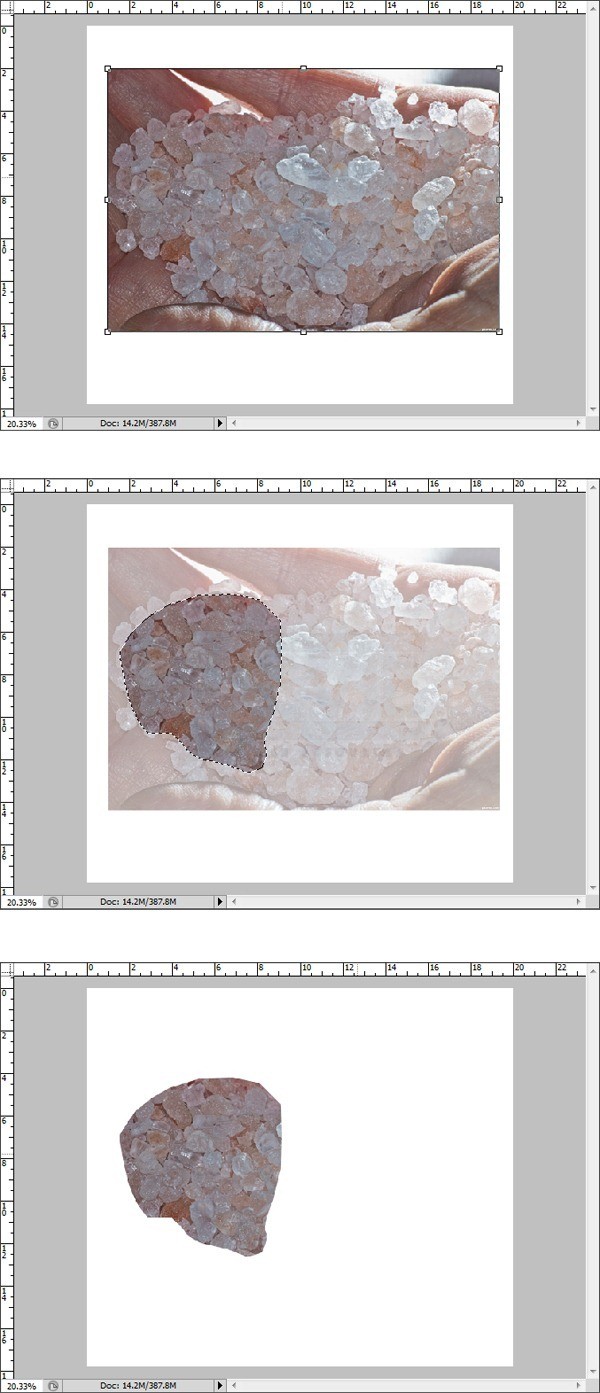
Next, open the source picture. Cut out some part of the picture. We need this part to be used as the skin texture for the dragon.
Step 9
We will give the texture for the left leg first. With left leg layer selected, drag the cut out into the dragon document. This will be a new layer in the layer panel. Create this layer Clipping Mask. Then, set the blending of it to Overlay at 100% opacity. Finally, duplicate (Ctrl+J) this layer one time and set it to Soft Light blending at 100% opacity. Group the left leg layers.
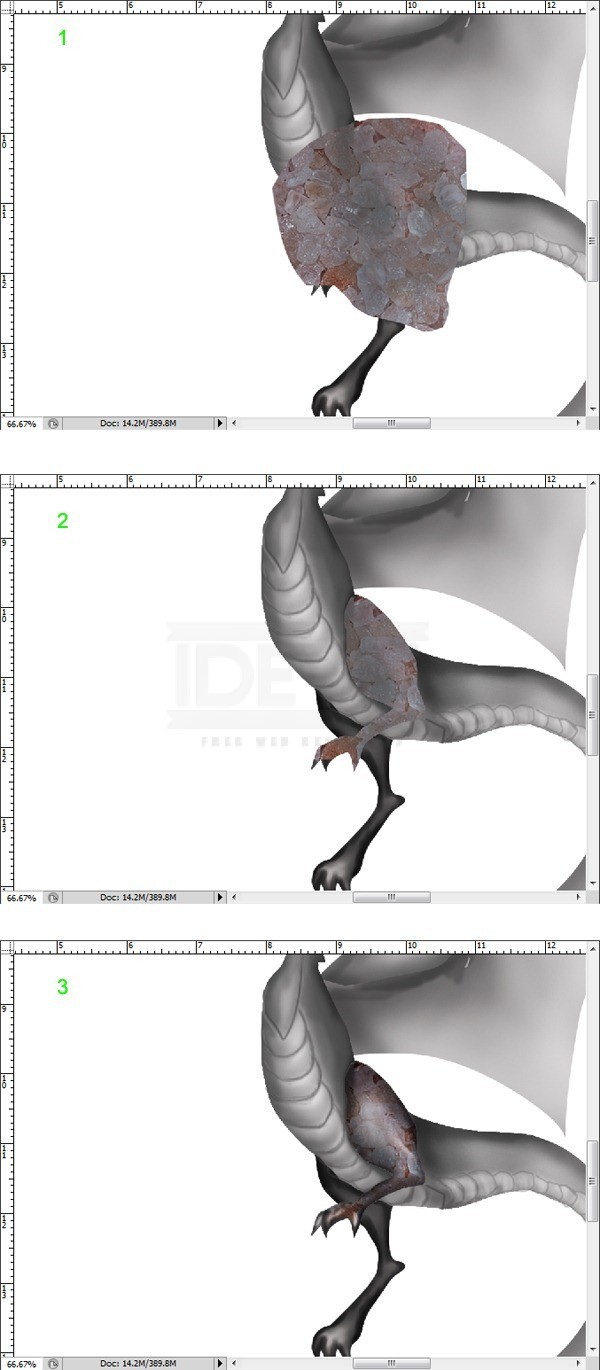
Step 10
Cut out the other part of the source picture in step 8, and drag the cut out to document. We will begin to apply textures to the main body.
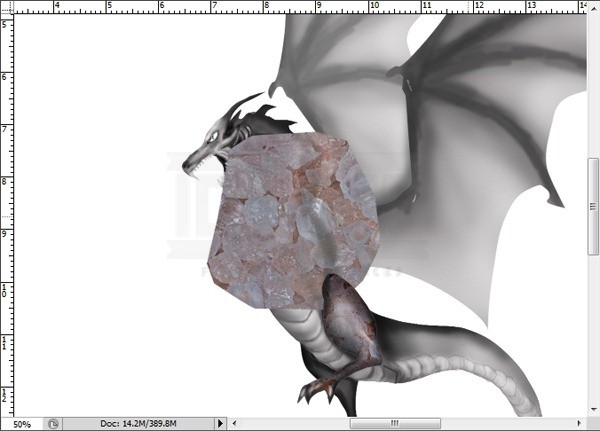
Step 11
I started to give the texture to the area around the neck and the back. Duplicate the cut out layer some times as needed. Make sure to create clipping mask for each duplication layers. Try to arrange the positions of them in such way that they will not look uniform. To get good result, vary the blending of the duplication layers to hard light, overlay or multiply. Then, I decided to hide the texture around the chest area. Give each duplication layer a layer mask and then hide the part of the textures on the chest area.
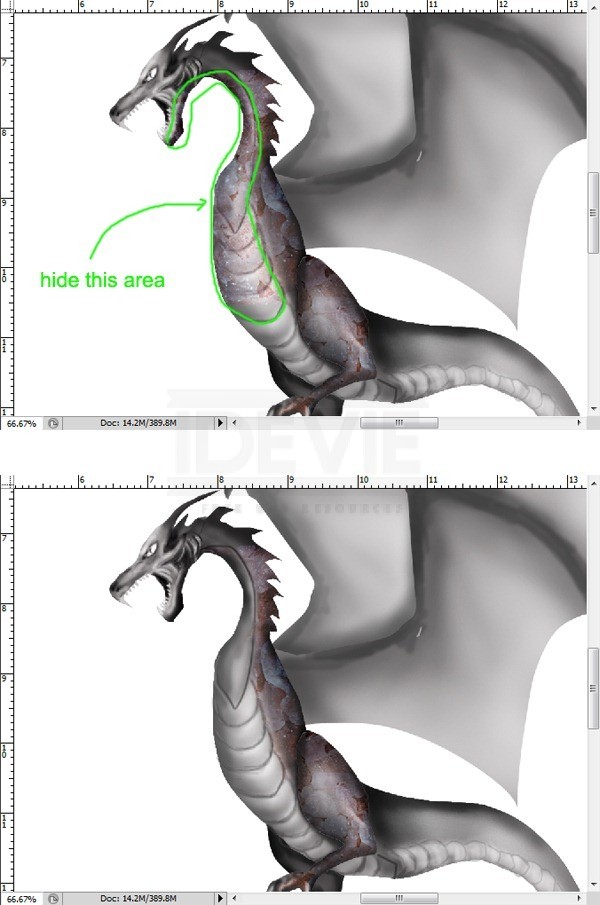
Step 12
With the same way as in the previous step 11, proceed to work on the face and tail area. Finally group the main body layers.
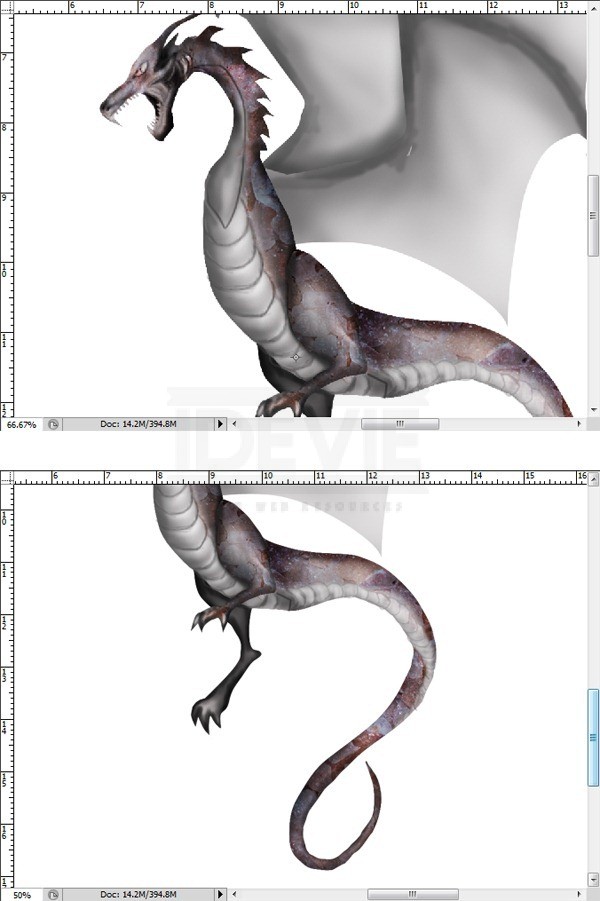
Step 13
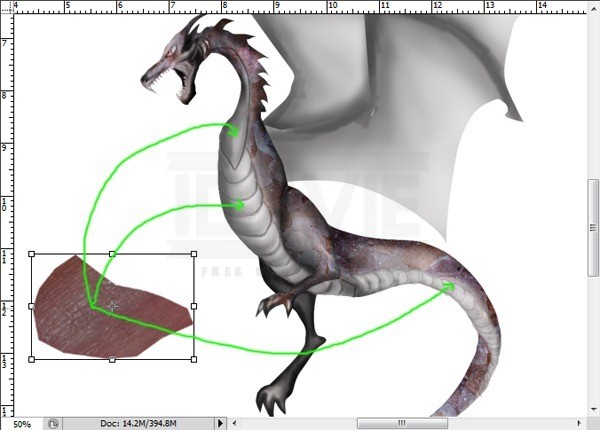
Cut out the other part of the source image again (step 8). We will apply the texture for the chest and some areas round the tail. Please refer back to previous step 11-12 for similar steps. The result is determined by the variations of the blending for the textures. Try to vary the blending of the duplication layers that we make to overlay, hard light, or multiply.
Step 14
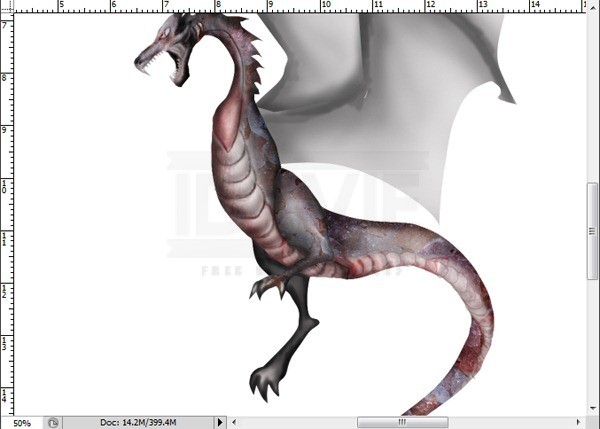
Here is the result I created for the main body after doing about 15 duplication layers at various blending.
Step 15
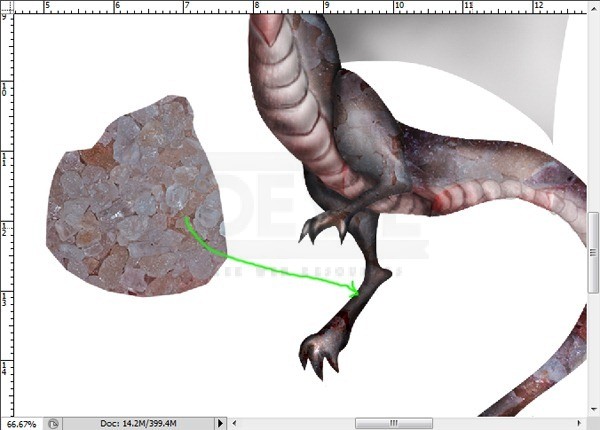
Again, take the other texture and apply it to the right leg. Please refer to the previous steps for the similar steps.
Step 16
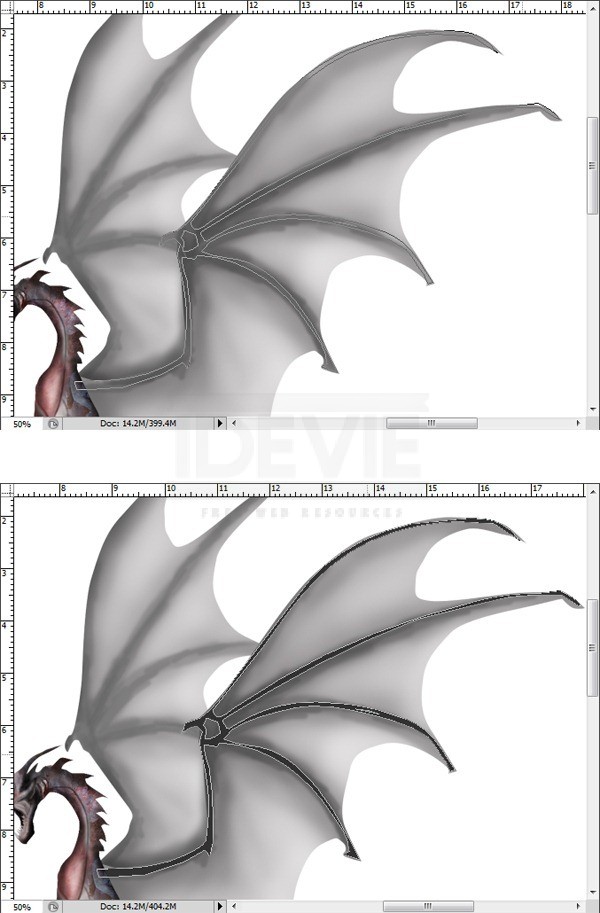
Create a new layer above the left wing layer. Take Pen tool and create the path like the one I created. Fill the path with black.
Step 17
Give this layer a layer style:
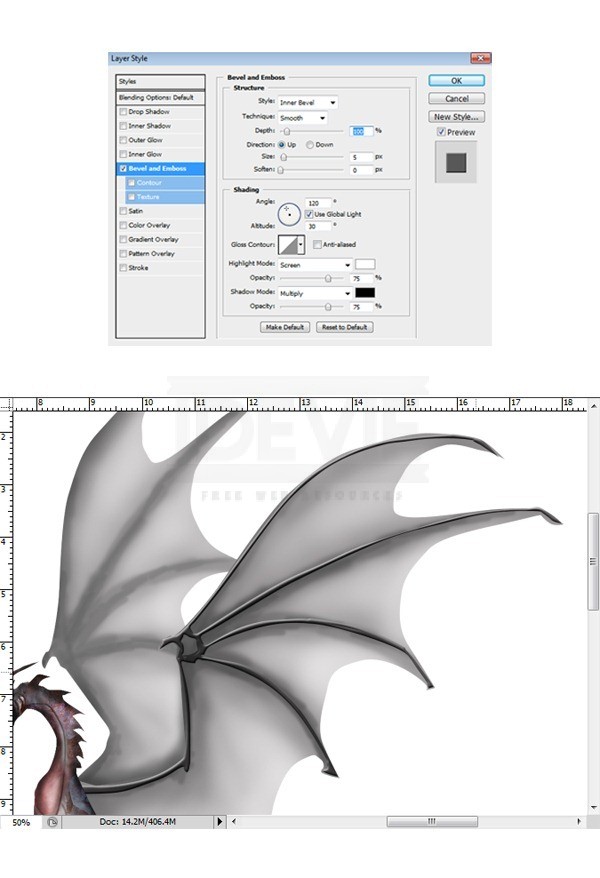
Step 18
Cut out another part of the source picture (step 8). This cut out is for the wing texture. Scale the cut out up to fit the wing. Create clipping mask for this layer. Set it to soft light at 100% opacity. Duplicate this layer some times as needed. Set the blending of the duplication layers vary to color and soft light. Finally, group the wing layers.
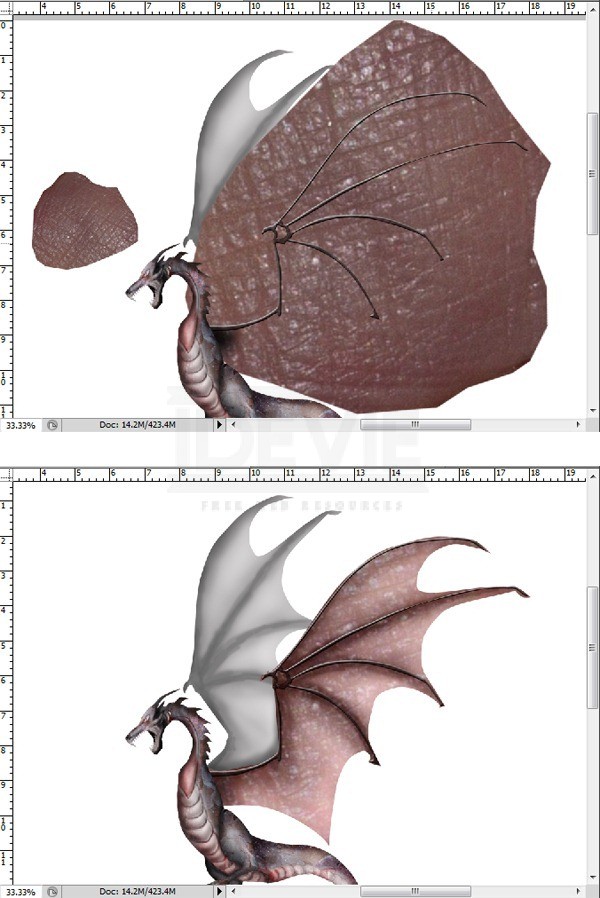
Step 19
I decided to simply duplicate the wing group and place the duplication group underneath the original wing group. We will use this duplication for the other wing. Scale the duplication down a bit. Rotate it. And there it is.. we have the right wing for the dragon. We have done with the dragon.
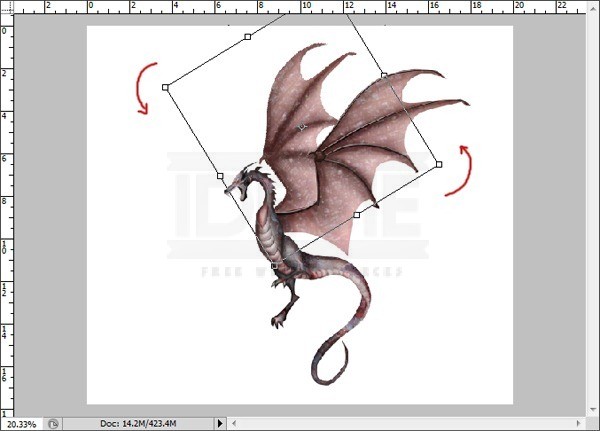
Step 20
Create a new document of 1500 pxl wide and 1596 pxl high.
Step 21
Open the tower picture into the new document. Hit Ctrl+T to activate Free Transform tool. Scale the tower picture up. Try to get the result I created.
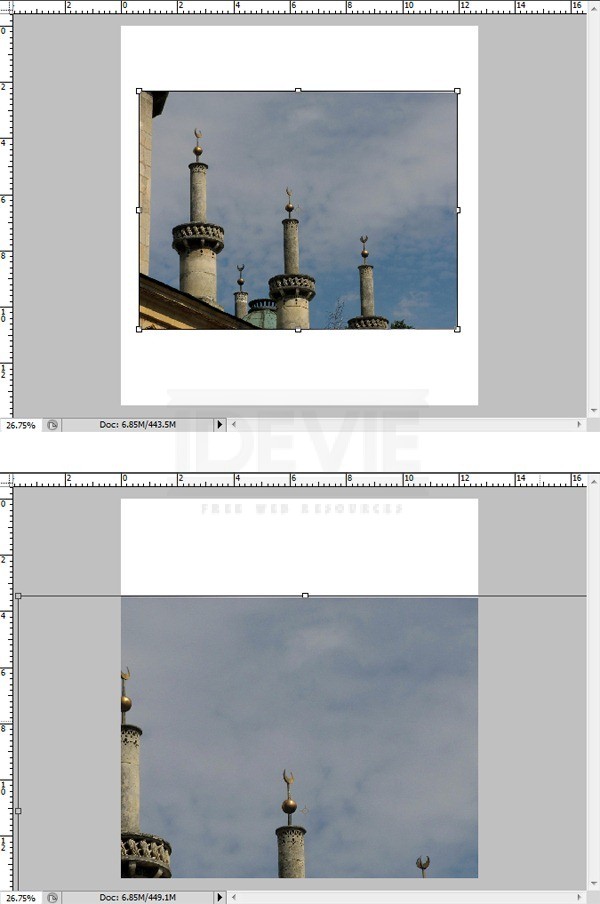
Step 22
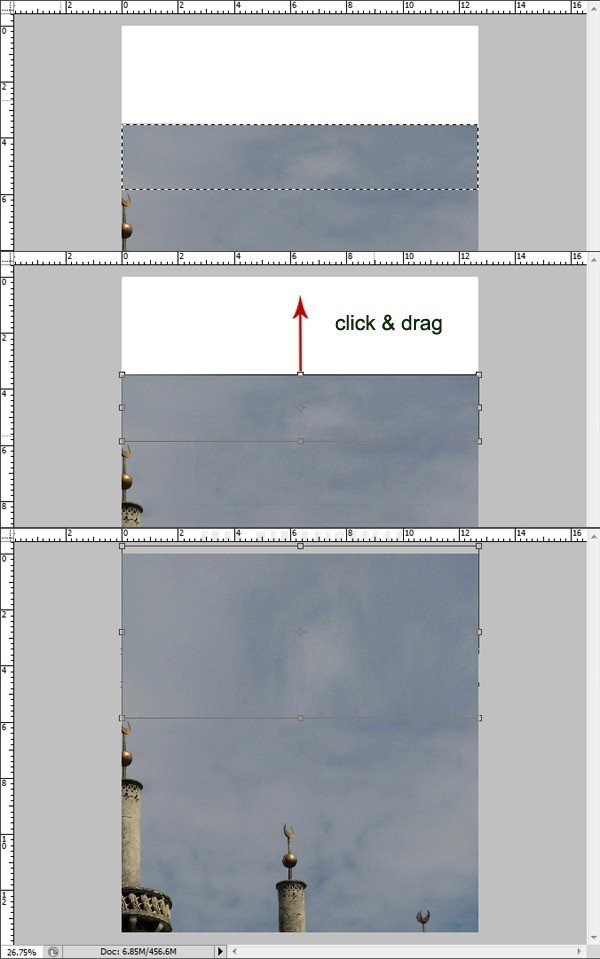
There is a white blank area on the document. We need to fill it out. Take Rectangular Marquee tool. Make selection on the upper part of the tower picture. Hit Ctrl+J to duplicate the selection into a new layer. With this new layer still selected, activate the Free Transform tool again. Click and drag up the layer to cover the blank area. Finally, merge these layer (Ctrl+E).
Step 23
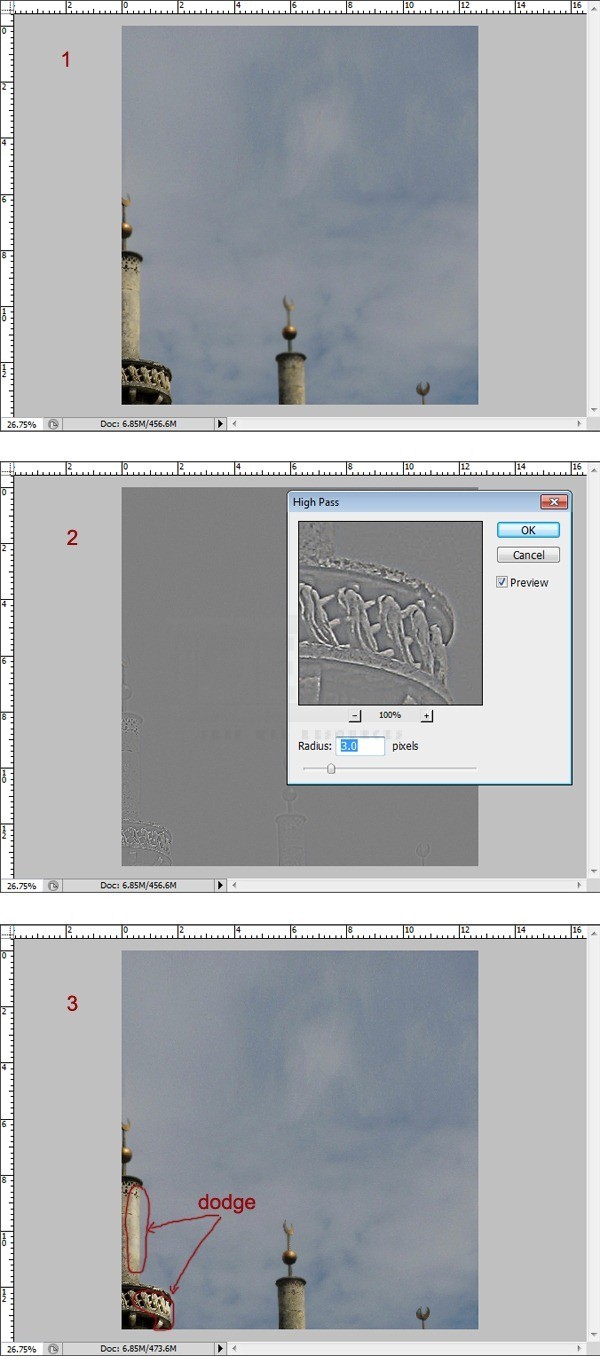
Duplicate the tower layer. With the duplication selected, go to Filter > Other > High Pass. Then set the blending of this layer to overlay. Take Dodge tool. Set it to Highlight at 8 % exposure. With a very soft brush, stroke gently some part of the closest tower.
Step 24
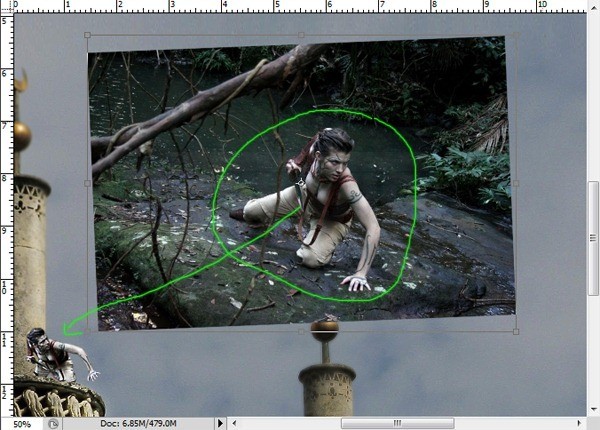
Open the model picture. Extract the model from the background. Finally, drag it to the document. Place the model on the tower.
Step 25
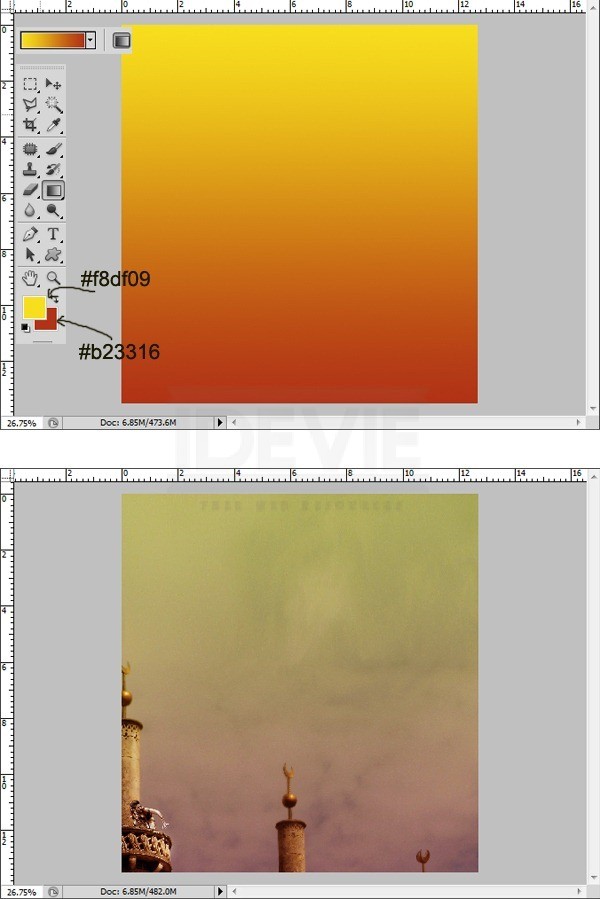
Next, create a new layer. Give this layer Gradient. Please see the illustration picture for the gradient setting. Set the blending of this layer to soft light at 100% opacity.
Step 26
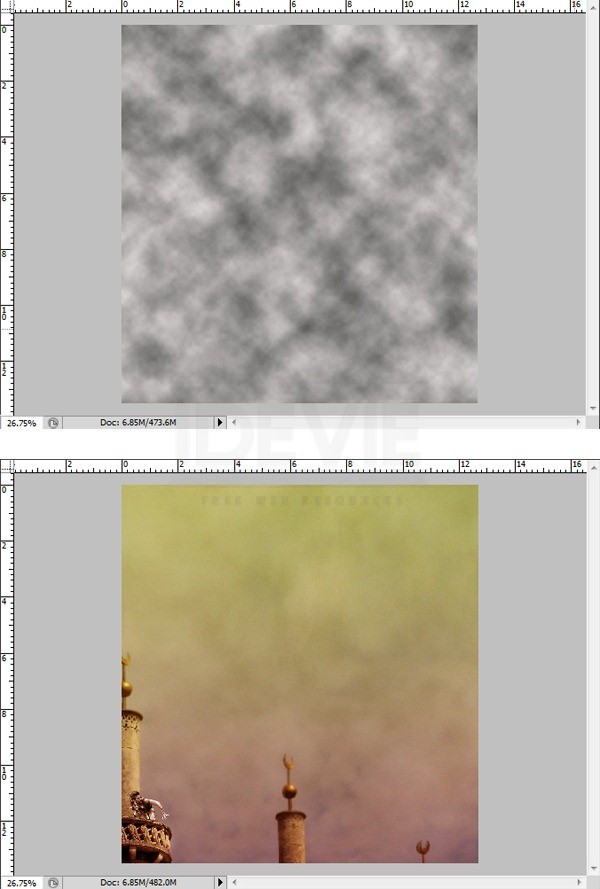
Create a new layer again. Make sure to set the foreground color to #51514e and the background to #e4dfde. Next go to Filter > Render > Cloud. Set this layer to soft light at 40% opacity.
Step 27
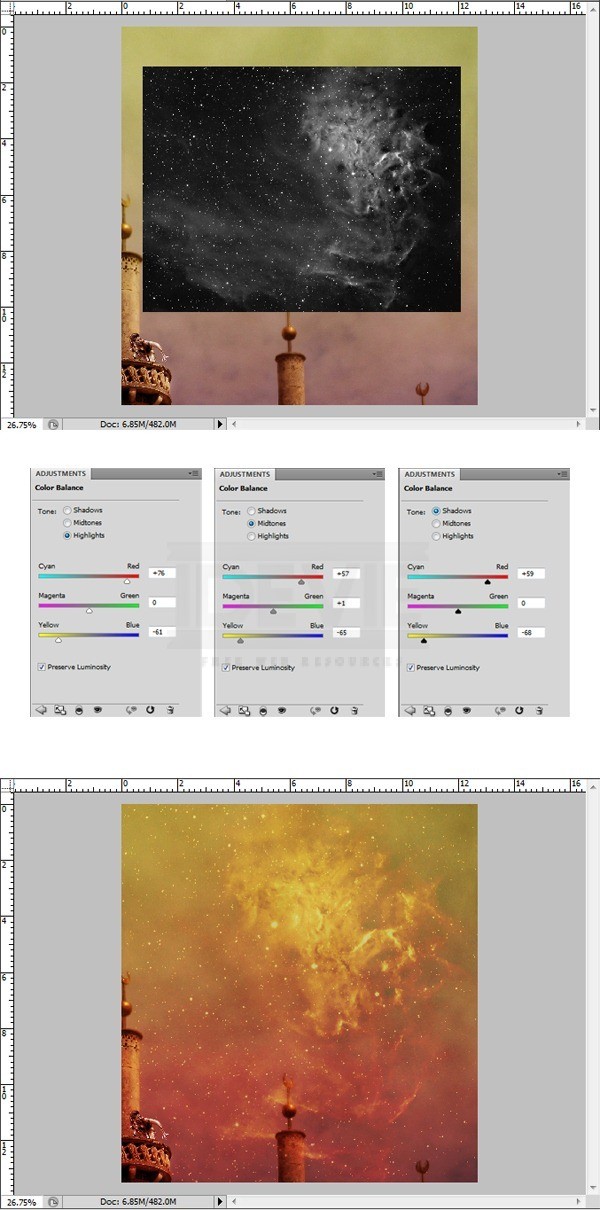
Open the nebula picture on the document. Hit Ctrl+T to activate Free Transform Tool and scale the picture up to fit the canvas. Set this layer to overlay blending at 46% opacity. Finally, give this layer a new adjustment layer: Color Balance. Make sure to create this color balance layer clipping mask.
Step 28
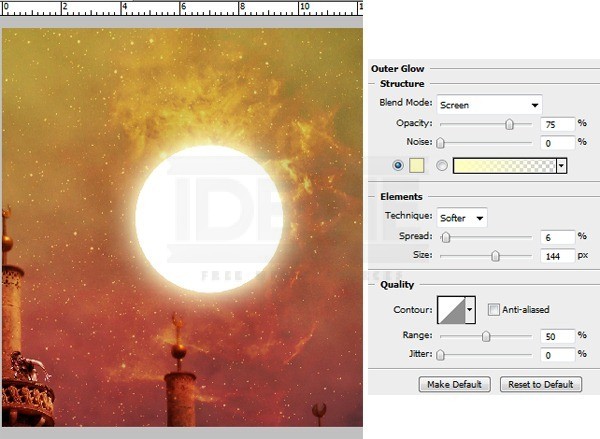
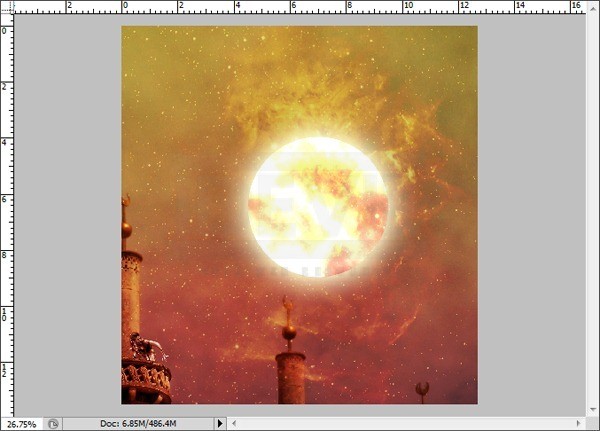
Create a new layer. I decided to add a moon on the scene. Take Elliptical Marquee tool and make round selection. Fill (Shift+F5) the selection with white. Finally give this layer a layer style: Outer Glow.
Step 29
Next, duplicate the moon layer one time. Set the blending of the duplication to color dodge at 100% opacity and the original moon layer to normal at 19% opacity. Then, create a new layer above the duplication moon layer. Create this new layer clipping mask. With the foreground set to black and the background to white, go to Filter > Render >Cloud to give this layer cloud. Please see the result I created in the illustration picture.
Step 30
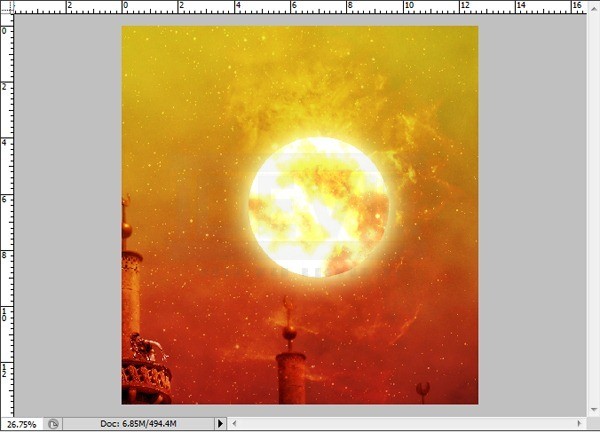
I decided to make the color of the scene more intent so to achieve this, I duplicated the gradient layer (created in step 25) and placed the duplication above the moon layer. I set this blending of this layer to soft light 100% opacity.
Step 31
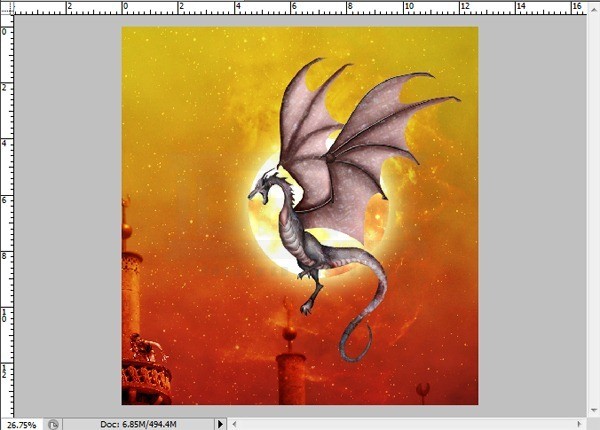
Add the dragon into scene. Scale it to fit the scene and place it in front of the moon.
Step 32
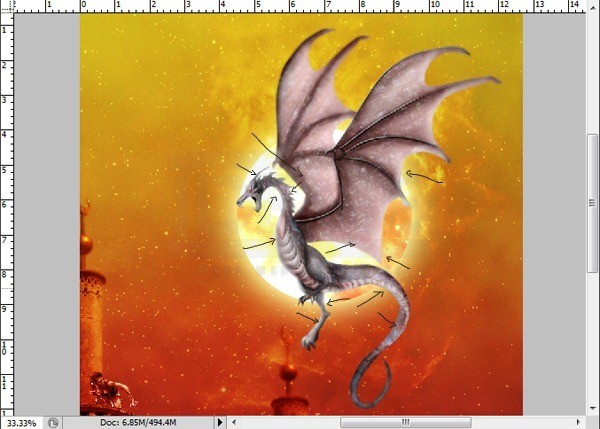
Create a new layer above the dragon layer. Create this layer clipping mask. Take Brush tool. Choose a very soft brush and set the opacity of the brush to 15%. With white color, stroke the edges of the dragon especially the ones to which the light of the moon is exposed. See the black arrows pointing the areas to which the brush is stroked.
Step 33
Next, create a new adjustment layer : Color Balance. Set the blending of this layer to normal at 100% opacity. Then, duplicate this color balance layer one time. Set this duplication to normal at 50% opacity.
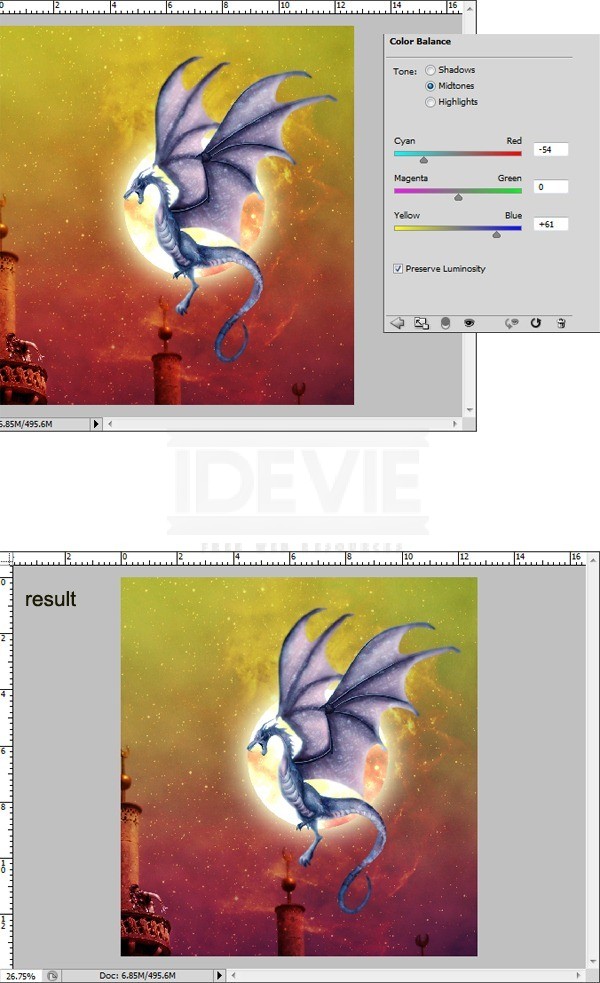
Step 34
Again, create a new adjustment layer: Gradient Map. See the setting for the gradient in the illustration picture. Hide some area affected by the gradient with a layer mask. Finally set the blending of this layer to screen at 52% opacity.
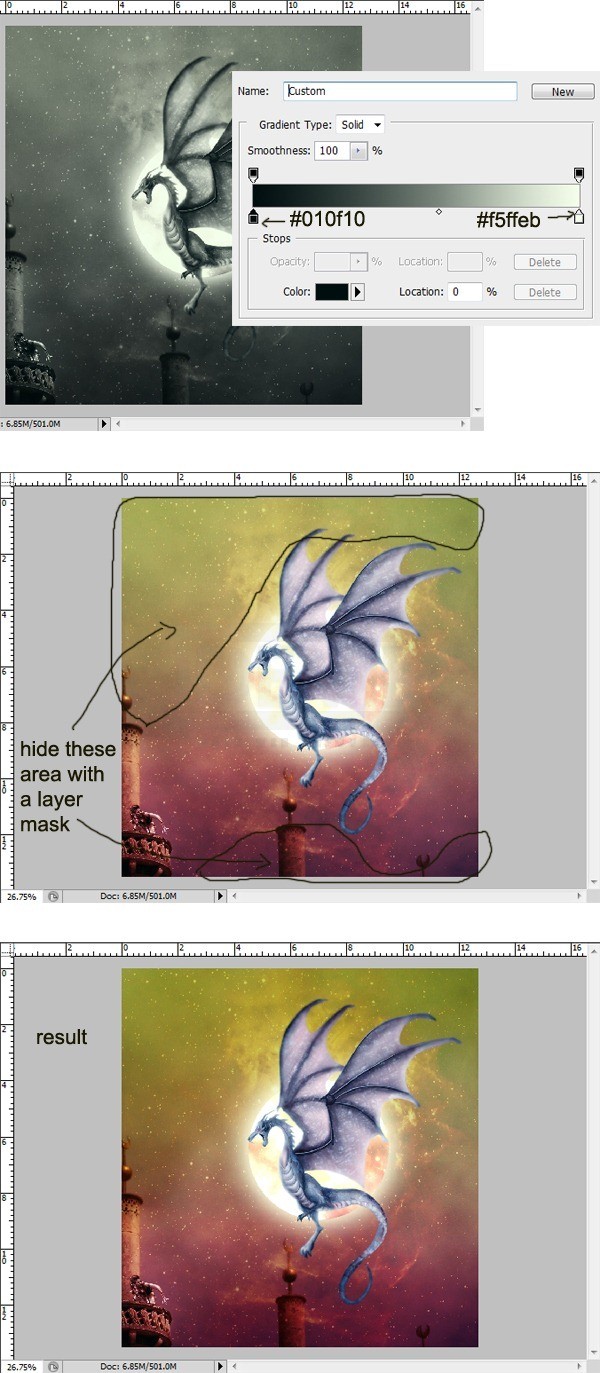
Step 35
Create another new adjustment layer: Brightness/Contrast. Hide some areas affected by this layer. Please see the illustration picture
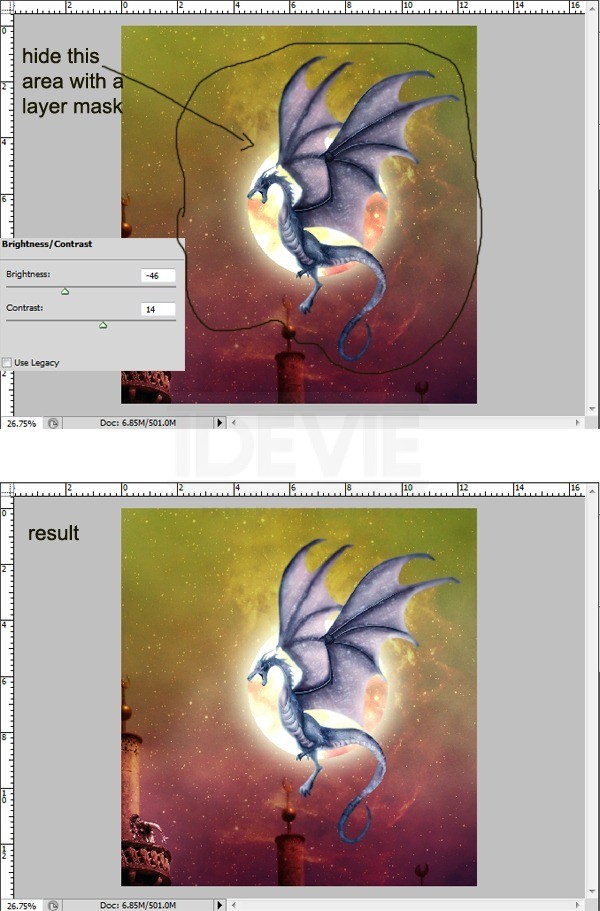
Step 36
Now hit Shift+Ctrl+Alt+E to stamp all the visible layers. This will create a new layer. With this layer selected, go to filter / blur / Gaussian blur. Then set the blending for this layer to soft light at 70% opacity. Next, create a new adjustment layer: Exposure. Create this new adjustment layer clipping mask in order to effect only the Gaussian layer.
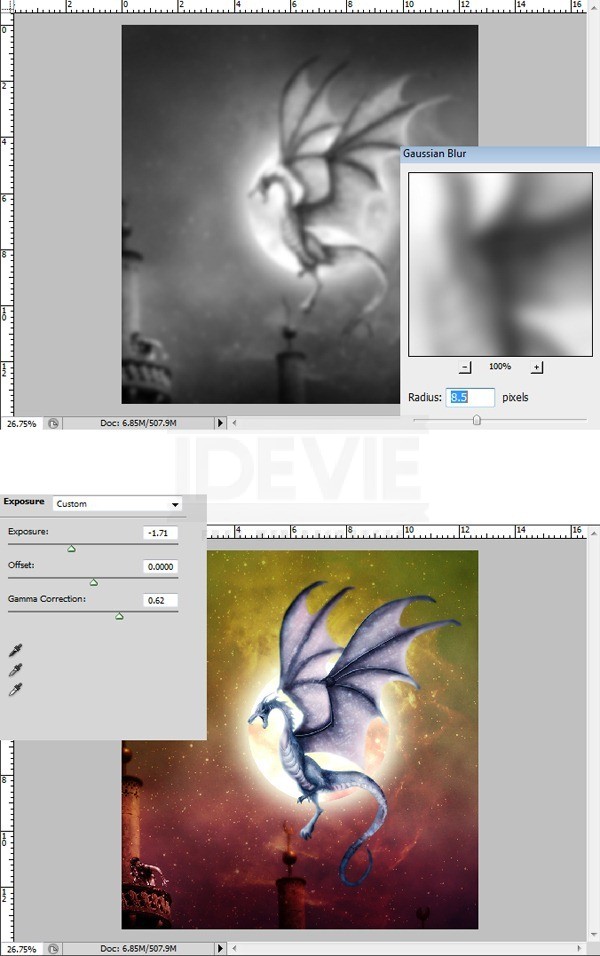
Step 37
Create a black new document of 900 pxl wide and 900 pxl high. We will manipulate fire for the dragon.
Step 38
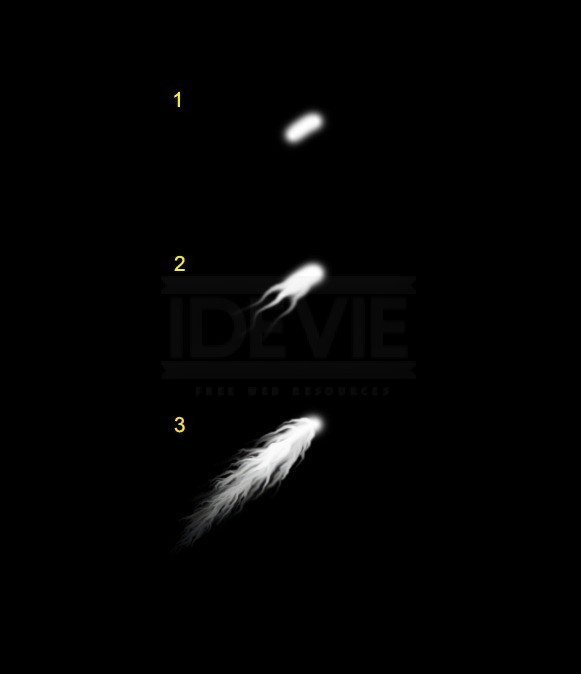
Create a new layer. Take Brush tool in the tool panel. With white color, stroke a shape like the one I created (1) Now activate Smudge tool. Choose a very soft brush. With Strength of 60-80%, start to smudge the shape (2) Vary the size of the brush to 5-10 pxl and keep on smudging until finding the desired shape. See the result I created (3).
Step 39
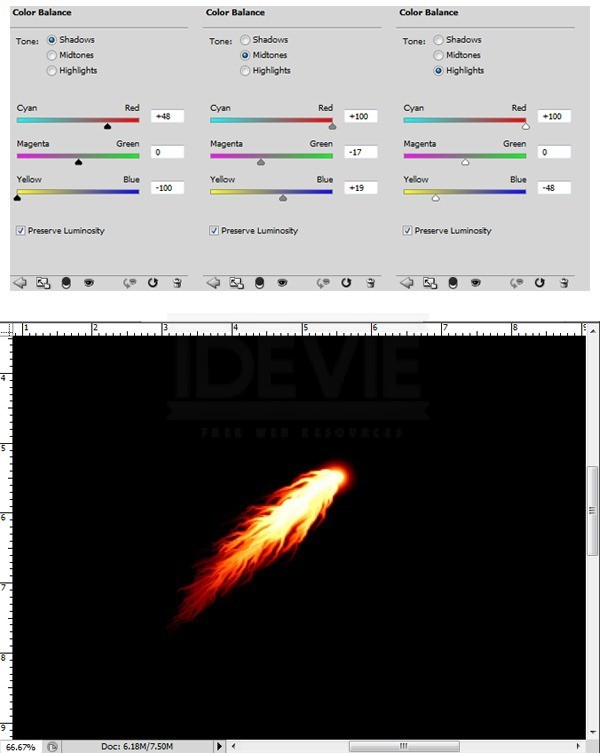
Next, create a new adjustment layer: Color Balance.
Step 40
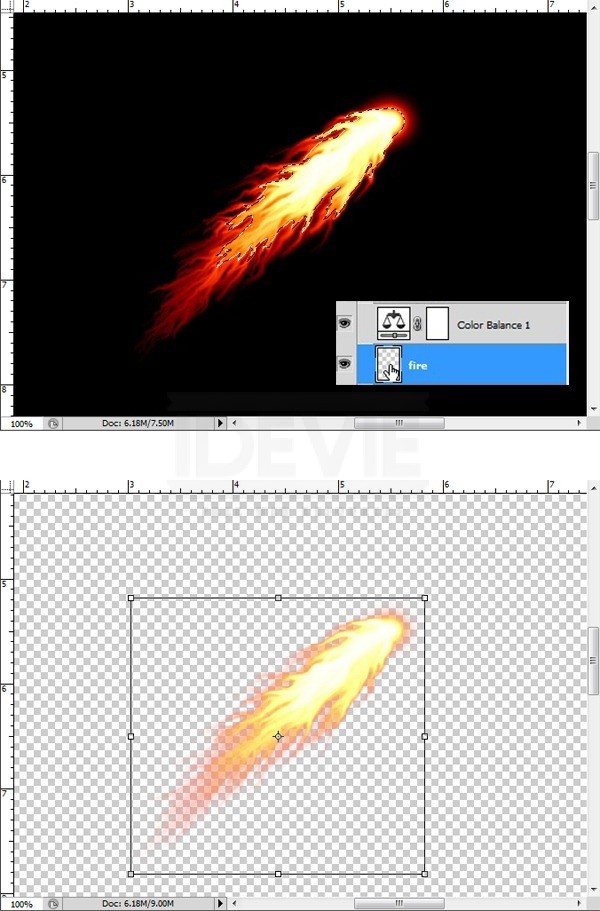
Create a new layer and place this layer underneath the fire layer. Put the cursor on the fire layer thumb, hit Ctrl and while the cursor is on the thumb click the mouse. This will make selection on the fire. Now go select the new layer and hit Shift+F5 to fill it. Fill the new layer with black. Click the eye icon on the background to hide it. Now there it is… we have the fire. Select the all fire layers and merge them.
Step 41
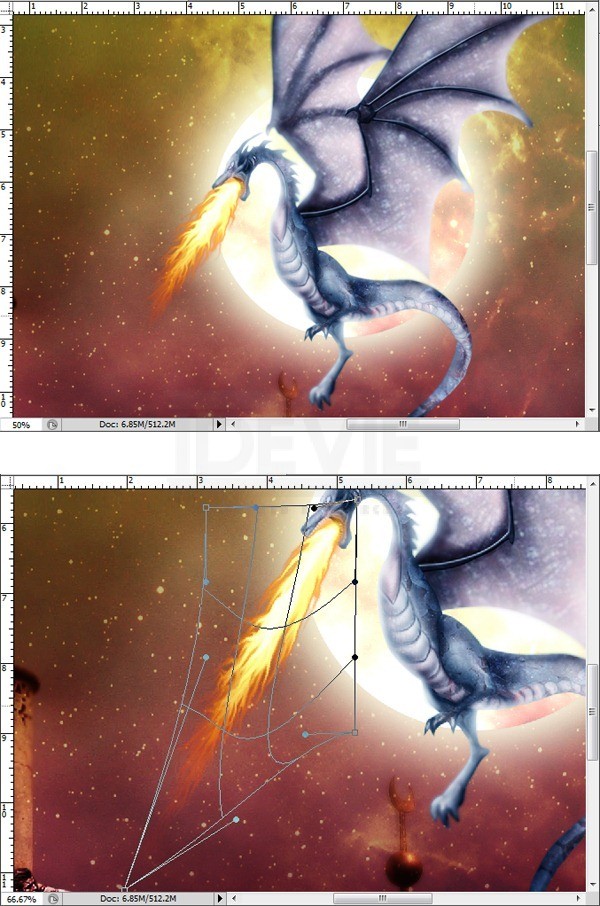
Drag the fire into the canvas. Duplicate it one time. Now Hit Ctrl+T to activate Free Transform tool. Wrap the duplication layer.
Step 42
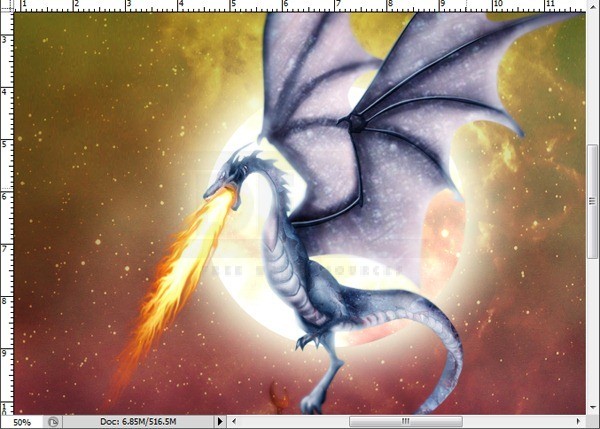
Here is the result I created so far.
Step 43
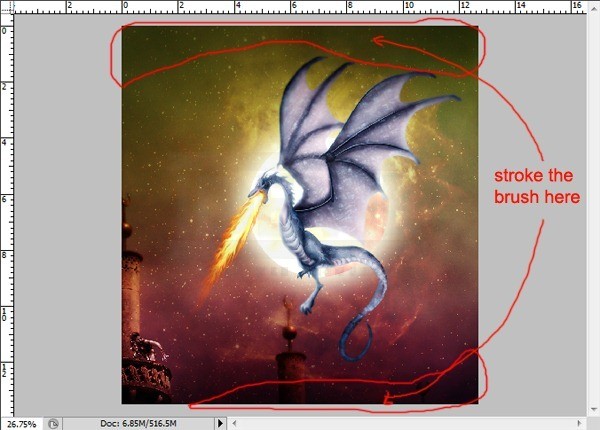
Create a new layer. Take Brush tool. Choose a very soft brush and set the opacity to 20%. With black, stroke the upper part of the scene and some area in lower left corner.
Step 44
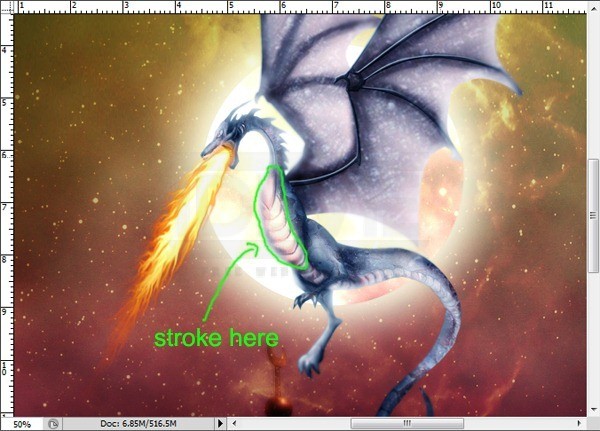
Create a new layer above the dragon layer. Create this layer clipping mask. Hit Shift+F5, fill it this layer with black. Set the blending of this layer to color dodge. Take the Brush tool. Set its opacity to 7%. Make sure to set the color of the foreground to #fd7b0f. Then, with the new layer still selected, stroke the brush gently to the chest and around the stomach.
Step 45
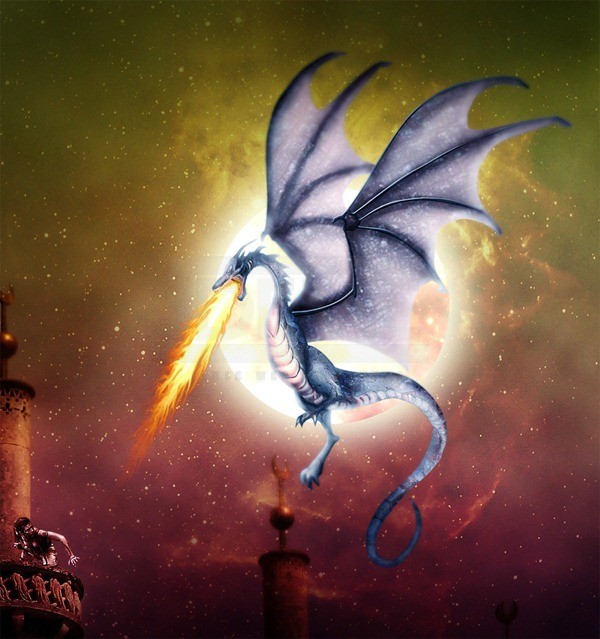
This is the final composition of the image:
Step 46
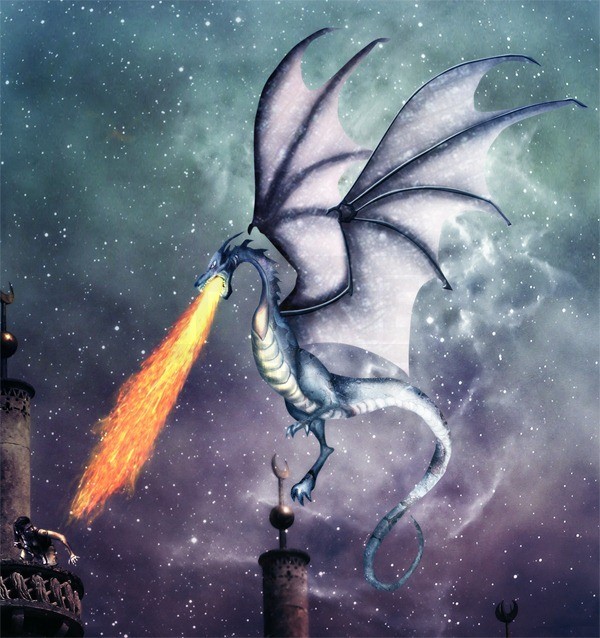
The other optional composition I created:
Final Results

