2. How to enhance your text with the Camera RAW filter in Photoshop
Step 1
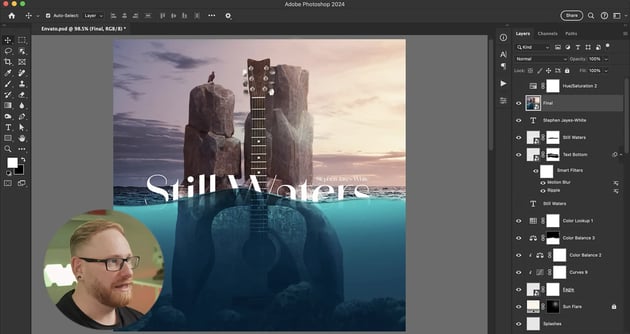
When you’ve finessed your design, select all your layers, go to Edit > Copy Merged, and then paste the entire design onto a single layer. Convert this new layer into a smart object and name it “Final”.


Step 2
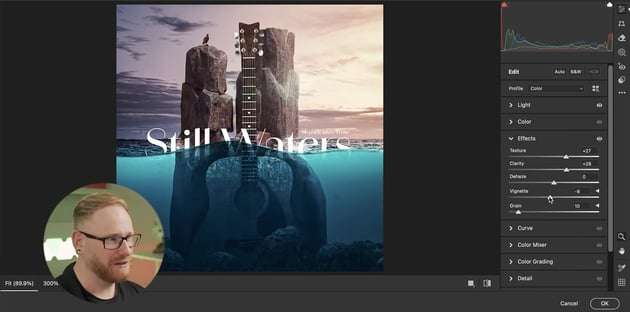
Add a Photoshop Camera Raw filter and start refining your composition. There are loads of settings you can use to refine your composition, but the one I recommend is Effects.
- Just by dragging up the texture and the clarity together, you can make your design stand out.
- You can introduce a little bit of grain to help blend everything together a bit more.
- You can also darken those edges a bit.
When you’re done, click OK. This will save as a Camera RAW filter adjustment layer, so you can edit it again by double-clicking it and changing the settings, or you can delete it entirely.


Step 3
If you want to carry on working on your design, hide the layer called Final and work on the layers below. When you’ve made some changes, select all, Edit > Copy Merged, and double-click to go back inside the smart object. Then paste in the new version and give it a version number, e.g. “Final V2”.
Then, all you need to do is save this smart object, close it down, and turn the final layer back on. Your final image should look something like this:


Discover more Photoshop resources and tutorials
In this tutorial, you learnt how to add text to your album cover design and blend it so that it fits seamlessly into your composition.
In the next and final tutorial, you’ll learn how to create an album cover mockup in Photoshop. Be sure to check out other upcoming articles on Envato Tuts+ and the Envato blog to discover more Photoshop tutorials. And for the digital subscription that will cover all your creative Photoshop assets and needs, visit Envato!
Here are some great resources to get you started: