You’ve recorded a video that shows someone’s face. You want to share it in your next CapCut production. But you don’t want to show their face in the finished project! Luckily, you can do both with the blur faces in CapCut feature.
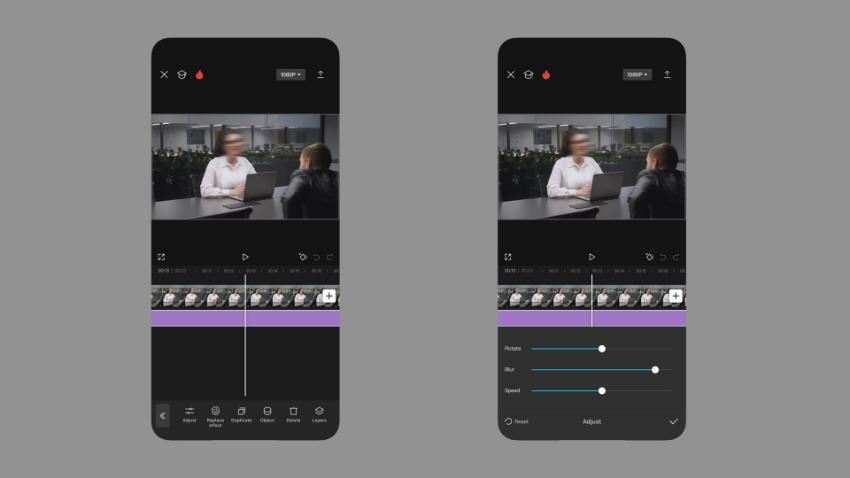
In this tutorial, you’ll learn how to blur faces on CapCut. With a simple effect, you can blur faces in your videos. This way, you can still show people on video. But their faces will be blurred, making them hard or impossible to identify. Read on, and I’ll show you exactly how to do it, step by step.
Why blur faces in CapCut?
Face blurring is one of many features in CapCut. But why is it useful? You may have never found yourself in a position to blur faces in a video.
In fact, there are many key reasons that can necessitate blurring faces in a video. For example, you might need to blur human faces in a video to:
- Comply with legal restrictions. In some areas, legal requirements dictate face blurring. This is especially true if your footage features minors. Always make sure to research local laws before sharing a video with people’s faces being shown.
- Protect the privacy of others. Protecting the privacy of others is never a bad idea. Blurring their faces in videos is a helpful way to do that.
- Safeguard people speaking about sensitive or secret topics. If you’re interviewing people on camera, you should guard their identities if the subject is sensitive. Imagine, for example, if you’re producing a news video interviewing someone who wants to be “off the record.”
- Defeat facial recognition programs. Automated systems exist that can identify faces. These are often used to feed them into search results and more. Do you want to avoid facial recognition tools? If so, face blurring in CapCut helps.
- Be creative or for stylistic reasons. Never lose sight of the fact that blurring faces can be used for style reasons. Imagine, for example, if you’re creating a drama video. Blurring faces can build suspense or be used for stylistic effects.
CapCut is the ideal tool to use for face blurring. With an intuitive interface and mobile editing, the whole process is a breeze. You don’t need expensive software or a powerful desktop editing setup.
How to blur faces in CapCut easily
Learning how to blur faces in CapCut is easy and quick. While not a feature you may use every day, it’s a valuable tool for your editing toolbox. I’ll walk you through how to blur faces using CapCut on an Apple iPhone. If you’re an Android user, no problem – CapCut is available from the Google Play Store as well. Versions are also offered for Mac and Windows PCs, if you’d rather edit on your desktop or laptop.
I’ll demonstrate using a stock video clip from Envato Elements. Want to download and follow along? Click here to add the video to your library.
1. Choose a CapCut project with faces to blur
In CapCut, video files are called projects. A project groups all of the media and effects for a video together. The first thing you’ll need to do to blur faces in CapCut is to create or open a new project. Here, let’s open an existing project.
When you’re working in a CapCut project, there are three key things to pay attention to. The first is front and center on your screen. It’s the video preview. Here, you’ll see each video clip displayed on-screen. When you make edits or add effects, they’ll be previewed in real time. Think of CapCut’s video preview as a dynamic and evolving view into your editing process.
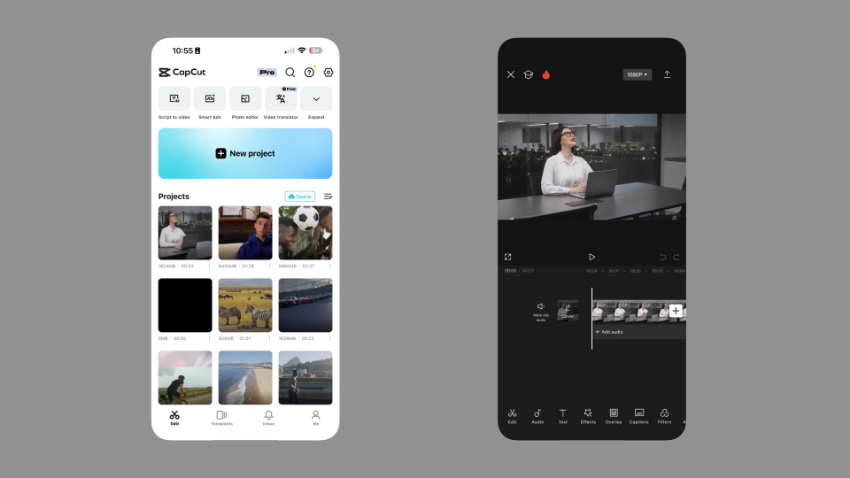
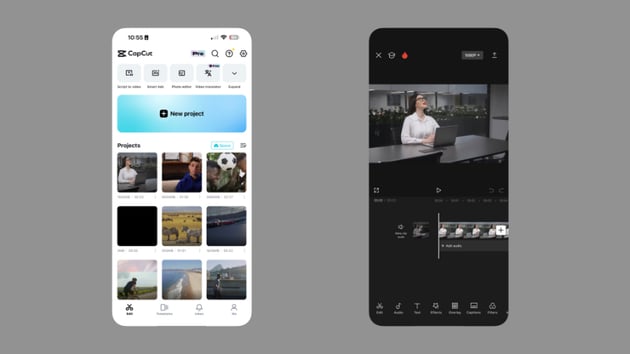

Below the preview is the Timeline. The Timeline is a filmstrip view for editing and controlling media in your CapCut projects. It’s here that you can navigate through clips frame-by-frame. And you can control the timing and sequence of your media. Later in the tutorial, we’ll use the Timeline to precisely position face blur effects.
Finally, you’ll need to work on CapCut’s toolbar menu. Look to the bottom of your screen to find a row of buttons. This is the toolbar menu, and it’s where you’ll find the ability to blur faces in CapCut.
2. Open the video effects panel
To blur faces in CapCut, you’ll need to open the Effects panel on the toolbar menu. Looking from left to right, Effects appears fourth, after Edit, Audio, and Text. Tap Effects to launch the main view.
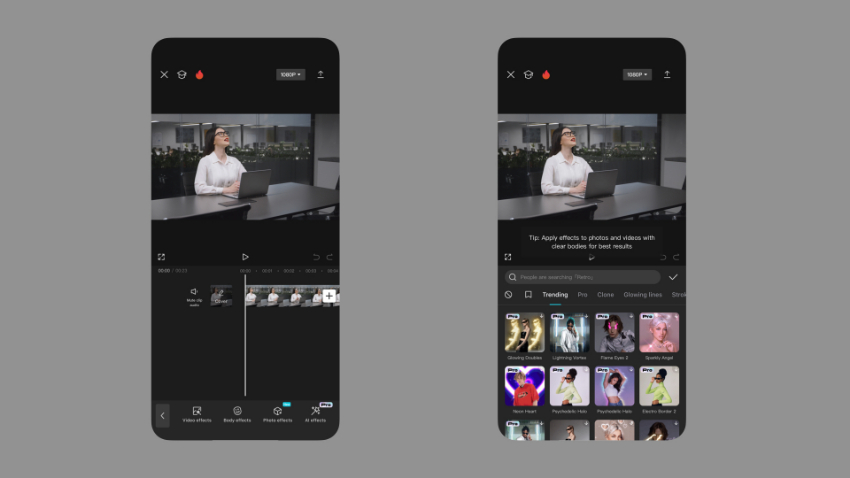
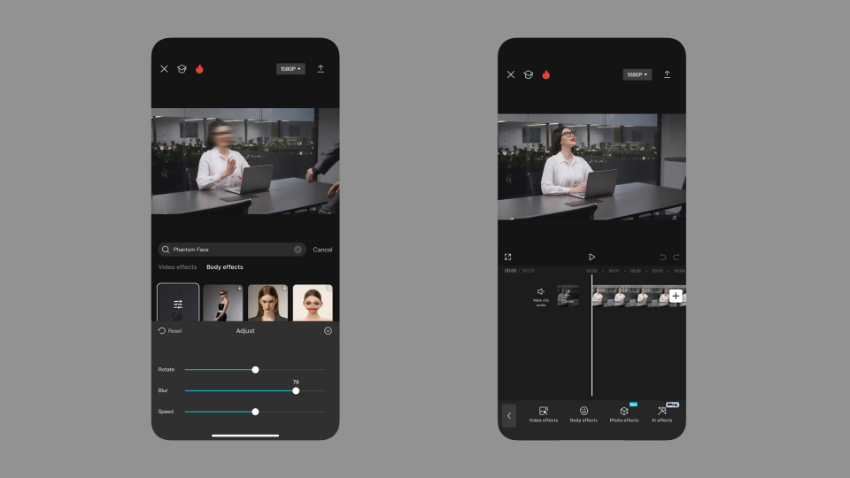
When you tap Effects, the toolbar will transform with four new options to select from. These are Video effects, Body effects, Photo effects, and AI effects. To blur a face in CapCut, you will want to choose the second option: Body effects. Tap Body effects to launch the Body effects gallery in CapCut.
3. Find and apply the Phantom Face effect
When you choose Body effects, CapCut’s effect gallery will open. Here, you will find no shortage of options to choose from. By default, the gallery opens on the Trending tab, which includes the most popular effects at the time you open it. Across the top, you’ll see a row of category buttons. These let you browse a variety of effects grouped by theme and style.
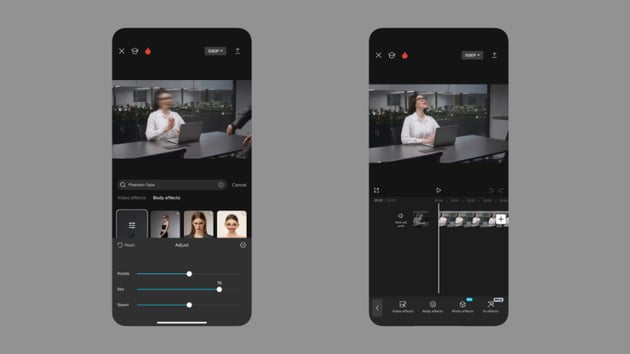
Above the category tabs is a Search box. To streamline the process of blurring faces in CapCut, click into the Search bar. Here, you can search for effects and designs by name. To blur faces in your CapCut videos, there is one effect that works perfectly. It’s called Phantom Face. As the name suggests, it’s tailor-made to make faces anonymous and blur out any key identifying details.
With the Search box active, type Phantom Face. On the lower right side of your keyboard, tap the blue Search button to look up this powerful and helpful effect.
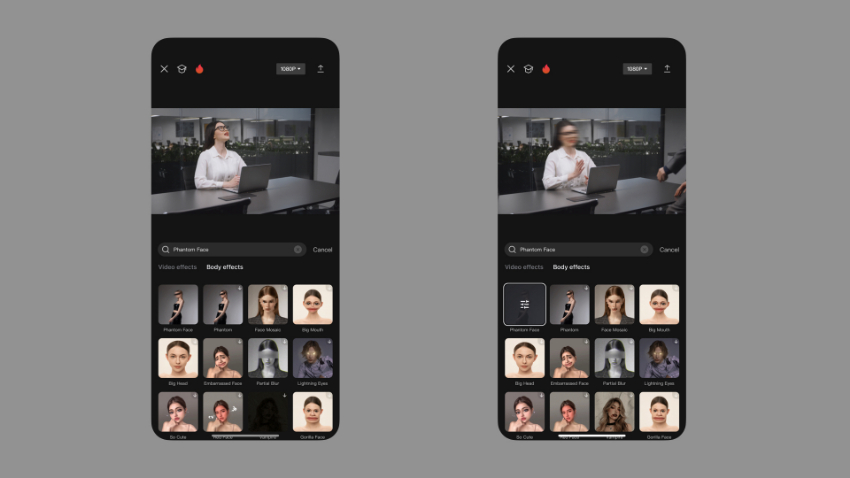
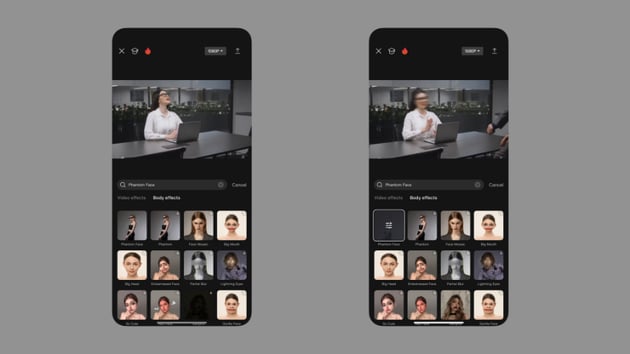
CapCut will return search results. First up will be the Phantom Face effect. As you can see, each individual effect in CapCut is shown with its own thumbnail image. What’s more: the individual effects preview in real time. Here, for example, you can see a blurred face on the Phantom Face thumbnail.
To blur a face in CapCut, apply the Phantom Face effect by tapping it with your finger. Watch above on the video preview to see what happens. Your video subject’s face blurs – instantly. In CapCut, blurring faces is truly that easy. But you’re not done making creative edits. The next step explains what I mean.
4. Control the intensity to adjust the blur level
You’ve successfully blurred a face in CapCut! The results are evident in the preview. But you still have creative control over how the effect looks. For many videos, the default Phantom Face blur setting is good enough. But if you need to boost the effect, you have options.
Look at the Phantom Face thumbnail once you’ve chosen it. Notice how it shows adjustment sliders on the thumbnail, instead of the effect’s original preview. This is the beauty of CapCut effects: while they have default settings, you can adjust them to fit your specific needs.
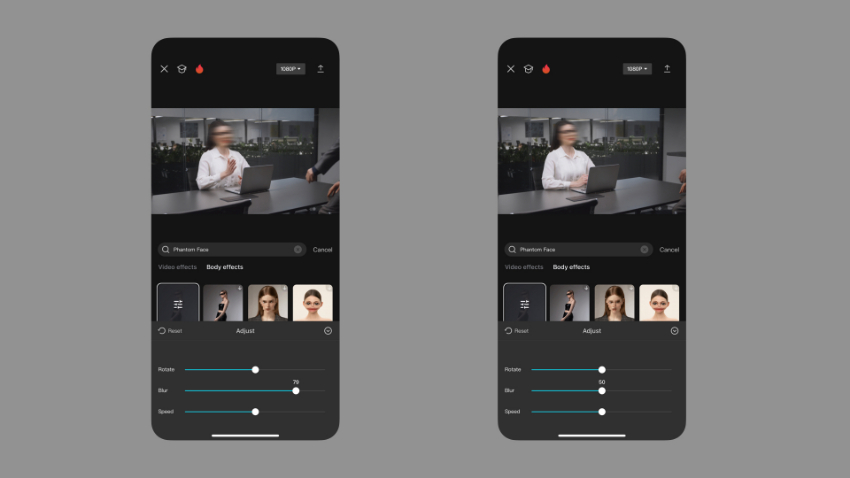
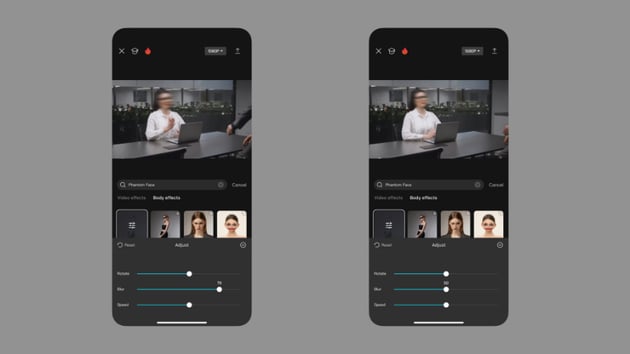
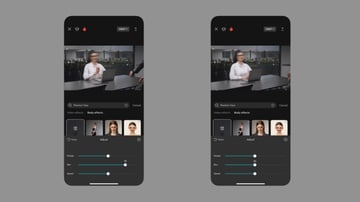
Tap the thumbnail again, and you’ll see three adjustment sliders appear. Two let you control the rotation and speed of the blur effect. But the center slider is most valuable. In essence, it controls how blurry faces become in CapCut. By default, the setting is around 60% of the Phantom Face effect’s capability.
To adjust the intensity of the Phantom Face effect in CapCut, you can simply move the slider. Drag it to the left, and your video subject’s face will get less blurry. Move to the right, and it gets blurrier. Once again, you can see your changes preview in real time on the video preview.
Spend a few moments dialing in the Phantom Face effect. Close out of the adjustment panel when you’re satisfied. Then, tap on the Checkmark icon to return to CapCut’s primary Edit view.
5. Place the effect on the timeline
Back on CapCut’s Edit panel, look at the Timeline. Again, this sits directly below the video preview. You’ll see your video clip across the top. And immediately below it, you can see the Phantom Face effect added. It’s labeled, and it appears as a purple bar.
Notice that the effect only covers a portion of your video. If you only want to blur someone’s face for part of the clip, you’re good to go. But to blur their face completely, you will want to make a quick adjustment here.
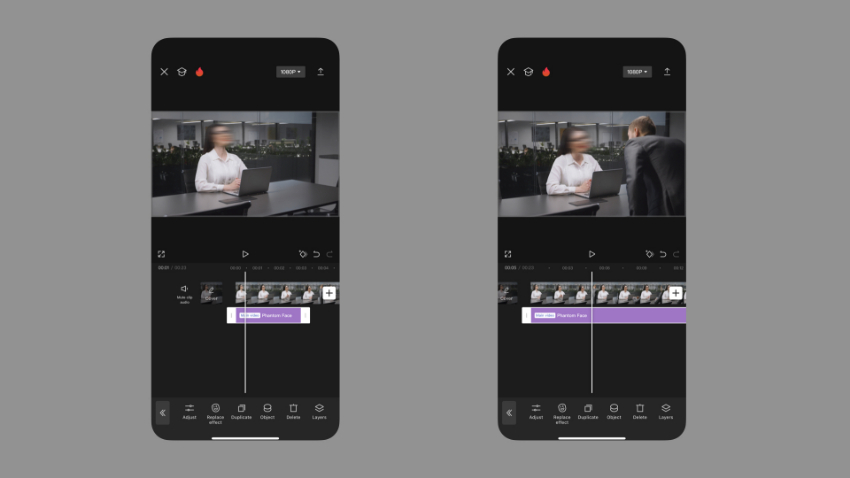
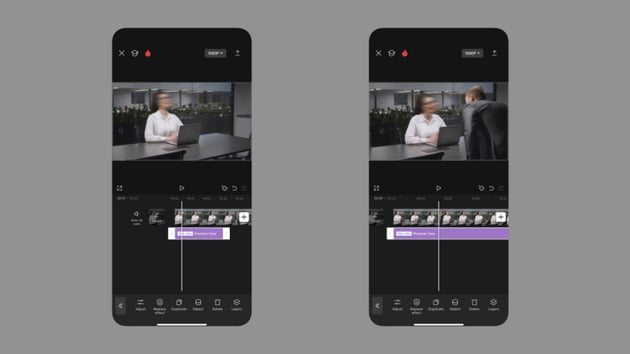
On the Phantom Face effect on the Timeline, find the white slider bars on each end of the effect clip. Tap and drag them left and right to cover the full duration of your video. They’ll automatically snap into place at the start and end of the clip. By making this easy adjustment, you’ll ensure that faces are blurred for the entirety of your CapCut video.
6. Export and share a blurred face video in CapCut
Just like that, you’ve learned how to blur faces in CapCut! Your last step here is to export and share your complete video with the world. Look to the upper right corner of CapCut’s main screen. There, you’ll see the Share button. Tap Share.
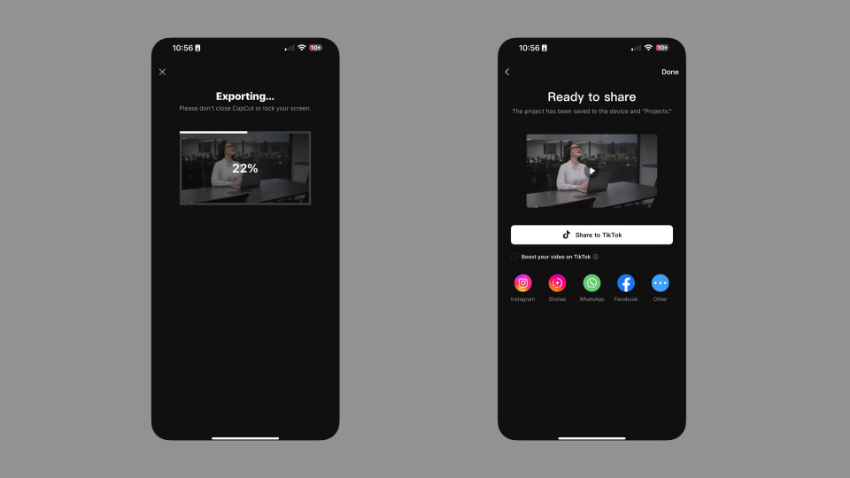

When you tap Share, CapCut will start exporting your video. After a few moments, you’ll have a saved copy of your clip on your device. Just like any other video, you can edit, share, send, and post it. But with CapCut, you can share directly to social media.
Front and center, you can tap Share to TikTok to post your video directly to your TikTok feed. And below, you can choose to share on Instagram, WhatsApp, Facebook, and more.
Learn more top CapCut tips and tricks (tutorials for 2024)
CapCut offers nearly unlimited potential. You can create videos about anything from anywhere. Hopefully, the tutorial guide above has inspired you to grow and expand your CapCut skills even more! And here at Envato Tuts+, we’ve got you covered.
Want to learn all about CapCut? Check out these trending tutorials to build knowledge and boost your skills – fast!
Blur faces in CapCut videos today
In this tutorial, I showed you how to blur faces in a CapCut video. As you can tell, it’s a fast and very simple process. Go to the Video effects, find the Phantom Face option, and tap to apply it. Adjust the intensity, and then make sure that faces are blurred for the full length of the video. It’s that easy.
Whether for privacy or stylistic effect, these steps are easy to follow. If you need to blur faces in a video, CapCut has you covered. And with this intuitive feature, you can handle the edit in seconds.