Welcome to this tutorial on learning how to draw the Transformers logo in Adobe Illustrator! Whether you’re a long-time fan of the legendary robots in disguise or just looking to sharpen your design skills, this step-by-step logo design guide will walk you through the process of creating a logo that has captivated fans for decades.
Get ready to unleash your inner Autobot (or Decepticon) and bring this classic logo to life!
Brief History of the Transformers Logo
The Transformers logo is one of the most recognizable symbols in pop culture. Introduced in 1984 alongside the original animated TV series and toy line, the logo features bold geometric shapes that evoke the high-tech, futuristic essence of the Transformers universe.
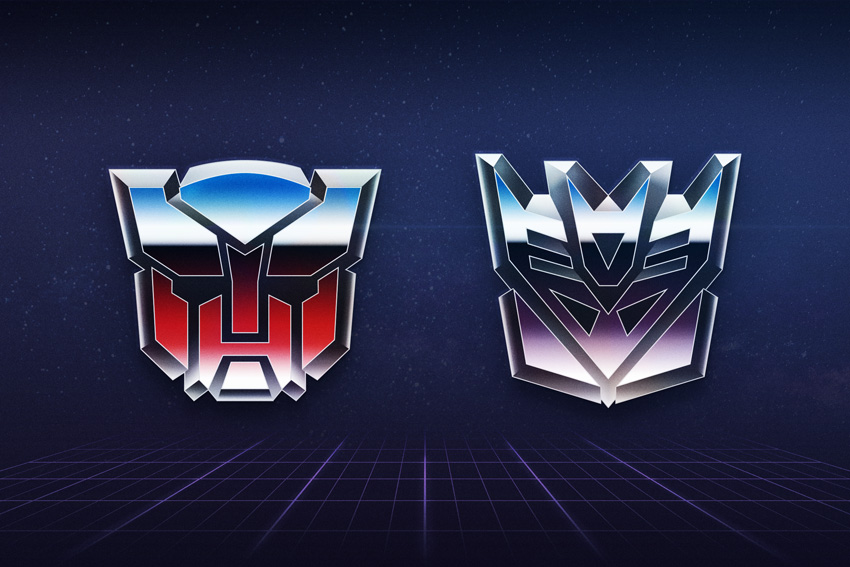
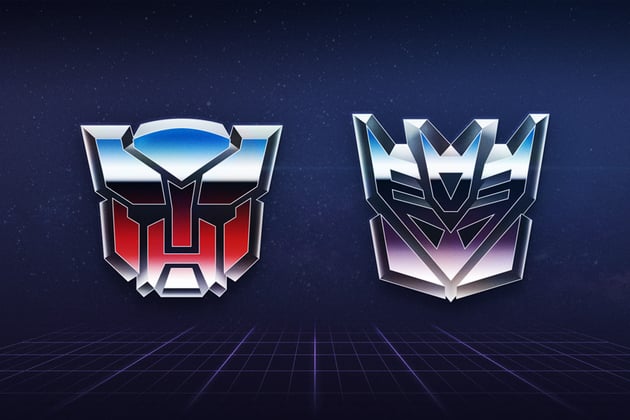

Alongside the logo are two distinct and very important designs: the Autobot and the Decepticon insignia, representing the two warring factions from the Transformers home planet of Cybertron. The Autobot logo, often seen in red, symbolizes heroism, bravery, and the fight for freedom. The Decepticon logo, typically depicted in purple, conveys a sense of menace, power, and control.
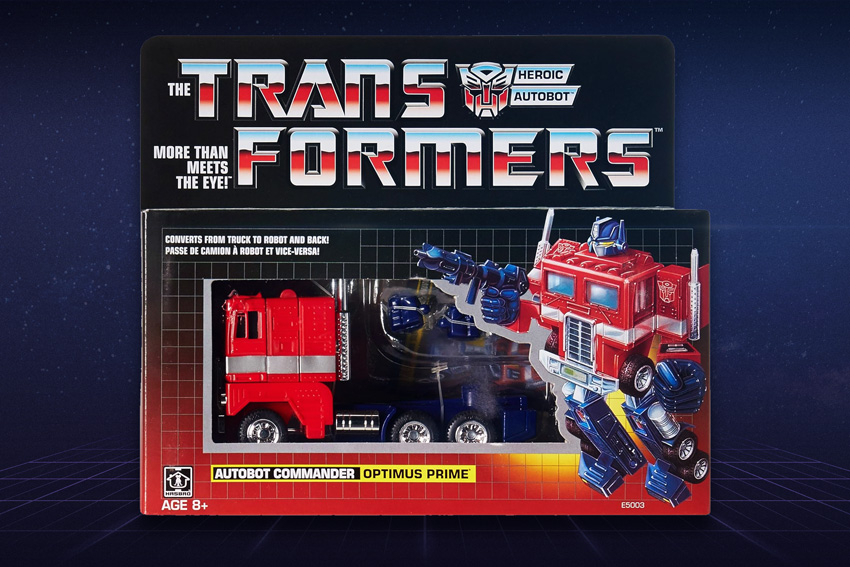
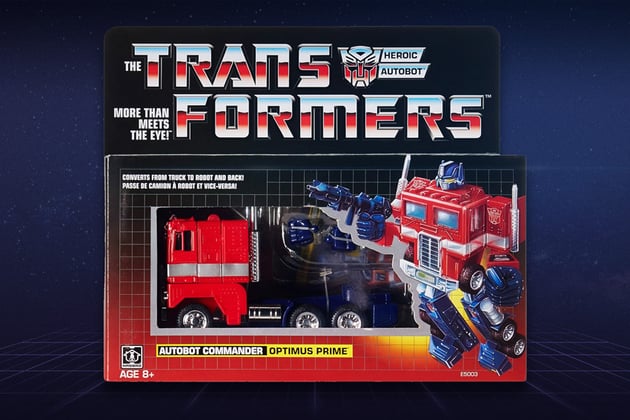
Over the years, the Transformers logo design has also been used in comics, movies, games, and other merchandise. The importance of the Transformers logo extends beyond its visual appeal; it serves as a symbol of the eternal struggle between good and evil. For fans, it represents childhood nostalgia, epic battles, and beloved characters like Optimus Prime and Megatron.
By learning how to draw the Transformers logo, you’ll be tapping into a rich legacy and celebrating a franchise that has transformed the landscape of entertainment.
Tutorial Assets
You’ll need the following resources to complete this project and learn how to draw the Transformers logo:


1. How to Set Up Your Document
Step 1
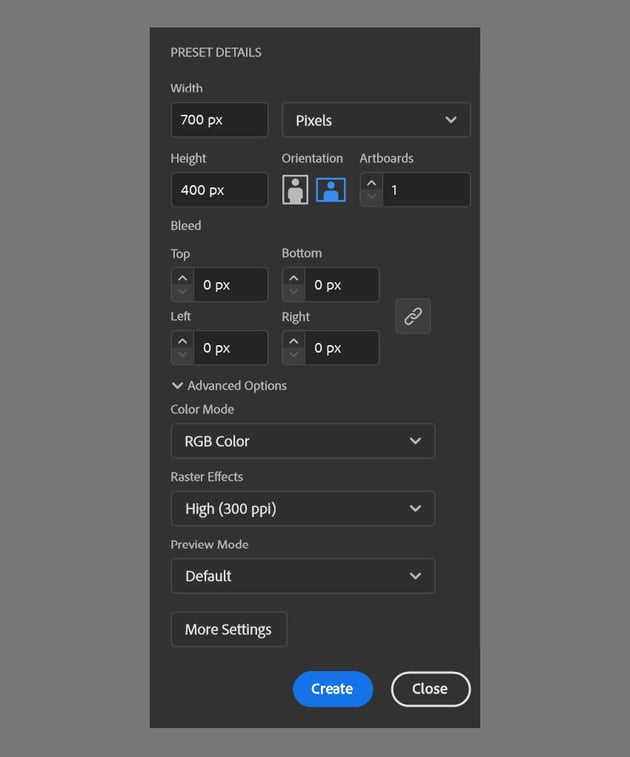
Open Adobe Illustrator and create a new document (File > New). Set the dimensions to 700 x 400 pixels and choose RGB colour mode for the best results on screen.


Step 2
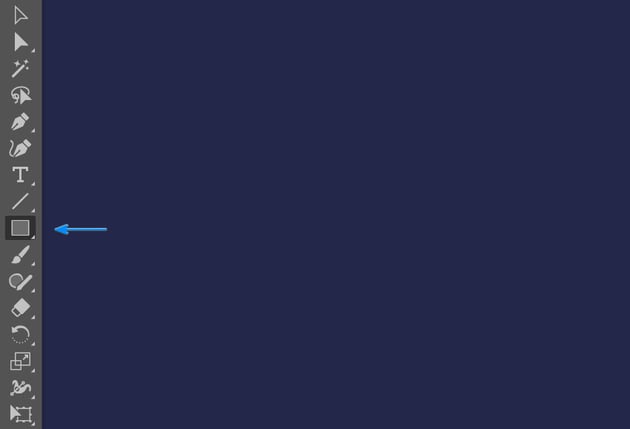
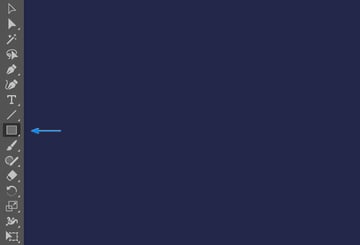
Use the Rectangle Tool (M) to cover the whole canvas and draw a dark blue shape that we will use as the background for our logo. The colour I’ll be using is 23274A, but feel free to choose your own.

Step 3
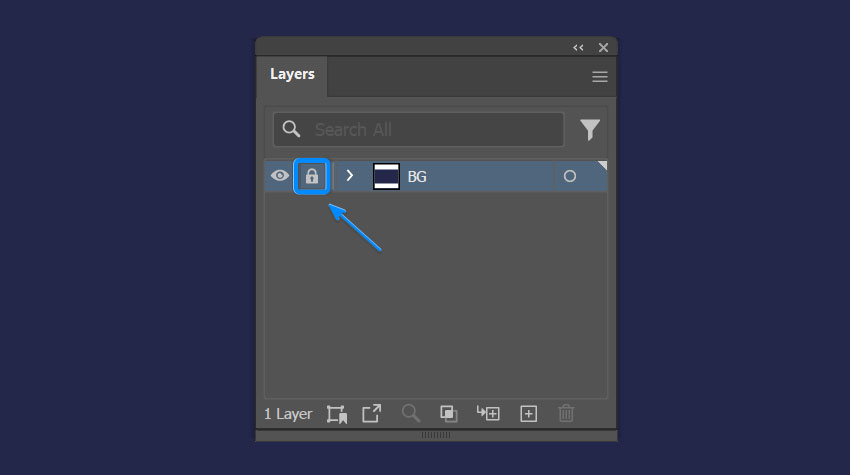
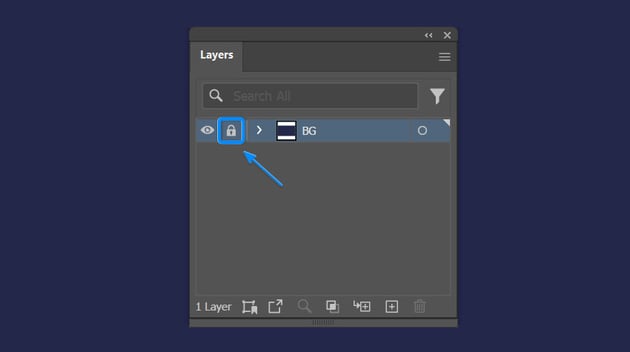
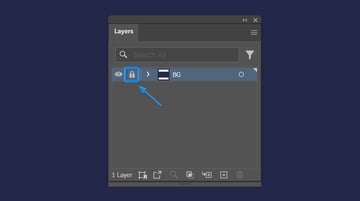
In the Layers panel, click on the square space next to the eye icon. A lock icon should then appear, which indicates that the layer is now locked.
Step 4
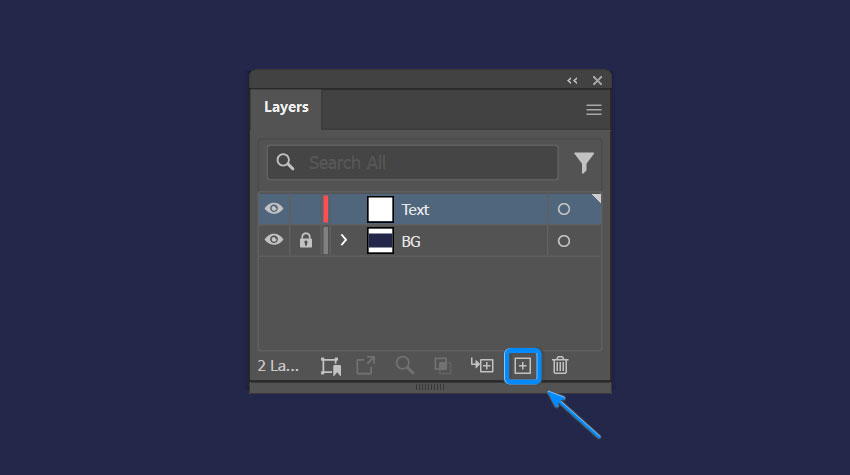
With our background layer locked, we can then create a new layer on top of it for our text. Locking the background layer prevents it from being accidentally moved or edited, allowing you to work on other elements without disrupting the background. In the next section, we’ll start learning how to draw the Transformers logo.

2. How to Prepare the Text
Step 1
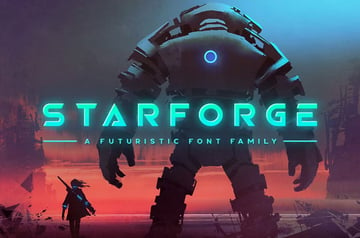
For this part of the tutorial, we’ll be using the Starforge Regular font, which is a sci-fi themed font available to download from Envato. Although this font is not an identical match to the original design, we can use the tools in Adobe Photoshop to make it match a bit better.
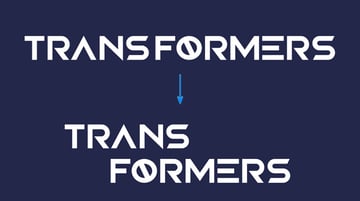
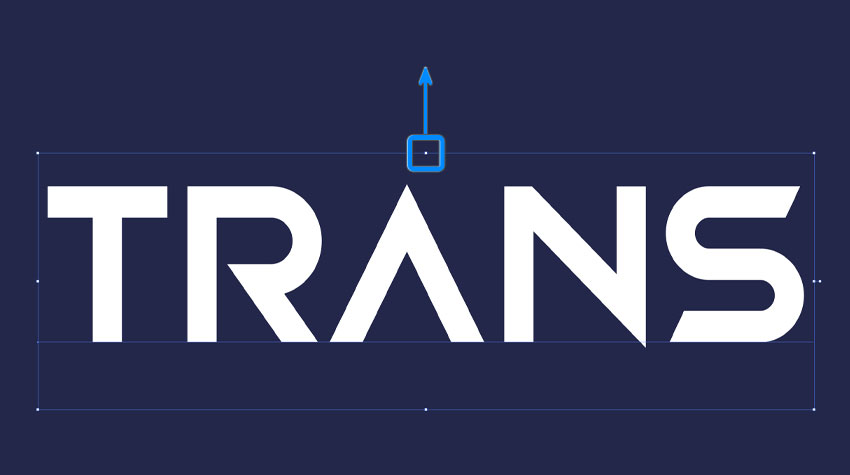
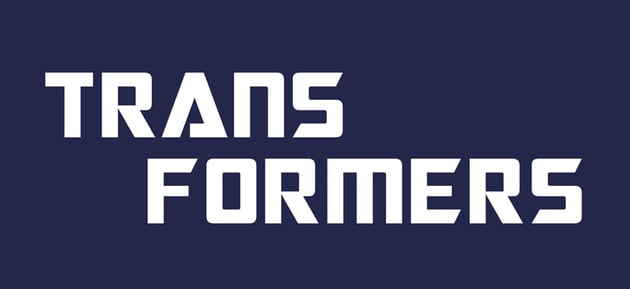
Create a new layer for the text and use the Type Tool (T)to write out the words for the logo. When creating the text, we want to separate the text for ‘TRANS’ and ‘FORMERS’. Place the text according to the image below.


Step 2
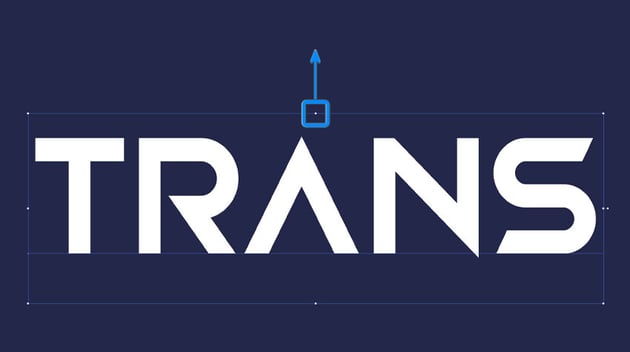
We now need to make the text appear taller by increasing the vertical scale. Do this by selecting the text and then going to the Character panel and adjusting the Vertical Scale percentage. Alternatively, you can use the Free Transform Tool (E) to manually stretch the text vertically.

Step 3
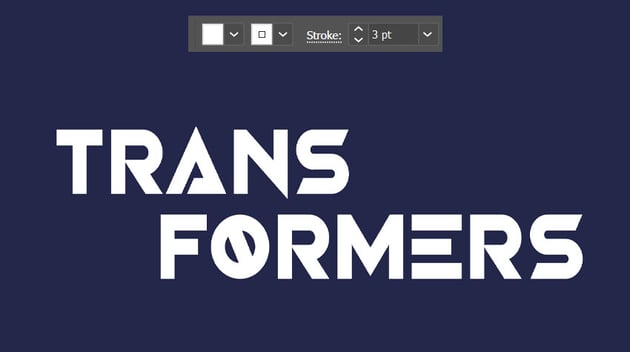
Select the text and add a 3 pt Stroke to it using the top toolbar or the Appearance panel. This will make the text appear slightly thicker.


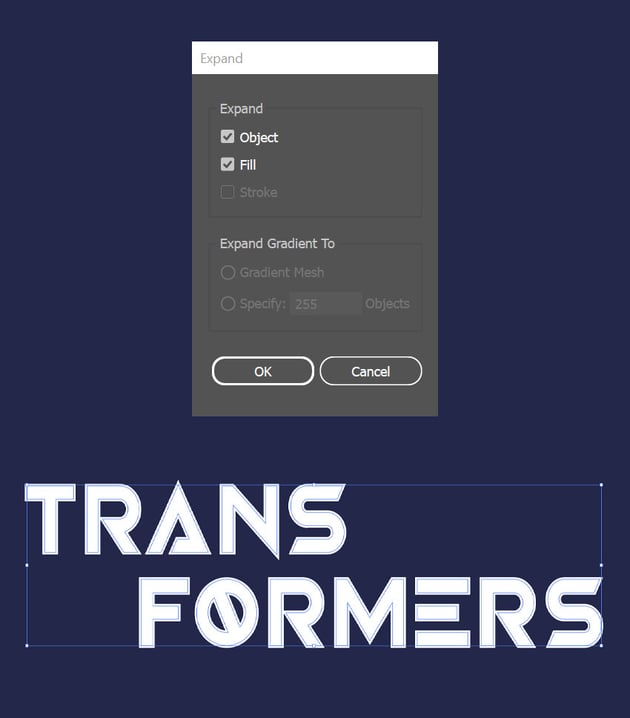
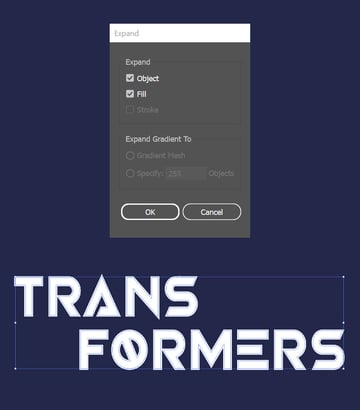
Step 4
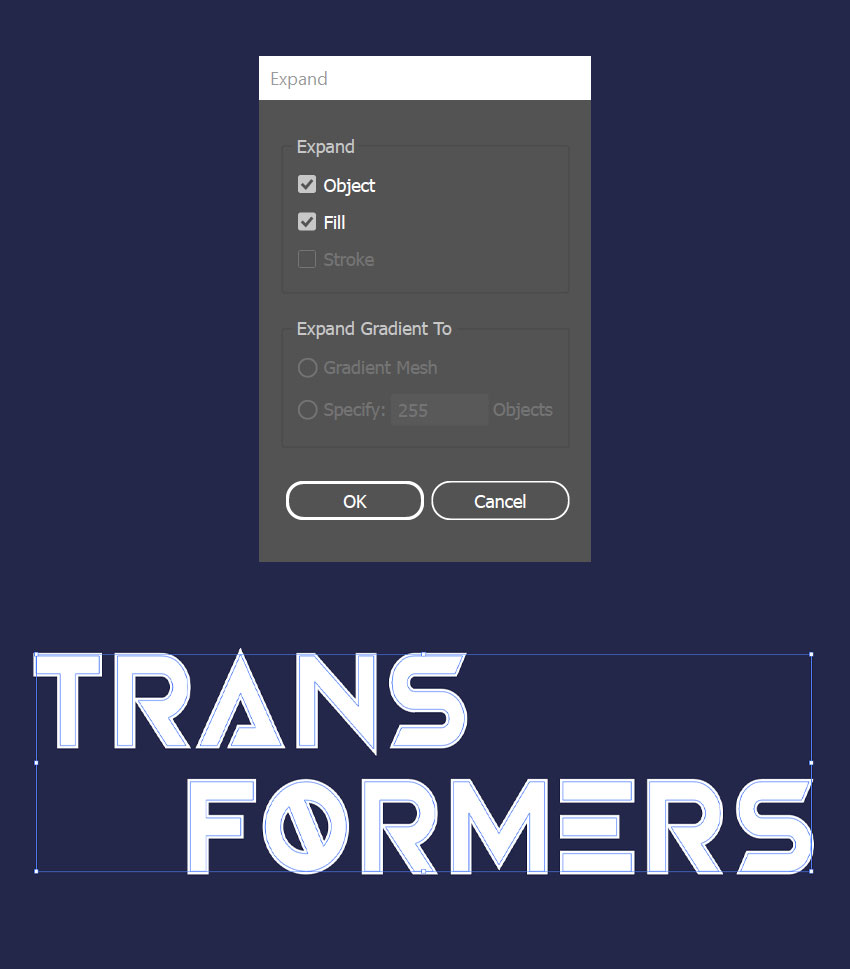
Now go to Object > Expand, which will convert the text into editable vector shapes.
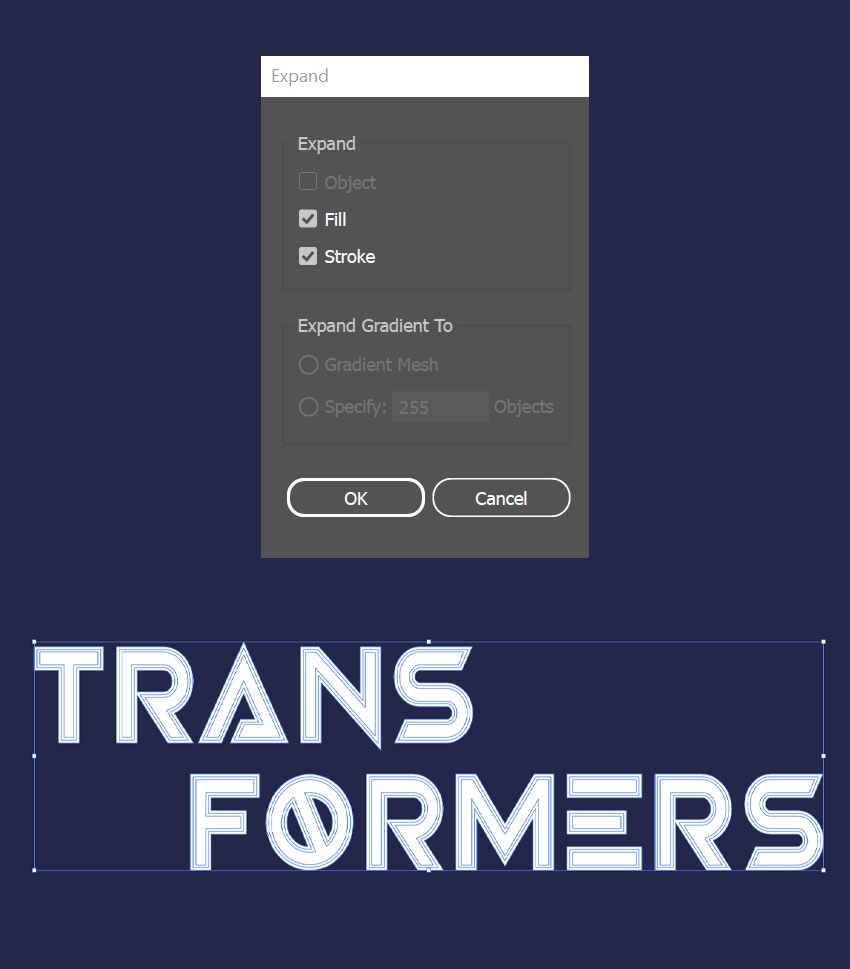
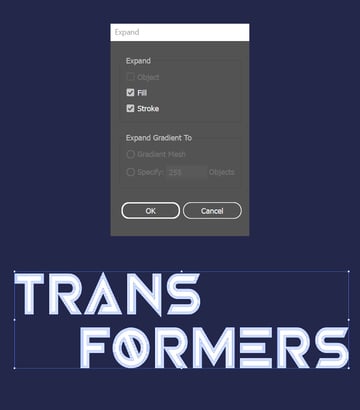
Step 5
Repeat the step again by going to Object > Expand one more time. This will convert the stroke into editable vector shapes.

Step 6
Go to the Pathfinder panel and select Unite. This function will combine all the selected shapes into a single merged shape, removing any overlapping lines or areas.
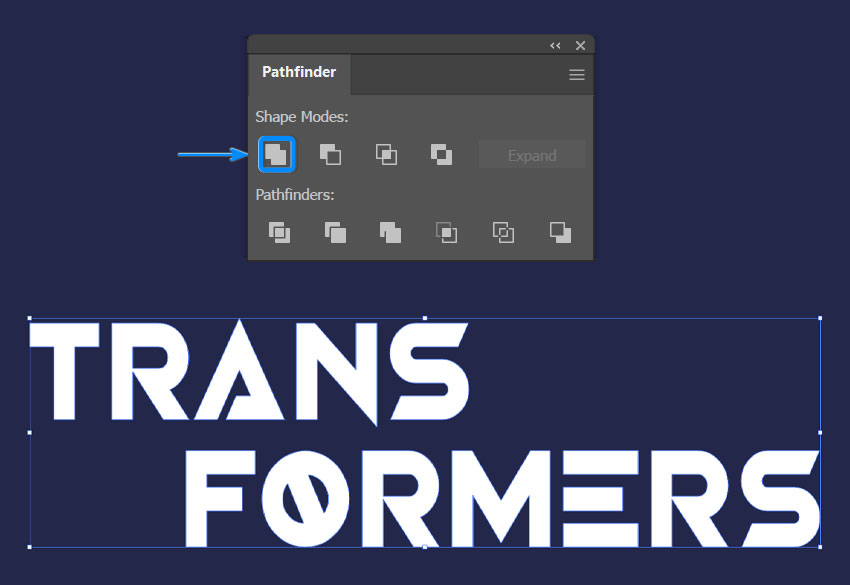


Step 7
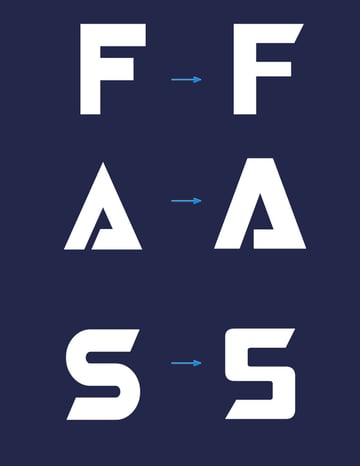
Now right-click > Ungroup the shapes and remove the letters ‘N’, ‘O’, and ‘M’, as shown in the image below. We’ll be replacing these letters with some custom-made shapes to more accurately reflect the Transformers logo design.


3. How to Create the Text Shapes for the Logo
Step 1
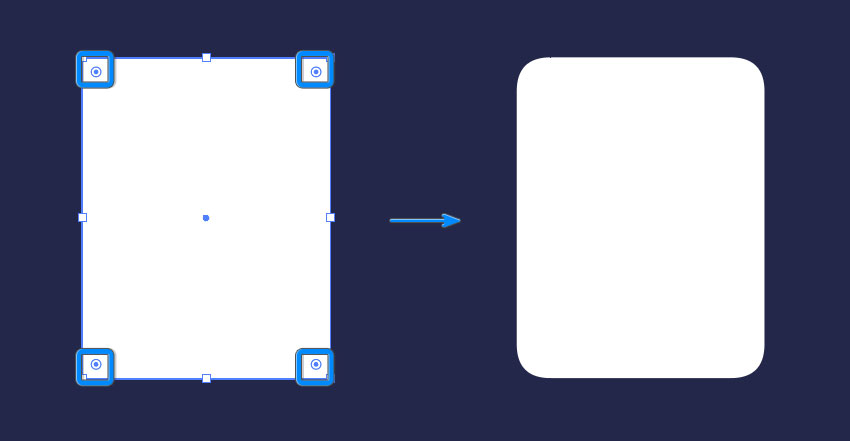
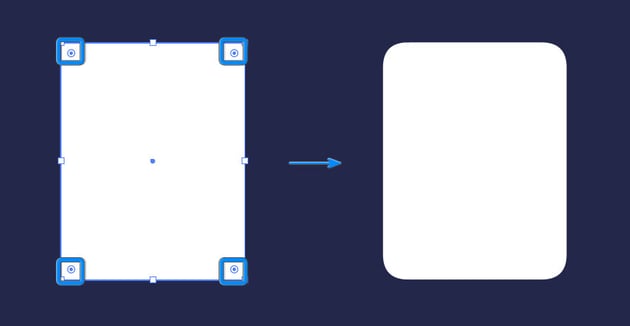
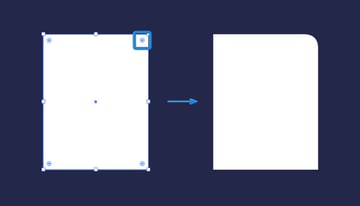
Use the Rectangle Tool (M) to create a rectangle roughly the same height as the font. Then use the Corner Widget handles that appear on each corner to round the corners slightly.

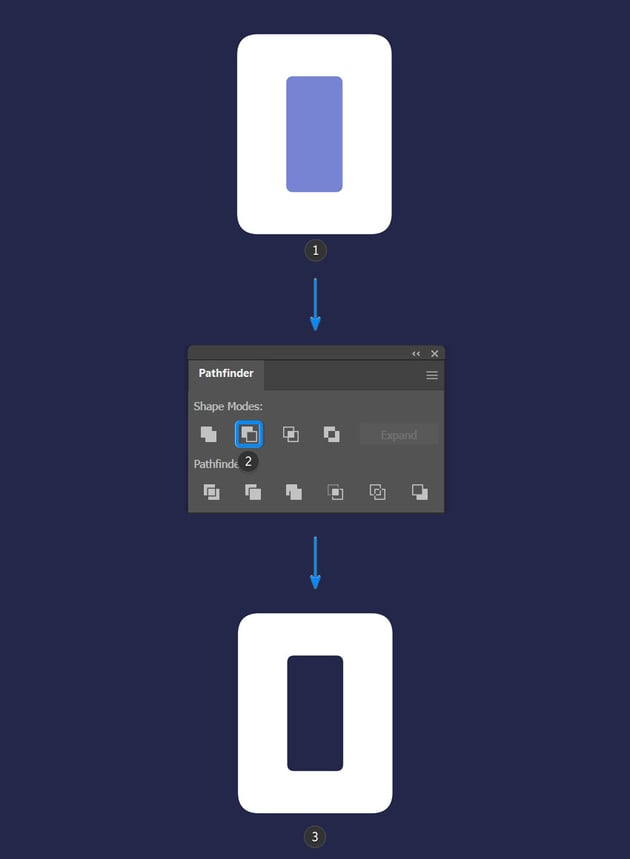
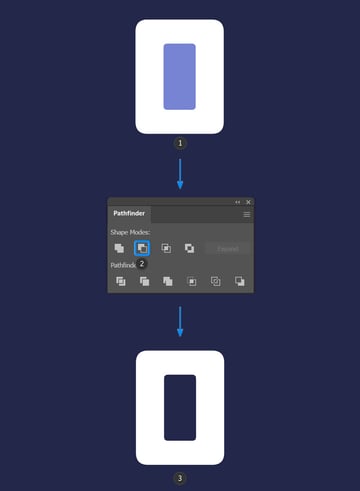
Step 2
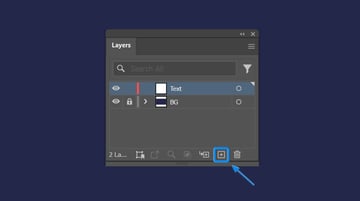
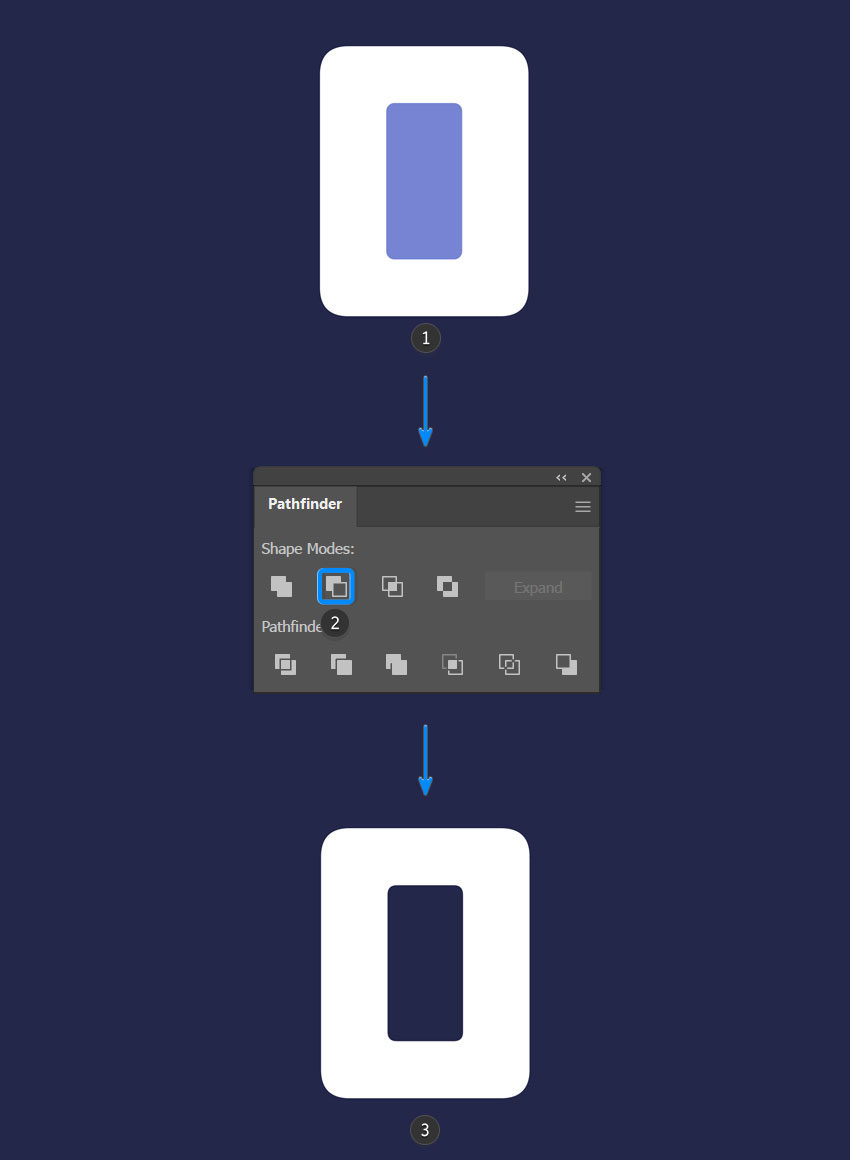
Create a smaller rectangle with round corners (it doesn’t matter what colour it is). Place it in the middle of the larger rectangle and make sure that it’s on top of the larger rectangle (right-click > Arrange > Bring to Front).


Step 3
Select both overlapping shapes and then, in the Pathfinder panel, click the Minus Front button to subtract the top shape from the bottom shape to create the letter ‘o’.
Step 4
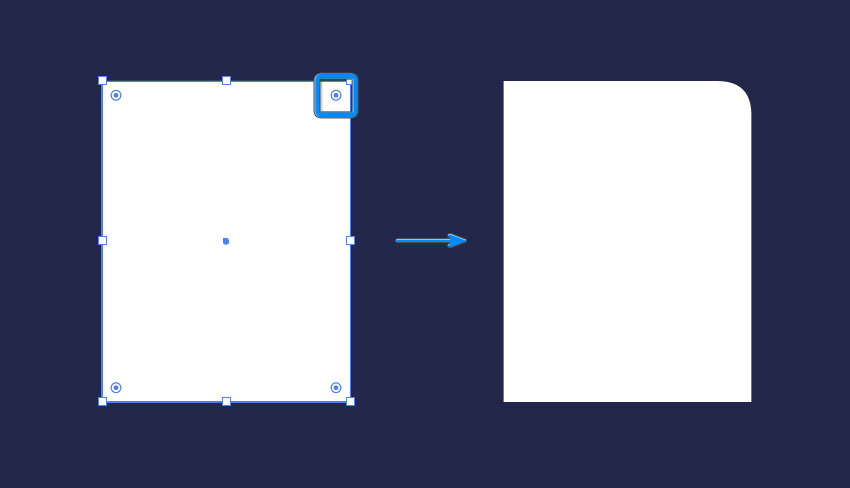
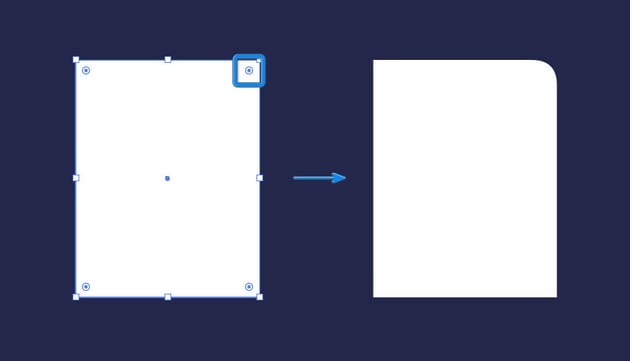
Use the Rectangle Tool (M) to create a rectangle roughly the same height as the font again. For the letter ‘n’, we just want to round the upper right corner.
Step 5
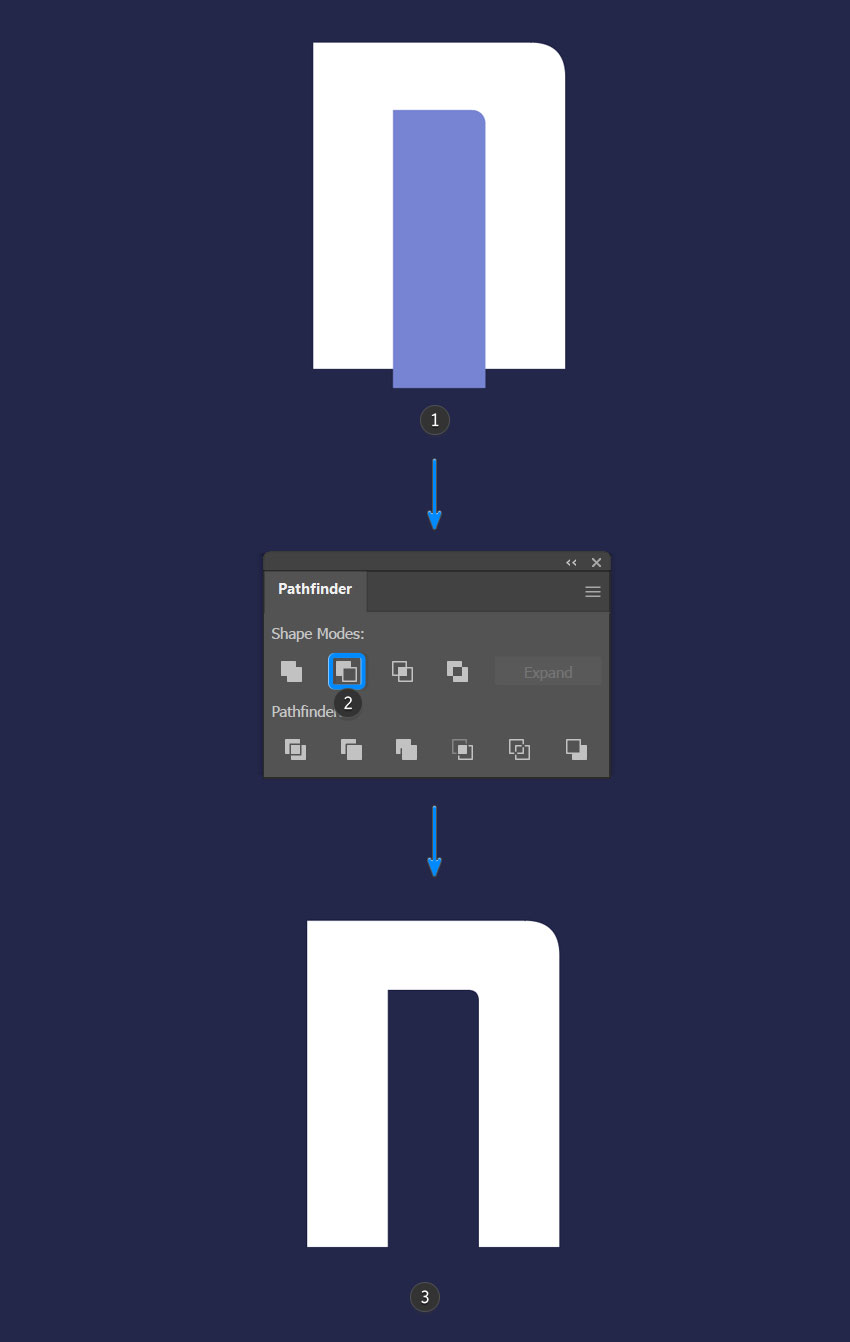
Create another smaller rectangle, which also has a rounded upper right corner. Place it in the middle of the larger rectangle and make sure that it is on top of the larger rectangle (right-click > Arrange > Bring to Front).


Step 6
Select both overlapping shapes and then, in the Pathfinder panel, click the Minus Front button to subtract the top shape from the bottom shape to create the letter ‘n’.


Step 7
To create the letter ‘m’, simply duplicate the letter ‘n’ and place it next to the original.


Step 8
To create the letter ‘E’, use the Rectangle Tool (M) and create a long rectangle, placing it on the left side of the letter.


Step 9
Now reduce the size of the middle rectangle and move the anchor points to so that it looks like the image below.


Step 10
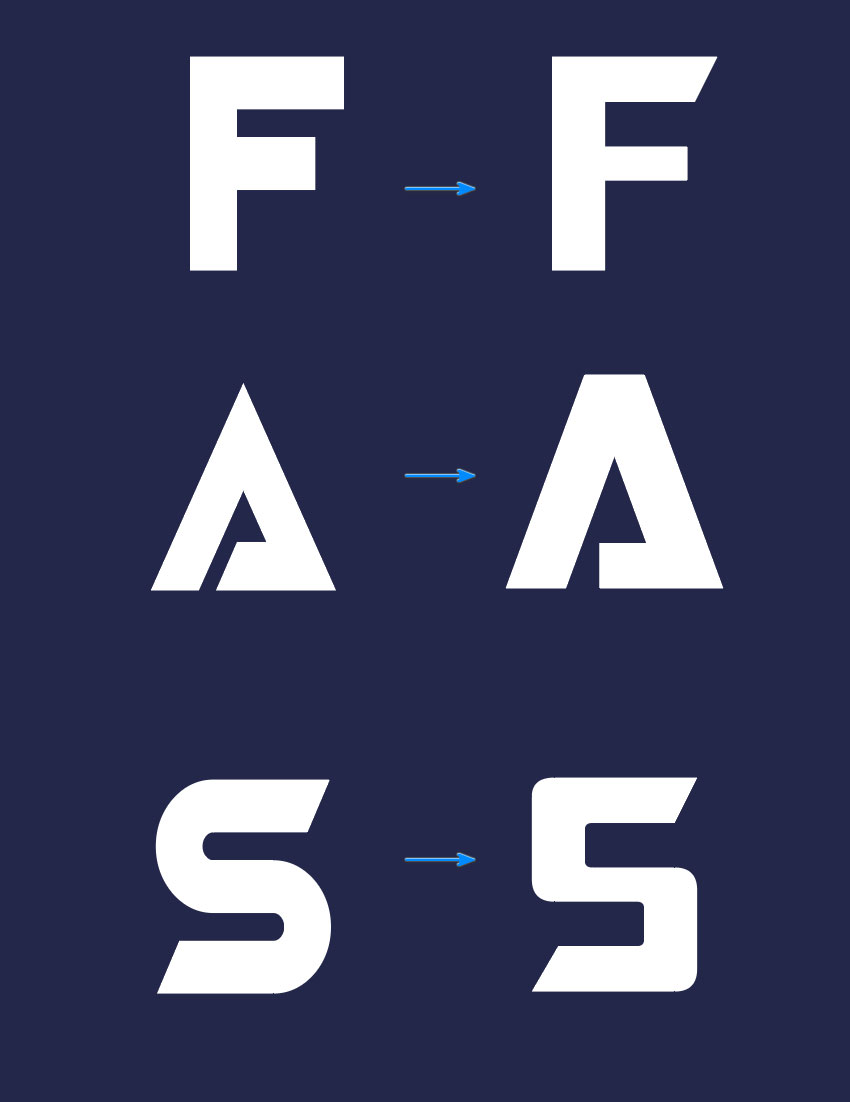
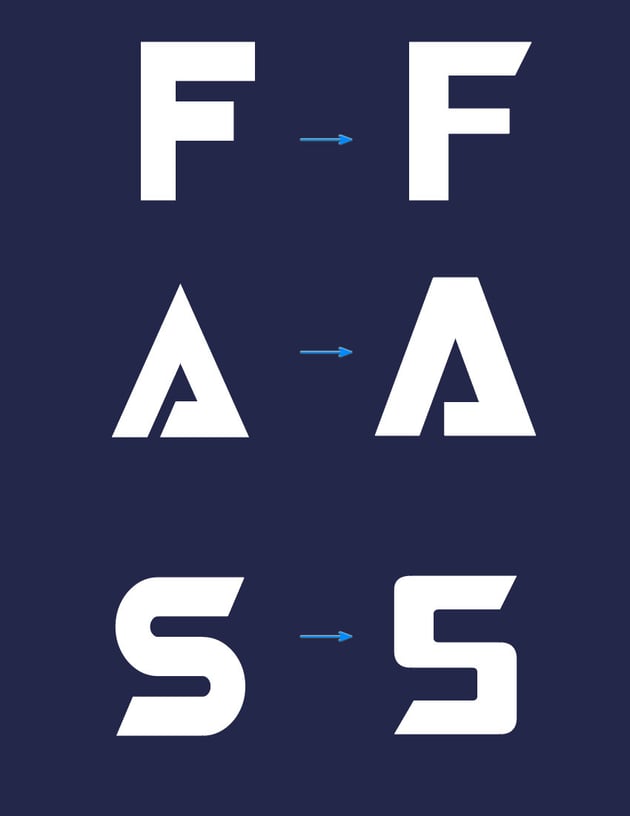
Now that you are familiar with making basic vector shapes, you can take a look at the other letters to see if they need further adjusting. As an optional step, you can further edit the rest of the letters to resemble the original Transformers logo.
Step 11
Now, place the new letters with the rest of the logo to complete the look. With the vector shapes ready, we can move on to the next step and make the logo appear 3D.


4. How to Make the 3D Transformers Text Effect
Step 1
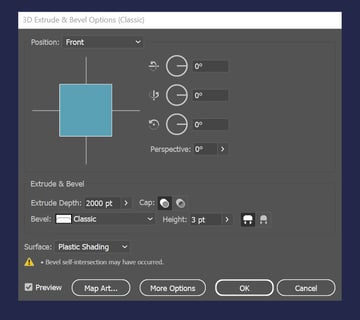
To make your Transformers text effect appear 3D, we need to select it and go to Effect > 3D and Materials > 3D Classic. This will open the 3D Extrude and Bevel Options (Classic). From there, we want to change the following settings:
- Position: Front
- Extrude Depth: 2000 pt
- Bevel: Classic
- Height: 3 pt
- Bevel Extent Out (the button to the right of the Height options)


Step 2
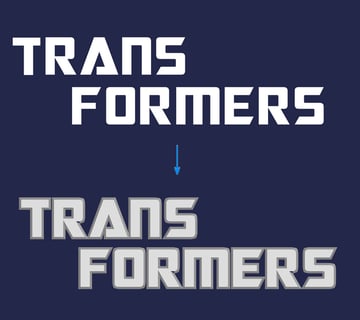
These settings will change the look of the text and add a 3D bevel to the outside edges of the original letter shapes.


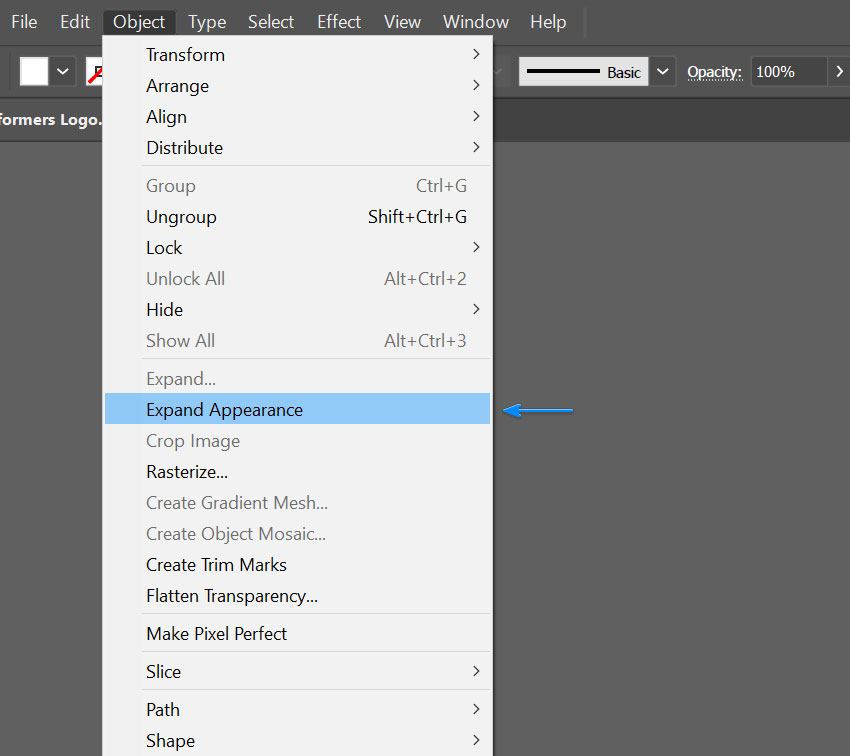
Step 3
With the text selected, go to Object > Expand Appearance. This will convert the 3D effect into editable vector shapes.


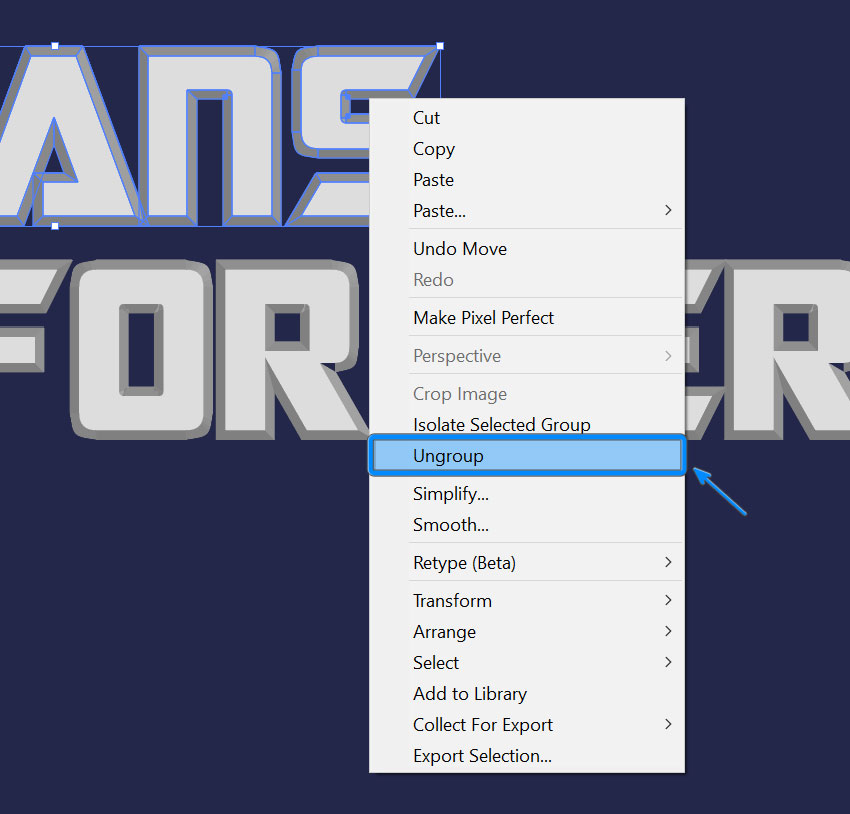
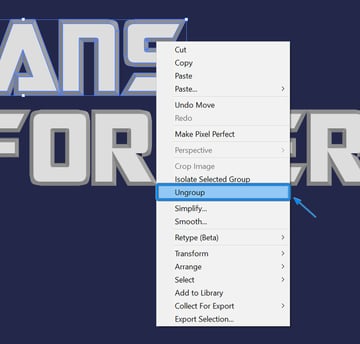
Step 4
Right-click and ungroup all the shapes so that you can select each letter individually.

5. How to Create the Transformers Text Effect Gradient
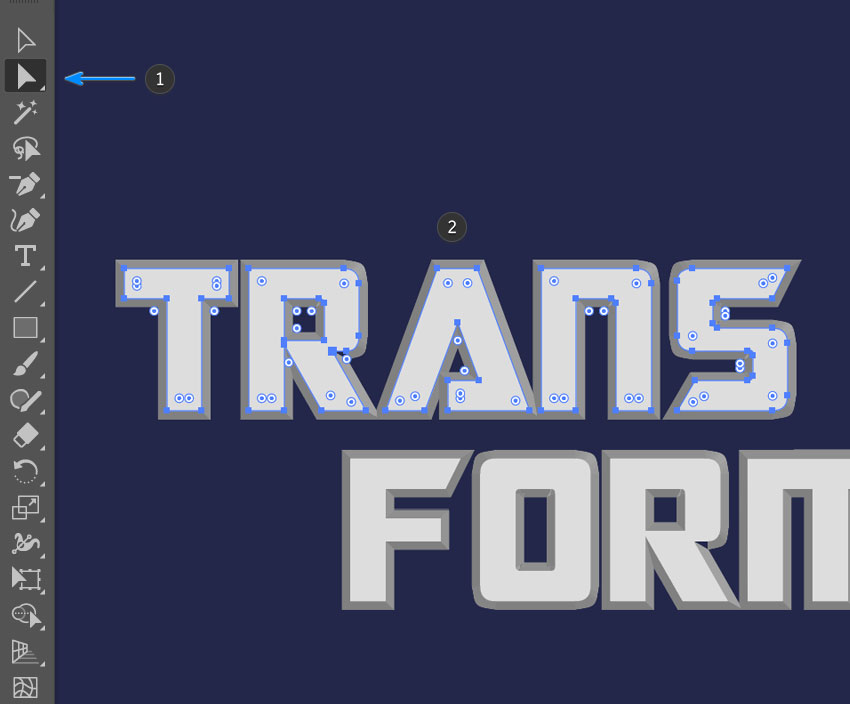
Step 1
Use the Direct Selection Tool (A) to select all the top letters (hold the Shift button on the keyboard whilst selecting to do this).
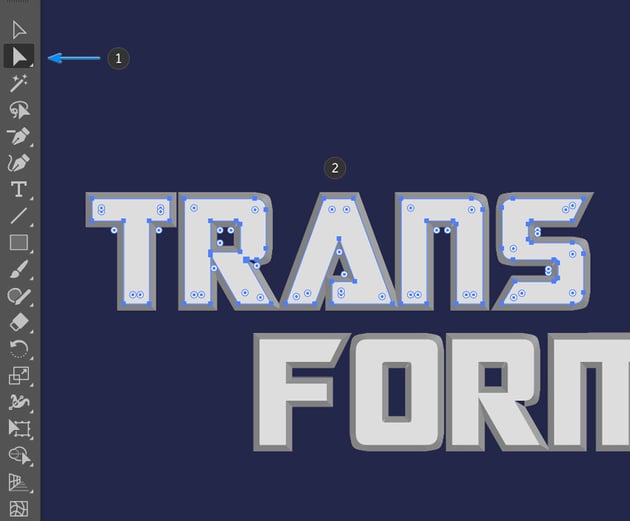
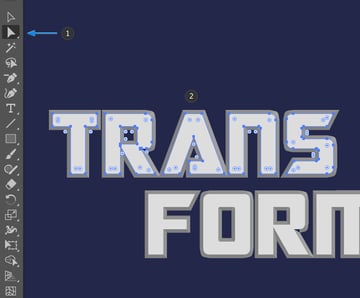
Step 2
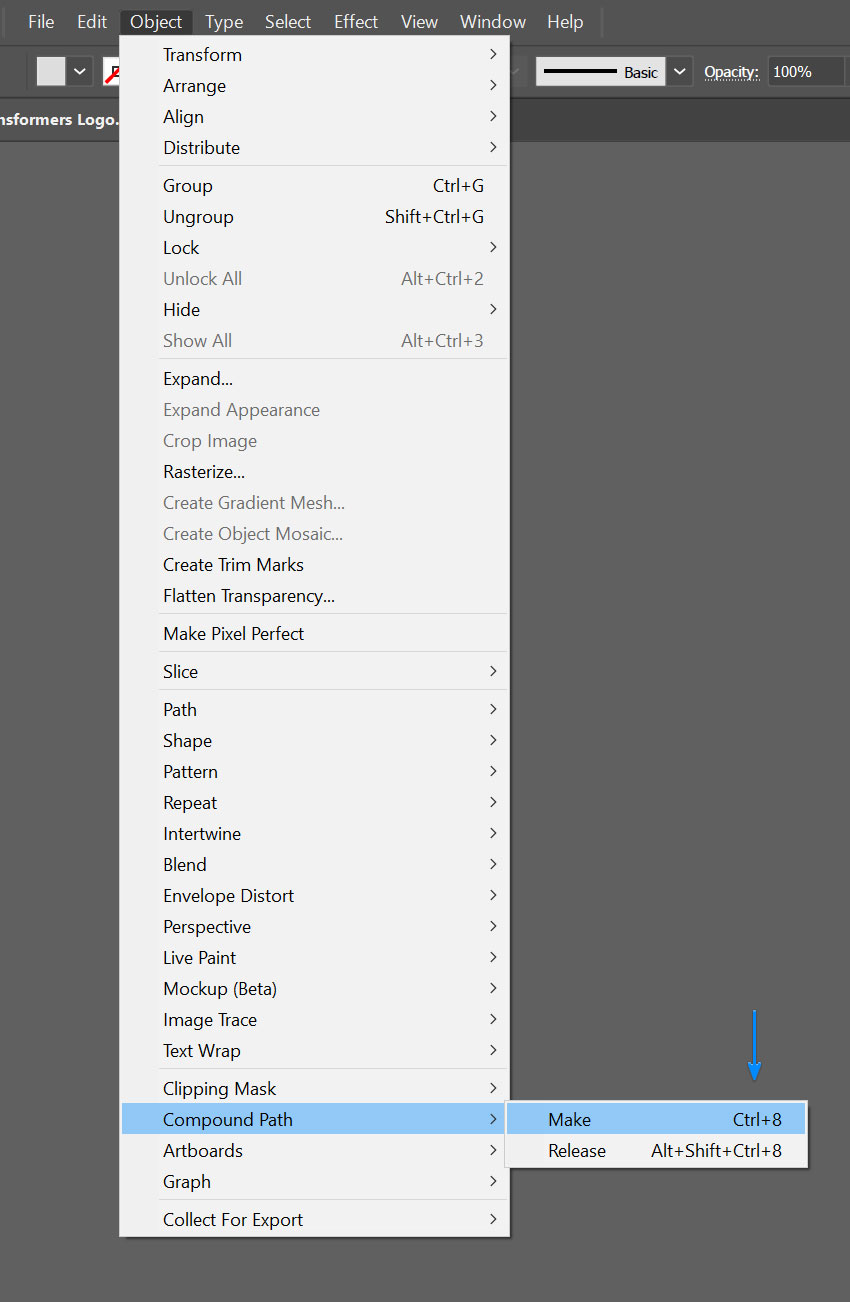
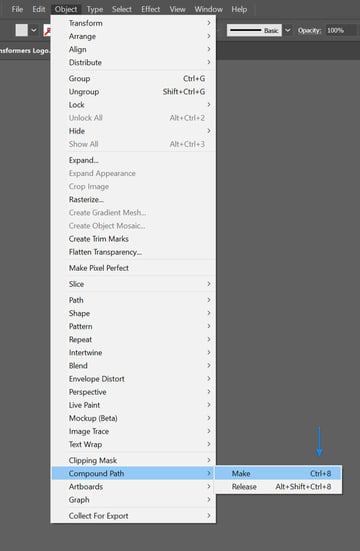
With all the letters selected, go to Object > Compound Path > Make. This combines multiple selected paths into a single path, which will allow us to apply the Transformers text effect across all the letters at once.

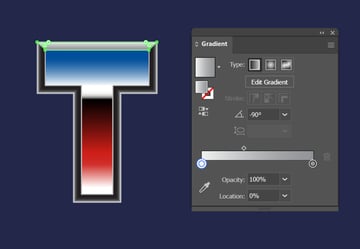
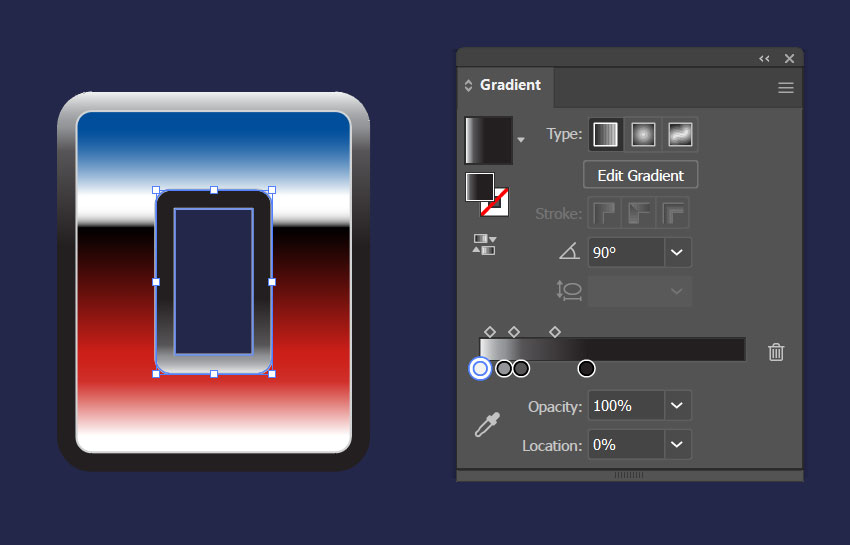
Step 3
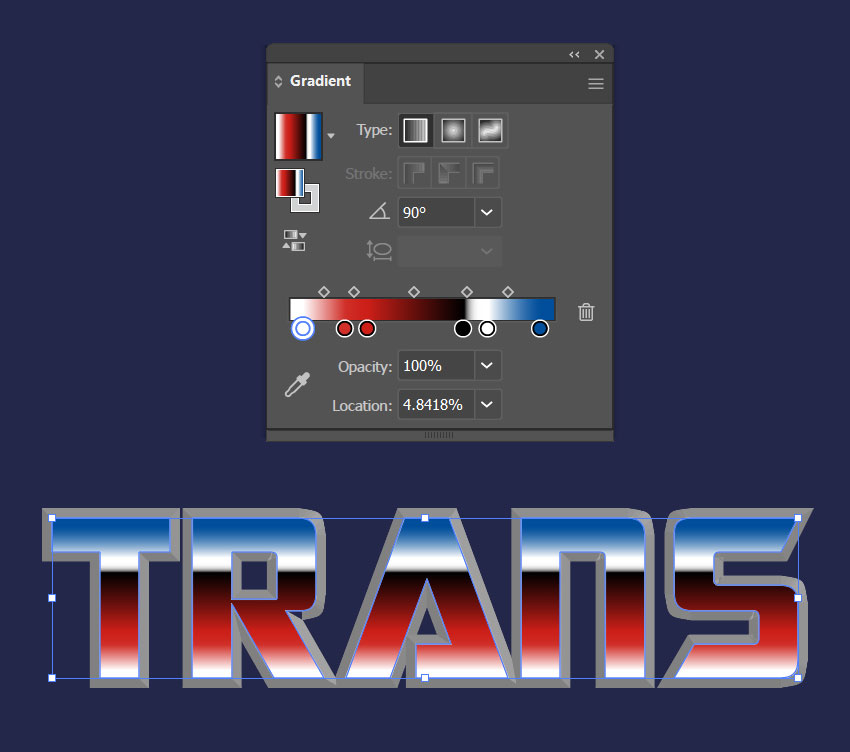
Now let’s apply a gradient effect. With all the text selected, open the gradient panel (Window > Gradient) and apply the following options:
- Type: Linear Gradient
- Angle: 90°
- Opacity: 100%
- Color stop 1 –Color:
#FFFFFFLocation: 4.8% - Color stop 2 –Color:
#D0302ALocation: 20.7% - Color stop 3 –Color:
#CC1F18Location: 29.3% - Color stop 4 –Color:
#000000Location: 65.8% - Color stop 5 –Color:
#FFFFFFLocation: 75.1% - Color stop 6 –Color:
#004E9BLocation: 95.15%

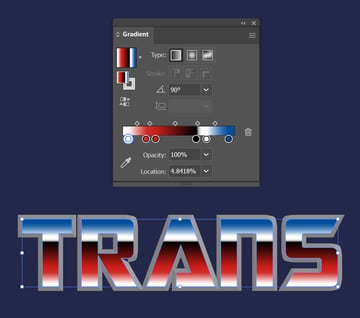
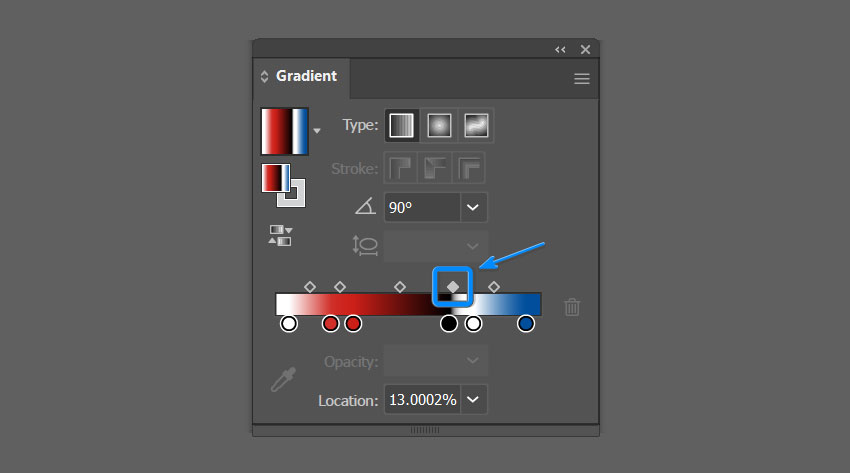
Step 4
Move the gradient slider that’s between the black and white colour stops to the location 13% to tighten up the transition between the two colours.


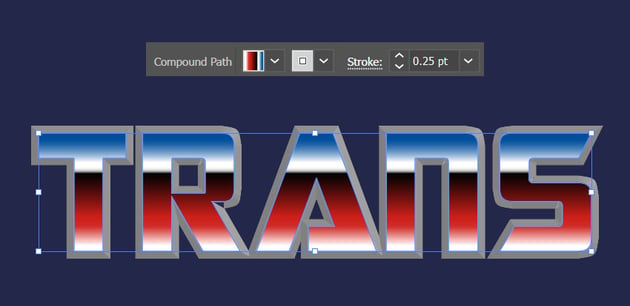
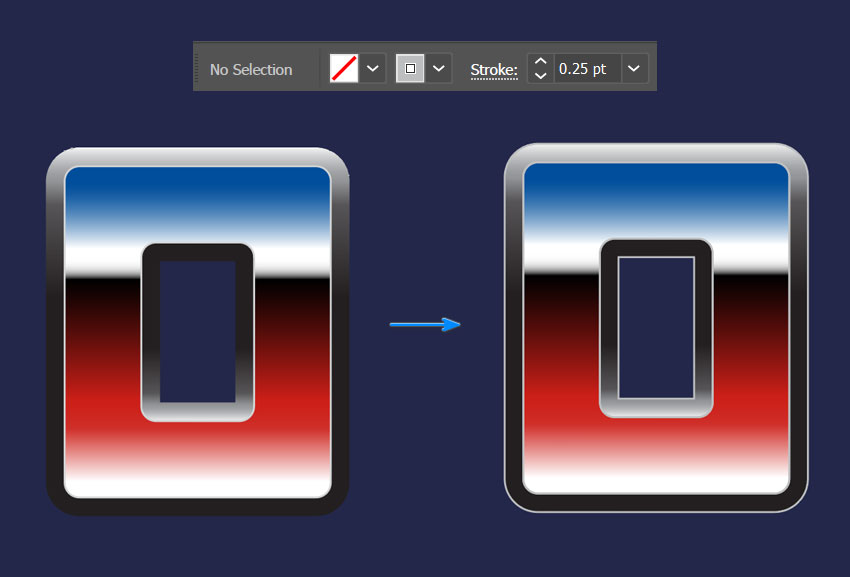
Step 5
Now add a 0.25 light grey D1D3D4 stroke around the letters to complete the look.


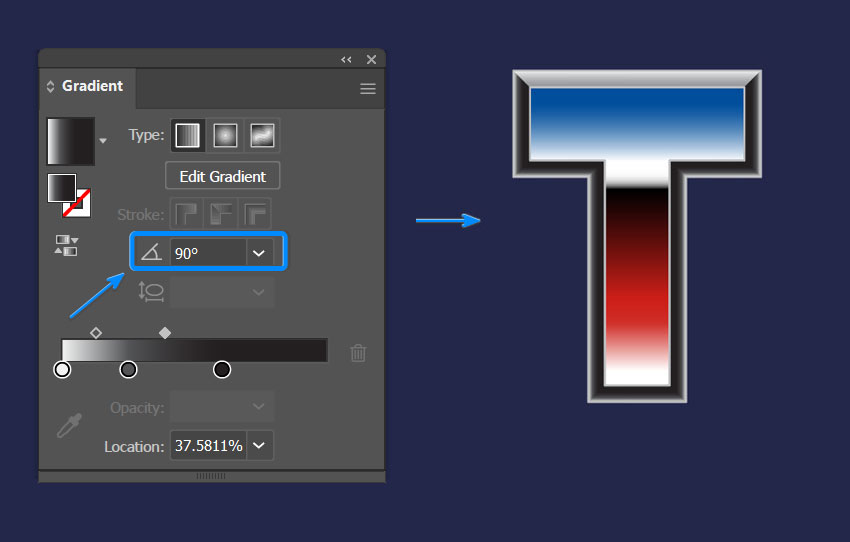
Step 6
For the next part, we want to add a gradient to each 3D segment individually. The gradient we’re going to use has the following settings:
- Type: Linear Gradient
- Angle: (This will change according to the shape we are applying the gradient to)
- Opacity: 100%
- Color stop 1 – Color:
#F1F2F2Location: 0.0001% - Color stop 2 – Color:
#535456Location: 25.2% - Color stop 3 – Color:
#231F20Location: 60.8%


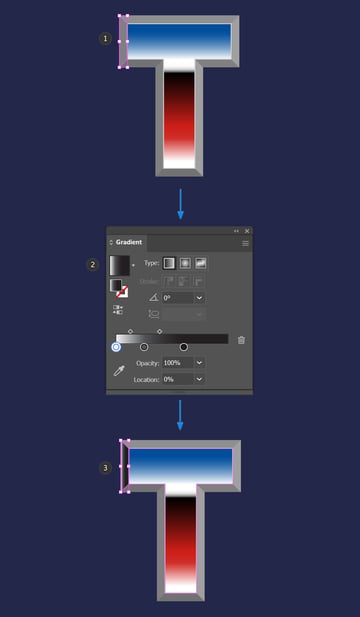
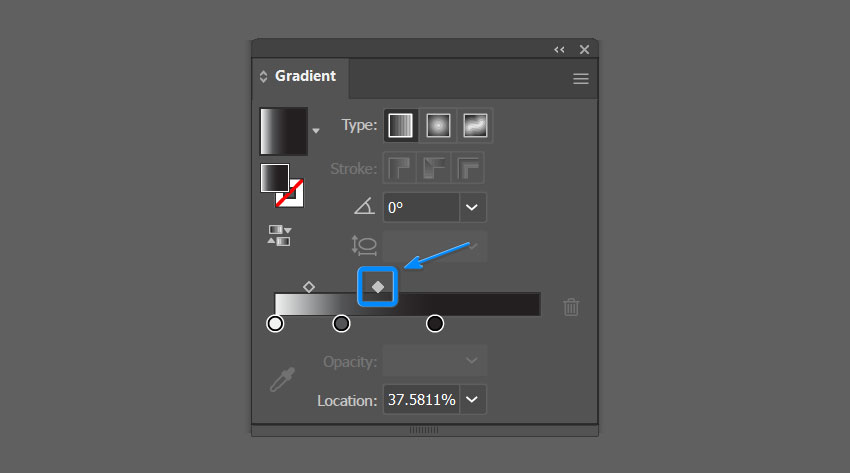
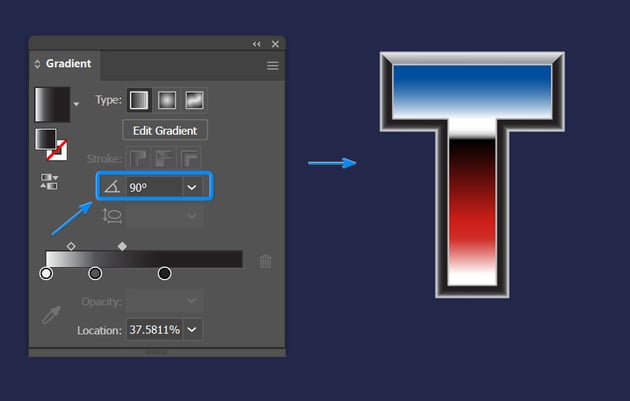
Step 7
Move the gradient slider that’s between the color stops 2 and 3 to the location 37.5% to tighten up the transition between the colours.


Step 8
Apply the gradient to the other shapes around the letter.
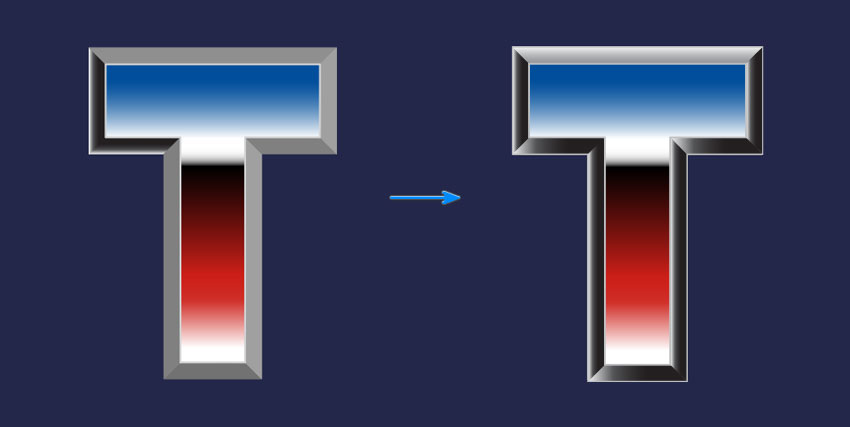

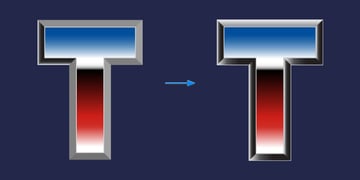
Step 9
Now adjust the gradient angle for each shape, so that the lightest part of the gradient is aligned to the outside edge of the letter.

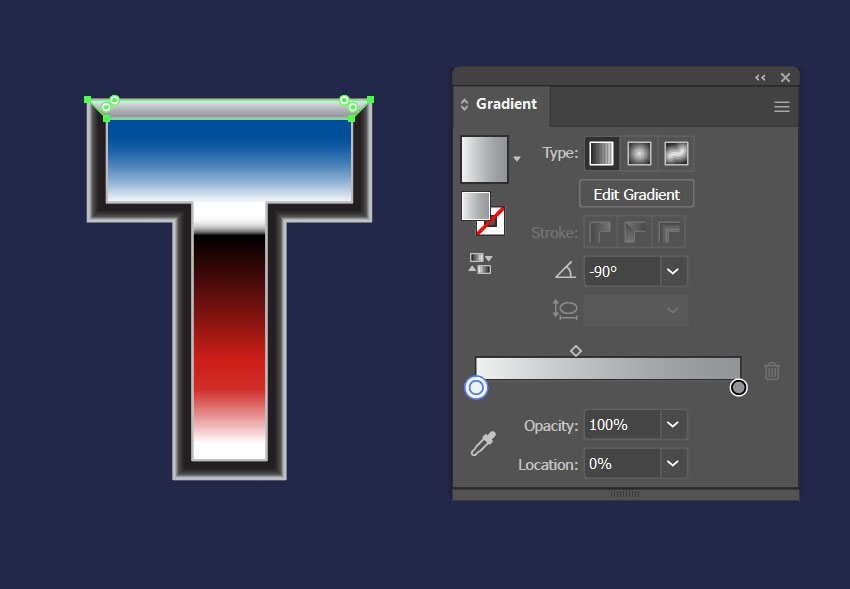
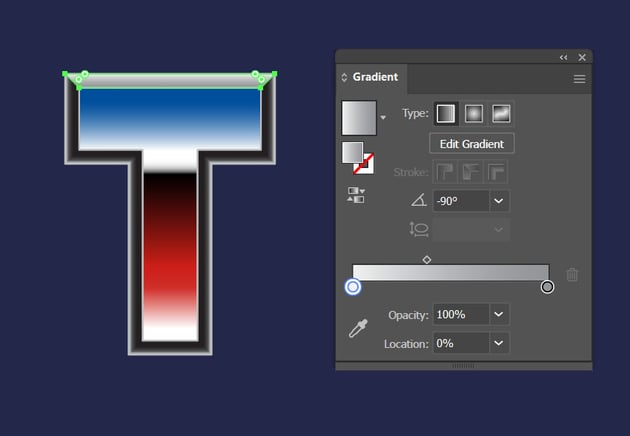
Step 10
Create a new gradient for the top bevel shape. The gradient we’re going to use has the following settings:
- Type: Linear Gradient
- Angle: 90°
- Opacity: 100%
- Color stop 1 – Color:
#F1F2F2Location: 0% - Color stop 2 – Color:
#939598Location: 100%
Step 11
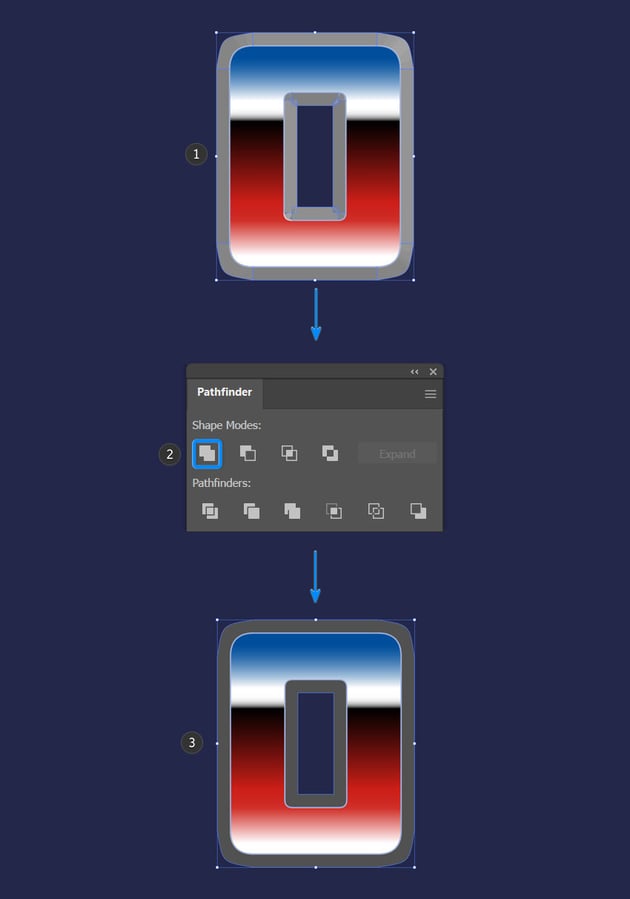
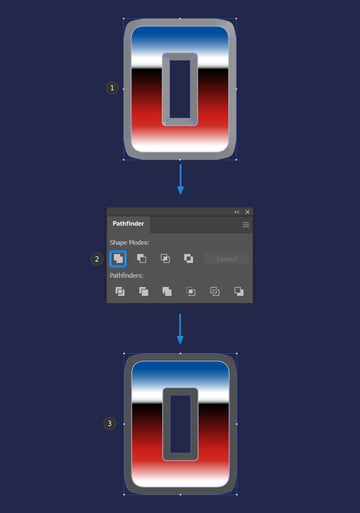
Before repeating the same steps for the rest of the letters, we need to combine some bevel shapes where there are curves, as the 3D effect has created multiple shapes in these areas.
We’ll use the letter ‘o’ as an example. Select all the bevel shapes, go to the Pathfinder panel, and select Unite.
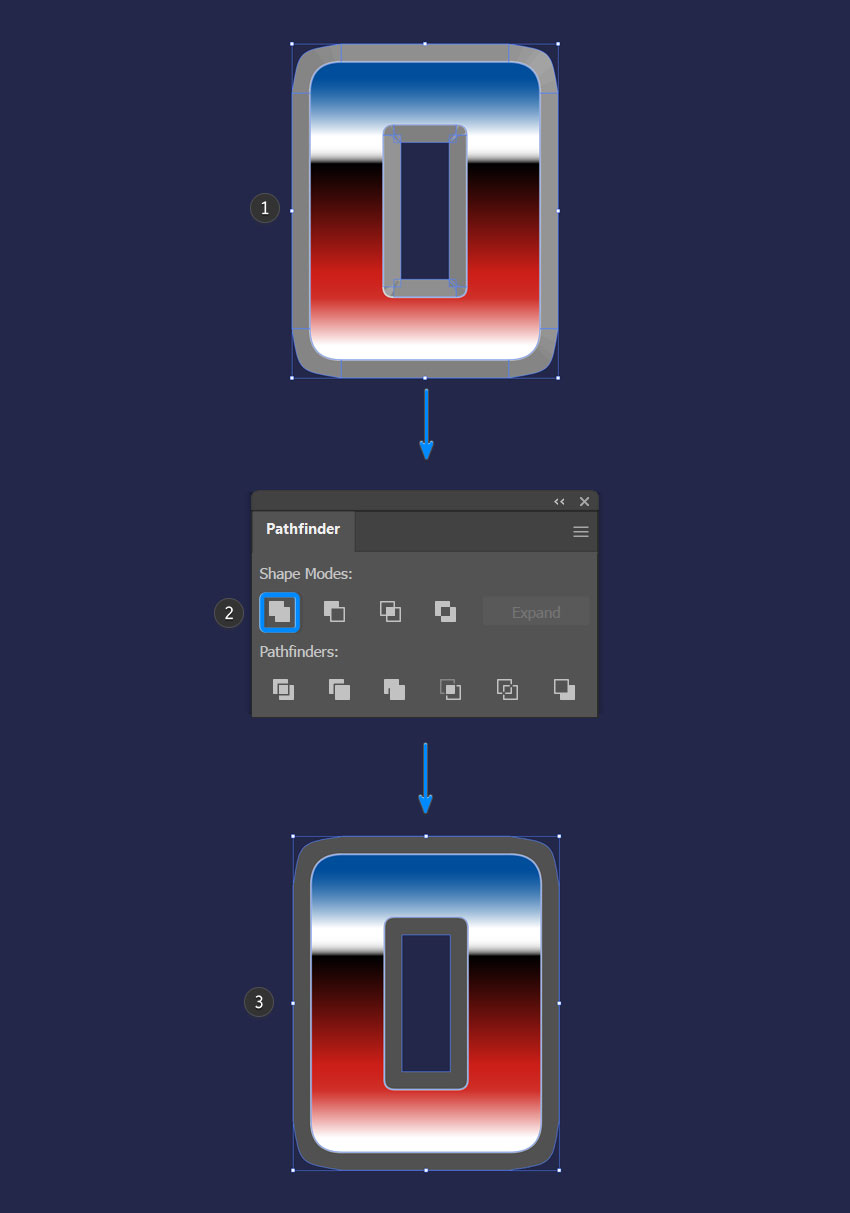
Step 12
Now apply the following gradient to the shapes, editing the angle as you see fit:
- Type: Linear Gradient
- Angle: (This will change according to the shape we are applying the gradient to)
- Opacity: 100%
- Color stop 1 – Color:
#F1F2F2Location: 0% - Color stop 2 – Color:
#939598Location: 9.12% - Color stop 3 – Color:
#575557Location: 15.5% - Color stop 3 – Color:
#231F20Location: 40.5%


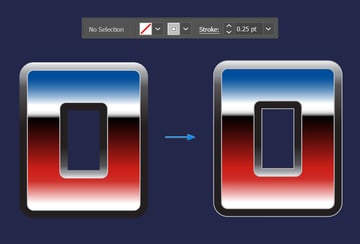
Step 13
Now add a 0.25 light grey D1D3D4 stroke around the letters to complete the look.

Step 14
Repeat the process for the rest of the letters. Remember to change the angle of the gradient for each of the bevel shapes, with the general rule of trying to keep the lighter colour aligned to the outside edge of the letter.


6. How to Create the Autobot Transformers Logo
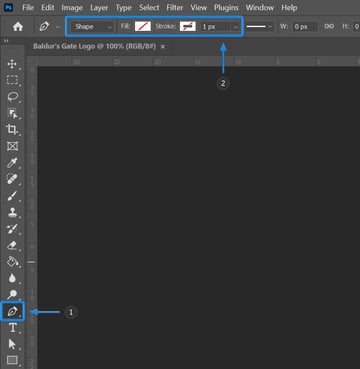
Step 1
Select the Pen Tool and use the following settings:
- Tool Mode: Shape
- Fill: No Color
- Stroke: No Color


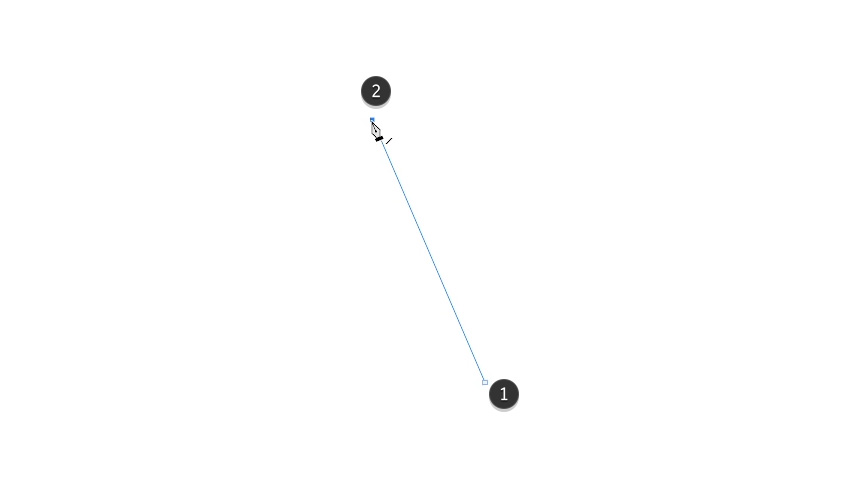
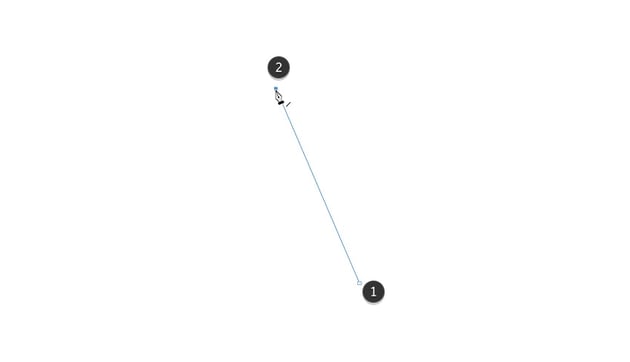
Step 2
Now let’s create the first shape for the Autobot Transformers logo. Click the left mouse button to create the first anchor point, and then click again to place a second anchor point to continue the outline of the shape.
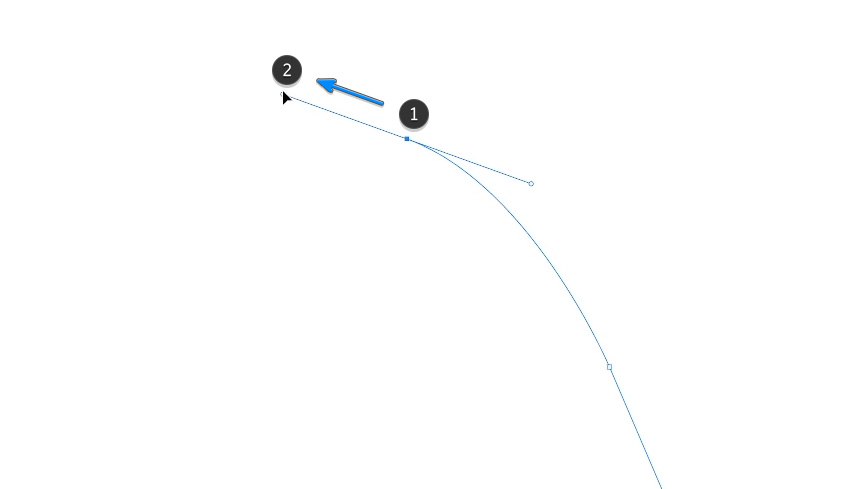
Step 3
To create a curved line, simply click and drag with the mouse when creating your anchor point.
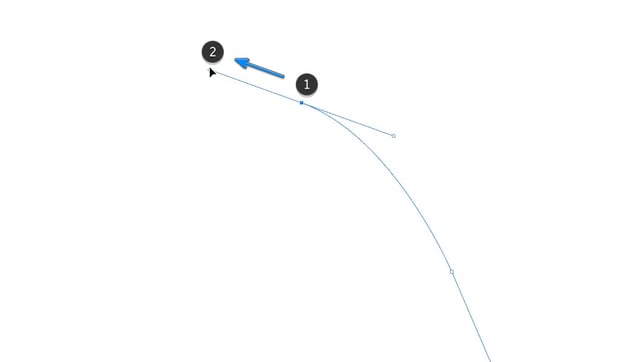

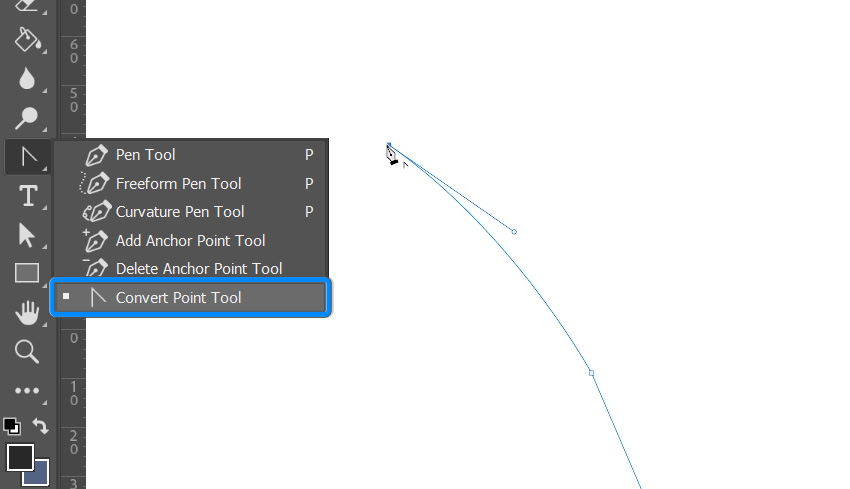
Step 4
To create a corner from a curved line, use the Convert Point Tool or hold the Alt key on the keyboard whilst using the Pen Tool.


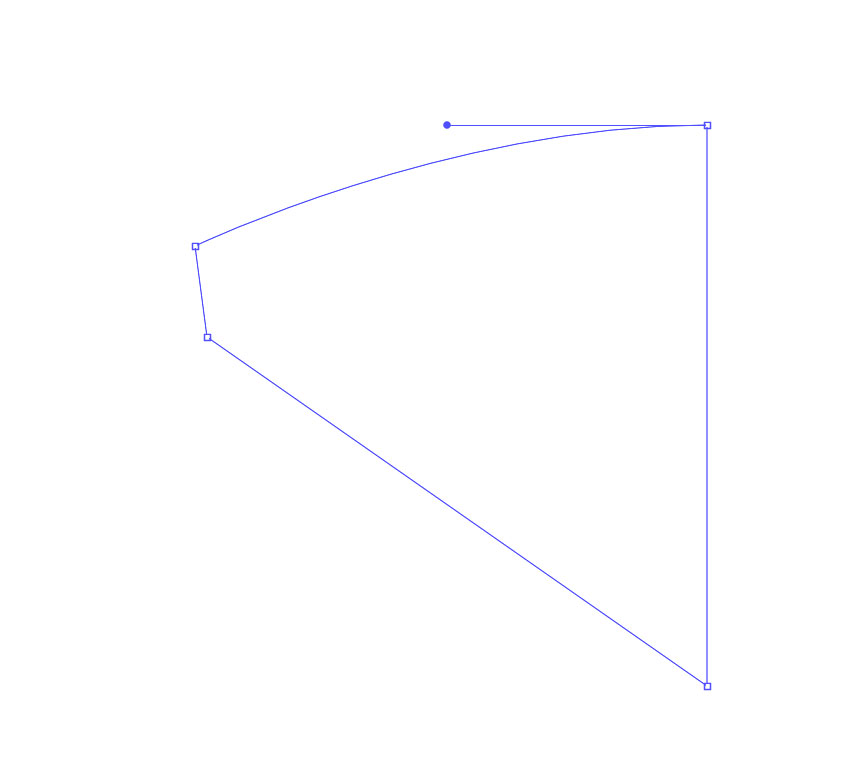
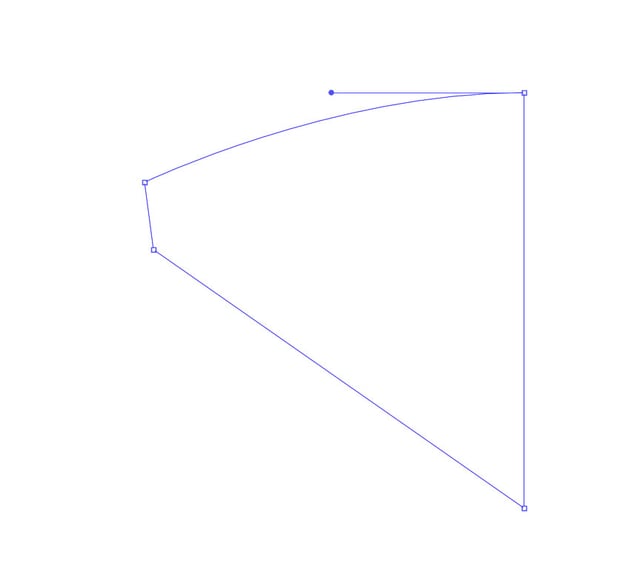
Step 5
Continue using the Pen Tool to draw out the first shape, and then join the last anchor point to the first anchor point to finish it.

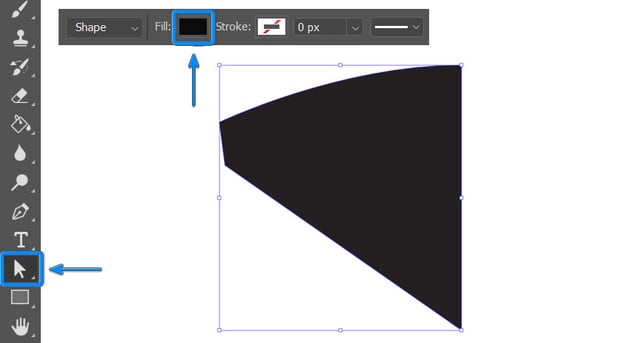
Step 6
Change the fill color from ‘No Color’ to black so that we can see the shape clearly. From there, you can use the Direct Selection Tool (A) to adjust the shape to your liking by clicking and dragging on the anchor points or handles.


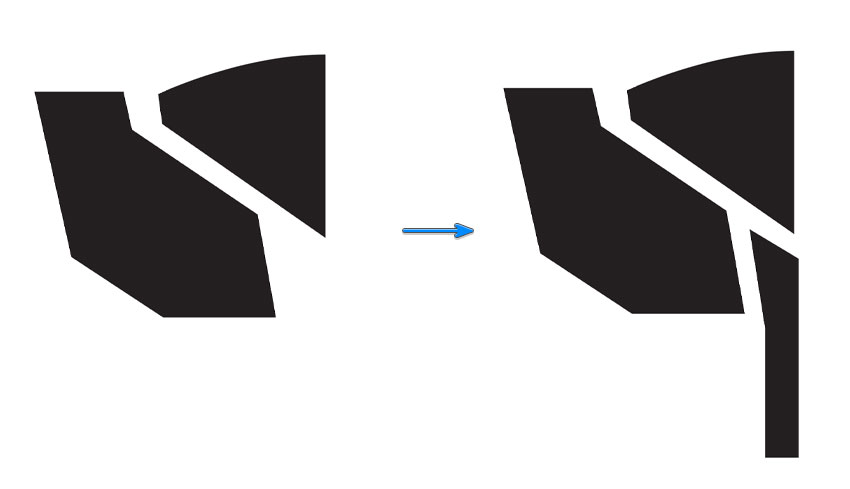
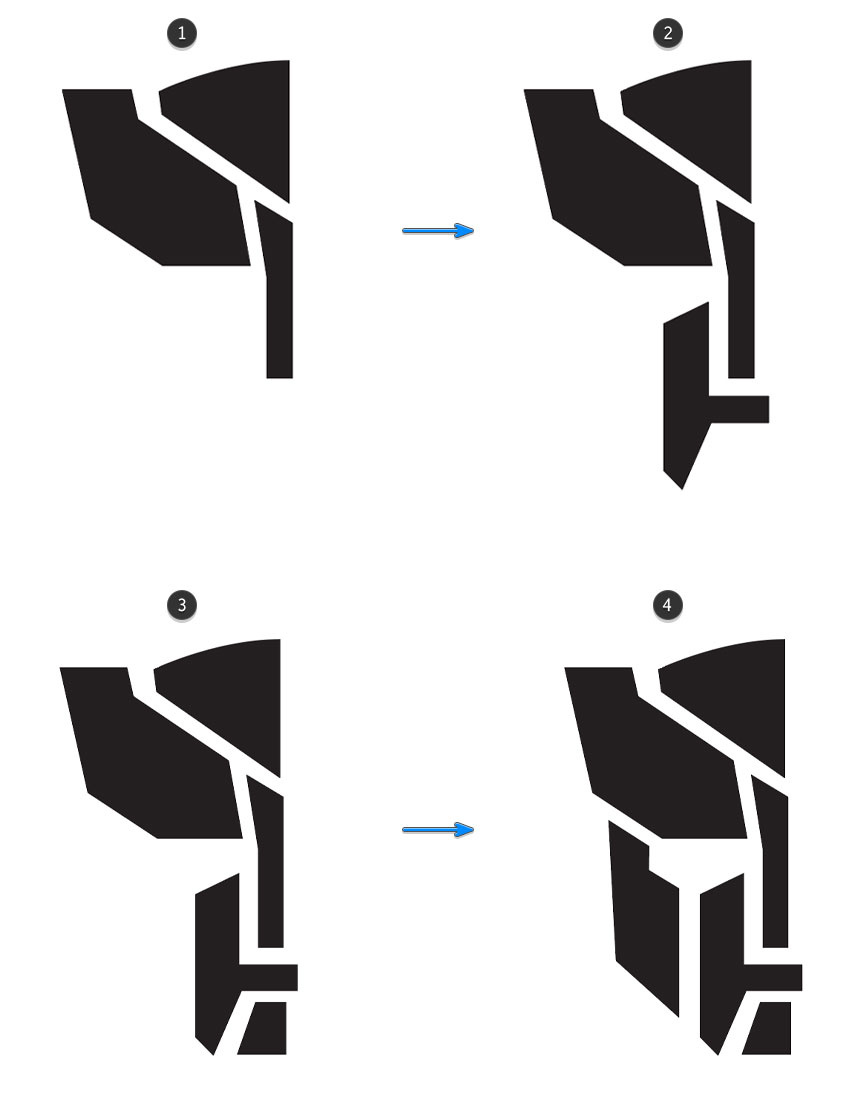
Step 7
Now follow the image below, using the same techniques to create the second and third shapes. Use the Direct Selection Tool (A) to adjust the anchor points and refine the shapes.
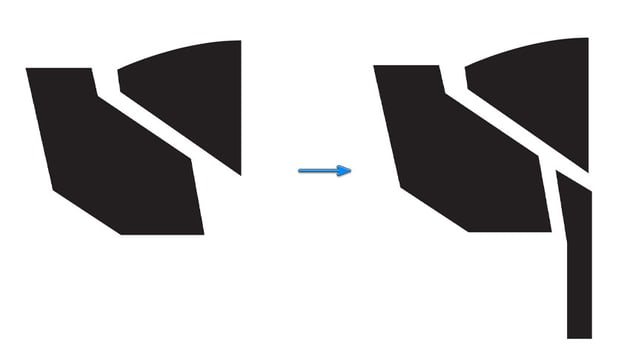
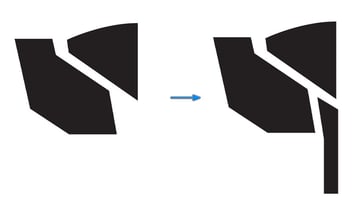
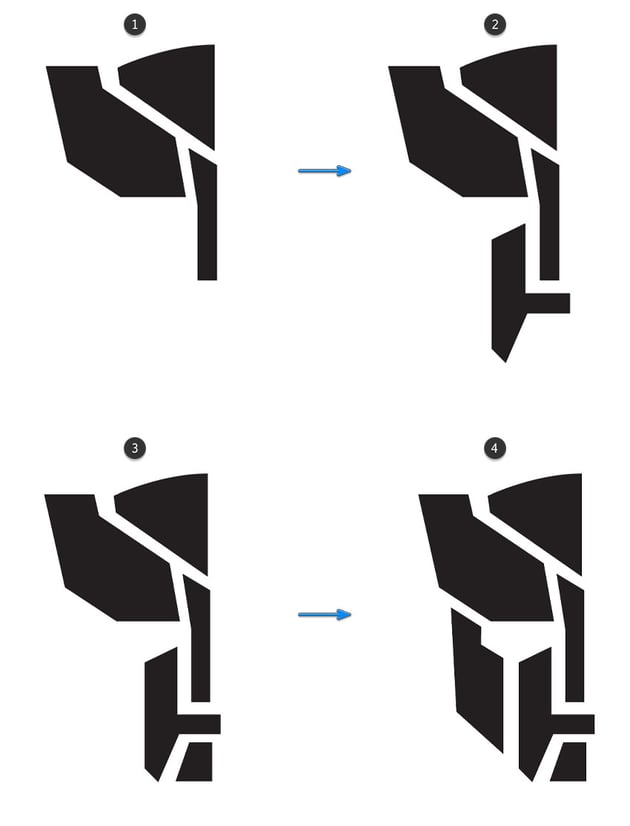
Step 8
Continue using the Pen Tool (P) and follow the steps below to complete the Autobot Transformers logo.

Step 9
When you’ve completed the first half of the face, simply duplicate all the objects by copying it (Control-C), pasting it (Control-V), and then flipping it (Right-click > Transform > Reflect > Vertical). Then move it into place.

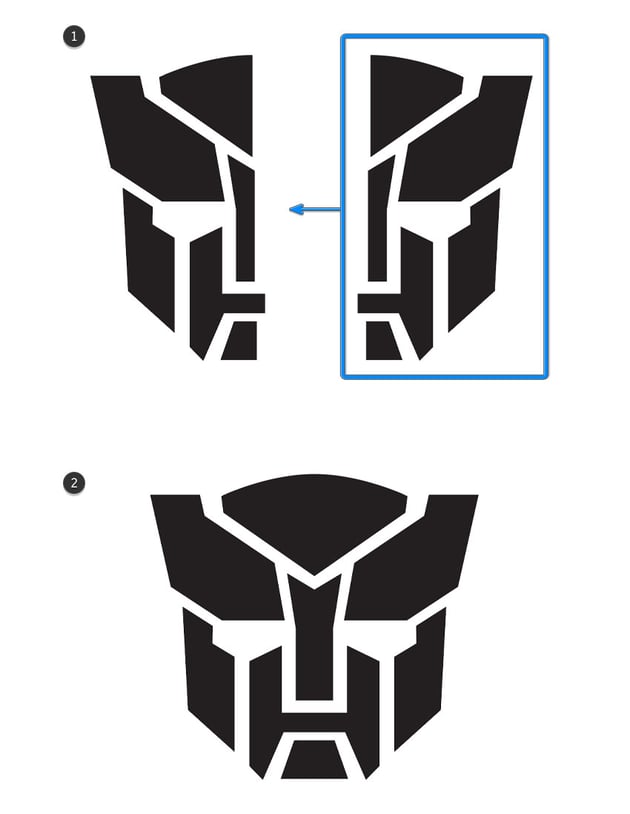

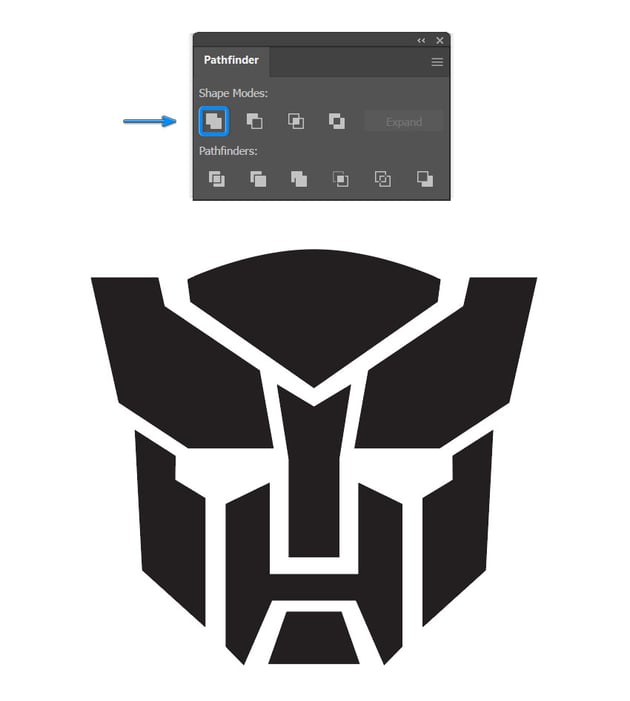
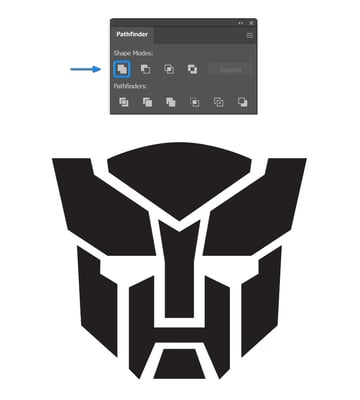
Step 10
Select all the shapes, and then go to the Pathfinder panel and select Unite.

7. How to Apply a Gradient to the Autobot Transformer Logo
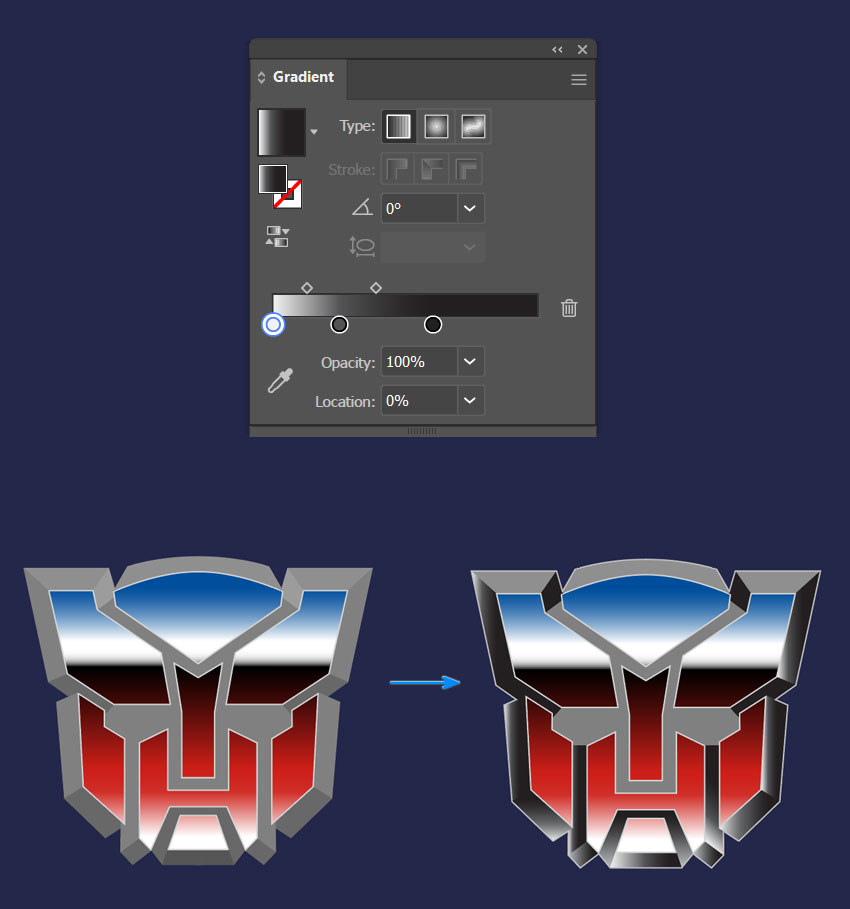
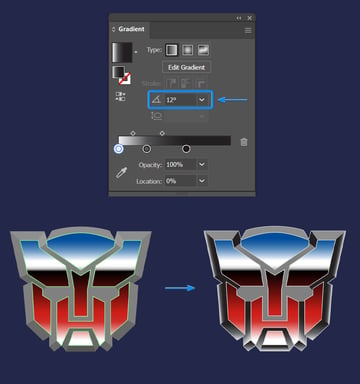
Step 1
Now let’s apply the same gradient that we used on our letters, to the Autobot Transformers logo. You can do this simply by selecting all the shapes and then using the Eyedropper Tool (I) to click on the gradient.
As a reminder, here are the settings for the gradient we used:
- Type: Linear Gradient
- Angle: 90°
- Opacity: 100%
- Color stop 1 – Color:
#FFFFFFLocation: 4.8% - Color stop 2 – Color:
#D0302ALocation: 20.7% - Color stop 3 – Color:
#CC1F18Location: 29.3% - Color stop 4 – Color:
#000000Location: 65.8% - Color stop 5 – Color:
#FFFFFFLocation: 75.1% - Color stop 6 – Color:
#004E9BLocation: 95.15%

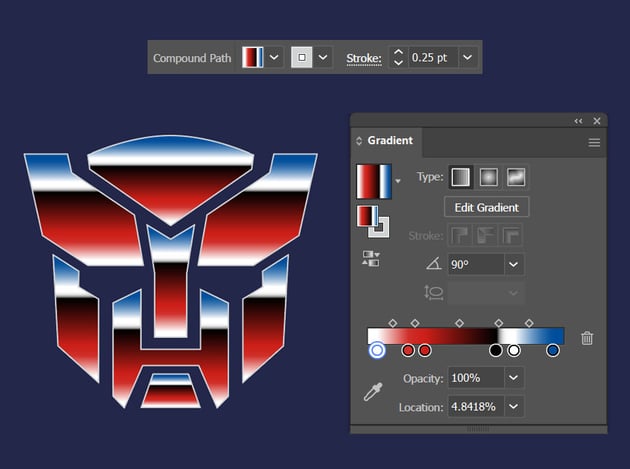
Step 2
With all the shapes selected, go to Object > Compound Path > Make. This combines multiple selected paths into a single path, which will allow us to apply the gradient across all the shapes at once.

Step 3
Now we’ll use the Pen Tool (P) again to draw out the outer shapes of the Autobot Transformers logo. Follow the steps below whilst using the Direct Selection Tool (A) to adjust the anchor points and refine the shapes.
You can create these shapes on a different layer below this one if it helps, so that they do not overlap with the top design. Otherwise, you may have to spend a lot of time arranging the shapes.
Remember: when you’ve completed the first half, simply duplicate all the objects by copying (Control-C), pasting (Control-V), and then flipping (Right-click > Transform > Reflect > Vertical). Then move them into place.


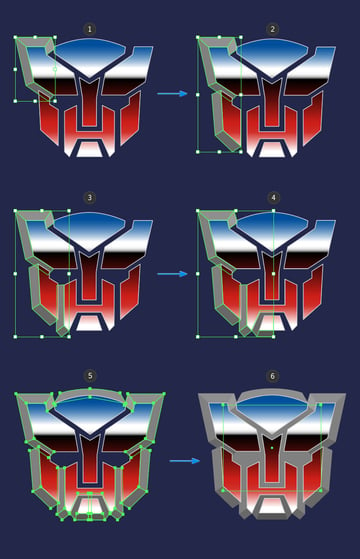
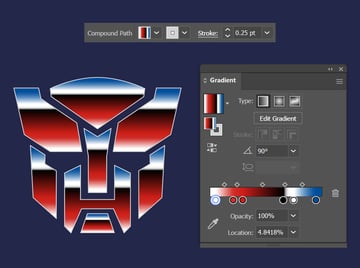
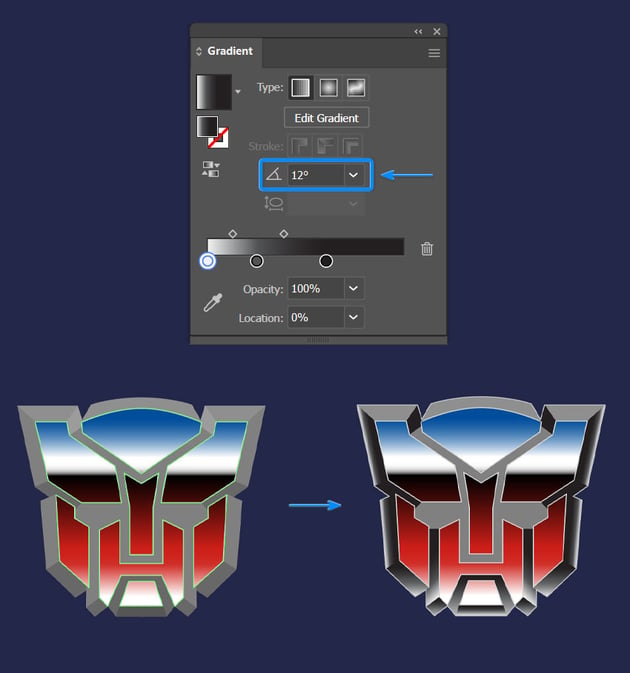
Step 4
After completing all the outer shapes, apply the bevel gradient in the same way you did for the letters. Here’s a reminder of the gradient settings:
- Type: Linear Gradient
- Angle: 90°
- Opacity: 100%
- Color stop 1 – Color:
#F1F2F2Location: 0% - Color stop 2 – Color:
#939598Location: 100%
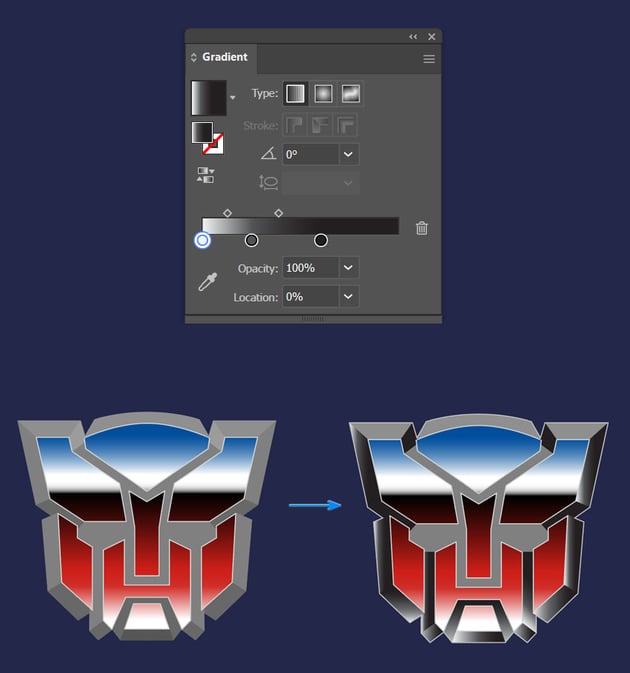
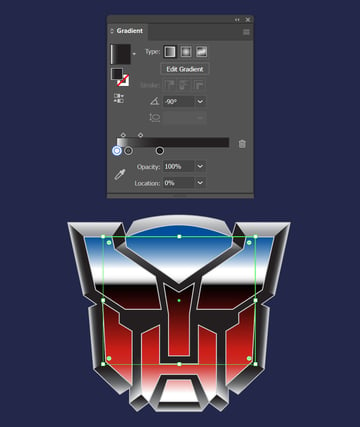
Step 5
Adjust the gradient angle for each shape, so that it appears similar to the image below.

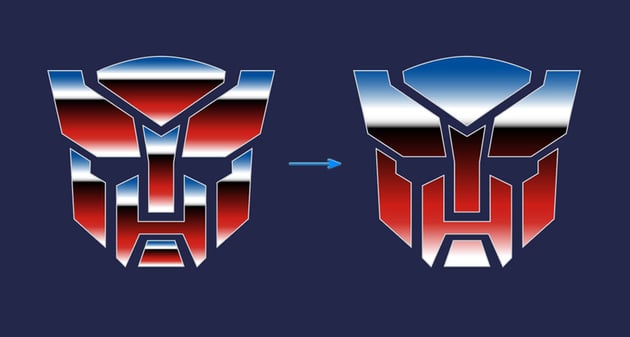
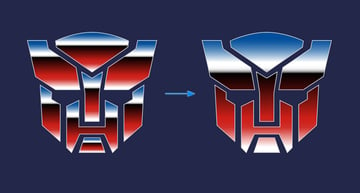
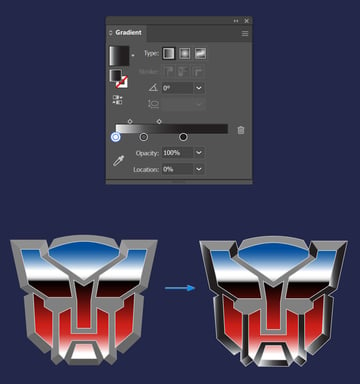
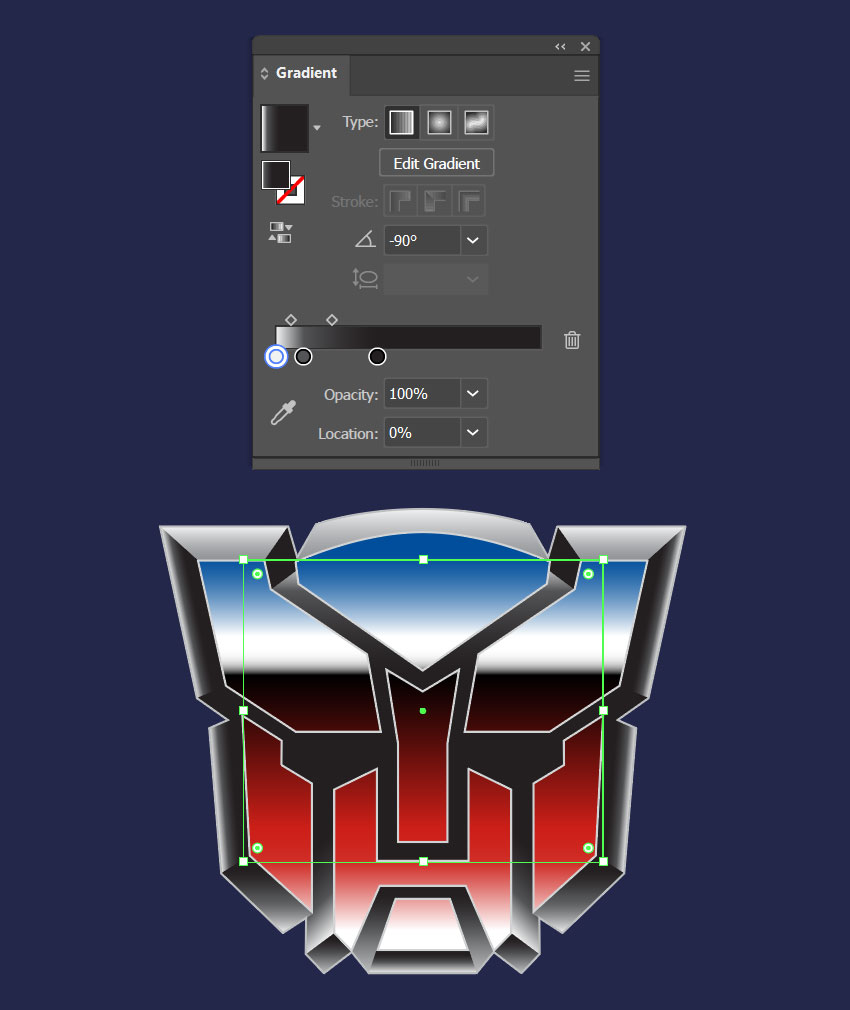
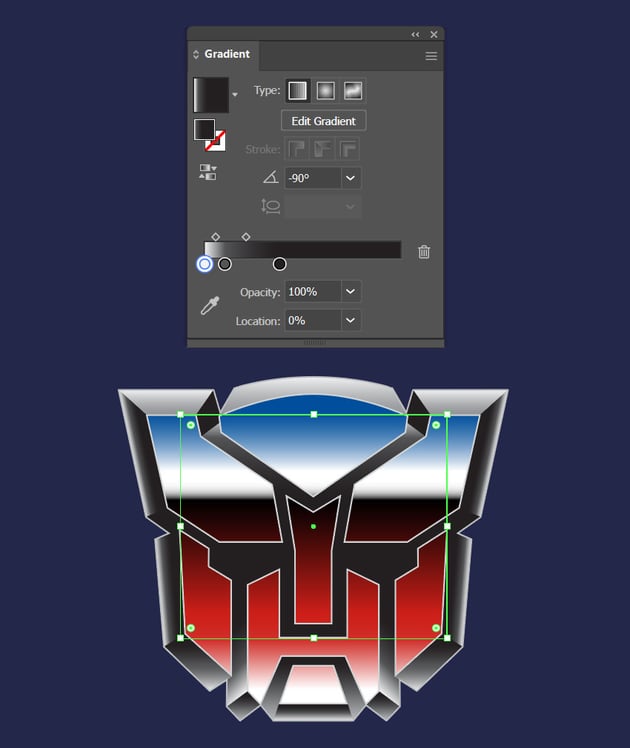
Step 6
For the inside shape, we’ll use a different gradient so that the eyes remain dark:
- Type: Linear Gradient
- Angle: -90°
- Opacity: 100%
- Color stop 1 – Color:
#F1F2F2Location: 0% - Color stop 2 – Color:
#535456Location: 10.3% - Color stop 2 – Color:
#231F20Location: 38.5%
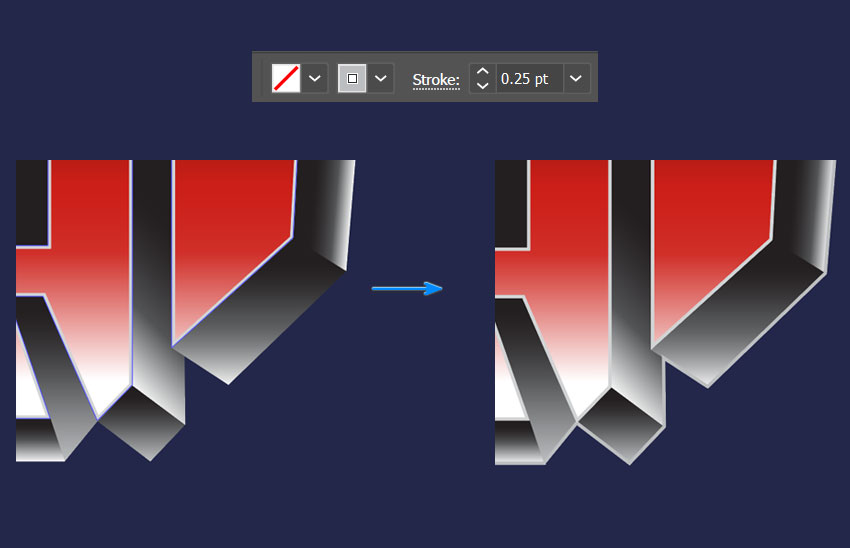
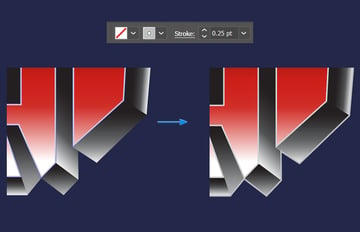
Step 7
Now add a 0.25 light grey D1D3D4 stroke around the letters to complete the look.

Step 8
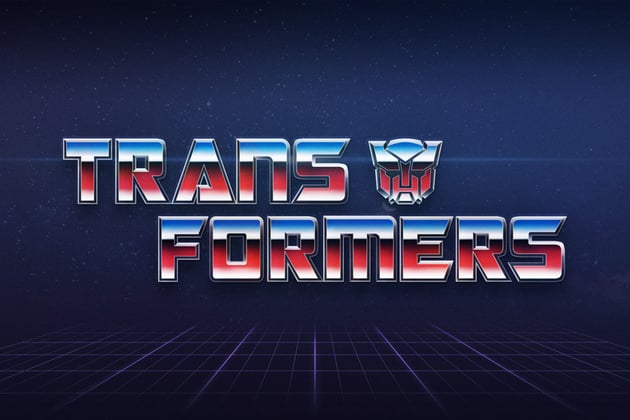
Once you’re happy with the way your Autobot symbol looks, add it to the rest of the text to complete the logo.


Conclusion
Congratulations, you’ve successfully created the classic Transformers logo in Adobe Illustrator! You’ve channeled your inner Cybertronian and crafted a piece of pop culture history. This project not only helps you practice fundamental Illustrator skills but also serves as a way to pay homage to one of the most iconic franchises in the world.


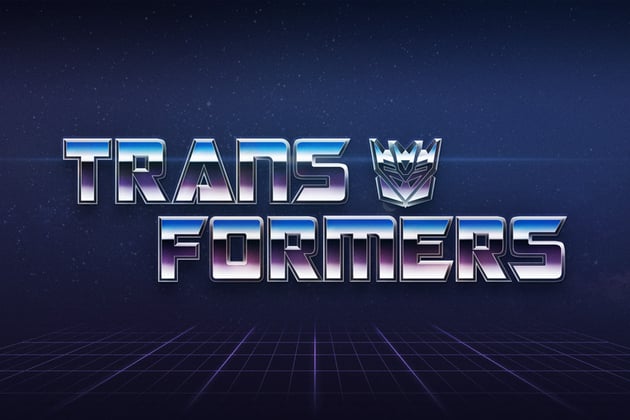
If you’re feeling inspired, you can use the same skills to create the Decepticon version of the logo. Follow similar steps, but adjust the shapes and colors to match the menacing look of the Decepticon insignia. Experiment with different shades of purple and sharp, angular lines to capture the essence of the Decepticons, led by the formidable Megatron.


Now that you know how to draw the Transformers logo, feel free to experiment with backgrounds you create yourself, or alternatively you can save time and download professionally crafted ones from Envato. Till next time, transform and roll out!
Popular Text Effects From Envato
Looking for a quick way to make retro-themed, sci-fi text effects in Illustrator or Photoshop? Well, look no further than Envato, where you’ll find a wide range of different and imaginative fonts, logos, graphics, and much more, all in one place. You can download as many as you want with a simple subscription. Let’s take a look!
80s Retro Text Effect (PSD)
Revitalize your designs with the 3D 80s Retro Text Effect from Envato! This vibrant, neon-infused text effect brings the energetic spirit of the 1980s to your projects. It’s perfect for posters, social media, and event flyers. It features a fully layered PSD and smart object replacement.