In part three of this series we’re going to get our hands dirty and start building a site for a fictitious podcast site: “Matcha Nerdz”. We’ll be using Middleman, Bourbon, Neat and Bitters. Let’s go!
In This Post
- Roadmap
- Basic Blog Setup
- LiveReload
- Organizing Posts
- GitHub Pages Deployment
- Smarter Assets
- Bourbon Setup
- Normalize and jQuery
Roadmap
Let’s start with a little heads-up of where this is going. Over the next couple of articles I’m going to build a small static site for a fictitious podcast called “Matcha Nerdz”—a podcast for people who want to dive into all things powdered green tea. It will have the following pages:
- A page for each tag
- A detail page for every episode
- An index page for previous podcasts
We will use Middleman for generating the static site and the Bourbon suite for all the styling. I hope that you have taken a look at my previous tutorials about Bourbon, Neat and Middleman before you arrived at this point. If not, I recommend you go and read them, unless you feel confident enough in the basics already.
For all things relating to styling, I’ve been heavily relying on Bourbon for quite a while. Also, I really dig the indented Sass syntax—I far prefer it to the .scss syntax. The .sass syntax is the only (probably) unfamiliar bit I would like throw at newbies, because I feel it’s really worth getting to know.
Basic Blog Setup
Let’s initiate a new app for our podcast site, by entering in the terminal:
middleman init matcha_nerdz
and then changing to our project directory:
cd matcha_nerdz
Now we’ll get Git going:
git init
# => to initiate new Git repo

git add --all
# => adds all the files for staging

git commit -m 'Initital commit'
# => commits changes
Next we add the blog template to the mix. This is a good basis for our podcast site. Later we will adjust the articles to display podcast audio tracks from SoundCloud. For now, however, it’s just a blog.
In the Gemfile add:
gem "middleman-blog"
Then via the terminal:
bundle
# or
bundle exec middleman
middleman init --template=blog
This will update your “matcha_nerdz” folder. “.config.rb” and your index template get a little update as well. On top of that you get new templates for your feed, tags page, calendar page, an example article and a new layout. Check the output from the terminal:
identical  .gitignore
   update  config.rb
    exist  source
   create  source/2012-01-01-example-article.html.markdown
   create  source/calendar.html.erb
   create  source/feed.xml.builder
   update  source/index.html.erb
   create  source/layout.erb
   create  source/tag.html.erb
    exist  source/stylesheets
    exist  source/javascripts
    exist  source/images
Git:
git add --all
git commit -m 'Adds blog template'
Creating New Articles
Now you can create new articles via the command line:
middleman article 'My new fancy second article'
#=> create  source/2015-11-22-my-wonderful-second-article.html.markdown
This creates a new markdown article under “/source”. This isn’t optimal storage-wise but we’ll get there. Fire up your server to see your first example blog article:
middleman
#or
middleman server
Tidying Things Up
Next we need have some housekeeping to do. The blog template created a new layout under “source/layout.erb”. We need to delete the orginal one in “source/layouts/layout.erb” and move the new one to there. So, via the terminal:
rm source/layouts/layout.erb
mv source/layout.erb source/layouts/
We also need to update the new “layout.erb” with stuff that was deleted in the layout file. Add the following to your <head> tag in “source/layouts/layout.erb”:
<meta content="IE=edge,chrome=1" http-equiv="X-UA-Compatible">
<%= stylesheet_link_tag "normalize", "all" %>
<%= javascript_include_tag  "all" %>
Most importantly, this makes sure that your JS and style assets are avaiable.
Git
git rm source/layout.erb
git add --all
git commit -m 'Moves new layout into /layouts
               Adds asset links
               Removes old layout'
LiveReload
To make our lives a tad more convenient we’ll add LiveReload to the mix. We need to grab the gem and then activate it in our “config.rb” file.
In our Gemfile:
gem 'middleman-livereload'
In the terminal:
bundle
Then in config.rb:
#uncomment
activate :livereload
And finally our Git commands:
git add --all
git commit -m 'Activates LiveReload'
With this activated, restart your server and your page will refresh automatically whenever you change content on the page, styles or behaviour. Life saver, trust me!
Attention! A word of caution: If you have another local server running, LiveReload may not play ball. You’ll need to kill that other server for now.
Organizing Posts
When you look where articles are stored right now, you’ll quickly realize that this organization directly under “/source” becomes tedious very quickly. Publish a couple of articles and you’ll be drowning in posts. There’s no need to be that messy–instead let’s create a dirctory under “/source” for all our posts. Move your article(s) in there and let Middleman know where to find them.
mkdir source/posts
mv source/2012-01-01-example-article.html.markdown source/posts/
Then we add “/posts” as a source for the blog articles. In config.rb:
blog.sources = "posts/:year-:title.html"
Then our Git commands:
git rm source/2012-01-01-example-article.html.markdown
# Removes moved file from repo

git add --all
gco -m 'Adds new folder for posts and adds source in config.rb'
And that’s it. Nothing should have changed and you should see the example article as before. Storage of posts, however, is a lot more sane. What’s also cool is that if you create new articles via the command line, your new posts will get stored in “/post” automatically:
middleman article 'My awesome 3rd article'
# => create  source/posts/2015-my-awesome-3rd-article.html.markdown
GitHub Pages Deployment
For me, pushing static sites to GitHub Pages is such a convenient solution that I don’t want to put you through deploying via Heroku or Amazon’s S3 service. Let’s keep it simple!
In the Gemfile:
gem "middleman-deploy"
Then in the terminal:
bundle
We need to add a deploy block to “config.rb”:
activate :deploy do |deploy|
  deploy.method = :git
  deploy.branch = 'gh-pages'
  deploy.build_before = true
end
In order for GitHub Pages to find your CSS and JS assets we’ll need to activate the following in config.rb as well:
configure :build do
  activate :relative_assets
end
Then, create a repo on GitHub, add the remote and deploy:
git remote add origin https://github.com/yourusername/repositoryname.git

middleman deploy
Boom! Your site is live under “yourusername.github.io/projectname” and your assets should be sorted out. I love this process—it couldn’t be easier and more user friendly. Great job GitHub!
git add --all
gco -m 'Adds setup for GitHub Pages deployment'
Smarter Assets
In the last step before we get into the Bourbon setup, I’d like to get rid of the styles that come with Middleman, and optimize our assets for a better performance in the browser—asset minification and concatenation. Go to “source/stylesheets/all.css” and delete its content. Just keep the first line:
@charset "utf-8";
Git commands:
git add --all
git commit -m 'Removes unneccessary Middleman styles'
Next we want to activate a couple of options to optimize for performance in “config.rb”:
configure :build do
  activate :asset_hash
  activate :minify_javascript
  activate :css
  activate :gzip
end
Then, again, Git commands:
git add --all
git commit -m 'Activates performance optimizations'
Let me quickly explain what we did here:
At the moment, gzip is the most popular and effective compression method. Its compression algorithm finds similar strings within a file and compresses them. For HTML, which is full of white space and matching tags, this is very effective and typically reduces the HTTP response size by a whopping 70%. Activating this not only gzips your HTML, but also CSS and JS files. During a build, Middleman creates your files as usual, but also duplicates them with a “.gz” version. When a browser gets in touch with your files, it can choose if it prefers to serve gzip compressed files or regular ones. gzipping is supported heavily by web and mobile browsers.
This process strips out all unneccessary junk from your styles and reduces their file size significantly. In short, your CSS becomes one big blob—optimized for being read by a machine. Definitely not friendly on the eyes.
This is the same as minify_css, but a bit more involved and sophisticated.
This activates hashing of your assets. It means that your asset filenames change and receive some extra information (during the build process) which informs browsers if they need to re-download assets or not. Now, the name of a file is dependent on the contents of that file. Hashed assets get cached by browsers and your sites get rendered faster. Another word for this is “fingerprinting” because it provides a simple solution to inform browsers whether or not two versions of a file are indentical. The deployment date does not matter—only the contents. Take a look below how hashed assets’ files look:
Screenshots
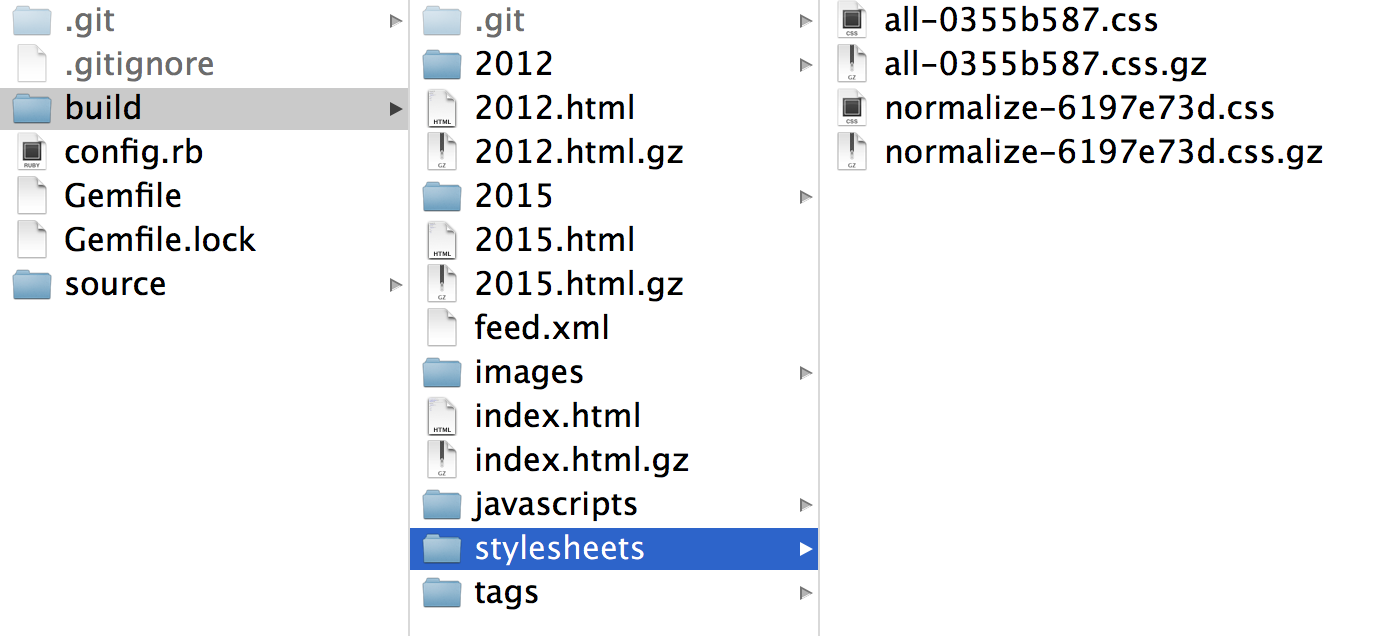
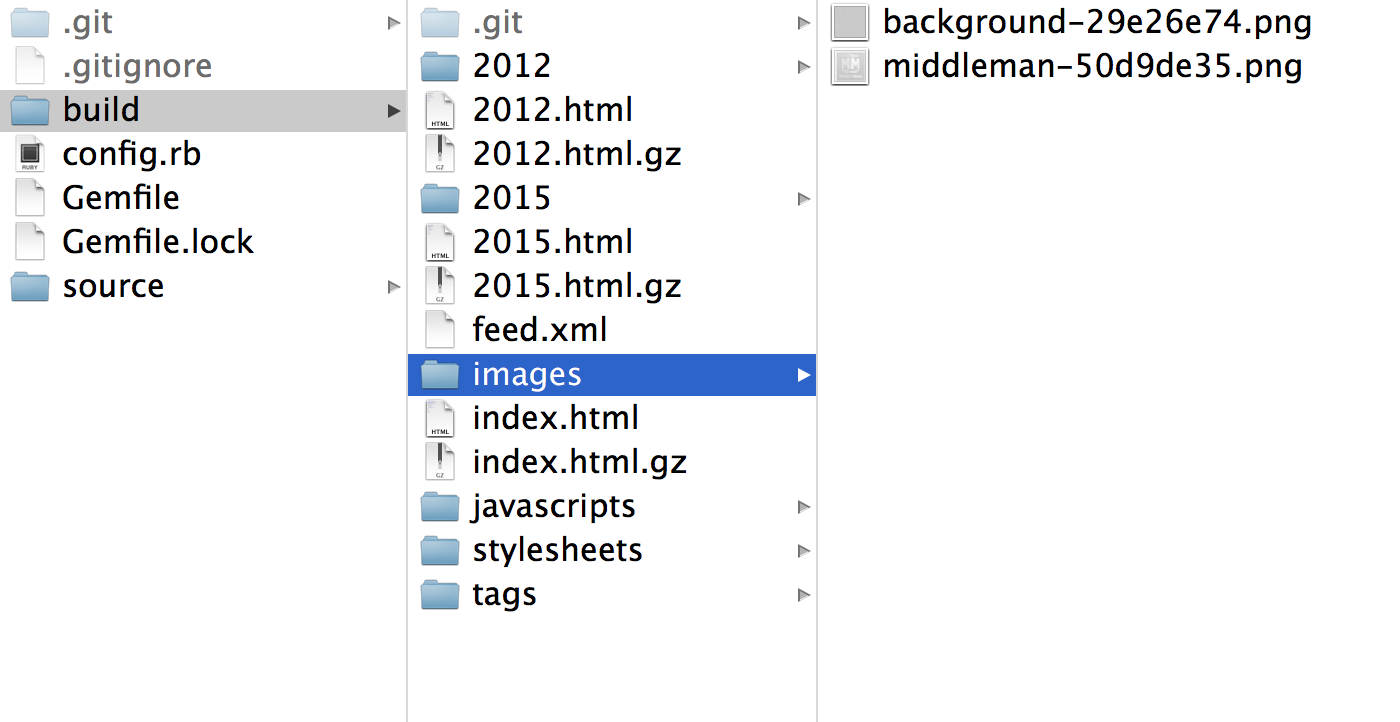
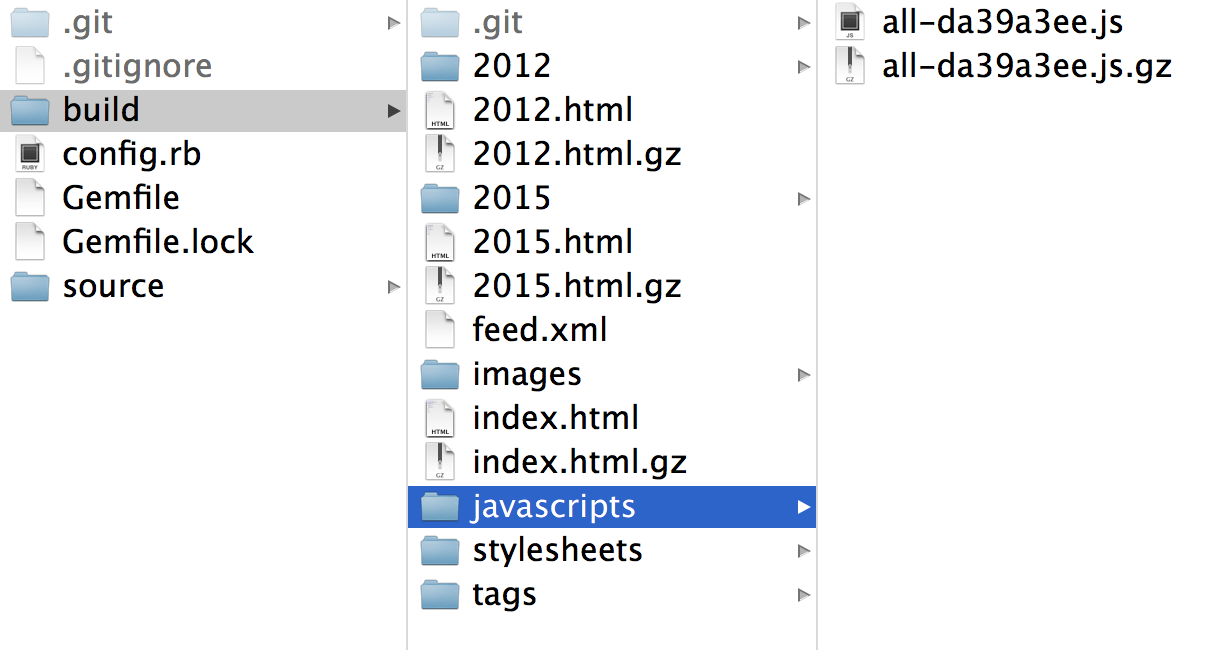
This looks nasty, but now your images, stylesheets and JavaScript files get a unique name through this added “random” code: a (unique) hash. Every time you change an asset and go through the build process again, this hash changes, which in turn signals to browsers that then, and only then, they need to re-download that particular file. The file is then effectively expired, a process known as “cache busting”.
Also worth mentioning: you can refer to your files the same way as before, but during build the references in your HTML get updated to use these hashed names. Take a look:
“/build/index.html(.gz)”:
<!doctype html>
<html>
  <head>
    <meta charset="utf-8" />
    <meta http-equiv='X-UA-Compatible' content='IE=edge;chrome=1' />
		 <meta content="IE=edge,chrome=1" http-equiv="X-UA-Compatible">
    <title>Blog Title</title>
    <link rel="alternate" type="application/atom+xml" title="Atom Feed" href="http://webdesign.tutsplus.com/feed.xml" />
    <link href="stylesheets/normalize-6197e73d.css" rel="stylesheet" type="text/css" /><link href="stylesheets/all-0355b587.css" rel="stylesheet" type="text/css" />
    <script src="http://webdesign.tutsplus.com/javascripts/all-da39a3ee.js" type="text/javascript"></script>
  </head>
  <body>

  ...
In your “/build” folder, JS and CSS files get referenced with the hashed asset names automatically. As a result of this hashing business, when you go through different pages in the same session, or revisit a page again later, these assets have been cached and don’t need to be requested again—until you change something. This process cuts down your number of requests by a staggering amount. Isn’t that cool? All of that with one line of code in “config.rb” and some Sprockets wizardry. Booyakasha!
The key with all these asset optimization techniques is to minimize the number of requests and the request size of your files and assets. Middleman offers great performance boosts, right out the box, with little work on your end.
Note: GitHub Pages has everthing gzipped and minified out of the box. But it doesn’t hurt to make sure everything is in place—especially if you later decide to host your app somewhere else.
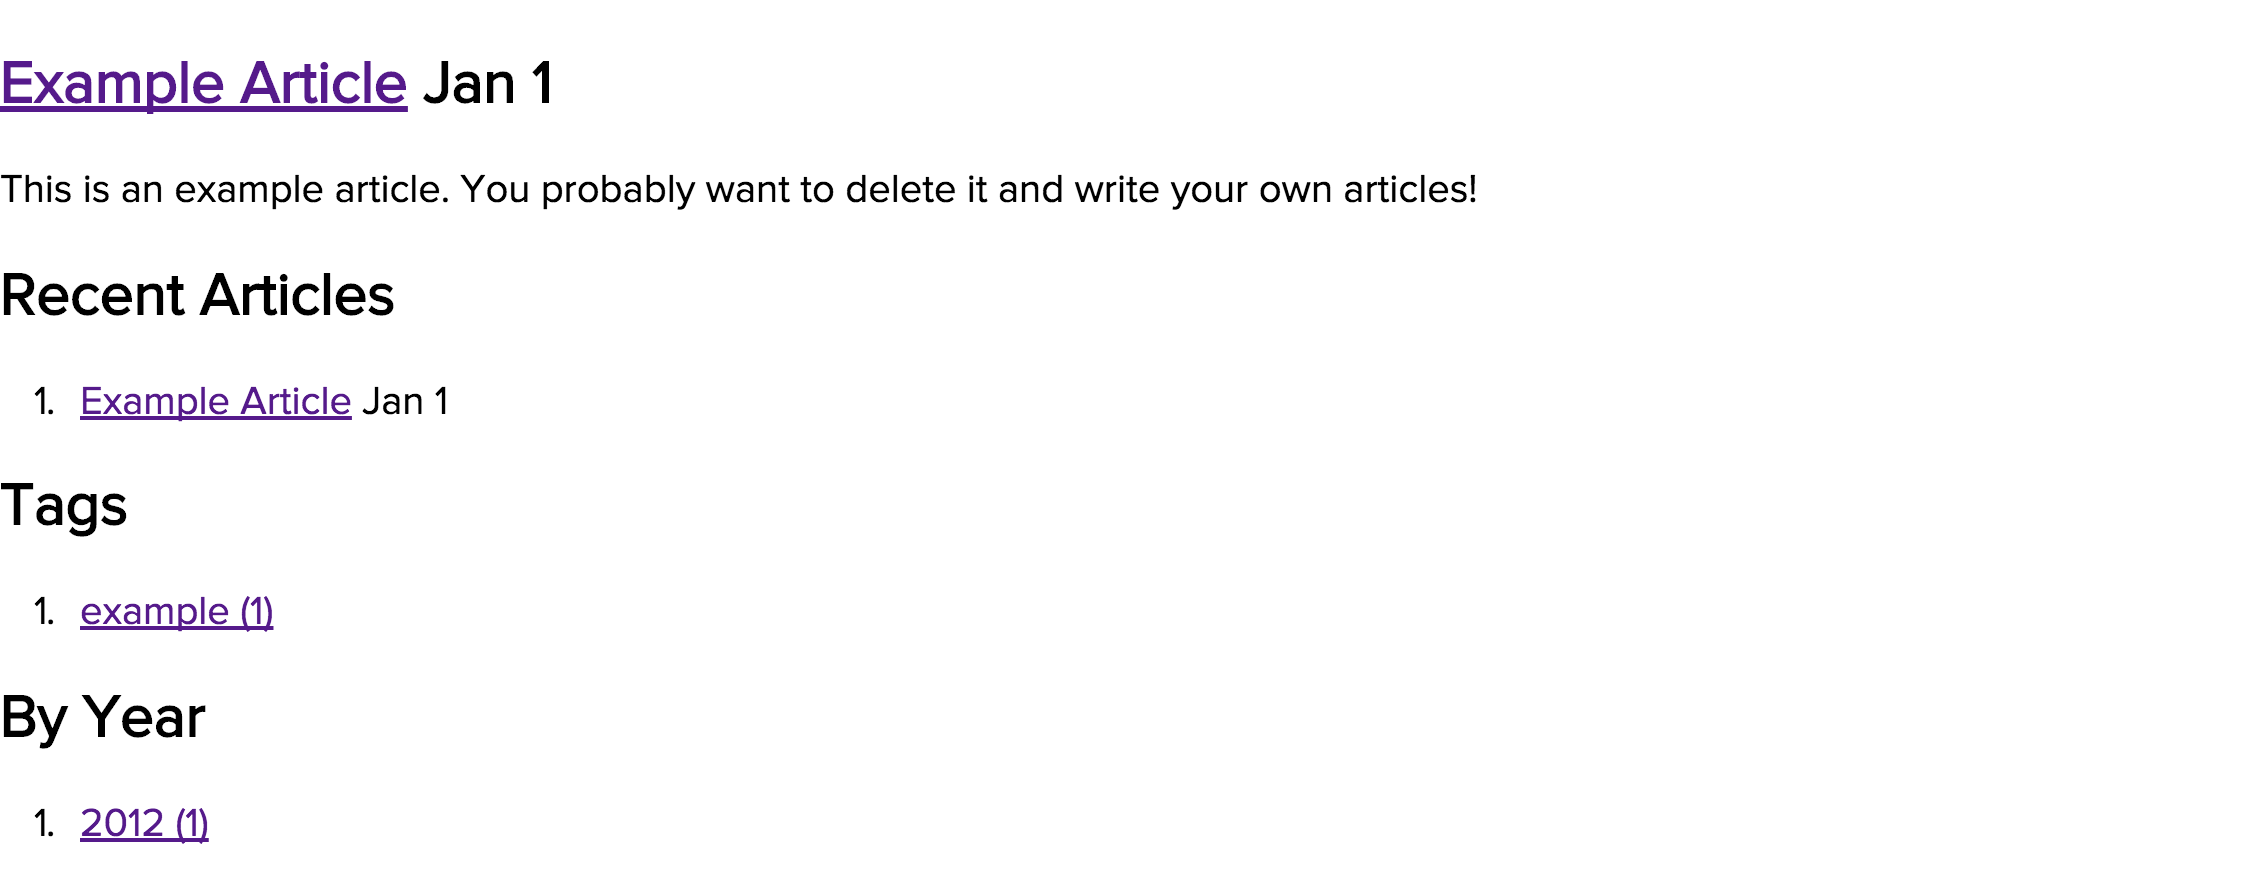
Let’s have a look at our current stage. Your index page should look pretty barebones now:
Bourbon Setup
For this project I want to use three gems from Bourbon:
Let’s add them to our Gemfile and bundle:
gem 'bourbon'
gem 'neat'
gem 'bitters'
In the terminal:
bundle
Bourbon and Neat are now good to go (almost). Bitters needs to install a few things first. We need to change into the stylesheets directory and activate a generator that places a bunch of Bitters files in a “/base” folder.
cd source/styleheets
bitters install
Take a look what we have after this:
Screenshot
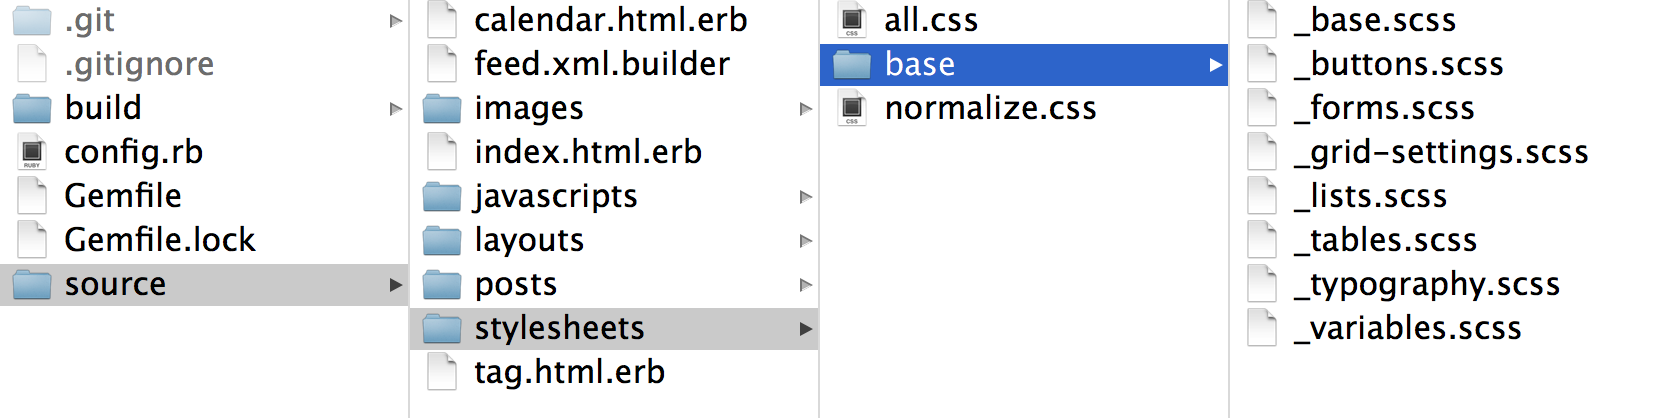
Bitters is something of a baseline for your designs. It gives you a couple of sane designs for UI elements like buttons, type, forms, error messages and so on. Bitters also prepares a “grid-settings” file for your Neat grid which we also have to set up by uncommenting the following line in “source/stylesheets/base/_base.scss”:
@import "grid-settings";
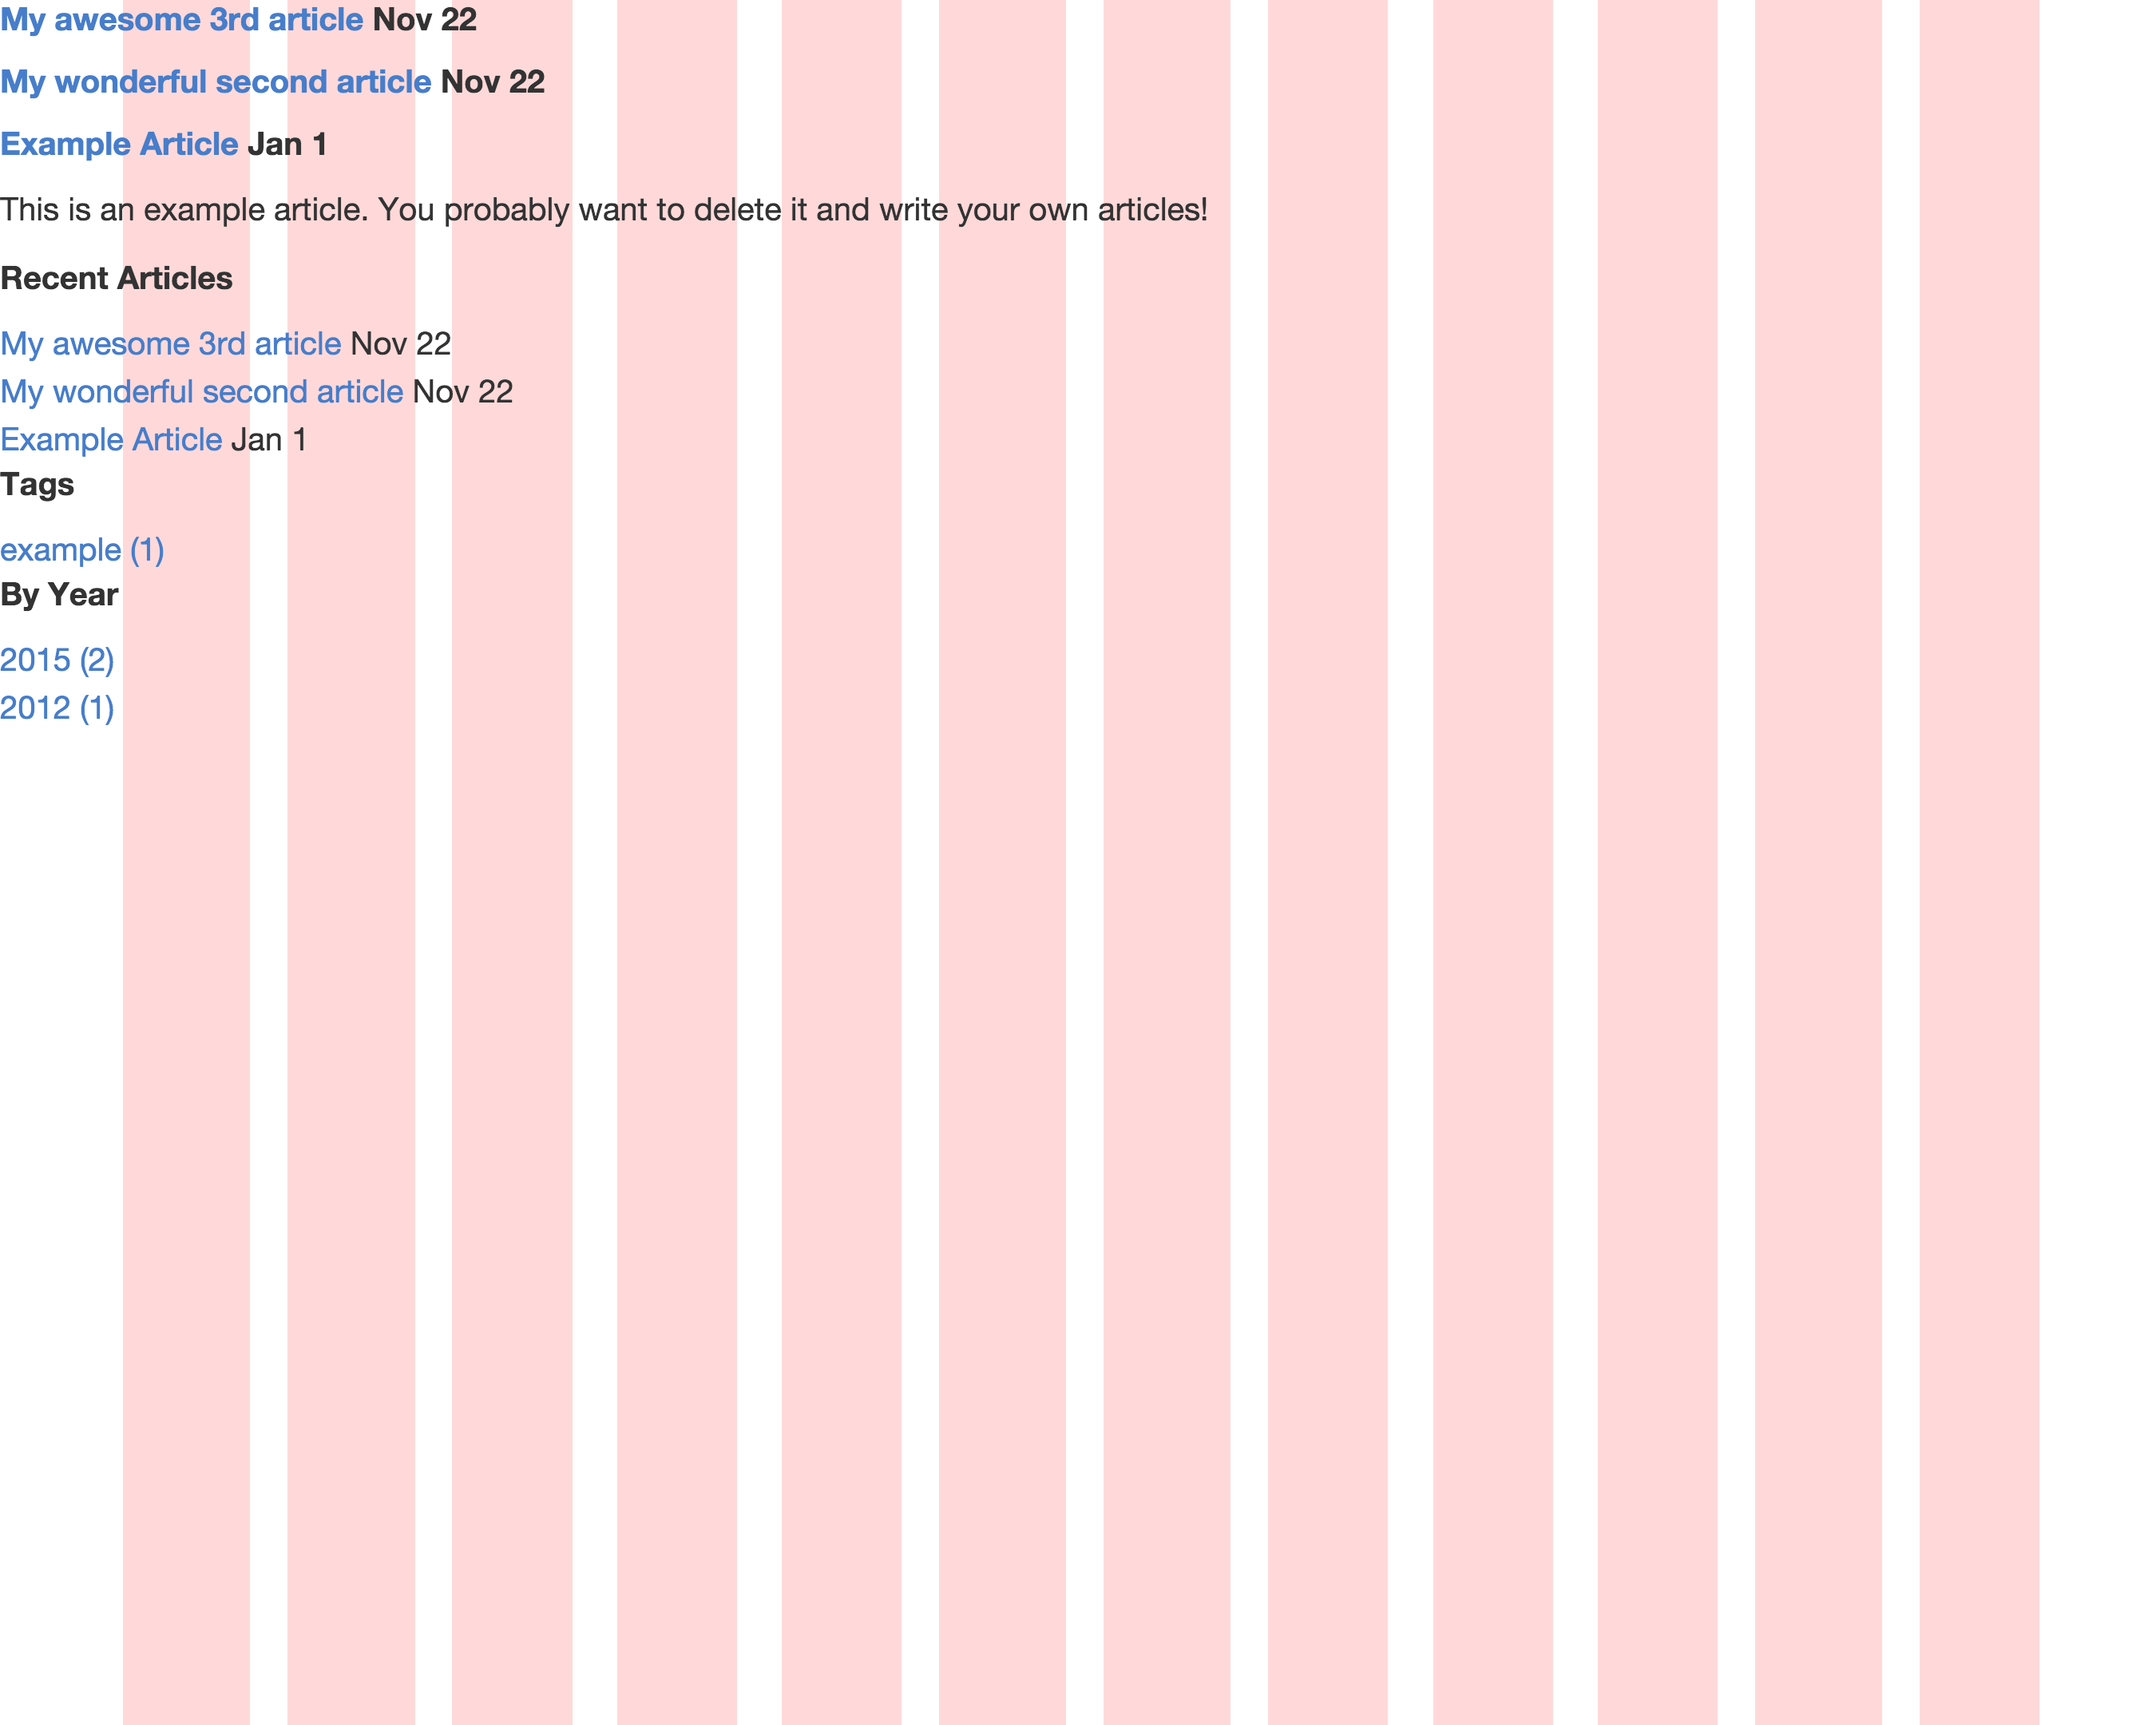
To complete our Bourbon settings for now I’d like to add the following variables to our grid-settings. They lay the groundwork for sizing our grid and activate a visual grid which helps us to better align our design.
In “/source/stylesheets/base/_grid-settings.scss”:
$column: 90px;
$gutter: 30px;
$grid-columns: 12;
$max-width: 1200px;

$visual-grid: true;
$visual-grid-index: back;
$visual-grid-opacity: 0.15;
$visual-grid-color: red;
The final step to make this work is to rename “/stylesheets/all.css” to “/stylesheets.all.sass” and import our Bourbon files.
Note: Since we switched to the indented Sass syntax, we also need to kill the semicolon at the end of the @charset line.
“all.css.scss”:
@charset "utf-8"

@import 'bourbon'
@import 'base/base'
@import 'neat'
We import Bitters’ base file here right after Bourbon because we need access to Neat’s grid-settings file (which is in the “/base” folder) before we import Neat.
Git:
git add --all
git commit -m 'Sets up Bourbon and activates grid settings'
Let’s have a look! You can see the red visual grid and, also thanks to Bitters, our typography has improved a bit beyond browser defaults. Take a look at a screenshot:
Normalize and jQuery
Middleman comes with a Normalize file which gets imported into “all.css” by default. This is one unneccessary asset request we can easily get rid of, so rename “source/stylesheets/normalize.css” to “source/stylesheets/_normalize.css.scss” first. Now we have a partial that we need to import right at the top after @charset in “source/stylesheets/all.sass”:
@charset "utf-8"

@import 'normalize'

@import 'bourbon'
@import 'base/base'
@import 'neat'
@import 'normalize'
One thing we shouldn’t overlook is the link for our stylesheets in our layout. Since we’re using Sass partials that all get imported into a final, “global” stylesheet, we do not need a link to normalize.css anymore—a link to all.sass is enough.
In “source/layouts/layout.erb”:
<%= stylesheet_link_tag "all" %>
And then Git:
git rm source/stylesheets/normalize.css
git add --all
git commit -m 'Imports normalize partial properly'
Finally, before we take a break, we should add jQuery which we’ll need later on. In the Gemfile:
gem "jquery-middleman"
And in the terminal:
bundle
Since I want to use CoffeeScript for this project, we need to rename “source/javascripts/all.js” to “source/javascripts/all.coffee”. In there we require jQuery for Sprockets / Asset Pipeline and we’re all set.
In all.coffee:
//= require jquery
Our Git commands:
git rm source/javascripts/all.js
git add -all
git commit 'Adds jQuery to the Mix
            Renames gobal js file to coffee'
And deploy:
middleman deploy
After deploying, open your site on GitHub Pages to see if everything works as expected. Nice job!
Break
Phew! Let’s take a break. We managed to get quite a few boring setup steps out of the way with this one. Hopefully you were given a clear picture of what you need for a solid basis when you start a new Middleman project. Next we’ll expand on what we’ve built here and continue working towards a decent site for our podcast.