The way web designers are using Photoshop is changing; pixel perfect comps are less relevant than they were a year or two ago. However, Photoshop is still an invaluable design tool and using its features properly is as important as ever. The following tips will help you master working with layers.
A Quick Word About Best Practices
Layers are a classic culprit where project disorganization is concerned. By handing over a PSD to a colleague, you have to assume they can understand and work with what you’ve given them. This means having well managed layers, color coding, proper labelling, grouping, efficient and non-destructive techniques, tidying up and so on.
These aspects are all very important, but we’re not going to dwell on them here. Instead, we’re going to focus on techniques and skills which will speed up your personal workflow.
Duplicate Layer Within Another PSD Document
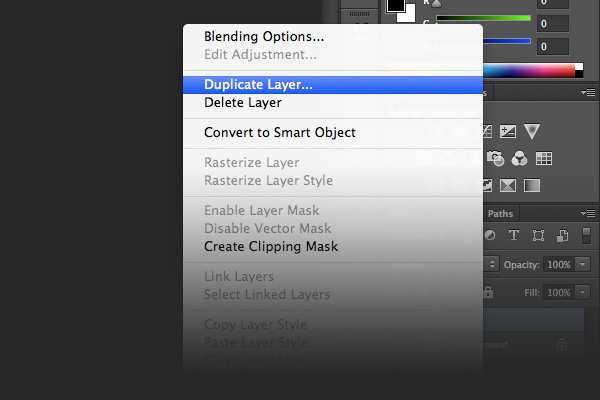
Dragging and dropping is most commonly relied on for this, but there’s a cleaner and more reliable way. To create a copy of your current layer and have it appear in the exact location in a different Photoshop document, right-click on the layer that you want to copy, and choose Duplicate Layer. When the dialog appears, choose the Destination from the Document list, then click OK.
For example, I’ve created a document containing a layer with a logo. I’d like to duplicate this logo within another document.

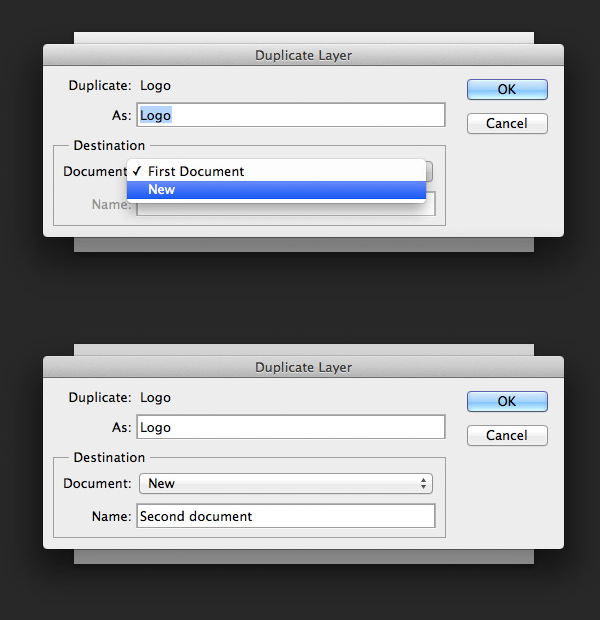
Following the steps above, I’m presented with the Duplicate Layer dialog.
Here it’s possible to select an existing open document, or create a new one. In this case I’ll create a new document.

That’s it! This technique can be really helpful when working with a bunch of layers which you need to export (such as creating sprite sheets).
Remove Default “copy” Extension
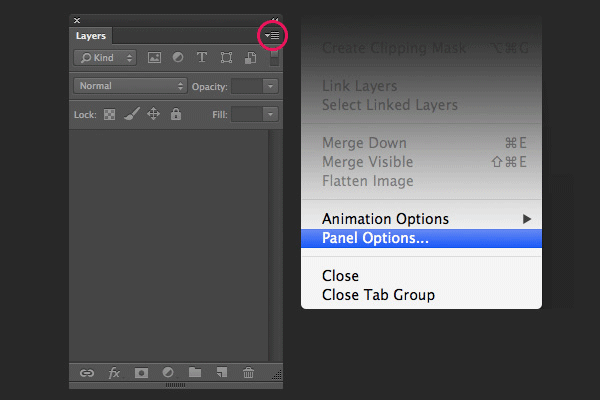
When you duplicate a layer in Photoshop, by default its name will be appended with “copy”. This is one of those defaults which niggles me, so I like to change it. To disable this default click on the little menu icon in the top right corner of the layers pannel and go to Panel Options.
In the resultant pop-up window uncheck Add “copy” to Copied Layers and Groups.
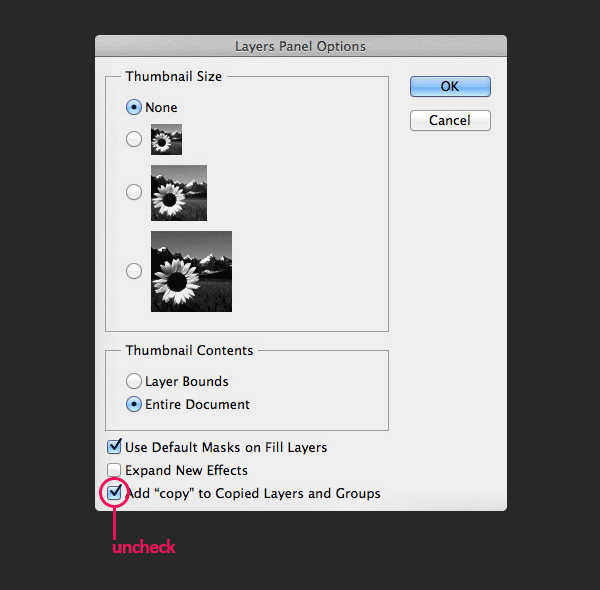
There are a few other useful panel options too..
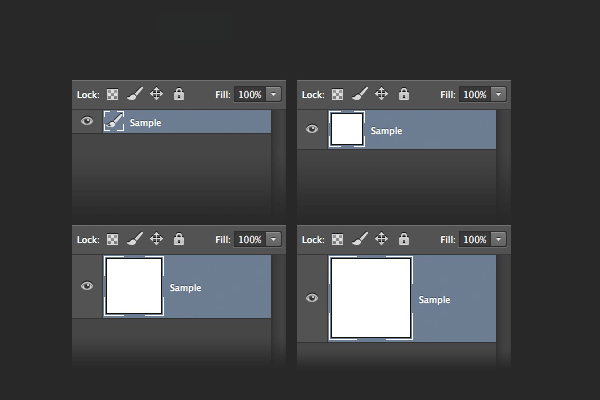
Thumbnail Size
Handy if you’re visually inclined, this option allows you to change the thumbnail size in the Layers Panel.
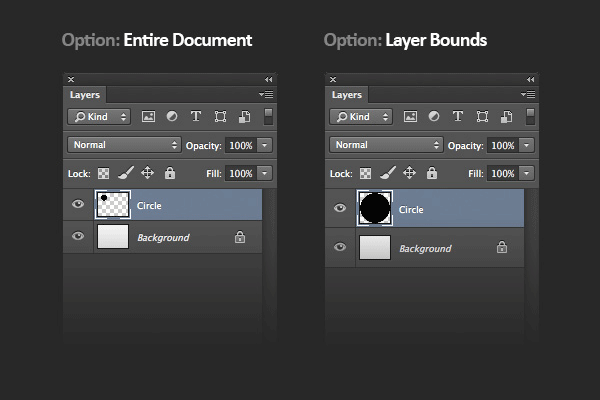
Thumbnail Contents
Semi-related to the previous option, this option will help you visualize the contents of a layer. Say, for example, you have a large canvas and a layer containing a small icon. In order to properly see the contents of this layer within the thumbnail, you can switch the setting to Layer Bounds.
In the example below I’ve simulated this with a canvas size of 1600×1200 and simple circle upon it. See the diference?
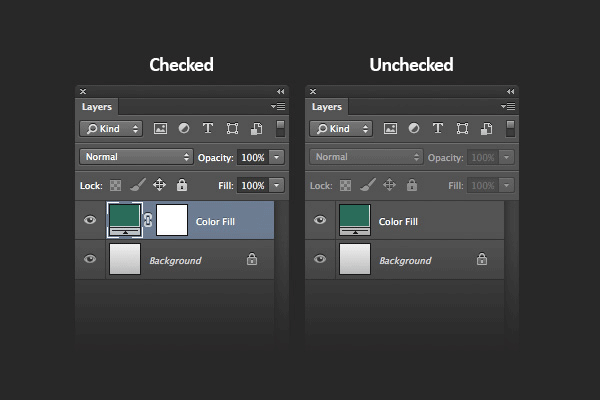
Default Masks on Fill Layer
Would you like to remove that layer mask when you create a fill layer? If so, uncheck the Use Default Masks on Fill Layers option.
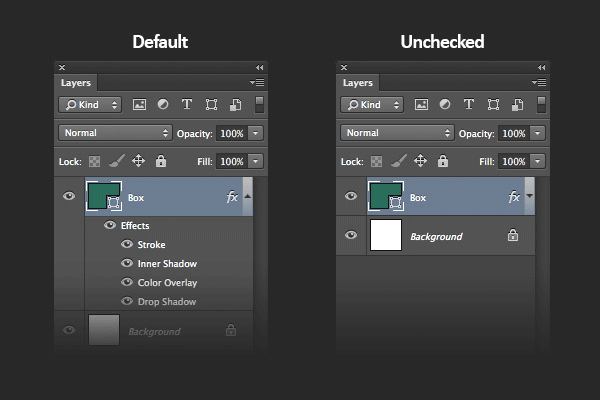
Expand New Effects
Another default which it can be handy to override. Uncheck this option and the next time you apply new layer styles somewhere, the styles will be collapsed when you’re finished. It can be pretty tedious to have to collapse expanded styles every time you’ve created them.
Separating Layer Styles
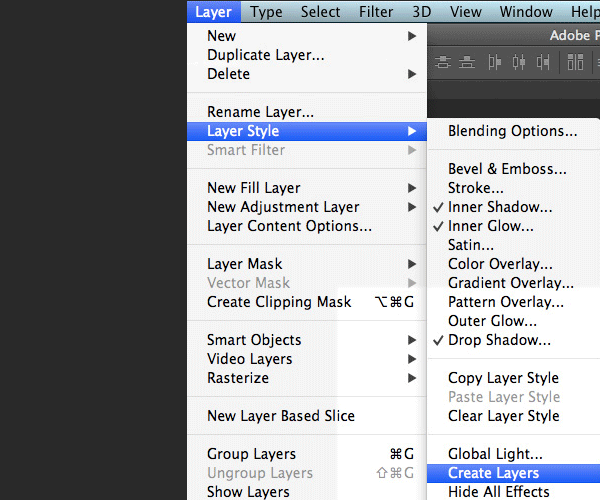
Sometimes referred to as jailbreaking layer styles, this technique allows you to fully manipulate each layer style individually. Select a layer (with styles) then go to Layer > Layer Styles > Create Layers and you’ll observe your styles split away onto layers of their own.
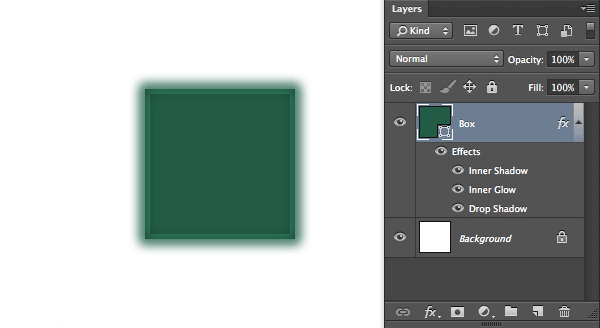
For example, here I’ve created a rectangle shape with a few layer styles.
Let’s say I want to rotate every layer style individually. I apply Create Layers as described above.
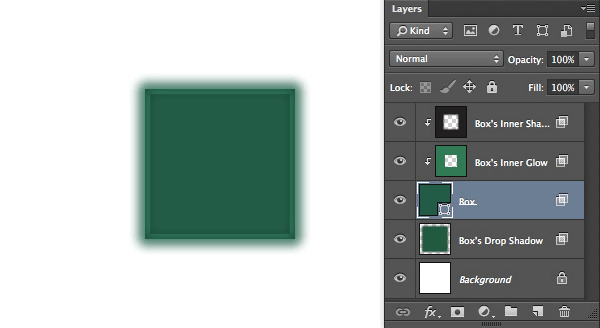
This then separates all the effects, which are still coupled with my layer.
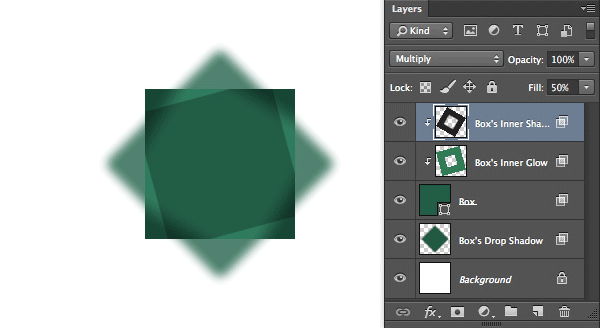
I can now rotate each effect individually.
Note: This is great when using Photoshop, and you can simulate similar effects using CSS Transforms in the browser.
Design Samples Through Layer Comps
This approach is a great alternative to Fireworks’ states. Using Layer Comps allows us to store different layer arrangements, making it really easy to switch between them. Not only can this speed your own workflow up, but also greatly improves presenting a PSD to your clients.
For example, let’s say that I have to create three design samples for a simple button. My client is interested in a sample with a shadow, a second one with an inner glow, then a third with a stroke. Altering the various Blending Options and excluding some of the layer styles each time would be very impractical. Saving Layer Comps allows me to switch between presets, like so:
Go to Window > Layer Comps to open the layer comps panel. Create a layer with some basic styles..
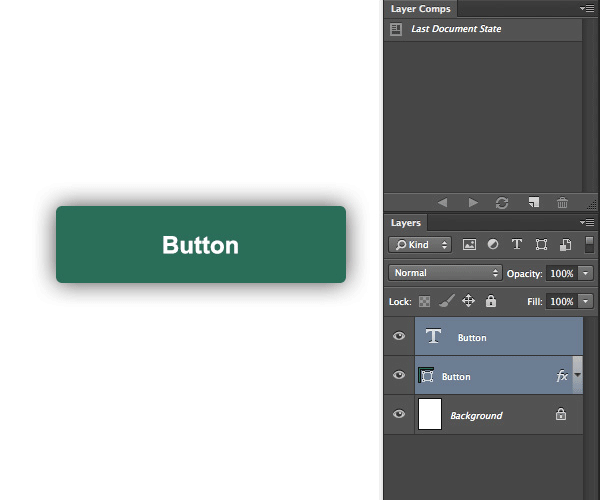
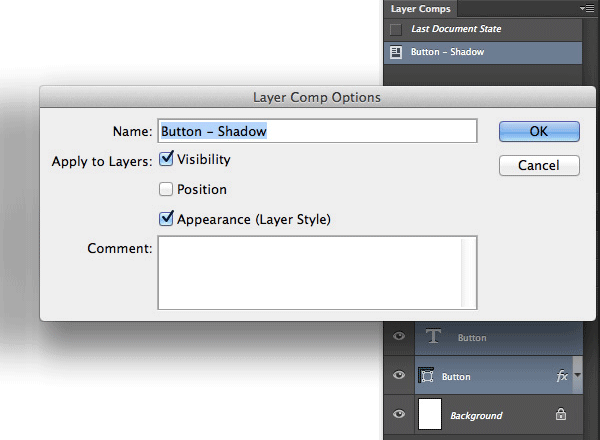
..then save a new comp (the little “new document” icon in the layer comps panel). Enter a name for the comp, check Visibility and Appearance, then add a comment for your own reference.
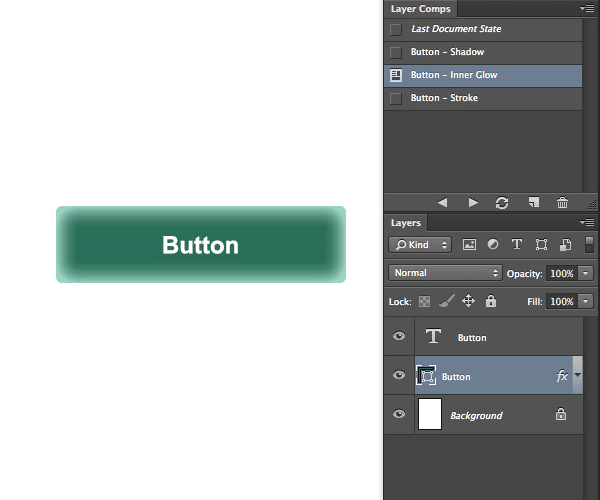
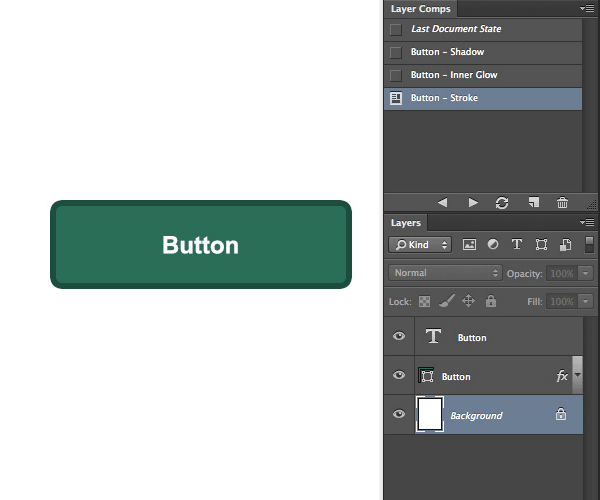
To make a particular layer comp visible, check the comp icon to the left of it.
Align Layers to Selection
This one is one of my favorites when working with bunch of layers and pixel perfection is important.
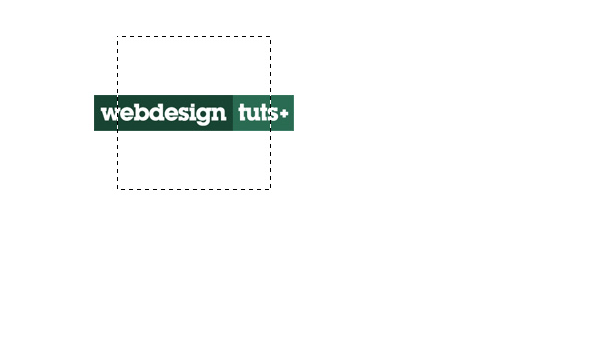
If, for example, I want to center a layer in a specific position but I don’t have anything to align with, I can use the selection tool.
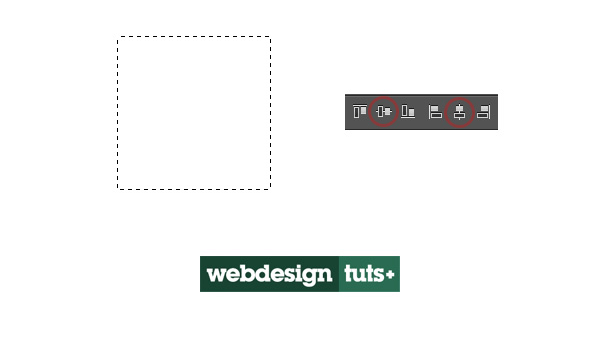
Create a selection with the Rectanglular Marquee Tool. Select the layer you want to align, select Move Tool (V) and use one of the align options in the top toolbar.
Useful Shortcuts
Photoshop provides a plethora of keyboard shortcuts to speed up your workflow. Memorize these five examples and you’ll become lightning fast when working with layers.
- New Layer: Cmd/Ctrl + Alt + Shift + N
- Duplicate Layer: Cmd/Ctrl + J
- Group Layers: Cmd/Ctrl + G
- Create/Release Clipping Mask: Cmd/Ctrl + Option + G
- Merge Layers: Cmd/Ctrl + E
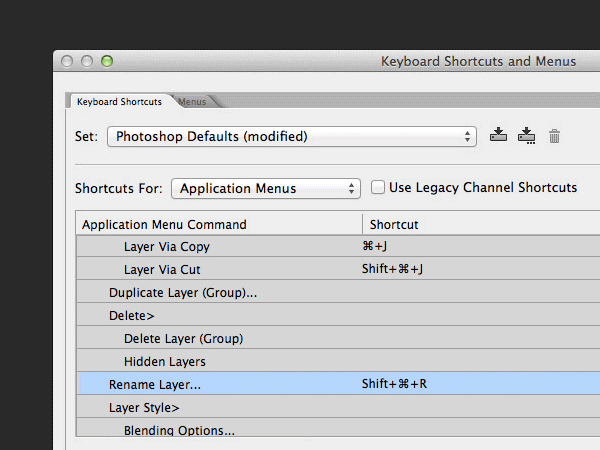
Quick Tip: Create Your Own Shortcut
To define your own shortcuts, simply go to Edit > Keyboard Shortcuts, but be wary that you don’t overwrite any default shortcuts.
For example, I want to create a shortcut for “Rename Layer” and for that I want to use the combination Cmd/Ctrl + Shift + R. Firstly I go to Edit > Keyboard Shortcut, then under the Layer tab I click on Rename Layer then press the button combination (Cmd/Ctrl + Shift + R) and click Accept. That’s it! You can use as many custom shortcuts as you want.
Conclusion
Manipulating layers properly and quickly is a fundamental skill for Photoshoppers. It speeds up workflow and improves the collaboration process when working in a team. If you know of any other layer-based tips, I’d love to hear them in the comments!