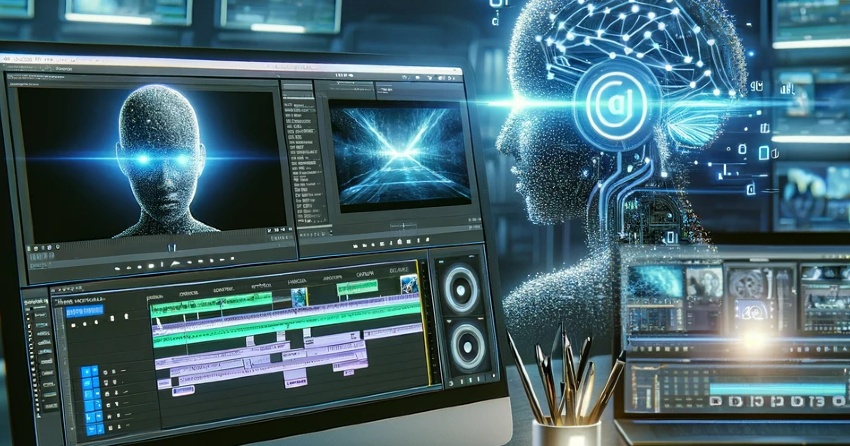
In the evolving landscape of artificial intelligence, Stable Diffusion stands out as a transformative tool in the creative domain. Stable Diffusion is a process known as image to video. Text to video is being released but at the time of this article it hasn’t been released yet. The model is being described by Stability as being trained to generate short video clips from image conditioning. It can generate 25 frames at resolution 576×1024. There is another fine-tuned model that runs at 14 frames.

This comprehensive guide explores various methods to utilize Stable Diffusion for video editing and animation, making it accessible for enthusiasts and professionals alike. From out-of-the-box solutions like Pinokio, Hugging Face, and Replicate to more customized approaches like Mov2mov in AUTOMATIC1111, this tutorial provides step-by-step instructions to achieve captivating AI-assisted video results.
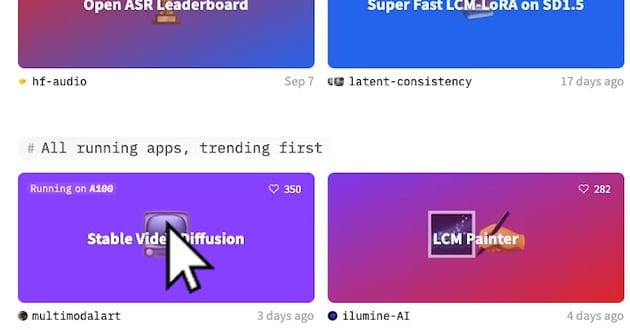
Use “Out-of-the-Box solutions”: A Guide to Pinokio, Hugging Face, and Replicate
In terms of using Stable Diffusion for free, you do have a number of options. If you want to run it locally, probably the easiest thing to do is to use Pinokio. You can also try it out for free on HuggingFace using the Stable Diffusion Space. Additionally, there is another free option at Replicate, which is a popular “non-local option” for Stable Diffusion video. We’ll guide you through the basics of all of this here.
First Up : Use Pinokio to Access Stable Video Diffusion
Setting up Pinoko can be a little bit of work, but the nice thing is once its installed, using Stable Video DIffusion is just a single click away.


Embracing Pinokio’s Ease of Use for Stable Video Diffusion (SVD)
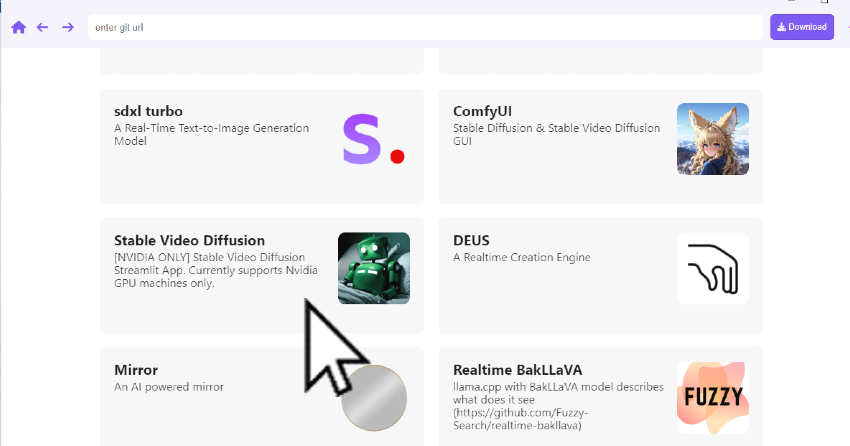
Pinokio, a novel AI browser, offers an intuitive and accessible platform for engaging with various AI applications, including Stable Video Diffusion (SVD). Designed to streamline the use of AI technology, Pinokio simplifies the process of installing, running, and automating AI models, making it particularly suitable for those new to AI-assisted video production.
Detailed Installation and Usage of Pinokio
Step 1: Installation Process:
Downloading Pinokio:
Installation Steps:
- Unzip the downloaded file to find the installer.
- Run the installer. On Windows, you may need to click “More Info” and then “Run anyway” to bypass the security warning.
- For Mac, after running the DMG file, drag the Pinokio app to the Applications folder and follow any additional steps provided in the installation guide.
Step 2: Using the Web UI:
- Once installed, Pinokio acts as a browser for AI applications. It simplifies the execution of various AI tasks, including those related to SVD.
- Pinokio can automate processes that would typically require command line interactions, making it more user-friendly for non-technical users.
Step 3: Understanding Pinokio’s Functionalities:
- Pinokio allows the running of terminal apps, server-based apps, and bots directly within its interface.
- It is equipped to handle various AI models, making it versatile for different AI applications.
Step 4: Exploring SVD with Pinokio:
- To use SVD, ensure you have the necessary checkpoint models, which can be downloaded and placed in the appropriate directory within Pinokio.
- The interface provides options to adjust settings like video frames, motion bucket ID, FPS, and augmentation level for SVD tasks.
Step 5: Output and Performance:
- Pinokio’s output will depend on the specific AI tasks executed. For SVD, this typically includes the generation of short video clips or animations.
- The platform is designed to be efficient, but performance may vary based on the complexity of tasks and the hardware specifications of the user’s computer.
Pinokio offers a revolutionary approach to interacting with AI applications like Stable Video Diffusion, providing a user-friendly platform that simplifies the process for beginners and enthusiasts. Its ability to automate and run complex AI tasks in a browser-like environment opens up new possibilities in AI-assisted video editing and production.


For more detailed instructions and information on using Pinokio, visit the official Pinokio documentation. This resource provides comprehensive guidance and updates for utilizing Pinokio for various AI applications.
Secondly, try harnessing the Power of Hugging Face
For those exploring cost-effective solutions, Hugging Face stands out as a viable option. Click here to visit the Hugging Face Version. Its ‘stable video diffusion’ space offers a straightforward approach: you upload an image and hit ‘generate.’ However, users might face limitations during peak usage times, potentially leading to errors. This is a small caveat in an otherwise smooth and accessible platform.


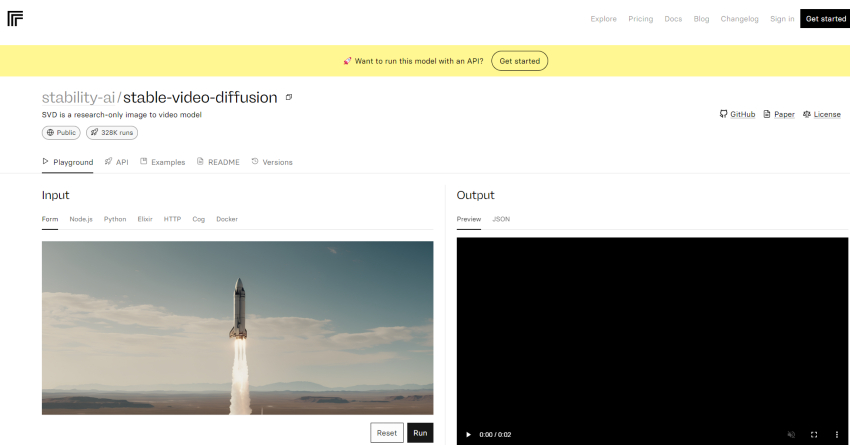
Replicate: Your Go-to for Non-Localized Stable Diffusion Video
Replicate emerges as a robust cloud-based alternative for creating Stable Diffusion videos. Click here to check it out now. Using replicate allows you to run a number of generations for free, but at some point they will ask you to pay, the price is actually fairly reasonable. After uploading your image, you can start experimenting with various settings:
- Frame Selection: Choose between 14 or 25 frames for your video.
- Aspect Ratio: Options include maintaining the original aspect ratio, cropping to 16:9, or using the image dimensions.
- Frames per Second (FPS): This setting is crucial for determining the length of your video. A higher FPS will result in a shorter video, and vice versa. For instance, setting it to 24 FPS gives you a quick, one-second video, while reducing it to 12 FPS doubles the length.
- Motion Bucket: Adjusting the motion bucket allows you to control the amount of movement in the video. A higher setting increases motion, while a lower setting reduces it.
- Conditional Augmentation: This feature controls the noise added to your initial input image. The more noise you add in the beginning, the more varied your results are going to be. The default setting usually provides a good balance of temporal consistency for most projects.
- Decoding T: This setting involves the number of frames decoded at a time, with 14 being the default. You can experiment with this setting to see different outcomes.


Beyond these features, Replicate also offers video upscaling and interpolation within the platform itself. This allows for enhancing the quality of your videos without needing to switch tools. For interpolation, you can use “rife-video-interpolation” by clicking here, and for video upscaling you can use the “real-esrgan-video by clicking here. This upscaler will take your video from 2k up to 4k.
There are tons of new updates that are constantly becoming available to the model, such as text to video, 3d mapping, and longer video outputs.
Extending Video Length with FinalRender
If you need to extend your video clips you can use FinalFrame.net. This was initially developed as a sort of a hack to extent your video clips beyond the initial 4 seconds. The new AI image to video tab in FinalRender opens up further possibilities. Here, you can upload an image and watch as FinalRender transforms it into a moving sequence. The platform also allows the addition of other videos, using the ‘Add Video’ button, which can be merged together in the project preview tab. An interesting aspect of FinalFrame is its timeline feature, where you can rearrange clips.

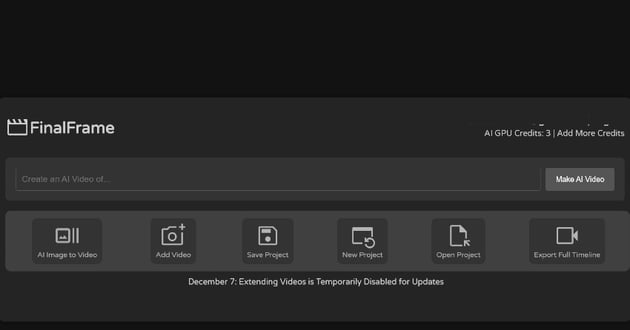

Once you’re happy with everything, you can use the ‘Export Full Timeline’ button, which will show you the completed video project in a pop-up. From here you can manually save the output video to your local computer for later use. At the time of writing this article, the ‘Save Project’, ‘New Project’, and ‘Open Project’ buttons don’t work, so if you close your browser window before manually downloading your final video, you’re work may be lost, forever.
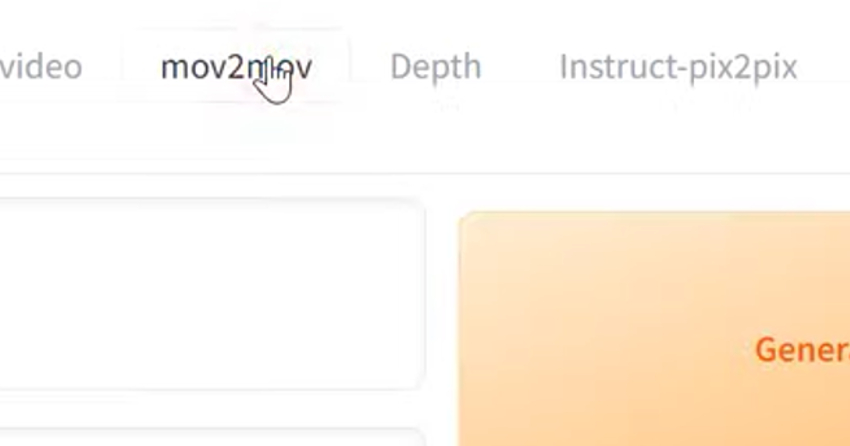
Advanced use of Stable Diffusion using Mov2mov with AUTOMATIC1111 Web-UI for Stable Diffusion
In the dynamic and ever-expanding world of AI-driven creativity, tools like Mov2mov and AUTOMATIC1111 represent significant milestones. They function within the ecosystem of Stable Diffusion, a cutting-edge AI model that has revolutionized the way we approach art and video generation. Mov2mov is an extension designed for the AUTOMATIC1111 Web-UI, a user-friendly interface for Stable Diffusion, facilitating the transformation of standard videos into AI-enhanced animations and creative visuals.
Understanding Mov2mov and AUTOMATIC1111
- Mov2mov: This extension stands out as a powerful tool for video editing, allowing users to apply the capabilities of Stable Diffusion directly to video content. With Mov2mov, you can take a regular video and transform it into various animation styles, leveraging AI to infuse new life and creativity into your projects.
- AUTOMATIC1111: Serving as the gateway to Stable Diffusion, AUTOMATIC1111 is a Web User Interface (Web-UI) that simplifies the process of utilizing Stable Diffusion’s capabilities. It acts as a platform where various extensions, including Mov2mov, can be integrated, providing an accessible and customizable environment for both beginners and experienced users in AI art generation.
How They Fit into Learning Stable Diffusion
- Broader Scope: Learning to use Stable Diffusion through AUTOMATIC1111 and its extensions like Mov2mov offers a practical and hands-on approach to understanding the potential of AI in creative fields. These tools not only make AI technology more accessible but also open up new avenues for artistic expression and innovation.
- Bridging the Gap: For those new to AI and machine learning, AUTOMATIC1111 provides an intuitive starting point. By incorporating extensions like Mov2mov, users can explore a wide range of applications – from generating unique artworks to transforming videos – all within a user-friendly environment.
- Enhancing Creative Workflow: Whether you’re an artist, a video editor, or simply an AI enthusiast, mastering tools like Mov2mov and AUTOMATIC1111 can significantly enhance your creative workflow. They offer a glimpse into the future of art and technology, where AI acts as both a tool and a collaborator in the creative process.
In essence, diving into Mov2mov and AUTOMATIC1111 opens up a world where the boundaries between technology and art blur, offering endless possibilities for creativity and innovation. As we continue to explore the capabilities of Stable Diffusion, tools like these will undoubtedly play a pivotal role in shaping the future of AI-assisted art and video production.
Setting Up AUTOMATIC1111 Web-UI
To leverage the power of Mov2mov for AI-assisted video editing, you first need to set up the AUTOMATIC1111 Web-UI on your machine.
Step 1: System Requirements:
- For Windows users: Windows 10 or higher, Nvidia GPU (minimum 4 GB VRAM).
- For Mac users: Apple Silicon M1/M2, 16 GB memory.
Step 2: Install Python:
- Download Python 3.10.6. Make sure to add Python to your system’s PATH during installation. If existing versions of Python are present, uninstall them first.
- Validate the installation by opening the Command Prompt (Windows) or Terminal (Mac), typing
python, and ensuring that Python 3.10 is running.
Step 3: Install Git:
- Download and install Git from its official website.
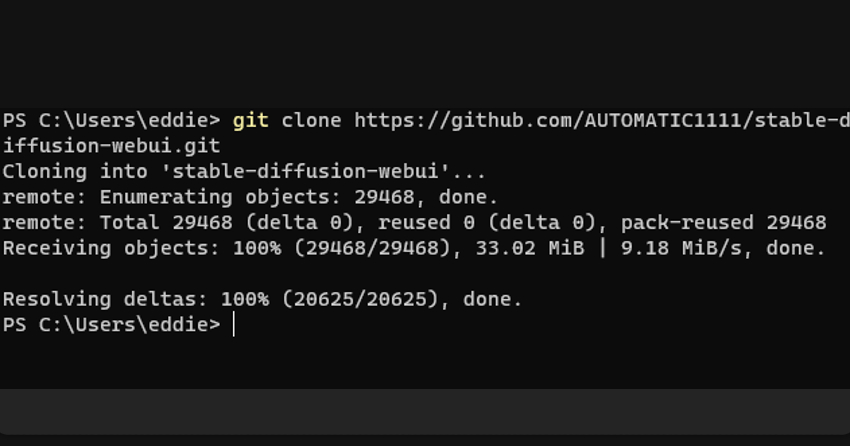
Step 4: Download AUTOMATIC1111:
- Open Command Prompt or Terminal.
- Navigate to your home folder (
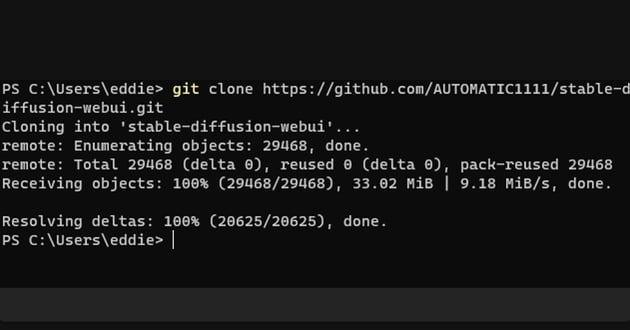
cd %userprofile%on Windows or justcdon Mac). - Clone the AUTOMATIC1111 repository using:
git clone https://github.com/AUTOMATIC1111/stable-diffusion-webui.git.
Step 5: Run AUTOMATIC1111:
- For Windows: Locate the
webui-user.batfile in thestable-diffusion-webuifolder and double-click to run. - For Mac: Open Terminal, navigate to the
stable-diffusion-webuifolder (cd ~/stable-diffusion-webui), and run./webui.sh --no-half. - Access the Web-UI by opening
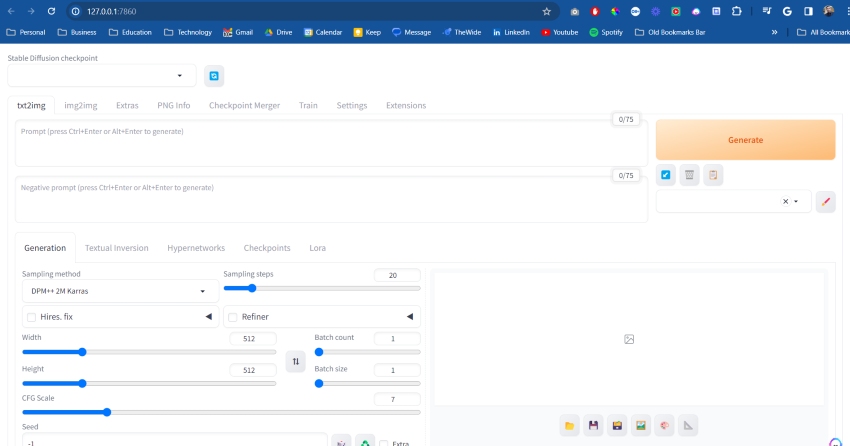
https://127.0.0.1:7860in your browser.


Installing Mov2mov Extension
Once AUTOMATIC1111 is operational, integrate the Mov2mov extension for advanced video editing capabilities.
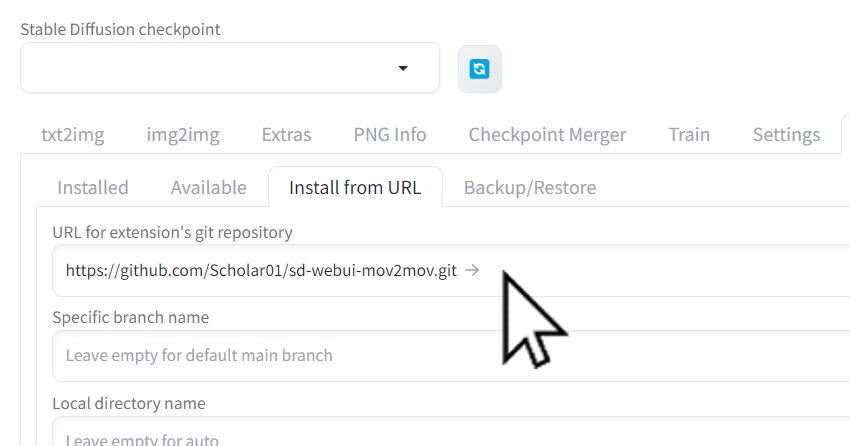
Step 1: Navigate to Extensions Tab:
- In the AUTOMATIC1111 Web-UI, go to the ‘Extensions’ section.
Step 2: Install Mov2mov:
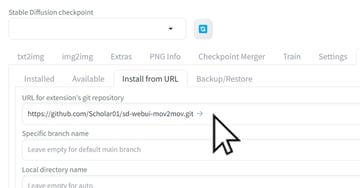
- Click on the ‘Install from URL’ tab.
- Paste the Mov2mov extension URL:
https://github.com/Scholar01/sd-webui-mov2mov. You can find the updated link by visiting the GitHub page for this by clicking here, then copying the git URL. - Wait for the installation to complete, then restart the Web-UI to apply the changes.

Using Mov2mov in AUTOMATIC1111
Mov2mov offers a sophisticated platform for customizing AI-generated videos, providing a range of features for personalized video creation.
Step 1: Select a Stable Diffusion Checkpoint:
- Inside Mov2mov, choose an appropriate Stable Diffusion checkpoint. This determines the AI’s style and approach to video editing.
Step 2: Upload Your Video:
- Upload the video file you wish to edit. Mov2mov supports various video formats, accommodating a wide range of projects.
Step 3: Customize Video Settings:
- Adjust key settings such as aspect ratio to frame your video correctly.
- Modify the frame rate (FPS) to control the video’s length and flow.
- Use the ‘Motion Bucket’ to regulate the amount of movement in the video.
- Experiment with ‘Conditional Augmentation’ for varying degrees of noise and texture in your video.
Step 4: Advanced Features:
- Mov2mov also includes advanced features like ControlNet for artistic effects and creative video transformations.
Step 5: Exporting Your Final Video:
- Once editing is complete, export your final video. Check the designated output folder in AUTOMATIC1111 for the finished product.

By following these detailed steps, you can utilize Mov2mov within the AUTOMATIC1111 Web-UI to create stunning AI-enhanced videos. This combination of tools opens up new avenues for creativity and innovation in video editing, catering to both amateurs and professionals in the field.
For further details, troubleshooting, and updates, refer to the AUTOMATIC1111 GitHub page and the Mov2mov GitHub repository.
Enhance Your Projects with Envato Elements
For those delving into AI-assisted video editing with tools like Stable Video Diffusion and Pinokio, Envato Elements is an invaluable resource for quality seed footage and images. It offers a vast, diverse library of high-quality, professionally-curated stock footage and images, perfect for enhancing any project. With unlimited downloads available through subscription, Envato Elements encourages creative freedom and exploration, providing a plethora of themes and styles to choose from. This makes it an ideal platform for sourcing creative assets that significantly impact the output of AI video editing tools. Envato Elements seamlessly integrates into your creative workflow, bridging the gap between AI capabilities and artistic vision. To explore and elevate your video projects with top-notch creative assets, visit Envato Elements.
Conclusion
Stable Diffusion offers a playground for creativity and experimentation in video editing and animation. As AI tools become more integrated into creative workflows, the possibilities are endless. We encourage you to experiment with Stable Diffusion and share your experiences and creations. Your feedback and questions are invaluable in fostering a community of innovative creators.