There are a lot of free and paid gallery plugins out there which you can use of your website to showcase images to visitors. Some of them simply allow you to display images in a neat manner on the website while others try to provide an all-in-one package with features like lightbox and social sharing etc.
In this tutorial, you will learn how to use the Portfolio Gallery WordPress plugin on a website to filter and organize a large number of images to show on any webpage. This image gallery plugin allows you to assign different images to different categories and then click on buttons at the top to only show images from a specific category.
How Can We Use It?
A plugin like this could be useful in a lot of situations. For example, a real estate business which shows houses to potential buyers could use it to filter images of different rooms, kitchen, interior and exterior etc. Let’s say there are a total of 50 images of a house on the webpage. Any user who wants to only see the images of living room first, could do so by simply clicking the “Living Room” button at the top. In this tutorial, we will learn how to do exactly that and a few other things.
The plugin could be useful for photographers as well. Wedding photographers showcasing their work could use it to filter images of different weddings or the bride, the groom and the decorations etc. The same principles can be used to filter images of all kinds on a website.
In this particular tutorial, we will use the the plugin to filter images of different animals, However, the same steps and techniques could be used for all other purposes as well. Lets start creating our gallery now.
Defining the Filters
Once you have installed the plugin, the first step is creation of different filters. Ideally, this has to be done before uploading any images. The filters you specify here will be used to categorize images when you upload them.
In the dashboard menu, go to Portfolio Gallery and then click on Filters to see all existing categories or add new categories. Initially, there will be only one category—called All. You cannot delete it even after you add more categories to the list. However, you can rename All to something else. The purpose of All is to show every image in the gallery on the webpage.
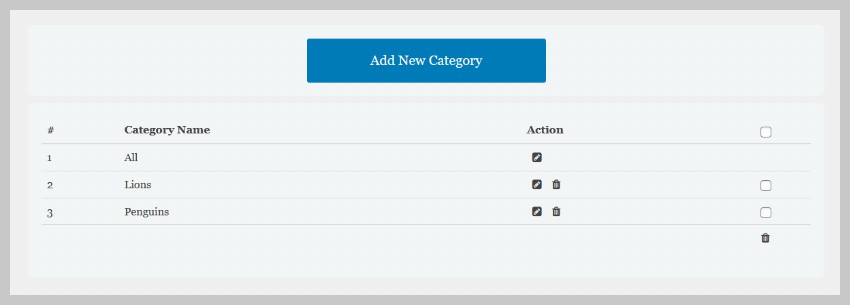
You can click on the Add New Category button on the Filters page to add new categories. In our case, we will add three categories called Lions, Penguins and Cats.
Adding Images to the Gallery
Once you have added all the desired categories, you can start creating your own gallery. Simply go to Portfolio Gallery > Add New Gallery in order to add a new gallery.
You can specify the title of the gallery at the top. The title is basically meant to help you identify the gallery. We will set the title to Animal Photography for our gallery.
Now click on the Add Images section and select all the images that you want to display in the gallery. All the images that you select will four input fields associated with them. These are used to provide additional information about the images.
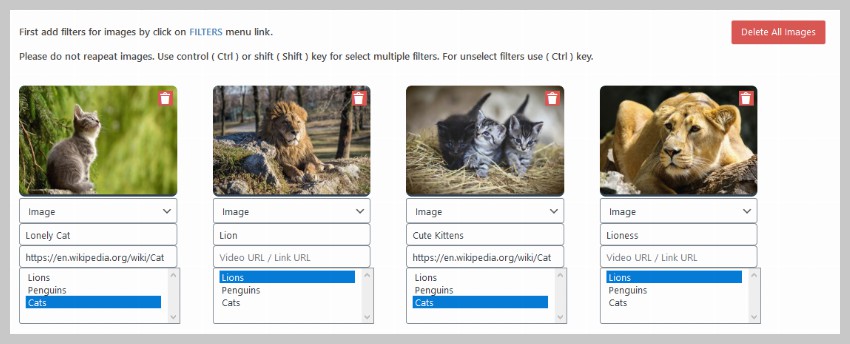
The first field is simply a dropdown menu which identifies the uploaded media as either an image or a video. The second field is the title of the image, this is auto-generated based on the name of image file that you uploaded. You can also change the title to whatever value you want.
The third field is optional and it contains the link to a webpage or video that you want to open once users click on the image thumbnail. We leave it bank for most images. However, the cat thumbnails will take users to a Wikipedia entry about cats. The fourth field is used to specify the category of each image. A single image can be put in multiple categories by pressing Ctrl key on Windows while you select additional categories.
Configuration Options
You can now change a few configuration options to change the behavior and appearance of the gallery. You simply have to go to the Config tab to do so.
The first setting, you see here would be the thumbnail size. You can st it to Small, Medium, Large or Full Size. It can be a bit confusing when you change the value of Gallery Thumbnail Size from Small to Medium but the thumbnails still have the same size as before. This setting actually controls the physical size of the image which is shown as a thumbnail on the webpage. This does not change the area taken up by the thumbnail on the webpage.
The right value for Gallery Thumbnail Size depends on the number of columns that you want to display on different devices. If you want to show 12 thumbnail columns, the area taken up by the thumbnails would be relatively small. This means that a small image will still look good in these thumbnails. However, if you create only three columns for the thumbnails, it makes more sense to choose a larger gallery thumbnail size because the thumbnails will occupy a larger area. In our case, we will set the thumbnail size to Medium.

As I mentioned earlier, you can easily specify the number of columns into which you want to divide your thumbnails. In our case, we will display them in three columns on desktops, two columns on tablets and a single column on mobile devices.
The next setting called Image Hover Effects is used to apply some special effects on images when users hover over them. We will set it to Grow Shadow in our case. This will add a subtle zoom-in effect when users hover over the thumbnail.
The configuration options also allow you to show or hide the title and numbering on image thumbnails. Set the value of Hide Thumbnail Spacing to Yes because we will be using our own custom CSS to fine tune the spacing and other aspects.
If you go to the Filters tab, you will notice that it only contains two settings called Filter Background Color and Filter Title Color. They are used to control the background and text color of the “buttons” that appear at the top of each gallery to filter the images. Set the background color to black and title color to white.
The Lightbox tab only contains a single option to show the images when users click on a thumbnail. This is done with the Bootstrap Lightbox that comes with the plugin.
You can now click on the Publish button to save the gallery.
The plugin generates a shortcode for every gallery you create. You can copy and paste it on any post or page where you want to display the gallery.
After following all the steps in the tutorial, you gallery should look like the image below.

Writing Custom CSS
There are a couple of things that we will change in the gallery. This will help you understand how to make your own changes in the future.
The image title is taking a lot of area on the thumbnail. We will make it smaller and display it in bottom-left corner instead of the entire width of the thumbnail.
Right now, the thumbnails are packed closely together. We will add a little space around them so that the gallery does not seem congested.
We can do both these things easily by overriding the original style ruels and adding some of our own.
Go to the Custom CSS tab and add the following CSS.
body .item-desc {
    background-color: rgba(0, 0, 0, 0.75);
    text-transform: uppercase;
    font-family: Roboto Slab;
    font-size: 1.5rem;
    padding: 0 6px;
}

body .item_desc_2421 {
    left: 0.5rem !important;
    right: auto !important;
}

body #filter_gallery_2421 .thumbnail_2421 {
    padding: 0.5rem !important;
}

body .simplefilter li {
    font-weight: 600;
    font-family: Passion One;
    text-transform: uppercase;
    font-size: 2rem;
    letter-spacing: 1px;
}
This will make all the necessary changes to our gallery. The final result should look like the image below.

Final Thoughts
In this tutorial, we learned how to use the free Portfolio Gallery WordPress plugin to add a gallery with filterable images on our website. As you saw, creating such a gallery becomes very easy with this plugin. You just begin by defining the categories and then assign one or more categories to each image. This will be enough to display a fully functional gallery on any page. However, you can change different configuration options or even add your own custom CSS in order to further customize the gallery.
If you are looking for more feature rich WordPress gallery plugins, take a look at over 200 gallery plugins available on CodeCanyon. They are all highly customizable and offer a lot of layouts. You will also get free lifetime updates and 6 months of support.