Discover a quick tip on how to remove clothing wrinkles in Photoshop, without an actual iron!
How to edit wrinkled clothes in Photoshop
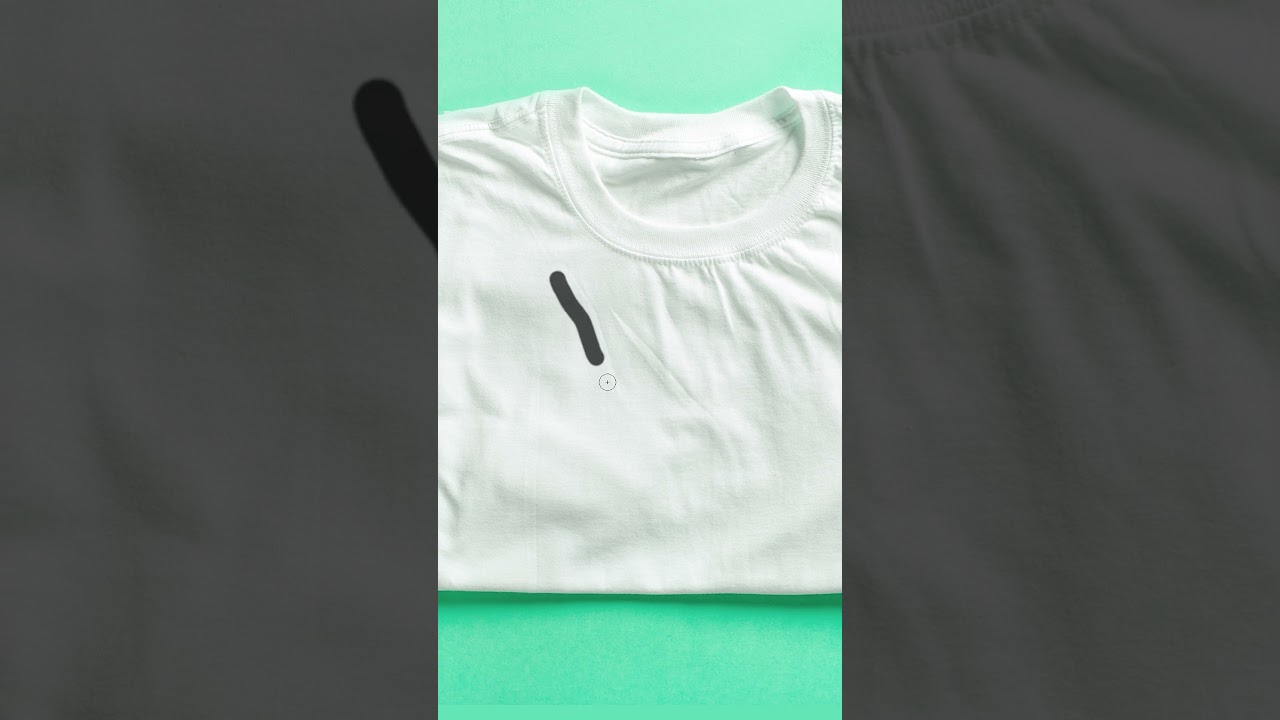
Step 1
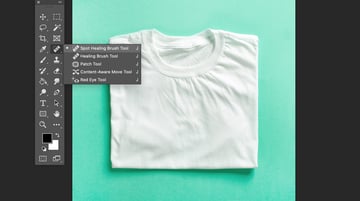
For starters, grab any garment photo for this tutorial on how to remove wrinkles from clothes in Photoshop, like this White Folded T-Shirt from Envato.
There are many methods to learn how to edit out wrinkles in clothes, but the most popular is by using healing brushes.
One helpful Photoshop tool that you can use to ‘iron’ garments or remove wrinkles from photos is the Spot Healing Brush Tool. This quick-fix tool basically helps to ‘heal’ a photo by blending pixels from the surrounding areas to match the colors and lighting to the pixels being healed. The tool automatically chooses the best pixels from the sample area and creates a seamless and smooth effect, so you don’t have to do it yourself.
To use the Spot Healing Brush Tool to reduce wrinkles in Photoshop, use the keyboard shortcut J or select the icon from the toolbar.


Step 2
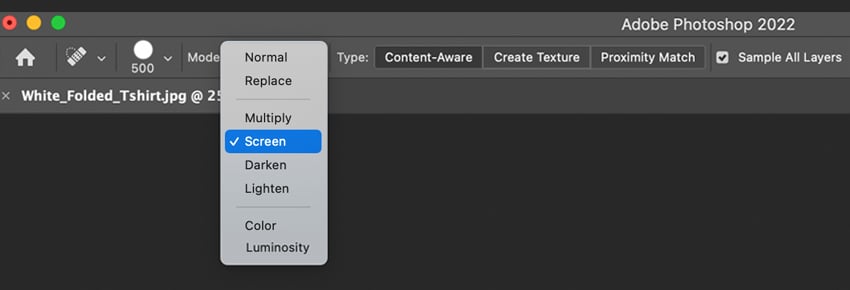
Once you’ve selected the Spot Healing Brush Tool, head over to the top settings bar and choose Painting Mode.
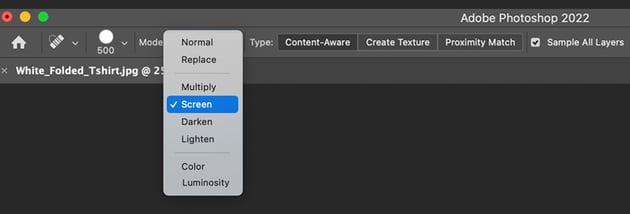
By default, it’s automatically set to Normal, but there are several mode options to choose from, such as Replace, Multiply, Screen, Darken, Lighten, Color, and Luminosity. For example, if there is a crease color that’s darker than the fabric around it, then you would have to select the opposite mode, Lighten, to brighten it.
Feel free to explore and experiment with which paint mode gives the effect you want. For this tutorial on how to remove clothing wrinkles in Photoshop, I started with Mode: Screen to achieve a clean, ironed effect.

Step 3
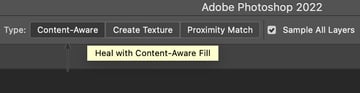
Next, you need to set a Healing Type from the top settings bar. Here you can also experiment with three different options: Content-Aware, Create Texture, and Proximity Match.
Each option gives different results. Selecting Type: Content-Aware is a good option when you wish to replicate the content and texture of the sample area.


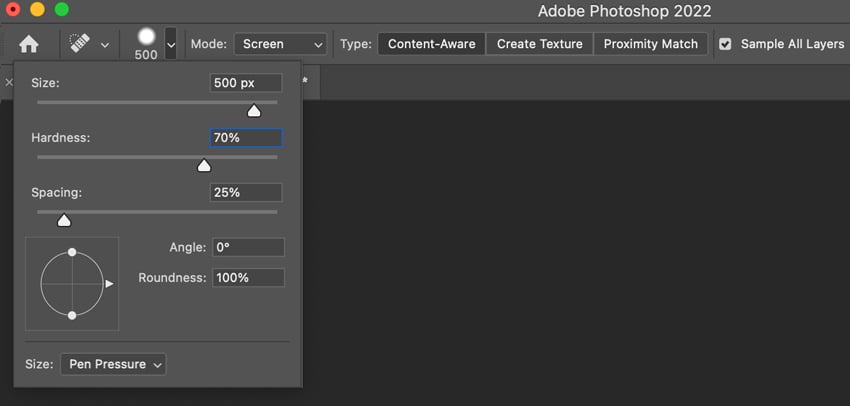
Step 4
After selecting the Paint Mode and Healing Type, you can move on to adjust the brush features such as the Hardness and Size, under the brush icon from the options bar.
Depending on the size of the area you want to fix, it’s always helpful to change the size of a brush. The easiest and fastest way to do so is by using the default hotkeys:
- Click ] to increase the brush size.
- Click [ to decrease the brush size.
I started with a Brush Size set to 500 px, Hardness to 70%, and Spacing at 25% to cover the main creases.


Step 5
Now, let’s smooth wrinkles in Photoshop using the adjusted Spot Healing Brush Tool. Once you’ve set the brush, zoom in on the wrinkle and brush over the area. Start with the significant wrinkles and make sure to paint out the creases, beginning from the edge.
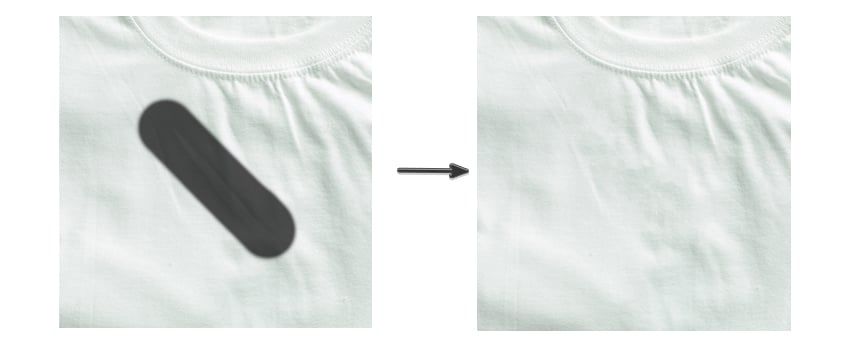
Step 6
Work by painting over single and isolated wrinkles first, and then make your way around the larger areas to smooth wrinkles in Photoshop.
You might run into the challenge of achieving natural results when covering large areas, so in most cases, you might need to go back and forth to adjust the brush settings. Make sure not to overdo the brushing; otherwise, it might flatten and discolor the brushing region.
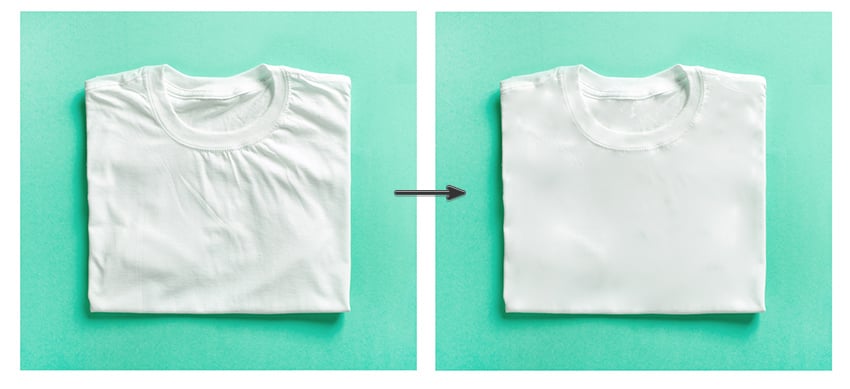
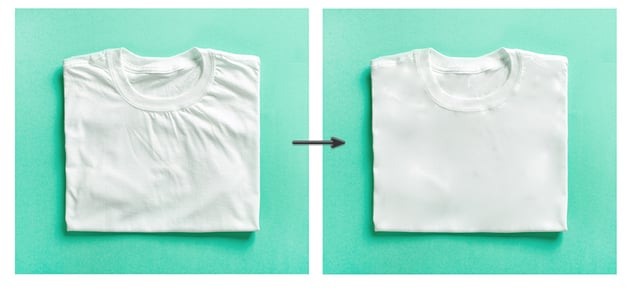
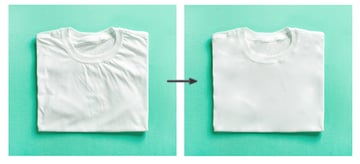
Great job! You know how to remove wrinkles in Photoshop
You’re done with this beginner-friendly Photoshop tutorial! Now you know how to remove wrinkles in Photoshop. The Spot Healing Brush Tool is a great option to remove creases from fabrics and garments, and there are still other tools to explore and experiment with to help you achieve similar results.


If you prefer design video tutorials, then you need to check out this new video by Abbey Esparza from the Envato Tuts+ YouTube channel. Learn how to get rid of wrinkles in Photoshop and more:
And while we’re on the subject of clothing and getting rid of wrinkles in Photoshop, if you are looking for T-shirt mockups or clothing photos, make sure to visit Envato for a wide selection of images. One subscription will give you access to millions of assets, it’s the perfect resource for designers and creatives.


But what if you don’t have the desire or the time to learn how to smooth wrinkles in Photoshop? If you’re looking for an AI wrinkle remover, you can trust our handy AI tool, ImageEdit. With it, you can enhance your images and tailor them to perfection. The best part is that this AI tool is available with your Envato subscription. This means you get millions of premium digital assets along with AI tools that will make all of your creative dreams a reality!


Recommended quick-tip tutorials
Did learning how to reduce wrinkles in Photoshop leave you wanting more Photoshop tips and awesome Photoshop effects? Check out these short Photoshop tutorials: