
In the realm of videography and film-making, there’s a simple elegance that is often associated with a ‘fade to black’. It’s much more than a mere ending or transition; it is a powerful tool that can evoke a myriad of emotions, making a lasting impression on the viewer. In essence, a fade to black is a technique where the scene gradually darkens until all visual information disappears, signifying a conclusion, a pause, or a poignant emotional moment.
When you’re engrossed in a film or video, these moments of fading to black can leave a deep imprint, creating memorable scenes that resonate with the audience long after they’ve finished watching. The fade-to-black effect encapsulates the notion that less can indeed be more.
For those dabbling in video editing with DaVinci Resolve, you’re in for a treat. This versatile software makes adding a fade-to-black effect a breeze, allowing anyone from beginners to professionals to utilize this classic cinematic technique in their projects. Whether you’re working on a short film, a promotional video, or a personal vlog, knowing how to add a fade to black can greatly enhance the overall viewing experience.
With DaVinci Resolve, you can easily add depth and dimension to your videos, creating seamless transitions and poignant endings that leave your viewers wanting more. And the best part? You don’t need to be a seasoned professional to achieve this. With a little guidance, you can quickly master the art of fading to black in DaVinci Resolve, adding a professional touch to your videos.
What is Fade to Black?
So, what exactly is a fade to black? In the simplest terms, it’s a gradual transition from a scene to complete darkness. It’s a powerful tool in the videographer’s toolkit, allowing for a range of emotional responses from the audience. Whether you’re signifying the end of a scene, transitioning between two unrelated segments, or simply wanting to evoke a strong emotional response, a fade to black can add a level of sophistication and depth to your video that few other techniques can match.


Showing transition to blackout for how to fade to black in DaVinci Resolve.
Method 1: Use the Dip to Color Transition
1. Open DaVinci Resolve2. Find the Effects Library3. Inside, locate the Toolbox. From there, go to Video Transitions4. Look for Dip to Color. Click and drag it to your timeline. Place it where you want the fade to start.
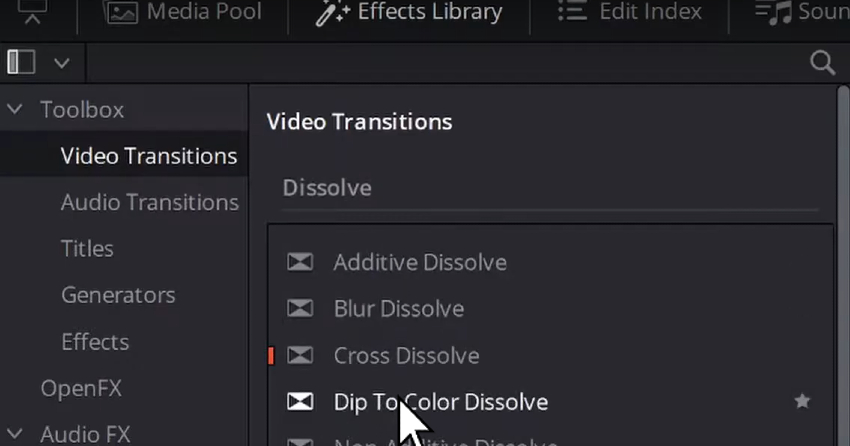
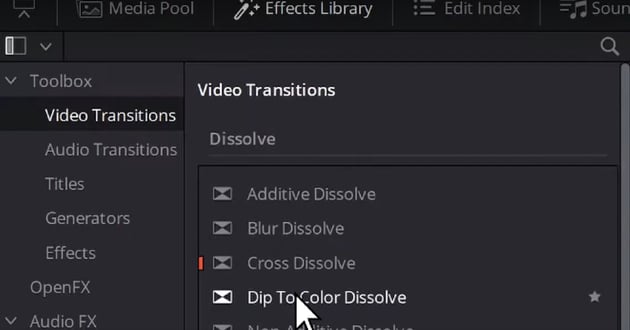
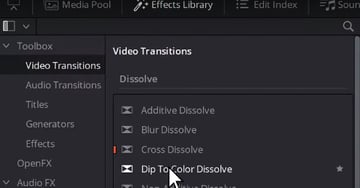
User clicking Dip To Color Dissolve menu for DaVinci Resolve fade to black tutorial.
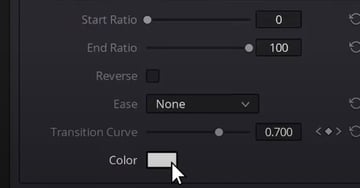
5. Now, it will fade to white. We’ll fix that. Click on the Dip to Color on your timeline. You’ll see a red border.
6. Open the Inspector.
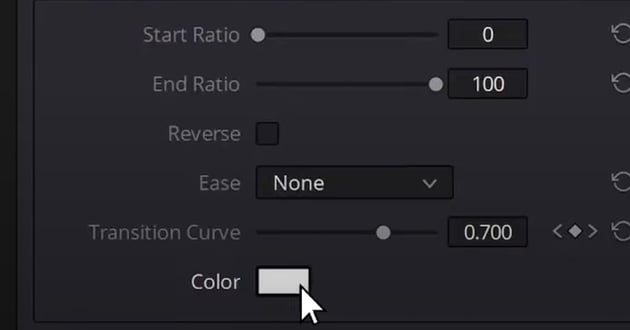
7. Find Color at the bottom. Change it from white to black.

User clicking on Color Picker in the Inspector menu to be able to Add fade in DaVinci Resolve.
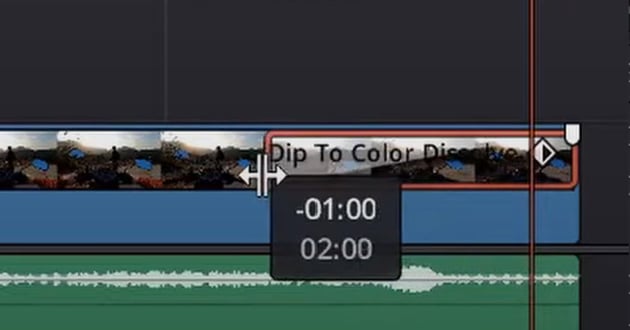
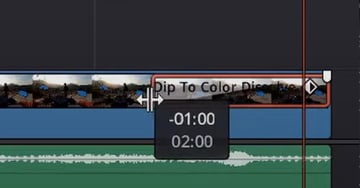
8. Want a slower fade? Hover over the edge of the Dip to Color. Drag it to adjust the duration.

Method 2: Adjust the Opacity
- Place your timeline cursor where the fade should start.
- Click on your clip. It’ll get a red border. Move your play head to wherever you want the fade to start.
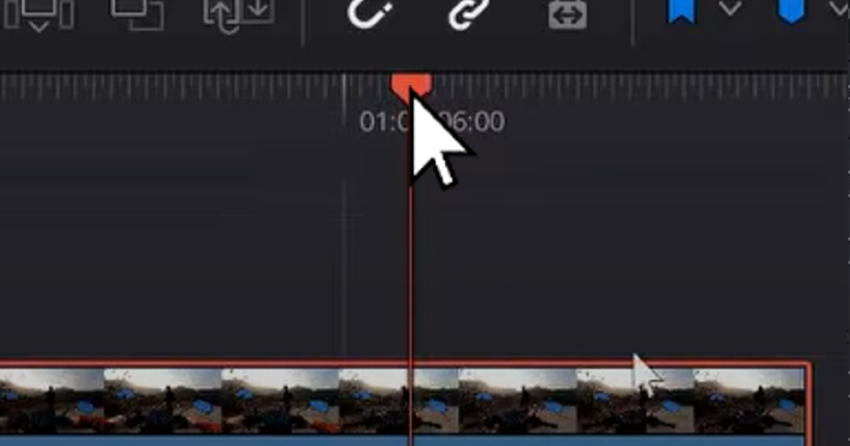

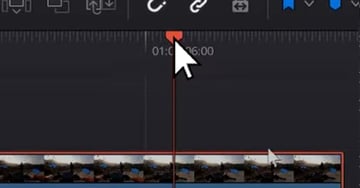
Move the play head to the desired starting location for article on fading to black in DaVinci Resolve.
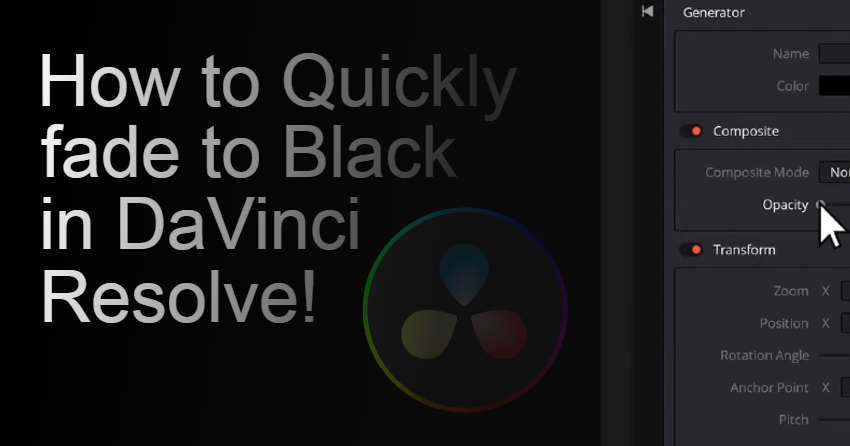
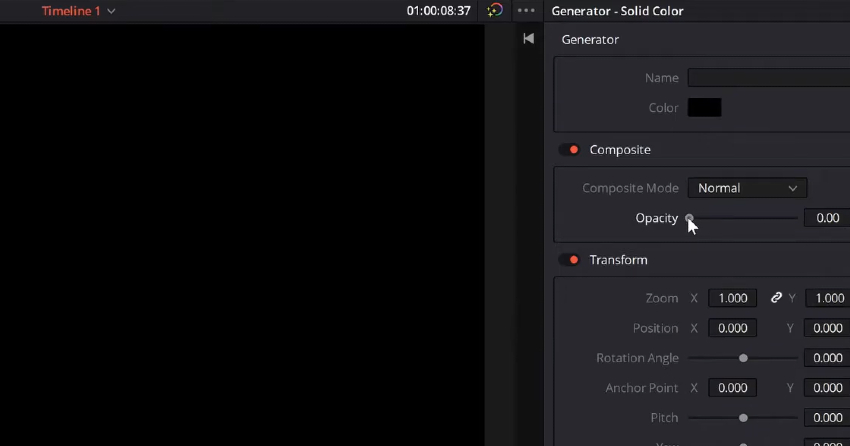
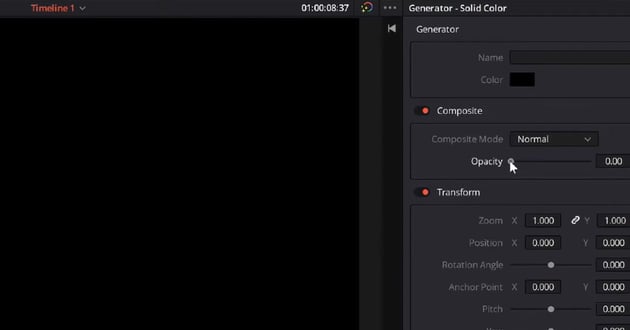
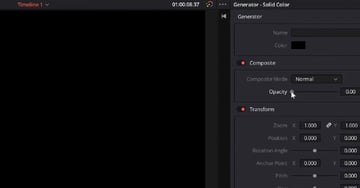
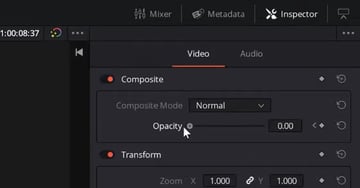
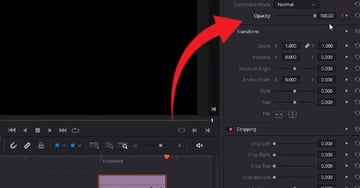
3. Open the Inspector. Under Composite, you’ll find Opacity.
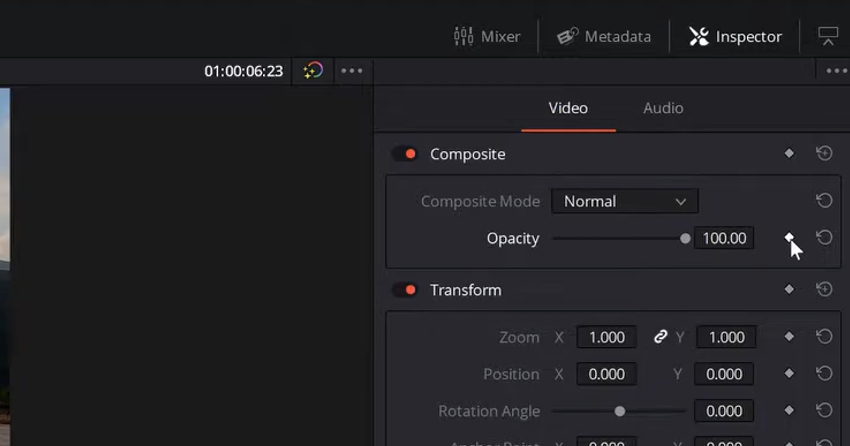
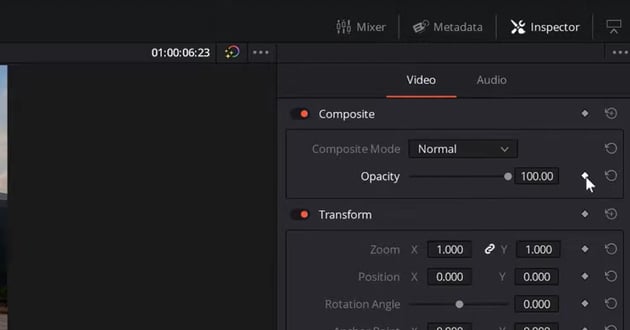

User clicking on Opacity diamond for article on how to fade to black DaVinci Resolve.
4. Click on the diamond icon, turning it red.
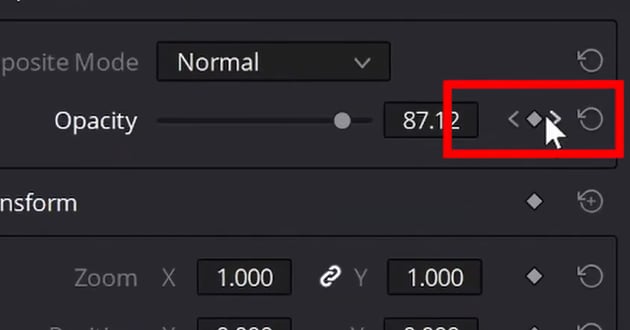
5. Move the play head to where you want full black. Drag the opacity slider to zero.


Drag Opacity down to zero for article for DaVinci Resolve fade to black tutorial.
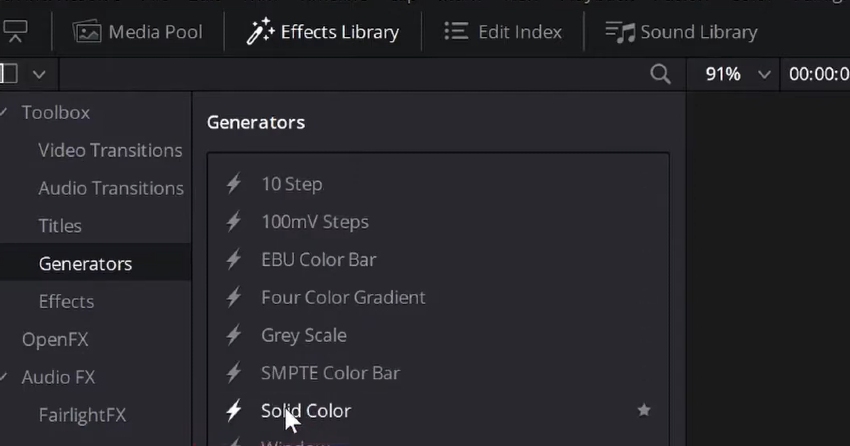
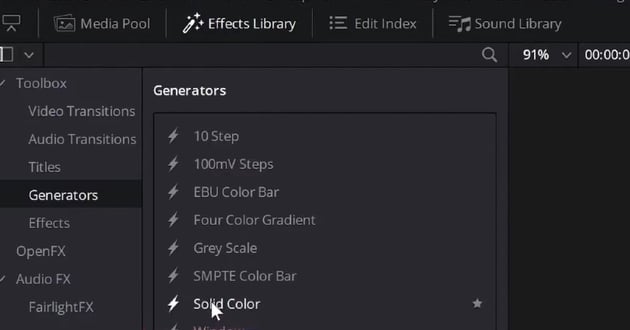
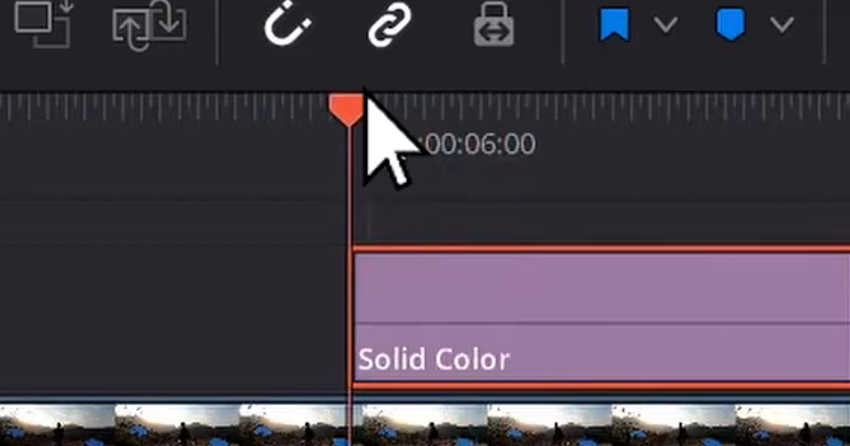
Method 3: Use the Solid Color Generator
- In the Effects Library, open the Toolbox. Then, find Generators.
- Drag Solid Color to your timeline.
User clicking Solid Color Generator and dragging it to the timeline for article on how to fade in DaVinci Resolve.
3. Adjust its start point by dragging its edge.


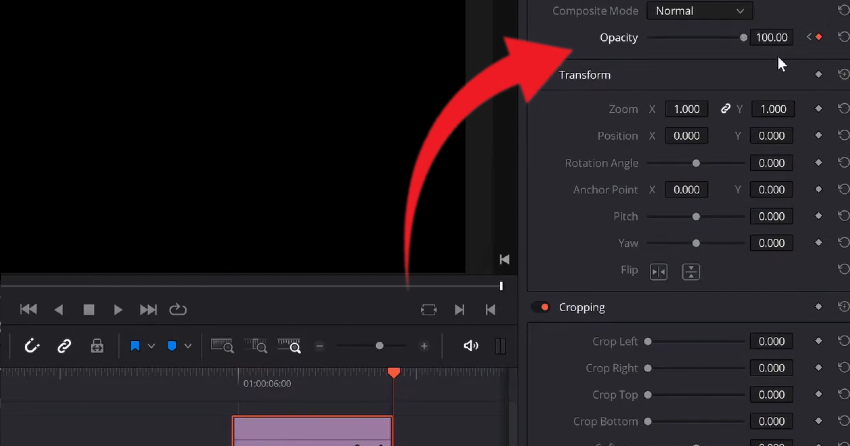
4. In a similar fashion to Method 2, with the timeline cursor at the start of Solid Color, open the Inspector.
5. Find Opacity. Click the diamond icon.
6. This time, we will start the clip at zero.
7. Then, similarly, move to the end of the Solid Color. And this time, you’ll drag opacity to one hundred percent.

The Power of Keyframes
Keyframes might appear as small, seemingly insignificant red diamonds on your editing timeline, but don’t be fooled by their size. These tiny tools are the heartbeat of animation and effects in video editing, including the fade-to-black effect in DaVinci Resolve. They are the markers that define where a change will start or end within your footage.


Key frame highlight for article on how to fade to black DaVinci Resolve.
Think of keyframes as the architects of motion and transformation in your video. They allow you to dictate exactly when and how a movement or an effect should occur. From animating text to applying filters and transitions, keyframes offer a world of possibilities. By harnessing the power of keyframes, you can create videos that are dynamic, visually interesting, and professionally polished.
So, while it’s true that keyframes are small, they are also mighty. Diving deeper into their functionality can unlock new doors in your video editing journey, turning static images into captivating stories. The more you understand about keyframes, the more control you have over your final product.


Conclusion
In the vast universe of video editing, mastering the fade to black technique is a small yet significant step. This simple effect holds immense power, capable of transforming the mood, pacing, and overall impact of your video. With DaVinci Resolve, adding a fade to black is not just easy; it’s intuitive. You have the freedom to choose the method that aligns best with your project needs and personal editing style.
Remember, the beauty of video editing lies in its simplicity. It’s not about using every tool at your disposal; it’s about using the right tool at the right time. And more often than not, less truly is more.