DaVinci Resolve stands out in the video editing world for its comprehensive features, including the seamless merging and joining of clips. This capability is crucial for creating a smooth narrative flow in your projects, whether they are cinematic productions, vlogs, or professional advertisements. This tutorial simplifies the process, guiding you through the effective techniques to merge clips in DaVinci Resolve, enhancing both your workflow and creative output.
Creating a Compound Clip
One of the most straightforward methods to merge clips in DaVinci Resolve is by creating a “Compound Clip.” This approach is ideal for when you have multiple distinct clips that you wish to combine into a single, unified segment. Here’s how you can do it:
Step 1: Select Clips
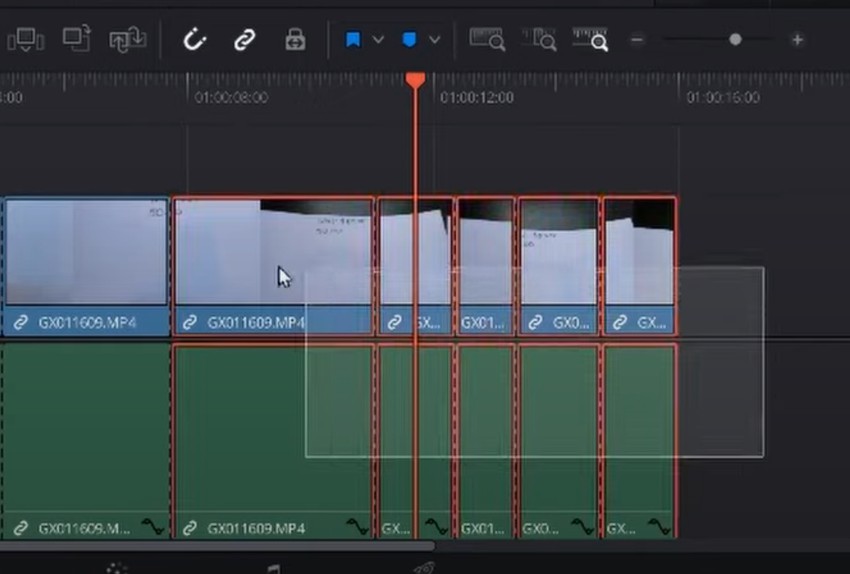

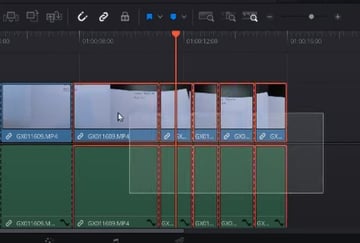
User selecting multiple clips for the article on how to use DaVinci Resolve to join clips.
- Begin by navigating to your timeline where your clips are located.
- To select the clips you wish to merge, if you are on a MacBook, hold the Command key, or if you’re using Windows, hold the Control key. Click on each clip you want to merge. You can also zoom in or out on the timeline to get a better view of your clips.
Step 2: Create a Compound Clip

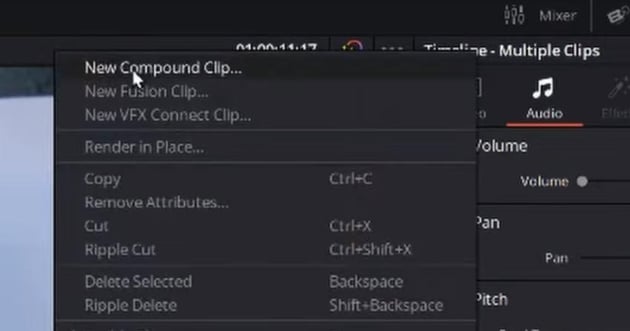

User choosing New Compound Clip for article on how to merge clips in DaVinci Resolve.
- Once you have selected the clips, right-click on any of the highlighted clips.
- From the context menu that appears, choose “New Compound Clip…”.
- This action opens a dialog box prompting you to name your new compound clip.
Step 3: Name and Create


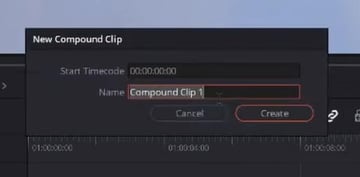
- In the dialog box, enter a name for your new compound clip. This name should ideally reflect the content or the purpose of the combined clips for easier identification later.
- Click “Create”. Your selected clips are now merged into one compound clip.
Tip: The beauty of compound clips in DaVinci Resolve is their versatility. You can always decompose them back into individual clips if needed, providing you with flexibility in your editing process.
Take Your Editing Game to the Next Level with Envato Elements
After mastering the techniques of merging and joining clips in DaVinci Resolve, you might be looking to elevate your video projects further. This is where our Envato Elements offer comes into play. With Elements, you gain access to a vast library of high-quality, professionally designed video templates, audio tracks, and visual assets that can transform your video projects from good to great.
Why Choose Envato Elements?
- Diverse Range of Templates: Elements offers a diverse array of templates that are compatible with DaVinci Resolve. These templates can significantly reduce your editing time and inspire creativity.
- High-Quality Assets: Each asset in Elements, whether it’s a visual effect, music track, or graphic, is crafted to meet high-quality standards, ensuring that your project stands out.
- Continuous Updates: Our library is continuously updated with fresh content, keeping you equipped with the latest trends and tools in video editing.


How Can Elements Enhance Your DaVinci Resolve Projects?
- Efficiency: Use ready-made templates to quickly create professional-looking videos.
- Creativity: Access to a wide variety of assets can spark new creative ideas for your projects.
- Professionalism: High-quality assets can elevate the production value of your projects, making them look more polished and professional.
To explore our Elements offer and see how it can benefit your DaVinci Resolve projects, click here. Discover the possibilities and take your video editing to the next level.
Tips and Tricks for Merging Clips in DaVinci Resolve
To further enhance your video editing experience in DaVinci Resolve, here are some useful tips and tricks that can make the process of merging and joining clips more efficient and creative:
- Keyboard Shortcuts: Familiarize yourself with DaVinci Resolve’s keyboard shortcuts. For instance, using “Ctrl+A” (Command+A on Mac) to select all clips, or “Alt and ” (Option and / on Mac) to join clips, can significantly speed up your editing process.
- Adjusting Clip Order Before Merging: Before creating a compound clip, ensure your clips are in the desired order. It’s easier to rearrange them on the timeline before merging rather than adjusting the sequence within a compound clip.
- Leveraging the Cut Page: For quick edits, use DaVinci Resolve’s Cut Page. It’s designed for rapid, straightforward editing and can be particularly useful when you need to merge clips quickly.
- Use of Markers: Place markers on your clips before merging them. This helps in identifying specific points or sections within the compound clip, making it easier to navigate through long merged clips.
- Decomposing Compound Clips: Remember that you can decompose a compound clip back into individual clips. This is useful if you need to make adjustments to a single clip within the compound or if you want to apply different effects to individual clips.
- Pre-Render Your Clips: If you’re working with high-resolution clips or a large number of clips, consider pre-rendering your timeline before merging. This can prevent lag during playback and editing.
- Use Color Coding: Color code your clips before merging. This visual organization assists in quickly identifying the types of clips you’ve merged, especially in complex projects.
- Experiment with Transitions: When merging clips, experiment with different transitions between clips for creative effects. DaVinci Resolve offers a variety of transition options that can add a professional touch to your merged clips.
- Regular Saving: Regularly save your project, especially before performing major actions like merging clips. This precaution ensures you don’t lose your work due to unforeseen issues.
- Utilize Compound Clips for Effects: Use compound clips to apply uniform effects or color grading to multiple clips at once. This ensures consistency across all merged clips.
By incorporating these tips and tricks into your editing workflow, you can make the most out of DaVinci Resolve’s powerful features, enhancing both efficiency and creative expression in your video editing projects.
Conclusion
In this tutorial, we’ve delved into the essential techniques of merging and joining clips in DaVinci Resolve, a vital skill set for any video editor aiming to enhance workflow efficiency and narrative continuity. Embracing these methods, coupled with the rich resources offered by Elements, can significantly elevate the quality and creativity of your projects. From crafting compelling short films to producing polished YouTube content, the combination of DaVinci Resolve’s editing prowess and Elements’ diverse assets empowers you to create truly impactful and professional video content. We eagerly anticipate seeing the remarkable creations you’ll achieve with these powerful tools at your disposal.