As a WordPress site owner, your site might occasionally suffer downtime caused by one or many critical errors in WordPress. When that happens, you’ll see the dreaded error message which says, “There has been a critical error on your website” when you try to log in or view the site.

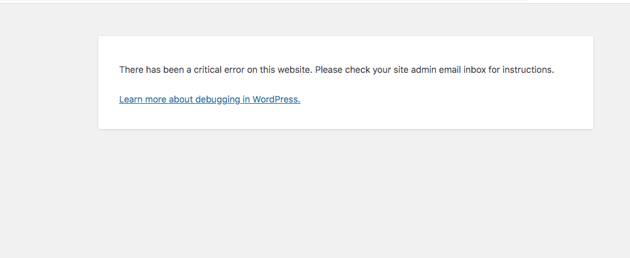

With this message, WordPress is basically telling you that there is a fatal error on your website. During this period, the site will remain inaccessible to visitors and you may be blocked from accessing the admin panel.
Fortunately, this error is easy to resolve, and in this article, we’ll go over the possible fixes for the WordPress critical error. First, let’s take a look at why this error might occur in the first place.
Causes of the “There Has Been A Critical Error in Your Website” Error
The Critical Website Error in WordPress can be caused by one or several things, but unfortunately, the error text is too vague to provide any idea of what exactly went wrong with your site. Therefore, it’s up to you to figure out the reason behind it.
If you encounter this error while setting up WordPress for the first time, then it’s very likely that you either specified the wrong database information or added an inaccessible database. In this case, you’ll have to set your accurate database details inside the wp-config.php file of your WordPress installation.
Aside from setting wrong database information, the critical WordPress error can also result from the following issues:
- corrupted database
- poor hosting provider
- lagging or overburdened web server
- corrupted website cache or PHP code (including plugins and themes)
- server file corruption
- other server-related issues
To help in fixing the issue, WordPress detects when a critical error happens and sends an email notification to the administrator’s email address. This email contains the error details and a link for logging into the site dashboard in recovery mode.
Note that, sometimes, this email might get sent to the spam folder. Therefore, be sure to check there if you don’t find it in your main inbox. If you don’t get the email at all, then you’ll have to locate the issue yourself and fix it.
How to Fix the “There Has Been a Critical Error on Your Website” Error?
Fixing the error requires you to know what caused it in the first place. In the notification email sent by WordPress, you’ll be shown the corrupted PHP file(s) and even the line of code to correct. However, if you didn’t get this message, do not worry.
Below are eight methods of resolving critical errors in your WordPress site. Click on the link below to skip to a particular section:
1. Deactivate Your Site Plugins
Corrupt plugins are one of WordPress’s most common causes of critical website errors. If the WordPress critical error occurred just after you installed a plugin, then you’ll need to deactivate that particular plugin and see what happens after that.
You can deactivate a plugin from the plugins area in your WordPress admin panel. But, in the event that you’re blocked from accessing the back-end, you’ll have to deactivate the plugins manually.
You can find all the plugins used in your site by navigating to wp-content > plugins from your WordPress site’s root directory.

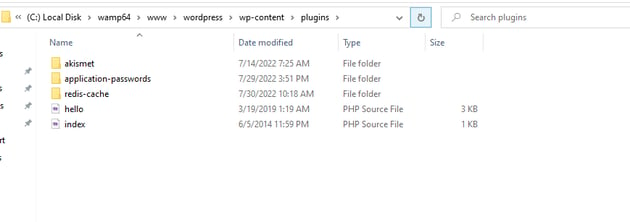
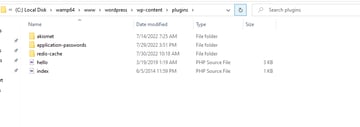
There all you simply need to do is rename the plugin. This ensures that WordPress loads without the problematic plugin when next you restart your WordPress site, which should get rid of the error.
If you’re not exactly sure which plugin is responsible, you can just rename them one by one until you find the culprit.
For hosted WordPress sites, you’ll need to log in using FTP. Consult your hosting provider for information on how to do that.
2. Check the Error Logs
Another method for checking the underlying cause of the critical error is by inspecting the error_log file, which stores PHP error information on your WordPress site. You can find this file within the wp-content folder of your WordPress installation.
The file lists all the errors in your WordPress site as well as the time that each of them occurred. In addition, each error has detailed information about the responsible source file and even the line of code you’ll need to fix.
3. Return to a Default Theme
Themes are responsible for the look and feel of WordPress websites. Because they form the foundation of your site, you’re very likely to get a critical error if there are conflicts in the PHP code powering your site’s theme.
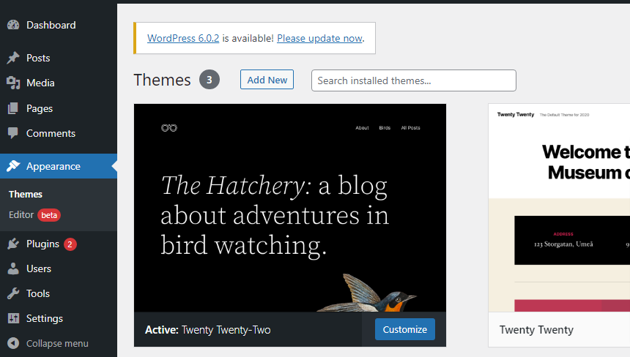
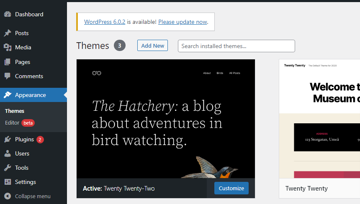
To check if a theme is responsible for your WordPress error, switch the current theme to a default one such as Twenty Twenty. If you can access the admin panel, go to Appearance > Themes and search for a default theme to use.

If you don’t have access to the admin panel, you’ll need to manually delete the theme folder in wp-content > themes. But before you do that, make sure that your site is backed up so you don’t end up permanently losing your theme files.
4. Restore Your Website from the Most Recent Backup Copy
The mere possibility of your WordPress site suffering a critical error is a good enough reason for you to regularly back up your site. Restoring a recent backup can be all you need to get your website working again, in the shortest time possible.
The process of restoring to a backup depends on how the backup was made. If you used a backup plugin like UpdraftPlus, navigate to the backup plugin’s panel and find the restore functionality. The interface will differ depending on the plugin you’re using, but generally, you’re just required to select a backup file to restore the site.
If you’re using a hosting platform which provides regular backups, you should be able to restore your website from the hosting dashboard or admin panel.
5. Enable Debug Mode for WordPress
In debug mode, WordPress is able to automatically detect PHP errors in either the main software or in the themes and plugins used on the site.
To enable debug mode in your WordPress site, open the wp-config.php file with a text editor or IDE and include the following code at the bottom of the file:
define( 'WP_DEBUG', true );

define( 'WP_DEBUG_DISPLAY', false );

define( 'WP_DEBUG_LOG', true );
The first setting above is what actually turns on debug mode on your site. The rest just define how the logs will be shown.
Save the file and restart your website. Errors will be added to the log in a file debug.log, which you can find in the wp-content folder. Inspect the logs and try to figure out the theme or plugin responsible for the error.
Make sure to remove the like lines of code when you’re done with debugging.
6. Raise the Upper Limit for Upload File Size
If you get the critical error message when attempting to upload a file to WordPress, it’s probably because the maximum upload file size is too small. In that case, you can fix the issue by increasing the limit.
You should always first compare the current maximum upload size to the size of the file you want to upload. The maximum size is shown to you at the Media > Add page, just beneath the file upload section.


To increase the limit, open the wp-config.php file with a text editor and set the new maximum upload size in ini_set() as shown below:
ini_set('upload_max_size' , '256M' );
ini_set('post_max_size','256M');
On the line above, we also increase the maximum size for text processing.
7. Clear Your Site Cache
Caching helps your website to load faster by temporarily storing important and frequently used data. However, as data accumulates, it’s possible for the cache to get corrupted. When this happens, you’ll get a critical error on your site.
This problem can be resolved by clearing the cache. All the stale data will be deleted and your site should start working again.
If you’re using a plugin like W3 Total Cache, go to the plugin’s panel in your WordPress dashboard and look for the functionality for clearing the cache. You may need to log in using the link in WordPress’s email in order to access your site’s admin panel.
8. Upgrade Your PHP Version
Using an old version of PHP is a common cause of critical errors in a WordPress site. For this reason, you should always use the latest stable version of PHP for your WordPress site. Currently, that’s between PHP 7.4 and 8.0.
Stable versions are not prone to errors like the older versions (PHP 5.x). You also don’t have to worry much about plugin and theme compatibilities. If you’re on an old PHP version, upgrade it to PHP 7.4 or higher. But before you do that, make sure you have backed up your website.
In most hosts, you can upgrade PHP from the hosting dashboard.
Summary
The WordPress critical error is one of the most common errors in WordPress, and fortunately, it’s very easy to resolve. In this article, we looked at several ways to troubleshoot this error and bring your website back to life.
To briefly recap, they are as follows:
- Deactivate your site plugins
- Check the error logs
- Return to a default theme
- Restore your website from the most recent backup copy
- Enable Debug Mode for WordPress
- Raise the Upper Limit for Upload File Size
- Clear Your Site Cache
- Upgrade Your PHP Version