In this tutorial, we’re going to learn how to darken the background in Photoshop. It’s a super simple and quick effect that you might find yourself using quite often. Whether you need to fix an overexposed background or want to bring focus to your subject, we’ve got you covered. So let’s dive in and discover the step-by-step process of how to darken the background in Photoshop.
How to Darken a Background in Photoshop
In the below image, we’re going to create a dark sky background for Photoshop. This will bring out details in the clouds and city skyline and bring more blue tones into the sky. However, you can use the same method to get any kind of dark background in Photoshop.
Step 1
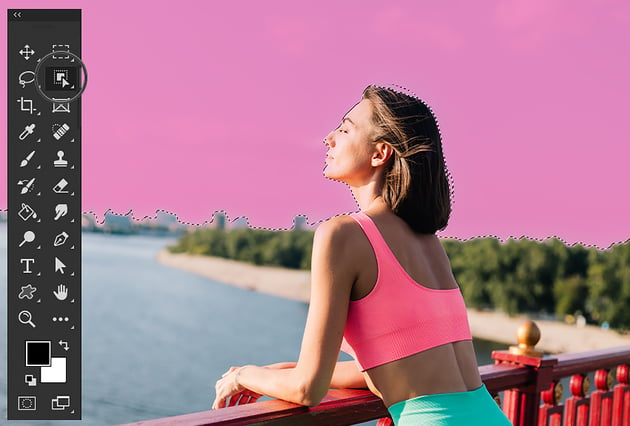
To get started, select your background. I personally find the Object Selection tool to work best, but feel free to use any selection tool that suits your needs.
To use the Object Selection tool, hover over the area you want to select. The selected part will be highlighted in vibrant pink. Click to create the selection.
In my case, I only want to select the sky. If you prefer the entire background to be selected, hover over your subject, click to select them, and then go to Select > Inverse Selection in the upper menu. This will Invert the selection to select the entire background.


Step 2
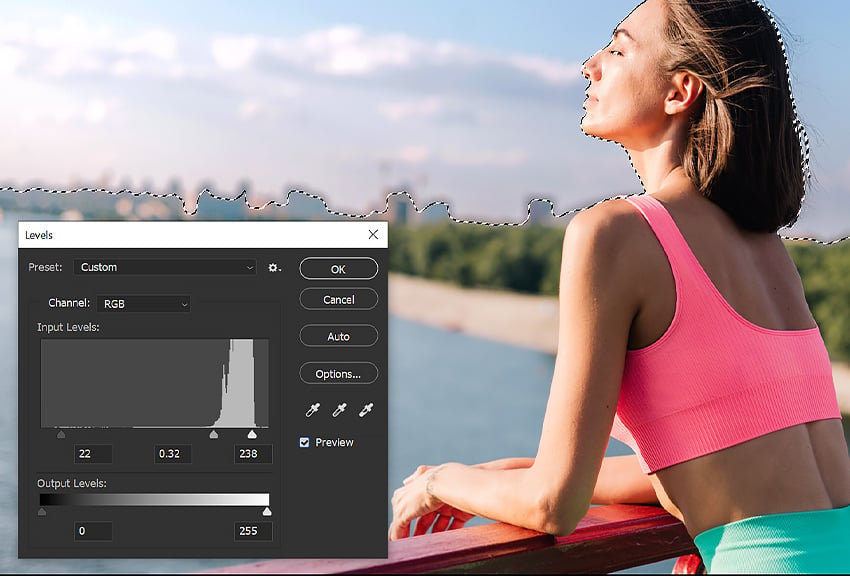
Next, go to Image > Adjustments > Levels.
We see three toggles. By moving the toggles to the right, we darken the image.
Below, I moved the middle toggle to the right a significant amount to darken the sky, and then I moved the rightmost toggle to the left to bring a small amount of brightness back into the clouds. Each image will need a different level of adjustment and settings.
There are multiple adjustments you can use to darken the background of an image. Other good options are Curves or Brightness/Contrast.


Step 3
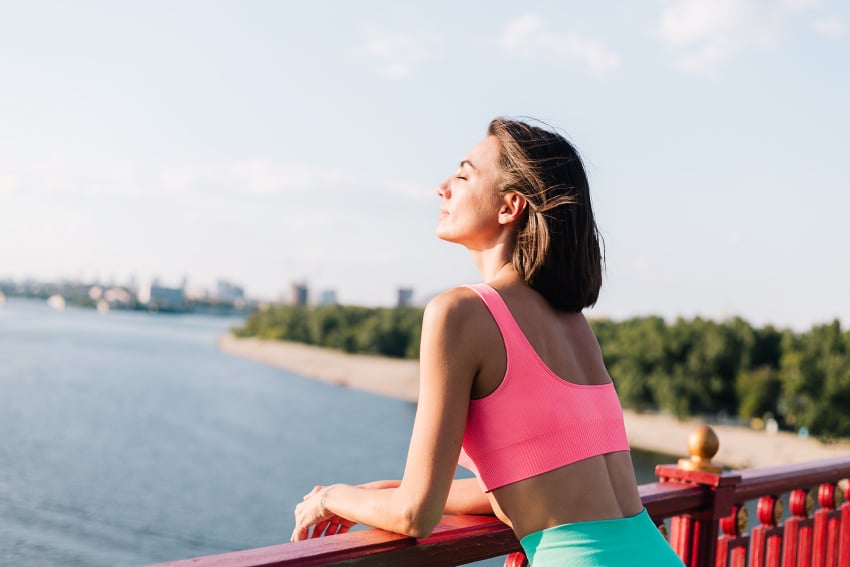
Press Control/Command-D to Deselect the image and remove the selection lines, and you’re done.
Below is the before, and then the after!


That’s It!
And there you have it: a straightforward way to darken the background in Photoshop. With this technique, you can add depth and focus to your images, making your subjects stand out. Or create a dark sky background for Photoshop when the photo is overexposed.
Remember, the key is to play around with the settings until you achieve the desired effect. So don’t be afraid to experiment! Thanks for following along with this tutorial. Keep exploring, keep learning, and most importantly, have fun with Photoshop. Happy editing!
Looking to learn even more? Try one of these tutorials: