By building a child theme you’ll preserve all your custom styles and functions through every theme update, ensuring your site retains its unique charm.
Create a child theme on your WordPress website by setting up a new directory and then adding a style.css file to hold your custom designs.
Then, with a bit of coding in a functions.php file, you can enhance your site’s functionality without breaking a sweat. By the time you’re done, you’ll have a child theme that not only reflects your personal brand but also withstands the test of time and updates.
Let’s Begin!
Overview of WordPress Child Themes
Understanding the bond between parent and child themes ensures you can update and customize your site without risking your tweaks each time the parent theme gets an upgrade.
What Are Child Themes in WordPress?
Think of child themes as your personal customization layer. They’re portable, replicable, and save you a lot of development time. Plus, they keep everything separate from the parent theme’s files, which is a smart way to avoid headaches when it’s time for an update.
In short, they’re the smart way to personalize your WordPress site.
Advantages of Using Child Themes
You’ll find that using child themes in WordPress offers several key advantages.
Safe Customizations
Creating a WordPress child theme ensures you’re customizing your website safely, without risking the integrity of the parent theme during updates. Here’s why they’re so beneficial:
- Customizations are update-proof. Your changes won’t be overwritten.
- Separation of changes. It keeps your tweaks distinct from the parent theme.
- Fallback safety. If something breaks, the parent theme is untouched and operational.
Easy Updates
Every customization you’ve made to your child theme remains intact with each update to the parent theme, ensuring you don’t lose a single tweak.
|
Benefit
|
Child Theme
|
Parent Theme
|
|
Update Safety
|
Preserved
|
Upgradable
|
|
Customization Retain
|
Yes
|
N/A
|
|
Separate Coding
|
Independent
|
Core
|
|
Ease of Management
|
High
|
Medium
|
Extending Functionality
Flexibility is one of the key advantages you’ll gain by using a child theme, as it allows you to extend the functionality of your WordPress site without altering the core structure of the parent theme.
Here’s what stands out:
- Safely customize your site’s design and functionality
- Preserve changes during parent theme updates
- Enhance performance with tailored optimizations
When To Opt for a Child Theme
You’ll want to consider using a child theme when you’re aiming to make significant customizations to your website’s design or functionality without affecting the original theme’s code. A child theme ensures your tweaks are preserved during parent theme updates, provides a safe environment for testing new features, and serves as a foundation for building a custom theme for specific projects or clients.
Here’s a quick reference to help you decide when to use a child theme:
|
Scenario
|
Opt for Child Theme?
|
|
Minor CSS changes
|
Not Necessary
|
|
Extensive design/functionality alterations
|
Yes
|
|
Safe testing of new features
|
Yes
|
How to Manually Create a Child Theme


Now that you’re prepared to customize your WordPress site, let’s walk through creating your own child theme. You’ll start by setting up a dedicated folder, then move on to crafting the essential style.css file.
After these steps, you’ll learn how to properly enqueue the stylesheets and activate your new child theme.
Prerequisites: Preparing Your WordPress Environment
Before diving into the creation of your WordPress child theme, it’s crucial that you’ve set up a backup and staging environment to safeguard your site. This step is vital to ensure that you can easily restore your website in case something goes awry during the customization process.
Here’s what you need to take care of:
- Back up your site: Use a reliable plugin or your hosting provider’s tools to create a full backup.
- Set up a staging environment: Clone your live site to a staging area where you can experiment without fear.
- Brush up on your skills: Make sure you’re comfortable with the basics of HTML, CSS, and PHP, as you’ll need them to tweak your child theme.
With these precautions in place, you’re set to start crafting your unique child theme safely and confidently.
Step 1: Create a Child Theme Folder
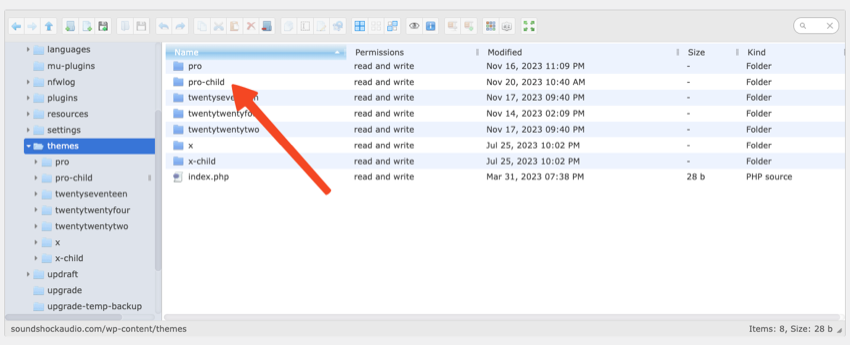
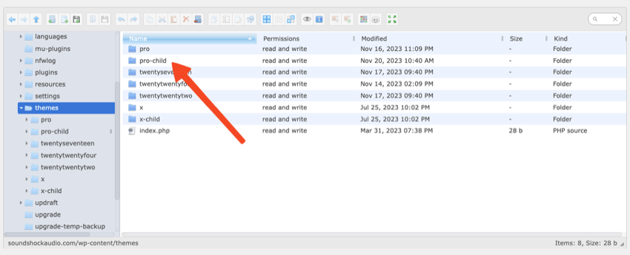
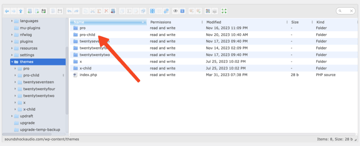
Having prepared your WordPress environment with a backup and staging area, let’s dive into your first task: creating a child theme folder in the wp-content/themes directory. This is where your child theme will live, safely separate from the parent theme.
Start by accessing your website’s files through an FTP client or your hosting file manager. Navigate to the wp-content/themes directory.
Now, create a new folder here. Name it similarly to the parent theme but add -child to distinguish it. For example, if your parent theme is X, name your child theme folder x-child.
That’s it! You’ve successfully created the child theme folder, the first step towards a flexible, update-proof WordPress site.
Step 2: Crafting the Essential style.css File
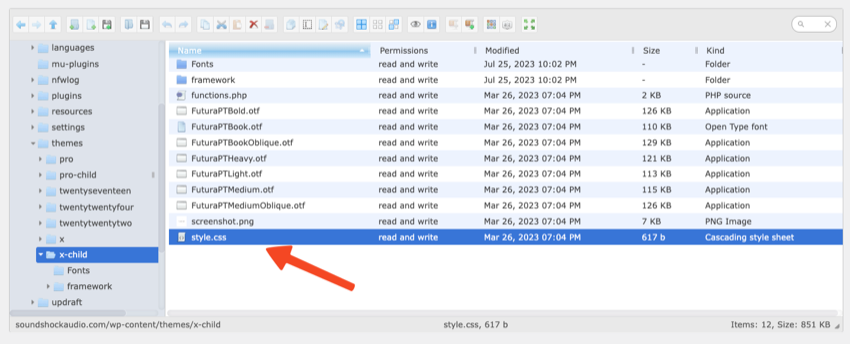
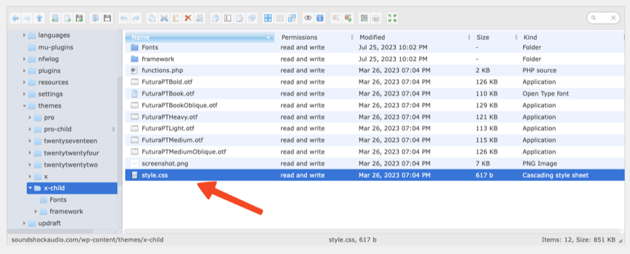

In your child theme directory, you’ll need to create a style.css file that defines the style and identity of your child theme. This file must include a header comment with the necessary details.
Here’s what you should focus on:
- Theme Name: Clearly identify the child theme by giving it a unique name.
- Template: Specify the parent theme name, ensuring WordPress knows which parent theme your child theme is associated with.
- Version: Including a version number for your child theme helps with managing updates and caching.
For example:
1 |
/*
|
2 |
Theme Name: X Theme Child
|
3 |
Theme URI: https://example.com/x-child/
|
4 |
Description: My Website X Child Theme
|
5 |
Author: John Doe
|
6 |
Author URI: http://example.com
|
7 |
Template: x
|
8 |
Version: 1.0.0
|
9 |
License: GNU General Public License v2 or later
|
10 |
License URI: http://www.gnu.org/licenses/gpl-2.0.html
|
11 |
Tags: light, dark, two-columns, right-sidebar, responsive-layout, accessibility-ready
|
12 |
Text Domain: xchild
|
13 |
*/
|
Once you’ve crafted your style.css with the required information, save it within the child theme folder.
Step 3: Enqueue Parent and Child Theme Stylesheets

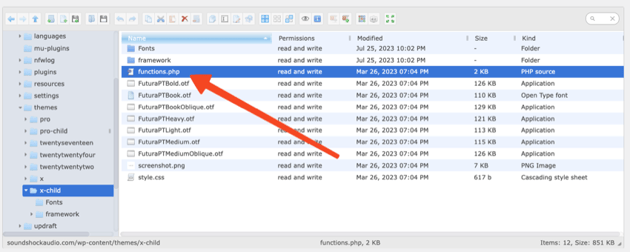
You’ll now need to perform stylesheet enqueueing to ensure both your parent theme and child theme’s styles are loaded correctly. This process is crucial to maintain your site’s visual consistency.
First, you’ll need to create a functions.php file like you did for the CSS file. Once you have the php file created, add a function to enqueue the styles. Use the wp_enqueue_style() function, specifying the parent theme stylesheet first, then your child theme’s stylesheet.
Here’s a table to help you visualize the process:
|
Function
|
Purpose
|
Parameters
|
|
wp_enqueue_style
|
Loads a specific stylesheet.
|
handle, src, deps, ver, media
|
|
add_action
|
Hooks a function to a specific action.
|
’wp_enqueue_scripts’, ’function_name’
|
|
get_stylesheet_uri
|
Retrieves the URI of the current theme’s stylesheet.
|
None
|
Remember to set the correct dependencies and version numbers to ensure your website reflects the latest changes.
That’s it! You’re now running a WordPress website with a child theme that’s uniquely yours.
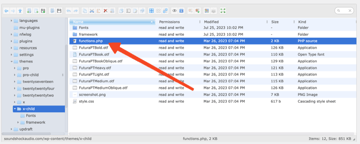
Step 4: Adding Template Files and Customizations
Now that you’ve set up your child theme, it’s time to customize it by overriding the parent theme files.
You can implement custom styles easily by editing the child theme’s style.css file.
For more advanced customizations, use the functions.php file to add or modify the theme’s functionality.
Overriding Parent Theme Files
Overriding parent theme files with your child theme ensures that your customizations are maintained, even when the main theme is updated.
Here’s how you can do it:
- Copy the template file from the parent theme to your child theme directory.
- Modify the file in your child theme folder.
- Activate your child theme to see the changes take effect.
Implementing Custom Styles
Typically, you’ll want to add your own flair to your child theme by implementing custom styles. This involves editing the ’style.css’ file in your child theme directory.
Here, you can add or override CSS to personalize your site’s appearance. Remember to enqueue both parent and child stylesheets in functions.php to ensure your custom styles are applied correctly after activation.
Using functions.php for Advanced Customizations
After customizing your child theme’s appearance with CSS, delve into the functions.php file to extend its functionality and make advanced customizations.
Here’s how you can enhance your theme:
- Add custom functions to tweak your site’s behavior.
- Use hooks to modify or extend the parent theme’s features.
- Override parent theme functions to tailor specific elements to your needs.
How to Create a Child Theme Using Plugins


If you’re not keen on manually creating a child theme, you have the option to use a plugin that does the heavy lifting for you.
Let’s walk through the process of selecting the right plugin and using it to generate your child theme effortlessly.
Comparing this method to the manual approach will help you understand the pros and cons of using plugins for this task.
Selecting the Right Plugin
When you’re looking to streamline the process of creating a WordPress child theme, opting for a plugin can be a smart move. These plugins make it easy to generate a child theme without diving into too much code.
Here are a few things to consider when selecting the right plugin:
- Ease of Use: Look for a plugin with a user-friendly interface that simplifies the creation process.
- Features Offered: Some plugins may offer additional features like enqueueing styles or copying template files.
- Compatibility and Updates: Ensure the plugin is compatible with your version of WordPress and is regularly updated for security and functionality.
Step-by-Step Process Using a WordPress Plugin
Start by installing and activating your chosen plugin.
Here are a few plugins that will create a child theme for you:
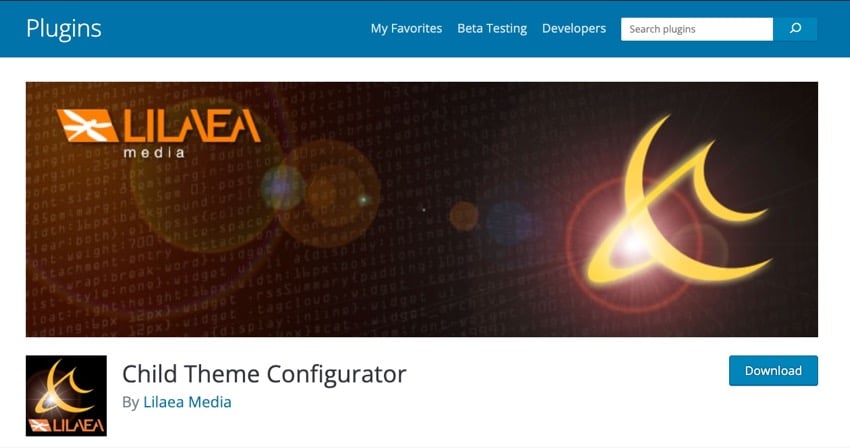
For this step-by-step tutorial, we’ll cover how to set up a child theme in the Child Theme Configurator plugin. Once you have installed the Child Theme Configurator plugin, follow the plugin developer’s provided instructions, summarized as follows:
- Begin by accessing the Parent/Child Tab.
- Choose the action, Create a New Child Theme: Install a new child theme based on an existing parent theme.
- Pick a parent theme when prompted.
- Analyze the child theme for dependencies and issues by clicking Analyze.
- Name the theme directory (not the theme itself).
- Decide on style saving location: Primary Stylesheet: Directly add new styles, replacing current ones or Separate Stylesheet: Preserve original styles and add new ones separately.
- Choose how to handle the parent theme stylesheet
- Customize Child Theme details like Name, Description, Author, etc.
- Optionally copy Parent Theme settings to the Child Theme.
- Click the Configurator button.
Thats it! You’ll have your child theme set up and ready to go!
Create a Child Theme for Your WordPress Site Now!
Creating a WordPress child theme is a straightforward and essential process for customizing your website safely and efficiently.
This article has guided you through the simple steps of setting up a child theme, from creating a dedicated folder and crafting a style.css file to enqueueing stylesheets and making advanced customizations.
Whether you choose to manually create your child theme or use a plugin, the benefits of using a child theme are clear: safe customizations, easy updates, and extended functionality, all while preserving the integrity of your parent theme.
If you are looking for high-quality WordPress themes and plugins, check out Envato Elements.