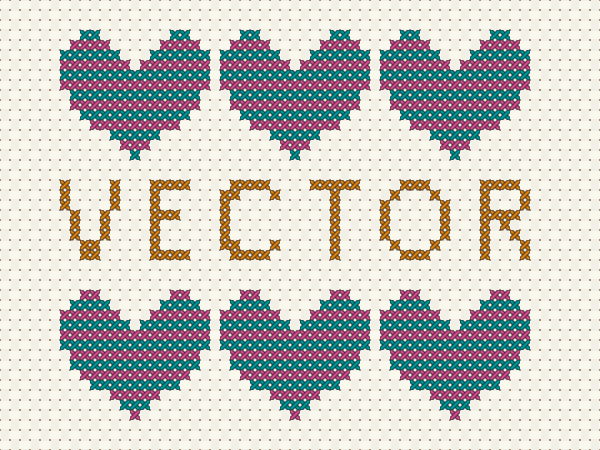
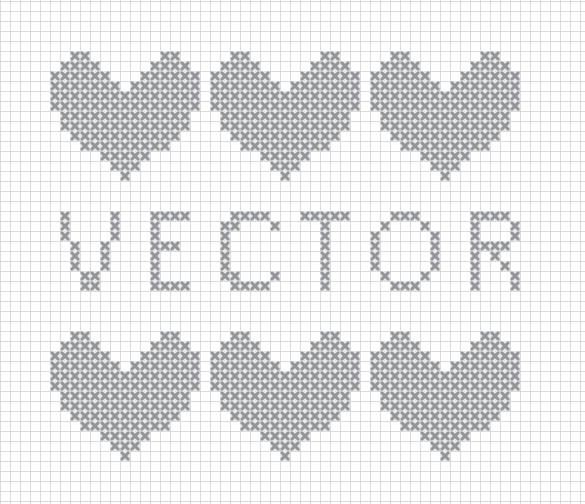
In today’s tutorial, I’m going to show you how to create a cross stitch effect using Adobe Illustrator CS6. I’ll be using the Appearance panel and patterns in order to create the design and then show you how you can create a simple Aida fabric background pattern. This is a great tutorial for those who are beginners but want to try out some advanced tools, so let’s get started!
Step 1
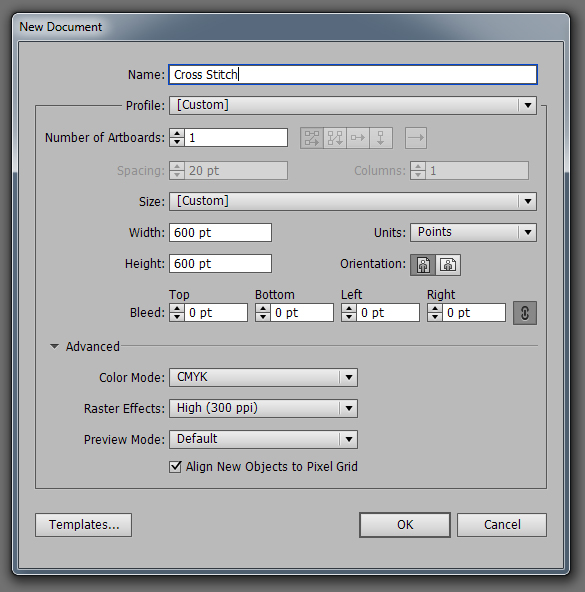
Let’s start by creating a New document by going to File > New. Create a 600 by 600pt canvas and drill down into the Advanced options. Your color mode is up to you, however I like using CMYK as I often print my vector designs. Place a tick in Align New Objects to Pixel Grid and then click on OK.
Step 2
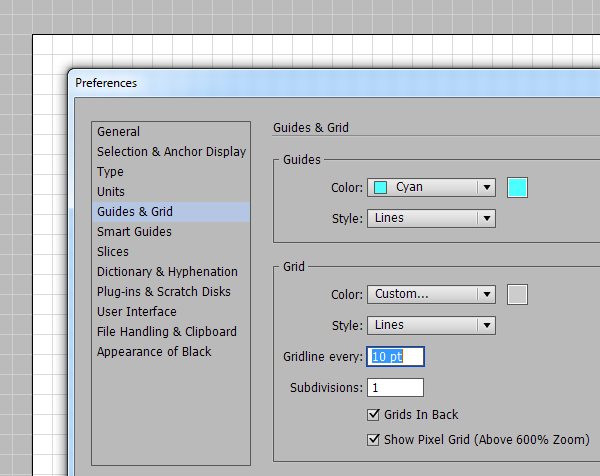
Now to set up a Grid. Go to Edit > Preferences > Guides & Grid. Within the Preferences screen, Style should be Lines, Gridline every 10pt and Subdivisions 1. This will create a Gridline every 10pts but wont have a subdivision in-between. Imagine each cross stitch will be within a 10 x 10pt box. If you want bigger stitches, increase the Gridline amount. Click on OK once done. To make the Grid visible, go to View > Show Grid and make sure there is a tick next to View > Snap to Grid.
Step 3
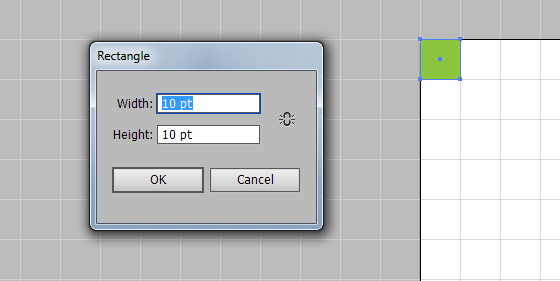
Using the Rectangle Tool (M), create a 10 x 10pt square. Move the square to one of the corners of the Artboard.
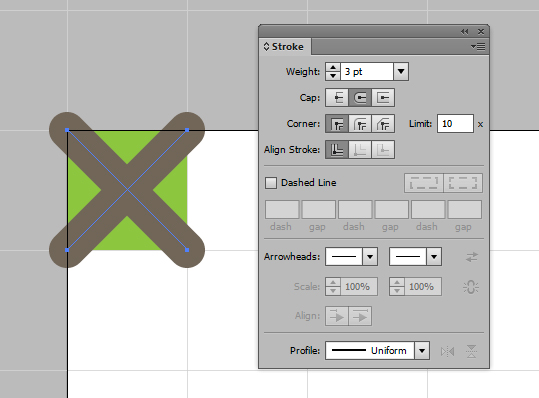
Step 4
With the Line Segment Tool (\), draw a 3pt Stroke Weight line diagonally on either direction across the square. In the Stroke panel, select Round Caps.
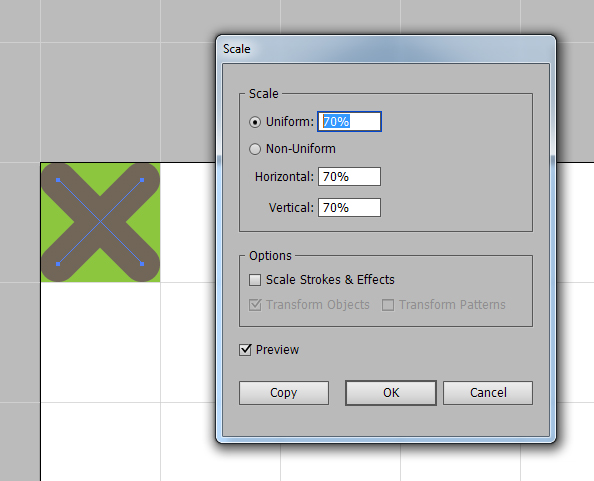
Step 5
Select both lines and then go to Object > Transform > Scale and enter in the value 70% in the Uniform field. Make sure that none of the options are ticked before as we don’t want to decrease the scale of the Stroke Weight, only the lines themselves. Click on OK once done.
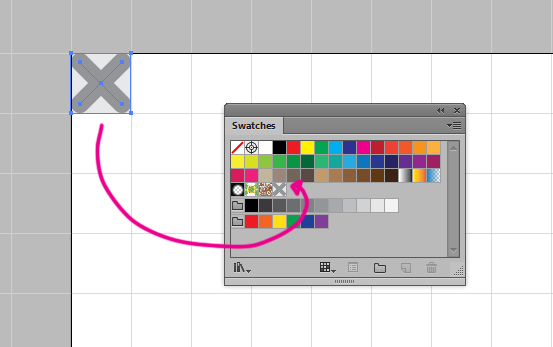
Step 6
Give the cross a medium grey fill and the background square an off white/grey fill. Then Select All (Ctrl + A) and drag and drop them into the Swatches panel. This will automatically create a pattern.
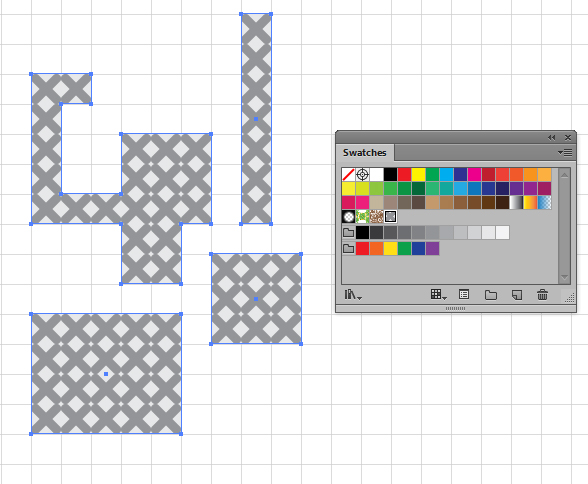
Use the Pen Tool (P) to create shapes out of squares to test that your pattern crosses align to the grid. Don’t create any curves, you just need to create straight lines by clicking from corner to corner on the grid.
Step 7
Now that we’re happy with the pattern, let’s begin creating our shapes to have in our cross stitch. I’ll be creating some heart shapes for this design. Begin with using the Blob Brush Tool (Shift + B) to draw half of a heart. Reduce it’s Opacity via the Transparency panel to about 10% and then lock it in place via the Layers panel. With the Blob Brush Tool (Shift + B), use the half heart shape as a guide to roughly draw along the grid, the shape of the heart.
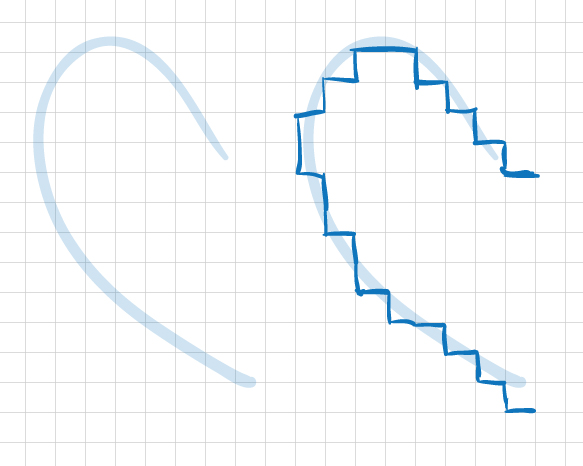
Select the shape and then go to Object > Transform > Reflect. Select Vertical and click on Copy. Then use your arrow keys on your keyboard to nudge it into place so you have a complete heart.
Step 8
I’m not so happy about the overall shape of the heart, so here I’ll show you how you can modify it. First you will need to select both shapes and go into the Pathfinder panel and select Unite. I’m going to increase the height of the heart by first selecting the lower portion of the heart with the Lasso Tool (Q) and then using the arrow keys on my keyboard to nudge it down a full two squares.
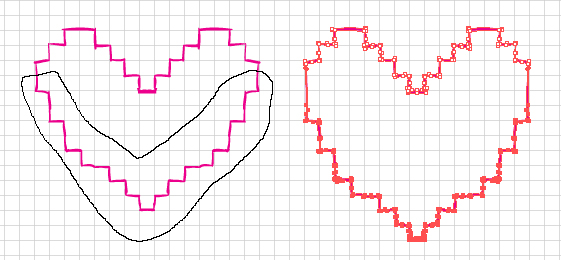
I’m going to shorten the heart towards the bottom, so I’ve repeated this method as shown below. Once you’re happy with your heart, duplicate it into a composition for your cross stitch design.
Step 9
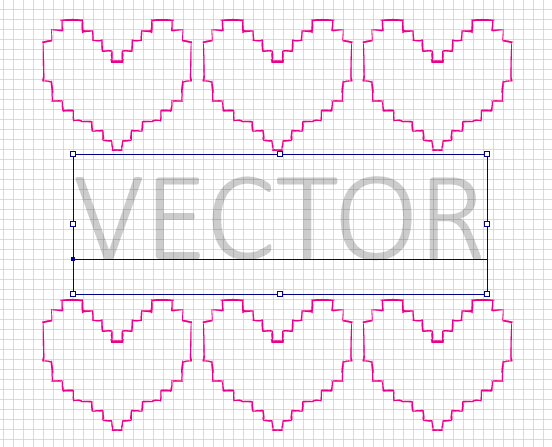
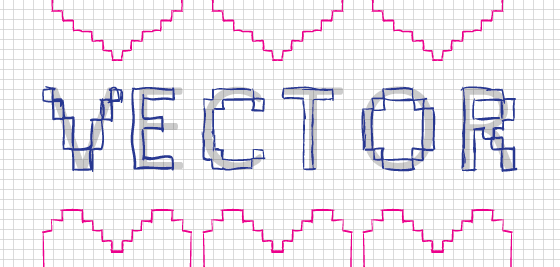
If you wish to add text to your design, you can duplicate the “sketch” and square trace method. First use the Type Tool (T) to add your text. I’d suggest a slim weight font. Once you’ve added your text and sized it into place, reduce the Opacity to 10%.
Then sketch around the squares to create your design. Don’t worry if the squares aren’t accurately on top of the font as it is just a guide to help you maintain a similar style lettering through out you composition.
Step 10
Once you’re done, hide all your guides and then move your letters and hearts into place. Adjust the kerning of your letters and modify if required. If you want some help with the kerning, check out this great beginners kerning video tutorial here on Vectortuts+.
Step 11
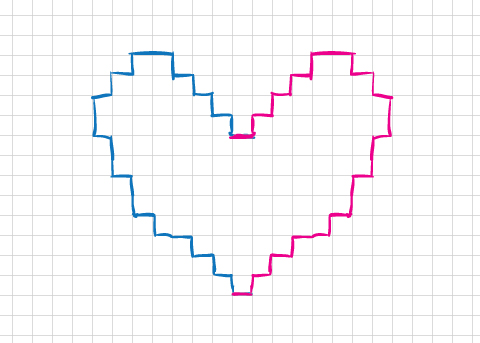
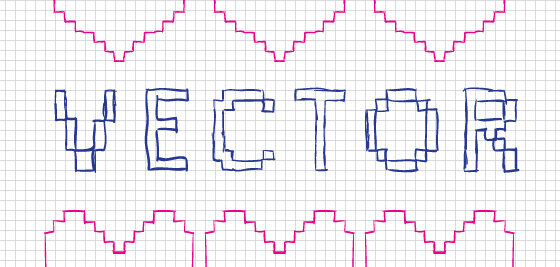
Reduce the Opacity of all your sketches to 10%. Then using the Pen Tool (P), draw a corner to corner, straight line shape, tracing over your sketch. For the hearts you can just draw the one and then copy and paste it into place.
Hide your sketch when you’re finished and here is what my design is looking like now. Select All (Ctrl + A) of the shapes and create a Compound Path (Ctrl + 8).
Step 12
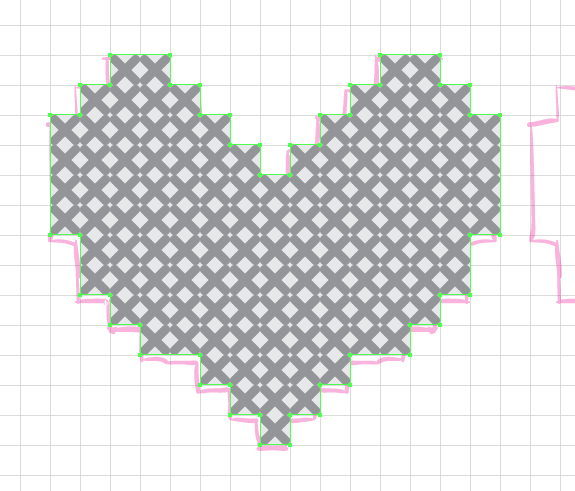
Now that I’m happy with the design, use the Rectangle Tool (M) and draw across the whole design and then fill it with our cross stitch pattern.
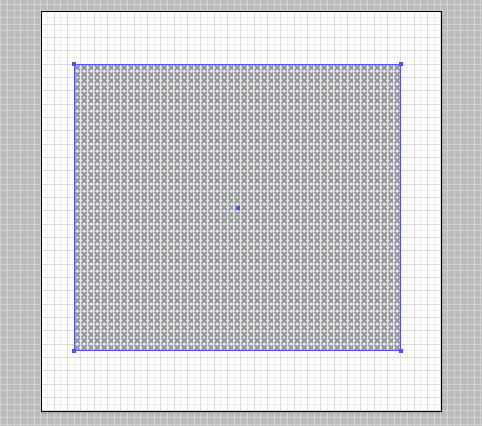
Place the Compound Path of the design on top of the rectangle.
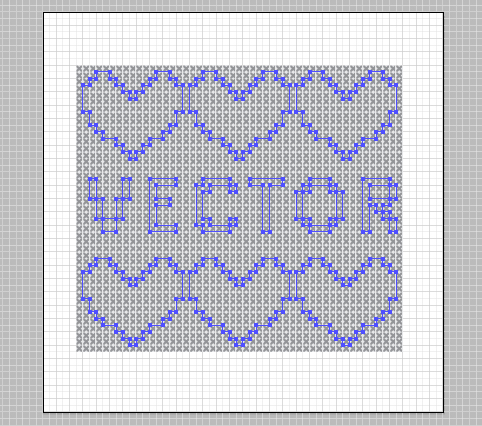
Step 13
Select both the rectangle and the design and create a Clipping Mask (Ctrl + 7).
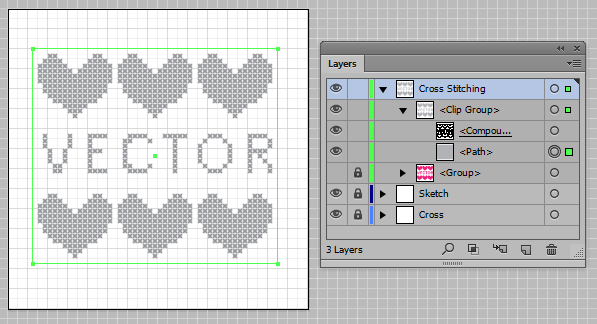
Step 14
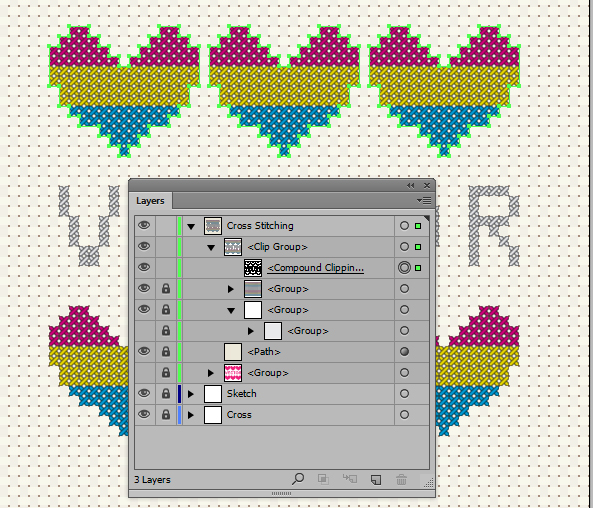
Select the rectangle within the Clipping Mask and go to Object > Expand. This will convert the rectangle to several groups containing individual groups of crosses as well as their background. Lock in place the Clipping Mask of the overall design (at the very top of the Clip Group) and then select a Path from one of the groups which contain the cross and background. This shape should have a null fill and a null stroke.
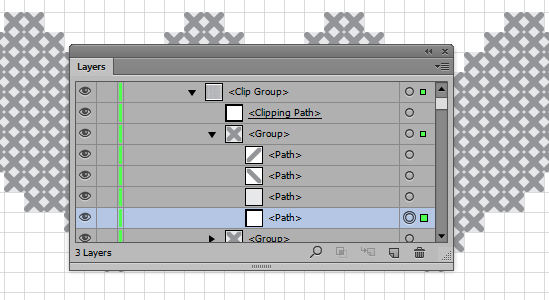
Then go to Select > Same > Appearance. This will select all of these shapes. They are unnecessary to this process, so we’re going to delete them. Select the delete key on your keyboard to do this.
Step 15
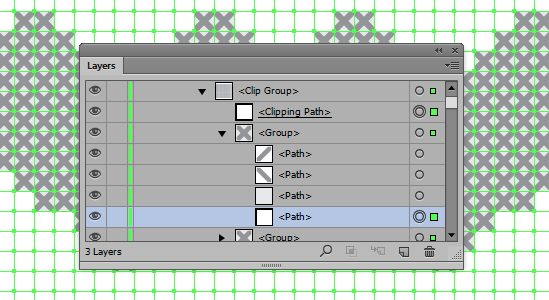
Each of the groups should now contain the two strokes which create the cross and then a square for the background of the cross. Select the square and then go to Select > Same > Fill Color. This will select all of the squares from the groups.
Cut (Ctrl + X) then from the groups and then Paste in Front (Ctrl + F). This will paste them above the Clip Group. While they are all still selected, Group them together (Ctrl + G). Then move this group back into the Clip Group, below the Clip Group which contains the crosses as shown below.
Step 16
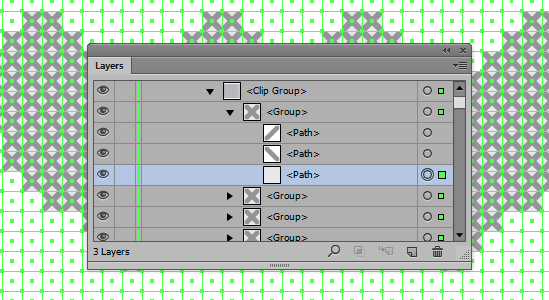
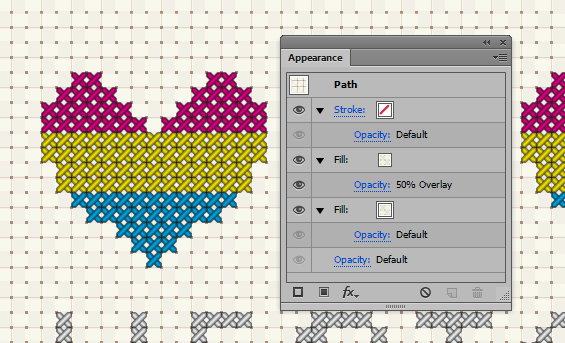
Select one of the strokes which create the cross and go to Select > Same > Stroke Color to select all of the strokes. In the Appearance panel I’m going to add the following elements. If you’d like to find out how to add new elements to the Appearance panel, check out this great tutorial on using the Appearance panel to find out more.
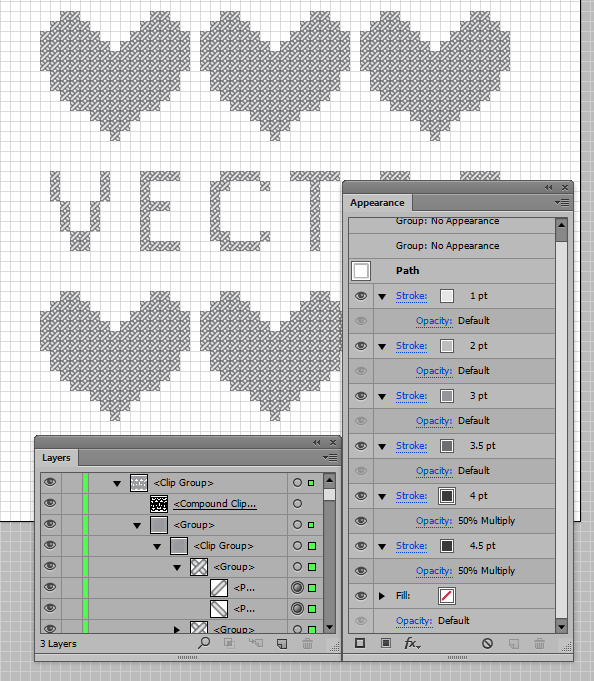
Step 17
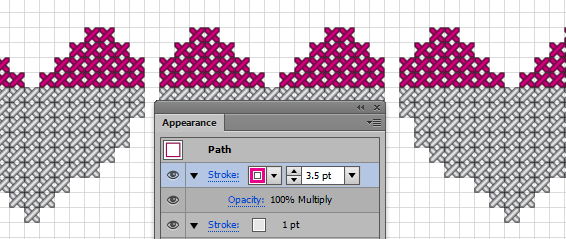
Lock the Compound Clipping Path and the group containing the off white background squares. Using the Direct Selection Tool (A), select rows of crosses.
In the Appearance panel, Add New Stroke and choose a stroke color which you’d like your crosses to be. Change the Stroke Weight to 3.5pt, ensure that the cap is Round and then set the Opacity to 100%, Blending Mode to Multiply.
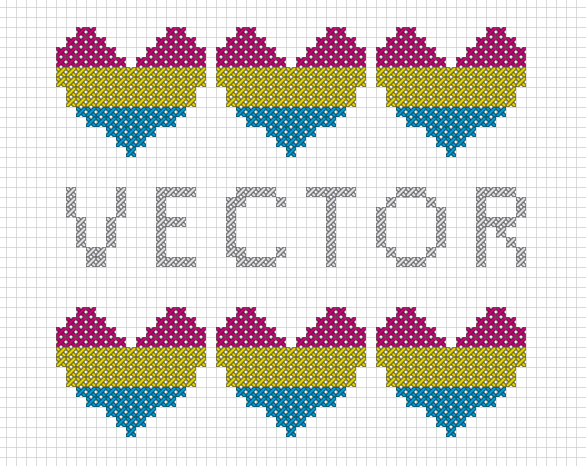
Step 18
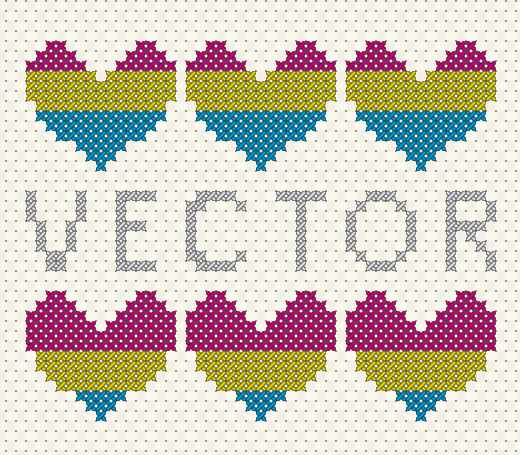
I’ve went ahead and created a CMYK color scheme for the crosses. The word “VECTOR” I’ve remained a neutral grey color.
Step 19
Let’s create an Aida fabric pattern for the background. We want a very subtle patchwork pattern with the sign of holes in the cloth. The holes would be where the thread from the cross stitching goes in and out of the fabric. So start by creating a 10 by 10pt square with the Rectangle Tool (M) and then moving it into the corner.

Step 20
While the square is selected, go to Object > Pattern > Make. This will open the Pattern Options.
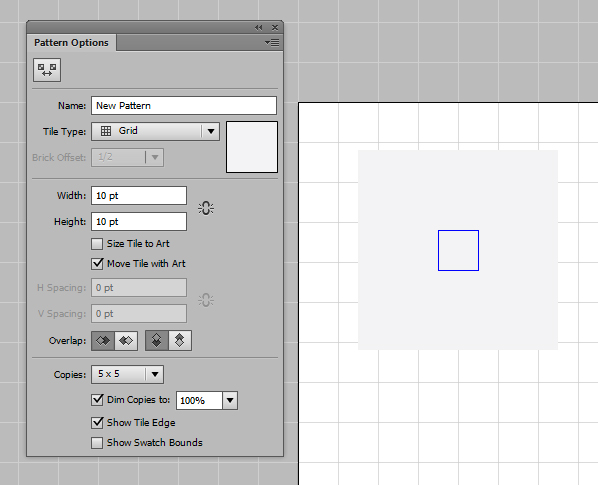
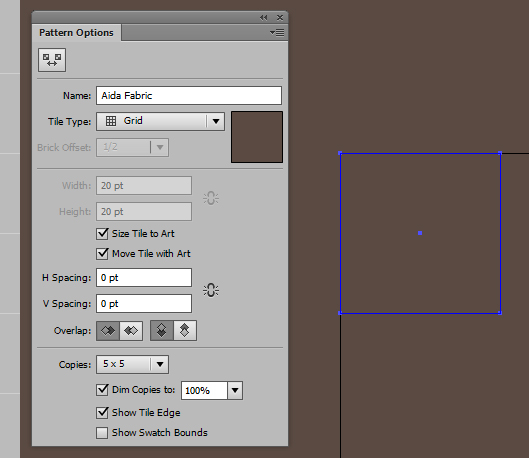
Increase the size of the square to 20 by 20pt and tick the following options below. Move the square into the top corner of your artboard.
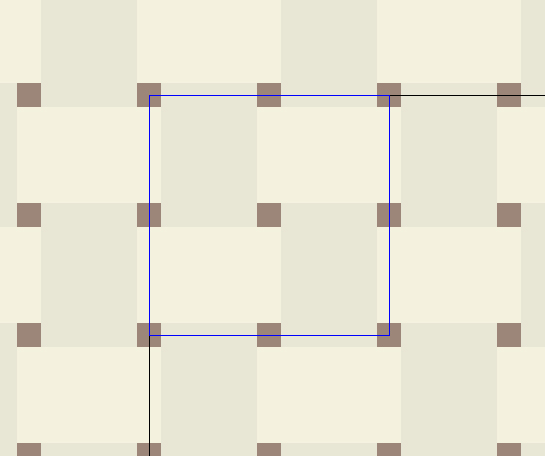
Step 21
Go to View > Snap to Grid and Untick it. This will make it easier to draw the lines, otherwise it will force the lines into the corners of the grid. Use the Line Segment Tool (\) to create a weave pattern by following the images below. Set the lines to an 8pt Stroke Weight.

Step 22
Before saving your pattern, recolor your strokes and background. The lines should be of a similar color, but slightly off so you can see a subtle weave.
Step 23
Enable Snap to Grid again. Draw a Rectangle (M) behind the design and align it to the artboard. Fill it with the Aida pattern. You may want to increase the contrast of the pattern if you can’t see it as well. I’ve done this via the Appearance panel with the settings below.
Step 24
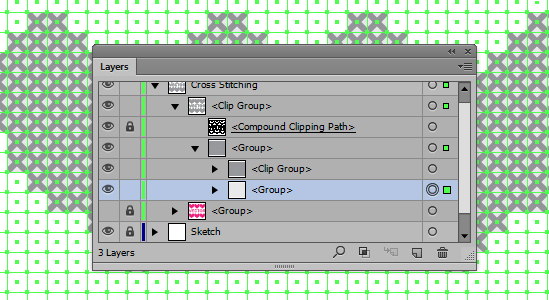
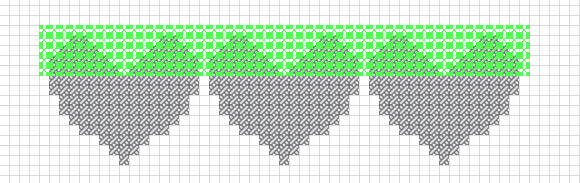
If you wish to modify your design, say you want the hearts to be closers to the text, lock all the elements within the Clipping Group apart from the Compound Clipping Path. Use the Direct Selection Tool (A) to then select the hearts.
Make sure that Snap for Grid is enabled, then nudge down your hearts with the arrows on your keyboard. I’ve modified my design as shows. Of course you may with to recolor your design, do this by selecting one of the crosses and using the Select > Same > Appearance method.
Conclusion
Trying playing with different color combinations and designs and see what you can come up with. If you’re into cross stitching and other handy crafts, why not check our Crafttuts+, one of our sites here on the Tuts+ network.