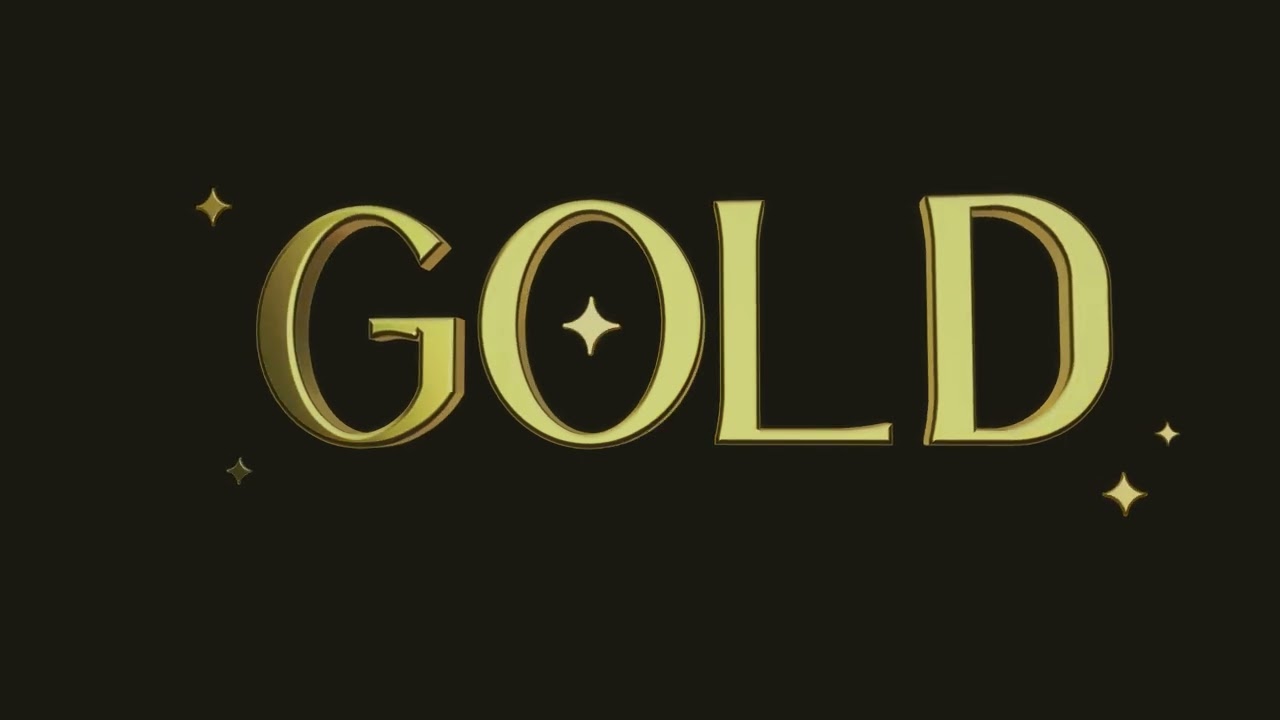
A glowing gold text effect is a perfect way to add a touch of elegance and luxury to your designs. In this tutorial, we’ll use Spline, a 3D design tool, to create a 3D text effect and bring it to life with animation, making it look dynamic and polished.
Whether you’re working on branding, social media graphics, or eye-catching typography for a project, this effect will help you achieve a sophisticated and high-end look.
Let’s dive in and turn simple text into a radiant, metallic gold font!
1. How to set up your scene in Spline
Step 1
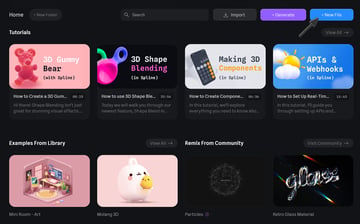
After logging into Spline, you’ll land on the Home screen. This is your creative hub, where you can access official tutorials, browse the Library for inspiration, and explore assets shared by the community. To start designing, click New File in the top-right corner. This will open a fresh workspace where we’ll craft our golden text effect.


Step 2
Once your new scene is created, a splash screen will appear with preset starting assets. Choose the very first option, 3D Text. This will be the foundation for our gold font.


Step 3
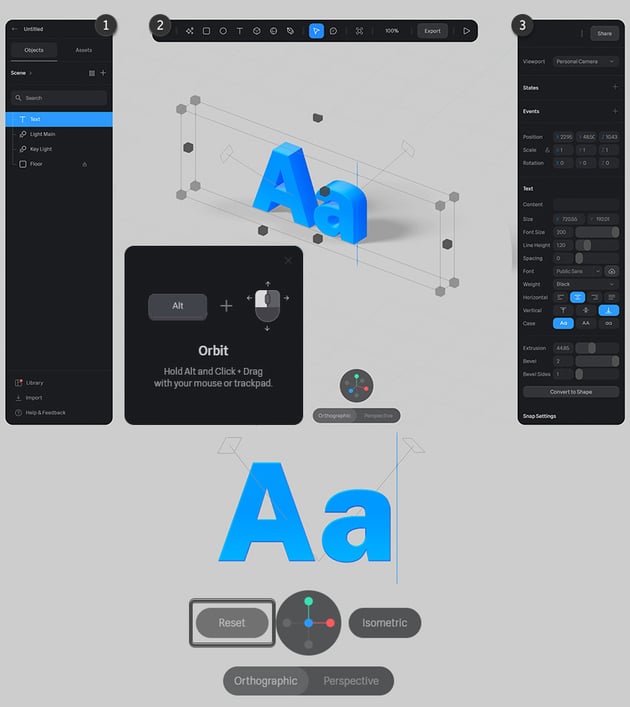
Before styling our golden text, let’s familiarize ourselves with Spline’s interface:
- Left Sidebar (Outliner): Organizes all scene objects in a structured list. Switch to the Assets tab to access the Asset Browser and Team Library Manager.
- Top Toolbar: Offers quick access to essential tools for creating and transforming objects. Here, you’ll also find options for zooming, exporting, and Play Mode.
- Right Sidebar (Properties Panel): Displays settings for selected objects, including materials, lighting, and animations.
Since we’re working in 3D space, navigating around the scene is key. Use these controls to move the camera:
- Orbit: Hold Alt/Option and drag with your mouse or trackpad.
- Pan: Hold Space and click & drag your mouse, or use two-finger drag on a trackpad.
- Zoom: Scroll with your mouse wheel or hold Control/Command and press Plus/Minus, or pinch on a trackpad.
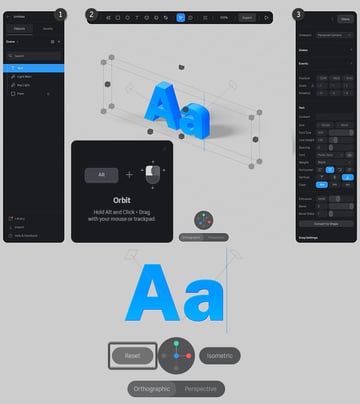
For precise text alignment, click the blue circle in the circular Navigation Tool at the bottom of the screen to switch to Front View. From here, we can also switch between Orthographic and Perspective views.

2. How to make letters look 3D in Spline
Step 1
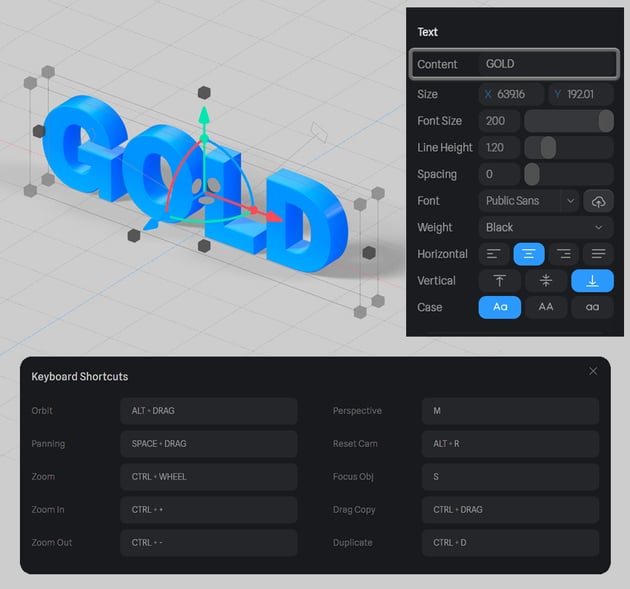
Once the text appears in the viewport, we can edit it in two ways:
- Double-click the text object directly in the viewport, which will activate a flashing text cursor to type.
- Use the Text panel in the right sidebar, where the Content box lets you input and edit text manually.
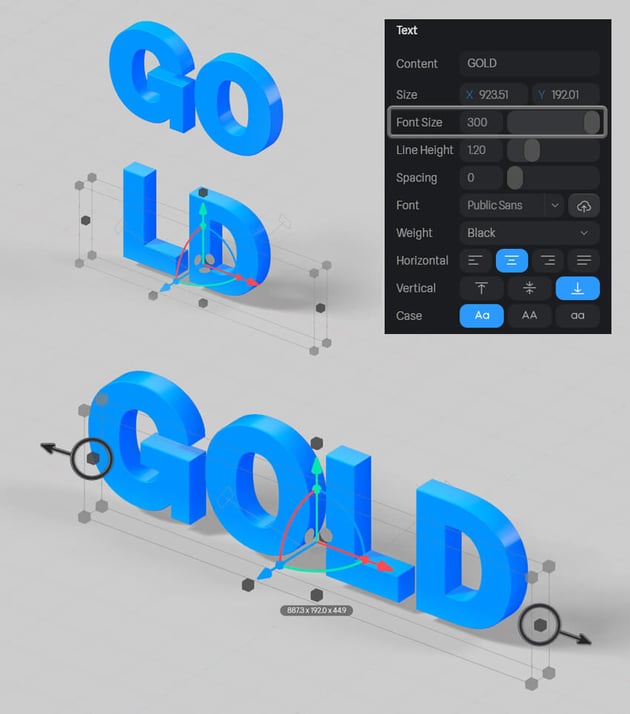
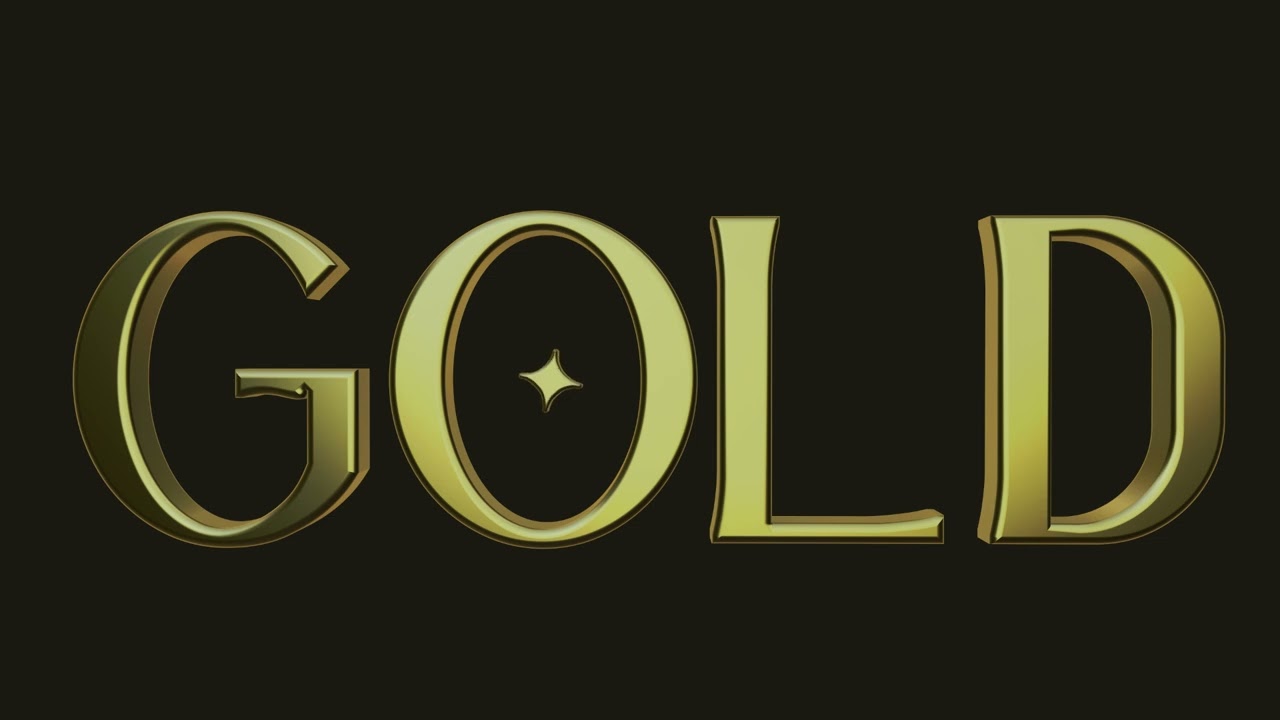
For this project, let’s type “GOLD” to create a base for our elegant golden text effect.
If you lose track of the navigation, you can find a list of Spline’s hotkeys in the Help menu at the bottom of the Outliner.


Step 2
Now, let’s refine the size of our text. In the Text panel, adjust the Font Size to 300 to make it larger. If the text becomes too compressed, hold Alt and drag the side manipulators to expand the bounding box horizontally. This will ensure our letters have enough breathing room for a bold and luxurious look.


Step 3
The right font choice is crucial for achieving a refined aesthetic and making letters look 3D. Spline offers a variety of built-in fonts, but for a truly polished look, we can browse Envato for an extensive collection of luxury fonts. Using Filters, we can narrow down the options to find a sophisticated serif or elegant script that enhances our design.
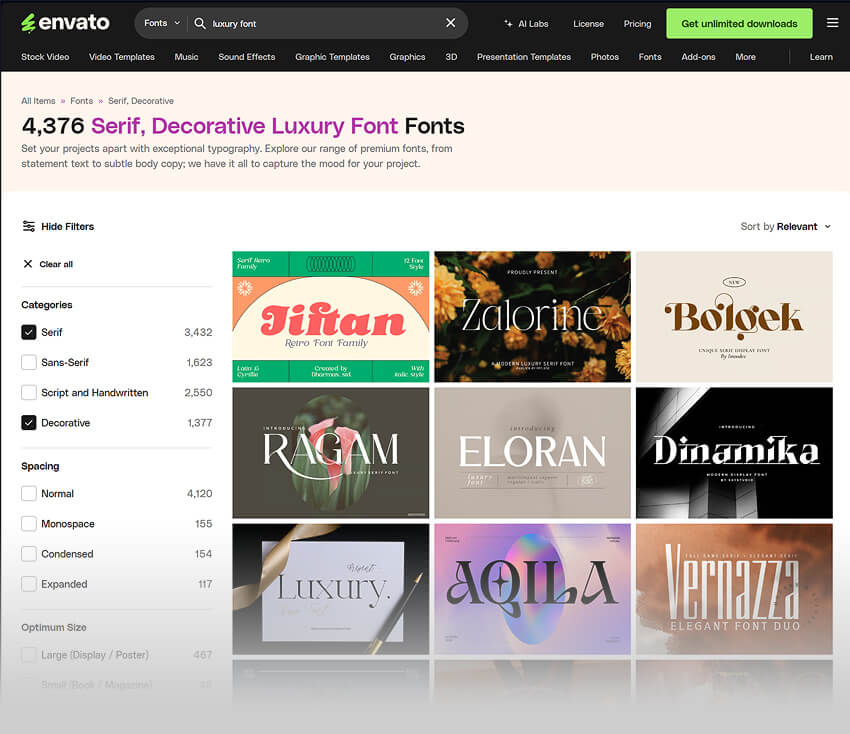

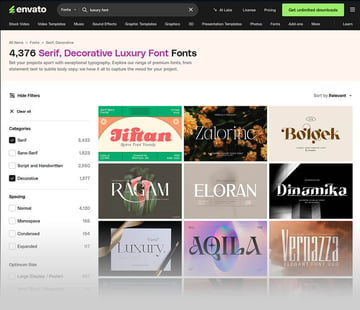
For this tutorial, I’ve picked this elegant font by snapedsgn, which has a classic yet modern feel, perfect for this golden text effect.
Step 4
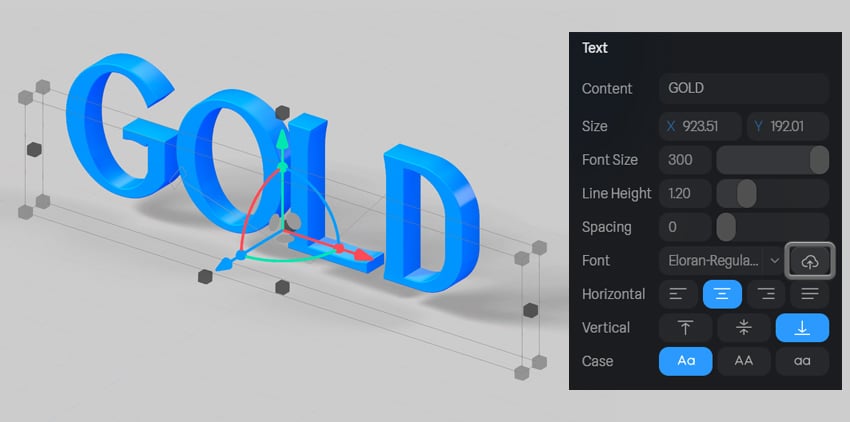
To upload a custom font into Spline:
- Click the cloud with an arrow icon in the Text panel.
- Select and upload the font file from your device.
Alternatively, you can explore Spline’s built-in fonts and choose one that fits the elegant, gold-inspired look.


Step 5
Let’s finalize the scene setup by adjusting the background and perspective.
- Switch to Front View by clicking the blue circle in the Navigation Tool.
- Change the camera mode to Perspective View to give our text a realistic depth.
- Darken the background for better contrast: click anywhere in the viewport to deselect all objects. Then, in the Scene settings on the right sidebar, set the BG Color to
#1E1714.


3. How to create a gold material in Spline
Step 1
Let’s transform our “GOLD” text into a realistic metallic gold!
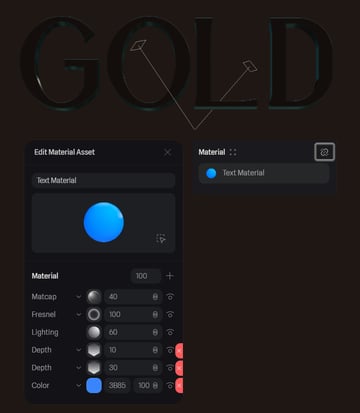
Scroll down to the Material section in the right sidebar. Here, we can modify the default Text Material in two ways:
- Click it to open the Edit Material Assets window.
- Click the chain icon to break the connection, making the material editable as separate layers.
Since we don’t need all the default layers, let’s clean up the material by deleting the unnecessary ones. Hover over each layer, and when the red X button appears on the right, click it to remove the Color and both Depth layers.
Now, we’re ready to build our gold font from scratch!


Step 2
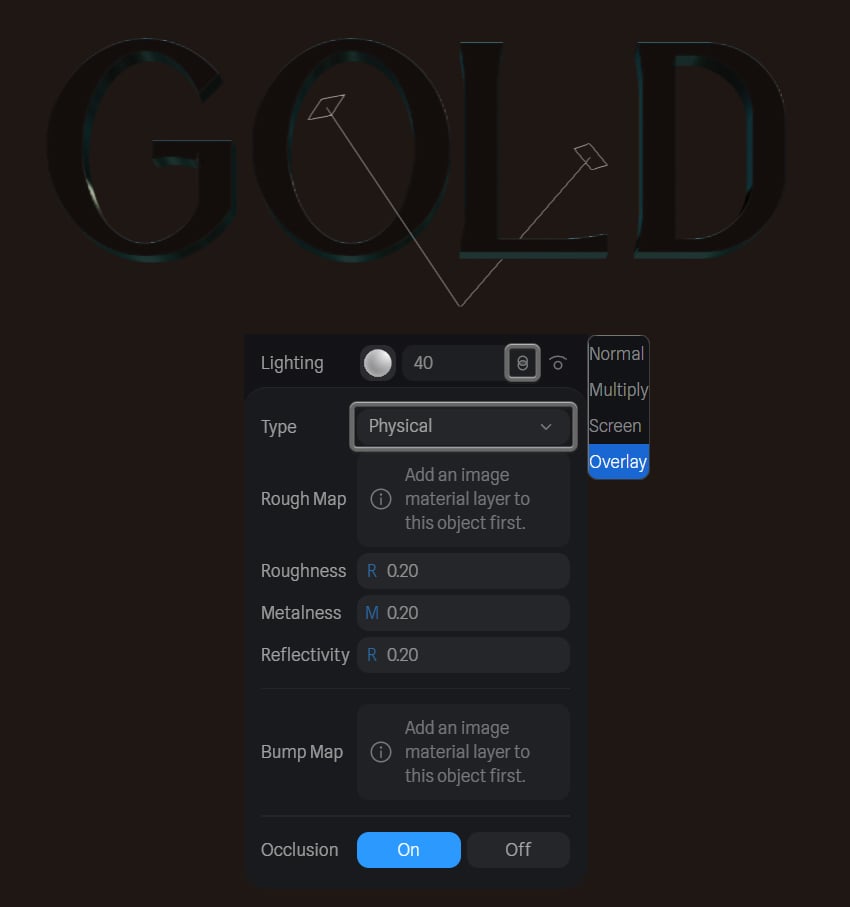
We can rearrange the remaining layers by dragging them up or down. Move the Lighting layer to the top of the list, and let’s start adjusting it.
For now, disable the visibility of the other layers by clicking the eye icon next to each one.
Modify the Lighting layer’s properties:
-
Opacity:
40 -
Blend Mode:
Overlay(click the two overlapping circles to change it) - Click the sphere icon next to the layer name to access the settings and apply the following:
-
Type:
Physical -
Roughness:
0.20 -
Metalness:
0.20 -
Reflectivity:
0.20 -
Occlusion:
On
-
Type:
This gives our text a subtle metallic reflection, the first step to achieving a luxurious gold effect.


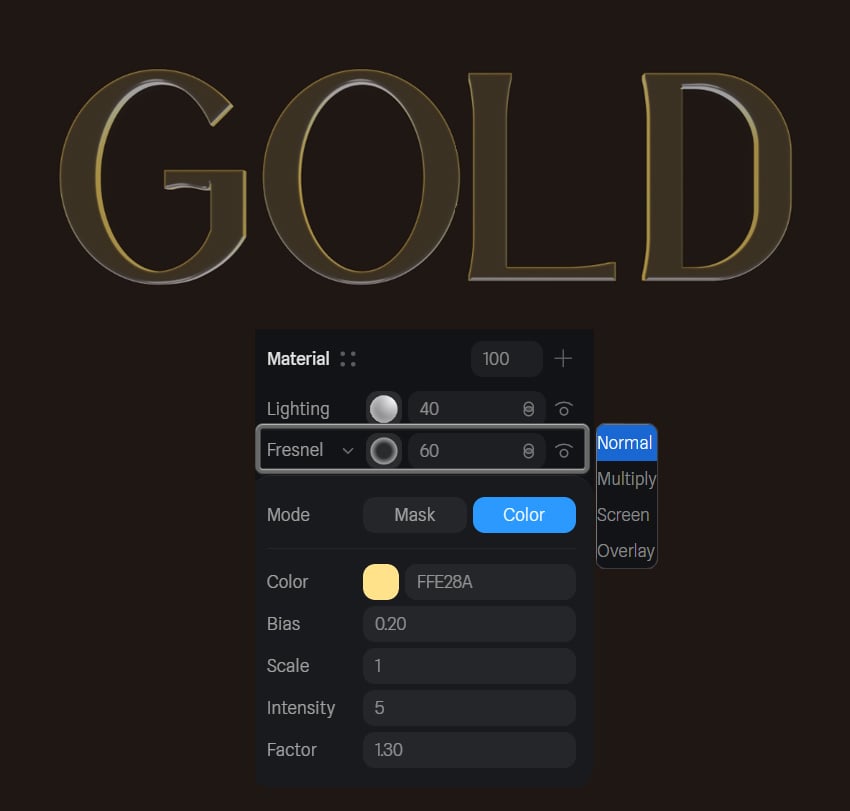
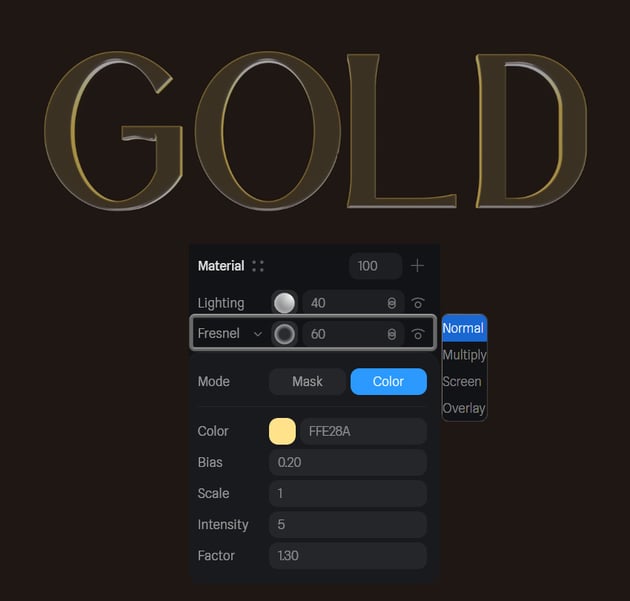
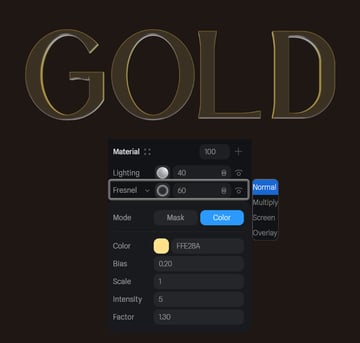
Step 3
Next, let’s refine the Fresnel layer. Turn its visibility on, and leave the Blend Mode as Normal. Increase the Opacity to 60 to enhance the reflective effect.
Click the sphere icon to open the layer settings and apply these values:
-
Color:
#FFE28A(a soft yellow) -
Bias:
0.20 -
Scale:
1 -
Intensity:
5 -
Factor:
1.30
The Fresnel layer enhances the golden glow by simulating how light interacts with curved metallic surfaces depending on the angle of the light.
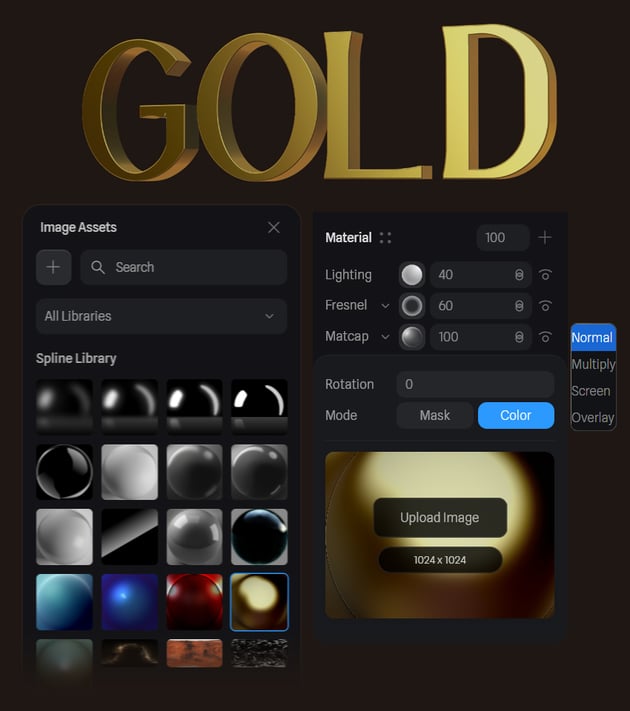
Step 4
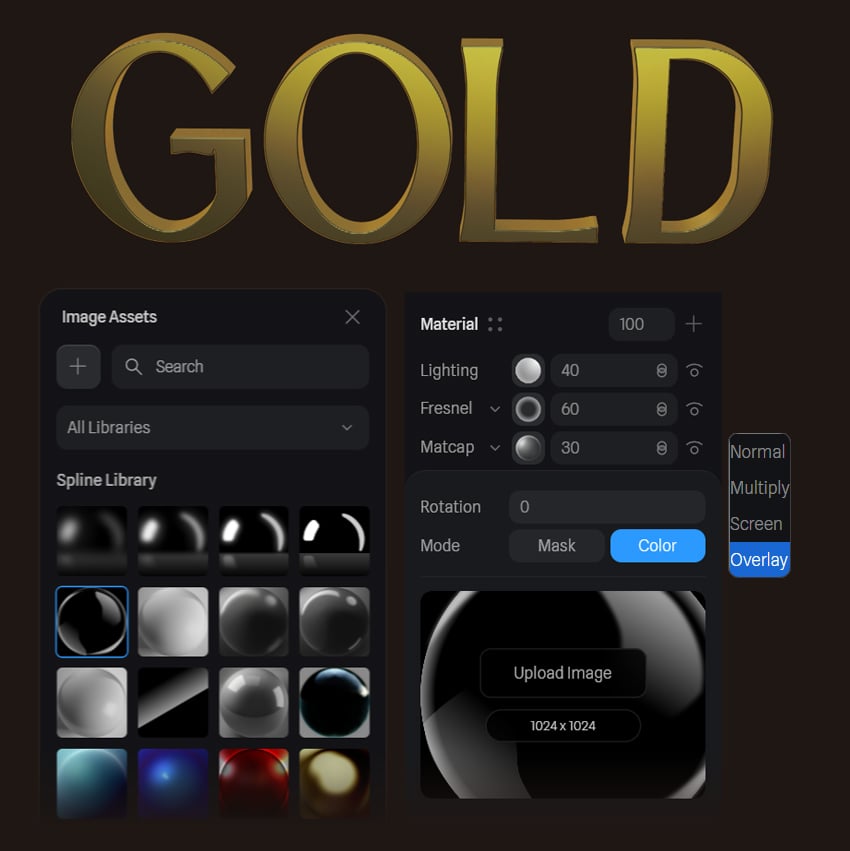
Now, let’s add a Matcap layer for a richer metallic look.
- Ensure the Matcap layer’s Opacity is at 100 and the Blend Mode remains Normal.
- Click the sphere icon next to Matcap.
- In the Image Assets menu, select a golden Matcap.
This step instantly adds realistic reflections and depth to our material.


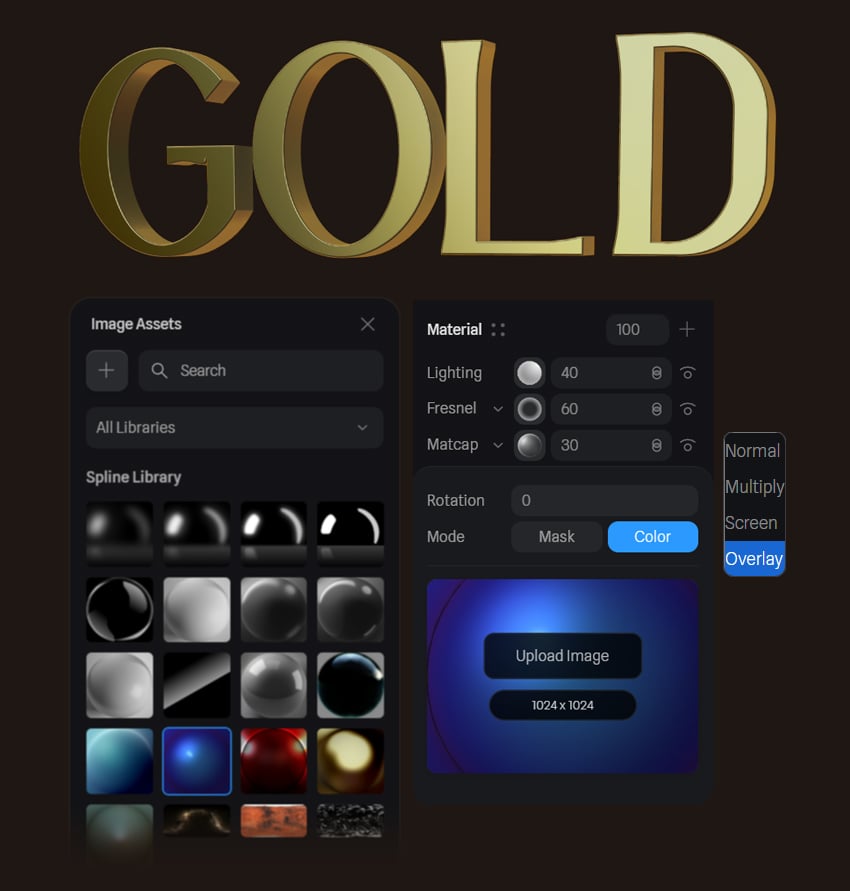
Step 5
To make the gold effect even more refined, let’s combine multiple Matcaps.
- Click the + icon to add a new layer. By default, it adds a Color layer on top.
- Change the layer type to Matcap by clicking the arrow next to its name.
- Drag the new Matcap layer above the previous Matcap.
For this second Matcap, apply these settings:
-
Opacity:
30 -
Blend Mode:
Overlay - Select a blue Matcap from the Image Assets menu.
The cooler blue tones help balance the warmth of the gold, giving it a premium look.

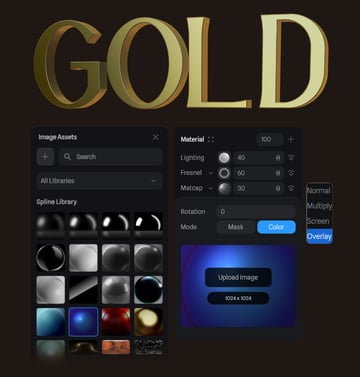
Step 6
Let’s add a third Matcap layer to enhance the shine!
- Add a new Matcap layer and position it on top of the previous one.
- Set Opacity to 30 and Blend Mode to Overlay.
- Click the sphere icon and choose a black glass material from the Image Assets library.
This final layer intensifies the shine, giving our gold text a sleek and polished finish.

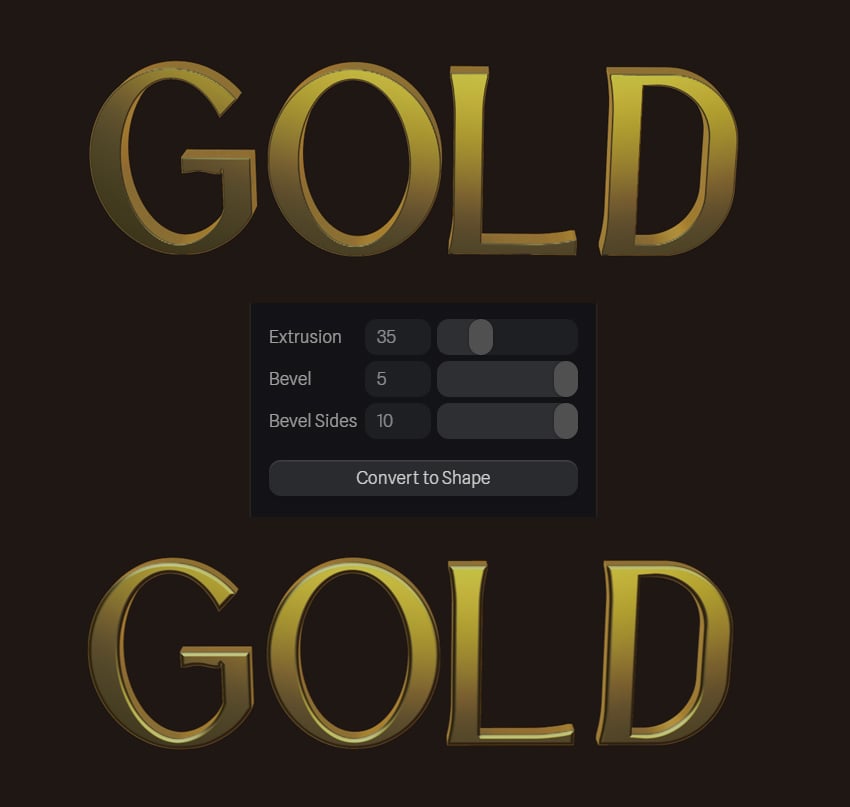
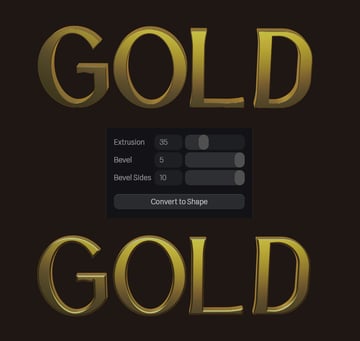
Step 7
To enhance the depth and definition of the text, let’s add a Bevel effect.
In the right sidebar, under the Text section, adjust the following:
-
Extrusion:
35 -
Bevel:
6 -
Bevel Sides:
10
The Bevel effect makes the edges of our text more pronounced, adding to the realistic metallic look.
The Bevel slider maxes out at 1, but you can manually type in higher values for more control.
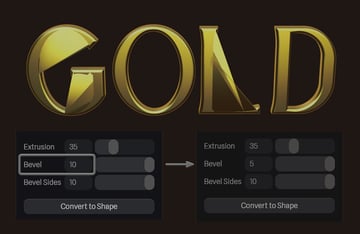
Step 8
Depending on the font and text size, Bevel may cause some distortions or break the text. If that happens:
- Reduce the Bevel value slightly to prevent breaking.
- Try using a thicker or smaller font for better results.
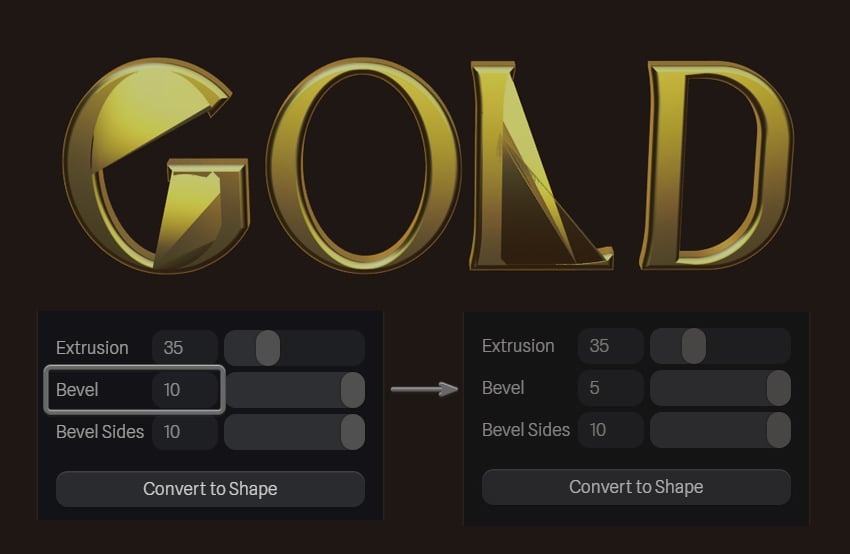

At this stage, our gold text already looks luxurious and refined!
4. How to create a golden star in Spline
Step 1
Let’s add a golden sparkle to complement our text!
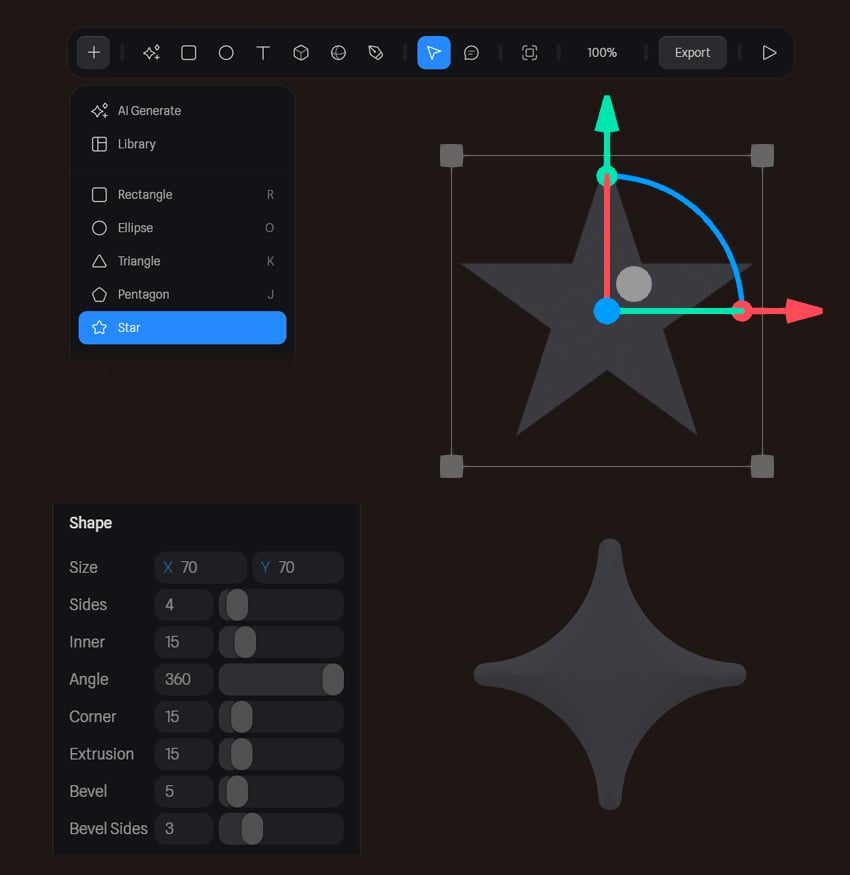
Click the + icon in the top toolbar and select Star from the drop-down list. Click on the canvas or click and drag to create a star.
By default, Spline generates a 5-point star, but we’ll customize it for a more elegant look. In the right sidebar, adjust the Shape parameters:
-
Size:
X: 70,Y: 70 -
Sides:
4 -
Inner:
15 -
Angle:
360 -
Corner:
15 -
Extrusion:
15 -
Bevel:
5 -
Bevel Sides:
3
This transforms the default star into a 4-point sparkle with soft, rounded edges.


Step 2
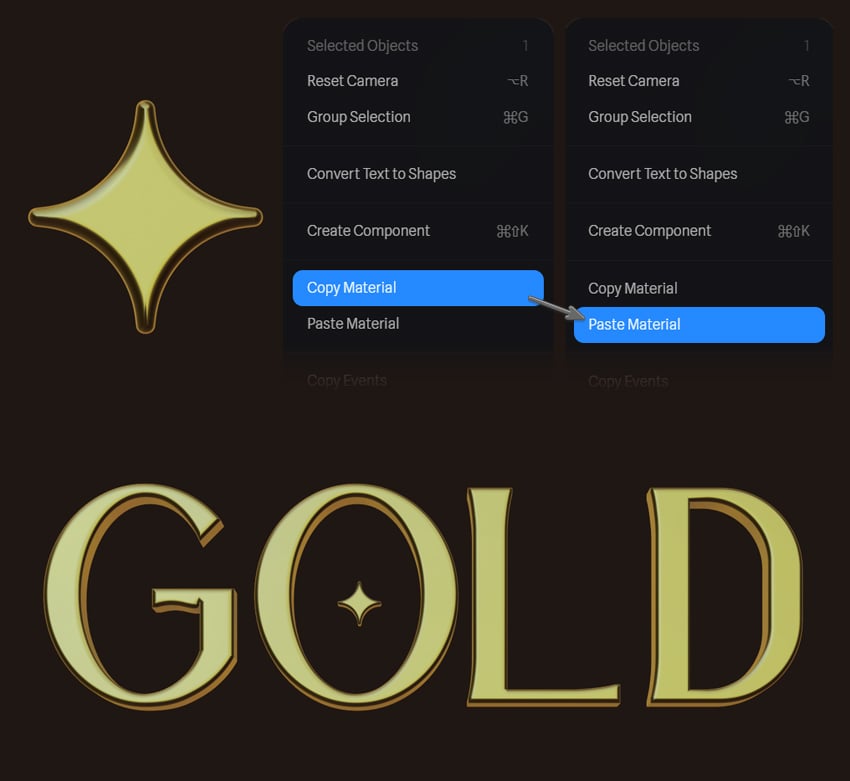
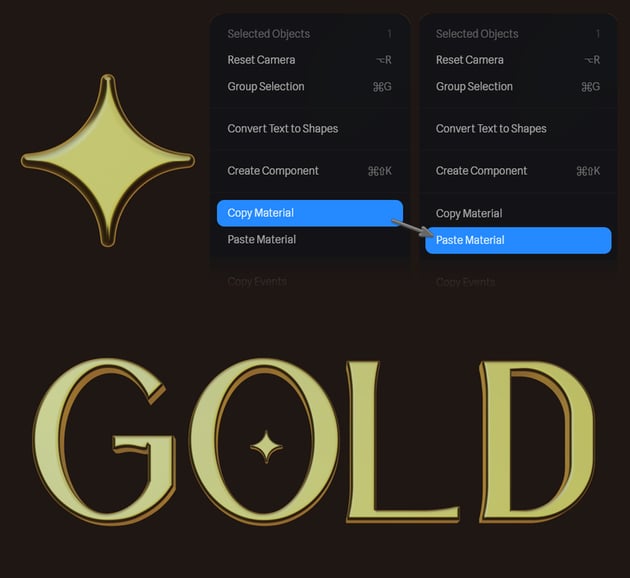
Now, let’s make our star match the golden text! To do this quickly, we can reuse the golden material that we already created for the text.
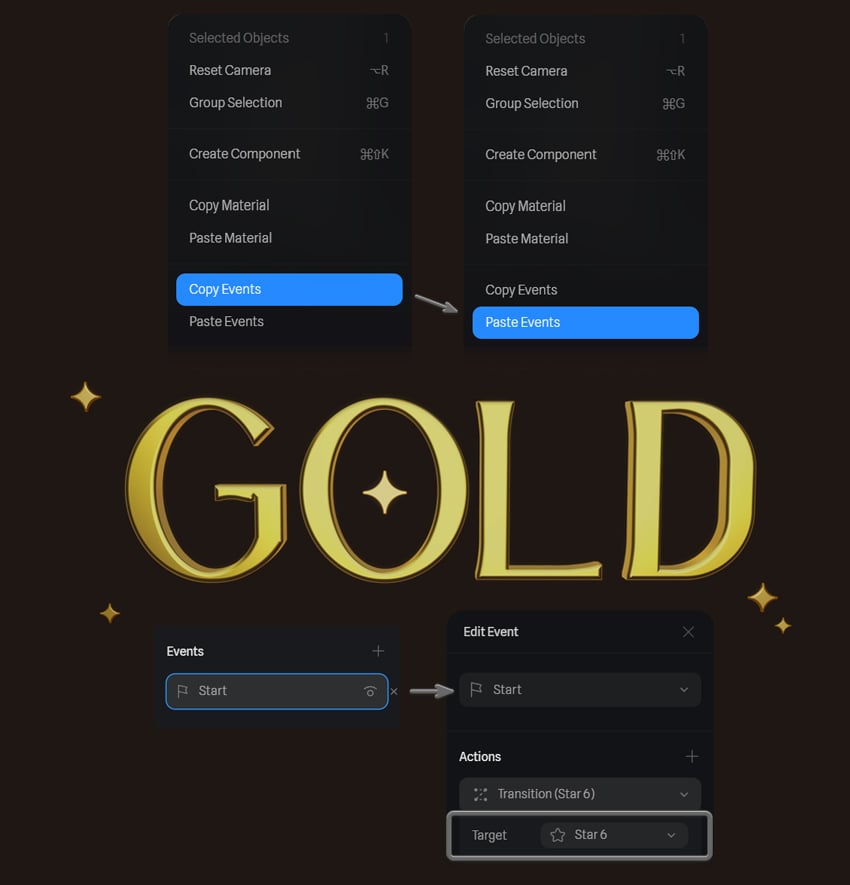
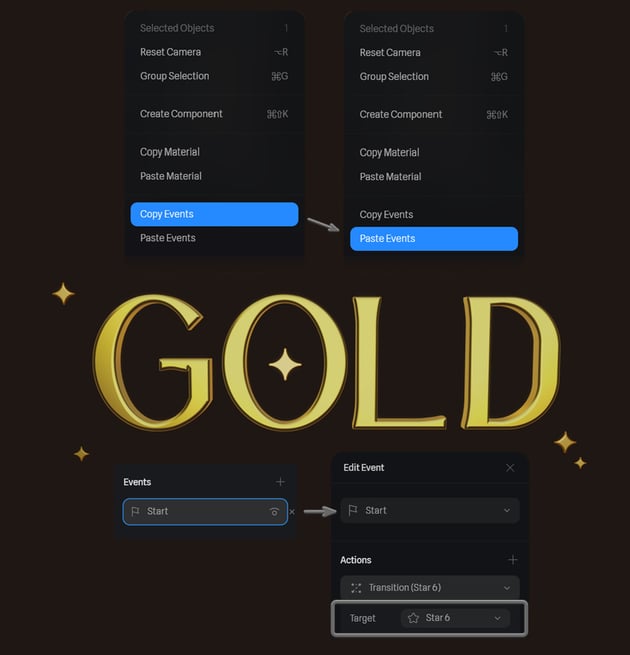
- Right-click the gold text and select Copy Material.
- Right-click the star and Paste Material.
This instantly applies the same golden finish to the star, creating a cohesive look.
Finally, let’s position the star as a decorative accent. Drag it into place inside the letter ‘O’ to make the design pop.
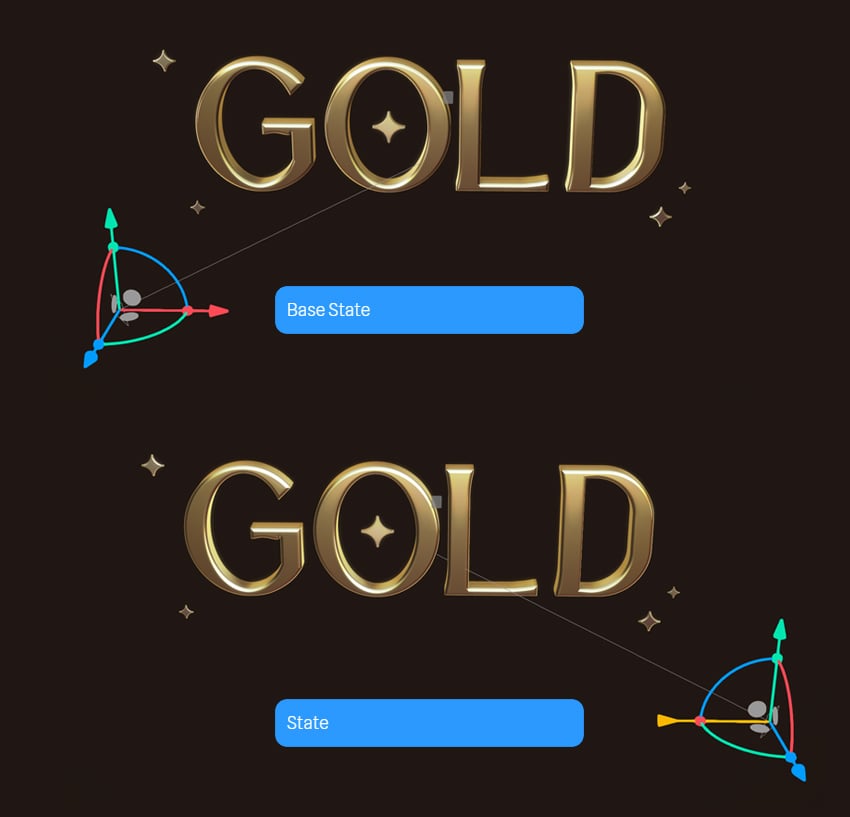
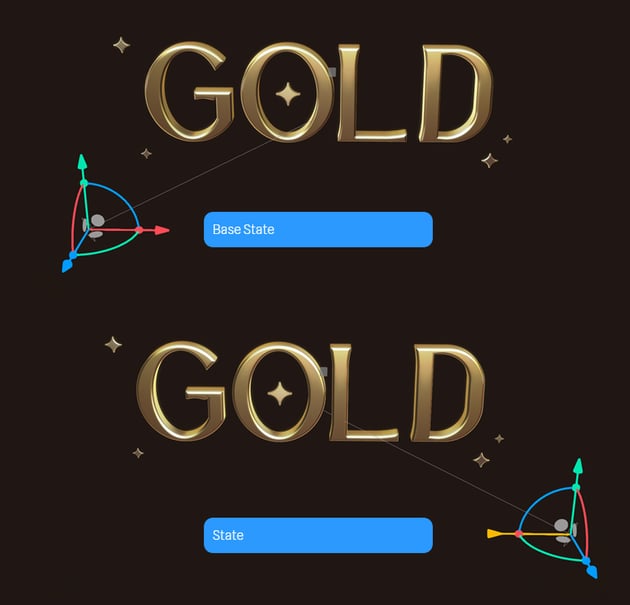
5. How to animate objects in Spline
Step 1
Animating in Spline is intuitive and beginner-friendly—even if you’ve never animated before!
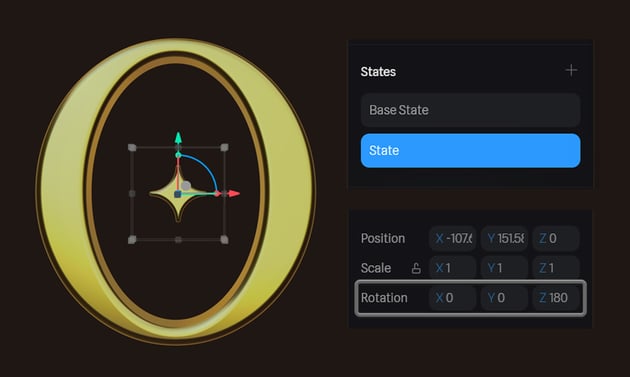
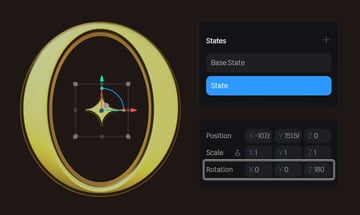
To give our golden star a subtle rotating motion, we’ll create two States with a slight difference in rotation and add a smooth Transition between them.
- Select the star and locate the States section in the right sidebar.
- Click the + icon to create a new State set. This automatically generates two States.
- Leave the Base State unchanged. (Your Position values may differ based on your scene setup, but that’s fine since we won’t be modifying the object’s position.)
- Click on State, then adjust the Rotation Z value to 180 degrees to make the star spin.
This setup ensures that the star smoothly rotates around its Z-axis.

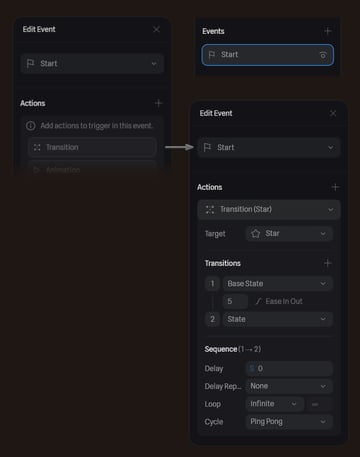
Step 2
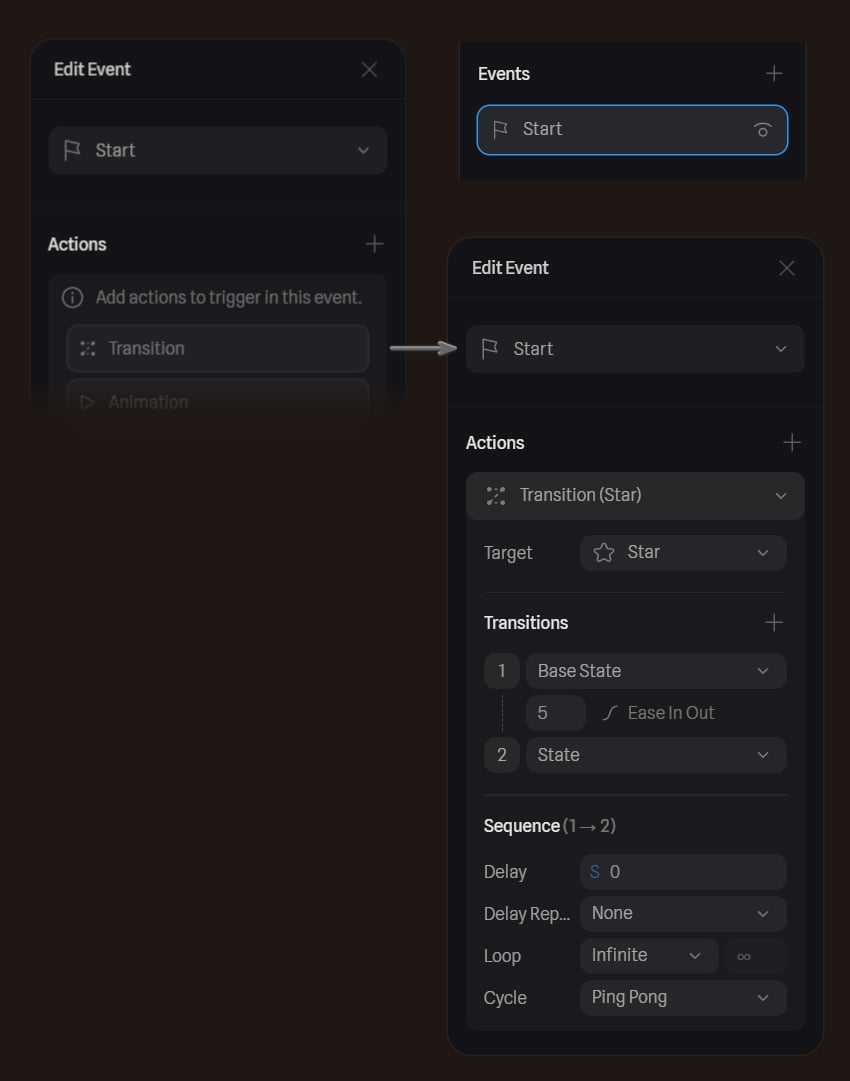
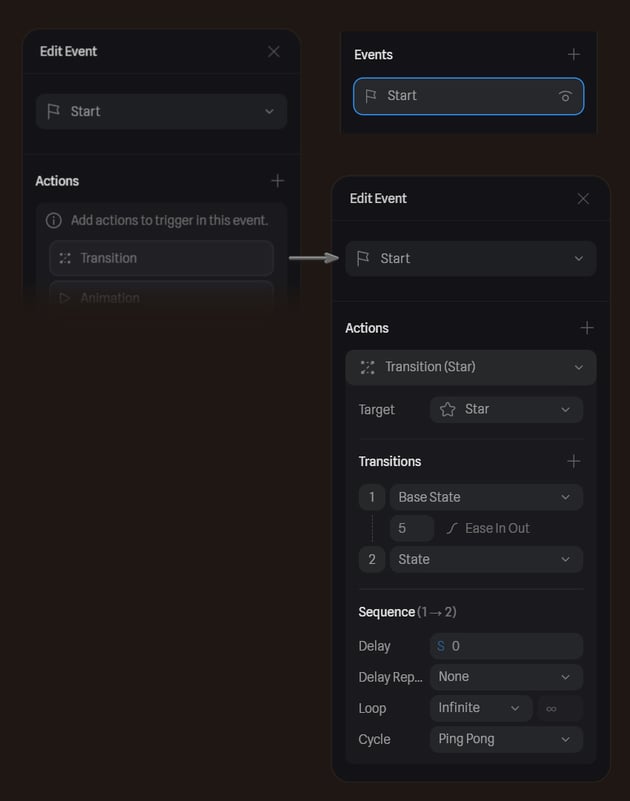
Now, let’s bring the animation to life by adding a Transition Event.
- In the right sidebar, find the Events section and click the + icon to create a new Transition Event.
- Configure the settings as follows:
-
Start State:
Base State -
End State:
State -
Speed:
5 -
Interpolation:
Ease In Out -
Loop:
Infinite -
Cycle Mode:
Ping Pong
-
Start State:
This setup makes the star gently oscillate back and forth, creating a polished, elegant animation.
Step 3
Let’s preview the effect! Click the Play button in the top toolbar or press Shift-Space. The star should now be rotating smoothly, adding a dynamic touch to our text composition.
Step 4
To make the composition more balanced and detailed, let’s Duplicate (Control-D) the star and create multiple variations.
It’s better to create new unique States for each copy. Otherwise, duplicating an animated object will misalign the Position values, causing the copies to drift during playback.
Once the copies are in their place and the States are correct, we can add the Transition Event for each copy. To speed up this process, right-click the original animated star, select Copy Events, and then Paste Events onto the newly created stars. Don’t forget to update the Target in the event settings for each individual star.

Step 5
Press Shift-Space to preview how all the spinning stars interact. Now, our scene feels more balanced and dynamic!
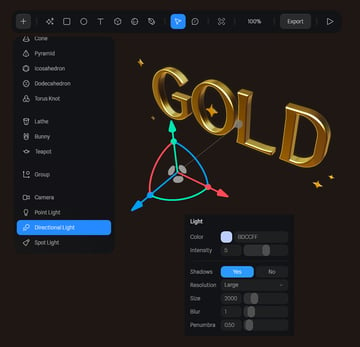
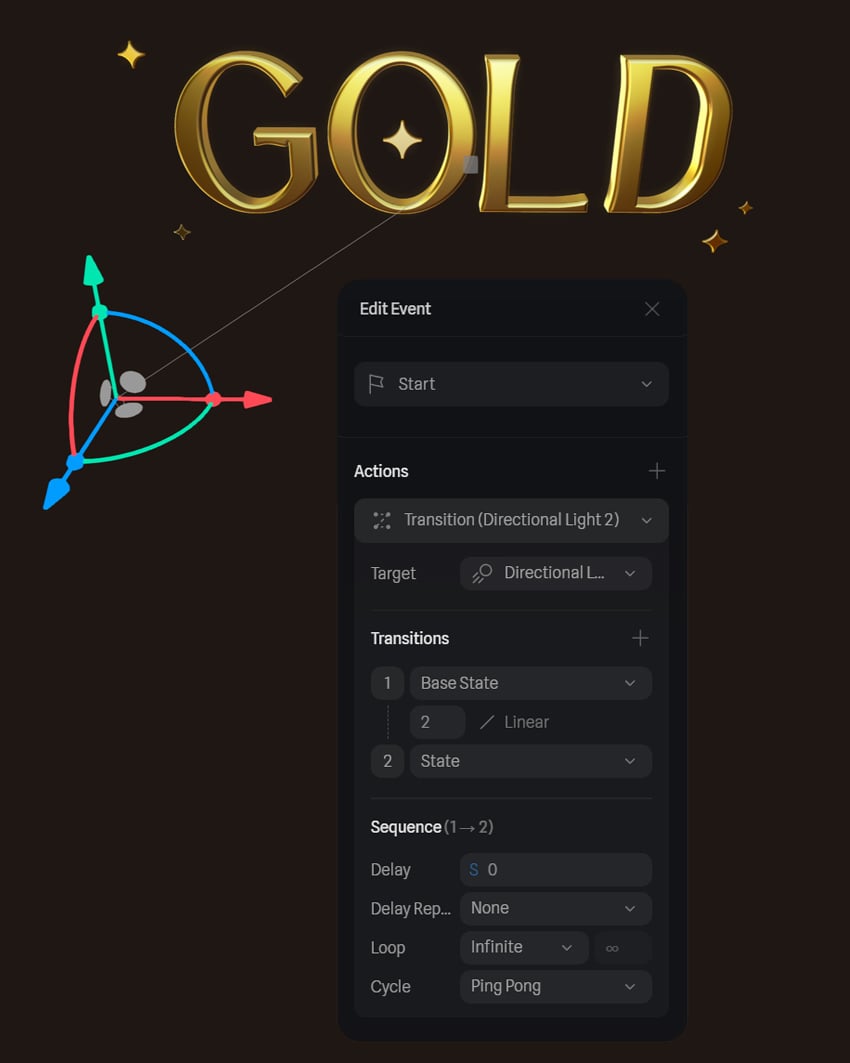
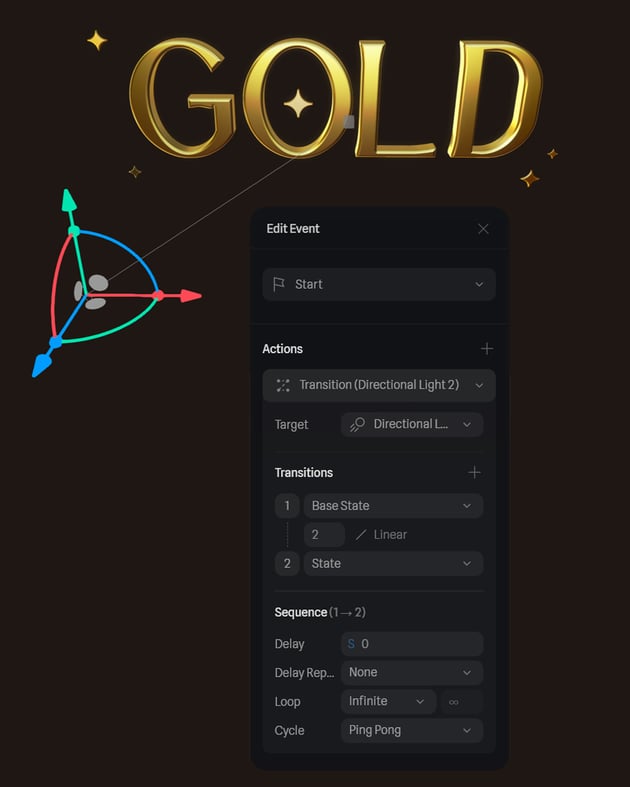
6. How to create and animate light in Spline
Step 1
By default, Spline includes two light sources in the Outliner. Let’s delete them and create a new light for a more refined effect.
- Click the + icon in the top toolbar.
- Scroll down and select Directional Light.
- In the right sidebar, adjust the light settings:
-
Color:
#BDCCFF -
Intensity:
5 -
Shadows:
Yes -
Resolution:
Large -
Size:
2000 -
Blur:
1 -
Penumbra:
0.50
-
Color:
This new lighting setup enhances the metallic shine and depth of our gold text, making it look even more realistic.


Step 2
Now, let’s create two States for the light movement.
- In the Base State, position the Directional Light in the lower left corner, casting light from a low front angle.
- In the second State, move the light to the lower right side, shifting the highlights dynamically.
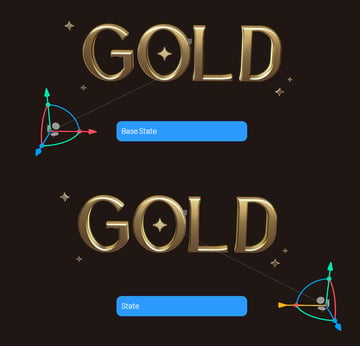
Step 3
Now, let’s animate the light movement! Create a new Transition Event with the following parameters:
-
Start State:
Base State -
End State:
State -
Speed:
2 -
Interpolation:
Linear -
Loop:
Infinite -
Cycle Mode:
Ping Pong
This creates a realistic shifting highlight that enhances the gold’s reflective qualities.

Step 4
Press Shift-Space to preview the animation—watch as the light moves dynamically, enhancing the golden shine.

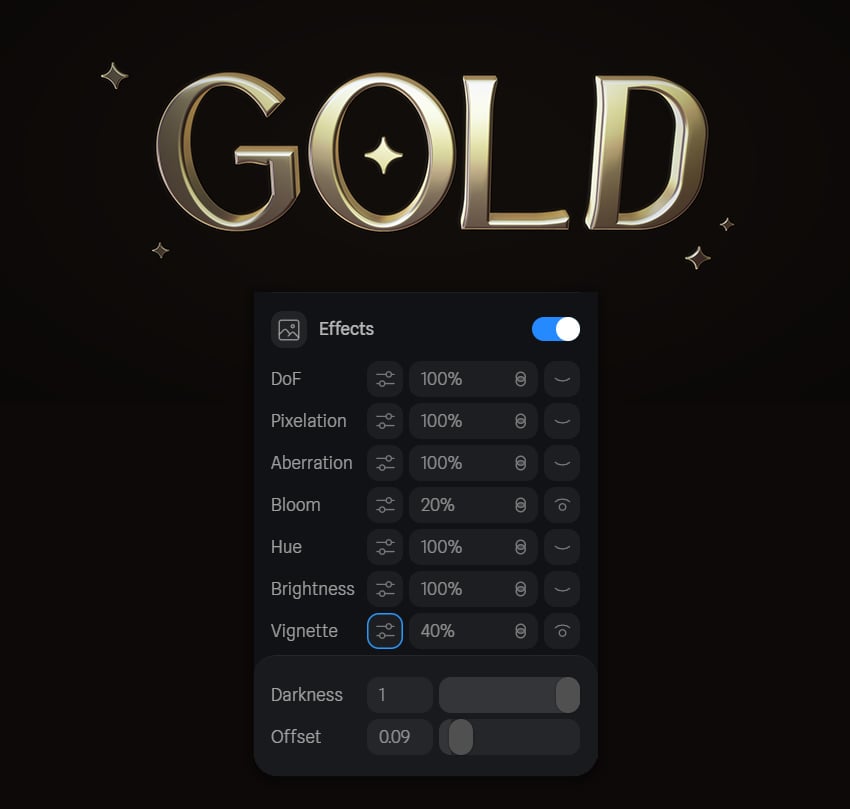
Step 5
Let’s add a final touch to polish the scene! Click anywhere on the background to deselect all objects, and locate the Effects section in the right sidebar.
Here, we can add enhancements like Depth of Field, Chromatic Aberration, and more.
To make the gold glow, enable Bloom and set:
-
Intensity:
20% -
Blend Mode:
Lighten
For a more cinematic feel, add a Vignette:
-
Intensity:
40% - Click the Settings icon next to Vignette to access more controls.
- Adjust Darkness and Offset for a subtle fading effect.
These small touches make the gold text pop, enhancing its luxurious appearance.


Step 6
To prepare a final version of our gold text effect for exporting, let’s adjust the scene dimensions.
- Click Edit Frame in the top toolbar.
- In the right sidebar, we can choose from a template or define custom dimensions manually. Let’s choose Full HD 1920×1080 px for a high-quality result.
Once the size is set, we can Export our work as a still image, as a GIF or as a Video Recording.
To export it as a video, set the following:
-
Format:
MP4 -
FPS (Frames Per Second):
30 -
Mode:
Manual(or set a time duration)
Press Start to record, and save the animation to your preferred destination.


Congratulations! Our golden text effect in Spline is done!
And there you have it—a stunning animated gold text effect in Spline! Through this tutorial, we explored what Spline is, how to create an online 3D design, realistic materials, animate objects, and enhance lighting to achieve a luxurious metallic shine. By combining multiple Matcaps, refining Bevel settings, and adding subtle animation, we turned a simple 3D text effect into a high-end, polished design.
Whether you’re using 3D design tool for branding elements, social media visuals, or motion graphics, this technique allows you to create eye-catching gold typography with ease. Experiment with different fonts, lighting angles, and animation speeds to make your designs unique.

Looking for more inspiration? Explore more 3D text effects to expand your design skills!