
Last week I shared a collection of free seamless knitted Christmas jumper patterns for my readers to download and get their design in the festive spirit. A few of you guys were interested in seeing how they were made, so today I’ll be showing you the techniques I used to build them. Don’t worry if you’re not into real life knitting, this process uses Adobe Illustrator to compose your design and create a repeating pattern!
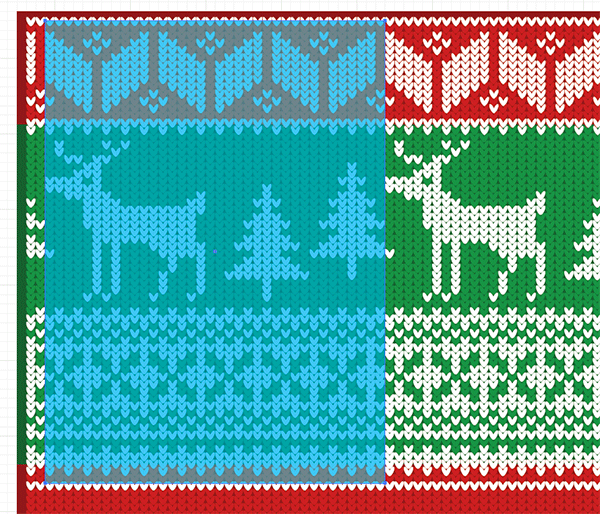
The design we’ll be creating in this tutorial is a knitted jumper style pattern using festive Christmas colours. It’s made up of tiny stitch like graphics which alternate in colour to produce intricate pattern designs, and the whole tile seamlessly repeats to fill an infinite area. Christmas is coming fast, so if you’re pressed for time, grab last week’s free Christmas jumper patterns download.
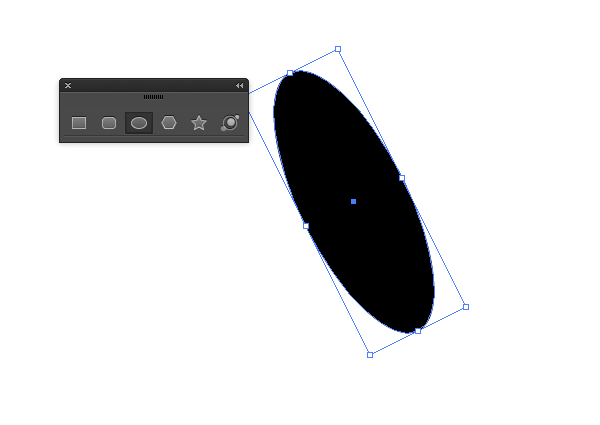
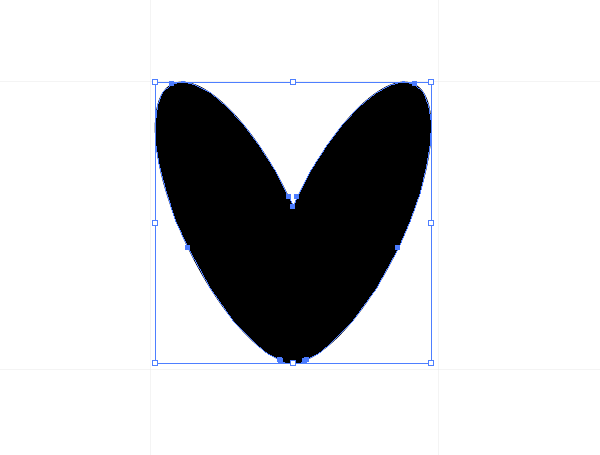
Create a new Illustrator document and use the Ellipse tool to draw a small oval shape. Rotate it slightly by spinning the shape with one of the corner handles.
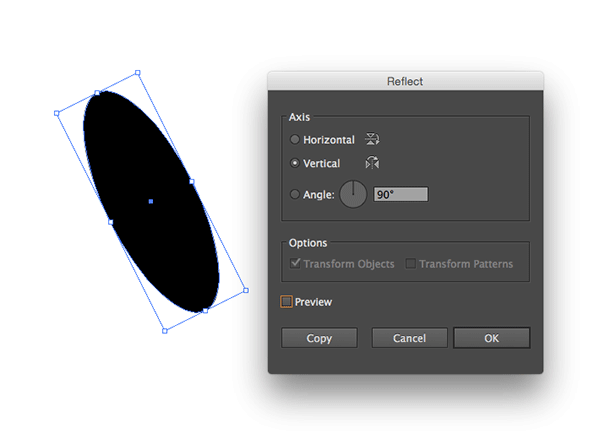
With the shape selected, go to Object > Transform > Reflect. Select the Vertical option then click the Copy button.
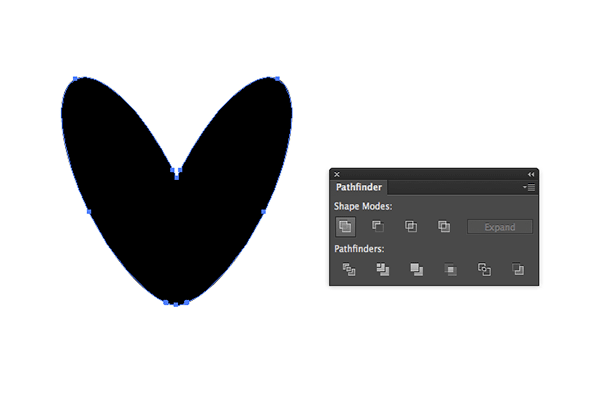
Move the duplicated shape to overlap the original, then Merge the shapes with the Pathfinder tool to produce a tiny V-shaped stitch graphic.
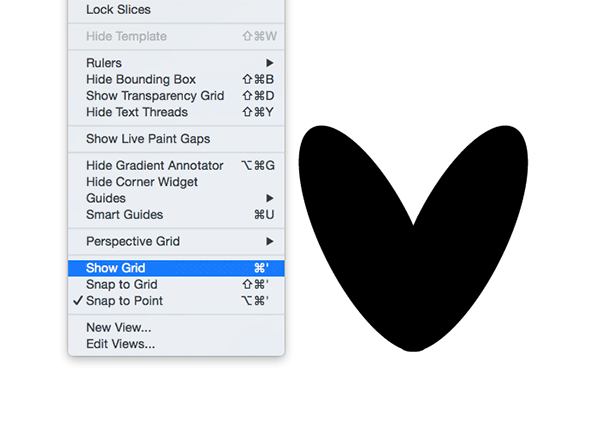
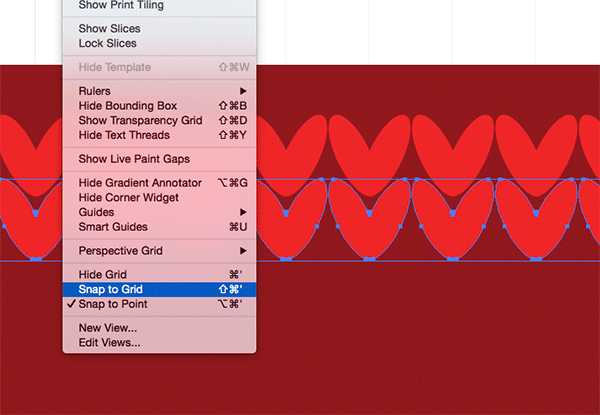
Turn on the document grid by selecting Show Grid from the View menu.
Scale the stitch graphic down in size to fit within one of the grid squares, but make it marginally smaller so there’s a small gap along the right and bottom edges.
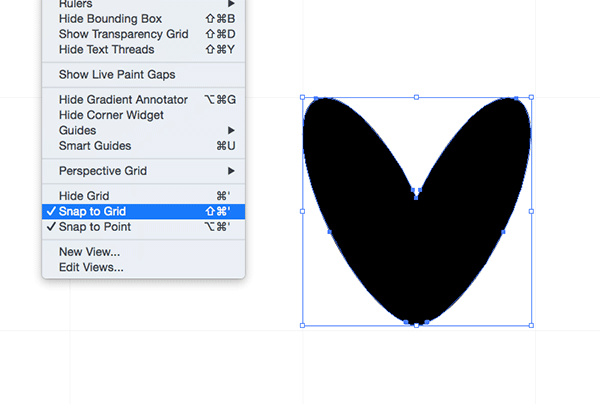
Turn on the Snap to Grid setting from the View menu and move the stitch to lock it perfectly onto one of the grid points.

Elsewhere on the document, draw a series of background rectangles filled with darker tones of your main pattern colours. Use the shortcut CMD+2 to lock these items and avoid accidentally selecting them later.
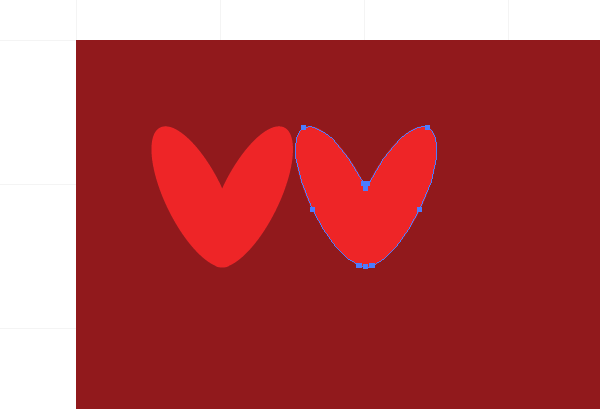
Move the stitch graphic into place over the first background and change its colour to a brighter variant of the background. Hold the ALT key while dragging a copy of the graphic to create a duplicate. This duplicate will automatically snap to the next grid point.
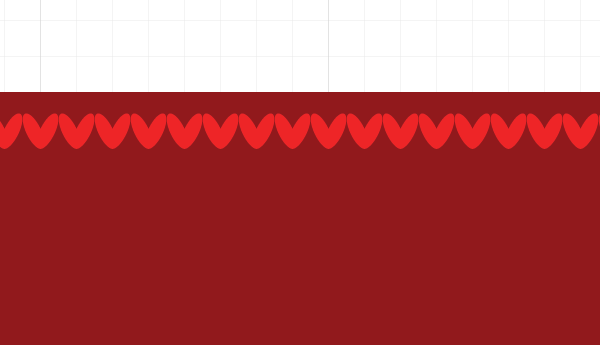
Repeatedly press the shortcut CMD+D to repeat the move command until you have a complete line of stitch graphics.
In order to align the next row we’ll have to turn Snap to Grid off. Select the entire line and ALT-drag a copy, manually aligning it with a small gap between the previous row.

Repeatedly press the CMD+D shortcut to completely cover the background rectangles with little stitch shapes.
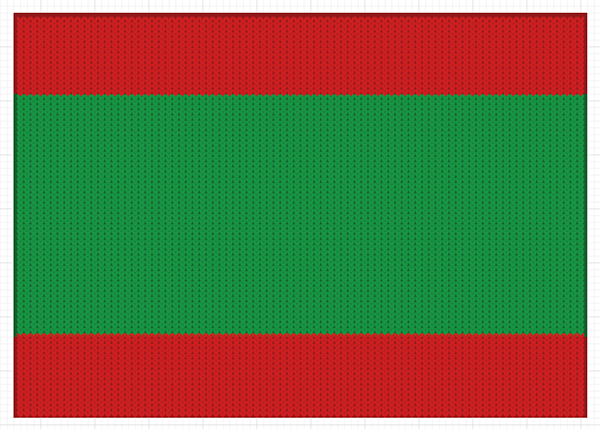
The red stitch graphics over the darker red background are ready to go, but the shapes over the green background need changing to a lighter green colour. Draw a large selection over the appropriate shapes and change the fill colour.
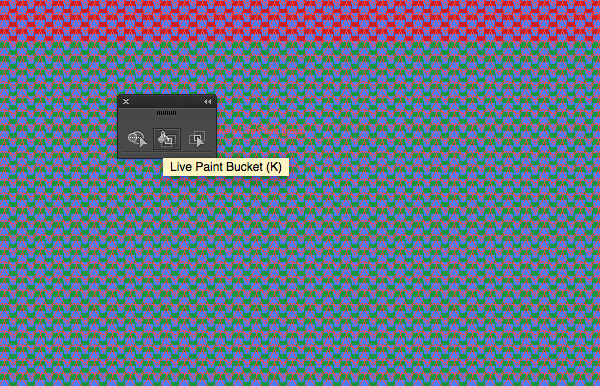
Now the real fun begins! Press CMD+A to select all the stitch graphics (the backgrounds are still locked so won’t be selected) and click anywhere on the selection with the Live Paint Bucket tool.
Deselect everything, then change the fill colour to white. The Live Paint Bucket tool can now be used to paint a pattern onto your design by altering the colour of specific stitch shapes.
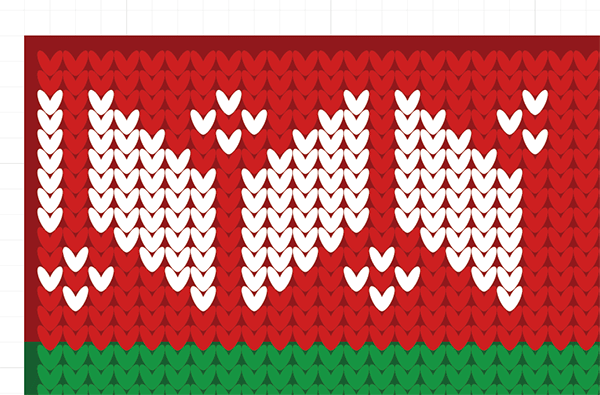
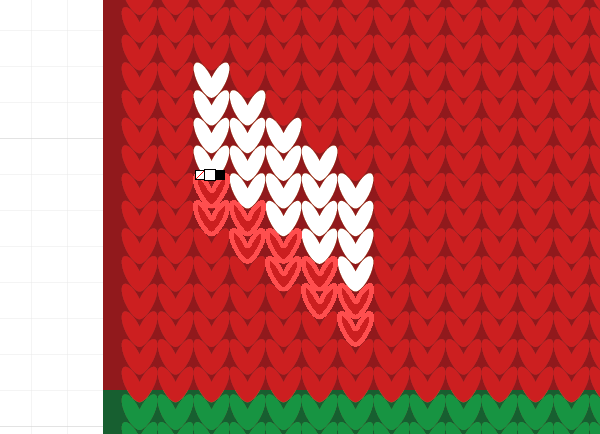
Use real life Christmas jumpers from Google Images as inspiration for your pattern, or freestyle it as you go!
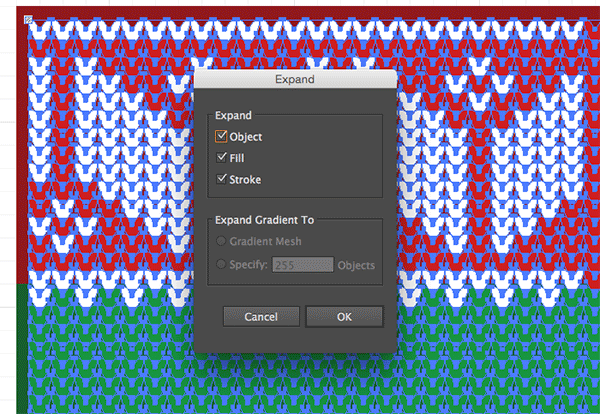
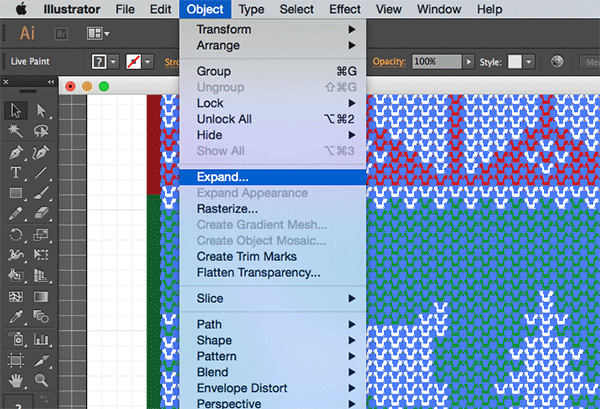
As your pattern begins to grow, keep in mind the fact that it needs to repeat. You can quickly fill out the rest of the row by Expanding the Live Paint object to convert the elements back into basic shapes.
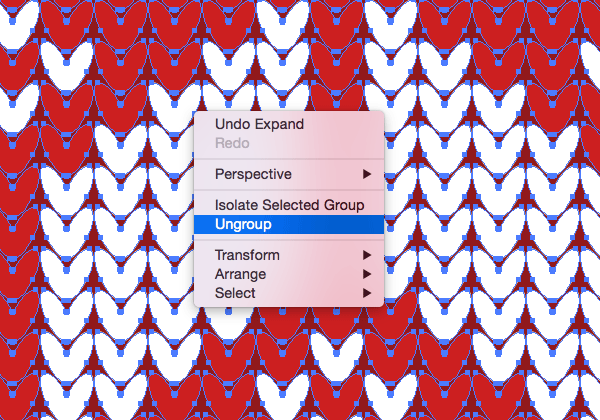
Repeatedly right click and select Ungroup to break apart the expanded elements until each shape can be selected individually.
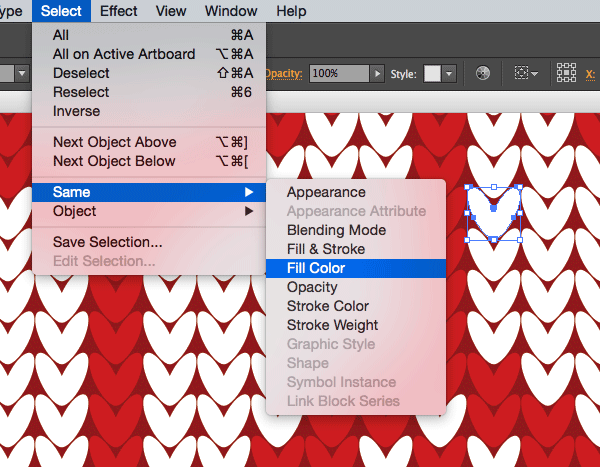
To quickly select just the white stitch shapes, go to Select > Same > Fill Color while one of the white objects is selected.
Hold the ALT key while dragging a copy of the pattern so far to extend and repeat the design. Use the shortcut CMD+D to repeat this duplication until the entire row is filled.

Select and delete any items that overlap the edge to keep things tidy. Don’t worry about the overall artboard being repeatable.

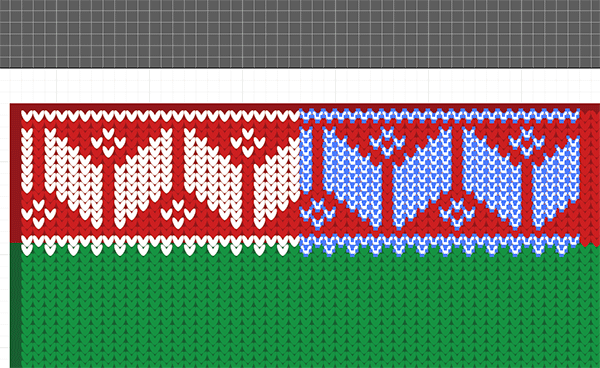
To continue editing the pattern over the green background, select all the shapes and activate the Live Paint Bucket tool.
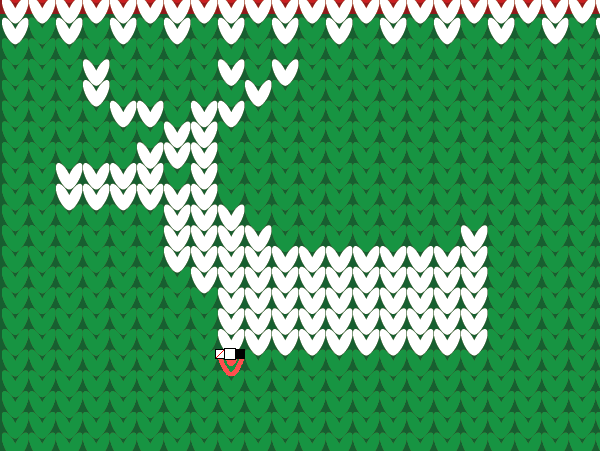
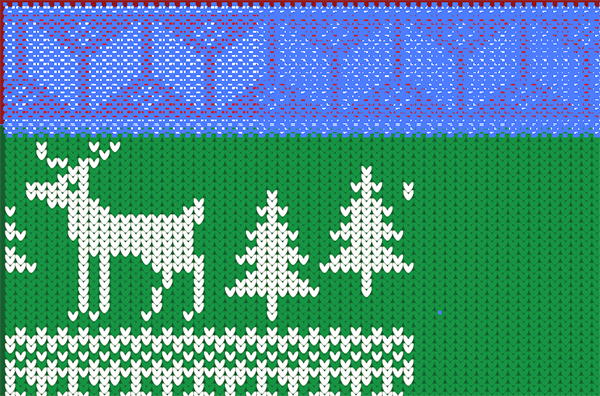
If you’re feeling adventurous, you could try drawing Christmas themed items within your pattern.
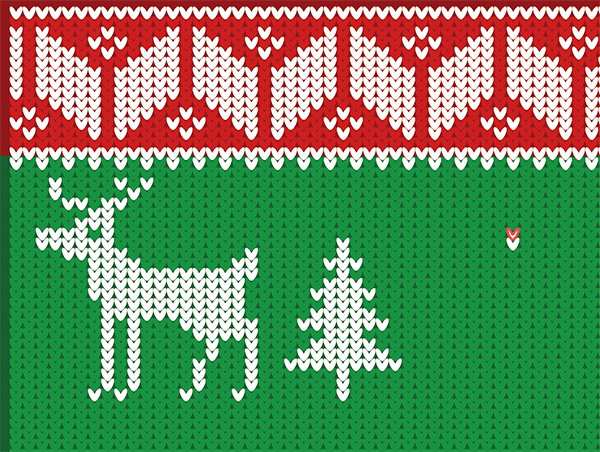
Remember to match your illustrations up with the existing parts of the pattern so its possible to repeat the design.
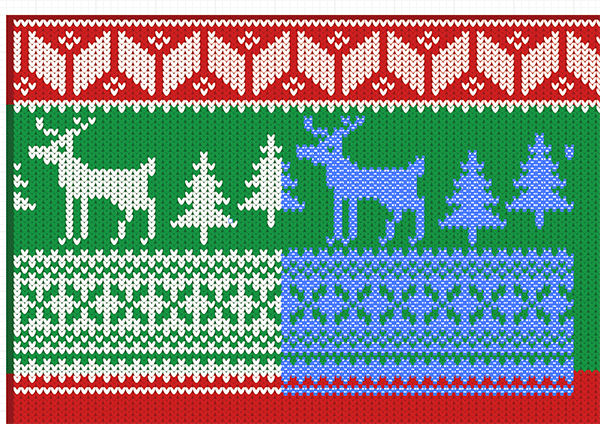
Another possibility is to fill an entire area with white shapes, then reverse out a pattern by filling the stitches with a colour.
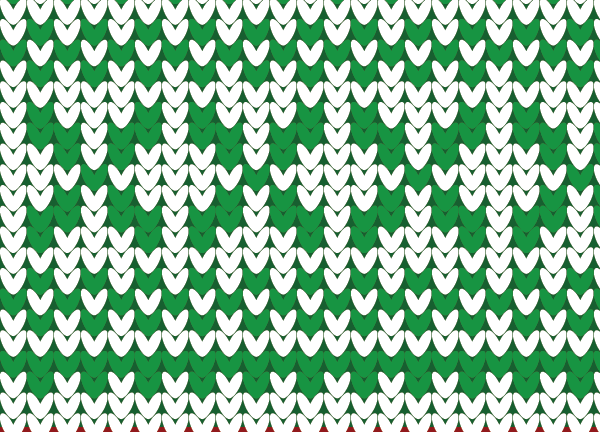
Intricate patterns can easily be created by simply alternating colour fills and following the rule to build the design.
Once your pattern design is complete, Expand the Live Paint object and Ungroup all the individual elements.
Since we’ve already extended the first pattern, select those items and lock them with the CMD+2 shortcut.
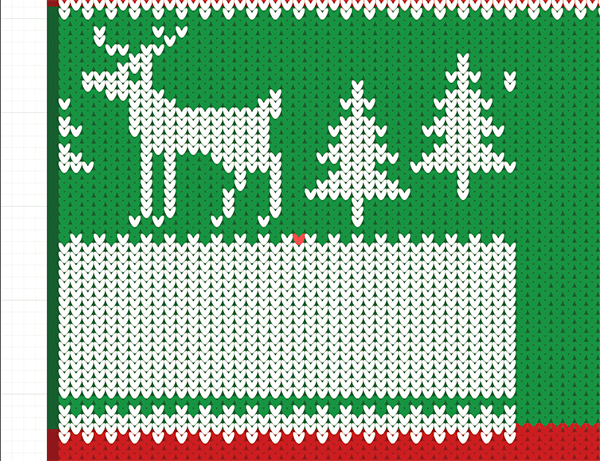
Make a selection of the remaining portion of the pattern using the Select > Same > Fill Color technique, then duplicate the objects and align the pattern so it seamlessly repeats horizontally.
In order to produce a fully repeatable pattern swatch, draw a rectangle around the design that starts and ends at the same point of the pattern. The Snap to Grid setting makes it easy to match the exact points.
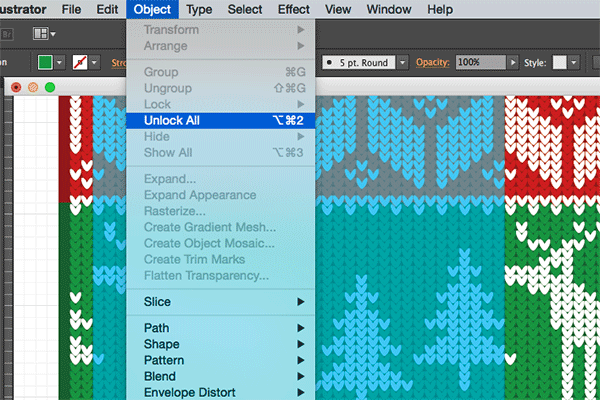
Press CMD+ALT+2 or go to Object > Unlock All to release all the locked shapes, then press CMD+A to Select All.
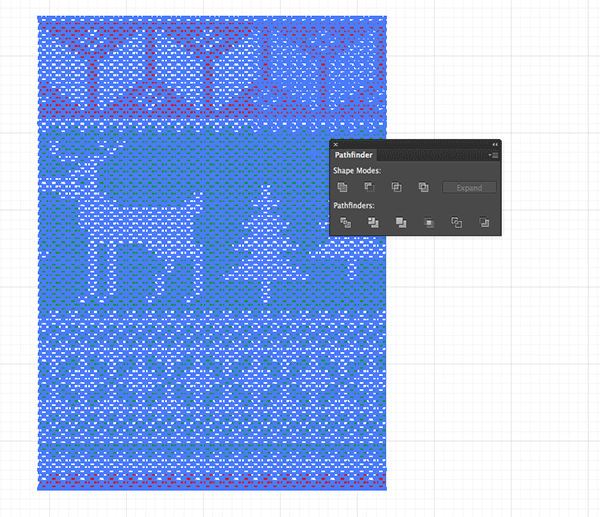
Hit the Crop button from the Pathfinder panel to trim the entire design down to the confines of the rectangle.
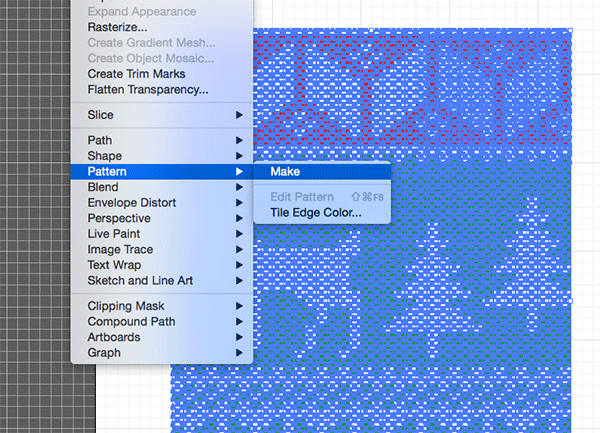
Go to Object > Pattern > Make to load the pattern tool in versions CS6+ (otherwise drag the design directly into the Swatches panel).
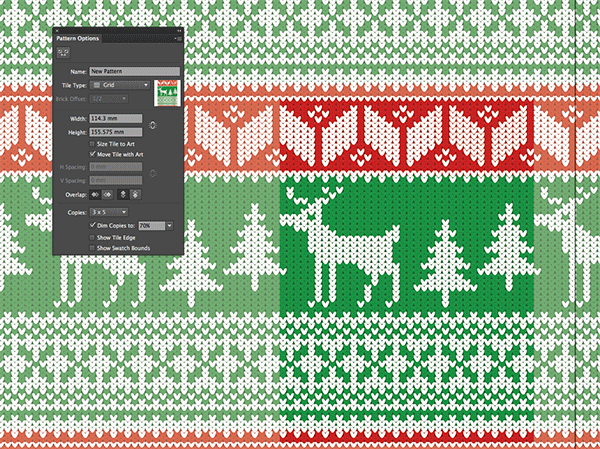
The Pattern tool allows you to preview how the pattern repeats so you can check for errors and ugly seams between the tiles.
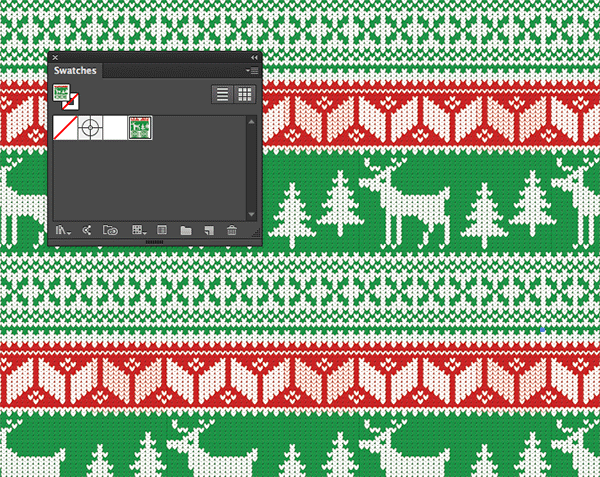
To apply the pattern to other shapes, select the newly created pattern swatch as a fill for any element. This pattern will infinitely repeat to fill the entire area of a shape.

It’s entirely up to you how you lay out your pattern design. It’s easy to make unique designs by mixing intricate patterns with illustrated elements. You could even use the Select > Same > Fill Color technique to adjust the colour of your jumper to provide additional variants.
The post How To Create a Christmas Jumper Pattern in Illustrator appeared first on Blog.SpoonGraphics.


