
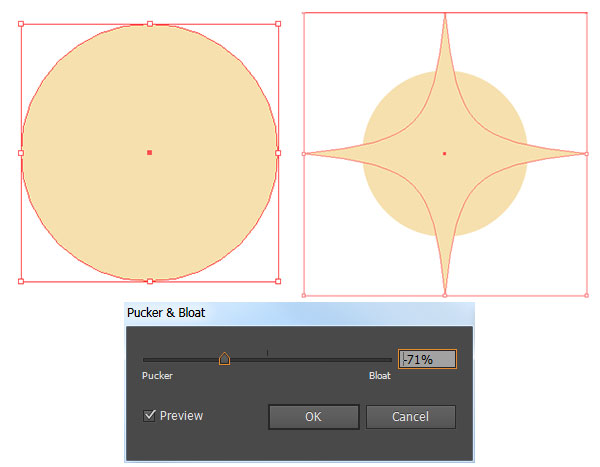
1. Cut up a Circle
Step 1
The design is simple to make. Start with the Ellipse Tool (L) and draw a circle. Copy (Control-C) and Paste (Control-V) that circle and make sure they’re perfectly Aligned. Select the top circle and go to Effect > Distort & Transform > Pucker & Bloat and set the slider to -71%. Expand under Object.
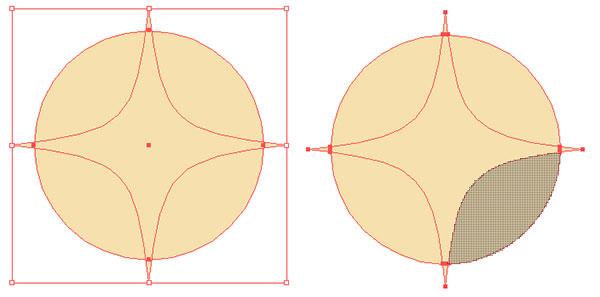
Step 2
Select both shapes and use the Shape Builder Tool (Shift-M) to separate each section. The points of the center shape that extend beyond the circle should be Deleted.
2. Basic Pattern Structure
Step 1
I chose cream to serve as the base color for the pattern. For the colors around the center, choose various brights and pastels.
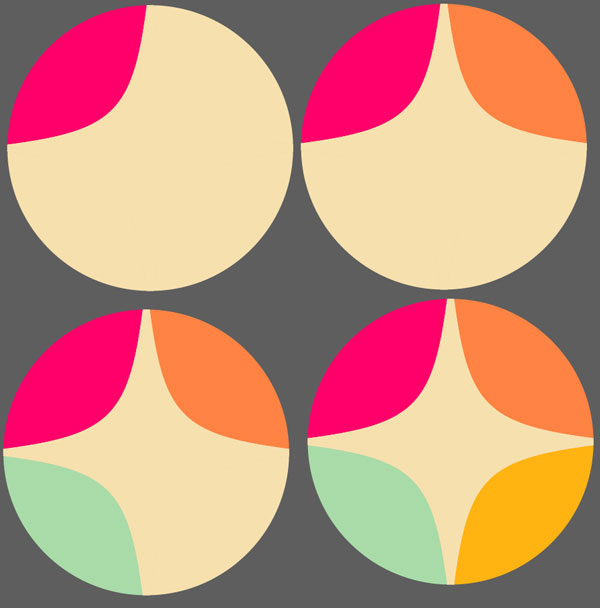
Step 2
I Copied and Pasted my initial circle design three times and grouped them together to form the design. This leads to the center of the four circles to being more like a rounded square, which I rather enjoy. You can, of course, have Puckered your second circle in Section 1, Step 1 further to avoid this. Vary the colors of your design (you’ll have another chance to do this later on). Make sure the center shape is cream, like those of the other four circles. To do so, draw a large circle around it, and select the center with the Shape Builder Tool and move on to the next step.
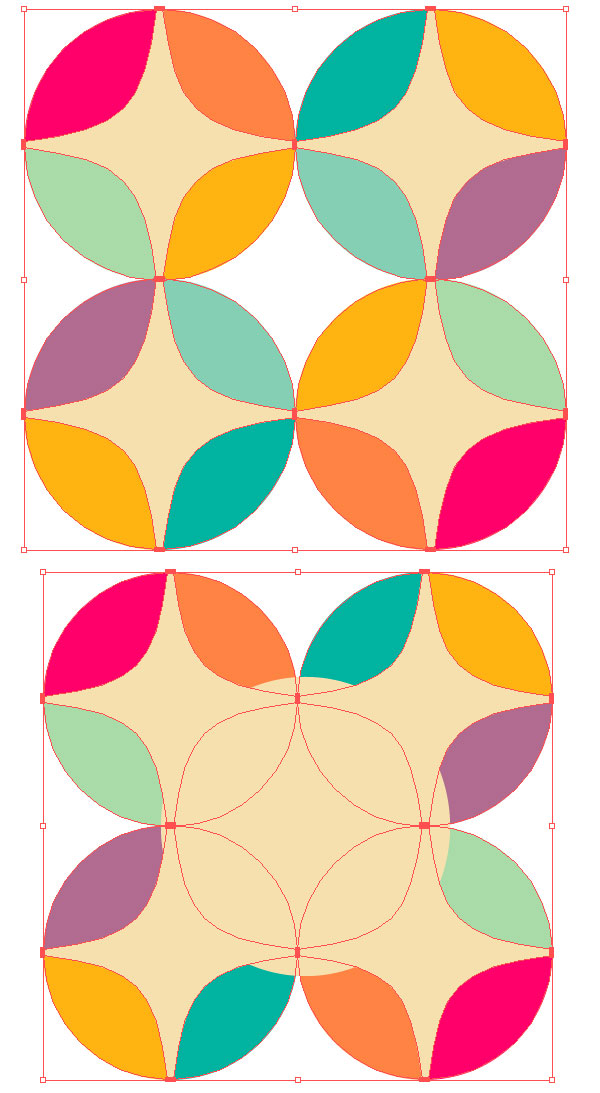
Step 3
Delete any extraneous shapes so you’re only left with the 21 objects seen below. Copy and Paste the central shape and place them on each edge. This allows you to fill up the space between each circle. Group together your design.
3. Set up the Design Tile
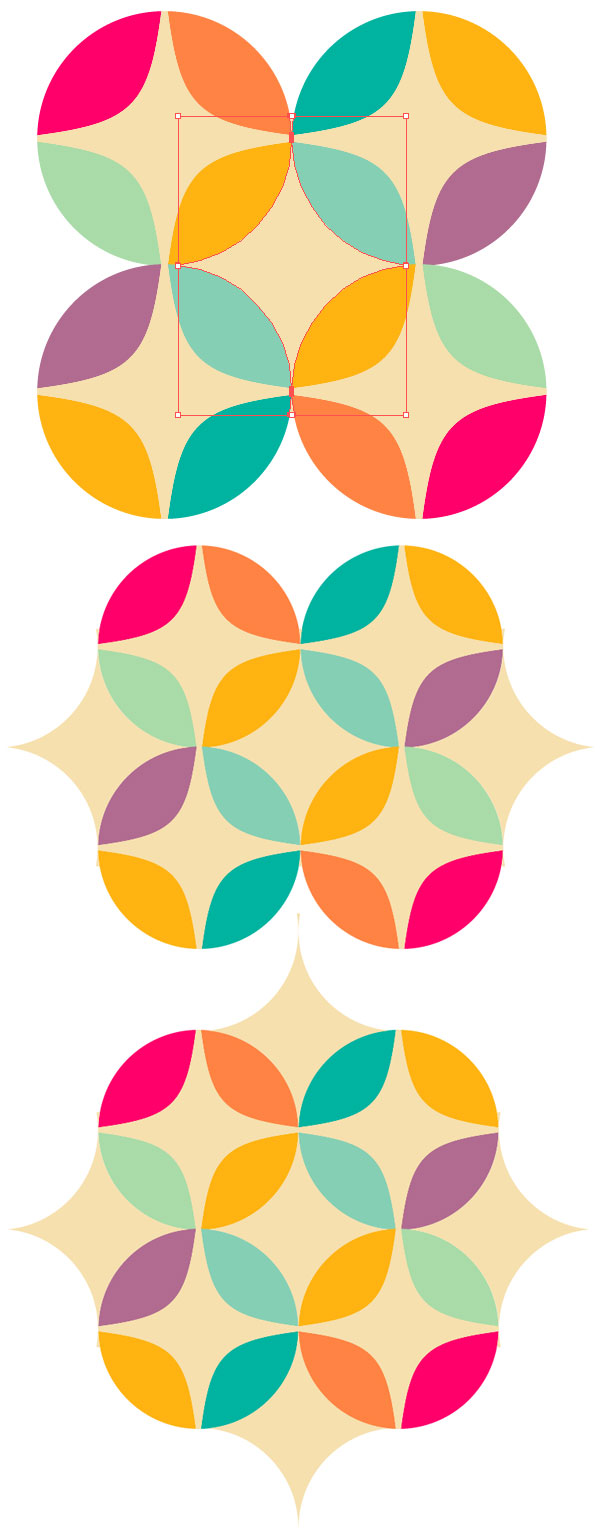
Step 1
Group together your design. You’re going to have to tile some of it manually in order to Divide it up so the pattern can tile seamlessly. Copy and Paste your design group and tile each copied group together. Fill in any holes with its corresponding shape (the same way you did in Section 2.
Step 2
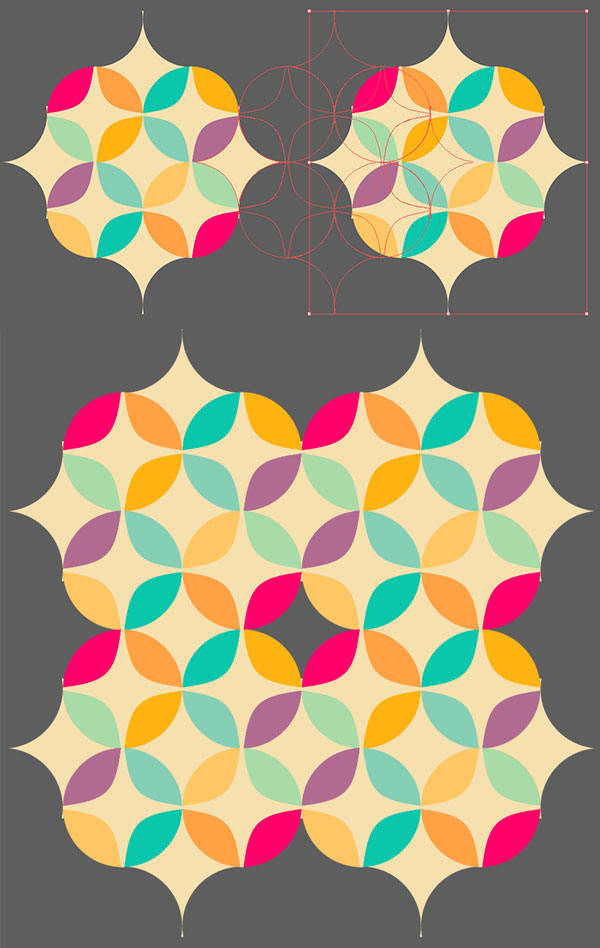
Once you’ve got a decent amount of the design tiled, use the Rectangle Tool (M) to draw a rectangle that hits the “corners” of circles on its own corners (see below). It may take a bit of playing with the design to line it up. Select everything and hit divide in the Pathfinder panel. Delete all shapes outside of the rectangle (or square).

4. Colors, Gradients, and Pattern!
Select the inner shapes (the star burst ones) and fill them with the same cream color as done previously and make sure the other shapes hold the same brights and pastels are done in Section 2.
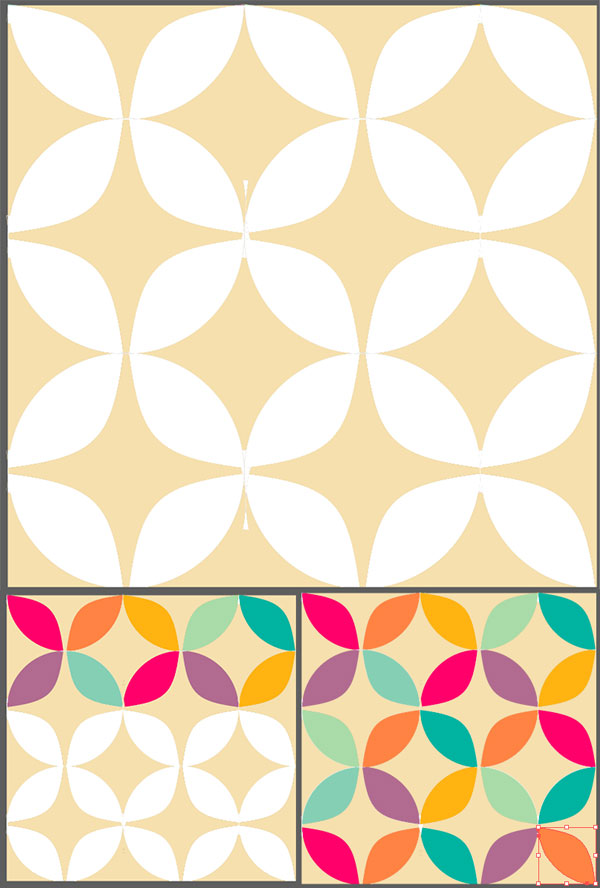
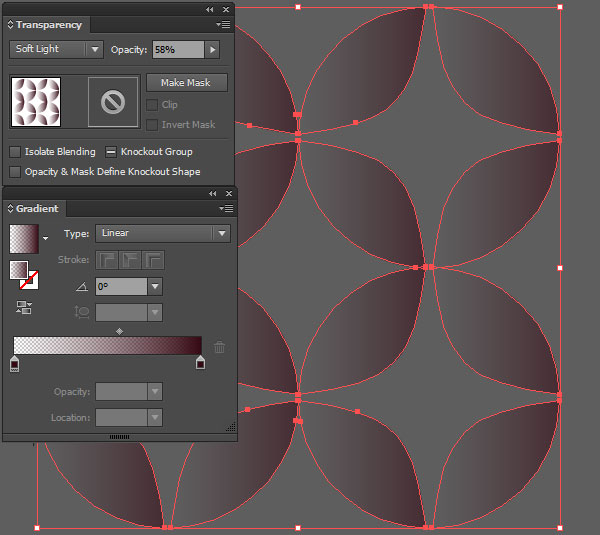
Step 2
Select the colorful portion of your design square, Copy, and Paste it. Apply a Linear Gradient that goes from a purple, brown, or maroon at 100% to 0% Opacity. Set the Blend Mode to Soft Light at 58% Opacity.
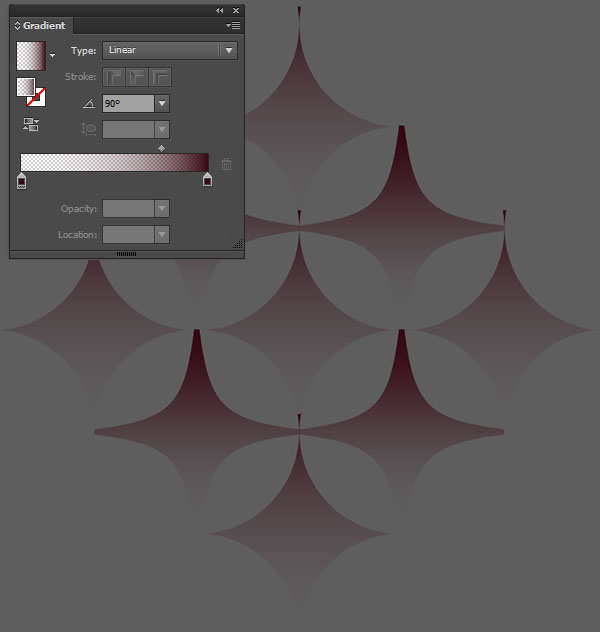
Step 3
For the creamy centers of the design you’ll have two groups of gradient shapes. The first uses the same Linear Gradient from the previous step at a 90° Angle. Set the Blend Mode to Soft Light in the Transparency panel.
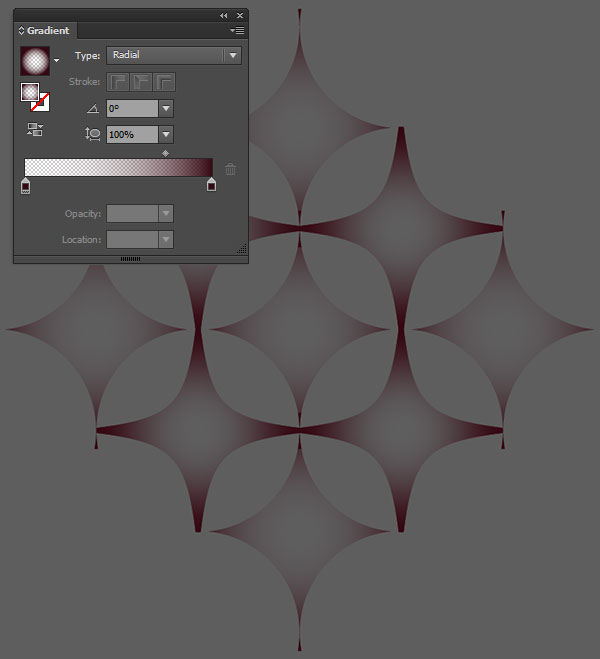
Step 4
The second gradient group for the creamy centers of the design are Radial Gradients with the darker color at the edges of each shape. Align with the gradient group from the previous step and your design pattern. Group everything together.
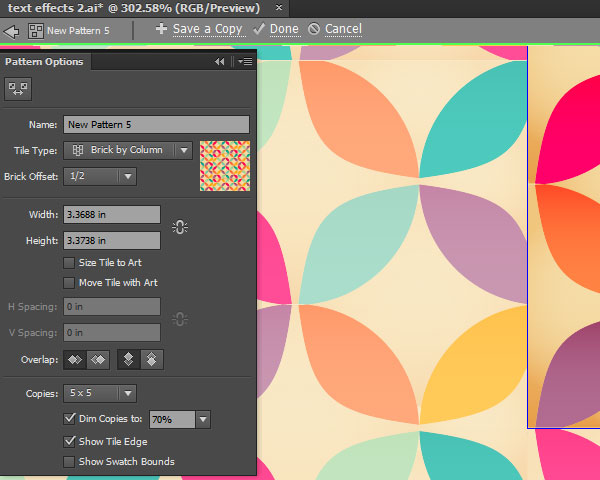
Step 5
Finally, open the Pattern Options panel and hit Make Pattern. Play with the Tile Type and Brick Offset in order to get a pattern you enjoy. Ultimately, I chose Grid for the Tile Type so the Brick Offset doesn’t matter.
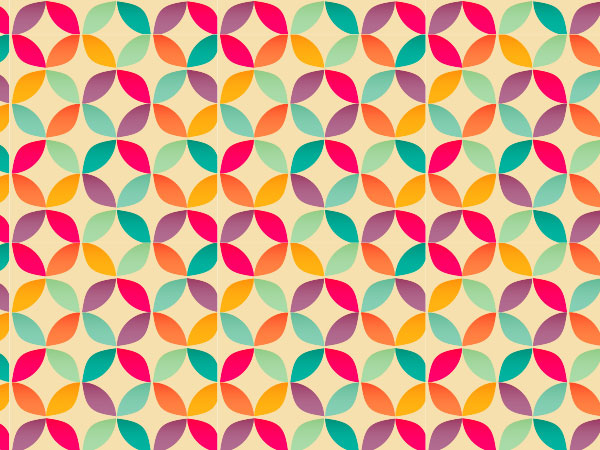
Congrats, It’s Over!
Look at you, creating fancy geometric patterns. Continue what you’ve done here by playing with different color themes, or start fresh and layer other shapes on to each other (hexagons, stars, teardrops, etc).