
In this tutorial I’ll show you how you can sketch in Illustrator in a natural fluid style, almost as if you’re drawing with pen and paper. The plug-ins DynamicSketch and WidthScribe have various intuitive tools and features to simplify your work flow and offer functionality that is nowhere in Adobe Illustrator or any other vector editor. So, let’s start to expand our creative opportunities!
1. Install the Required Plug-ins and Create a New Document
To draw this sketch we’ll be using plug-ins from Astute Graphics, which will help us to work naturally and make drawing more fun. Download 14 day free trials of DynamicSketch and WidthScribe plug-ins.
These videos cover the installation, licensing, and activation process. We’ll be learning about the installed plug-ins and their tool sets as we go along.
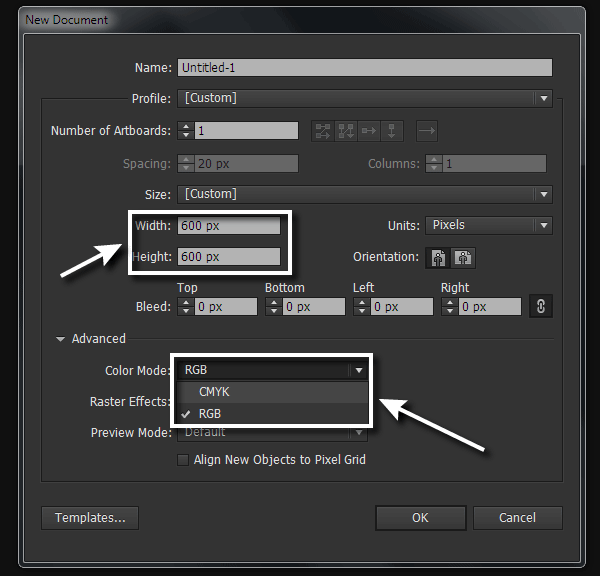
Run Adobe Illustrator, then hit Control-N to create a new document. In the opened dialog box, set the parameters of the artboard and choose the color mode depending on how you want to use your created image. If you’re planning to print your artwork choose the CMYK color mode and if you only want to publish your artwork on the web then choose the RGB color mode.
2. Draw an Anchor from Basic Geometric Shapes
Step 1
If you’ve ever studied a book on drawing, you’ll know that drawing begins with creating basic shapes. Sticking to the boundaries of these shapes, beginner artists can easily keep the basic proportions and symmetry of an illustrated object. Adobe Illustrator has many features that help get us started very quickly. So, take the Ellipse Tool (L) and create two circles without a fill and with a stroke of any color and thickness. The centers of the circles should coincide with each other.

You can position the objects from now on with the help of the Smart Guides mode (View > Smart Guides (Control-U)) and Align panel (Window > Align (Shift-F7)).
Step 2
Using the Rectangle Tool (M) create a rectangle that is elongated in the vertical direction as shown in the image below.
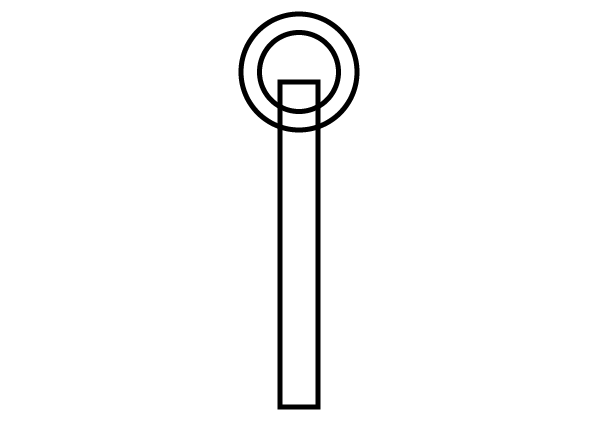
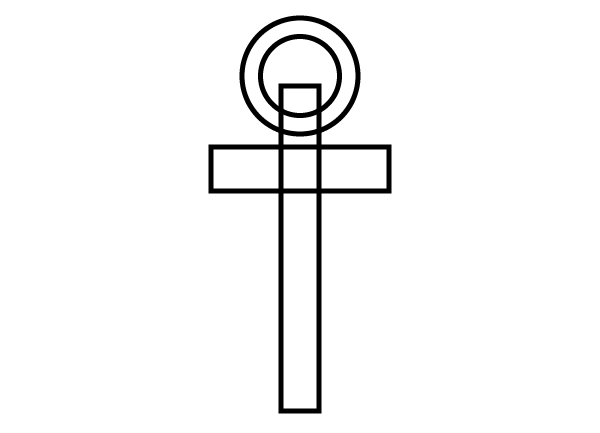
Now create a horizontally elongated rectangle.
Step 3
Take the Polygon Tool and create an equilateral triangle.
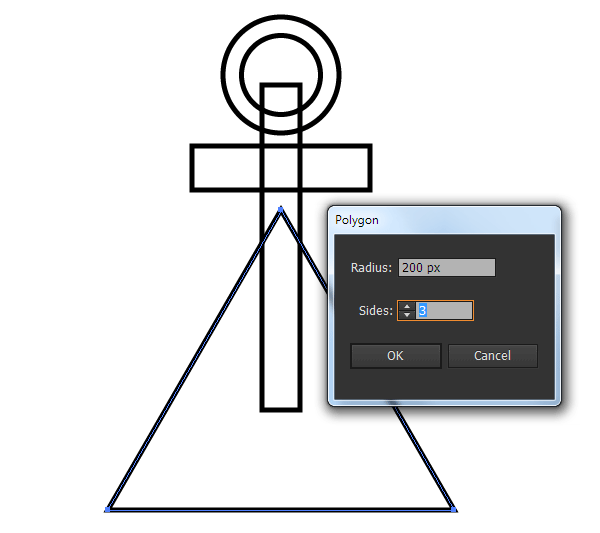
Keeping the rectangle selected, go to Object > Transform > Reflect … then choose the Horizontal Axis in the dialog box.
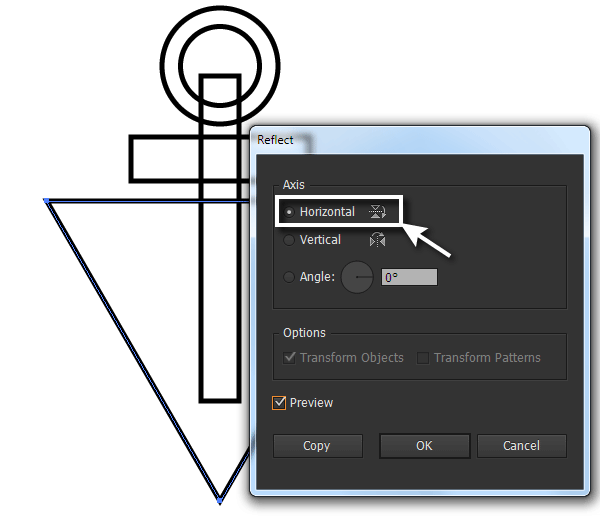
Move the triangle to the lower part of the anchor. Select to the bottom tip of the triangle using the Direct Selection Tool (A), then move it up a little while holding Shift.
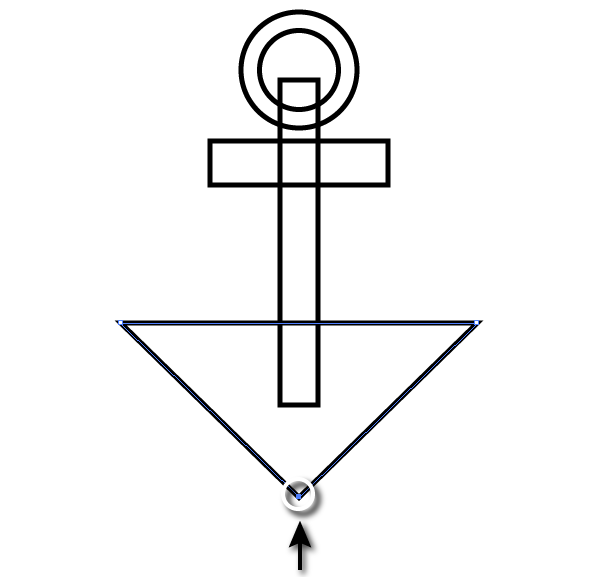
Step 4
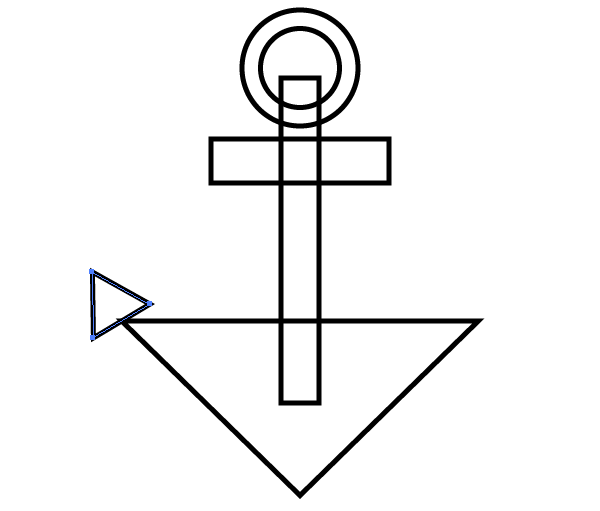
Create another triangle and place it at an angle on the larger triangle. Rotate the smaller triangle slightly using the Selection Tool (V).
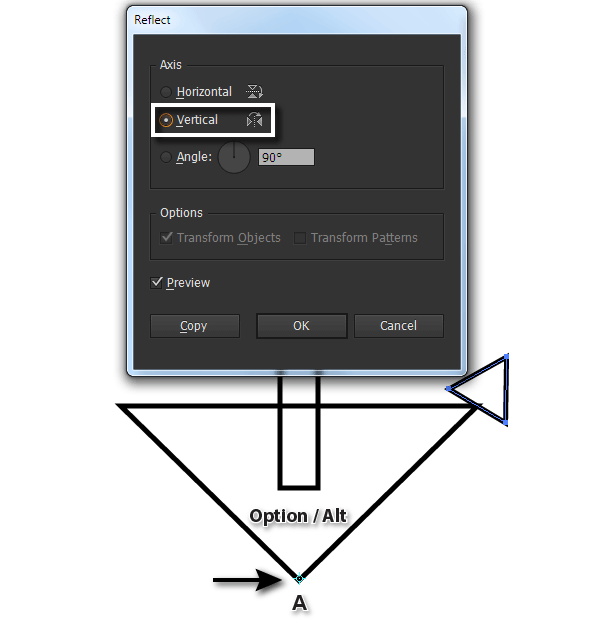
Take the Reflect Tool (O), hold Alt key and click at the point A. Choose the Vertical Axis, and then click on the Copy button in the dialog box.
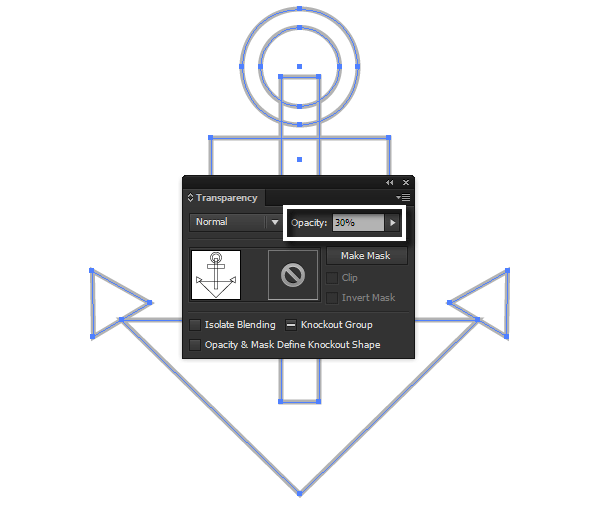
Select all the created objects and group them up (Control-G). Reduce the opacity of the entire group in the Transparency panel. If necessary, reduce the stroke thickness in the Stroke panel. We’ll use these created shapes as a template.
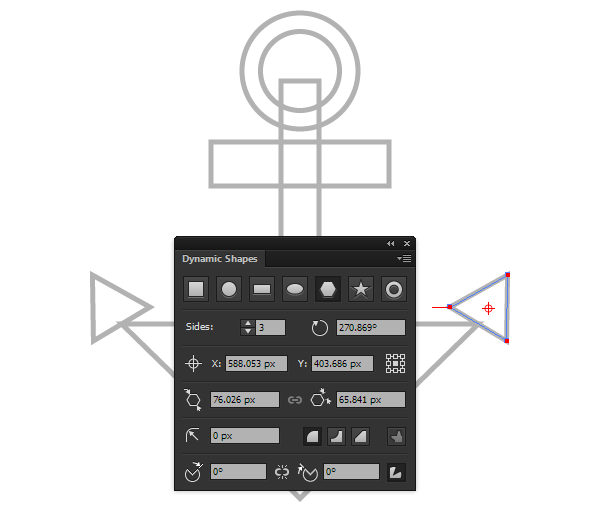
Just as a side note, this process can be greatly streamlined by using the Dynamic Shapes Tool from the VectorScribe plug-in, as this enables you to change the object’s parameters not only during the process, but also afterwards.
3. Sketch with DynamicSketch
Step 1
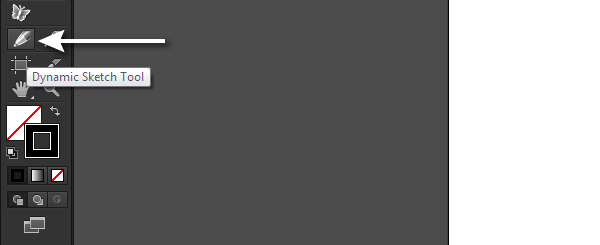
After installing the DynamicSketch plug-in, the DynamicSketch icon will appear in the Tools panel.
To open the DynamicSketch Preferences dialog box, double-click on the tool’s icon, or press the Return/Enter key after choosing the tool. To create a sketch, I use slightly different settings from the default ones. You can see these in the image below.
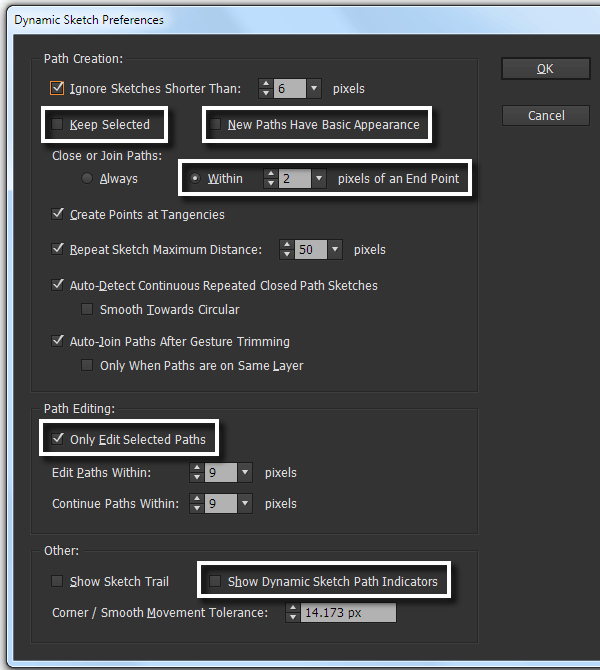
For more information on this tool’s settings, you can read from the Overview: Dynamic Sketch Preferences.
Step 2
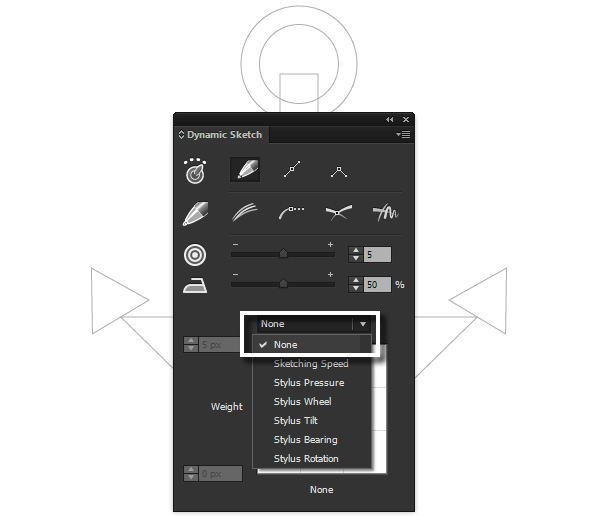
Open the Dynamic Sketch panel (Window > Dynamic Sketch > Dynamic Sketch panel). Choose None in the fly-out menu of the panel. You may have to extend the panel by opting for Expand Panel from the panel’s fly-out menu.
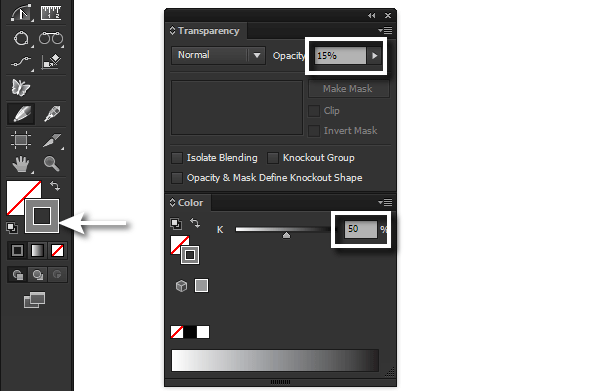
Set the color to gray and 1px for the stroke’s thickness. Reduce the opacity to 15-20%.
Go to View > Hide Edges (Control-H) to draw in a more natural manner.
Step 3
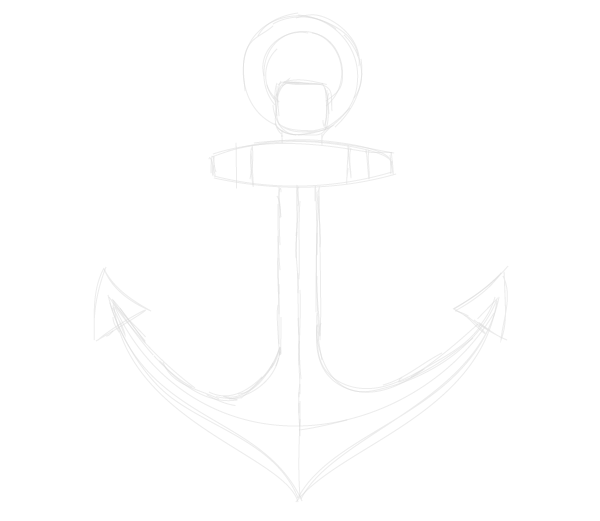
Now, sketch an anchor based on the shape of the template. The look and feel of the drawing process is very similar to a pencil sketch.
4. Create the Outline with DynamicSketch
Step 1
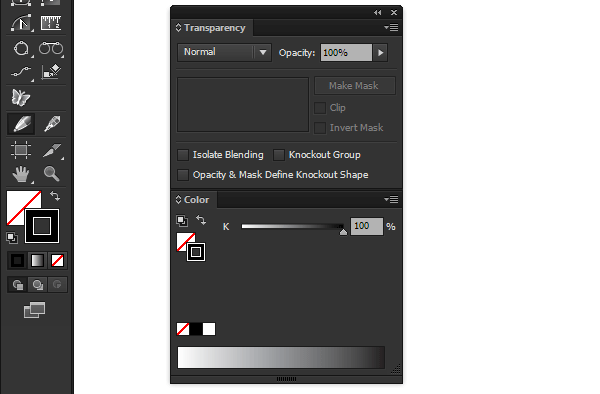
Set the stroke’s color to black and increase the Opacity to 100%.
As with the Paintbrush Tool (B), we’re able to set the relationship between the variable stroke width and several parameters.
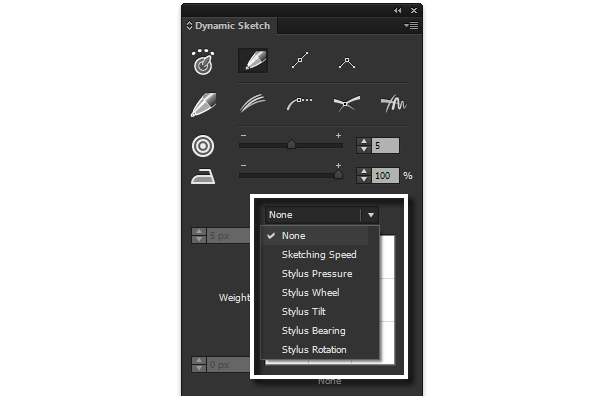
If you’re using a graphic tablet in your work, you’ll need to set the relationship between the stroke width and the pressure of the stylus. If you use a mouse for drawing, then you need to set the relationship between the stroke width and the cursor speed (Sketching speed). By the way, none of the standard tools in Adobe Illustrator possesses such a feature. You can also set the minimum and maximum stroke width to correspond to the stylus pressure or cursor speed.
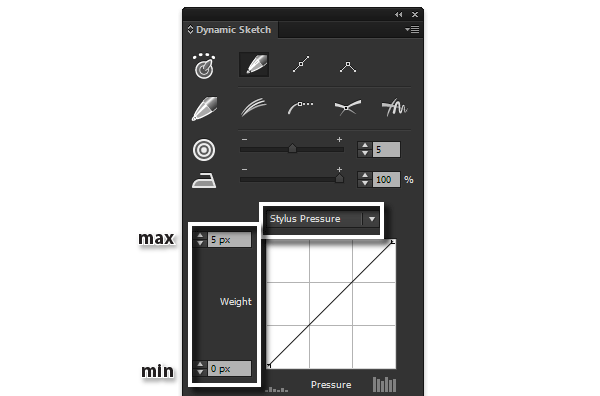
At the bottom of the Dynamic Sketch panel, you can see a diagram of the dependence of the stroke width to the change in the selected parameter. By default, this diagram shows a linear relationship, but you can edit it (add points, move, bend, etc.), to set up the tool to work how you want it to.
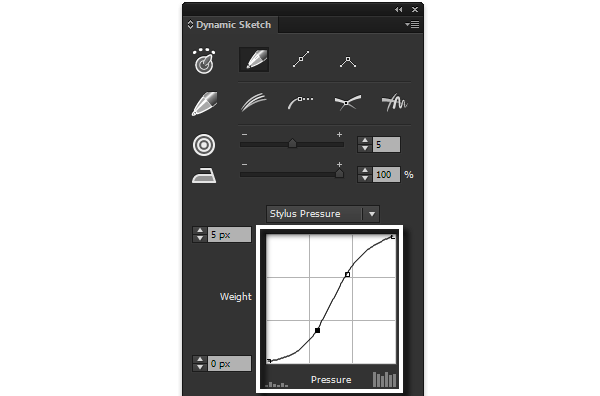
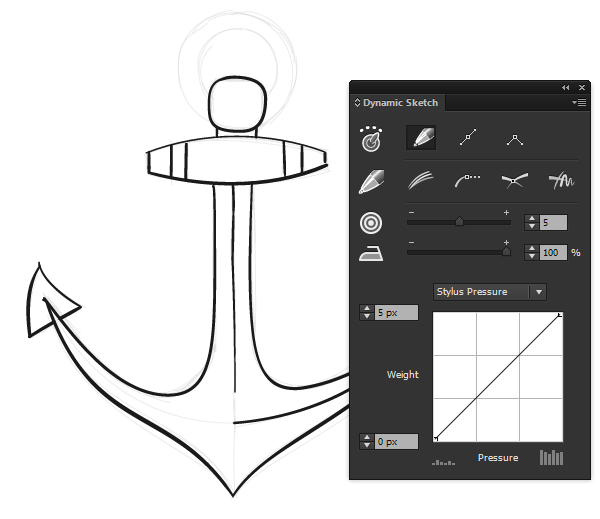
I draw using a graphic tablet, so I’ve chosen Stylus Pressure and linear relationship in the panel. Create the outline of an anchor, based on the sketch, as shown below.
Step 2
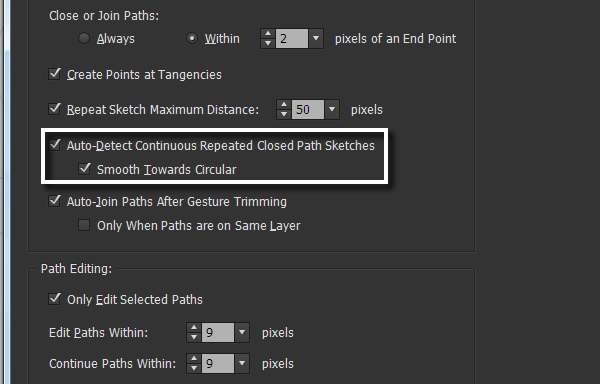
Typically, artists create rounded shape objects by multiple repetition of its shape. DynamicSketch makes drawing circular objects so quick and simple. Open the DynamicSketch Preferences dialog box, and then tick Auto-Detect Continuous Repeated Closed Path Sketch Traces and Smooth Toward Circular.
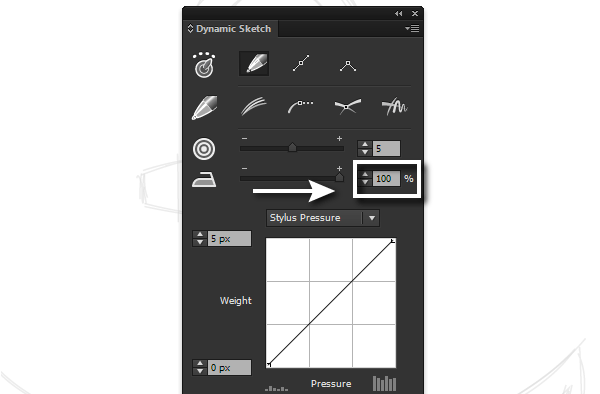
Set 100% for smoothness and Stylus Pressure in the Dynamic Sketch panel.
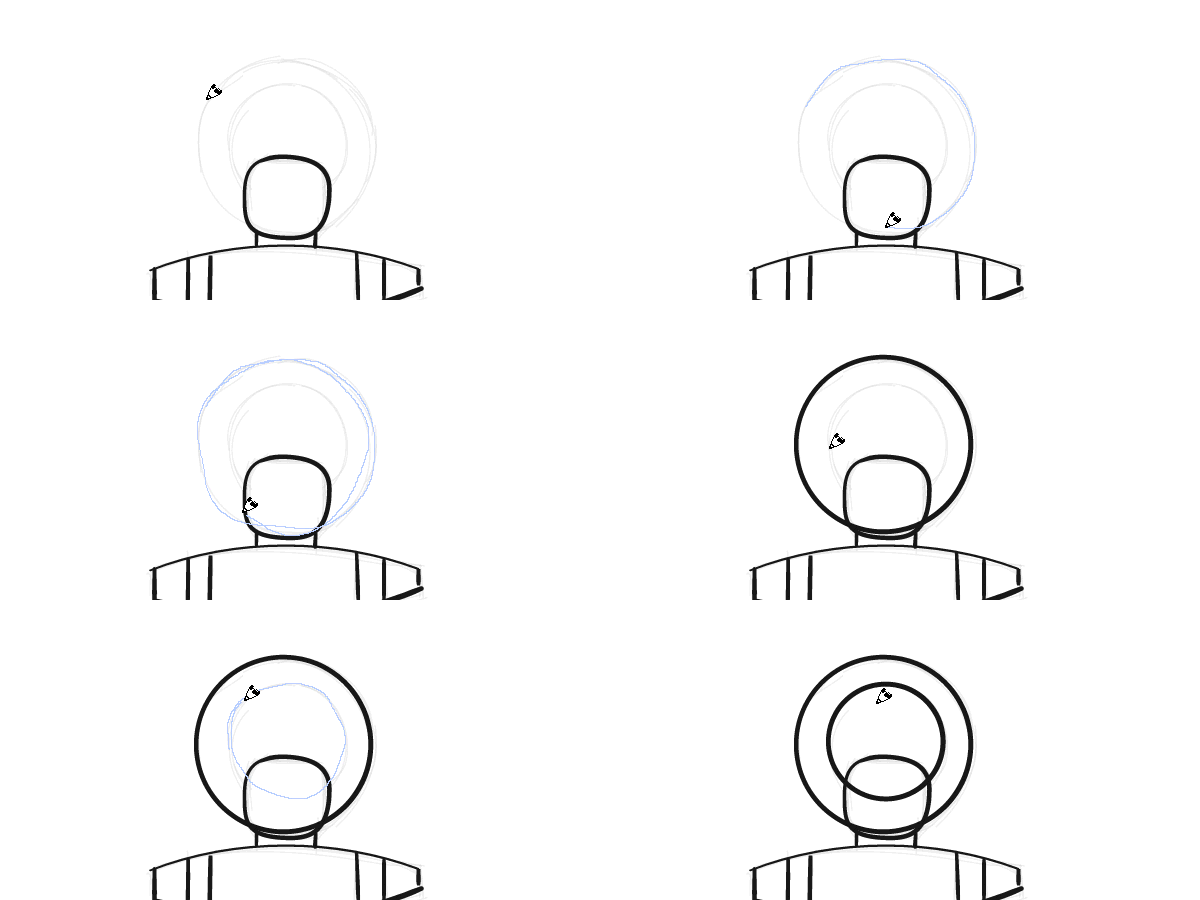
Now you can draw a ring of the anchor in the shape of circles. Just draw a loop twice around to get your perfect circle.
Step 3
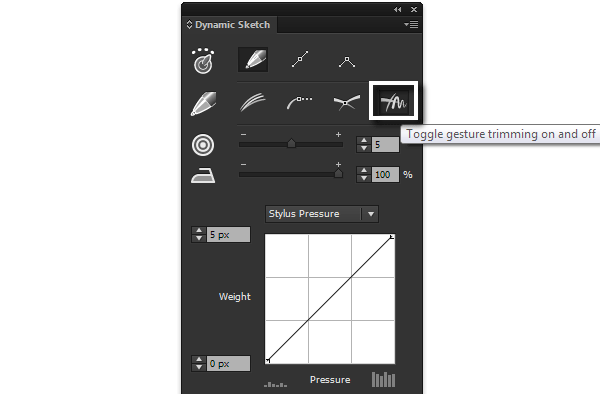
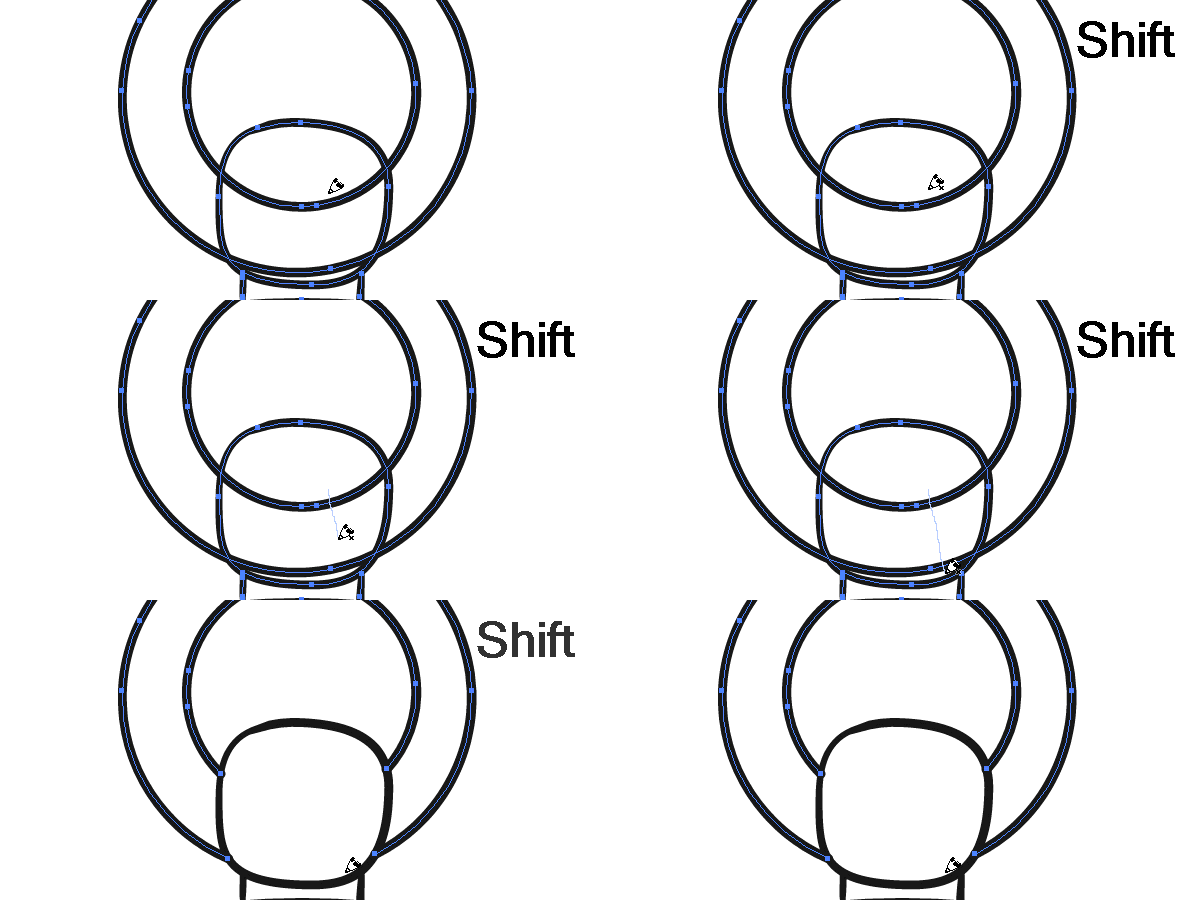
We need to remove parts of the paths that cross the ring’s mounting. Gesture Trimming enables us to do this so easily. Click on the Gesture Trimming button in the Dynamic Sketch panel.
Select all the objects of the outline, then cross the paths, holding Shift. As you can see, this immediately deletes unwanted segments.
5. Create Shadows Using Hatching
Step 1
Create hatching in the areas where you want shadows. The distance between the hatches and the thickness should correspond to the density of the shadow in this area.
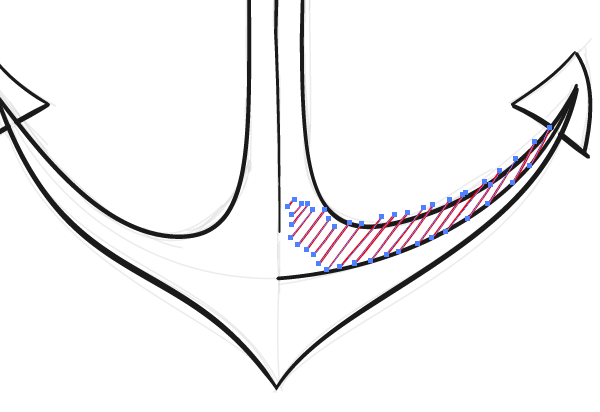
This can normally require certain skills, but Dynamic Sketch again simplifies the task. First, you can create straight-line segments. To do this, hold down the Alt while drawing.

Secondly, you don’t need to keep an eye on the hatching so that it’s exactly within the outline of the object. As mentioned above, you can easily remove unwanted parts of the paths using the Gesture Trimming function.
Step 2
To enhance the density of the shadow, use hatching as shown below.
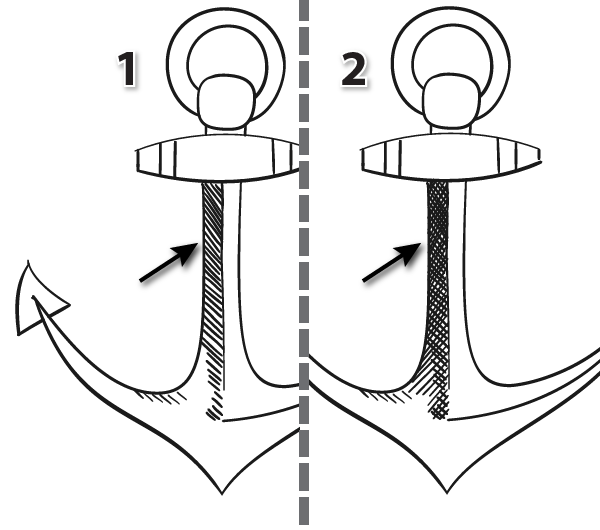
Areas where there is no hatching correspond to glares on the anchor.
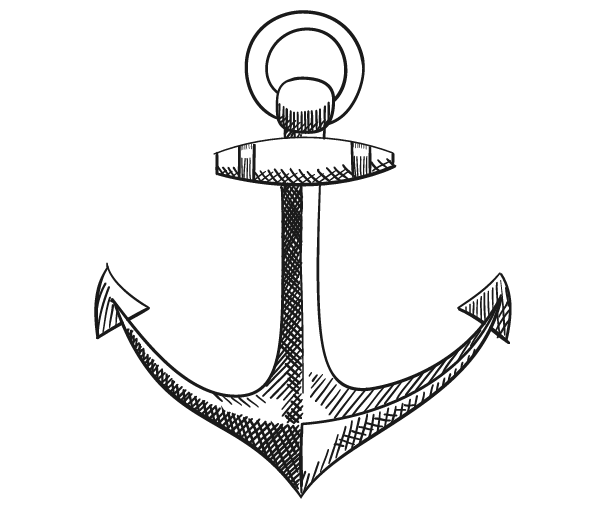
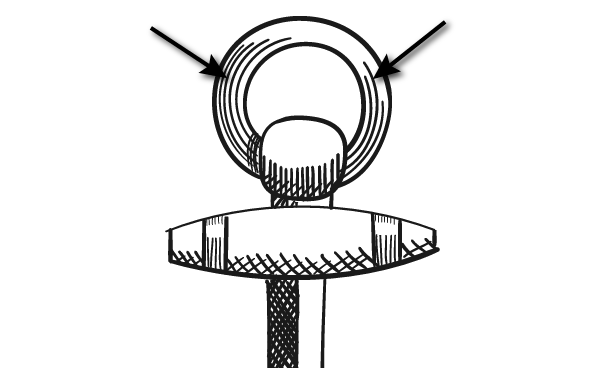
Not all the hatching should be done using straight-line segments. For example, on the anchor’s ring I’ve created arc-like strokes in order to convey the nature of the surface.
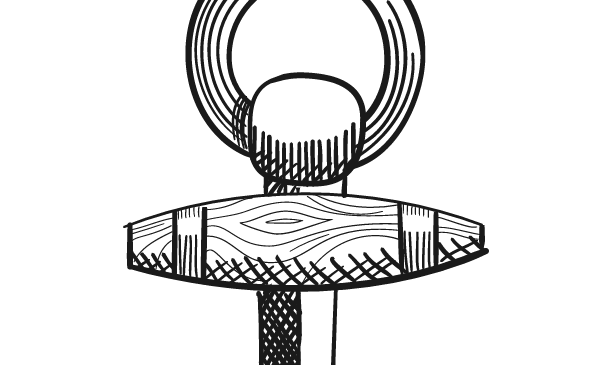
Finally, to create the wooden texture, I’ve drawn a few wavy lines resembling typical fibers.
6. Create the Lighthouse
Step 1
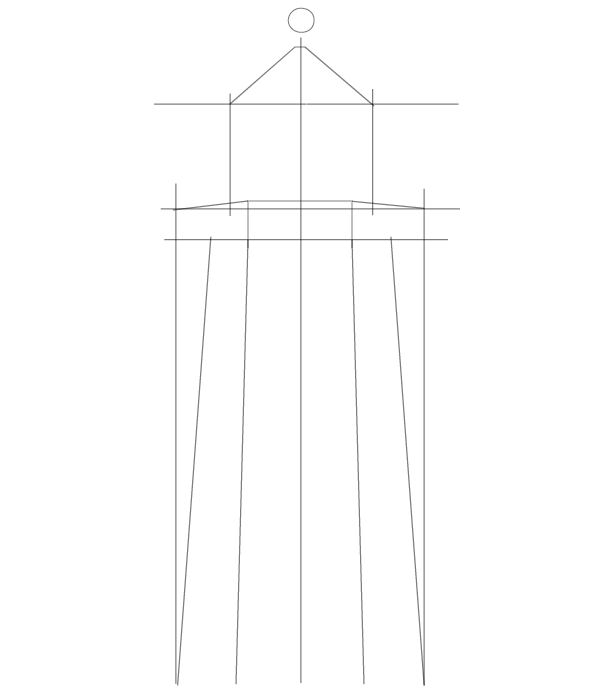
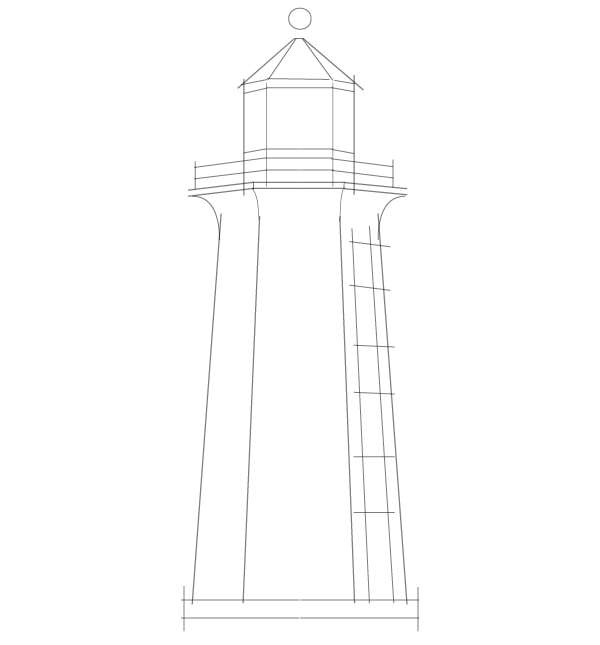
This process isn’t significantly different from drawing the anchor, so I’m only showing the main stages here. Create the basic shape of a lighthouse by using Adobe Illustrator’s native tools and features.
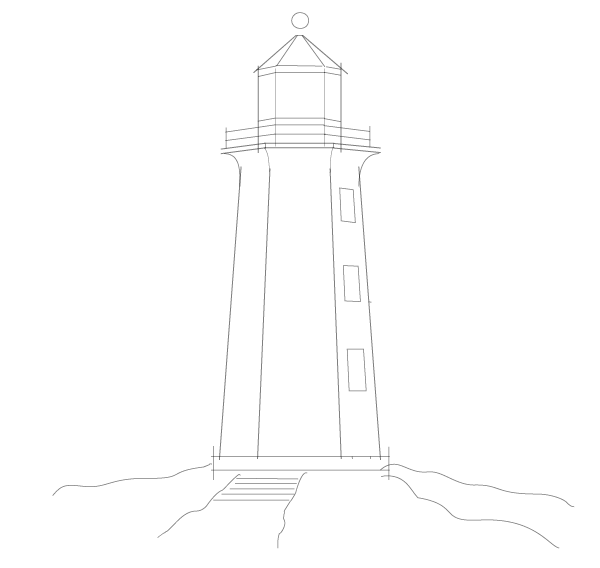
Step 2
Draw the outline of the lighthouse with variable stroke paths using the DynamicSketch Tool.
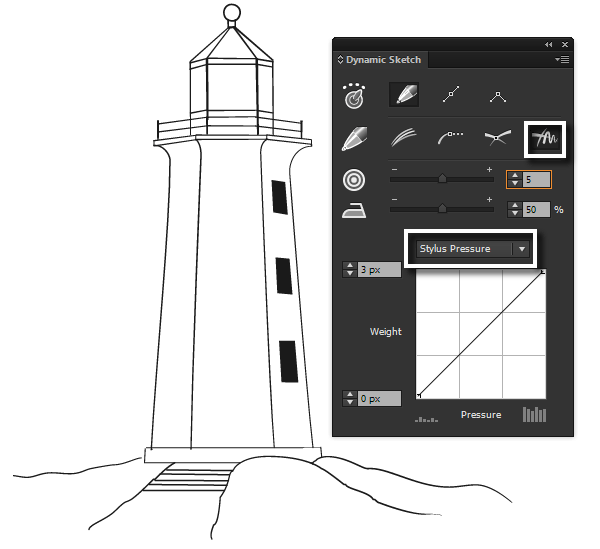
In this step, I used the Stylus Pressure option and the Gesture Trimming function to remove unwanted segments (to clean up the illustration).
Step 3
Create shadows on the lighthouse using hatching. Here you can use the feature of drawing straight-line segments, included in the Shift modifier.
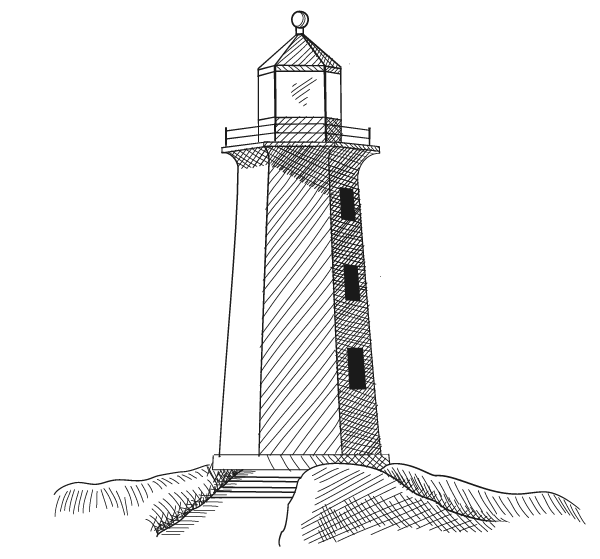
7. Post Processing Paths of Variable Thickness using WidthScribe
Step 1
WidthScribe is a unique plug-in which really enhances your vector work by varying multiple width strokes simultaneously with both ease and speed. The results bring your work to life and create real depth and impact. Let’s see how we can use its features to improve and refine our drawing. After installing the plug-in its tools will appear in the Tools panel.
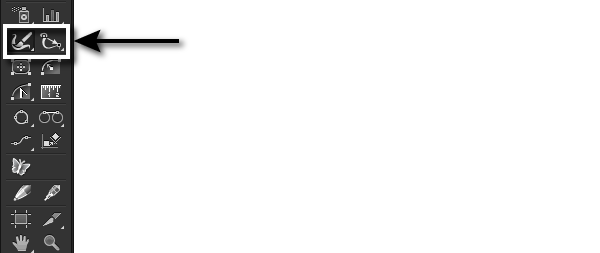
Take the Width Brush Tool, then open the Width Brush Tool Options dialog box by double-clicking on the tool’s icon or on the Return/ Enter key. Set the desired brush size and hardness. You can also change the brush size by using the Left and Right Square brackets. I think that 50% hardness is the best setting for this piece of work. Choose Adjust Width by Fixed Amount, set -1.5 px and also Pressure if you’re using a graphics tablet.
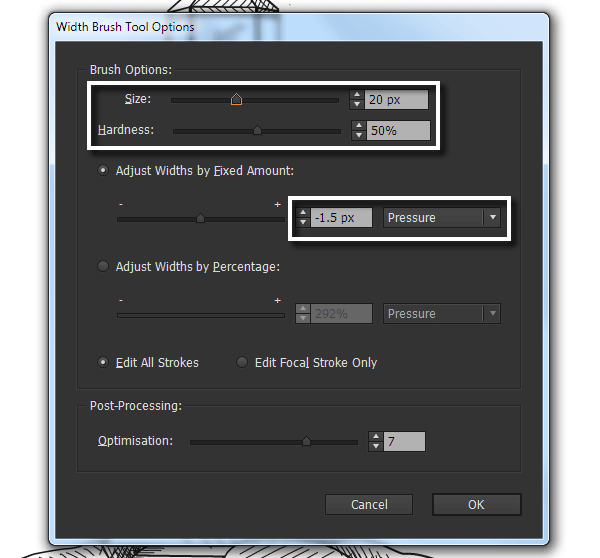
A negative value of this parameter will mean we can reduce the width of paths in the impact area.
Step 2
Usually at the edges of an object the shadow becomes less dense due to reflections from the surrounding environment. Let’s reduce the shadow’s density on the right edge of the lighthouse. To do this, select the hatching, and then draw on it from top to bottom using the Width Brush Tool.
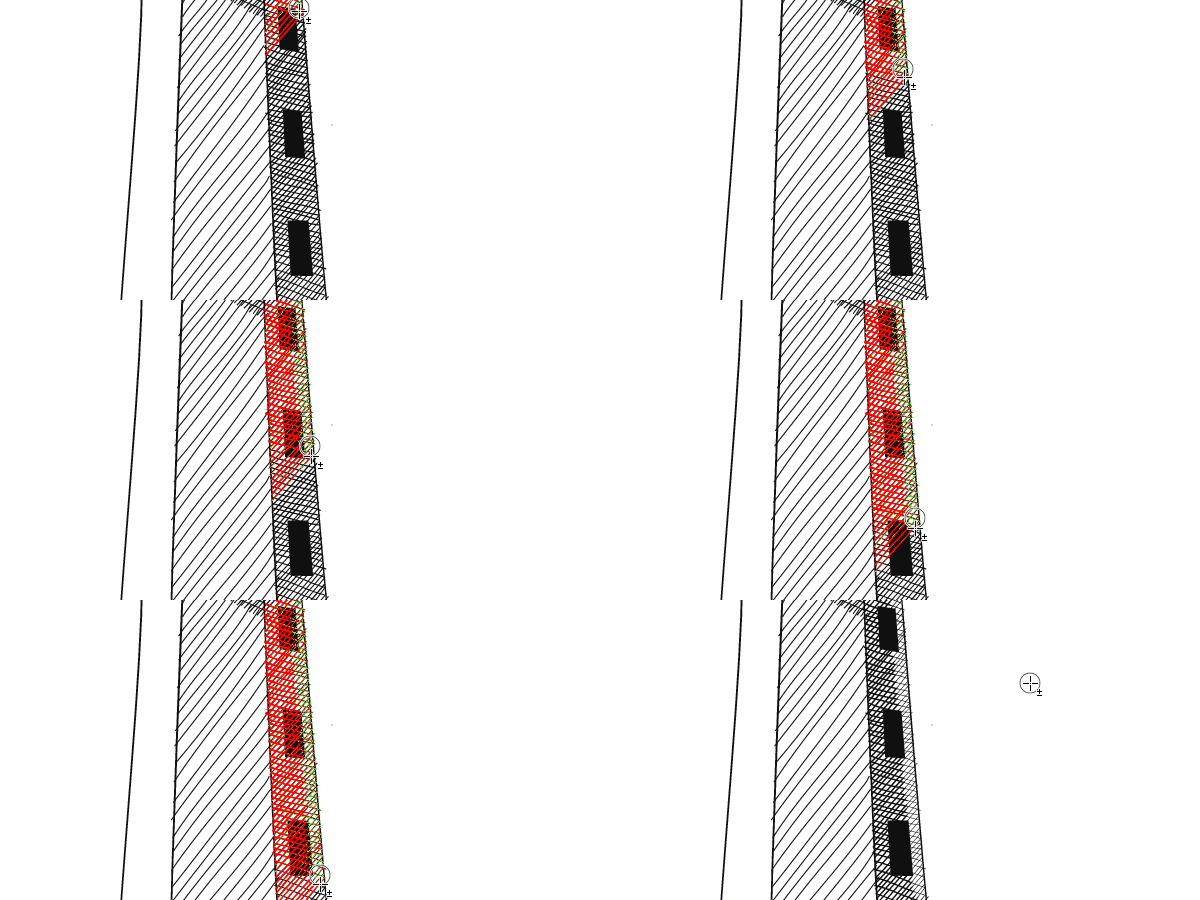
We’ve been able to achieve our desired result in just ten seconds although more than one hundred paths were processed in that time!
No tool or process in Adobe Illustrator is able to do this for us.
Step 3
Now let’s take another tool from WidthScribe, the Width Gradient tool. To open its panel go to Window> WidthScribe > Gradient Width panel.
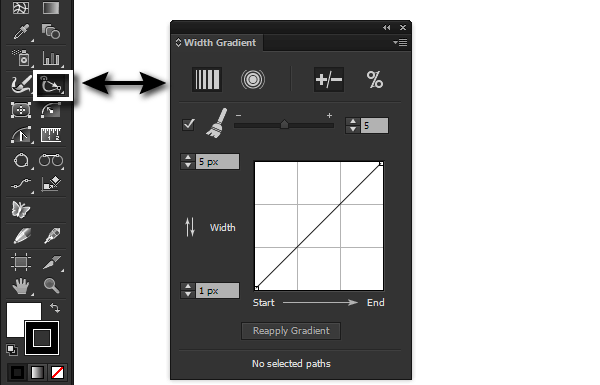
Now we can apply linear and radial gradients to selected paths. The Width Gradient Tool doesn’t change the color like a normal gradient does, but it changes the widths of paths. To see how it works, choose a linear gradient and set the starting and ending width of the paths.
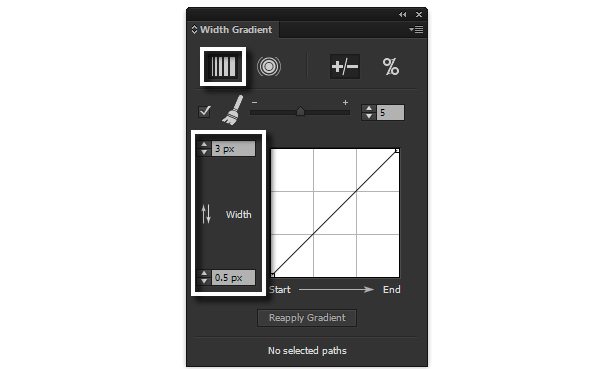
In the Layers panel, locate and select the groups of paths to which you want to apply the width gradient.

Whilst applying the gradient you can preview its effect on your illustration. While holding the mouse button down, you can change the gradient’s direction and length.
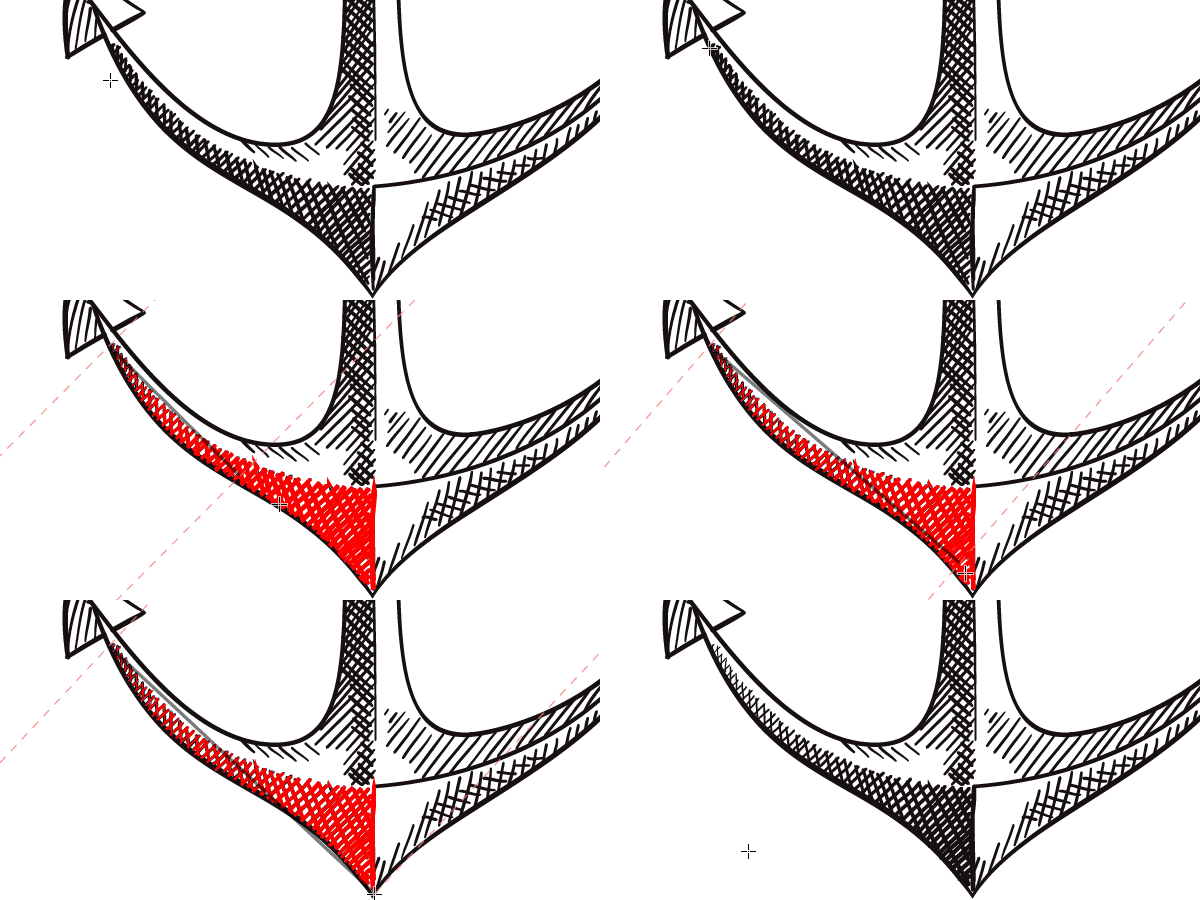
In literally a few seconds we’ve been able to linearly change the density of the hatching. To do this manually would take much more time, effort and skill. WidthScribe just made our job a whole lot easier!
Step 4
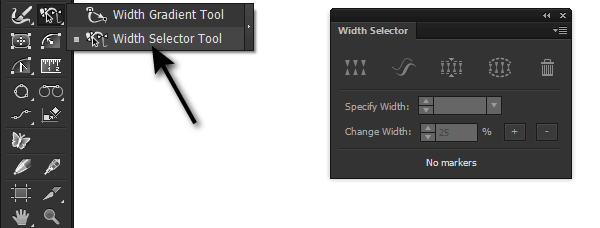
Take the next tool of WidthScribe, the Width Selector Tool, and open its panel (Window > WidthScribe > Width Selector panel).
Width markers on the variable width paths have now appeared.
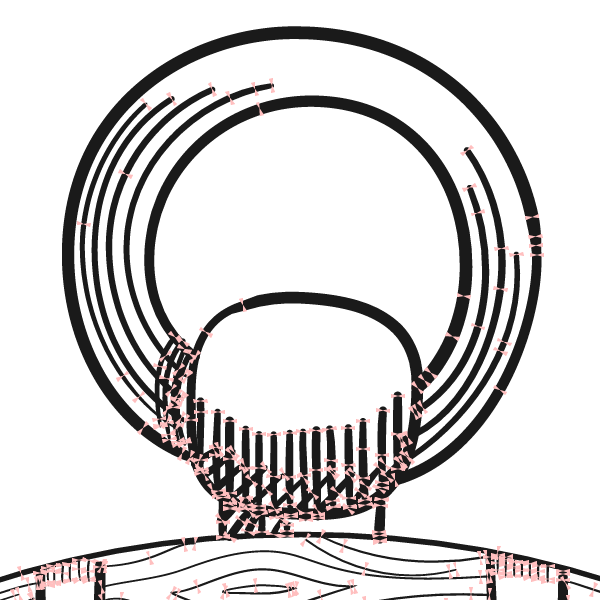
The Width Selector Tool is designed to select and work with width markers. Select width markers at the ends of paths of the anchor ring while holding Shift. Now press on the Taper Stroke button in the Width Selector panel. This sharpens or tapers the ends of the paths you’ve selected.

Taper the paths where necessary to add depth and contour to your illustration.

8. The Final Touches
Step 1
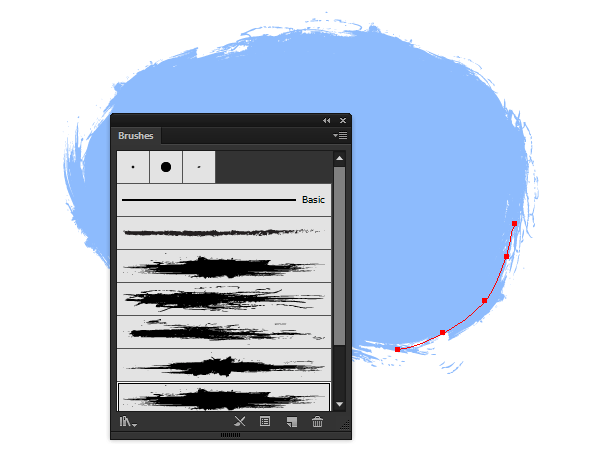
Continuing with a nautical theme we can use the Dynamic Sketch Tool or Pencil Tool (N) to create an arbitrary shape with a blue fill.
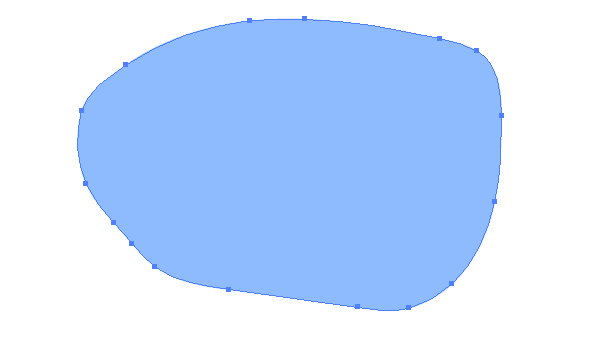
Now we’ll need grunge brushes. For this sketch, I’ve used free Illustrator brushes BEAT ‘EM UP. Choose the same color blue as above, but disable the fill and use this for the stroke color. Now take the Paintbrush Tool (B) and create strokes with the grungy brushes along the outline of the blue shape.
Step 2
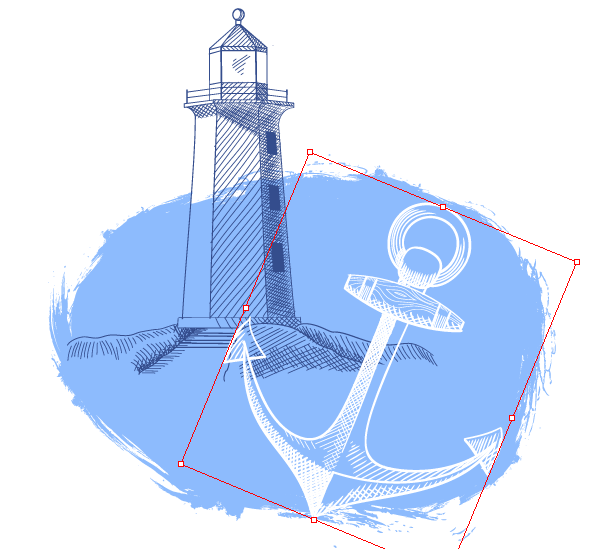
Recolor the objects of the lighthouse in a dark blue color, then place it on the blue background, as shown below.

Recolor all the objects of the anchor in white and place it at the forefront of your composition. Incline the anchor to the right side, using the Selection Tool (V).
Congratulations! You are Done!
It’s impossible to cover all the features and tools of DynamicSketch and WidthScribe in just one tutorial. However, I hope this example shows you how intuitive they are and how they can help you to enjoy being creative by streamlining your work flow.
