Working with many types of footage? There’s a chance you’ll have various frame rates across your files. You’ll often see this called FPS, or frames per second.
The FPS describes how many individual frames a camera captured in a second of footage. It’s important to know how to change frame rate in Premiere Pro to create a cohesive production.
In this tutorial, we’ll cover how to change the frame rate of a video. Let’s jump in!
How to change frame rate in Premiere Pro
You’ll now learn how to change FPS of video in Premiere Pro. You can apply these changes to a single clip or a complete project. These let you precisely adjust the frame settings of any task.
Keep in mind: You’re limited by the frame rate that your videos have captured. Changing the frame rate in Premiere can’t exceed what your camera was able to film.
For this tutorial, you’ll see two beautiful stock footage clips from Envato in use. Download them here and here to follow along.
So let’s see how to change frame rate in Premiere Pro, quickly and easily.
1. How to change FPS of a video in Premiere Pro
We’ll begin by looking at how to change FPS of video in Premiere Pro. This is an edit that you can apply to a single clip.
Want to make edits for a full project? We’ll cover that below, in the next section.
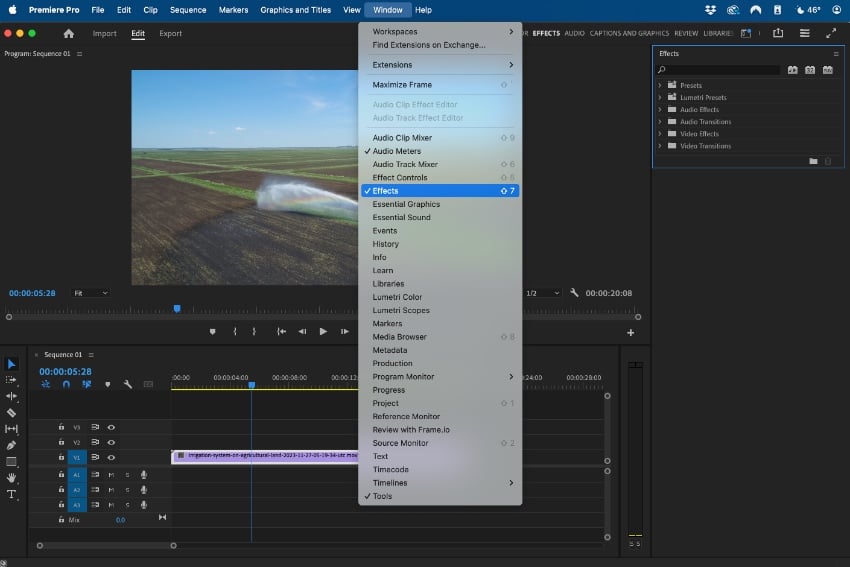

Begin with a video clip in your Premiere Pro Timeline, like you see above. Then, open the Effects panel. To do that, click on Window at the top of your screen.
On the Window dropdown, choose Effects. The Effects sidebar will open on the right side of your Premiere Pro screen.
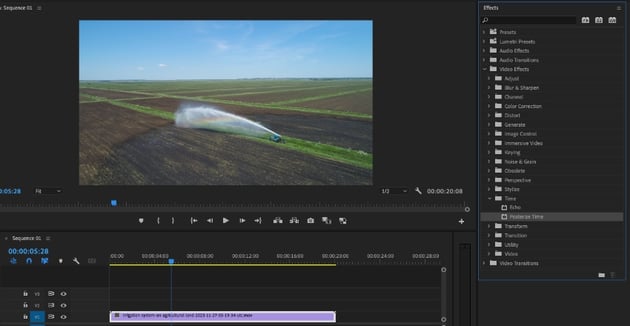
Here’s how to change the FPS of video in Premiere Pro. On the Effects panel, find the Video Effects folder. Open it up, click Time, and then find the Posterize Time effect.


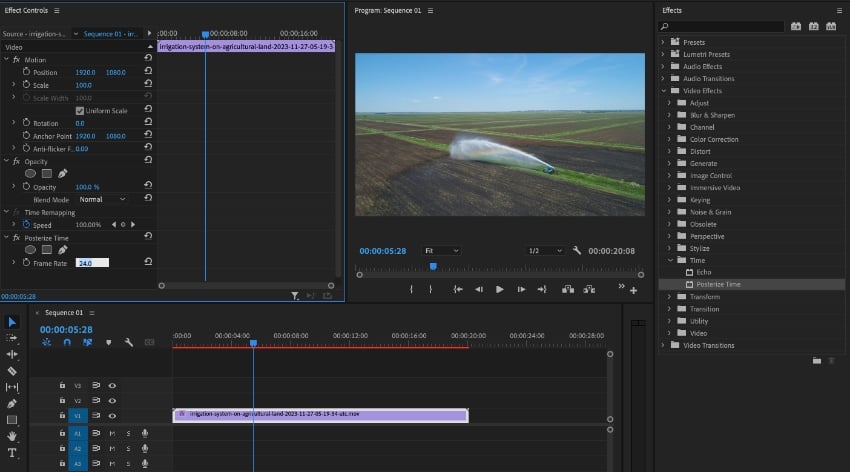
Drag and drop Posterize Time over your clip in the Timeline. Then, return to the Window dropdown at the top of your screen. Click Effect Controls.
The Effect Controls panel opens on the left. At the bottom of it, you’ll see the Posterize Time effect. Within it, there is a Frame Rate setting.
The number you see corresponds to the frames per second (FPS) of the video. Here, it defaults to 24. Change to a different value to change the FPS of your video clip.


2. How to change frame rate in Premiere Pro sequences (for a project)
Now, let’s explore how to change frame rate in Premiere Pro projects. This is a mass edit that you can apply to a Premiere Pro sequence.
Begin by opening the Project panel. To do that, return to the Window dropdown and choose Project. When the Project panel launches, you’ll see the sequences in your Premiere project listed.


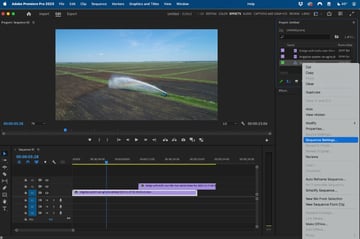
So, how to change the frame rate of a video sequence? Right-click on said sequence. Click Sequence Settings from the list of options. On it, find the Timebase dropdown near the top.
Here, you’ll see a list of frames per second (FPS) options that you can choose from. Select one and choose it by clicking to apply it. Then, click OK in the bottom right of the Sequence Settings.


Your chosen frame rate will apply to your entire Premiere Pro sequence.
You’ve just learned how to change frame rate in Premiere Pro! As you can see, it’s a quick and effortless process. And you can do it for both sequences and individual clips.
The best source for Adobe Premiere Pro templates
Envato is a secret to success for many video editors. For one flat rate subscription, you’ll access thousands of designs! That gives you more tools than ever to work with.
Unlock everything you need for your project: stock footage, graphics, audio, and more. Explore them all using the AI-powered search to find precisely what you need.
Envato has an unbeatable value. It’s a one stop shop with everything you need for your perfect video production. Join today and unlock everything you need!
You just learned how to change FPS of video in Premiere Pro!
Now, you know how to change frame rate in Premiere. It’s an important skill that you can use to create a cohesive project with many sources of footage. With this new skill, you can easily adjust each clip or the project settings for a perfect edit.
It’s your turn to practice this important skill. Envato includes footage in many frame rates, so grab your favorite and play with it in Premiere. You’re sure to use this new skill on your future projects!