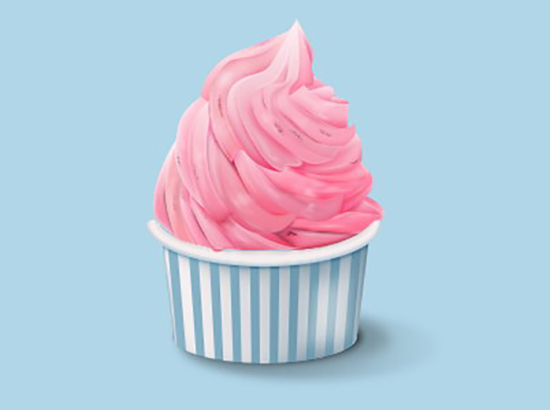
In this tutorial, we will learn how to Draw a Delicious Ice Cream Icon in Photoshop. We will be using the built-in vector shapes in Photoshop to achieve this outcome. Have a try!
This is an intermediate to advanced level Photoshop tutorial.
Final Result Preview
Step 1: Preparing Canvas
We will start by making a new file with size 400 px × 300 px.
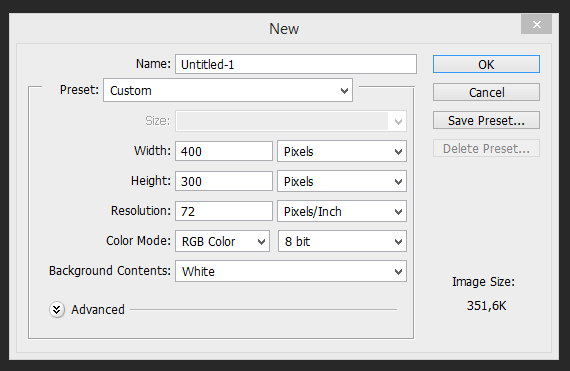
Step 2
Click Add Adjustment Layer icon and then select Solid Color.
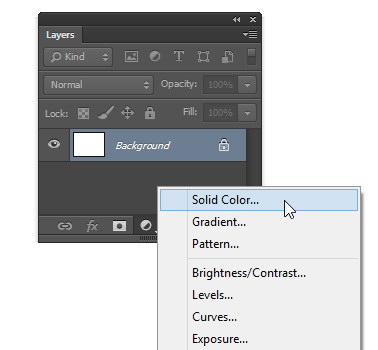
Photoshop will ask you to select a color. Select light blue color. This will be the file background.
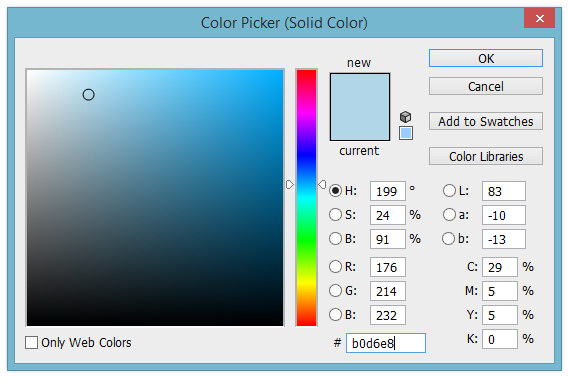
Step 3
In the Layers panel, double click its layer name to change its name to background. This simple habit will help you organize the layers.
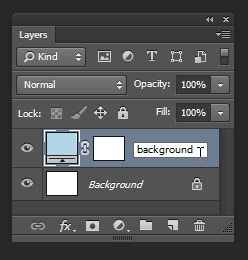
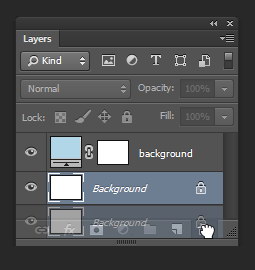
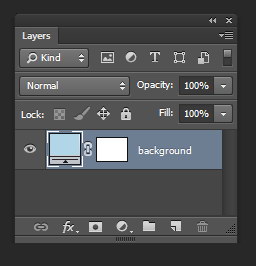
The default background in bottom of the Layers panel is no longer needed. We can delete it by dragging it to the Delete icon. This way, you can save few kilo bytes on the file size.
Step 4: Drawing The cup
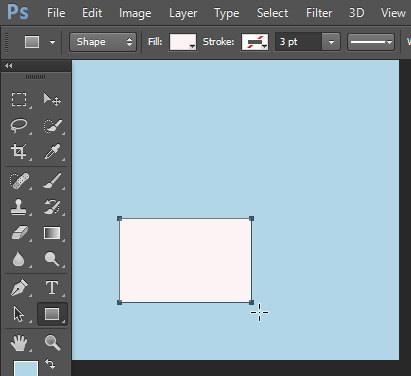
Now, we’ll start drawing the cup. Draw a rectangle shape using Rectangle Tool with Shape selected in the Option Bar. For its Color, select white. Select None for the Stroke.
Step 5
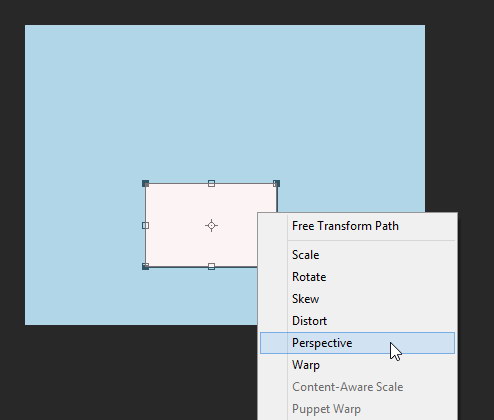
Let’s transform its shape. Hit Ctrl + T to apply Free Transform. Right click and then select Perspective.
Step 6
Pull top corner of the rectangle shape outward.
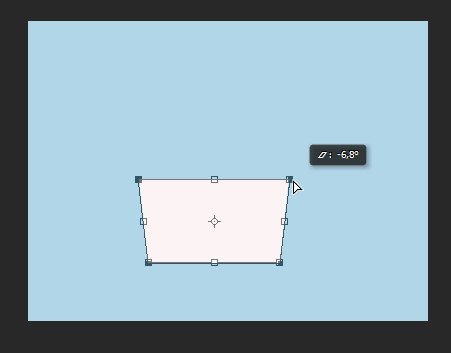
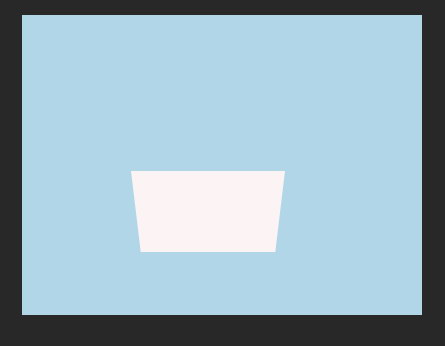
Hit Enter to confirm the transformation.
Step 7
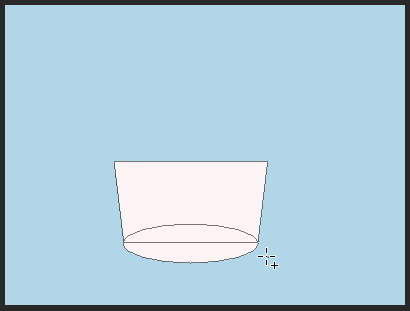
Activate Ellipse Tool and then Shift-drag to add an ellipse on lower part of the rectangle.
Step 8
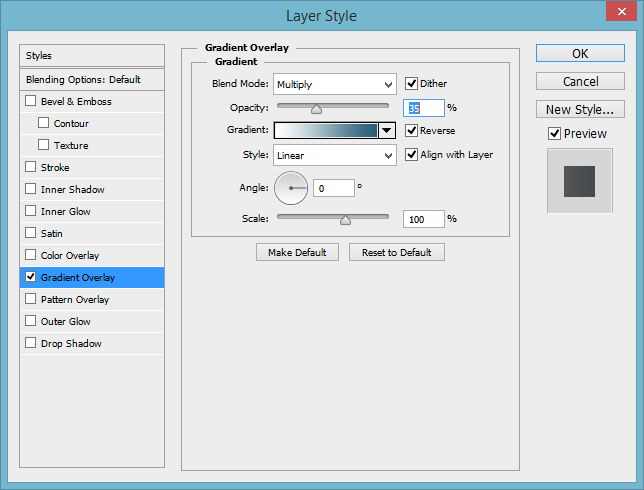
Double click the shape and then add Gradient Overlay. For its gradient, set it to Linear from white to light blue with Blend Mode: Multiply.
Step 9
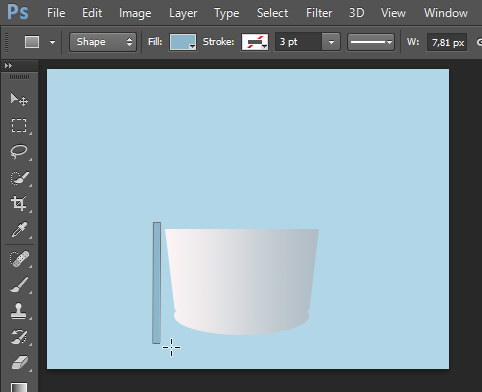
Add a thin blue rectangle shape and place it vertically above the cup shape.
Step 10
Activate Move Tool. Select the shape we have just made. Shift + Alt-drag to duplicate it. Keep doing this until we have enough set of rectangle covering the cup shape.

Step 11
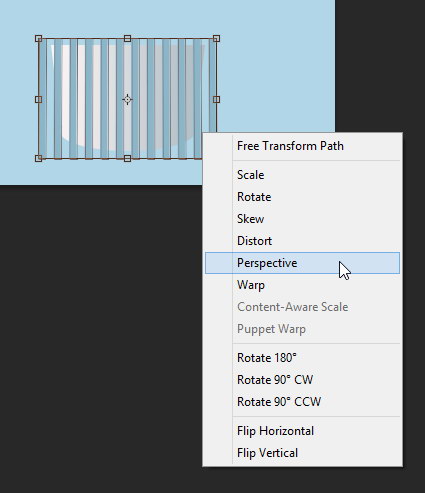
Select all the shape using Move Tool. Hit Ctrl + T to perform Free Transform. Right click and then select Perspective.
Step 12
Pull lower corner inward until its shape matches the cup perspective.

Step 13
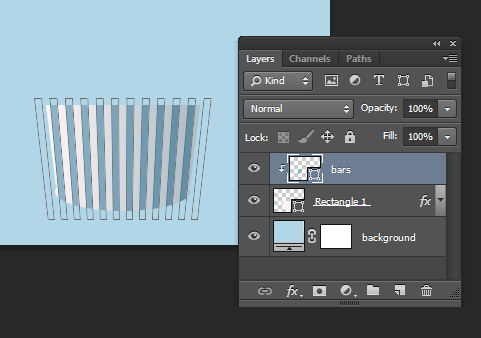
Hit Ctrl + Alt + G to convert the layer to Clipping Mask. All the rectangles will goes inside the cup and become its stripes.
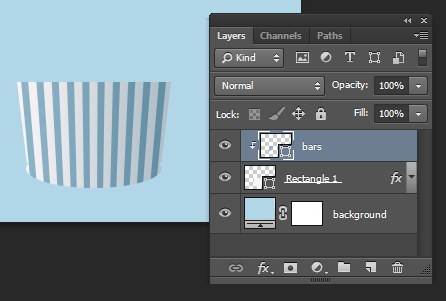
Step 14
In Layers Panel, create new group layer and name it cup. We want to keep every layers that creates the cup inside this layer group. By being organized, you will work more efficient with Photoshop. From now on, place every new layer in this layer group. Add a new ellipse shape on top of the cup. Use same color as the previous shape.
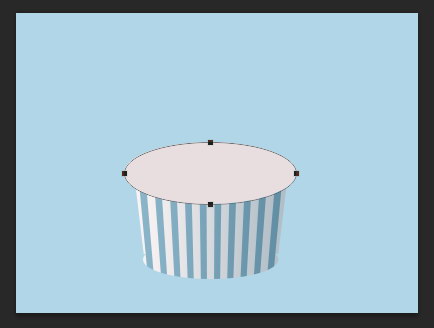
Step 15
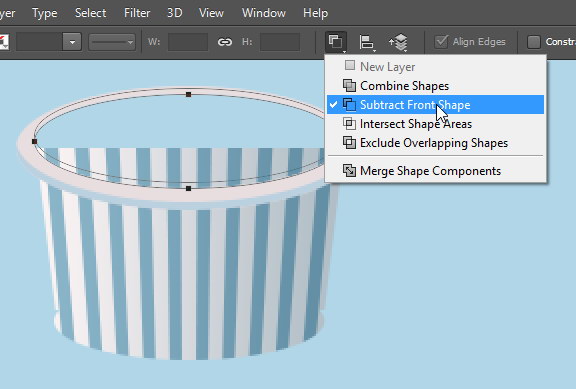
Inside the previous shape, add another smaller ellipse shape. Set its path mode to Subtract Front Shape from the Option Bar. This is going to be the upper part of the ice cream cup.
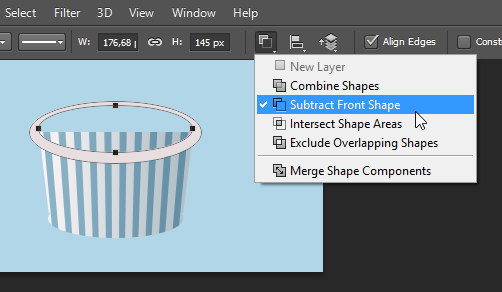
Step 16
To turn it into a three-dimentional object, we need to add lighting and shadow. Select the bigger ellipse shape we made in earlier step using the Path Selection Tool. Duplicate the path by pressing Ctrl + C and then Ctrl + V twice. We now have two paths. Move the last path upward and then set its path mode to Subtract Front Shape. We now should have two overlapping ellipses.
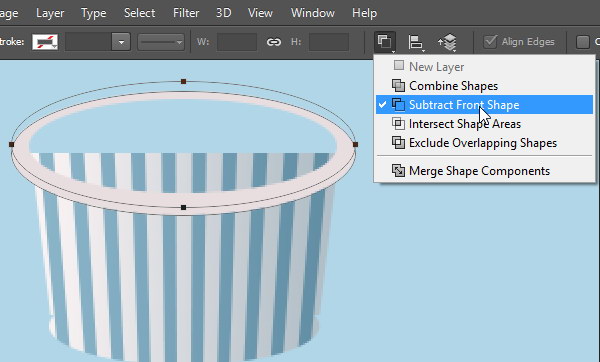
Step 17
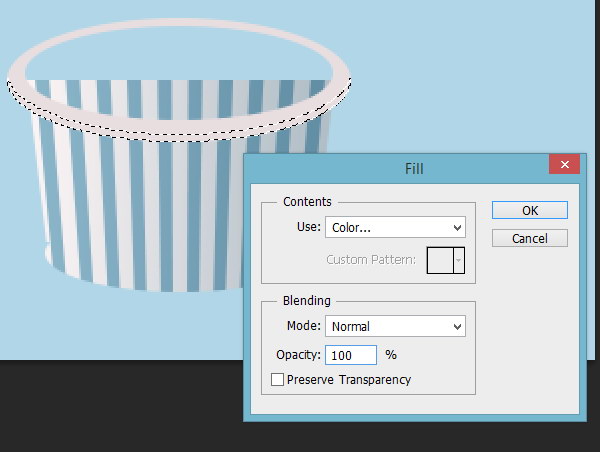
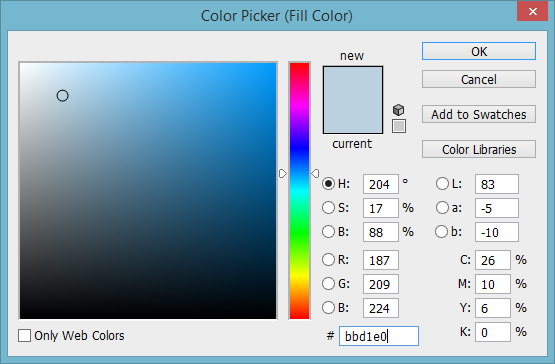
Select both paths and then hit Ctrl + Enter to convert it into a selection. We should have a crescent shape selection. Make new layer and convert it into a Clipping Mask. This way, every highlight we add will goes into the upper part of the cup. Click Edit > Fill. In the dialog box, select Use: Color. A dialog box will shown up asking for color input. Use blue. Click OK to start fill the selected area with blue color.
Step 18
Repeat previous steps. This time, create a crescent path on top part of the ellipse.
Step 19
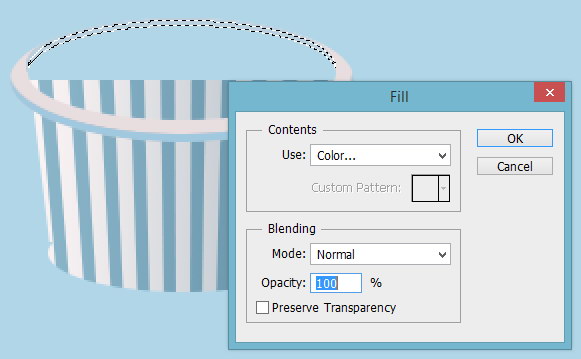
Convert it to selection. Still using same layer, fill it with darker blue color.
Step 20
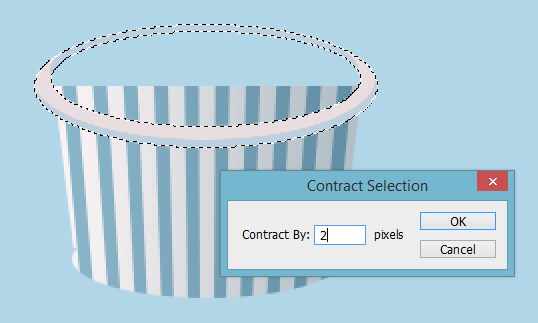
Ctrl-click the first ring shape we created earlier. Hit Ctrl + Enter to convert it into a selection. Click Select > Modify > Contract. Set Contract By: 2 pixels. Selection will be contracted by 2 pixels, making it smaller.
Step 21
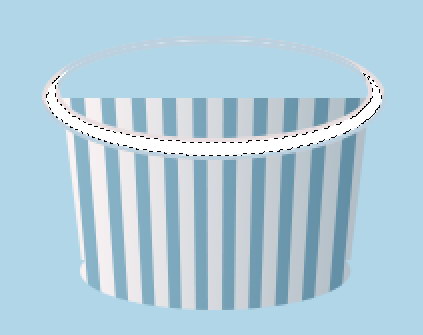
Make new layer and then fill selection with white.
Step 22
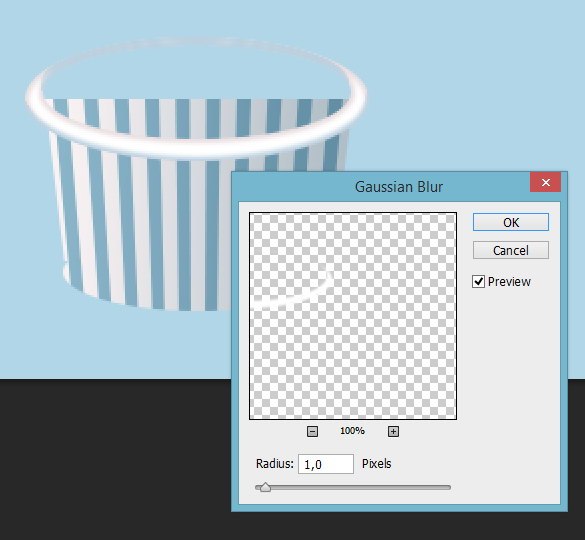
Remove selection (Ctrl + D) and then apply Gaussiang Blur filter (Filter > Blur > Gaussian Blur).
Step 23
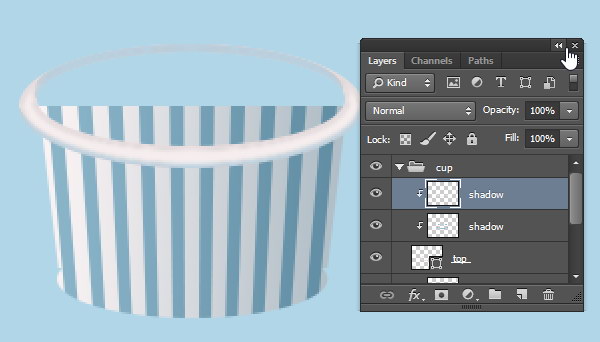
Make sure the layer is above the upper part of the cup layer. Convert it to Clipping Mask (Ctrl + Alt + G).
Step 24
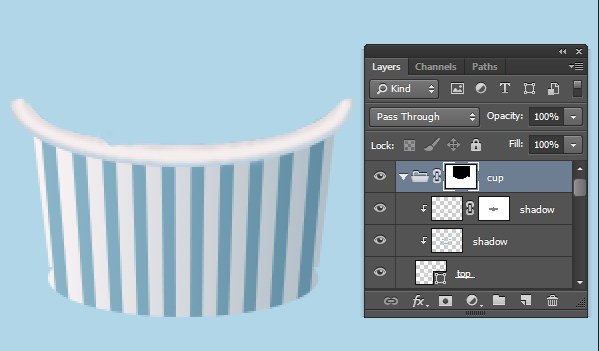
Add layer mask to the group layer. Activate Brush Tool and set foreground color to black. Paint to hide unused element of the cup. See image below for reference. We want to hide areas that will be covered by the ice cream.
Step 25
Add new layer and place it under the upper part of the cup. Paint shadow and highlight using Brush Tool until we have realistic lighting on the cup surface. Play around with Opacity of the Brush Tool to get proper result.
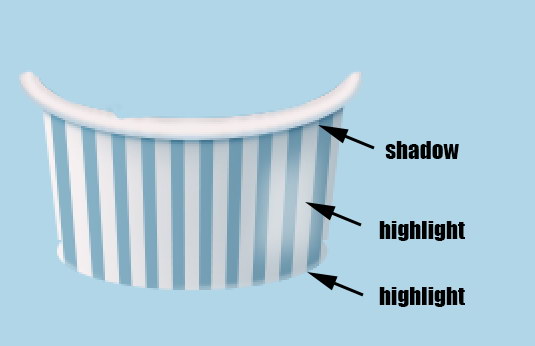
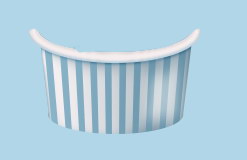
So far, here’s what we have. We have done drawing the cup. Our next work is drawing the ice cream.
Step 26: Drawing Ice Cream
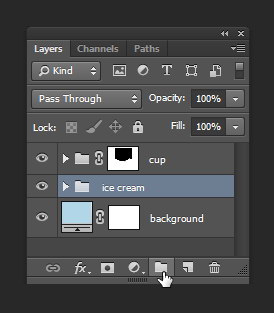
Start by creating a group layer and name it ice cream. Place it underneath the cup group layer. We will place every ice cream layer here.
Step 27
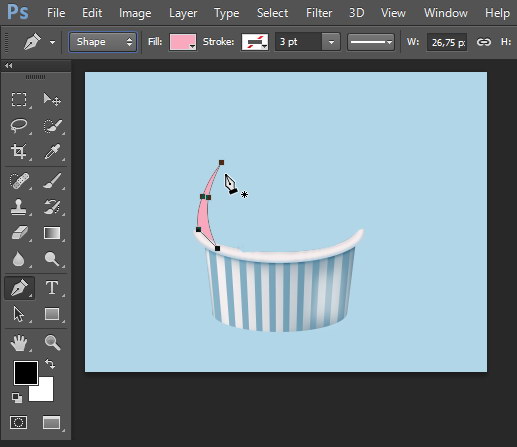
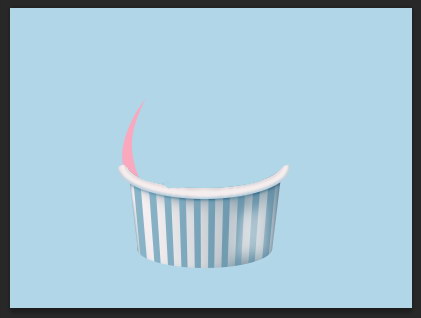
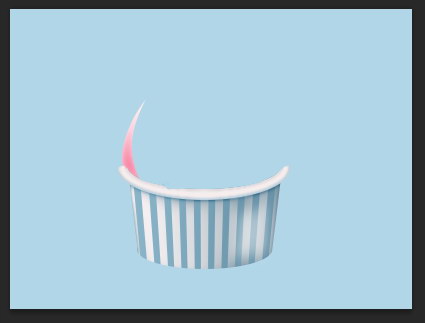
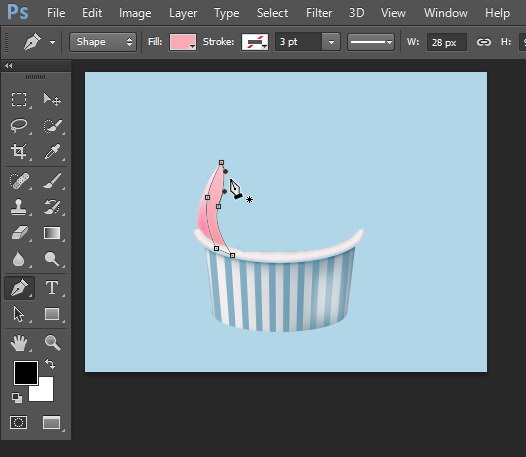
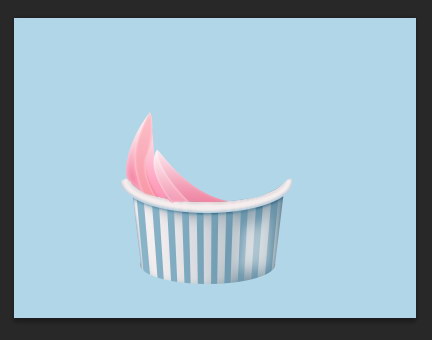
Activate Pen Tool and select Shape in the Option Bar. In the Fill option, select pink color for strawberry flavour. You can select your own color. Click and drag to draw a curve shape.
Step 28
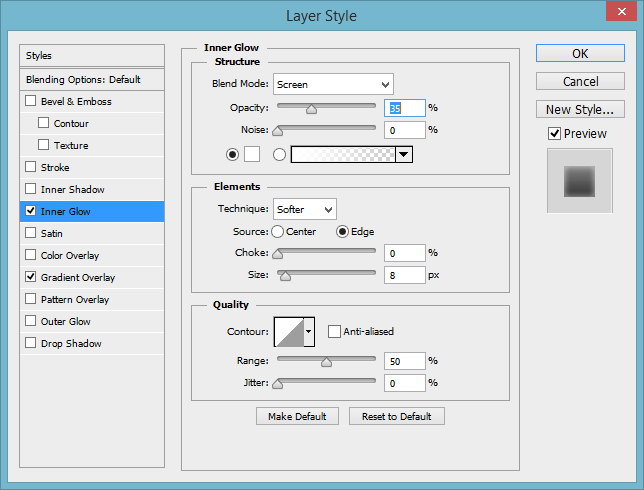
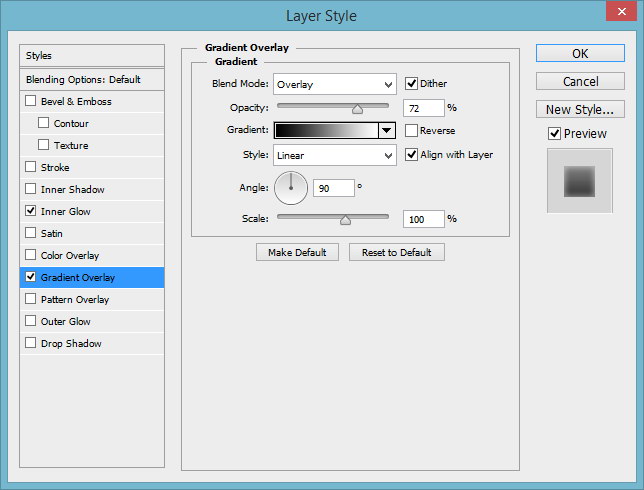
Double click the layer and then add following layer styles. Inner Glow with white color and Blend Mode: Screen and Gradient Overlay from white to black with Blend Mode: Overlay.
Below is the result we have.
Step 29
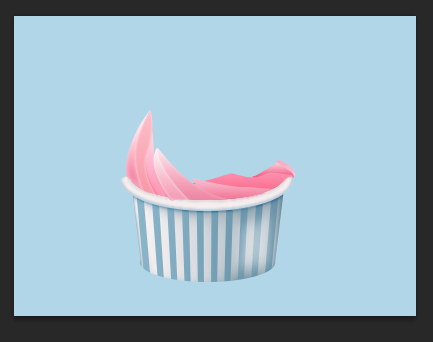
Draw another curved shape using Pen Tool. Use same color as the previous curved shape, but this time add a bit of lightness variation. Not as identical as the last shape to keep the result as natural as possible. A bit of lighter or darker color sounds good.
Step 30
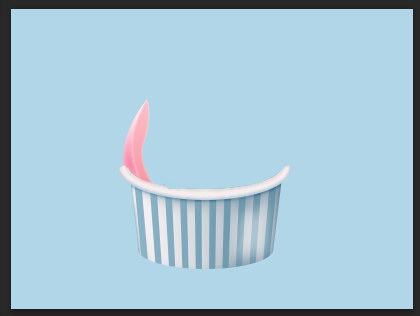
Add same layer style as the previous shape.
Step 31
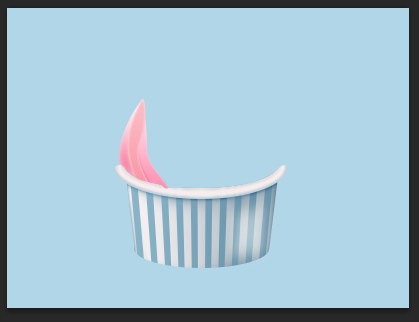
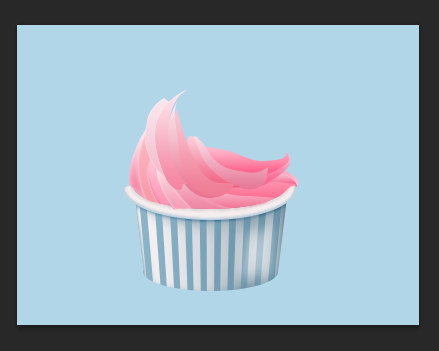
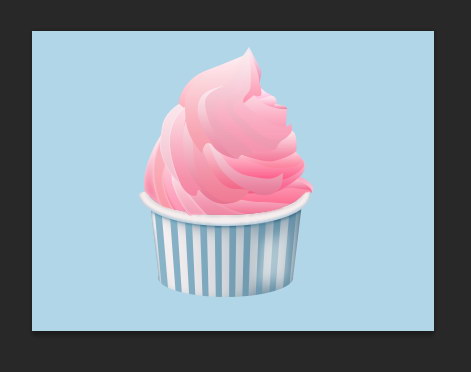
Keep adding curved shape with random shape, similar color, and same layer styles.
Step 32
We’ve had enough curved curves to be used as an ice cream. Now, we want to make it more realistic by adding shadow and highlight. Select the first layer shape and add new layer on top of it. Convert it to Clipping Mask (Ctrl + Alt + G).
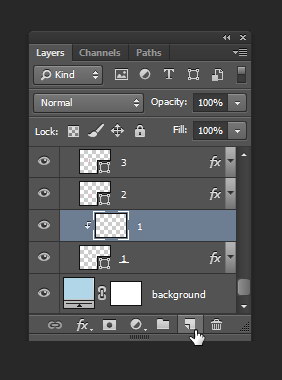
Step 33
Activate Brush Tool with small brush size. To change the brush size, simply right click to open brush size options.
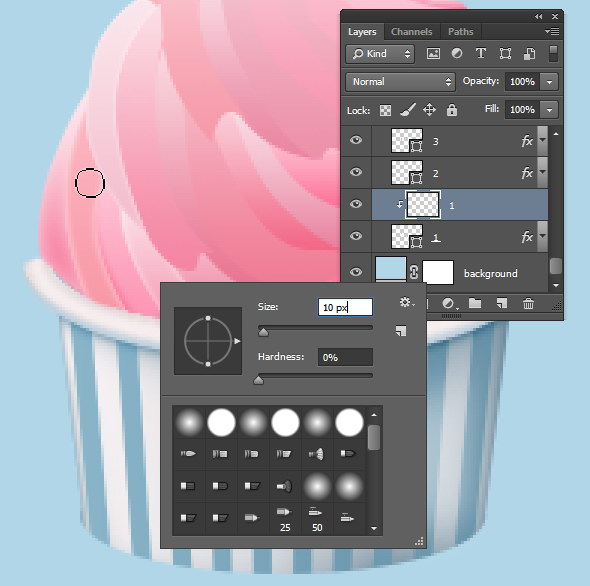
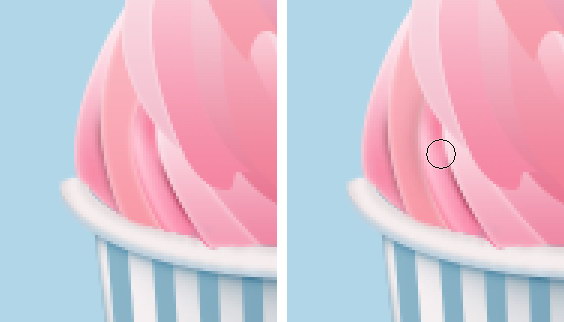
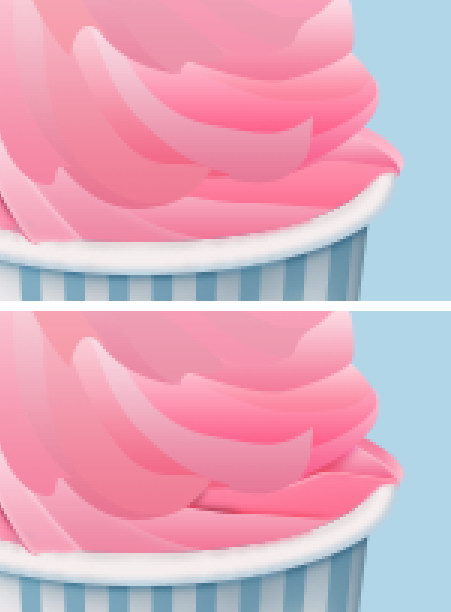
Step 34
Set foregound to dark pink and then drag to paint shadow. To add brightness, paint with lighter pink. If needed, you can aways add another layer and then set it to Clipping Mask.
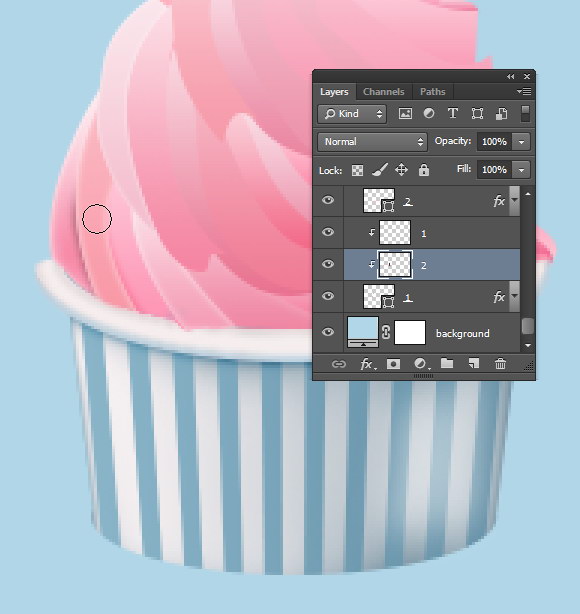
Step 35
Keep on doing this.
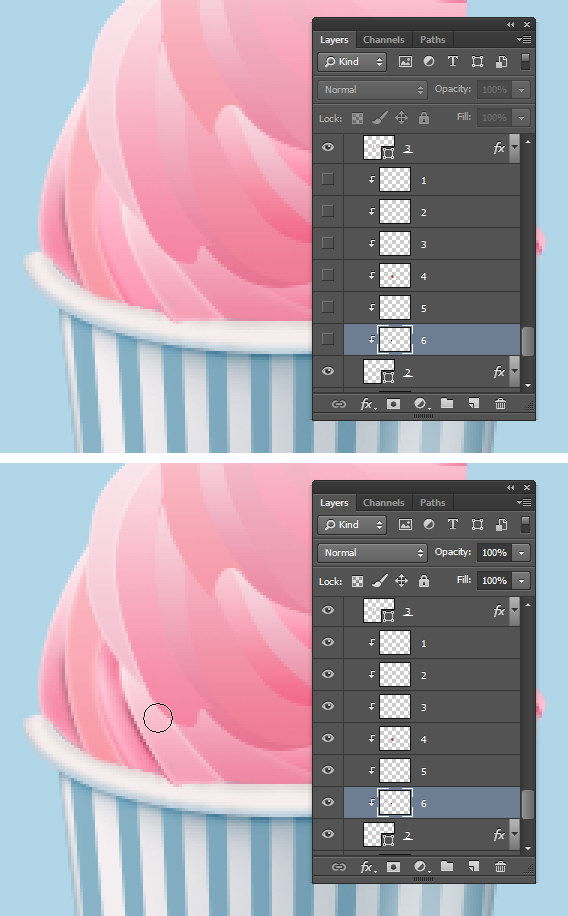
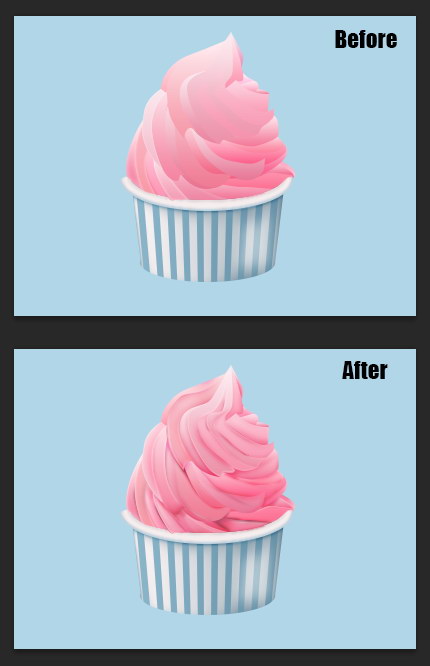
Below you can compare the difference before and adding lighting and shadow using Brush Tool. You may want to keep the effect subtle by lowering Opacity of the Brush Tool in the Option Bar.
Step 36: Adding Shadow
Let’s continue adding cup shadow onto the surfaces. As always, we want the layers stack to stay organized. Add new group layer and then place it underneath the cup.
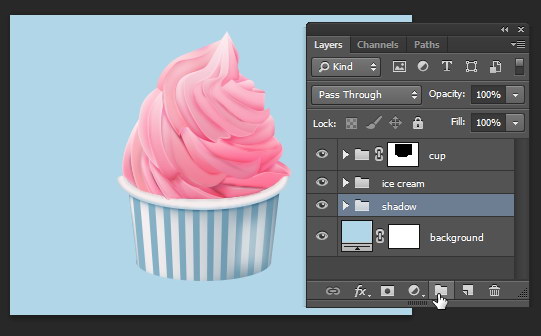
Step 37
Make a new elliptical selection usign Ellipse Marquee Tool. The selection should be as big as the cup’s base.
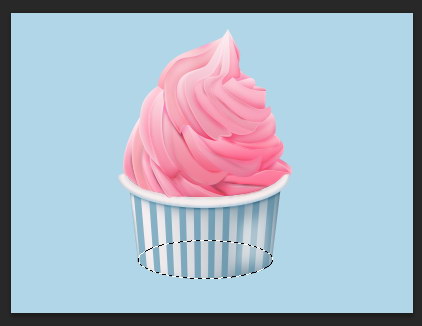
Step 38
Make new layer. Click Edit > Fill and then fill selection with dark blue. We choose dark blue because the cup itself is blue. You may want to choose different color depending on your cup’s color. Remove selection using keyboard shortcut Ctrl + D. Click Filter > Blur > Gaussian Blur to soften the shadow.
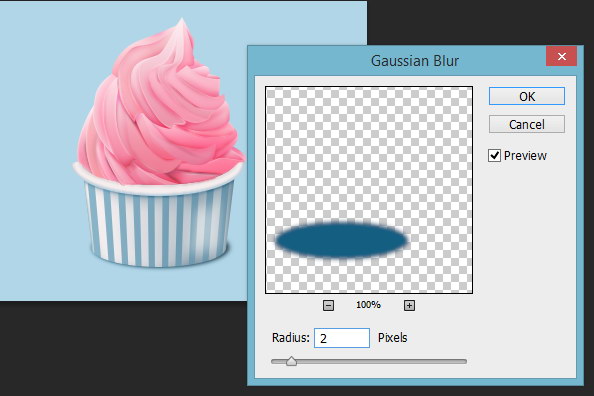
Step 39
Activate Move Tool and then hit Right Arrow twice to move the shadow to the right two pixels.
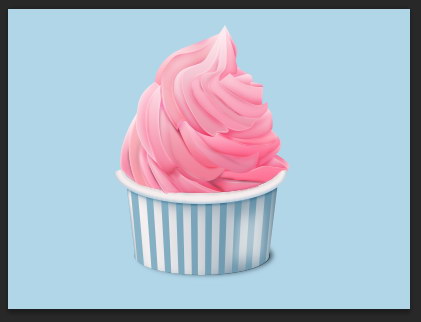
Step 40
Hit Ctrl + J to duplicate the shadow. Transform its shape, hit Ctrl + T. Make it wider.
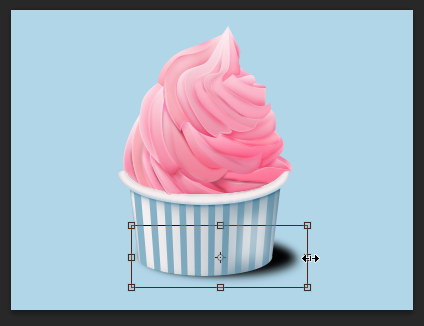
Step 41
Keep the shadow natural by reducing its Opacity. You can also apply another Gaussian Blur filter to soften it even more.
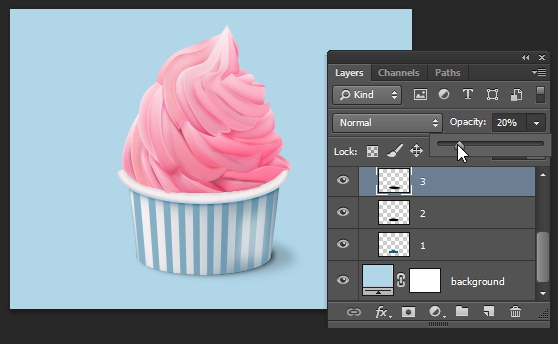
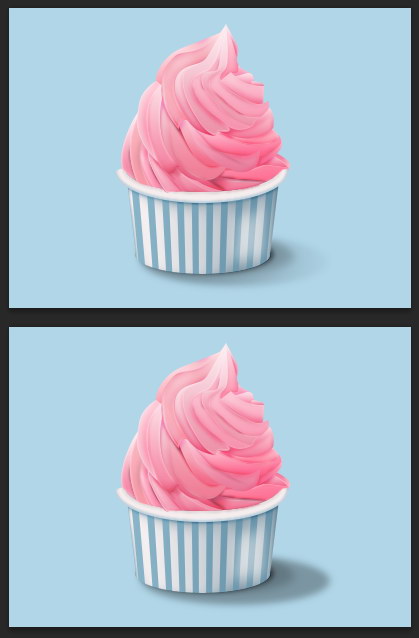
Step 42: Add Shadow and Highlight
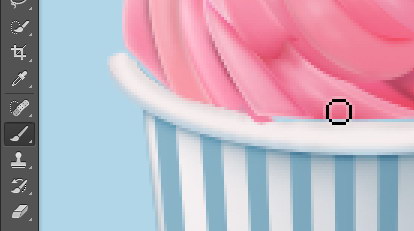
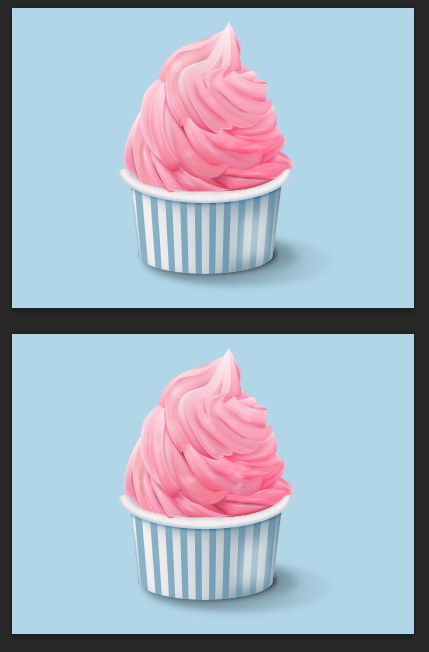
I find the ice cream shape currently too flat. We want to add more lighting into its surface. Make new layer and then activate Brush Tool with low Opacity. Paint white on top of the ice cream surface. Click and drag along the surface to make the highlight moves smoothly following its curvature.
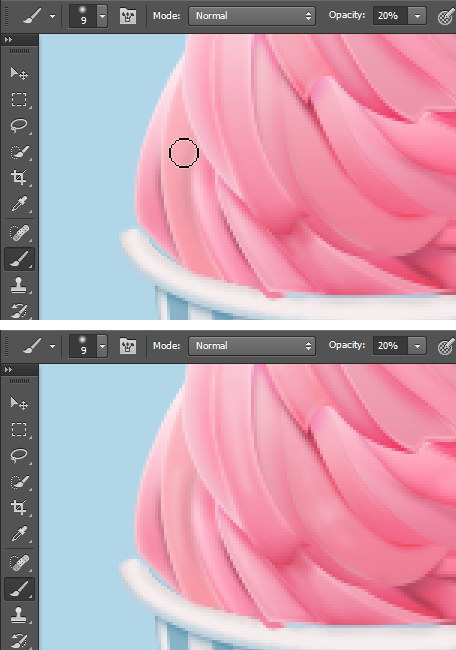
The difference is very subtle as you can see below.
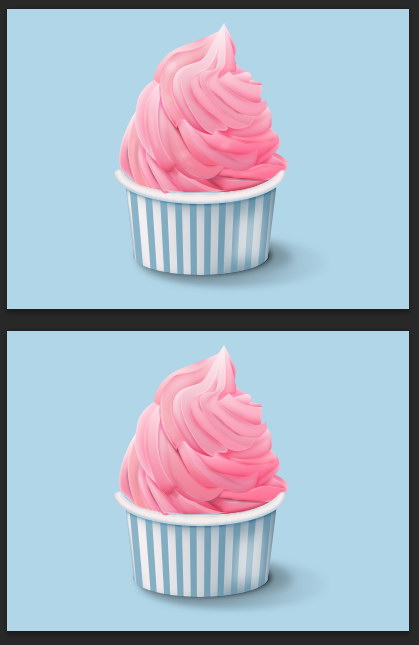
Step 43
For adding shadow, paint with black. As in previous step, use Brush Tool with low Opacity.
Step 44
To make it realistic, we also want to add some imperfection onto the surface. Activate brush with higher Opacity and very low Brush Size, such as 1 px or 2 px. Make new layer and then paint black dots randomly on the ice cream surface.
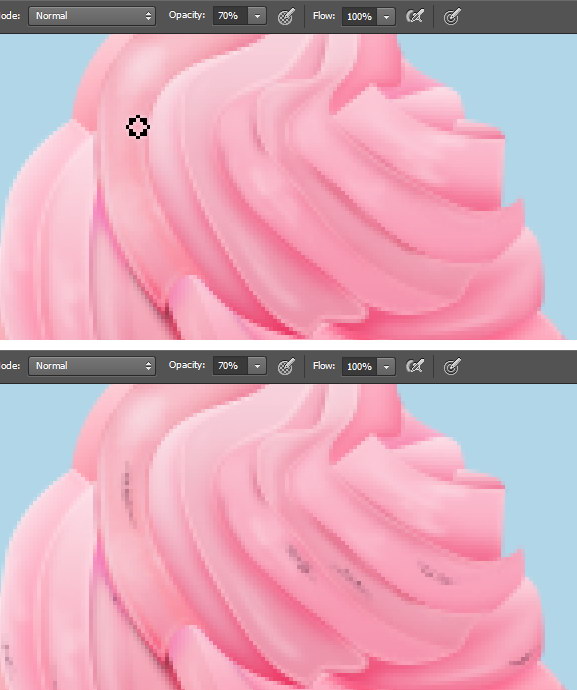
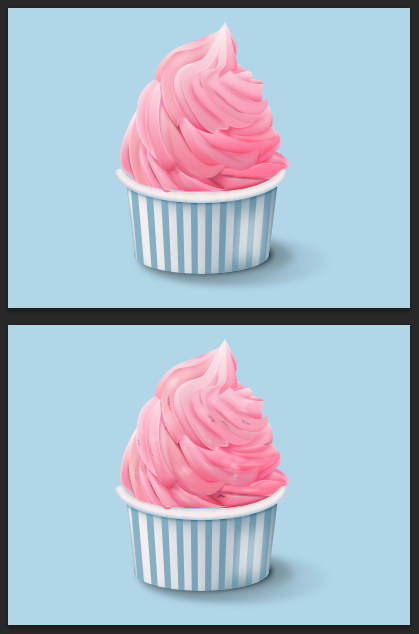
Below you can see the subtle difference between silk as smooth ice scream and a more realistic ice cream.
Final Result
This is the result we have, a nice and delicious ice cream icon. As you see, we use only using basic vector shape and then repeating it a lot. Patience is the key here. I hope you enjoy this tutorial and learn a lot from it. Thanks.

