Elementor Pro’s built-in templates are a great way to style an individual page, but why customize your online store on a product-by-product basis, when you can use Elementor Template Kits to design your entire eCommerce site?
Countless businesses use WordPress to sell their products and services, thanks to the popular WooCommerce plugin. In the previous post, we built a complete eCommerce store, using WordPress, WooCommerce and Elementor Pro.
In this follow-up post, I’ll show you how to redesign your entire online store, using Elementor Template Kits. We’ll also create a header that features all of your store’s contact information. Alternatively, if you have a very specific vision in mind, then I’ll show you how to create your own Elementor template from scratch—giving you complete creative control over your eCommerce site.
What We’ll Be Building
Elementor is a flexible tool that gives you several ways to design your eCommerce store. In the previous post, I showed you how to redesign WooCommerce’s product archive and product pages, using any of Elementor Pro’s ready-made templates. In this follow-up post, we’ll be exploring some additional ways that you can create a professionally-designed eCommerce store using Elementor.
By the end of this tutorial, you’ll have created:
- A complete eCommerce store, using Envato Elements Template Kits. We’ll install a themed collection of templates that contain designs for all the pages your WooCommerce site could possibly need. By the end of this section, you’ll have overhauled your product page, product archive page, and created a themed header that appears across your entire store. To ensure you’re happy with the finished product, I’ll also show you how to customize your chosen template kit with your own widgets, contact information and links.
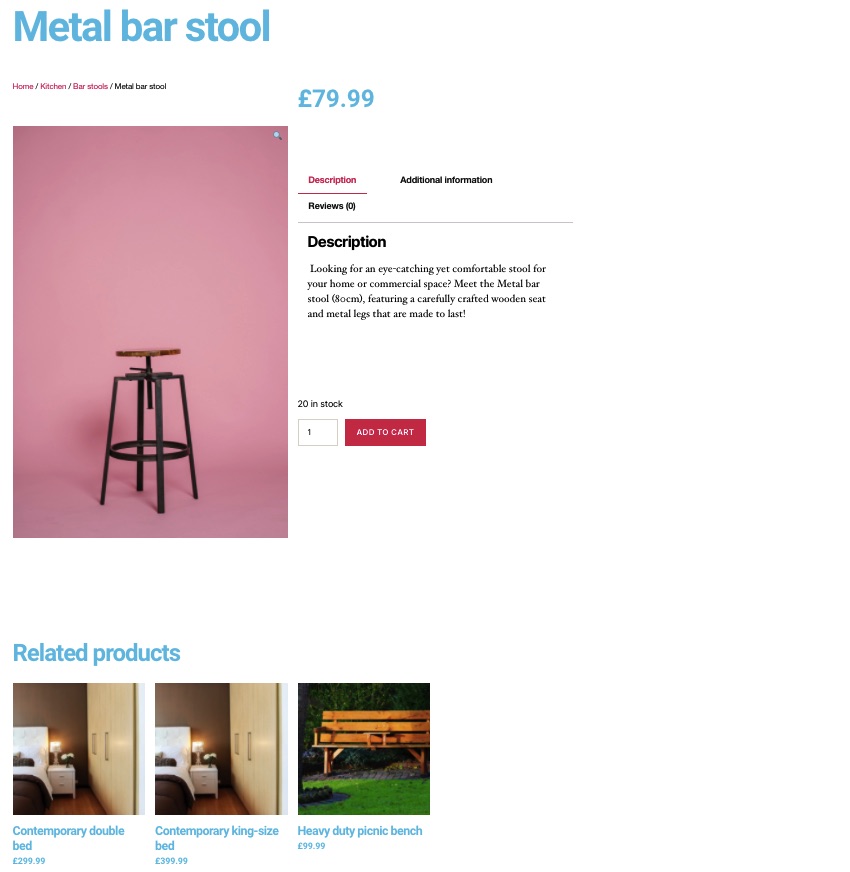
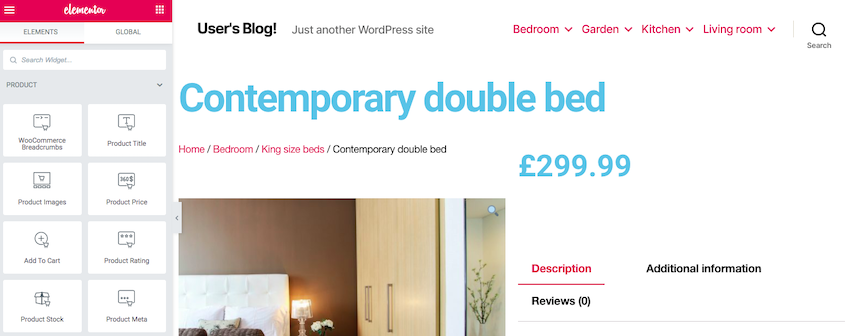
- A product page without a template! Have a specific design in mind? Or want to experiment with a few different potential designs? I’ll show you how to build a product page without using a template. By the end of this section, you’ll have created the following design:
We have lots to cover, so let’s get started!
Using Envato Elements Template Kits With WooCommerce
Elementor Pro’s built-in templates are a great way to style an individual page—but why customize your site on a page-by-page basis, when you can use a single template kit that styles your entire website?
Elementor Template Kits are themed collections of templates, including eCommerce kits that are designed specifically with online stores in mind.

Template kits can take the pain out of designing and building an online store. Simply choose your kit, apply a template to each of your pages, make any desired changes—and congratulations, you have a professionally-designed WooCommerce site!
These template kits also provide stand-alone blocks that you can combine into your own page layouts. Using these blocks, you can create pages that are unique to your website, but also consistent with your chosen template kit.
In this section, I’ll show you how to overhaul your single product page and product archive, customize your default templates with extra widgets, and even how to build a complete eCommerce store using your chosen Elementor Template Kit.
Install an eCommerce Elementor Template Kit
Envato Elements provides a wide range of professionally-designed Template Kits, ranging from flexible, multipurpose templates to industry-specific kits.
The Envato Elements website has an entire section dedicated to shopping and ecommerce, but you’ll also find templates designed with your specific business in mind, whether that’s photography, travel, real estate, or fitness.
You can spend some time browsing all the available options, and decide which template is the best fit for your website. I’m using the Shoppix kit in all of my screenshots.

Once you’ve chosen your kit, you just need to upload that kit to your website:
- On the Envato Elements website, select the template that you want to use and then click Download.
- You can now either add this kit to an existing project, or create a new project. Make your choice, and your kit will be downloaded automatically.
- Head over to your WordPress website.
- In WordPress’ left-hand menu, select Templates > Add New.
- Select Import Templates.
- Click Choose file and then select the zip file that you just downloaded.
- Select Import Now.
Your Envato Elements Template kit will now be uploaded to your WordPress site, ready for you to use.
Apply Your Elementor Template Kit
In this section, I’ll show you how to overhaul your product page, using an Envato Elements template.
All of the Elementor templates on Envato Elements are professionally-designed, but if your chosen template isn’t quite right for your specific website, then these templates are also easy to customize.
In this section, I’ll show you how to easily add new functionality to any template, using a selection of Elementor widgets.
Let’s start by applying a template:
- In WordPress’ left-hand menu, select Templates > Add New.
- Open the Template type dropdown and select Single Product.
- Give your template a name, and then select Create template.
- In the subsequent window, select the My Templates tab.
- Choose the template that you want to use. In my screenshots I’m using Single Product 1.
Whenever you choose a template, Elementor will prompt you to import the document settings for that template, which will override the page’s current settings. Unless you have a specific reason not to, you’ll generally want to import the document settings for your chosen template.
Your template will now open in the Elementor editor.
This template already has everything your product page needs, but what if you want to add some extra functionality?
In the following sections, I’ll show how to customize your product page template, using several popular Elementor widgets.
Facebook, Twitter, Instagram, & More: Adding Social Sharing Icons
You should make it easy for visitors to share all your content on social media—including your products.
Although it’s not as common as sharing content such as blog posts or articles, visitors may sometimes feel the need to share your products, for example if you’re running a particularly noteworthy discount, or your site features some interesting or unusual products.
You can add social sharing icons to your product pages, using Elementor’s Share Buttons widget:
- In the Elementor Panel, find the Share Buttons widget.
- Drag and drop this widget into the section where you want to display your social sharing buttons.
- In the Elementor Panel, make sure the Content tab is selected.
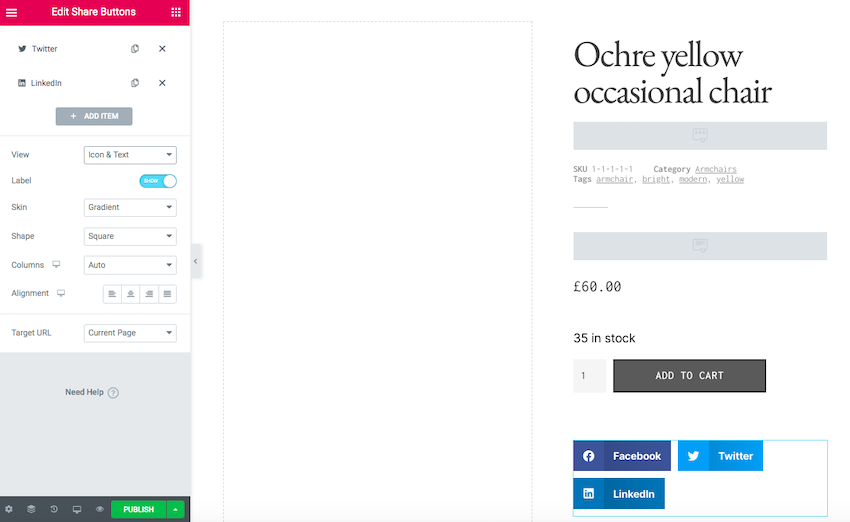
- By default, this widget displays icons for Facebook, Twitter and LinkedIn. If you want to remove any of these icons, then click its accompanying X.
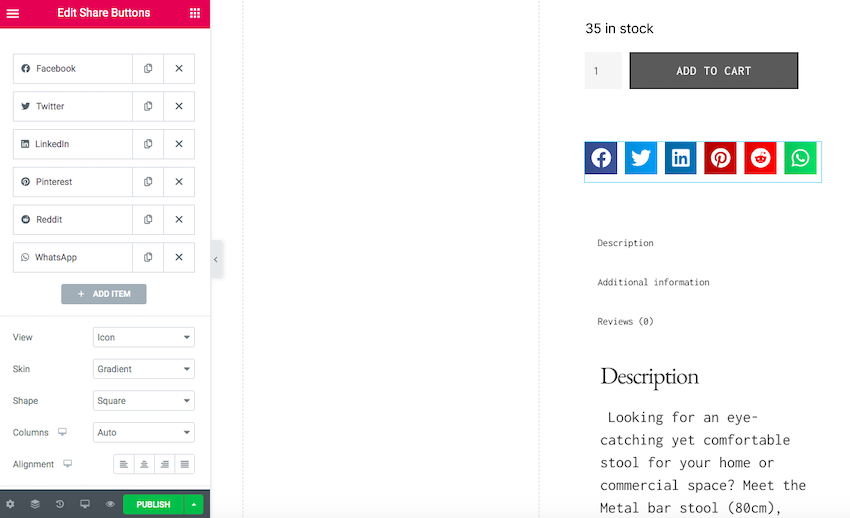
- You can add more social media platforms to this widget by selecting Add Item and then using Network to select the social media platform in question.

- Rinse and repeat for every additional platform that you want to include in your widget.
- Next, you can tweak the look and feel of your social sharing buttons. Open the View dropdown and choose whether these buttons should feature an icon, text, or an icon and text.
You may also want to change the size of these icons, or the size of the sharing buttons in general, using the Style tab.
In this section, we covered a few different ways that you can customize the Social Sharing widget, but there’s plenty more changes that you can make.
It’s well worth taking the time to explore the Elementor Panel’s various tabs and settings, until you’re completely happy with your Social Sharing widget.
Add to Cart: Customizing This Essential Widget
Since it’s such an integral part of the online shopping experience, most product page templates feature a built-in Add to Cart widget. However, you may want to customize this default widget, or even replace it with Elementor’s Custom add to cart widget.
The Shoppix template is no exception, as it features a built-in cart widget. However, its Add to Cart button is grey, which means it blends into the rest of my site.
To ensure potential customers don’t struggle to locate my Add to Cart button, I’ve decided to customize this widget with a bolder, brighter color:
- In the live preview canvas, click to select the Add to Cart widget.
- In the Elementor Panel, click the Background color swatch, which launches the color picker.
- Use the color picker to select the color that you want to use. I’m opting for a bright color that contrasts (but doesn’t outright clash) with my site’s color scheme.
Alternatively, Elementor provides a Custom add to cart widget. This widget features the familiar Add to Cart button, plus an optional text field where visitors can specify how many products they’re adding to their cart.
Suspect your customers might want to purchase products in bulk? In this scenario, a Custom add to cart may be a good alternative to the standard cart widget.
To replace your template’s Add to Cart widget with Elementor’s Custom add to cart, you’ll need to delete the existing Add to Cart widget. In Elementor’s live preview canvas, click to select the cart widget, and then press the Delete key on your keyboard.
In the Elementor Panel, find the Custom Add to Cart widget, drag it onto the live preview canvas and then drop this widget into position.
You can now customize the look and feel of your Custom Add to Cart widget, by clicking to expand the Button section in the Elementor Panel.
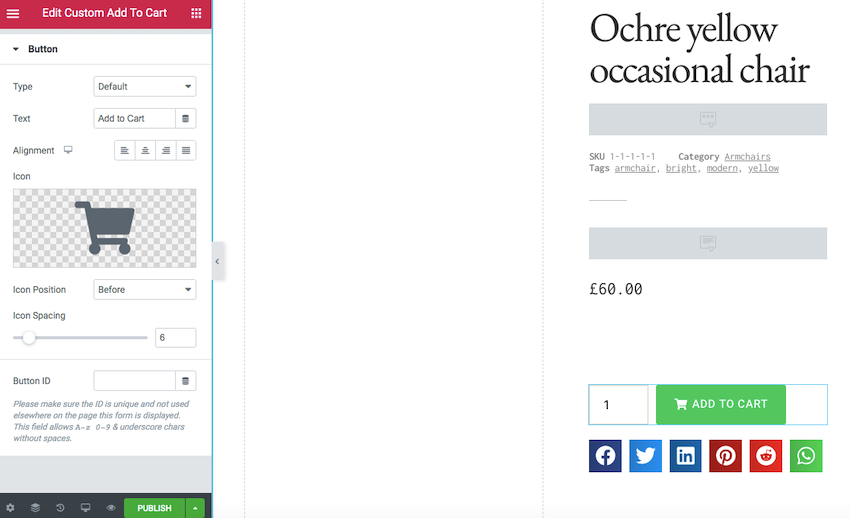
To change the button’s color, open the Type dropdown and choose from the various options.
You may also want to change the text that appears on the Add to Cart button, using the Text field.
The Custom Add to Cart widget can also display an optional Quantity text box, which is perfect for visitors who want to add multiple items to their cart. To add this Quantity box, click to expand the Product section in the Elementor panel.
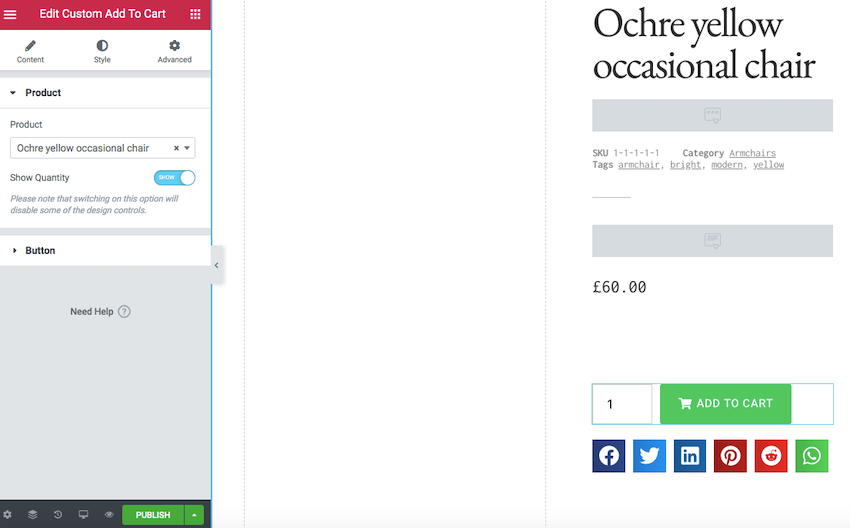
- Open the Product dropdown and select the product that you’re currently viewing.
- Drag the Show Quantity slider into the Show position.
Unlike some other cart widgets, Elementor’s Custom add to cart widget doesn’t feature a product stock count. If you want to display this information on your product page, then you’ll need to use Elementor Pro’s Product stock widget, which you’ll find in the Elementor Panel.
Boost Your Revenue, With an Upsell Strategy
As an eCommerce business, you should always be pushing customers towards bigger and better products—upselling is one sales tactic that’s popular with businesses of all shapes and sizes.
Once you’ve implemented an upsell strategy, your website will automatically encourage visitors to dig a little deeper into their pockets. For example, if a customer is viewing the latest MacBook Air, then your website can tempt them to splash more cash, by displaying the latest MacBook Pro in the sidebar. Bonus points if you highlight the fact that the Pro is on sale, for this week only!
To implement an upsell strategy, you’ll need to link all your related products in the WordPress admin area, and then add Elementor’s Upsell widget to your product page template.
Since we already have the Elementor editor open, let’s add our Upsell widget:
- In the Elementor Panel, find the Upsell widget.
- Drag and drop this widget into the desired location in your live preview canvas.
Before any upsell content appears on your website, you’ll need to link all related products in the WordPress admin area. Once you’ve published your product page template, you’ll need to perform the following:
- In the WordPress dashboard, select Products > All Products.
- Find the first product that you want to link to its more expensive counterpart, and then open this product for editing, as normal.
- Scroll to the Product data section, and then select the Linked Products tab.

- In Upsells, enter the product that you want to recommend as a more expensive alternative.
- Click Update.
You can now repeat the above steps, for all the products that you want to link.
Now, everytime someone views my Contemporary double-bed, WordPress will present the Contemporary king-sized double bed as a potential upgrade—and hopefully earn us some extra revenue in the process!

By tempting your customers with more luxurious, high-end alternatives, you can ensure you’re getting maximum revenue from each and every sale.
How to Publish Your Elementor Template Kit Site
Once you’re happy with your customized product page template, it’s time to roll it out across your eCommerce store:
- In the Elementor Panel, select Publish.
- In the subsequent popup, open the Include dropdown and make sure Products is selected.
- Click Save and Close.
All of your product pages will now feature this brand-new layout.
Moving Beyond a Single Template: How to Build an eCommerce Store
Elementor Template Kits provide all the templates you need to create a complete eCommerce store.
If you opted for a kit that was designed specifically for eCommerce stores, such as Shoppix, then you’ll have access to templates covering all the major eCommerce pages, including a product archive template.
To create a consistent look and feel across your website, you’ll typically use multiple templates from the same template kit. In the following sections, we’ll move beyond a single page and apply multiple templates to our website, including a header template that’ll appear across our entire eCommerce store.
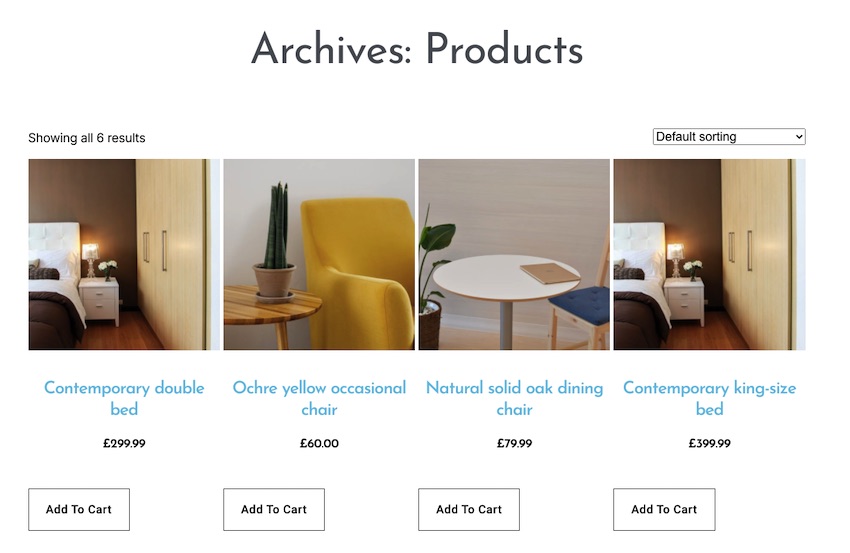
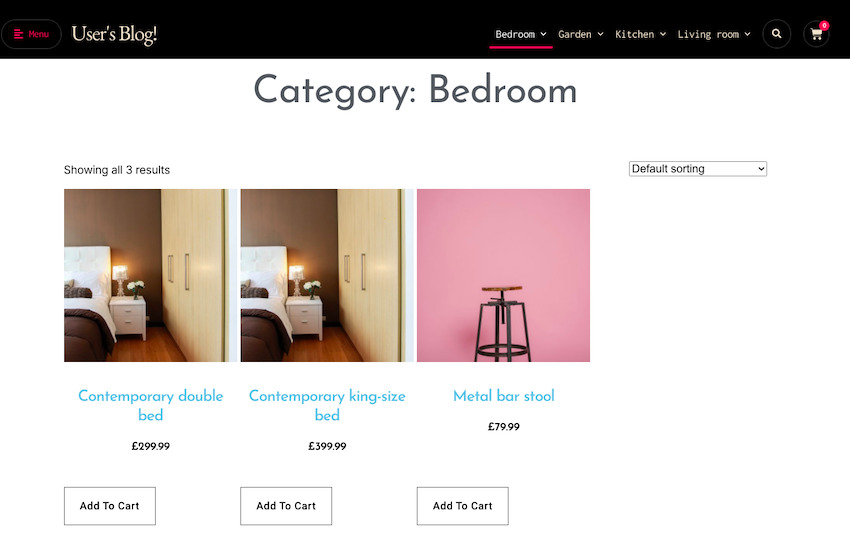
How to Update WooCommerce’s Product Archive
To start, I’m going to apply Shoppix’s product archive template to my site:
- In WordPress’ left-hand menu, select Templates > Theme Builder.
- Select the Add New button.
- Open the Template type dropdown and select Product Archive.
- Give your template a name, and then click Create Template.
- Elementor will now display all the available templates; click to select the Product Archive template that you want to use.
Your chosen template will now open in the Elementor editor.
At this point, you can customize your template by adding and removing widgets, or editing the widgets that come built into your template.
Once you’re happy with your template, it’s time to hit Publish:
- Click the green Publish button in the Elementor Panel.
- In the subsequent popup, open the Include dropdown and select All Product Archives.
- Click Save and Close.
The updated product archive will now be rolled out across your website.
How to Create a Header for Your eCommerce Site
At this point, you’re using multiple templates from the same Elementor Template Kit, which is perfect for giving your website a consistent look and feel. However, many websites use recurring elements such as headers and sidebars, to help tie their pages together and create a stronger brand identity.
In the following sections, we’ll use your chosen template kit to create a header that’ll appear across your eCommerce store. I’ll also show you how to customize the header template with your contact information and links to the most important areas of your online store.
To start, let’s choose a header template:
- In WordPress, select Templates > Theme Builder.
- Click Add New.
- Open the Select the template type… dropdown and choose Header.
- Give this template a descriptive name.
- Select Create Template > My Templates.
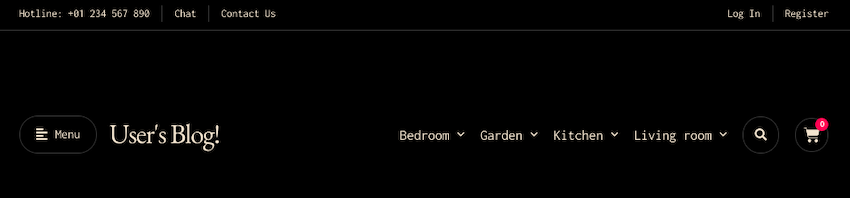
Depending on your chosen theme, you may have a choice of header templates, for example my Shoppix theme provides Header Menu – Light and Header Menu – Dark templates.
In my screenshots, I’m using Header Menu – Dark.When prompted, opt to import the document settings.
Your chosen header template will now open in the Elementor editor.
There’s lots of ways that you can customize a header template, but I’ll be covering two of the most popular: adding contact information and adding links.
Help Potential Customers Contact You
By including contact details in your header, you can encourage potential customers to reach out with any questions they might have. Providing easy access to your contact information can also make your business seem more trustworthy, as potential customers will already know how to contact you if they encounter any problems.
In Elementor, contact information is typically displayed via the Icon List widget. If your chosen template already includes an Icon List, then you can customize this widget with your own contact information:
-
Click to select your template’s Icon List widget.
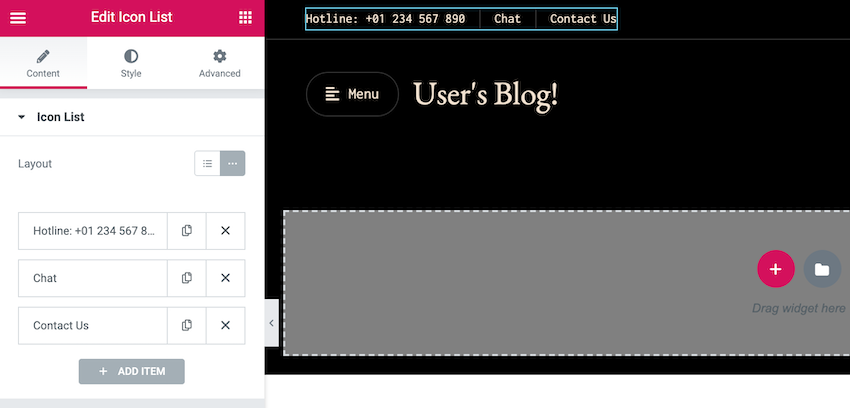
- In the Elementor Panel, click to expand the Icon List section.
- Click to expand the section of text that you want to edit.
- Enter your text into the Text field.
- Add an optional link and icon, if required.
- If you want to add more information to your Icon List, then click Add Item and customize this item with your own text, plus any icons or links that you want to use.
If your chosen template doesn’t already feature an Icon List, then you can find this widget in the Elementor Panel, and then drag and drop it onto your live preview canvas.
How to Add Links to Your Site’s Header
Headers are a great way to provide easy access to all of your site’s most important content, and many header templates already contain placeholder links.
Envato’s Shoppix template is no exception, as it already provides placeholders for Chat, Contact Us, Log in and Register pages, as part of its built-in Icon List widget. I’m going to customize these placeholders to link to different areas of my website.
If your template doesn’t provide similar placeholder links, but it does feature an Icon List, then you can add your links as new items:
- In the live preview canvas, click to select your existing Icon List widget.
- Click the Add Item button.
Alternatively, you can add a new Icon List by locating this widget in the Elementor Panel, and then dropping it onto your live preview canvas.
For the sake of simplicity, I’m going to assume you have an Icon List widget that you want to customize with your own links:
- In the live preview canvas, click to select the Icon list widget.
- In the Elementor Panel, find the item that you want to turn into a link, and then click to expand this section.
- In the Link field, either copy/paste or type your link.
- If required, change the text that appears in the header, by editing the Text field.
Rinse and repeat for every link that you want to add to your header.
By default, my header has a placeholder for a Contact Us page. Currently, my website doesn’t actually have this page, but Shoppix does have a dedicated Contact Us template.
If you want to add a Contact Us page to your eCommerce store, then you can use this template to quickly and easily generate a Contact Us page that compliments the rest of your website.
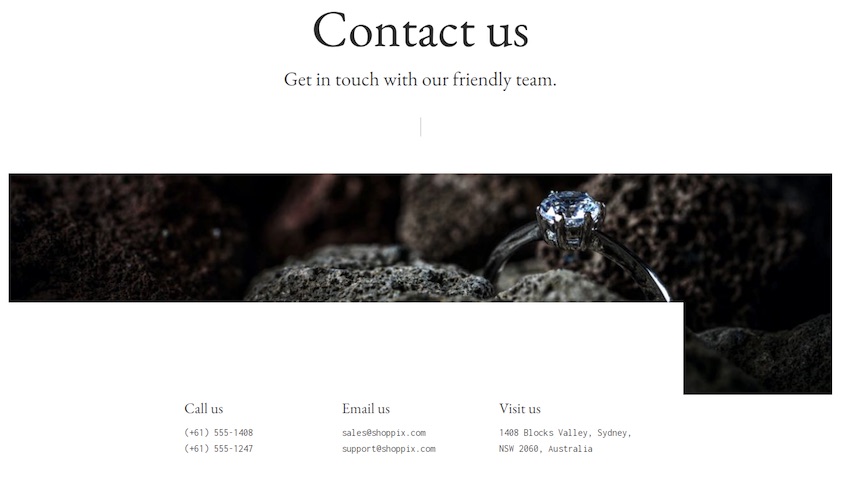
You can then reference this Contact Us page in your header.
The Shoppix header also contains placeholders for Log in and Register pages. If your site doesn’t have membership functionality, then we have a list of 22 free and premium membership plugins that you can add to your WordPress website. Alternatively, we’ve published a step-by-step guide to building a membership site, using the Ultimate Membership Pro (UMP) plugin.
 WordPress22 Best Membership Plugins for Your WordPress Site
-
WordPressMonetize Your Content: Create a Membership WordPress Site With UMP


Perfecting Your Header: Remove Unwanted Links
If your header contains placeholders that you don’t want to use, then it’s easy to remove them:
- Click to select your Icon List widget.
- The Elementor Panel will now update to display all the items included in this widget.
- To delete an item, click its accompanying X icon.
Using these techniques, you can craft a header that contains links to all your website’s most important pages.
Roll Out Your Custom WooCommerce Header
Happy with how your header is setup? Then it’s time to hit Publish:
- In the Elementor Panel, click Publish.
- Open the Include dropdown and select Entire Site.
- Click Save & Close
Your new header is now live, and should appear across your entire eCommerce site.
Designing an eCommerce Site, Using Elementor’s Theme Builder
In this tutorial, we’ve seen how you can create a stylish eCommerce site, using a range of ready-made templates, including the dozens of professionally-designed template kits available from Envato Elements.
But what if you want to design a Woocommerce site, without using a template?
Perhaps you have a specific design in mind; maybe you need to ensure your eCommerce site stands out from the crowd, or maybe you want to mock up various designs, using an intuitive page builder?
Transforming a blank slate into an Elementor template does require some time and effort, particularly compared to using a ready-made template. However, you’ll be working with many of the same widgets, so building an eCommerce template shouldn’t feel too dissimilar to customizing a ready-made eCommerce template.
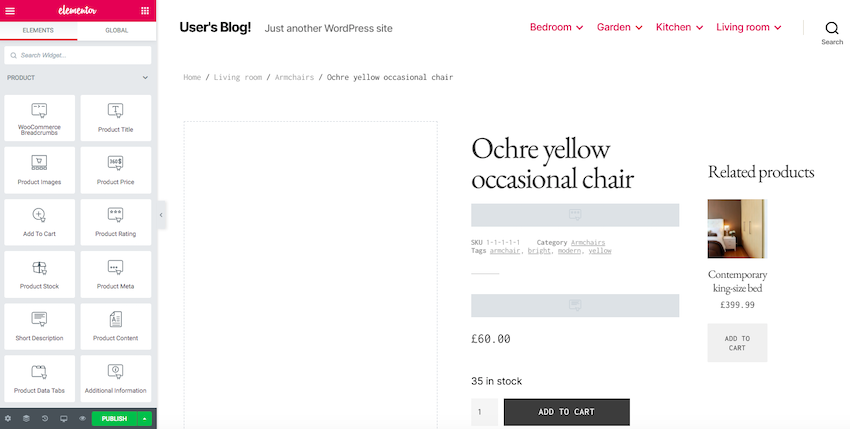
In this final section, I’ll show you how to build a product page without using a template. To keep things interesting, I’ll use some widgets that we haven’t previously covered, including the WooCommerce breadcrumbs widget, which help keep customers orientated as they explore your various product categories.
How to Create Your Own Elementor Template
To create a blank template:
- In WordPress’ left-hand menu, select Templates.
- Give the Add New button a click.
- Open the Template type dropdown and select Single Product.
- Give your template a descriptive name.
- Click Create template.
- Elementor’s template library will now open automatically. Since we’re not using a template, you can close this window.
You should now have a completely blank slate to work with.
Build a Product Page, Without Using a Template
Let’s start from the top, by creating a space for our product title:
- In the Elementor Panel, grab the Product Title widget and drop it onto the live preview canvas.
- You can now use the Elementor Panel to change the title’s appearance, including altering the size of the text and its alignment.
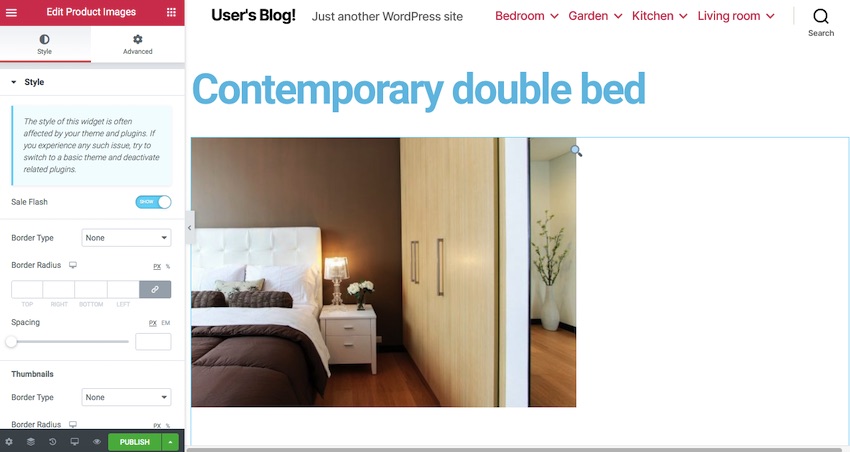
- In the Elementor Panel, select the Style tab. Here, you can change the product title’s color and font, add a shadow, and make other stylistic changes. Spend some time experimenting, to see what effects you can create.
- Next, we need to show potential customers what they’re purchasing. In the Elementor Panel, find the Product Images widget and drag it onto the live preview canvas.
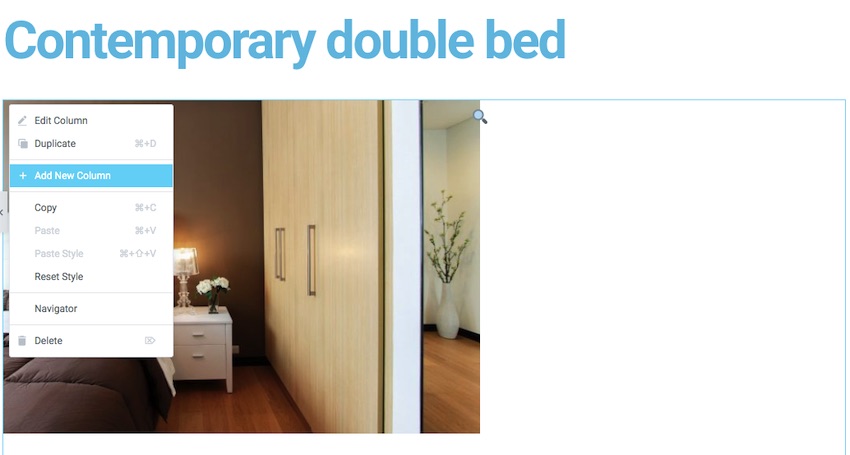
Every product needs a description! I want to display my product description alongside the product image, so I’m going to add a second column. To add a column, click the section that contains the Product Image widget. This section should now be outlined in blue. Then, in the section’s upper-left corner, Control-click the Column icon.
-
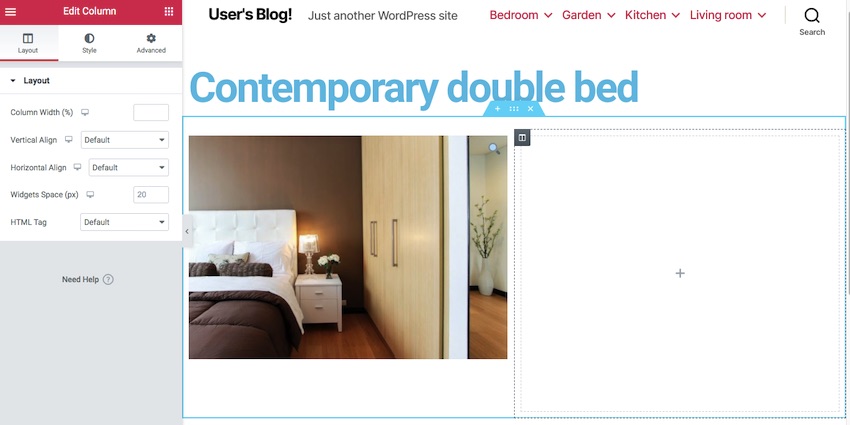
Select Add New Column. You should now have a section consisting of two columns.
-
In the Elementor Panel, find the Product Data Tabs widget, and drag and drop it onto the column you just created.
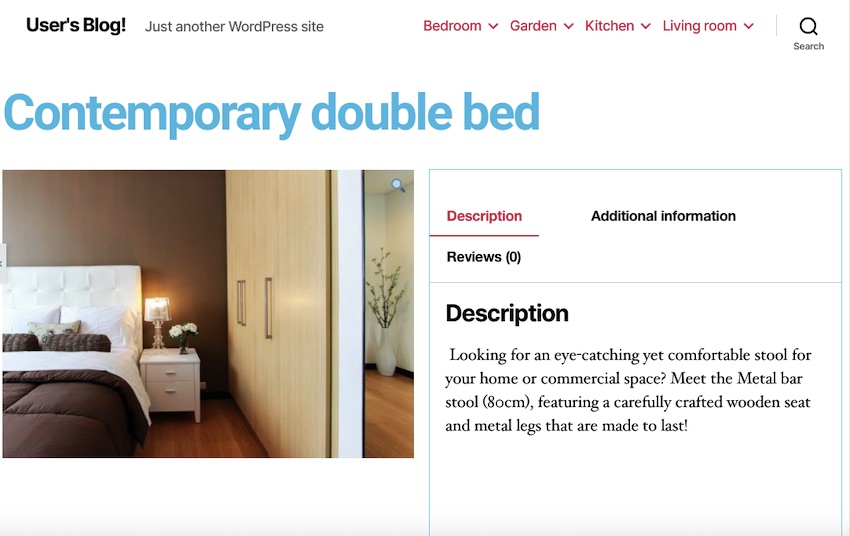
- Now we need to add the price. In the Elementor Panel, find the Product Price widget and drag and drop it onto the canvas.
- By default, the Product Price widget is on the smaller side, so I’m going to adjust the size of its font. In the Elementor Panel, select the Style tab.
- Find Typography and click its accompanying Edit icon.
- In the subsequent popup, increase the size of the font.
- Next up is the Add to Cart feature. In the Elementor Panel, find Add to Cart and drag and drop this widget onto the canvas.

Next, I want to add breadcrumbs so that visitors can see the categories and subcategories this product belongs to, such as Furniture, Electronics, or Gardening. In the Elementor Panel, grab the WooCommerce breadcrumbs widget and drop it onto the canvas.
Finally, I want to encourage visitors to purchase additional items, by creating a Related Products area. In the Elementor Panel, grab the Product Related widget and drop it onto the canvas.
These are all the widgets I’m adding to my product page, but you may want to add extra widgets, such as the Social Sharing or Upsell widgets we covered earlier.
You can also style your widgets, by selecting them in the canvas and then opening the Styles tab in the Elementor Panel. Finally, you can change your template’s layout, by grabbing any widget in the canvas and dropping it into a new location.
When you’re happy with your template, you can publish it by selecting Publish > Include > Products > Save and Close. Every product page across your website will now feature this new design.
You can repeat this process to create templates for any ecommerce page, or even design an element that’ll appear across your online store, similar to the header we created earlier. The possibilities are endless!
Conclusion
In this series, we covered three ways that you can build a WooCommerce store using Elementor. If you’ve been following along, then you’ll have created multiple eCommerce templates, including product archives, product pages, and headers. You should also be familiar with all of Elementor’s most important eCommerce widgets.
Elementor Template Kits are themed collections of templates, including eCommerce kits that are designed specifically with online stores in mind.
Template kits can take the pain out of designing and building an online store. Simply choose your kit and apply a template to each of your pages to get a professionally-designed WooCommerce site!
-
ElementorHow to Use Elementor Templates: A 101 Intro
-
ElementorTop 25 Elementor Template Kits for WordPress (+ Free Templates)