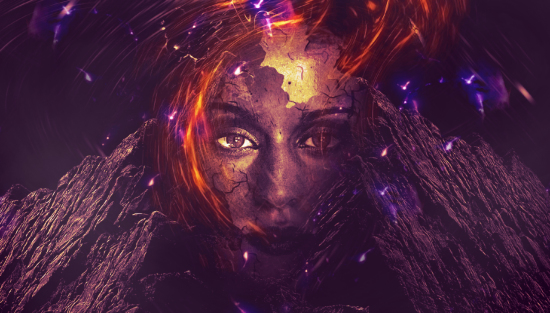
In this tutorial, I will show you the process of creating this Rocky Face Manipulation with Abstract Lighting Effect in Photoshop. You will learn some interesting methods of creating nice-looking abstract line effects and some fancy colouring technique with adjustment layers. Have a try!
This is an intermediate level tutorial and some steps can be tricky.
Note: The Photoshop tutorial is done in Photoshop CC – therefore some screenshot may have slighting different layout as in the earlier version. Some brushes are exclusive to Photoshop CS6.
Here is a preview of the final effect I have for this tutorial: (click to enlarge)
OK Let’s get started!
To complete this tutorial, you will need the following stocks:
Crack Brushes (Pick one from the list)
Optional: Abstract Brush Set
Step 1
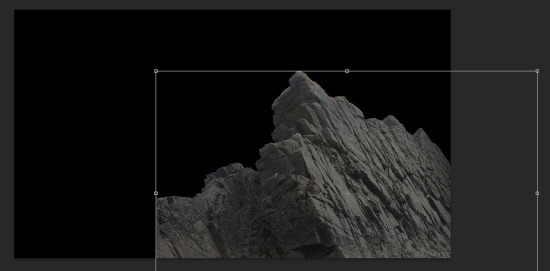
Create a new document sized 1440px * 820px with black background. Load the rock texture into Photoshop and select the rock part of the image as shown below:
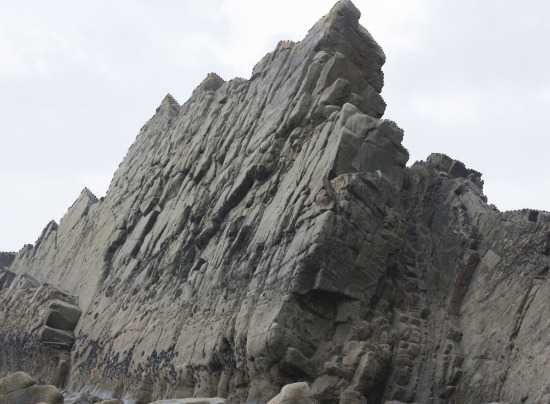
Copy and paste the selection to our canvas and resize it, place it to the bottom right side of the canvas as shown below:
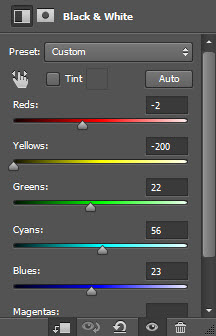
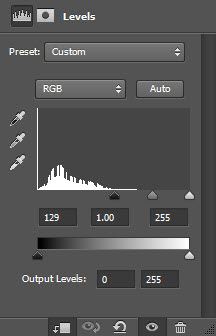
Apply the following adjustment layers to this rock layer:
Black and White
Levels
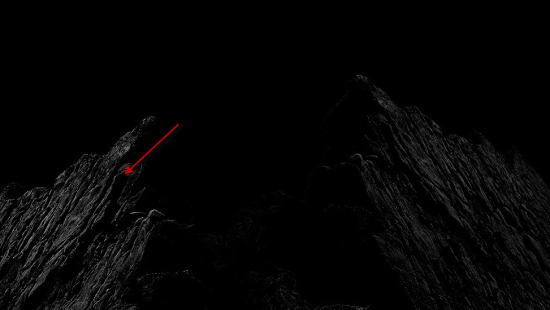
Repeat the above process and add another piece of the rock texture to the bottom left of the canvas, and here is the effect so far:
Step 2
We will work on manipulating the model’s face in this step. Load the model image into Photoshop and cut out the following portion, paste it to the centre of the canvas as shown below:
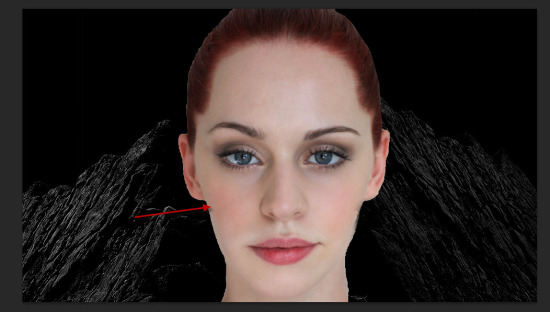
Use the crack brush you downloaded, remove parts of the face as shown below:
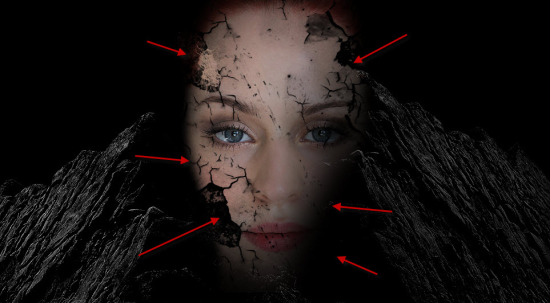
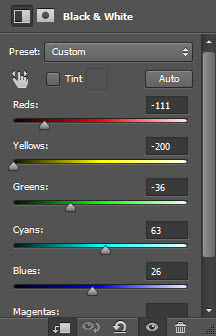
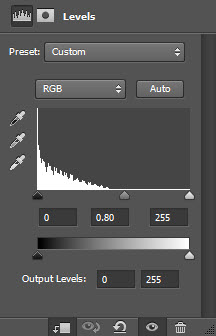
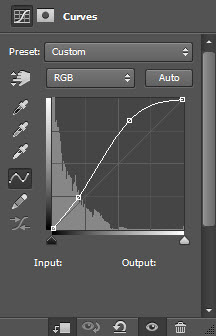
Add the following 3 adjustment layers as clipping mask to this face layer:
Black and White
Levels
Curves
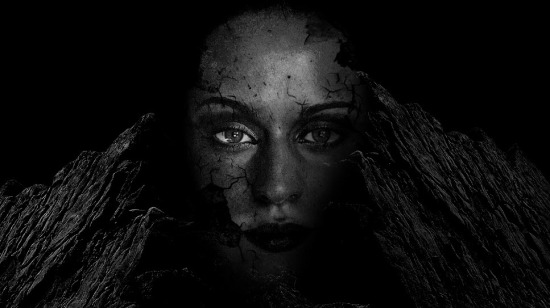
and here is the effect so far:
Step 3
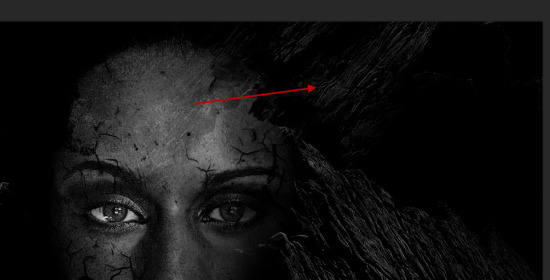
We will add some more rock texture over the face in this step. Repeat the process in Step 1, but this time we use a smaller piece of rock texture. Add the rock texture to the following area:
Keep adding more rock texture to the following area:
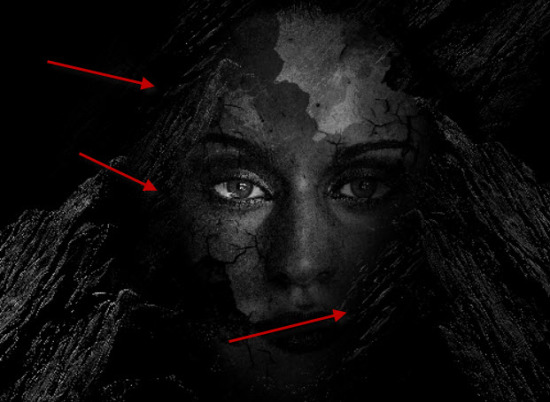
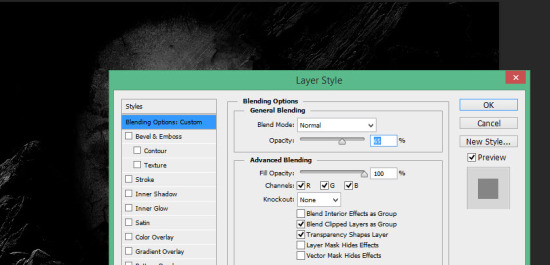
You can adjust the layer opacity of the rock layer so as to add more depth for our image:
Step 4
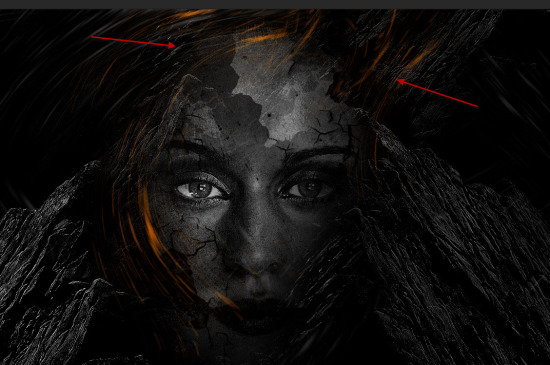
We will add some abstract lines around the face. Use a particle brush to paint some particles on a new layer (I used the colour orange):
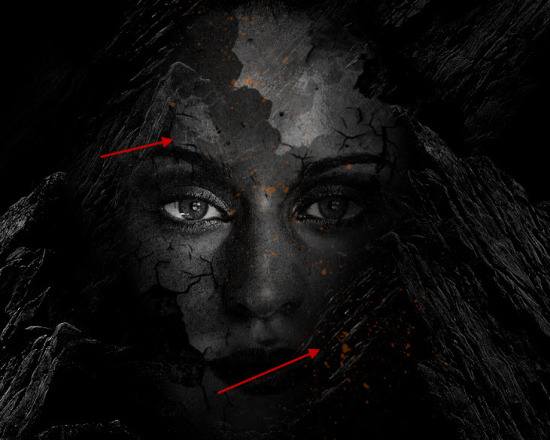
Apply Motion Blur filer to this particle layer:
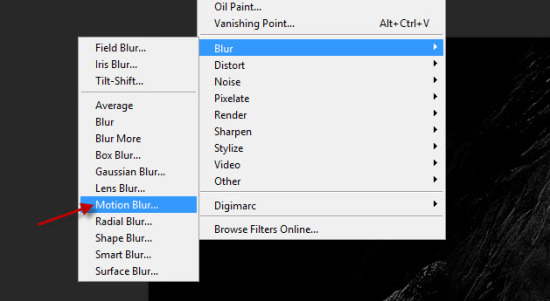
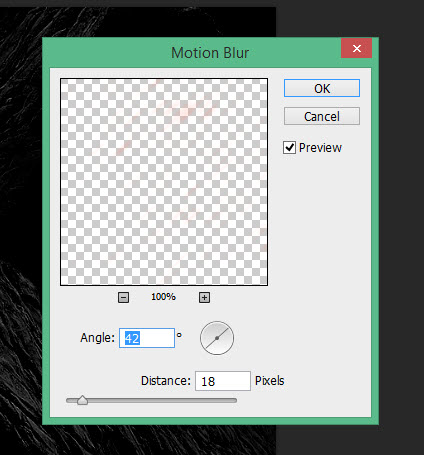
Then go to Filter > Distort > Twirl and apply the following settings:
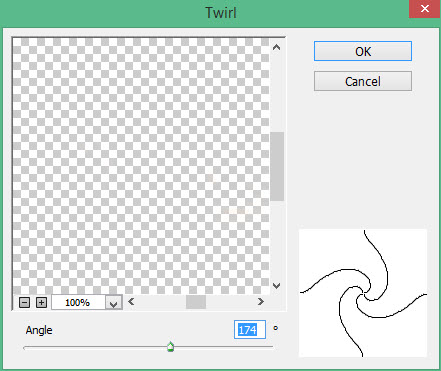
Use a soft eraser to remove parts of the layer, and here is the result you will aim to achieve:
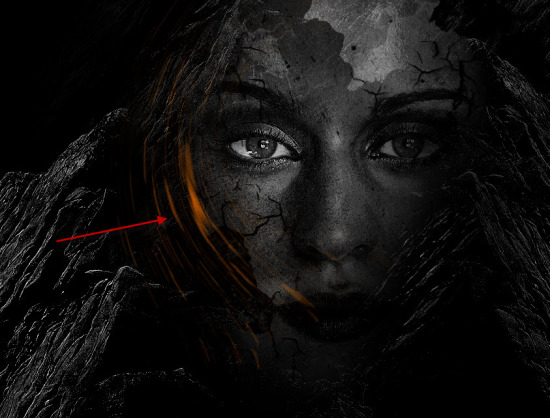
Repeat the above process and add more abstract lines to our image:
Step 5
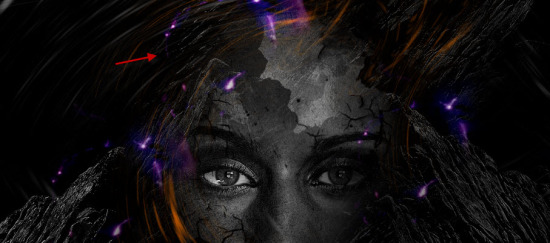
We will work on some final touches for this image. I added some extra lighting patterns with an abstract brushset: (You can achieve the same result with a space themed stock image)
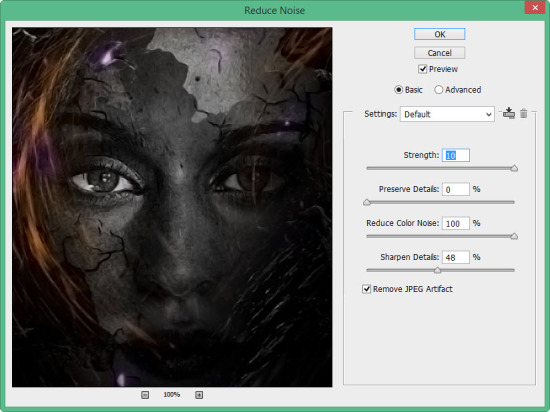
Flatten the image and duplicate the background layer, apply the following “Reduce Noise” filter to the duplicated layer:
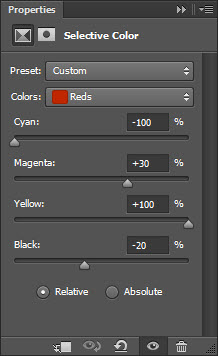
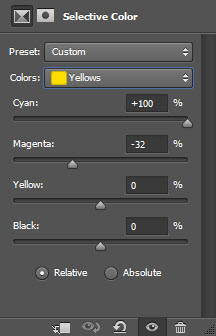
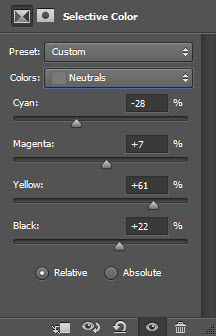
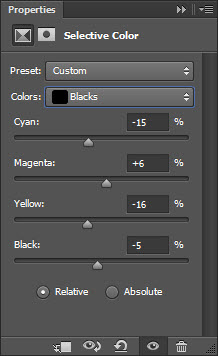
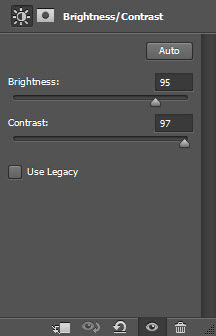
I added some colours to the image with the following adjustment layer:
Selective Color
Brightness and Contrast
and here is my final effect: (click to enlarge)
That’s it for this tutorial! Hope you enjoy it and find it useful. Till next time, have a great day!

