Calendarize it! is one of the most feature-rich WordPress calendar plugins that you can find in the market. You can use it to create different types of events like those with a fixed start and end time of a couple of hours, or events that span multiple days. You can also use it to create recurring events. The plugin comes with a lot of add-ons that add even more functionality to the core plugin.
-
![]()
In the digital age, users are online 24/7. Everyone prefers to check availability and make appointments, reservations, or bookings online. They want to do…
-
![]()
An appointment booking plugin makes it easy to manage your visitors, appointments and schedules in a well-organized manner. Business such as salons, spas,…
-
![]()
Looking for the best WordPress event calendar plugins? This list has all the top event calendar plugins you need to consider.
-
![]()
WordPress calendar plugins let users make bookings, schedule events, pay for appointments, and more. If your website does any of these things, you need a…


In this tutorial, we will create an event calendar for a school which is organizing a sports month. All the sports event organized by the school will be listed on the event calendar. This example will help you quickly figure out how to use the plugin to create your own event calendars.
Getting Started
The first step would be to download the Calendarize it! plugin from CodeCanyon. Every plugin that you download from CodeCanyon comes with free lifetime updates and six months of support. This should help you get up and running in no time.
After downloading the plugin, you can install it on your WordPress website. Once the plugin has been installed, make sure that you enter your valid license key by going to Calendarize it! > Options > License. Adding a license key will allow you to download the free add-ons offered with the plugin.
When you install the plugin, you will see a dashboard notification that asks if you want to automatically set up the plugin. If you click on Confirm, the plugin will automatically create a couple of page for you like the event and venue templates. It will also create a calendar page with the Calendarize it! shortcode to display the calendar.

Adding Venues
Every sports event that you plan to organize will have to take place somewhere. So, it is a nice idea to start by adding some venues to the plugin. This way you will be able to quickly attach any venue to a particular event.
You can add a venue by going to Calendarize it! > Venues. The only information that is actually required to add a venue is its name. For example, if you plan to add a soccer game to the sports calendar, its venue could simply be school playground. This would be fine for events mentioned in a sports month calendar of a school.

However, if you are a big organization and your events can take place in different cities, states or countries, you will definitely want to provide more details. Luckily, the plugin allows you to add more information about a venue.
You can provide an address for the venue that includes the street name, city, state and even country. You can also add the latitude and longitude of the location where event is taking place. The plugin will make it easy for visitors to locate the event by showing it in an embedded Google map.

I should point out that you will have to provide an API key to show the map properly. You can add an API key by going to Options > General Settings.
The plugin also gives you the option to add contact information about each venue. This is particularly helpful for people who want to know more about the event located at the venue by contacting someone on site.

Once you have provided all the details, simply click on the Add Venue button at the button to save it. Every venue that you add using the plugin will have its own dedicated page.
Adding Organizers and Calendars
Just like details about a venue, you can also add details about the organizers of an event. For example, in our case we could provide contact information of the sports teacher. If the events are being organized on a larger scale, the plugin provides a great way to allow people to contact the team responsible for organizing the event.
Generally, you would like to show different types of events on different calendars. In our example, the school might want to display all the sports related events on a calendar dedicated for sports events while the academic events are displayed on a different calendar.
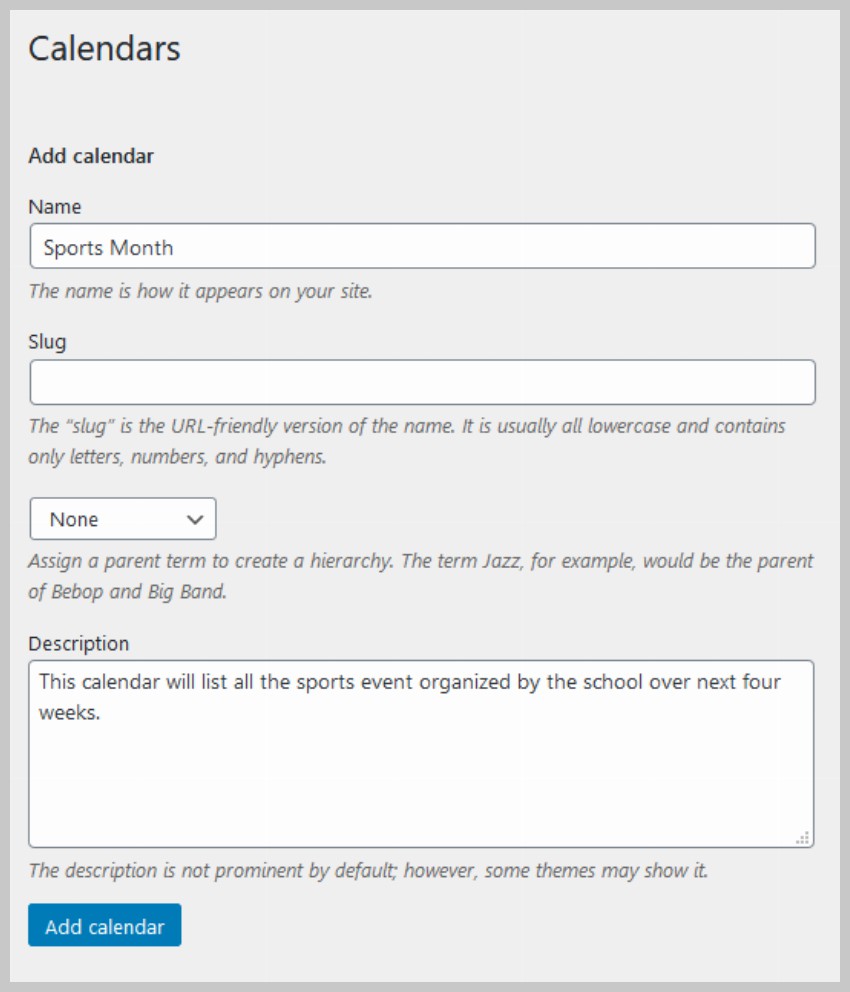
You can add your own calendars to display the events by going to Calendarize it! > Calendars. After that, just provide a title and an optional description for the calendar. Clicking on the Add Calendar button will now add the calendar to the plugin database.
Creating Events
The first thing that you will notice when adding your own events to the calendar is that the process is incredibly easy. This is the most-user friendly WordPress event calendar plugin that I have ever used.
You can add a new event by going to Calendarize it! > Add new event. You will be able to add all details related to the event on this page now.
Begin by adding the title of the event, which in this case would be Soccer Match.
Scroll down a little and you will see a calendar for the current month. The current date will be highlighted with a light yellow color. You can click on any date in this calendar and it will show a tooltip where you can provide more details about the event. The arrows in the top-left corner of the calendar are used to move to past or future dates one month or year at a time.
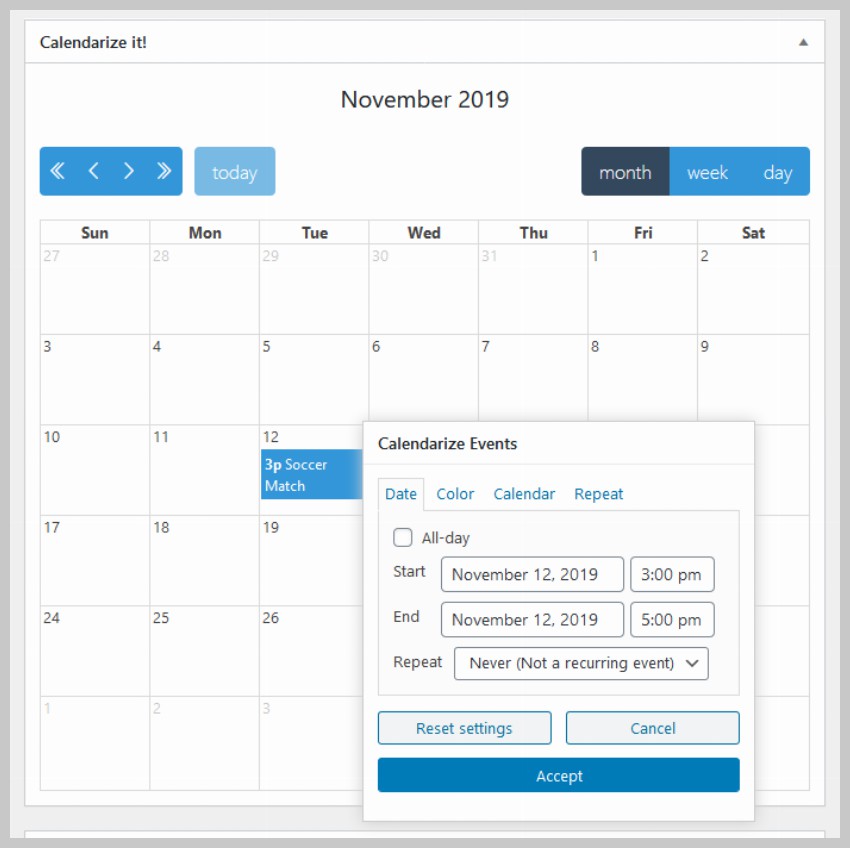
Since a soccer match will have a specific time, uncheck All-day from the tooltip and provide your own start and end times. You will notice that the Date tab of the tooltip also contains a dropdown menu to select the frequency of repeating events. You can set repeating event options from the dropdown like Every day, Every week and so on. This will instantly highlight the corresponding dates in the calendar.
All events will have a light blue color when you create them. You can go to the Colors tab in the tooltip to select a different color for the background or the event as well as the text. This will help people easily identify different events.
Most of the times, people will click on different events mentioned in the event calendar in order to find more information about them. You can set up the plugin in a way that it either opens a tooltip or a dedicated page when users click on an event. A tooltip is ideal if you don’t have to provide a lot of details for the event. However, it might be better to take users to the event detail page if you want to provide a lot of extra information. These options are available in the Calendar tab of the tooltip.
You can now click on the Accept button to show the event in the calendar.
More Complicated Repeating Event Schedules
Events might not always repeat after same intervals of time. In our case, the initial soccer matches between different teams might take place everyday. However, there could breaks for a day or two between matches when the tournament reaches final stages. The Calendarize it! plugin is very good at handling this kind of event repetition.
After adding the initial event to the calendar, you can click on any date and the plugin will show you a tooltip to schedule the event for that date. The tooltip will only show the fields for the start and end time of the event for any repeating events. All other details like the venue and organizers will stay the same.
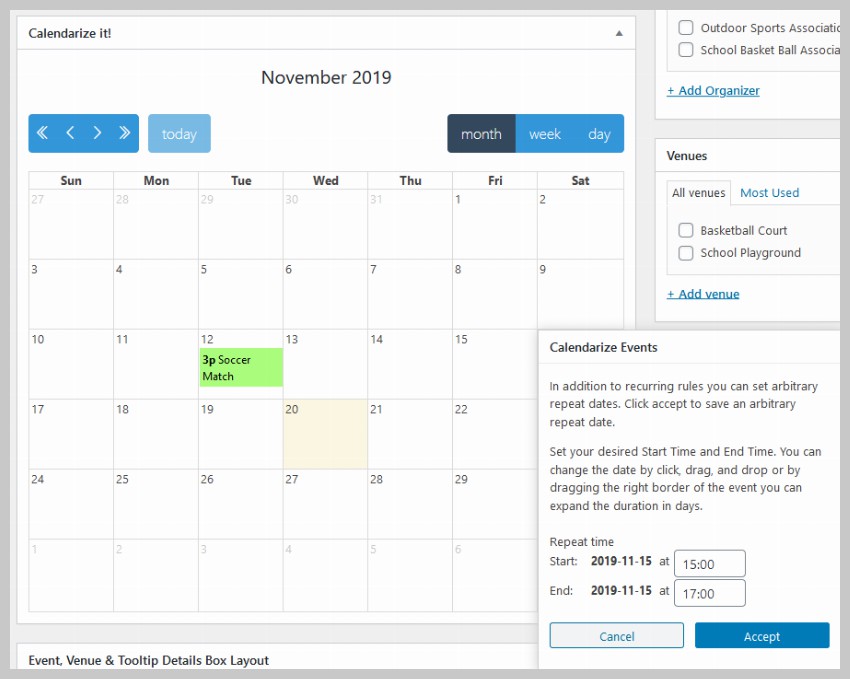
The plugin adds an event to the calendar as soon as you click on a date. This way it become incredibly easy to add events to the calendar.
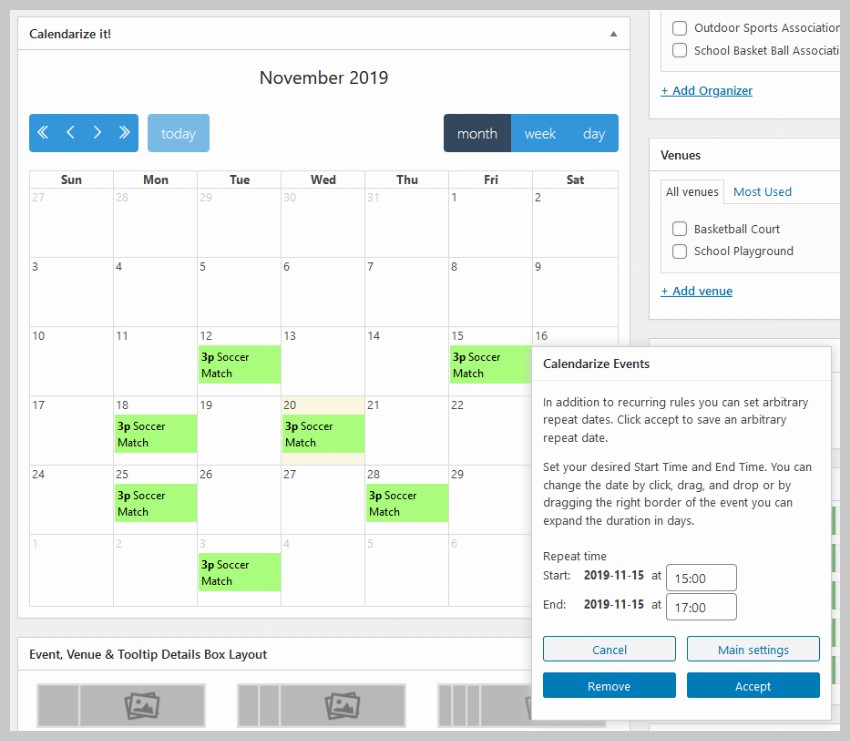
Removing an already added event is also easy. You just have to click on the event that you want to remove and then click on the Remove button in the tooltip.
Displaying the Events in a Calendar
None of the events that we have created so far will show up on the front-end, because we have not attached them to a calendar yet.
We started this tutorial by adding some venues, calendars and organizers to our plugin. The sidebar on the Add New Event page contains three different sections which can be used to assign each event to one or more venues, calendars or organizers.
Under the Calendars section, you should see a calendar called Sports Month. Checking this box will include our soccer and other game events into the Sports Month calendar. You can check multiple calendars here to include the same event in multiple calendars.
Similarly, you should select the organizers as Outdoor Sports Association and the venue as School Playground for soccer events. This will populate the event detail tooltip that appears upon clicking on an event with its venue and organizers etc.

After adding these details to the event, you should now go to Calendarize it! > Calendars and view the Sports Month calendar. It will show all the sports events that you added like the image below.
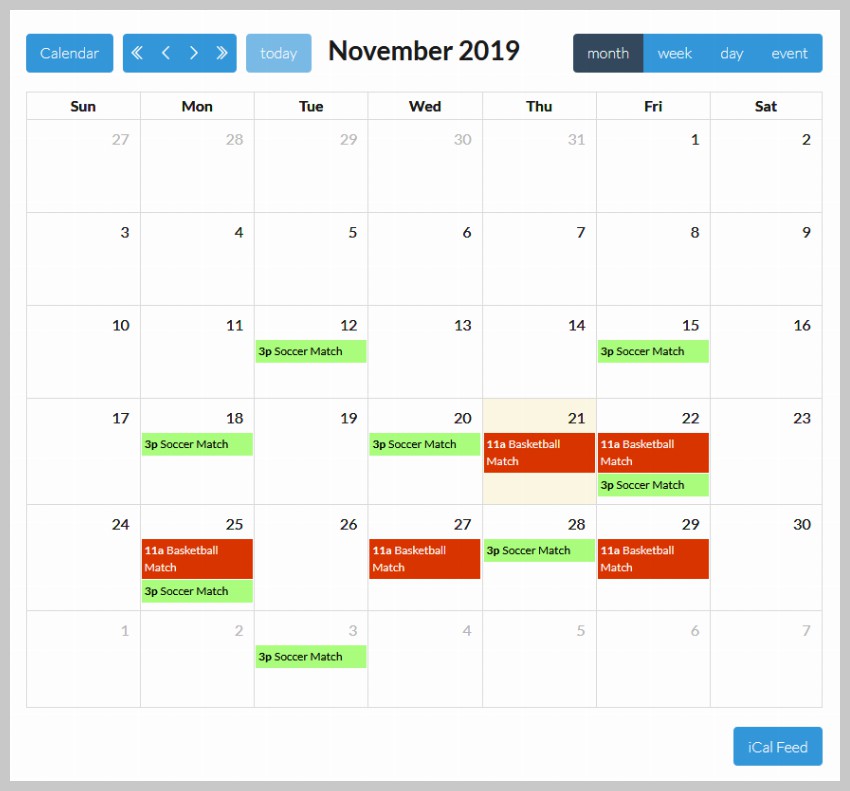
Try clicking on one of the events and you will see a tooltip that provides information about the event. This includes the timing, venue and organizer etc. Users who want more information about the venue or the organizer can click on respective links in the tooltip.

Final Thoughts
The Calendarize it! WordPress plugin is one of the best event calendar plugins that I have used so far. It comes with a lot of features and flexibility. Adding, deleting and modifying events only takes a couple of seconds once you have set up the initial event.
All events can be displayed on one or more calendars completely independent of other events. This allows you to create multiple calendars to only show relevant events to different groups of users.
The plugin also comes with a lot of useful add-ons that provide additional features like themes and a CSS editor. If you are looking for a WordPress event calendar for your website, you should give the Calenderize it! plugin a serious thought.